

Page 1
NXTDIMIL/A
Wiring Accessories
Touch Dimmer Switch
Wiring Instructions
Before commencing work always isolate the power at the consumer unit
/ fuse box.
*Note – If your installation uses a four-lug metal mounting box, remove the
top and bottom lugs or bend fully back.
2a. Replacing an existing accessory
1. Unscrew the accessory from the wall/mounting box.
2. Note the cable connections:
The illustration shows 1 wire of each colour connected to each terminal.
There should be an additional connection between the mounting box earth
terminal and the accessory earth terminal.
3. Unscrew each terminal to release the wire.
1. Install mounting box (metal or moulded) for either fl ush or surface
mounting, ensuring appropriate size of product.
2. Select the most suitable entry point of the mounting box (knock-out) and
route the cables through. If a metal box is used, a cable grommet should
be fi tted to the entry point.
3. Cables should be prepared so a suffi cient conductor length reaches the
terminals. Strip the ends of the individual conductors leaving an adequate
length bare to enter terminals.
1. Line up the new accessory to mounting box and take note of where each
terminal is located.
2. Connect each wire to the matching terminal.
An earth connection should always be made between the mounting box
earth terminal and the accessory earth terminal, where fi tted.
All bare earth wires must be sheathed with green/yellow sleeving.
When connecting the new accessory ensure that only the bare end of the
wire enters the terminal and no bare wires are visible.
3. Tighten terminal screws securely. (Do not over tighten)
4. Complete Installation & Test
1. Carefully position the accessory into the mounting box, ensuring that no
wires are trapped between the plate and the wall and secure with screws
(do not over tighten) then insert screw covers (optional).
2. Once the installation has been completed correctly, replace the fuse/
reset MCB (trip), switch the power back on at the consumer unit and test.
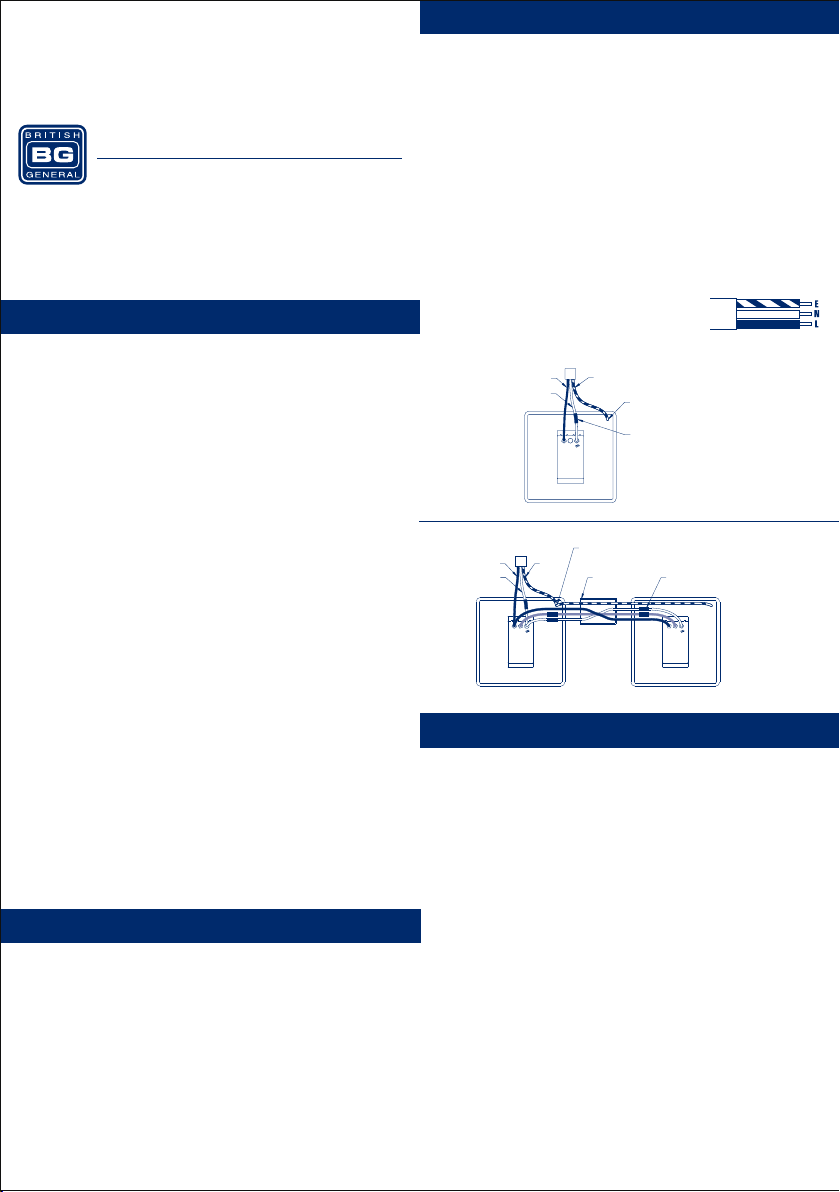
This product can only be an one way switching circuit where one switch
controls a light (or circuit) i.e. on of off.
The touch dimmer (master) switch should replace that switch.
For two way switching, where a light (or circuit) is controlled by two switches, the Master touch dimmer must be used with a Slave touch dimmer.
A Master touch dimmer cannot be used in combination with a traditional
light switch or any other dimmer switch.
Please refer to the wiring diagrams for guidance.
If the installation uses a four lug metal mounting box, remove the top and
bottom lugs or bend fully back.
1. Power Off
2b. New installation
3. Connection (See diagram)
Installation Note
Safety Warning
For your safety, this product must be installed in accordance with local
Building Regulations. If in any doubt, or where required by the law, con-
sult a competent person who is registered with an electrical self-certifi cation scheme. Further information is available online or from your Local
Authority.
Please read carefully and use in accordance with these safety wiring
instructions. Before commencing any electrical work ensure the supply is
switched off at the mains. Either by switching off the consumer unit or by
removing the appropriate fuse or turning off MCB (trip). Wiring should be in
accordance with the latest edition of the IET regulations (BS 7671).
To prevent fi re hazard always use cable of the correct rating & type for the
application.
Warning do not exceed the load rating of this device as stated on the rear
of the product.
Wire Identifi cation – Twin & Earth Cable
Note - As from 1st April 2004 new colour codes for hard wire installations
were introduced.
EARTH = Green/Yellow Sleeving
NEUTRAL = Black (pre Apr 04) / Blue (after Apr 04)
LIVE = Red (pre Apr 04) / Brown (after Apr 04)
SWITCHED LIVE
TO LIGHT
LIVE
SWITCHED LIVE
LS-LINK LS-LINK
MASTER UNIT
One Way Switching
TO LIGHT
LIVE
EARTH
EARTH TO MOUNTING BOX EARTH TERMINAL
IF SWITCH HAS AN EARTH TERMINAL, AN EARTH CABLE
MUST BE RUN BETWEEN IT AND THE METAL BOX
BROWN SLEEVING TO BE ADDED
LS-LINK
MASTER UNIT
EARTH
TO SWITCHED LIVE CABLES
Two Way Switching
EARTH TO MOUNTING BOX EARTH TERMINAL
IF SWITCH HAS AN EARTH TERMINAL, AN EARTH CABLE
MUST BE RUN BETWEEN IT AND THE METAL BOX
BS 6004 CABLE
3 CORE + EARTH
BROWN SLEEVING TO BE ADDED
TO SWITCHED LIVE CABLES
SLAVE UNIT
User Instructions
The Master and Slave touch dimmers work in the same manner, and
comprise of two touch areas for lighting control.
The upper region of the dimmer switch referred to as [Up] in the following
instructions and the lower region referred to as [Down].
The following functions can be performed using these areas of the touch
dimmer.
A short press on either the [Up] or [Down] regions of the switch will toggle
the lights off or on to previous brightness setting.
Press and hold [Up] or [Down] will adjust the brightness up or down.
When the brightness reaches the level you require, remove contact with
the switch.
Double press [Up] to go straight to maximum brightness.
Double press [Down] to directly to the minimum brightness.
Starting with lights off, press and hold [Up] to begin illuminating the lights
from the minimum brightness level.
Starting with lights off, press and hold [Down] to recall the previous brightness setting and begin dimming the lights.
Features
Overload Protection – This dimmer is fitted with an overload current protection
device, in the event of an overload condition the dimmer will stop working until the
overload is corrected. Please check the total load ratings before installing.
Soft Start – To prolong the life of the connected lighting this dimmer features a
soft start function. Upon switching on, lighting will increase from 0 to 100% in 1.2
seconds.
Page 2
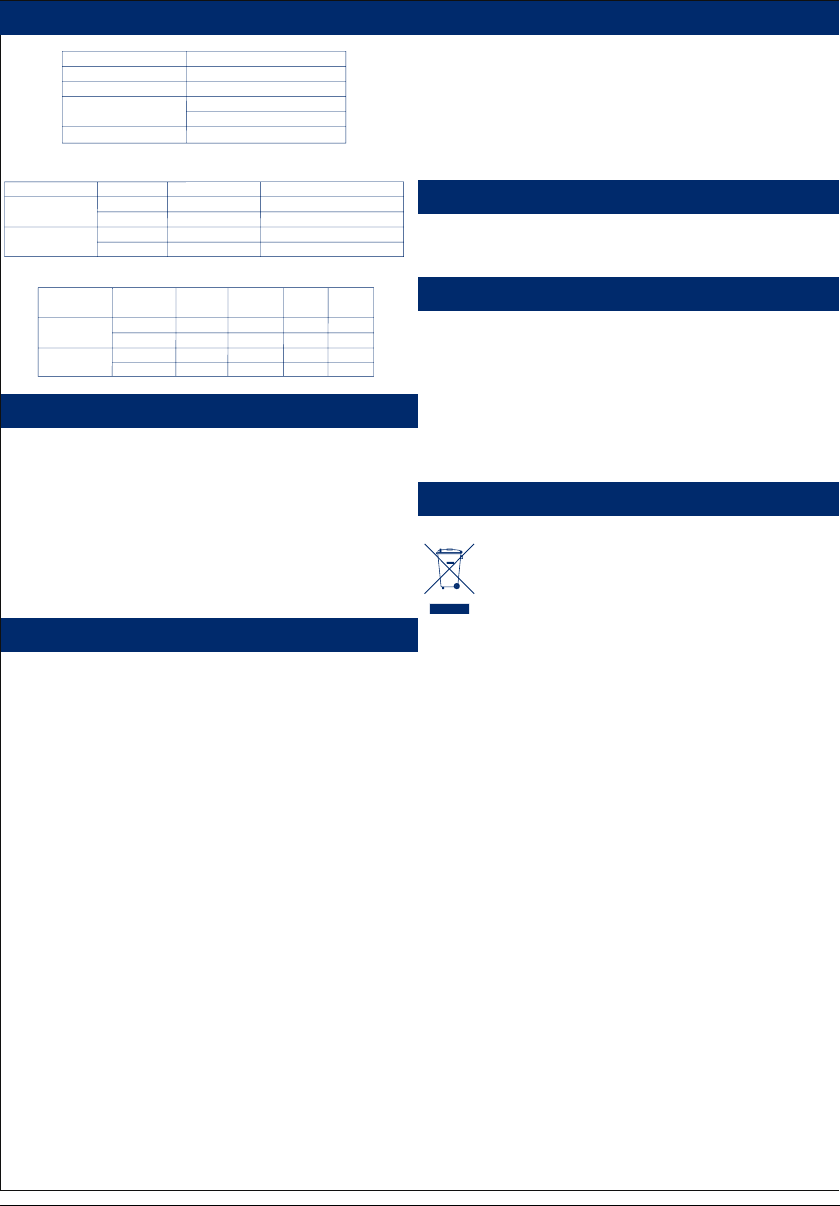
Load Information
Technical
Lamp Type
Incandescent
Eco-halogen
Dimmable LED
High Voltage Halogen
Rating
5-200VA
20-200VA
5-100W
1 to 10 Dimmable LEDs
20-200VA
Incandescent and ECO Halogen Lamps
Plate size
Square plates
86mm x 86mm
Rectangular plates
146mm x 86mm
No. of Dimmers
1
2
3
4
Max. each Dimmer
200W
150W
150W
150W
Max. total per plate
200W
300W
450W
600W
LED Lamps
Plate size
Square plates
86mm x 86mm
Rectangular plates
146mm x 86mm
No. of Dimmers
1
2
3
4
Load
per Dimmer
5-100W
5-100W
5-100W
5-100W
per Dimmer
Max. total
≤10
≤10
≤10
≤10
Max.
per plate
100W
200W
300W
400W
Max. total
per plate
≤10
≤20
≤30
≤40
Additional Advice for Decorative Products
Fixing method varies depending on which product range is supplied.
Always ensure wall surface is reasonably flat and smooth, with no bumps
or projections. Metal frontplates WITH screw fixing holes, fix the unit to
the back box using two fixing screws supplied. All Decorative products
MUST have an earth connection between the frontplate and back box.
Frontplates WITHOUT screw fixing holes. These products comprise main
unit with integral gasket, and frontplate as separate item. Fix unit to
back box using two fixing screws supplied. Clip frontplate onto main
assembly, ensuring screwdriver notch is located bottom right hand
corner.
To remove plate, place medium size flat bladed screwdriver in notch and
lever off against gasket.
Care
To maintain the high quality appearance of decorative finish switches and
sockets, BG Electrical recommend the use of a soft cloth periodically to
clean the front face. When installing a decorative product please ensure
that the wall is decorated, finished and free of moisture prior to installation.
BG Electrical recommends avoiding using, but not restricted to, these
substances from becoming in contact with the decorative metal frontplates
when cleaning or decorating:
• Adhesive tape, including low tack masking tape
• Solvents
• White spirit
• Multi surface cleaners
• Industrial multipurpose cleaning wipes
• Wet wipes
Using items like those listed above may cause a degrading effect to
the frontplates lacquer/plated finish, although the function will remain
unaffected.
Voltage : 220-240V ac
Frequency : 50/60Hz
Dimmer Type: Trailing Edge
Rating : See charts
Terminal capacity : 2 x 1mm² 2 x 1.5mm²
Min box depth (profi led plates) : 1 & 2 gang switches 25mm 3, & 4 gang
switches 35mm
Min box depth (fl at plates) : 35mm
Batch Code explanation
yyWxx Manufacturing date code, year of manufacture (yy) and week of
manufacture (Wxx)
Address/Helpline
Luceco PLC
Stafford Park 1
Telford TF3 3BD
ENGLAND
If you have further technical assistance you can get in touch with our
Technical Helpline on:
+44 (0)3300 249 279
[email protected]
(EU) Luceco SE
C/ Bobinadora 1-5
08302 Mataró
SPAIN
Environmental Protection
This symbol is known as the “Crossed-out Wheelie Bin
Symbol”. When this symbol is marked on a product or battery,
it means that it should not be disposed of with your general
household waste. Some chemicals contained within electrical/
electronic products or batteries can be harmful to health
and the environment. Only dispose of electrical/electronic/
battery items in separate collection schemes, which cater for
the recovery and recycling of materials contained within. Your
co-operation is vital to ensure the success of these schemes
and for the protection of the environment.
 Loading...