

Page 1

BC 85
D
Blutdruckmessgerät
Gebrauchsanweisung .............................................. 2 – 16
G
Blood pressure monitor
Instructions for use ................................................17 – 29
F
Tensiomètre
Mode d’emploi ........................................................30 – 43
E
Tensiómetro
Instrucciones de uso ..............................................44 – 57
I
Misuratore di pressione
Istruzioni per l’uso .................................................. 58 – 71
T
Tansiyon ölçme cihazı
Kullanım kılavuzu .................................................... 72 – 84
r
Прибор для измерения артериального
давления на запястье
Инструкция по применению ................................85 – 99
Q
Ciśnieniomierz
Instrukcja obsługi ............................................... 100 – 113
E
lectromagnetic Compatibility Information .......... 114 – 116
Page 2

DEUTSCH
Inhalt
1. Kennenlernen .....................................................................2
2. Wichtige Hinweise ..............................................................2
3. Gerätebeschreibung ...........................................................6
4. Messung vorbereiten ..........................................................7
5. Blutdruck messen ..............................................................8
6. Messwerte abrufen und löschen ......................................11
7. Übertragung der Messwerte ..........................................12
8. Fehlermeldung/Fehlerbehebung ....................................14
9. Gerät und Manschette reinigen und aufbewahren .........14
10. Technische Angaben ......................................................14
11. Garantie ..........................................................................16
Sehr geehrte Kundin, sehr geehrter Kunde,
wir freuen uns, dass Sie sich für ein Produkt unseres Sortimentes entschieden haben. Unser Name steht für hochwertige und eingehend geprüfte Qualitätsprodukte aus den Bereichen Wärme, Sanfte Therapie, Blutdruck/Diagnose, Gewicht,
Massage, Beauty und Luft.
Bitte lesen Sie diese Gebrauchsanweisung aufmerksam durch,
bewahren Sie sie für späteren Gebrauch auf, machen Sie sie
anderen Benutzern zugänglich und beachten Sie die Hinweise.
Mit freundlicher Empfehlung
Ihr Beurer-Team
1. Kennenlernen
Überprüfen Sie das Beurer BC 85 Blutdruckmessgerät auf
äußere Unversehrtheit der Verpackung und auf die Vollständigkeit des Inhalts.
Das Handgelenk-Blutdruckmessgerät dient zur nichtinvasiven
Messung und Überwachung arterieller Blutdruckwerte von er-
2
wachsenen Menschen. Sie können damit schnell und einfach
Ihren Blutdruck messen, die Messwerte abspeichern und sich
den Verlauf der Messwerte anzeigen lassen. Bei eventuell vorhandenen Herzrhythmusstörungen werden Sie gewarnt.
Die ermittelten Werte werden eingestuft und grafisch beurteilt.
2. Wichtige Hinweise
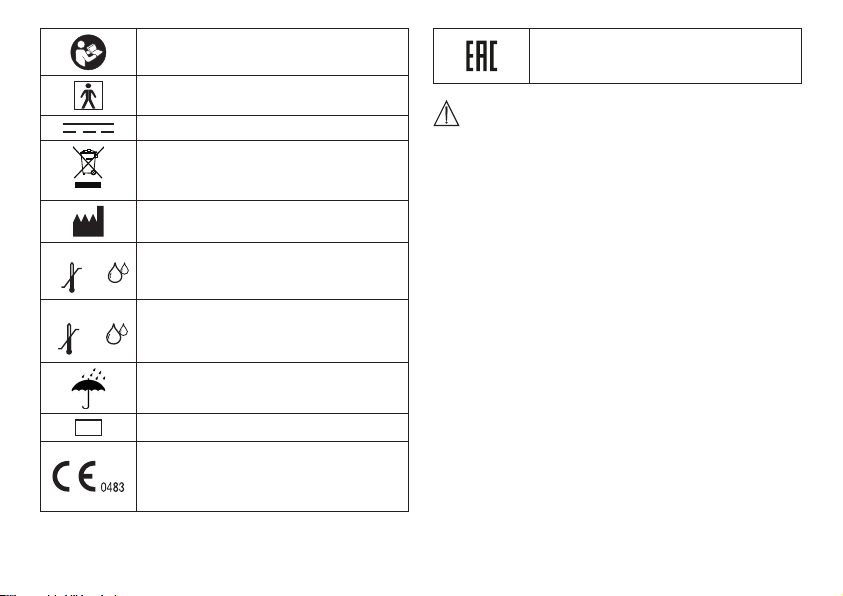
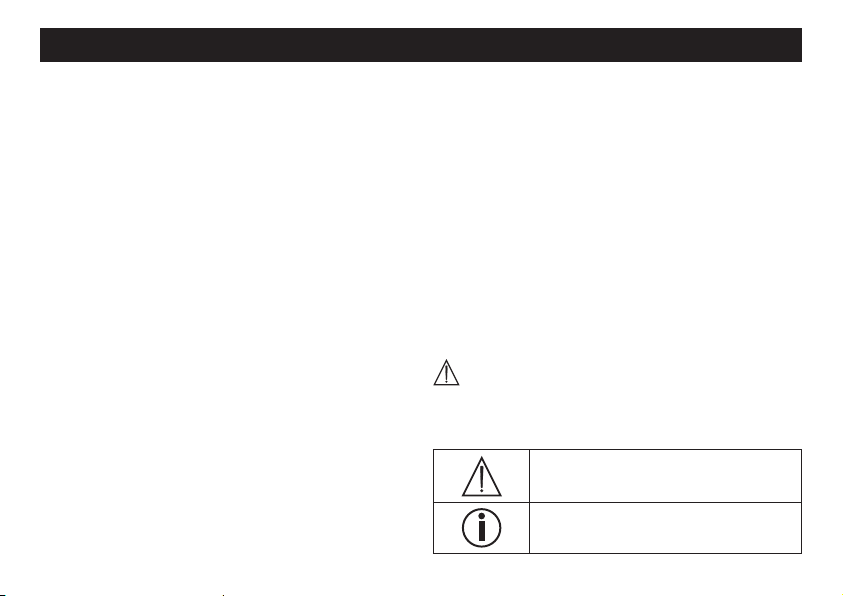
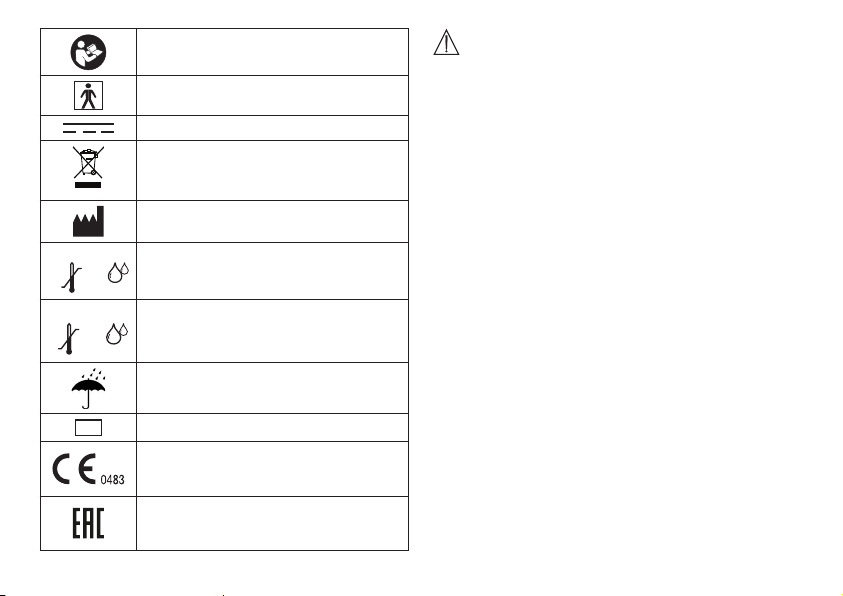
Zeichenerklärung
In der Gebrauchsanweisung, auf der Verpackung und auf dem
Typschild des Geräts und des Zubehörs werden folgende
Symbole verwendet:
Vorsicht
Hinweis
Hinweis auf wichtige Informationen
Page 3
Storage
-25°C
5°C
70°C
Operating
40°C
SN
Gebrauchsanweisung beachten
Anwendungsteil Typ BF
Gleichstrom
Entsorgung gemäß Elektro- und Elektronik-
Altgeräte EG-Richtlinie WEEE (Waste Electri
cal and Electronic Equipment)
Hersteller
Zulässige Lagerungstemperatur und
- luftfeuchtigkeit
RH 15-93%
Zulässige Betriebstemperatur und
- luftfeuchtigkeit
RH 15-93%
Vor Nässe schützen
Seriennummer
Die CE-Kennzeichnung bescheinigt die
Konformität mit den grundlegenden An
forderungen der Richtlinie 93/42/EEC für
Medizinprodukte.
Zertifizierungszeichen für Produkte, die in
die Russische Föderation und in die Länder
der GUS exportiert werden.
Hinweise zur Anwendung
•
Um eine Vergleichbarkeit der Werte zu gewährleisten, mes-
sen Sie Ihren Blutdruck immer zu gleichen Tageszeiten.
-
•
Ruhen Sie sich vor jeder Messung ca. 5 Minuten aus!
•
Wenn Sie mehrere Messungen an einer Person durchführen
möchten, warten Sie zwischen den einzelnen Messungen
jeweils 5 Minuten.
•
Mindestens 30 Minuten vor der Messung sollten Sie nicht
essen, trinken, rauchen oder sich körperlich betätigen.
•
Wiederholen Sie die Messung im Falle zweifelhaft gemesse-
ner Werte.
•
Die von Ihnen selbst ermittelten Messwerte können nur zu
Ihrer Information dienen – sie ersetzen keine ärztliche Untersuchung!
Besprechen Sie Ihre Messwerte mit dem Arzt, begründen
Sie daraus auf keinen Fall eigene medizinische Entscheidungen (z.B. Medikamente und deren Dosierungen)!
•
Verwenden Sie das Blutdruckmessgerät nicht bei Neugebo-
renen und Präeklampsie-Patientinnen. Vor Anwendung des
Blutdruckmessgerätes in der Schwangerschaft empfehlen
-
wir eine Abstimmung mit dem Arzt.
•
Bei Einschränkungen der Durchblutung an einem Arm auf
Grund chronischer oder akuter Gefäßerkrankungen (unter
anderem Gefäßverengungen), ist die Genauigkeit der Hand-
3
Page 4

gelenksmessung eingeschränkt. Weichen Sie in diesem Fall
auf ein am Oberarm messendes Blutdruckmessgerät aus.
•
Dieses Gerät ist nicht dafür bestimmt, durch Personen (ein-
schließlich Kinder) mit eingeschränkten physischen, sensorischen oder geistigen Fähigkeiten oder mangels Erfahrung
und/oder mangels Wissen benutzt zu werden, es sei denn,
sie werden durch eine für Ihre Sicherheit zuständige Person
beaufsichtigt oder erhielten von ihr Anweisungen, wie das
Gerät zu benutzen ist. Kinder sollten beaufsichtigt werden,
damit sie nicht mit dem Gerät spielen.
•
Erkrankungen des Herz-Kreislaufsystems können zu Fehl-
messungen bzw. zu Beeinträchtigungen der Messgenauigkeit führen. Ebenso der Fall ist dies bei sehr niedrigem Blutdruck, Diabetes, Durchblutungs- und Rhythmusstörungen
sowie bei Schüttelfrost oder Zittern.
•
Das Blutdruckmessgerät darf nicht im Zusammenhang mit
einem Hochfrequenz-Chirurgiegerät verwendet werden.
•
Verwenden Sie das Gerät nur bei Personen mit dem für das
Gerät angegebenen Umfangbereich des Handgelenks.
•
Beachten Sie, dass es während des Aufpumpens zu einer
Funktionsbeeinträchtigung des betroenen Gliedmaßes
kommen kann.
•
Die Blutzirkulation darf durch die Blutdruckmessung nicht
unnötig lange unterbunden werden. Bei einer Fehlfunktion
des Gerätes, nehmen Sie die Manschette vom Arm ab.
•
Verhindern Sie einen anhaltenden Druck in der Manschette
sowie häufige Messungen. Eine dadurch resultierende Beeinträchtigung des Blutflusses kann zu Verletzungen führen.
• Achten Sie darauf, dass die Manschette nicht an einem Arm
angelegt wird, deren Arterien oder Venen in medizinischer
Behandlung sind, z.B. intravaskulärer Zugang bzw. eine intravaskuläre Therapie oder ein arteriovenöser (A-V-) Nebenschluss.
•
Legen Sie die Manschette nicht bei Personen an, die eine
Brustamputation hatten.
•
Legen Sie die Manschette nicht über Wunden an, da dies zu
weiteren Verletzungen führen kann.
•
Legen Sie die Manschette ausschließlich am Handgelenk
an. Legen Sie die Manschette nicht an anderen Stellen des
Körpers an.
•
Sie können das Blutdruckmessgerät ausschließlich mit Bat-
terien betreiben.
•
Die Abschaltautomatik schaltet das Blutdruckmessgerät zur
Schonung der Batterien aus, wenn innerhalb 2 Minuten keine Taste betätigt wird.
•
Das Gerät ist nur für den in dieser Gebrauchsanweisung be-
schriebenen Zweck vorgesehen. Der Hersteller haftet nicht
für Schäden, die durch unsachgemäßen oder falschen Gebrauch verursacht wurden.
Hinweise zur Aufbewahrung und Pflege
•
Das Blutdruckmessgerät besteht aus Präzisions- und Elek-
tronik-Bauteilen. Die Genauigkeit der Messwerte und Lebensdauer des Gerätes hängt ab vom sorgfältigen Umgang:
– Schützen Sie das Gerät vor Stößen, Feuchtigkeit,
Schmutz, starken Temperaturschwankungen und direkter
Sonneneinstrahlung.
– Lassen Sie das Gerät nicht fallen.
4
Page 5
– Benutzen Sie das Gerät nicht in der Nähe von starken
elektromagnetischen Feldern, halten Sie es fern von Funkanlagen oder Mobiltelefonen.
•
Falls das Gerät über einen längeren Zeitraum nicht benutzt
wird, wird empfohlen die Batterien zu entfernen.
Hinweise zum Umgang mit Batterien
•
Wenn Flüssigkeit aus einer Batteriezelle mit Haut oder Au-
gen in Kontakt kommt, die betroffene Stelle mit Wasser auswaschen und ärztliche Hilfe aufsuchen.
•
Verschluckungsgefahr! Kleinkinder könnten Batterien verschlucken und daran ersticken. Daher Batterien für
Kleinkinder unerreichbar aufbewahren!
•
Auf Polaritätskennzeichen Plus (+) und Minus (-) achten.
•
Wenn eine Batterie ausgelaufen ist, Schutzhandschuhe
anziehen und das Batteriefach mit einem trockenen Tuch
reinigen.
•
Schützen Sie Batterien vor übermäßiger Wärme.
•
Explosionsgefahr! Keine Batterien ins Feuer werfen.
•
Batterien dürfen nicht geladen oder kurzgeschlossen wer-
den.
•
Bei längerer Nichtbenutzung des Geräts die Batterien aus
dem Batteriefach nehmen.
•
Verwenden Sie nur denselben oder einen gleichwertigen
Batterietyp.
•
Immer alle Batterien gleichzeitig auswechseln.
•
Keine Akkus verwenden!
•
Keine Batterien zerlegen, öffnen oder zerkleinern.
Hinweise zu Reparatur und Entsorgung
•
Batterien gehören nicht in den Hausmüll. Bitte entsorgen
Sie die verbrauchten Batterien an den dafür vorgesehenen
Sammelstellen.
•
Önen Sie das Gerät nicht. Bei Nichtbeachten erlischt die
Garantie.
•
Das Gerät darf nicht selbst repariert oder justiert werden.
Eine einwandfreie Funktion ist in diesem Fall nicht mehr gewährleistet.
•
Reparaturen dürfen nur vom Kundenservice oder autorisier-
ten Händlern durchgeführt werden. Prüfen Sie jedoch vor
jeder Reklamation zuerst die Batterien und tauschen Sie
diese gegebenenfalls aus.
•
Im Interesse des Umweltschutzes darf das Gerät
am Ende seiner Lebensdauer nicht mit dem Hausmüll entfernt werden. Die Entsorgung kann über
entsprechende Sammelstellen in Ihrem Land erfolgen. Entsorgen Sie das Gerät gemäß der Elektro- und
Elektronik-Altgeräte EG-Richtlinie – WEEE (Waste Electrical
and Electronic Equipment). Bei Rückfragen wenden Sie sich
an die für die Entsorgung zuständige kommunale Behörde.
5
Page 6
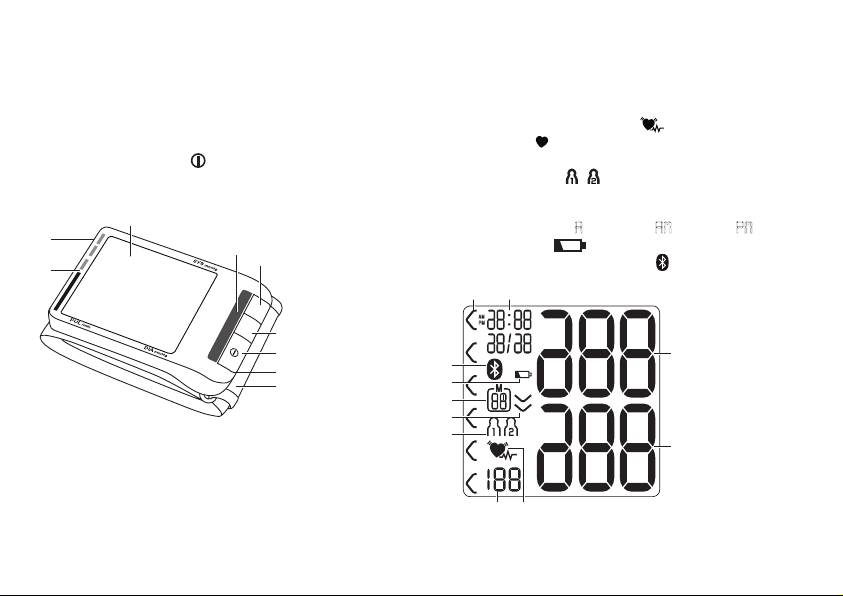
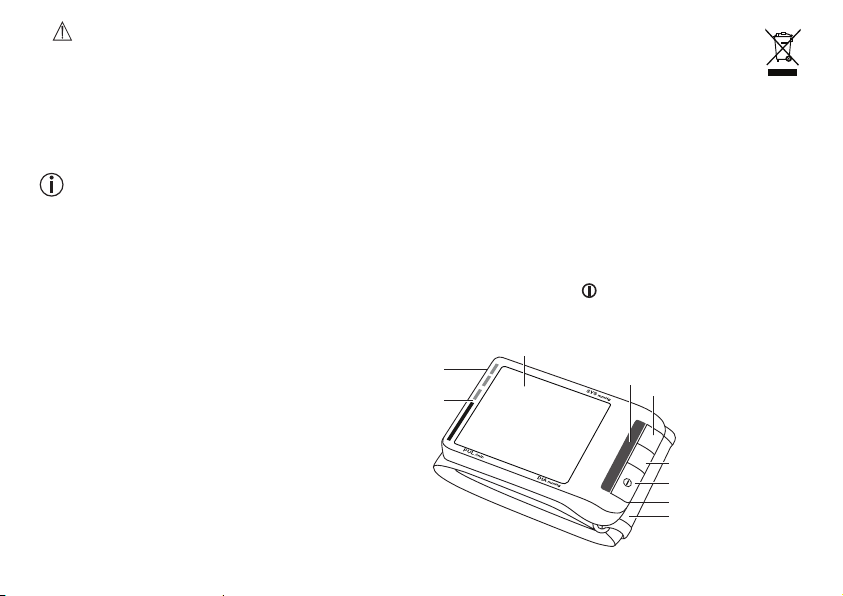
3. Gerätebeschreibung
SYS mmHg
1. Skala zur Einstufung der Messergebnisse
2. USB-Schnittstelle
3. Display
4. Positionierungsanzeige (Herzhöhe)
5. Speichertaste M1
6. Speichertaste M2
7. START/STOPP-Taste
8. Batteriefach abdeckung
9. Handgelenksmanschette
3
2
1
4
5
M1
O
M2
k
6
7
8
9
Anzeigen auf dem Display:
1. Einstufung der Messergebnisse
2. Uhrzeit und Datum
3. Systolischer Druck
4. Diastolischer Druck
5. Symbol Herzrhythmusstörung
Symbol Puls
6. Ermittelter Pulswert
7. Benutzerspeicher /
8. Aufpumpen, Luft ablassen (Pfeil)
9. Nummer des Speicherplatzes / Speicheranzeige
Durchschnittswert ( A ), morgens (
AM
), abends (
10. Batterieanzeige
11. Symbol Bluetooth® Übertragung
1 2
11
3
10
9
8
7
4
56
6
PM
)
Page 7
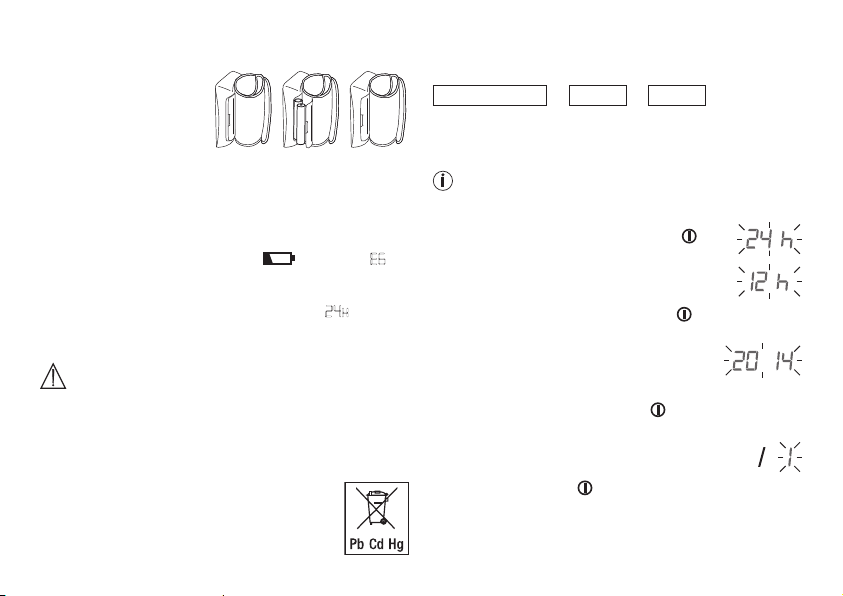
4. Messung vorbereiten
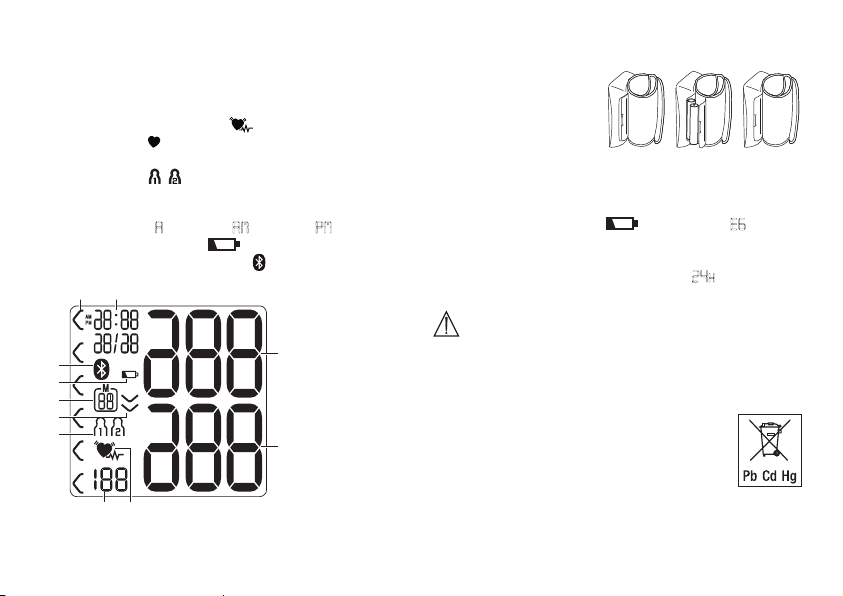
Batterie einlegen
• Entfernen Sie den De-
ckel des Batteriefaches
auf der rechten Seite des
Gerä tes.
•
Legen Sie zwei Batte-
rien vom Typ 1,5 V Micro (Alkaline Type LR03) ein. Achten
Sie unbedingt darauf, dass die Batterien entsprechend der
Kennzeichnung mit korrekter Polung eingelegt werden. Verwenden Sie keine wiederaufladbaren Akkus.
•
Schließen Sie den Batteriefachdeckel wieder sorgfältig.
Wenn das Symbol Batteriewechsel
scheint, ist keine Messung mehr möglich und Sie müssen alle
Batterien erneuern.
Alle Displayelemente werden kurz angezeigt,
Display. Stellen Sie nun wie im Folgenden beschrieben Datum
und Uhrzeit ein.
Batterie Entsorgung
• Die verbrauchten, vollkommen entladenen Batterien müs-
sen Sie über speziell gekennzeichnete Sammelbehälter,
Sondermüllannahmestellen oder über den Elektrohändler
entsorgen. Sie sind gesetzlich dazu verpflichtet, die Batterien zu entsorgen.
• Diese Zeichen finden Sie auf schadstoff-
haltigen Batterien:
Pb = Batterie enthält Blei, Cd = Batterie enthält
Cadmium, Hg = Batterie enthält Quecksilber.
blinkt und E6 er-
24h
blinkt im
7
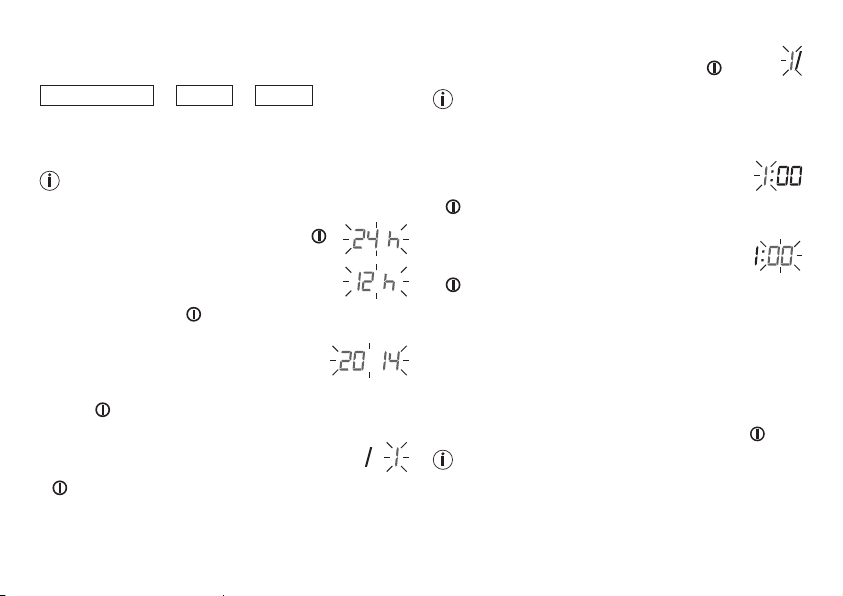
Stundenformat, Datum und Uhrzeit einstellen
In diesem Menü haben Sie die Möglichkeit folgende Funktionen nacheinander einzustellen.
Stundenformat➔Datum➔Uhrzeit
Sie sollten Datum und Uhrzeit unbedingt einstellen. Nur so
können Sie Ihre Messwerte korrekt mit Datum und Uhrzeit
speichern und später abrufen.
Wenn Sie die Speichertaste M1 oder M2 gedrückt halten,
können Sie die Werte schneller einstellen.
Stundenformat
•
Halten Sie die START/STOPP-Taste für
5 Sekunden gedrückt.
•
Wählen Sie mit den Speichertasten M1/M2
Ihr gewünschtes Stundenformat und bestätigen Sie mit der START/STOPP- Taste .
Datum
Im Display blinkt die Jahreszahl.
•
Wählen Sie mit den Speichertasten M1/M2
Ihre gewünschte Jahreszahl und bestätigen
Sie mit der START/STOPP-Taste .
Im Display blinkt die Monatsanzeige.
• Wählen Sie mit den Speichertasten M1/M2 Ihren
gewünschten Monat und bestätigen Sie mit der
START/STOPP-Taste .
Page 8

Im Display blinkt die Tagesanzeige.
1 2 3
1 cm
M1
M2
O
k
M1
M2
O
k
M1
M2
O
k
•
Wählen Sie mit den Speichertasten M1/M2 Ihren ge-
wünschten Tag und bestätigen Sie mit der START/
STOPP-Taste .
Wenn als Stundenformat 12h eingestellt ist, ist die Reihen-
folge der Tages- und Monatsanzeige vertauscht.
Uhrzeit
Im Display blinkt die Stundenzahl.
•
Wählen Sie mit den Speichertasten M1/M2 Ihr
gewünschte Stundenzahl und bestätigen Sie mit
der START/STOPP-Taste .
Im Display blinkt die Minutenzahl.
•
Wählen Sie mit den Speichertasten M1/M2 Ihr
gewünschte Minutenzahl und bestätigen Sie mit
der START/STOPP-Taste .
Nachdem alle Daten eingestellt wurden, schaltet sich das Gerät automatisch aus.
Bluetooth
®
Im Display blinkt das Bluetooth® Symbol.
•
Wählen Sie mit den Speichertasten M1/M2, ob die automa-
tische Bluetooth® Datenübertragung aktiviert (Bluetooth®
Symbol blinkt) oder deaktiviert (Bluetooth® Symbol wird
nicht angezeigt) sein soll und bestätigen Sie mit der START/
STOPP-Taste .
Die Akkulaufzeit verkürzt sich durch die Übertragung per
Bluetooth®.
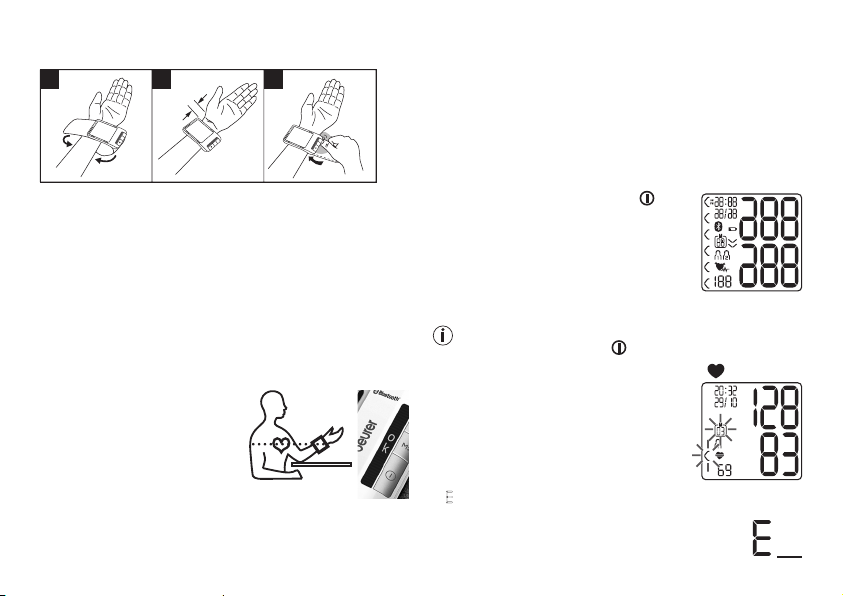
5. Blutdruck messen
Manschette anlegen
•
Entblößen Sie Ihr linkes Handgelenk. Achten Sie darauf,
dass die Durchblutung des Arms nicht durch zu enge Kleidungsstücke oder Ähnliches eingeengt ist.
Legen Sie die Manschette auf der Innenseite Ihres Hand-
gelenkes an.
•
Schließen Sie die Manschette mit dem Klettverschluss, so-
dass die Oberkante des Gerätes ca. 1 cm unter dem Handballen sitzt.
•
Die Manschette muss eng um das Handgelenk anliegen,
darf aber nicht einschnüren.
Richtige Körperhaltung einnehmen
•
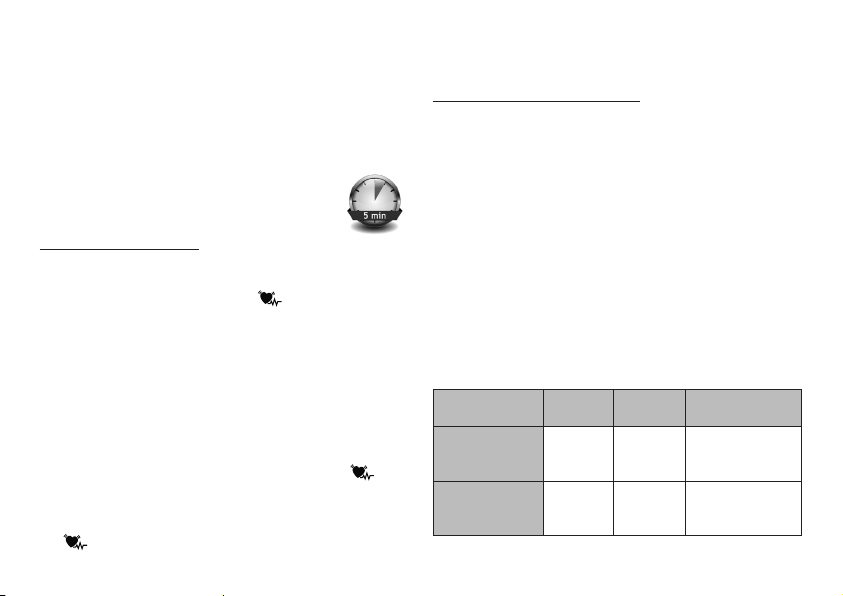
Ruhen Sie sich vor jeder Messung ca. 5 Minuten aus!
Ansonsten kann es zu Abweichungen kommen.
•
Sie können die Messung im
Sitzen oder im Liegen durchführen. Sitzen Sie zur Blutdruckmessung bequem. Lehnen Sie Rücken und Arme an.
Kreuzen Sie die Beine nicht.
Stellen Sie die Füße flach auf
8
Page 9
den Boden. Stützen Sie Ihren Arm unbedingt ab und win-
keln ihn an. Achten Sie in jedem Fall darauf, dass sich die
Manschette in Herzhöhe befindet. Ansonsten kann es zu
erheblichen Abweichungen kommen. Entspannen Sie Ihren
Arm und die Handflächen. Als zusätzliche Hilfe ist in dem
Gerät eine O.K.- Sym bol- Leiste integriert, welche Ihnen die
richtige Position des Blutdruckmess gerätes anzeigt. Wenn
Sie auf der Anzeige ein O.K. sehen, haben Sie die richtige
Position erreicht.
•
Um das Messergebnis nicht zu verfälschen ist es wichtig,
sich während der Messung ruhig zu verhalten und nicht zu
sprechen.
Blutdruckmessung durchführen
Legen Sie, wie zuvor beschrieben, die Manschette an und
nehmen Sie die Haltung ein, in der Sie die Messung durchführen wollen.
•
Um das Blutdruckmessgerät zu starten,
drücken Sie die START/STOPP-Taste
. Alle Displayanzeigen leuchten kurz
auf.
Nach 3 Sekunden beginnt das Bludruckmessgerät automatisch mit der Messung.
Die Messung erfolgt während des Aufpumpvorgangs.
Sie können die Messung jederzeit durch das Drücken der
START/STOPP-Taste abbrechen
Sobald ein Puls zu erkennen ist, wird das Symbol Puls
angezeigt.
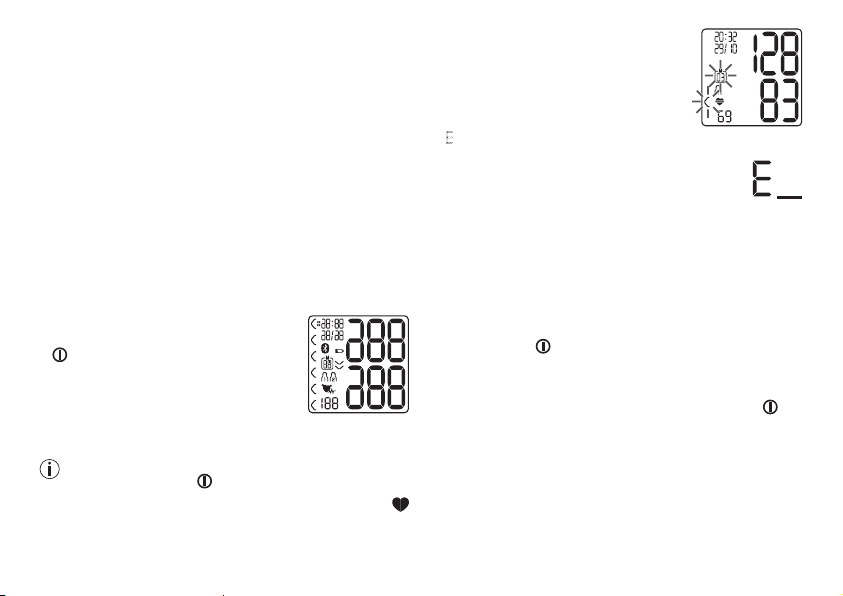
• Die Messergebnisse systolischer
Druck, diastolischer Druck und Puls
werden angezeigt.
• E
_ erscheint wenn die Messung nicht
ordnungsgemäß durchgeführt werden konnte.
Beachten Sie das Kapitel Fehlermeldung/Fehlerbehebung in dieser Gebrauchsanweisung und
wiederholen Sie die Messung.
•
Wählen Sie nun durch Drücken der Speichertasten M1 oder
M2 den gewünschten Benutzerspeicher aus. Wenn Sie keine Auswahl des Benutzerspeichers vornehmen, wird das
Mess ergebnis dem zuletzt verwendeten Benutzerspeicher
zur Speicherung zugewiesen. Das entsprechende Symbol
M1 oder M2 erscheint im Display.
•
Schalten Sie das Blutdruckmessgerät mit der START/
STOPP-Taste aus. Damit wird das Messergebnis im
ausgewählten Benutzerspeicher abgespeichert.
®
Ist die Bluetooth
Datenübertragung aktiviert, so werden
nach der Bestätigung mit der START/STOPP-Taste die
Daten übertragen.
• Das Bluetooth
®
Symbol im Display blinkt. Das Blutdruckmessgerät versucht nun für ca. 30 Sekunden eine Verbindung zur App aufzubauen.
• Sobald eine Verbindung besteht, hört das Bluetooth
®
Symbol auf zu blinken. Alle Messdaten werden automatisch in
die App übertragen. Nach erfolgreicher Datenübertrageung
schaltet sich das Gerät aus.
9
Page 10
•
Wenn nach 30 Sekunden keine Verbindung zur App her-
gestellt werden kann, erlischt das Bluetooth® Symbol und
das Blutdruckmessgerät schaltet sich nach 3 Minuten automatisch aus.
Wenn Sie vergessen das Gerät auszuschalten, schaltet sich
das Gerät nach ca. 3 Minuten automatisch aus. Auch in diesem Fall wird der Wert im ausgewählten oder zuletzt verwendeten Benutzerspeicher abgespeichert.
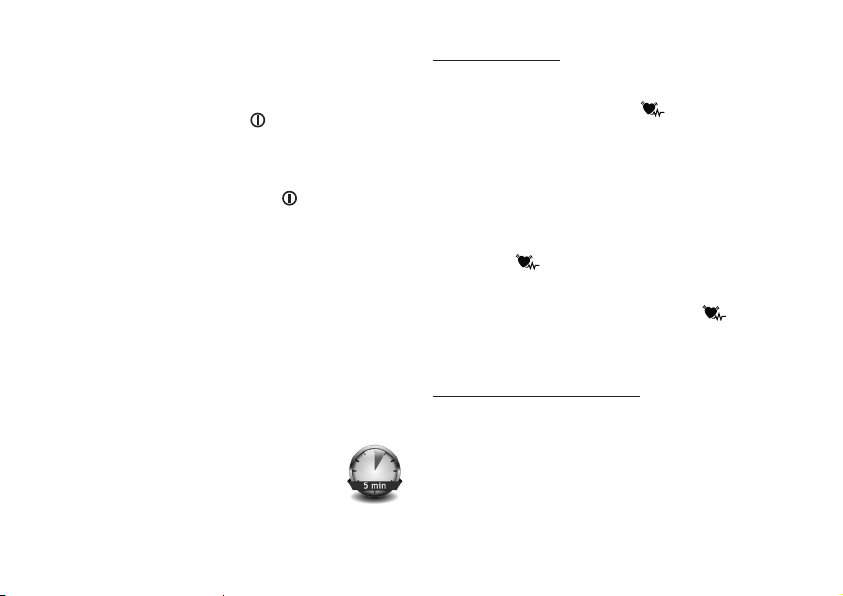
Warten Sie vor einer erneuten Messung mindestens 5 Minuten!
Ergebnisse beurteilen
Herzrhythmusstörungen:
Dieses Gerät kann während der Messung eventuelle Störungen des Herzrhythmus identifizieren und weist gegebenenfalls
nach der Messung mit dem Symbol
Dies kann ein Indikator für eine Arrhythmie sein. Arrhythmie
ist eine Krankheit, bei der der Herzrhythmus aufgrund von
Fehlern im bioelektrischen System, das den Herzschlag steuert, anormal ist. Die Symptome (ausgelassene oder vorzeitige Herzschläge, langsamer oder zu schneller Puls) können
u.a. von Herzerkrankungen, Alter, körperlicher Veranlagung,
Genussmitteln im Übermaß, Stress oder Mangel an Schlaf
herrühren. Arrhythmie kann nur durch eine Untersuchung bei
Ihrem Arzt festgestellt werden.
Wiederholen Sie die Messung, wenn das Symbol nach
der Messung auf dem Display angezeigt wird. Bitte achten
sie darauf, dass Sie sich 5 Minuten ausruhen und während
der Messung nicht sprechen oder bewegen. Sollte das Symbol
oft erscheinen, wenden Sie sich bitte an Ihren Arzt.
darauf hin.
Selbst diagnose und -behandlung aufgrund der Messergebnisse können gefährlich sein. Befolgen Sie unbedingt die Anweisungen Ihres Arztes.
Einstufung der Messergebnisse:
Die Messergebnisse lassen sich gemäß nachfolgender Tabelle
einstufen und beurteilen.
Diese Standardwerte dienen jedoch lediglich als allgemeine
Richtlinie, da der individuelle Blutdruck bei verschiedenen Personen und unterschiedlichen Altersgruppen usw. abweicht.
Es ist wichtig, dass Sie Ihren Arzt in regelmäßigen Abständen
zu Rate ziehen. Ihr Arzt teilt Ihnen Ihre individuellen Werte für
einen normalen Blutdruck sowie den Wert mit, ab dem die
Höhe des Blutdrucks als gefährlich einzustufen ist.
Die Einstufung im Display und die Skala auf dem Gerät geben an, in welchem Bereich sich der ermittelte Blutdruck befindet. Sollte sich der Wert von Systole und Diastole in zwei
unterschiedlichen Bereichen befinden (z.B. Systole im Bereich „Hoch Normal“ und Diastole im Bereich „Normal“) dann
zeigt Ihnen die grafische Einteilung auf dem Gerät immer den
höheren Bereich an, im beschriebenen Beispiel „Hoch Normal“.
10
Bereich der
Blutdruckwerte
Stufe 3:
starke
Hypertonie
Stufe 2:
mittlere
Hypertonie
Systole
(in mmHg)
≥ 180 ≥ 110
160 – 179 100 – 109
Diastole
(in mmHg)
Maßnahme
einen Arzt aufsuchen
einen Arzt aufsuchen
Page 11
Bereich der
Blutdruckwerte
Stufe 1:
leichte
Hypertonie
Hoch normal 130 – 139 85 – 89
Normal 120 – 129 80 – 84 Selbstkontrolle
Optimal < 120 < 80 Selbstkontrolle
Quelle: WHO, 1999 (World Health Organization)
Systole
(in mmHg)
140 – 159 90 – 99
Diastole
(in mmHg)
Maßnahme
regelmäßige Kontrolle beim Arzt
regelmäßige Kontrolle beim Arzt
6. Messwerte abrufen und löschen
Benutzerspeicher
Die Ergebnisse jeder erfolgreichen Messung werden zusammen mit Datum und Uhrzeit abgespeichert. Bei mehr als 60
Messdaten wird jeweils die älteste Messung überschrieben.
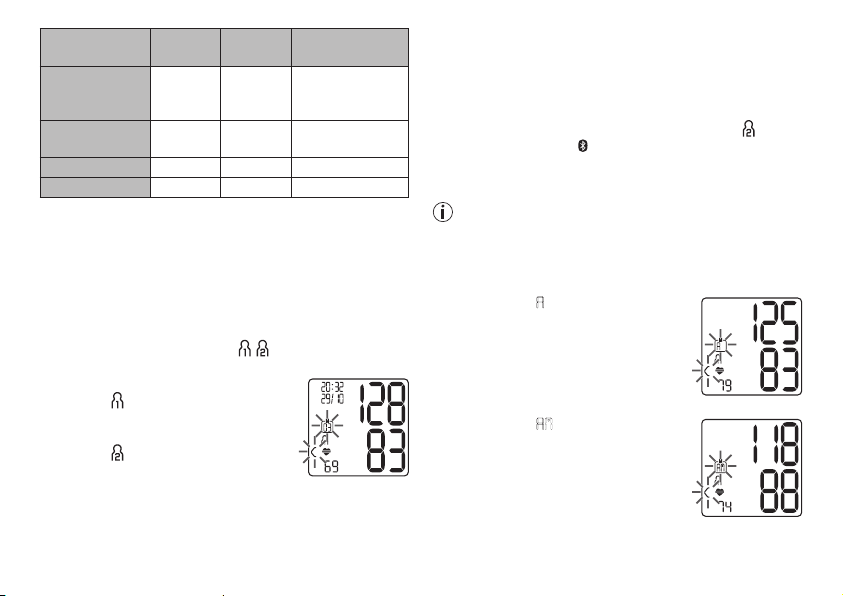
•
Wählen Sie mit der Speichertaste M1 oder M2 Ihren ge-
wünschten Benutzerspeicher ( ) wenn das Gerät ausgeschaltet ist.
–
Wenn Sie die Messdaten für Benutzer-
speicher einsehen möchten, drücken Sie die Speichertaste M1.
–
Wenn Sie die Messdaten für Benutzer-
speicher einsehen möchten, drücken Sie die Speichertaste M2.
Auf dem Display erscheint der Durchschnitt aller Messungen.
Ist
Bluetooth® aktiviert (das Symbol wird auf dem Display
blinkend angezeigt) versucht das Blutdruckmessgerät eine
Verbindung mit der App aufzubauen. Wenn Sie während
dessen die M1-Taste drücken, wird die Übertragung abgebrochen und die Durchschnittswerte der Morgen-Messung
werden angezeigt.
Wenn Sie die M2-Taste drücken, wird die Übertragung abge
brochen und die Messdaten des Benutzerspeichers werden
angezeigt. Das Symbol wird nicht mehr angezeigt. Sobald
eine Verbindung besteht und die Daten übertragen werden,
sind die Tasten inaktiv.
Wenn Sie den Benutzerspeicher 1 ausgewählt ha-
Wenn Sie den Benutzerspeicher 2 ausgewählt ha-
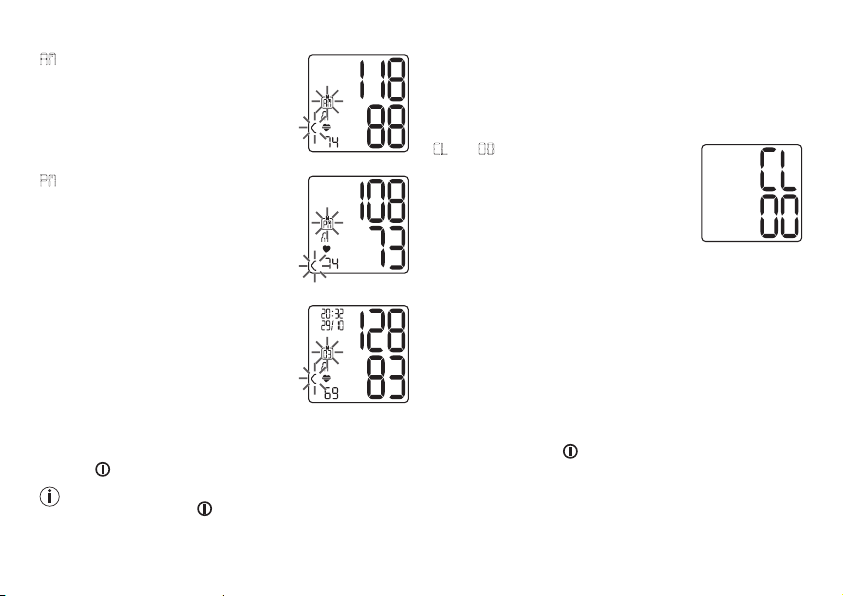
Durchschnittswerte
Im Display blinkt
Es wird der Durchschnittswert aller ge-
speicherten Messwerte dieses Benutzerspeichers angezeigt.
•
Drücken Sie die jeweilige Speichertas-
Im Display blinkt
Es wird der Durchschnittswert der letzten
7 Tage der Morgen-Messungen angezeigt ( Morgen: 5.00 Uhr – 9.00 Uhr).
•
Drücken Sie die jeweilige Speichertas-
11
ben ist die Speichertaste M1 zu betätigen.
ben ist die Speichertaste M2 zu benutzen.
A
.
te (M1 oder M2).
AM
.
te (M1 oder M2).
-
-
Page 12
Im Display blinkt PM.
Es wird der Durchschnittswert der letzten
7 Tage der Abend-Messungen angezeigt
(Abend: 18.00 Uhr – 20.00 Uhr).
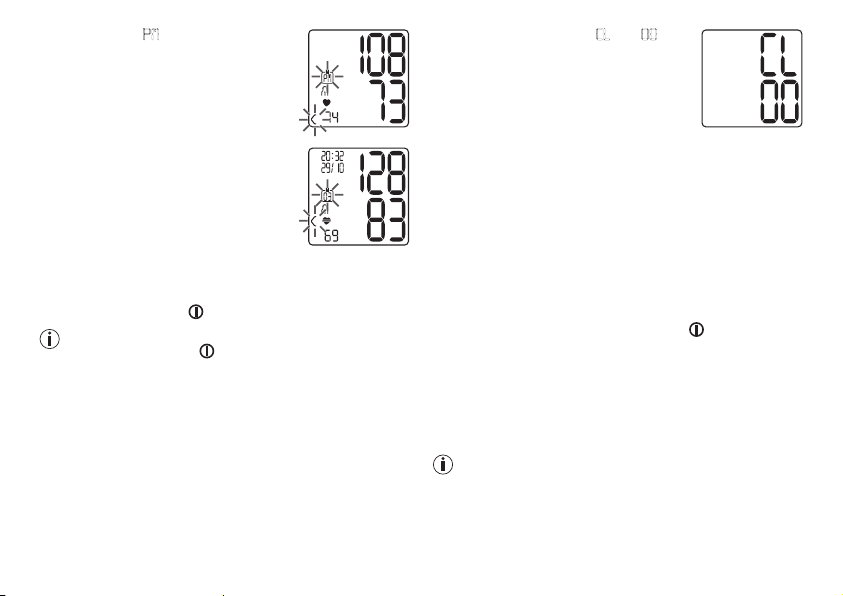
Einzelmesswerte
•
Wenn Sie die jeweilige Speichertaste
(M1 oder M2) erneut drücken, wird im
Display die letzte Einzelmessung angezeigt (hier im Beispiel Messung 03).
•
Wenn Sie die jeweilige Speichertaste
(M1 oder M2) wieder drücken, können
Sie jeweils Ihre gemessenen Einzelmesswerte einsehen.
•
Um das Gerät wieder auszuschalten, drücken Sie die
START/STOPP-Taste .
Sie können das Menü jederzeit durch Drücken der
START/STOPP-Taste verlassen.
Messwerte löschen
•
Um den Speicher des jeweiligen Benutzerspeichers zu lö-
schen, wählen Sie zunächst einen Benutzerspeicher aus.
•
Starten Sie die Abfrage der Durchschnittswerte.
•
Halten Sie die Speichertasten M1/M2 für 5 Sekunden ge-
drückt.
A
uf dem Display erscheint CL und 00.
Alle Werte des gegenwärtigen Benutzerspeichers werden gelöscht.
Anschließend schaltet sich das Gerät automatisch aus.
Einzelmesswerte löschen
Um einzelne Messungen des jeweiligen Benutzerspeichers zu
löschen, wählen Sie zunächst einen Benutzerspeicher.
•
Starten Sie die Abfrage der Einzelmesswerte.
•
Halten Sie die Speichertaste M1 / M2 für 5 Sekunden ge-
drückt (abhängig davon in welchem Benutzerspeicher Sie
sich befinden).
•
Der ausgewählte Wert wird gelöscht. Das Gerät zeigt kurz-
zeitig CL 00 an.
•
Sollen weitere Werte gelöscht werden, wiederholen Sie den
oben beschriebenen Vorgang.
Durch Drücken der START/STOPP-Taste können Sie das
Gerät jederzeit ausschalten.
7. Übertragung der Messwerte
Übertragung über USB-Schnittstelle
Schließen Sie Ihr Blutdruckmessgerät mithilfe des USB-Kabels
an Ihren PC an.
Während einer Messung kann keine Datenübertragung ge-
startet werden.
12
Page 13
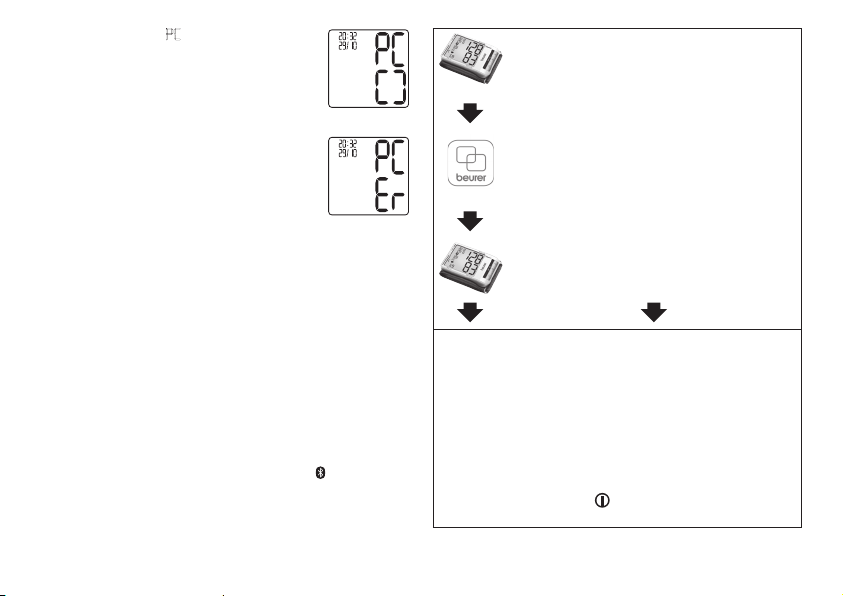
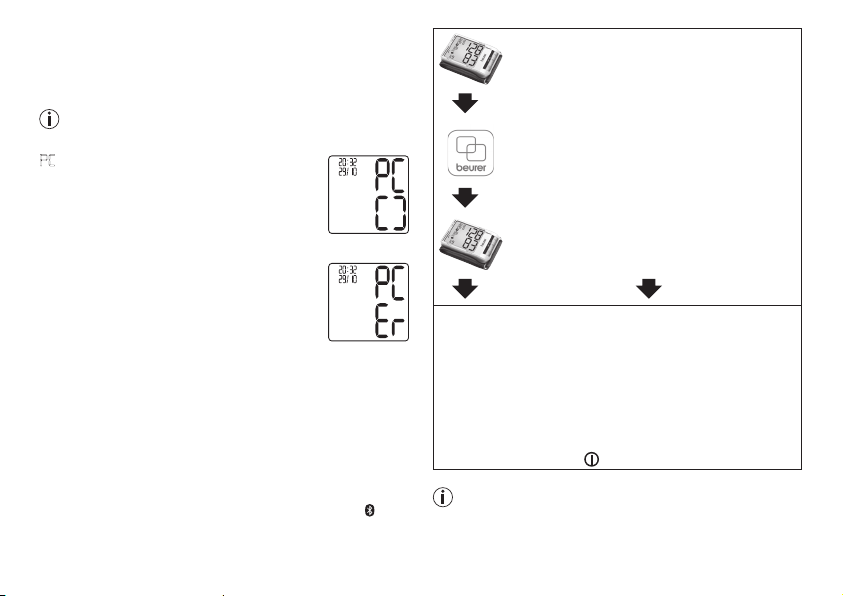
Auf dem Display wird PC angezeigt. Starten Sie
die Datenübertragung in der PC-Software
„HealthMana ger“. Während der Datenübertragung wird im Display eine Animation angezeigt.
Eine erfolgreiche Datenübertragung wird wie in
Abb 1. dargestellt. Bei einer nicht erfolgreichen
A
bb. 1
Datenübertragung wird die Fehlermeldung wie
in Abb. 2 angezeigt. In diesem Fall unterbrechen Sie die PC-Verbindung und starten die
Datenübertragung erneut.
Nach 30 Sekunden der Nichtverwendung sowie bei Unterbrechung der Kommunikation
A
bb. 2
mit dem PC schaltet sich das Blutdruckmessgerät automatisch ab.
Übertragung über Bluetooth
®
Sie haben die Möglichkeit die gemessenen und auf dem Gerät
gespeicherten Werte zusätzlich auf Ihr Smartphone per Blue-
tooth® zu übertragen.
Dazu benötigen Sie die Beurer „HealthManager“ App. Diese
ist im App Store verfügbar.
Um die Werte zu übertragen befolgen Sie die folgenden Punkte:
Wenn im Einstellungsmenü Bluetooth® aktiviert ist, werden
die Daten automatisch nach der Messung übertragen. Auf
dem Display erscheint links oben das Symbol (siehe Kapitel
4.Messung vorbereiten).
Schritt 1: BC 85
Aktivieren Sie Bluetooth
Kapitel „4. Messung vorbereiten, Bluetooth®“).
Schritt 2: Beurer „HealthManager“ App
Fügen Sie in der Beurer HealthManager App
unter „Einstellungen / Meine Geräte“ das
BC 85 hinzu.
Schritt 3: BC 85
Nehmen Sie eine Messung vor.
Schritt 4: BC 85:
Übertragung der Daten direkt im Anschluss an eine
Messung:
• Ist die Bluetooth
Daten übertragung aktiviert, so werden nach
der Bestätigung des Benutzerspeichers mit der
START/STOPP-Taste
die Daten übertragen.
13
®
an Ihrem Gerät (siehe
Schritt 4: BC 85:
Übertragung der Daten zu
einem späteren Zeitpunkt:
• Gehen Sie in den
®
Speicherabruf-Modus
(Kap. 7). Wählen Sie den
gewünschten Benutzerspeicher. Die Bluetooth®
Übertragung startet automatisch.
Page 14
Die Beurer „HealthManager“ App muss zur Übertragung
aktiviert sein.
Um eine störungsfreie Übertragung zu gewährleisten entfernen Sie hierzu bitte ggf. die Schutzhülle Ihres Smartphone.
Starten Sie die Datenübertragung in der Beurer „HealthManager“ App.
Die Wortmarke Bluetooth
®
und zugehöriges Logo sind eingetragene Handelsmarken der Bluetooth® SIG, Inc. Jedwede
Nutzung dieser Marken durch die Beurer GmbH erfolgt unter
Lizenz. Weitere Handelsmarken und Handelsnamen sind Eigentum der jeweiligen Inhaber.
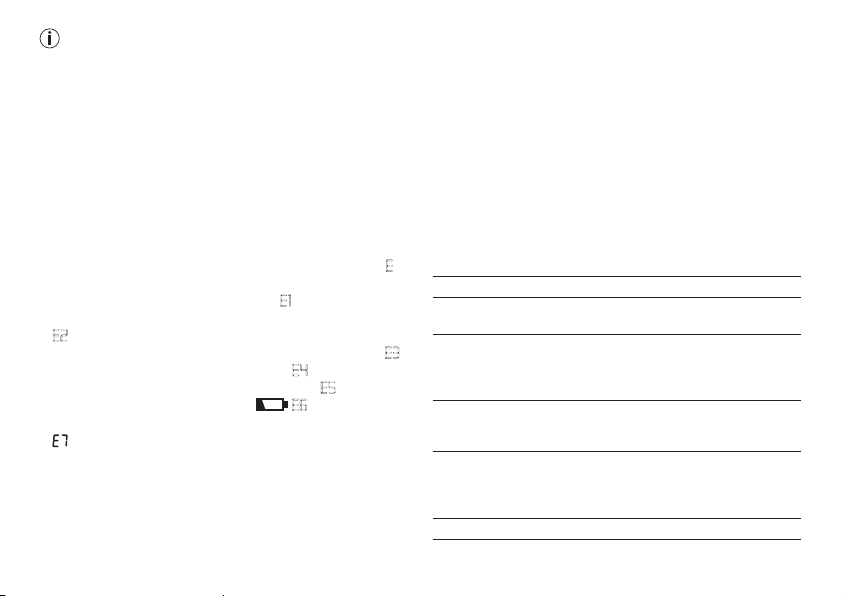
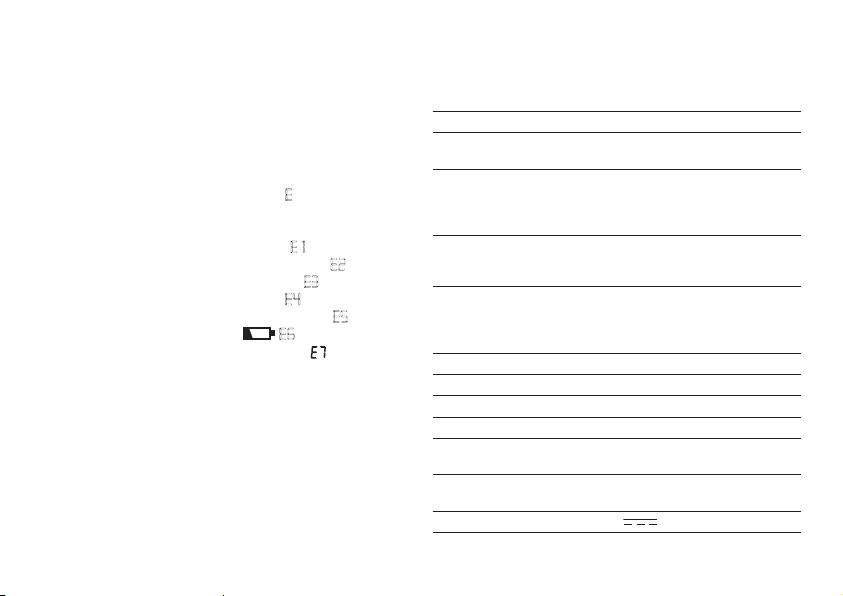
8. Fehlermeldung/Fehlerbehebung
Bei Fehlern erscheint auf dem Display die Fehlermeldung E_
Fehlermeldungen können auftreten, wenn
•
der Puls nicht erfasst werden konnte:
•
Sie sich während der Messung bewegen oder sprechen:
E2
;
•
die Manschette zu stark bzw. zu schwach angelegt ist: E3;
•
Fehler während der Messung auftreten: E4;
•
der Aufpumpdruck höher als 300 mmHg ist: E5;
•
die Batterien fast verbraucht sind E6.
•
die Daten nicht per Bluetooth® gesendet werden konnten:
E 1
;
.
Wiederholen Sie in diesen Fällen die Messung. Achten Sie
da rauf, dass Sie sich nicht bewegen oder reden. Setzen Sie
gegebenenfalls die Batterien neu ein oder ersetzen Sie diese.
.
9. Gerät und Manschette reinigen und
aufbewahren
•
Reinigen Sie das Gerät und die Manschette vorsichtig nur
mit einem leicht angefeuchteten Tuch.
•
Verwenden Sie keine Reinigungs- oder Lösungsmittel.
•
Sie dürfen Gerät und Manschette auf keinen Fall unter Was-
ser halten, da sonst Flüssigkeit eindringen kann und das
Gerät und die Manschette beschädigt.
•
Wenn Sie Gerät und Manschette aufbewahren, dürfen keine
schweren Gegenstände auf dem Gerät und der Manschette
stehen. Entnehmen Sie die Batterien.
10. Technische Angaben
Modell BC 85
Typ BC 80
Messmethode Oszillometrisch, nicht invasive Blut
Messbereich Manschettendruck 0-300 mmHg,
Genauigkeit der An
zeige
Messunsicherheit max. zulässige Standardabweichung
Speicher 2 x 60 Speicherplätze
14
druckmessung am Handgelenk
systolisch 50-250 mmHg,
diastolisch 30-200 mmHg,
Puls 40-180 Schläge /Minute
-
systolisch ± 3 mmHg,
diastolisch ± 3 mmHg,
Puls ± 5 % des angezeigten Wertes
gemäß klinischer Prüfung:
systolisch 8 mmHg /
diastolisch 8 mmHg
-
Page 15
Abmessungen L 97 mm x B 68 mm x H 22 mm
Gewicht Ungefähr 108 g (ohne Batterien)
Manschettengröße 135 bis 230 mm
Zul. Betriebs-
bedingungen
Zul. Aufbewahrungs
bedingungen
Stromversorgung 2 x 1,5 V
Batterie-Lebensdauer Für ca. 300 Messungen, je nach Höhe
Zubehör Gebrauchsanweisung, 2 x 1,5 V AAA
Klassifikation Interne Versorgung, IPX0, kein AP oder
Datenübertragung
per Bluetooth® wireless technology
+5 °C bis +40 °C, 15-93 % relative Luft
feuchte (nicht kondensierend)
-
-25 °C bis +70 °C, 15-93 % relative
Luftfeuchte, 700-1060 hPa Umgebungsdruck
AAA Batterien
des Blutdrucks bzw. Aufpumpdruck
Batterien, Aufbewahrungsbox
APG, Dauerbetrieb, Anwendungsteil
Typ BF
Das Blutdruckmessgerät verwendet
Bluetooth® low energy technology,
Frequenzband 2,4 GHz,
-
Kompatibel mit Bluetooth 4.0 Smartphones / Tablets
Liste der unterstützten Smartphones
/ Tablets
•
Dieses Gerät entspricht der europäischen Norm EN60601-
1-2 und unterliegt besonderen Vorsichtsmaßnahmen hinsichtlich der elektromagnetischen Verträglichkeit. Bitte
beachten Sie dabei, dass tragbare und mobile HF-Kommu-
nikationseinrichtungen dieses Gerät beeinflussen können.
Genauere Angaben können Sie unter der angegebenen
Kundenservice-Adresse anfordern oder am Ende der Gebrauchsanweisung nachlesen.
•
Das Gerät entspricht der EU-Richtlinie für Medizinprodukte
93/42/EEC, dem Medizinproduktegesetz und den Normen
EN1060-1 (nicht invasive Blutdruckmessgeräte Teil 1: Allgemeine Anforderungen), EN1060-3 (nicht invasive Blutdruckmessgeräte Teil 3: Ergänzende Anforderungen für elektromechanische Blutdruckmesssysteme) und IEC80601-2-30
(Medizinische elektrische Geräte Teil 2-30: Besondere Festlegungen für die Sicherheit einschließlich der wesentlichen
Leistungsmerkmale von automatisierten nicht invasiven
Blutdruckmessgeräten).
•
Die Genauigkeit dieses Blutdruckmessgerätes wurde sorg-
fältig geprüft und wurde im Hinblick auf eine lange nutzbare
Lebensdauer entwickelt.
Bei Verwendung des Gerätes in der Heilkunde sind Messtechnische Kontrollen mit geeigneten Mitteln durchzuführen. Genaue Angaben zur Überprüfung der Genauigkeit
können unter der Service-Adresse angefragt werden.
•
Wir garantieren hiermit, dass dieses Produkt der europäi-
schen R&TTE Richtlinie 1999/5/EC entspricht.
Kontaktieren Sie bitte die genannte Serviceadresse, um
detailliertere Angaben – wie zum Beispiel die CE-Konformitätserklärung – zu erhalten.
15
Page 16

11. Garantie
Wir leisten 3 Jahre Garantie ab Kaufdatum für Material- und
Fabrikationsfehler des Produktes. Die Garantie gilt nicht:
•
Im Falle von Schäden, die auf unsachgemäßer Bedienung
beruhen.
•
Für Verschleißteile.
•
Bei Eigenverschulden des Kunden.
•
Sobald das Gerät durch eine nicht autorisierte Werkstatt
geönet wurde.
Die gesetzlichen Gewährleistungen des Kunden bleiben durch
die Garantie unberührt. Für Geltendmachung eines Garantiefalles innerhalb der Garantiezeit ist durch den Kunden der
Nachweis des Kaufes zu führen. Die Garantie ist innerhalb
eines Zeitraumes von 3 Jahren ab Kaufdatum gegenüber der
Beurer GmbH, Ulm (Germany) geltend zu machen.
Bitte wenden Sie sich im Falle von Reklamationen an unseren Service unter folgendem Kontakt:
Service Hotline:
Tel.: +49 (0) 731 / 39 89-144
E-Mail: kd@beurer.de
www.beurer.com
Fordern wir Sie zur Übersendung des defekten Produktes
auf, ist das Produkt an folgende Adresse zu senden:
Beurer GmbH
Servicecenter
Lessingstraße 10 b
89231 Neu-Ulm
Germany
16
Irrtum und Änderungen vorbehalten
Page 17
ENGLISH
Contents
1. Getting to know your device ............................................17
2. Important notes ................................................................17
3. Unit description ................................................................20
4. Preparing for the measurement ........................................21
5. Measuring blood pressure ................................................23
6. Displaying and deleting measurements ...........................25
7. Transferring measurements ............................................27
8. Error messages/troubleshooting ....................................28
9. Cleaning and storing the device and cuff .......................28
10. Technical specifications .................................................28
Dear customer,
Thank you for choosing one of our products. Our name stands
for high-quality, thoroughly tested products for applications in
the areas of heat, gentle therapy, blood pressure/diagnosis,
weight, massage, beauty and air.
Please read these instructions for use carefully and keep them
for later use, be sure to make them accessible to other users
and observe the notes they contain.
With kind regards,
Your Beurer team
1. Getting to know your device
Check that the packaging of the Beurer BC85 blood pressure
monitor has not been tampered with and make sure that all
the required contents are present.
The wrist blood pressure monitor is used to carry out non-invasive measurement and monitoring of arterial blood pressure
values in human adults. This allows you to quickly and easily
measure your blood pressure, save the measurements and
display the development of the measurements. You are also
warned of possible existing cardiac arrhythmia.
The recorded values are classified and evaluated graphically.
2. Important notes
Signs and symbols
The following symbols are used in these instructions for use,
on the packaging and on the type plate for the device and the
accessories:
Attention
Note
Note on important information
17
Page 18
Storage
-25°C
5°C
70°C
Operating
40°C
SN
Observe the instructions for use
Application part, type BF
Direct current
Disposal in accordance with the Waste
Electrical and Electronic Equipment EC
Directive – WEEE
Manufacturer
Permissible storage temperature and
humidity
RH 15-93%
Permissible operating temperature and
humidity
RH 15-93%
Protect from moisture
Serial number
The CE labelling certifies that the product
complies with the essential requirements of
Directive 93/42/EEC on medical products.
Certification symbol for products that are
exported to the Russian Federation and
members of the CIS
Notes on use
•
In order to ensure comparable values, always measure your
blood pressure at the same time of day.
•
Before every measurement, relax for about five minutes.
•
If you want to perform several measurements on the same
person, wait five minutes between each measurement.
•
Do not take a measurement within 30 minutes of eating,
drinking, smoking or exercising.
•
Repeat the measurement if you are unsure of the measured
value.
•
The measurements taken by you are for your information
only – they are no substitute for a medical examination.
Discuss the measurements with your doctor and never base
any medical decisions on them (e.g. medicines and their
administration).
•
Do not use the blood pressure monitor on newborns or
patients with pre-eclampsia. We recommend consulting
a doctor before using the blood pressure monitor during
pregnancy.
•
In the case of restricted circulation on the arm as a result of
chronic or acute vascular diseases (including vascular constriction), the accuracy of the wrist measurement is limited.
In this case you should avoid using an upper arm blood
pressure monitor.
•
This device is not intended for use by people (including chil-
dren) with restricted physical, sensory or mental skills or a
lack of experience and/or a lack of knowledge, unless they
are supervised by a person who has responsibility for their
safety or they receive instructions from this person on how
18
Page 19
to use the device. Supervise children around the device to
ensure they do not play with it.
•
Cardiovascular diseases may lead to incorrect measure-
ments or have a detrimental eect on measurement accuracy. The same also applies to very low blood pressure,
diabetes, circulatory disorders and arrhythmias as well as
chills or shaking.
•
The blood pressure monitor must not be used in connection
with a high-frequency surgical unit.
•
Only use the unit on people who have the specified wrist
measurement for the device.
•
Please note that when inflating, the functions of the limb in
question may be impaired.
•
During the blood pressure measurement, the blood circula-
tion must not be stopped for an unnecessarily long time. If
the device malfunctions, remove the cu from the arm.
•
Do not allow sustained pressure in the cu or frequent
measurements. The resulting restriction of the blood flow
may cause injury.
•
Ensure that the cu is not placed on an arm in which the ar-
teries or veins are undergoing medical treatment, e.g. intravascular access or therapy, or an arteriovenous (AV) shunt.
•
Do not use the cu on people who have undergone a mas-
tectomy.
•
Do not place the cu over wounds as this may cause further
injury.
•
Place the cu on your wrist only. Do not place the cu on
other parts of the body.
•
The blood pressure monitor can only be operated with bat-
teries.
19
•
To conserve the batteries, the monitor switches o auto-
matically if you do not press any buttons for 2 minutes.
•
The device is only intended for the purpose described in
these instructions for use. The manufacturer is not liable for
damage resulting from improper or careless use.
Instructions for storage and maintenance
•
The blood pressure monitor is made from precision and
electronic components. The accuracy of the measurements
and service life of the device depend on its careful handling:
– Protect the device from impacts, humidity, dirt, marked
temperature fluctuations and direct sunlight.
– Do not drop the device.
– Do not use the device in the vicinity of strong electromag-
netic fields and keep it away from radio systems or mobile
telephones.
•
We recommend that the batteries be removed if the device
will not be used for a prolonged period of time.
Notes on handling batteries
• If your skin or eyes come into contact with battery fluid, flush
out the affected areas with water and seek medical assistance.
•
Choking hazard! Small children may swallow and
choke on batteries. Store the batteries out of the reach of
small children.
•
Observe the plus (+) and minus (-) polarity signs.
•
If a battery has leaked, put on protective gloves and clean
the battery compartment with a dry cloth.
•
Protect the batteries from excessive heat.
Page 20
•
Risk of explosion! Never throw batteries into a fire.
•
Do not charge or short-circuit batteries.
•
If the device is not to be used for a long period, take the
batteries out of the battery compartment.
•
Use identical or equivalent battery types only.
•
Always replace all batteries at the same time.
•
Do not use rechargeable batteries.
•
Do not disassemble, split or crush the batteries.
Instructions for repairs and disposal
•
Batteries do not belong in household waste. Please dispose
of empty batteries at the collection points intended for this
purpose.
•
Do not open the device. Failure to comply will result in void-
ing of the warranty.
•
Do not repair or adjust the device yourself. Proper operation
can no longer be guaranteed in this case.
•
Repairs must only be carried out by Customer Services or
authorised suppliers. Before making a claim, please check
the batteries first and replace them if necessary.
•
For environmental reasons, do not dispose of the
device in the household waste at the end of its useful life. Dispose of the device at a suitable local collection or recycling point. Dispose of the device in
accordance with EC Directive – WEEE (Waste Electrical and
Electronic Equipment). If you have any questions, please
contact the local authorities responsible for waste disposal.
3. Unit description
1. Scale for classifying the measurements
2. USB interface
3. Display
4. Positioning display (heart level)
5. Memory button M1
6. Memory button M2
7. START/STOP button
8. Battery compartment lid
9. Wrist cu
3
2
1
20
4
5
M1
O
M2
k
6
7
8
9
Page 21
Information on the display:
SYS mmHg
1. Classification of measurements
2. Time and date
3. Systolic pressure
4. Diastolic pressure
5. Cardiac arrhythmia symbol
Pulse symbol
6. Calculated pulse value
7. User memory /
8. Pump up, release air (arrow)
9. Memory space number/memory display
average value ( A ), morning (
AM
), evening (
10. Battery status indicator
11. Symbol for Bluetooth® transfer
1 2
11
10
9
3
8
7
4
56
PM
4. Preparing for the measurement
Inserting the batteries
•
Remove the battery
compartment lid on the
left side of the device.
•
Insert two 1.5 V micro
(alkaline type LR03) batteries. Make sure that the batteries are inserted the correct
way round. Do not use rechargeable batteries.
•
Close the battery compartment lid again carefully.
)
If the battery change symbol
no more measurements are possible and you must replace
all batteries.
All display elements are briefly displayed,
display. Now set the date and time as described below.
Battery disposal
• The empty, completely flat batteries must be disposed of
through specially designated collection boxes, recycling
points or electronics retailers. You are legally required to
dispose of the batteries.
• The codes below are printed on batteries
containing harmful substances:
Pb = Battery contains lead,
Cd = Battery contains cadmium,
Hg = Battery contains mercury
21
is flashing and E6 appears,
24h
flashes in the
Page 22
Setting the hour format, date and time
This menu allows you to set the following functions, one after
another.
Hour format
Date
➔
Time
➔
It is essential to set the date and time. Otherwise, you will not
be able to save your measured values correctly with a date
and time and access them again later.
If you press and hold the M1 or M2 memory button, you
can set the values more quickly.
Hour format
•
Press and hold the START/STOP button
for 5 seconds.
•
Select the desired hour format using the M1/
M2 memory buttons and confirm with the
START/STOP button .
Date
The year flashes on the display.
•
Select the year using the M1/M2 memory
buttons and confirm with the START/STOP
button .
The month flashes on the display.
•
Select the month using the M1/M2 memory but-
tons and confirm with the START/STOP button
.
The day flashes on the display.
•
Select the day using the M1/M2 memory buttons
and confirm with the START/STOP button
.
If the hour format is set as 12h, the day/month dis-
play sequence is reversed.
Time
The hours flash on the display.
•
Select the hour using the M1/M2 memory but-
tons and confirm with the START/STOP button
.
The minutes flash on the display.
•
Select the minute with the M1/M2 memory but-
tons and confirm with the START/STOP button
.
Once all the data has been set, the device switches o automatically.
Bluetooth
®
The Bluetooth® symbol flashes on the display.
•
Use the M1/M2 memory buttons to choose whether au-
tomatic Bluetooth® data transfer is activated (Bluetooth®
symbol flashes) or deactivated (Bluetooth® symbol is not
shown) and confirm with the START/STOP button .
Bluetooth® transfers will reduce the battery capacity.
22
Page 23
5. Measuring blood pressure
1 2 3
1 cm
M1
M2
O
k
M1
M2
O
k
M1
M2
O
k
Attaching the cu
•
Expose your left wrist. Ensure that the circulation of the arm
is not hindered by tight clothing or similar.
Place the cu on the inside of your wrist.
•
Close the cu with the hook-and-loop fastener such that
the upper edge of the device is positioned approx. 1 cm
underneath the heel of the hand.
•
The cu must be fitted tightly around the wrist, but must not
constrict.
Adopt the correct posture
•
Before every measurement, relax for about five minutes.
Otherwise deviations can occur.
• You can take the measurement while sitting or lying.
To take your blood pressure,
make sure you are sitting
comfortably with your arms
and back leaning on something. Do not cross your legs.
Place your feet flat on the ground. Make sure to rest your
arm and move it. Always make sure that the cu is at heart
level. Otherwise significant deviations can occur. Relax
your arm and the palm of your hand. An O.K. symbol bar is
integrated into the device to additionally assist you. It signals the correct position of the blood pressure monitor. You
are in the right position if you can see O.K. on the display.
•
To avoid falsifying the measurement, it is important to re-
main still during the measurement and not to speak.
Performing the blood pressure measurement
As described above, attach the cu and adopt the posture in
which you want to perform the measurement.
•
Press the START/STOP button to
start the blood pressure monitor. All
displays will illuminate briefly.
The blood pressure monitor will begin the
measurement automatically after 3 seconds.
The measurement is taken during the inflation phase.
You can cancel the measurement at any time by pressing
the START/STOP button .
As soon as a pulse is found, the pulse symbol is displayed.
•
The systolic pressure, diastolic pressure
and pulse rate measurements are
displayed.
• E
_ appears if the measurement could not be performed
properly. Observe the chapter on error messages/troubleshooting in these instructions for use
and repeat the measurement.
23
Page 24
•
Now select the desired user memory by pressing the M1 or
M2 memory buttons. If you do not select a user memory,
the measurement is stored in the most recently used user
memory. The relevant symbol M1 or M2 appears in the display.
•
Press the START/STOP button to switch o the blood
pressure monitor. The measurement is then stored in the
selected user memory.
®
If Bluetooth
after pressing the START/STOP button
• The Bluetooth
data transfer is activated, data is transferred
®
symbol flashes on the display. The blood
.
pressure monitor now attempts to connect to the app for
approx. 30 seconds.
• The Bluetooth® symbol stops flashing as soon as a connection is established. All measurement data is automatically
transferred to the app. Once the data has been successfully
transferred, the device switches o.
•
If a connection to the app cannot be established after
30seconds, the Bluetooth
®
symbol goes out and the blood
pressure monitor switches off automatically after 3minutes.
If you forget to turn o the device, it will switch o automatically after approx. 3 minutes. In this case too, the value is
stored in the selected or most recently used user memory.
Wait at least 5 minutes before taking another
measurement.
Evaluating results
Cardiac arrhythmia:
This device can identify potential disruptions of the heart
rhythm when measuring and if necessary, indicates this after
the measurement with the symbol
.
This can be an indicator for arrhythmia. Arrhythmia is an illness
in which the heart rhythm is abnormal because of flaws in the
bioelectrical system that regulates the heartbeat. The symp
toms (skipped or premature heart beats, pulse being slow or
too fast) can be caused by factors such as heart disease, age,
physical make-up, excess stimulants, stress or lack of sleep.
Arrhythmia can only be determined through an examination by
your doctor.
If the symbol is shown on the display after the measurement has been taken, repeat the measurement. Please ensure
that you rest for 5 minutes beforehand and do not speak or
move during the measurement. If the symbol
appears frequently, please consult your doctor. Self-diagnosis and treatment based on the measurements can be dangerous. Always
follow your GP’s instructions.
Classification of measurements:
The measurements can be classified and evaluated in accordance with the following table.
However, these standard values serve only as a general
guideline, as the individual blood pressure varies in dierent
people and dierent age groups etc.
It is important to consult your doctor regularly for advice. Your
doctor will tell you your individual values for normal blood
pressure as well as the value above which your blood pressure is classified as dangerous.
24
-
Page 25

The classification on the display and the scale on the unit
show which category the recorded blood pressure values fall
into. If the values of systole and diastole fall into two dierent
categories (e.g. systole in the ’High normal’ category and diastole in the ’Normal’ category), the graphical classification on
the device always shows the higher category; for the example
given this would be ’High normal’.
Blood pressure
value category
Setting 3:
severe hypertension
Setting 2:
moderate hypertension
Setting 1:
mild hypertension
High normal 130 – 139 85 – 89
Normal 120 – 129 80 – 84 self-monitoring
Optimal < 120 < 80 self-monitoring
Source: WHO, 1999 (World Health Organization)
Systole
(in mmHg)
≥ 180 ≥ 110
160 – 179 100 – 109
140 – 159 90 – 99
Diastole
(in mmHg)
Action
seek medical
attention
seek medical
attention
regular monitoring by doctor
regular monitoring by doctor
6. Displaying and deleting measurements
User memory
The results of every successful measurement are stored together with the date and time. The oldest measurement is
overwritten in the event of more than 60 measurements.
•
Select the desired user memory ( ) using the M1 or M2
–
To view the measurement data for user
–
To view the measurement data for
If you press the M2 button, the transfer is cancelled and the
measurement data of user memory
bol is no longer shown. The buttons are deactivated as soon as
a connection is established and the data is transferred.
Average values
A
flashes on the display.
The average value of all saved measured values in this user memory is
displayed.
25
memory buttons if the device is switched o.
memory , press the M1 memory button.
user memory , press the M2 memory button.
The average of all measurements appears on the display.
If
Bluetooth® is activated (the symbol will flash on the dis-
play), the blood pressure monitor is attempting to connect
to the app. If you press the M1 button in the meantime, the
transfer will be cancelled and the morning average will be
displayed.
is displayed. The sym-
Press the M1 button if you have selected user memory 1.
Press the M2 memory button if you have selected user
memory2.
Page 26
•
Press the relevant memory button (M1 or M2).
AM
flashes on the display.
The average value of the morning measurements for the last 7 days is displayed
(morning: 5.00 a.m. – 9.00 a.m.).
•
Press the relevant memory button
(M1 or M2).
PM
flashes on the display.
The average value of the evening measurements for the last 7 days is displayed
(evening: 6.00 p.m. – 8.00 p.m.).
Individual measured values
•
When the relevant memory button
(M1 or M2) is pressed again, the last
individual measurement is displayed
(in this example, measurement 03).
•
When the relevant memory button
(M1 or M2) is pressed again, you can
view your individual measurements.
•
To switch the device o again, press the START/STOP
button .
You can exit the menu at any time by pressing the
START/STOP button .
Deleting measured values
•
To clear the memory of the relevant user memory, you
must first select a user memory.
•
Start the retrieval of the average values.
•
Press and hold the M1 / M2 memory buttons for 5 sec-
onds.
CL
and 00 appear on the display.
All the values in the current user memory
are deleted.
The device will then switch o automatically.
Deleting individual measurements
To clear individual measurements from the relevant user memory, you must first select a user memory.
•
Start individual measurement access.
•
Press and hold the memory button M1 / M2 for 5 seconds
(depending on the user memory you are in).
•
The selected value is deleted. The device briefly displays CL
00.
•
If you would like to delete other values, repeat the process
described above.
You can switch o the device at any time by pressing the
START/STOP button .
26
Page 27
7. Transferring measurements
Transfers using the USB interface
Connect the blood pressure monitor to your PC using the USB
cable.
No data transfer may be launched whilst performing a
measurement.
PC
is shown on the display. Begin the data
transfer in the “HealthManager” PC software.
During the data transfer, an animation is
shown on the display. A successful data transfer is displayed as in fi gure 1. If the data transfer is unsuccessful, an error message appears
as in fi gure 2. In this case, interrupt the PC
connection and start the data transfer again.
After 30 seconds of not being in use or if
communication with the PC is interrupted,
the blood pressure monitor switches itself o
automatically.
Transfer via Bluetooth
It is also possible to transfer the measured values saved on
the device to your smartphone using Bluetooth®.
You will need the Beurer “HealthManager” app for this. The
app is available from the App Store.
Proceed as follows to transfer values:
If Bluetooth® is activated in the settings menu, the data is
transferred automatically after the measurement. The symbol appears in the top left of the display (see chapter 4 “Preparing the measurement”).
®
f
igure 1
f
igure 2
27
Step 1: BC 85
Activate Bluetooth® on your device (see chapter
4 “Preparing the measurement, Bluetooth®”).
Step 2: Beurer “HealthManager” app
In the Beurer “HealthManager” app, add the
BC 85 under “Settings/My devices”.
Step 3: BC 85
take a measurement.
Step 4: BC 85:
data transfer immediately
following measurements.
•
If Bluetooth® data trans-
fer has been activated,
data is transferred after
having confirmed the user
memory and pressing the
START/STOP button .
The Beurer “HealthManager” app must be active to allow
data transfers.
Step 4: BC 85:
Data transfer at a later point:
•
Go to memory mode
(chapter 7). Select the
desired user memory. The
Bluetooth® transfer starts
automatically.
Page 28
If your smartphone has a protective cover, remove this to ensure that there is no interference during the transfer. Begin the
data transfer in the Beurer “HealthManager” app.
®
The Bluetooth
marks owned by Bluetooth
word mark and logos are registered trade-
®
SIG, Inc. and any use of such
marks by Beurer GmbH is under license. Other trademarks
and trade names are those of their respective owners.
8. Error messages/troubleshooting
In the event of errors, the error message E_
display.
Error messages may appear if:
•
It was not possible to record the pulse:
•
You move or speak during the measurement:: E2 ;
•
The cu is fastened too tightly or loosely: E3;
•
Errors occur during the measurement: E4;
•
The pump pressure is higher than 300 mmHg: E5;
•
The batteries are almost empty E6.
• The data could not be sent via Bluetooth®: .
In such cases, repeat the measurement. Ensure that you do not
move or speak. If necessary, reinsert or replace the batteries.
appears on the
E 1
;
9. Cleaning and storing the device and cuff
•
Clean the device and cu carefully using a slightly damp
cloth only.
•
Do not use any cleaning agents or solvents.
•
Under no circumstances hold the device and cu under
water, as this can cause liquid to enter and damage the
device and cu.
•
If you store the device and cu, do not place heavy objects
on the device and cu. Remove the batteries.
10. Technical specifications
Model BC 85
Type BC 80
Measurement method Oscillometric, non-invasive blood pres
Measurement range Cuff pressure 0-300 mmHg,
Display accuracy Systolic ± 3 mmHg,
Measurement inac
curacy
Memory 2 x 60 memory spaces
Dimensions L 97 mm x W 68 mm x H 22 mm
Weight Approximately 108 g (without batteries)
Cuff size 135 to 230 mm
Permissible operating
conditions
Permissible storage
conditions
Power supply 2 x 1.5V
28
sure measurement on the wrist
Systolic 50-250 mmHg,
Diastolic 30-200 mmHg,
Pulse 40-180 beats/minute
Diastolic ± 3 mmHg,
Pulse ± 5 % of the value shown
-
Max. permissible standard deviation
according to clinical testing:
Systolic 8 mmHg /
Diastolic 8 mmHg
+5 °C to +40 °C, 15-93 % relative hu
midity (non-condensing)
-25 °C to +70 °C, 15-93 % relative hu
midity, 700-1060 hPa ambient pressure
AAA batteries
-
-
-
Page 29
Battery life For approx. 300 measurements, de-
Accessories Instructions for use, 2 x 1.5V AAA bat
Classification Internal supply, IPX0, no AP or APG,
Data transfer via
Bluetooth® wireless
technology
pending on levels of blood pressure
and pump pressure
teries, storage box
continuous operation, application part
type BF
-
The blood pressure monitor uses
Blue tooth® low energy technology,
2.4 GHz frequency band,
Compatible with Bluetooth 4.0 smartphones/tablets
List of supported smartphones/tablets
•
This device is in line with European Standard EN 60601-
1-2 and is subject to particular precautions with regard to
electromagnetic compatibility (EMC). Please note that portable and mobile HF communication systems may interfere
with this unit. More details can be requested from the stated
Customer Services address or found at the end of the instructions for use.
•
This device corresponds to the EU Medical Devices Direc-
tive 93/42/EEC, the German Medical Devices Act (Medizinproduktgesetz) and the standards EN1060-1 (non-invasive sphygmomanometers, Part 1: General requirements),
EN 1060-3 (non-invasive sphygmomanometers, Part3:
Supplementary requirements for electro-mechanical blood
pressure measuring systems) and IEC80601-2-30 (Medical
electrical equipment – Part 2-30: Particular requirements for
the basic safety and essential performance of automated
non-invasive sphygmomanometers).
•
The accuracy of this blood pressure monitor has been care-
fully checked and developed with regard to a long useful
life.
If using the device for commercial medical purposes, it must
be regularly tested for accuracy by appropriate means. Precise instructions for checking accuracy may be requested
from the service address.
•
We hereby guarantee that this product complies with the
European R&TTE Directive 1999/5/EC.
Please contact the specified service address to obtain more
detailed information such as the CE conformity declaration.
29
Subject to errors and changes
Page 30
FRANÇAIS
Sommaire
1. Présentation .....................................................................30
2. Conseils importants .........................................................30
3. Description de l’appareil ..................................................34
4. Préparation de la mesure .................................................35
5. Mesurer la tension ............................................................36
6. Récupérer et supprimer les valeurs de mesure ................39
7. Transfert des valeurs mesurées ......................................40
8. Message d’erreur/Résolution des erreurs ......................41
9. Nettoyage et rangement de l’appareil et de la
manchette ......................................................................42
10. Caractéristiques techniques ...........................................42
Chère cliente, cher client,
Nous vous remercions d’avoir choisi l’un de nos produits.
Notre société est réputée pour l’excellence de ses produits
et les contrôles de qualité approfondis auxquels ils sont soumis dans les domaines suivants : chaleur, thérapie douce,
diagnostic de pression artérielle, contrôle de poids, massage,
beauté et purification d’air.
Lisez attentivement ce mode d’emploi, conservez-le pour un
usage ultérieur, mettez-le à disposition des autres utilisateurs
et suivez les consignes qui y figurent.
Sincères salutations,
Votre équipe Beurer
1. Présentation
Vérifiez que l’emballage du tensiomètre BC 85 de Beurer est
intact et que tous les éléments sont inclus.
Le tensiomètre de poignet est conçu pour la mesure non invasive et la surveillance des valeurs de tension artérielle des
personnes adultes. Il vous permet de mesurer votre tension
rapidement et facilement, d’enregistrer les valeurs et d’acher l’évolution des valeurs. Vous êtes averti en cas d’éventuels troubles du rythme cardiaque.
Les valeurs calculées sont classées et évaluées sous forme
graphique.
2. Conseils importants
Symboles utilisés
Les symboles suivants sont utilisés sur le mode d’emploi, sur
l’emballage et sur la plaque signalétique de l’appareil et des
accessoires:
Attention
30
Page 31

Storage
-25°C
5°C
70°C
Operating
40°C
SN
Remarque
Indication d’informations importantes
Respectez les consignes du mode d’emploi
Appareil de type BF
Courant continu
Élimination conformément à la directive
européenne WEEE (Waste Electrical and
Electronic Equipment) relative aux déchets
d’équipements électriques et électroniques
Fabricant
Température et taux d’humidité de stockage
admissibles
RH 15-93%
Température et taux d’humidité admissibles
pour l’utilisation
RH 15-93%
Protéger contre l’humidité
Numéro de série
Le sigle CE atteste de la conformité aux exigences fondamentales de la directive 93/42/
EEC relative aux dispositifs médicaux.
Marque de certification pour les produits,
qui sont exportés en Fédération de Russie
et dans les pays de la CEI
Conseils d’utilisation
•
Mesurez toujours votre tension au même moment de la
journée afin que les valeurs soient comparables.
•
Avant toute mesure, reposez-vous pendant env. 5minutes!
•
Lorsque vous devez eectuer plusieurs mesures sur une
personne, patientez à chaque fois 5minutes entre chaque
mesure.
•
Évitez de manger, boire, fumer ou de pratiquer des activités
physiques pendant au moins 30minutes avant la mesure.
•
Eectuez une nouvelle mesure si vous avez un doute sur les
valeurs mesurées.
•
Les mesures que vous avez établies servent uniquement
d’information – elles ne remplacent pas un examen médical!
Communiquez vos résultats à votre médecin, vous ne devez
prendre en aucun cas des décisions d’ordre médical sur la
base de ces seules mesures (par ex. le choix de médicaments et de leurs dosages)!
•
N’utilisez pas le tensiomètre sur des nouveau-nés et des
patientes atteintes de pré-éclampsie. Nous recommandons
de consulter le médecin avant d’utiliser le tensiomètre pendant la grossesse.
31
Page 32

• En cas de limitation de la circulation sanguine dans un bras
en raison de maladies chroniques ou aiguës des vaisseaux
(entre autres vasoconstriction), l’exactitude de la mesure au
poignet est limitée. Dans ce cas, passez à un tensiomètre au
bras.
•
Cet appareil n’est pas conçu pour être utilisé par une per-
sonne (y compris les enfants) dont les capacités physiques,
sensorielles ou intellectuelles sont limitées, ou n’ayant pas
l’expérience et/ou les connaissances nécessaires. Le cas
échéant, cette personne doit, pour sa sécurité, être surveillée par une personne compétente ou doit recevoir de cette
dernière des recommandations sur la manière d’utiliser l’appareil. Surveillez les enfants afin de les empêcher de jouer
avec l’appareil.
•
Les maladies cardio-vasculaires peuvent entraîner des er-
reurs de mesure, plus précisément des mesures imprécises.
C’est également le cas lors d’une tension très basse, de
diabète, de troubles de la circulation et du rythme cardiaque
et de frissons de fièvre ou de tremblements.
•
Le tensiomètre ne doit pas être utilisé parallèlement à un
appareil chirurgical haute fréquence.
•
Utilisez uniquement l’appareil sur des personnes dont le
périmètre du poignet correspond à celui indiqué pour l’appareil.
•
Veuillez noter que la fonction du membre concerné peut
être entravée lors du gonflage.
•
Il ne faut pas bloquer la circulation sanguine plus longtemps
que nécessaire au cours de la prise de tension. Si l’appareil
ne fonctionne pas bien, retirez le brassard du bras.
•
Évitez des mesures trop fréquentes ou une pression conti-
nue du brassard. Elles entraînent une réduction de la circulation sanguine et constituent un risque de blessure.
•
Veillez à ne pas placer la manchette sur un bras, dont les
artères ou les veines sont soumises à un traitement médical, par exemple en présence d’un dispositif d’accès intravasculaire destiné à un traitement intravasculaire ou en cas
de shunt artérioveineux.
•
N’utilisez pas le brassard sur des personnes qui ont subi
une mastectomie.
•
Ne placez pas le brassard sur des plaies, son utilisation
peut les aggraver.
•
Placez la manchette uniquement au niveau du poignet. Ne
placez pas la manchette sur d’autres parties du corps.
•
Vous ne pouvez utiliser le tensiomètre qu’avec des piles.
•
L’arrêt automatique permet de faire passer le tensiomètre
en mode économie d’énergie lorsqu’aucune touche n’est
manipulée pendant un délai de 2minutes.
•
L’appareil est conçu pour l’utilisation décrite dans ce mode
d’emploi. Le fabricant ne peut être tenu pour responsable
des dommages causés par une utilisation inappropriée ou
non conforme.
Consignes de rangement et d’entretien
•
Le tensiomètre est constitué de composants électroniques
et de précision. La précision des valeurs mesurées et la durée de vie de l’appareil dépendent d’un maniement soigné:
–
Protégez l’appareil contre les chocs, l’humidité, les saletés, les fortes variations de température et l’ensoleillement
direct.
32
Page 33

– Ne laissez pas tomber l’appareil.
– N’utilisez pas l’appareil à proximité de champs électroma-
gnétiques puissants, tenez-le éloigné des installations de
radio et des téléphones mobiles.
•
Si l’appareil n’est pas utilisé pendant une période prolon-
gée, il est recommandé de retirer les piles.
Remarques relatives aux piles
•
Si du liquide de la cellule de pile entre en contact avec la
peau ou les yeux, rincez la zone touchée avec de l’eau et
consultez un médecin.
•
Risque d’ingestion! Les enfants en bas âge pourraient
avaler des piles et s’étouffer. Veuillez donc conserver les
piles hors de portée des enfants en bas âge!
•
Respectez les signes de polarité plus (+) et moins (-).
•
Si la pile a coulé, enfilez des gants de protection et nettoyez
le compartiment à piles avec un chiffon sec.
•
Protégez les piles d’une chaleur excessive.
•
Risque d’explosion! Ne jetez pas les piles dans le feu.
•
Les piles ne doivent être ni rechargées, ni court-circuitées.
•
En cas de non utilisation prolongée de l’appareil, sortez les
piles du compartiment à piles.
•
Utilisez uniquement des piles identiques ou équivalentes.
•
Remplacez toujours l’ensemble des piles simultanément.
•
N’utilisez pas d’accumulateur!
•
Ne démontez, n’ouvrez ou ne cassez pas les piles.
Consignes de réparation et d’élimination
•
Les piles ne doivent pas être jetées avec les ordures ména-
gères. Veuillez jeter les piles usées dans les points de collecte prévus à cet eet.
•
N’ouvrez pas l’appareil. Le non-respect de cette consigne
annulerait la garantie.
•
Vous ne devez pas réparer ou ajuster l’appareil vous-même.
Le bon fonctionnement de l’appareil n’est plus garanti si tel
était le cas.
•
Seul le service client ou un opérateur autorisé peut procéder
à une réparation. Cependant, avant toute réclamation, veuillez contrôler au préalable l’état des piles et les remplacer le
cas échéant.
•
Dans l’intérêt de la protection de l’environnement,
l’appareil ne doit pas être jeté avec les ordures ménagères à la fin de sa durée de service. L’élimination
doit se faire par le biais des points de collecte compétents dans votre pays. Éliminez l’appareil conformément
à la directive européenne – WEEE (Waste Electrical and
Electronic Equipment) relative aux appareils électriques et
électroniques usagés. Pour toute question, adressez-vous
aux collectivités locales responsables de l’élimination et du
recyclage de ces produits.
33
Page 34

3. Description de l’appareil
SYS mmHg
1. Échelle pour classement des résultats de mesure
2. Interface USB
3. Écran
4. Indication de position (au niveau du coeur)
5. Touche mémoire M1
6. Touche mémoire M2
7. Touche MARCHE/ARRÊT
8. Couvercle du compartiment à piles
9. Manchette de poignet
2
1
3
4
5
M1
O
M2
k
6
7
8
9
Données achées à l’écran:
1. Classement des résultats de mesure
2. Heure et date
3. Pression systolique
4. Pression diastolique
5. Symbole du trouble du rythme cardiaque
Symbole Pouls
6. Valeur du pouls mesurée
7. Mémoire utilisateur /
8. Pompage, dégonflage (flèche)
9. Numéro de l’emplacement de sauvegarde / Achage de
la sauvegarde, valeur moyenne ( A ), matin (
AM
), soir (
10. Achage du niveau des piles
11. Symbole de transmission Bluetooth®
1 2
11
3
10
9
8
7
4
56
34
PM
)
Page 35

4. Préparation de la mesure
Insertion des piles
• Retirez le couvercle du
compartiment à piles sur
le côté gauche de l’appareil.
•
Insérez deux piles micro
de 1,5V (alcalines de type LR03). Veillez impérativement à
insérer les piles en respectant la polarité indiquée. N’utilisez
pas de batteries rechargeables.
•
Refermez soigneusement le couvercle du compartiment à
piles.
Lorsque le symbole de remplacement des piles
et que E6 apparaît, vous ne pouvez plus eectuer de mesure
et vous devez remplacer les piles.
Tous les éléments de l’écran s’achent brièvement et
gnote à l’écran. Veuillez maintenant régler la date et l’heure en
suivant les instructions suivantes.
Élimination des piles
• Les piles usagées et complètement déchargées doivent
être mises au rebut dans des conteneurs spéciaux ou aux
points de collecte réservés à cet usage ou bien déposées
chez un revendeur d’appareils électriques. L’élimination des
piles est une obligation légale qui vous incombe.
• Ces pictogrammes se trouvent sur les piles à
substances nocives: Pb = pile contenant du
plomb, Cd = pile contenant du cadmium,
Hg = pile contenant du mercure.
clignote
24h
cli-
Régler le format de l’heure, la date et l’heure
Dans ce menu, vous avez la possibilité de régler successivement les fonctions suivantes.
Format de
l’heure
Vous devez impérativement régler la date et l’heure. C’est le
seul moyen d’enregistrer correctement et de récupérer ultérieurement vos mesures avec la date et l’heure.
Vous pouvez régler plus rapidement les valeurs en mainte-
nant enfoncées les touches de mémoire M1 ou M2.
Format de l’heure
•
Maintenez la touche MARCHE/ARRÊT
enfoncée pendant 5secondes.
•
À l’aide des touches mémoire M1/M2, sélec-
tionnez le format d’heure que vous souhaitez
et confirmez avec la touche MARCHE/ARRÊT .
Date
L’année clignote à l’écran.
•
À l’aide des touches mémoire M1/M2,
sélectionnez le format d’heure que vous
souhaitez et confirmez avec la touche
MARCHE/ARRÊT .
Le mois clignote à l’écran.
•
À l’aide des touches mémoire M1/M2, sélection-
nez le mois que vous souhaitez et confirmez avec
la touche MARCHE/ARRÊT
35
Date
➔
Heure
➔
.
Page 36

Le jour clignote à l’écran.
1 2 3
1 cm
M1
M2
O
k
M1
M2
O
k
M1
M2
O
k
•
À l’aide des touches mémoire M1/M2, sélection-
nez le jour que vous souhaitez et confirmez avec la
touche MARCHE/ARRÊT .
Si le format de l’heure est réglé sur 12h, l’ordre d’achage
du jour et du mois est inversé.
Heure
L’heure clignote à l’écran.
•
À l’aide des touches mémoire M1/M2, sélec-
tionnez l’heure que vous souhaitez et confirmez
avec la touche MARCHE/ARRÊT .
Les minutes clignotent à l’écran.
•
À l’aide des touches mémoire M1/M2, sélec-
tionnez l’heure que vous souhaitez et confirmez
avec la touche MARCHE/ARRÊT .
Une fois toutes les dates réglées, l’appareil s’éteint automatiquement.
Bluetooth
®
Le symbole Bluetooth® clignote à l’écran.
•
À l’aide des touches mémoire M1/M2, déterminez si le
transfert automatique des données via Bluetooth® doit
être activé (le symbole Bluetooth® clignote) ou désactivé
(le symbole Bluetooth
choix avec la touche MARCHE/ARRÊT
L’autonomie de la batterie est réduite en cas de transfert
par Bluetooth®.
®
ne s’ache pas) et confirmez votre
.
5. Mesurer la tension
Positionnement de la manchette
•
Mettez votre poignet gauche à nu. Faites attention à ce que
la circulation du sang ne soit pas restreinte par des vêtements trop serrés ou autres.
Placez la manchette sur l’intérieur de votre poignet.
•
Fermez la manchette avec la fermeture Velcro de manière à
ce que le bord supérieur de l’appareil se trouve à env. 1cm
de la paume de la main.
•
La manchette doit être bien serré autour du poignet sans
l’étrangler.
Adopter une position adéquate
•
Avant toute mesure, reposez-vous pendant env. 5minutes!
Sinon, cela pourrait entraîner des erreurs.
•
La mesure peut se faire en
position assise ou allongée.
Installez-vous confortablement avant de prendre votre
tension. Faites en sorte que
votre dos et vos bras soient
bien appuyés sur le dossier et
les accoudoirs. Ne croisez pas les jambes. Posez les pieds
36
Page 37

bien à plat sur le sol. Soutenez impérativement votre bras
et pliez-le. Faites attention, dans tous les cas, à ce que la
manchette se trouve au niveau du cœur. Sinon, cela pourrait entraîner des erreurs considérables. Détendez votre
bras et les paumes. Pour vous aider, une barre d’outils
OK a été intégrée afin d’indiquer la position correcte du
tensiomètre. Si vous ne voyez affiché qu’un symbole OK, il
se trouve dans la bonne position.
•
Pour ne pas fausser le résultat, il est important de rester
calme durant la mesure et de ne pas parler.
Mesurer la tension artérielle
Positionnez la manchette tel que décrit plus haut et installezvous dans la position de votre choix pour eectuer la mesure.
•
Pour démarrer le tensiomètre, appuyez
sur la touche MARCHE/ARRÊT
.
Tous les achages s’allument
brièvement.
Après 3 secondes, le tensiomètre débute
la mesure automatiquement.
La mesure se fait lors du gonflage.
Vous pouvez interrompre la mesure à tout moment en
appuyant sur la touche START/STOP .
Dès qu’un pouls est reconnaissable, le symbole Pouls
s’ache.
•
Les résultats de mesure de la pression
systolique, de la pression diastolique
et du pouls sont achés.
• E
_ s’ache lorsque la mesure n’a pas pu être eectuée correctement. Lisez le chapitre Message d’erreur/
Résolution des erreurs de ce mode d’emploi et
recommencez la mesure.
•
En appuyant sur la touche mémoire M1 ou M2,
sélectionnez maintenant la mémoire utilisateur de votre
choix. Si vous ne choisissez pas de mémoire utilisateur,
le résultat de la mesure est attribué au dernier utilisateur
enregistré. Le symbole M1 ou M2 correspondant s’ache
à l’écran.
•
Éteignez le tensiomètre en appuyant sur la touche
MARCHE/ARRÊT . Ainsi, le résultat de la mesure est
enregistré dans la mémoire utilisateur choisie.
®
Lorsque le transfert de données via Bluetooth
est activé,
après confirmation de la mémoire utilisateur et pression sur la
touche MARCHE/ARRÊT
, les données sont transférées.
• Le symbole Bluetooth® clignote à l’écran. Pendant envi-
ron 30 secondes, le tensiomètre tente alors d’établir une
connexion avec l’application.
• Dès que la connexion est établie, le symbole Bluetooth®
cesse de clignoter. Toutes les mesures sont transférées
automatiquement sur l’application. Après le transfert des
données, l’appareil s’éteint automatiquement.
•
Si, après 30secondes, aucune connexion n’a plus être éta-
blie avec l’application, le symbole Bluetooth
®
s’éteint et le
tensiomètre se met automatiquement hors tension après
3minutes.
37
Page 38

Si vous oubliez d’éteindre l’appareil, il s’éteindra automatiquement après environ 3minutes. Dans ce cas, la valeur est attribuée à l’utilisateur de la mémoire choisie ou utilisée en dernier.
Attendez au moins 5minutes avant d’eectuer
une nouvelle mesure!
Évaluer les résultats
Troubles du rythme cardiaque:
Cet appareil est capable d’identifier d’éventuels troubles du
rythme cardiaque au cours de la mesure et le signale le cas
échéant après la mesure, par le symbole
.
Cela peut indiquer une arythmie. L’arythmie est une maladie
qui se caractérise par une anomalie du rythme cardiaque, en
raison de perturbations du système bioélectrique. Les symptômes (battements cardiaques en retard ou en avance, pouls
plus rapide ou plus lent) peuvent être induits notamment par
une pathologie cardiaque, par l’âge, par des prédispositions
naturelles, par une alimentation trop riche, par le stress ou
encore par un manque de sommeil. Une arythmie ne peut être
établie que par une consultation médicale.
Si le symbole
s’ache après la mesure, recommencez-la.
Veillez à vous reposer pendant 5minutes et à ne pas parler ni bouger pendant la mesure. Si le symbole
apparaît
souvent, veuillez consulter un médecin. Il peut être dangereux
d’eectuer un autodiagnostic et une automédication sur la
base des résultats de la mesure. Suivez impérativement les
instructions de votre médecin.
Classement des résultats de mesure:
Les résultats de mesure sont classés et évalués selon le tableau suivant.
38
Ces valeurs ne doivent être utilisées qu’à titre indicatif car la
tension artérielle varie selon les personnes, les âges, etc.
Il est important de consulter votre médecin de manière régulière. Votre médecin vous donnera vos valeurs personnelles
pour une tension artérielle normale et la valeur à laquelle la
tension artérielle est considérée comme dangereuse.
Le classement qui s’ache ainsi que l’échelle de l’appareil
permettent d’établir la plage dans laquelle se trouve la tension
mesurée. Si les valeurs de systole et de diastole se trouvent
dans deux plages diérentes (par ex. systole en plage «normale haute» et diastole en plage «normale»), la graduation
graphique indique toujours la plage la plus haute sur l’appareil, à savoir «normale haute» dans le présent exemple.
Plage des valeurs de tension
Niveau 3:
forte hypertonie
Niveau 2:
hypertonie
moyenne
Niveau 1:
légère hypertonie
Normale haute 130 – 139 85 – 89
Systole
(en mmHg)
Diastole
(en mmHg)
≥ 180 ≥ 110
160 – 179 100 – 109
140 – 159 90 – 99
Mesures
consulter un
médecin
consulter un
médecin
examen régulier
par un médecin
examen régulier
par un médecin
Normale 120 – 129 80 – 84 Auto-contrôle
Optimale < 120 < 80 Auto-contrôle
Source: OMS, 1999 (Organisation Mondiale de la Santé)
Page 39

6. Récupérer et supprimer les valeurs de
mesure
Mémoire utilisateur
Le résultat de chaque mesure réussie est enregistré avec la
date et l’heure. Lorsqu’il y a plus de 60données de mesure, la
mesure la plus ancienne est écrasée.
•
Lorsque l’appareil est éteint, sélectionnez la mémoire uti-
lisateur ( ) que vous souhaitez utiliser à l’aide des
touches mémoires M1 ou M2.
–
Si vous souhaitez visualiser les
données de mesure de la mémoire
utilisateur , appuyez sur la touche
mémoire M1.
–
Si vous souhaitez visualiser les don-
nées de mesure de la mémoire utilisateur , appuyez sur la touche
mémoire M2.
La moyenne de toutes les mesures s’ache à l’écran.
Si la fonction Bluetooth® est activée (le symbole clignote à
l’écran), le tensiomètre tente d’établir une connexion avec
l’application. Si vous appuyez alors sur la touche M1, le transfert est interrompu et les valeurs moyennes sont affichées.
En appuyant sur la touche M2, le transfert est interrompu et les
mesures de la mémoire utilisateur
ne s’ache plus. Dès que la connexion est établie et que les
données sont transférées, les touches sont inactives.
Si vous avez sélectionné la mémoire utilisateur1, vous
devez actionner la touche mémoire M1.
sont achées. Le symbole
Si vous avez sélectionné la mémoire utilisateur2, vous
devez actionner la touche mémoire M2.
Valeurs moyennes
A
clignote à l’écran.
La valeur moyenne de toutes les valeurs
mesurées enregistrées pour cet utilisateur est achée.
•
Appuyez sur la touche mémoire
correspondante (M1 ou M2).
AM
clignote à l’écran.
La valeur moyenne des mesures matinales des 7 derniers jours est achée
(matin: 5h00 – 9h00).
•
Appuyez sur la touche mémoire
correspondante (M1 ou M2).
PM
clignote à l’écran.
La valeur moyenne des mesures du soir
des 7 derniers jours est achée (soir:
18h00 – 20h00).
Valeurs mesurées individuelles
•
Si vous appuyez de nouveau sur
la touche mémoire (M1 ou M2), la
dernière mesure s’ache à l’écran (ici
par exemple la mesure 03).
39
Page 40

•
Si vous appuyez de nouveau sur la touche mémoire (M1
ou M2), vous pouvez consulter vos mesures individuelles.
•
Pour éteindre l’appareil, appuyez sur la touche MARCHE/
ARRÊT
Eacer les valeurs mesurées
•
Pour effacer tous les enregistrements d’une mémoire
utilisateur donnée, sélectionnez d’abord une mémoire
utilisateur.
•
Démarrez la consultation de la valeur moyenne des
mesures.
•
Maintenez les touches mémoire M1 / M2 enfoncées pen-
dant 5secondes.
CL
et 00 s’achent à l’écran.
T
outes les valeurs de la mémoire utilisateur actuelle sont supprimées.
Enfin, l’appareil s’éteint automatiquement.
Eacer les valeurs de mesure individuelles
Pour eacer certaines mesures d’une mémoire utilisateur
donnée, sélectionnez d’abord une mémoire utilisateur.
•
Démarrez la consultation des mesures individuelles.
•
Maintenez la touche mémoire M1 / M2 enfoncée pendant
5secondes, selon la mémoire utilisateur que vous utilisez.
•
La valeur sélectionnée est supprimée. L’appareil ache
brièvement CL 00.
.
Vous pouvez quitter le menu à tout moment en appuyant
sur la touche MARCHE/ARRÊT .
•
Si vous souhaitez supprimer d’autres valeurs, répétez la
procédure décrite ci-dessus.
Vous pouvez éteindre l’appareil à tout moment en appuyant
sur la touche MARCHE/ARRÊT .
7. Transfert des valeurs mesurées
Transfert via interface USB
Raccordez votre tensiomètre à votre PC à l’aide du câble
USB.
Aucun transfert de données ne peut être lancé pendant
une mesure.
PC s’ache sur l’écran. Lancez le transfert des
données dans le logiciel PC « HealthManager». Pendant le transfert des données, une
animation s’ache à l’écran. La Fig. 1 illustre
un transfert de données réussi. Lorsque le
transfert des données échoue, un message
d’erreur apparaît comme montré en Fig. 2.
Dans ce cas, interrompez la connexion avec
le PC, puis lancez à nouveau le transfert des
données.
Le tensiomètre s’éteint automatiquement
après 30secondes d’inactivité ou après l’interruption de la connexion avec le PC.
Transmission via Bluetooth
Vous avez également la possibilité de transférer en plus les
mesures enregistrées sur l’appareil sur votre smartphone via
Bluetooth®.
40
®
F
F
ig. 1
ig. 2
Page 41

À cet e et, il vous faut l’application Beurer «HealthManager»
disponible sur l’App Store.
Pour transférer les valeurs, veuillez suivre les points suivants:
Si la fonction Bluetooth
®
est activée dans les paramètres, le
transfert des données se fait automatiquement après la mesure. Sur l’écran en haut à gauche, le symbole apparaît (voir
chapitre 4 Préparer la mesure).
Étape 1: BC 85
Activez le Bluetooth
®
sur votre appareil (voir
chapitre «4. Préparer la mesure, Bluetooth®»).
Étape 2: Application Beurer
«HealthManager»
Ajoutez le BC 85 dans l’application Beurer
« HealthManager » à la section « Réglages/
Mes appareils».
Étape 3: BC 85
E ectuez une mesure.
Étape 4: BC 85:
Transfert des données directement après une prise
de mesure:
• Lorsque le transfert de
données via Bluetooth®
est activé, après confirmation de la mémoire
utilisateur et pression
sur la touche MARCHE/
Étape 4: BC 85:
Transférer les données ultérieurement:
•
Accédez au mode de ré-
cupération de la mémoire
(chap. 7). Sélectionnez
la mémoire utilisateur de
votre choix. Le transfert
®
Bluetooth
démarre auto-
matiquement.
ARRÊT , les données
sont transférées.
L’application Beurer «HealthManager» doit être activée
pour le transfert.
Afi n de garantir une transmission sans perturbations, veuillez
retirer la housse de votre smartphone. Lancez le transfert de
données depuis l’application Beurer «HealthManager».
La marque verbale Bluetooth
®
et son logo sont des marques
déposées de Bluetooth® SIG, Inc. Toute utilisation de ces
marques par Beurer GmbH se fait sous licence. Les autres
marques et appellations commerciales sont la propriété de
leurs propriétaires respectifs.
8. Message d’erreur/Résolution des erreurs
En cas d’erreur, un message d’erreur s’a che à l’écran E_
Des messages d’erreur peuvent s’a cher lorsque
•
le pouls n’a pas pu être pris:
•
vous bougez ou parlez durant la mesure: E2;
•
la manchette est trop ou pas assez serrée: E3;
41
E 1
;
.
Page 42

•
des problèmes surviennent au moment de la mesure: E4;
•
la pression de gonflage est supérieure à 300mmHg: E5;
•
les piles sont presque vides E6 ;
•
les données n’ont pas pu être envoyées via Bluetooth®: .
Dans ces cas-là, réitérez la mesure. Veillez à ne pas bouger
ni parler. Le cas échéant, remettez les piles ou remplacez-les.
9. Nettoyage et rangement de l’appareil et de
la manchette
•
Nettoyez soigneusement l’appareil et la manchette, uni-
quement à l’aide d’un chion légèrement humide.
•
N’utilisez pas de détergent ni de solvant.
•
Ne passez jamais l’appareil ni la manchette sous l’eau, qui
pourrait s’infiltrer à l’intérieur de l’appareil ou la manchette
et l’endommager.
•
Ne posez pas d’objets lourds sur l’appareil ni sur la man-
chette lorsqu’ils sont rangés. Retirez les piles.
10. Caractéristiques techniques
Modèle BC 85
Type BC 80
Mode de mesure Mesure de la tension artérielle au poi
Plage de mesure Pression dans la manchette
gnet, oscillométrique et non invasive
0-300mmHg
Pression systolique 50-250mmHg
Pression diastolique 30-200mmHg
Pouls 40-180pulsations/minute
-
Précision de
l’indicateur
Incertitude de mesure écart type max. admissible selon des
Mémoire 2 x 60emplacements de mémoire
Dimensions L97 mm x l68 mm x H22 mm
Poids Environ 108 g (sans les piles)
Taille de la manchette 135 à 230 mm
Conditions de
fonctionnement adm.
Conditions de
stockage admissibles
Alimentation
électrique
Durée de vie des piles Environ 300mesures, selon l’élévation
Accessoires Mode d’emploi, 2 x piles AAA 1,5V,
Classement Alimentation interne, IPX0, pas d’AP
systolique ±3mmHg
diastolique ±3mmHg
pouls ±5% de la valeur affichée
essais cliniques: systolique 8mmHg
diastolique 8mmHg
+5°C à +40°C, 15-93% d’humidité
relative de l’air (sans condensation)
-25°C à +70°C, 15-93% d’humidité
de l’air relative, 700-1060hPa de pres
sion ambiante
2x piles AAA 1,5V
de la tension artérielle ainsi que la
pression de gonflage
boîte de rangement
ni d’APG, utilisation continue, appareil
de type BF
42
-
Page 43

Transfert de données
par technologie sans fil
®
Bluetooth
•
Cet appareil est en conformité avec la norme européenne
Le tensiomètre utilise Bluetooth® low
energy technology,
bande de fréquence 2,4GHz,
compatible smartphones/tablettes Blue
tooth 4.0
Liste des smartphones/tablettes pris en
charge
EN60601-1-2 et répond aux exigences de sécurité spéciales relatives à la compatibilité électromagnétique. Veuillez noter que les dispositifs de communication HF portables
et mobiles sont susceptibles d’influer sur cet appareil. Pour
des détails plus précis, veuillez contacter le service aprèsvente à l’adresse mentionnée ou vous reporter à la fin du
mode d’emploi.
•
Cet appareil est conforme à la directive européenne 93/42/
EEC sur les produits médicaux, à la loi sur les produits
médicaux ainsi qu’aux normes européennes EN1060-1
(tensiomètres non invasifs, partie1: exigences générales),
EN1060-3 (tensiomètres non invasifs, partie 3: exigences
complémentaires sur les tensiomètres électromécaniques)
et EC80601-2-30 (appareils électromédicaux, partie 2-30:
exigences particulières pour la sécurité et les performances
essentielles des tensiomètres non invasifs automatiques).
•
La précision de ce tensiomètre a été correctement testée
et sa durabilité a été conçue en vue d’une utilisation à long
terme.
Dans le cadre d’une utilisation médicale de l’appareil, des
contrôles techniques de mesure doivent être menés avec
les moyens appropriés. Pour obtenir des informations précises sur la vérification de la précision de l’appareil, vous
pouvez faire une demande par courrier au service après-
-
vente.
•
Nous garantissons par la présente que ce produit est
conforme à la directive européenne R&TTE 1999/5/CE.
Veuillez contacter le SAV à l’adresse indiquée afin d’obtenir
de plus amples détails, comme par exemple la déclaration
de conformité CE.
43
Sous réserve d’erreurs et de modifications
Page 44

ESPAÑOL
Índice
1. Introducción .....................................................................44
2. Indicaciones importantes .................................................44
3. Descripción del aparato ...................................................47
4. Preparación de la medición ..............................................48
5. Medición de la presión arterial .........................................50
6. Consultar y borrar los valores medidos ...........................52
7. Transmisión de los valores de medición ........................54
8. Mensajes de error/Solución de problemas ....................55
9. Limpiar y guardar la unidad y el brazalete .....................56
10. Características técnicas .................................................56
Estimada clienta, estimado cliente:
Nos alegramos de que haya elegido un producto de nuestra
colección. Nuestro nombre es sinónimo de productos de calidad de primera clase sometidos a un riguroso control en los
ámbitos del calor, las terapias no agresivas, la presión arterial/
el diagnóstico, el peso, los masajes, la belleza y el aire.
Lea detenidamente estas instrucciones de uso, consérvelas
para su futura utilización, haga que estén accesibles para otros
usuarios y observe las indicaciones que contienen.
Atentamente,
El equipo de Beurer
1. Introducción
Compruebe que el embalaje del tensiómetro Beurer BC 85
esté intacto y que su contenido esté completo.
El tensiómetro para muñeca sirve para la medición y el control
de los valores de la presión sanguínea arterial de forma no invasiva en personas adultas. Con él puede medirse la presión
sanguínea de forma rápida y sencilla, guardar los valores de
la medición en la memoria y consultar la evolución de los valores medidos. Además, advierte de eventuales alteraciones
del ritmo cardiaco.
Los valores medidos se clasifican y evalúan de forma gráfica.
2. Indicaciones importantes
Símbolos
En las presentes instrucciones de uso, en el embalaje y en la
placa de características del aparato y de los accesorios se
utilizan los siguientes símbolos:
Precaución
Nota
Indicación de información importante
44
Page 45

Storage
-25°C
5°C
70°C
Operating
40°C
SN
Observe las instrucciones de uso
Pieza de aplicación tipo BF
Corriente continua
Eliminación según la Directiva europea sobre
residuos de aparatos eléctricos y electróni
cos (RAEE)
Fabricante
Temperatura y humedad de almacenamiento
admisibles
RH 15-93%
Temperatura y humedad de funcionamiento
admisibles
RH 15-93%
Proteger de la humedad
Número de serie
El sello CE certifica que este aparato cumple
con los requisitos establecidos en la directiva
93/42/EEC relativa a los productos sanitarios.
Símbolo de certificación para aquellos productos que se exportan a la Federación Rusa
y a los países de la CEI
Indicaciones de utilización
•
Para garantizar la comparabilidad de los valores, tómese la
tensión siempre a la misma hora del día.
•
Repose unos 5 minutos antes de cada medición.
•
Si desea realizar más de una medición en una misma perso-
na, espere entre medición y medición 5 minutos.
•
No coma, beba, fume ni realice esfuerzos físicos durante un
-
mínimo de 30 minutos antes de realizar la medición.
•
Repita la medición si desconfía de la validez de los valores
medidos.
•
Las mediciones realizadas por usted solo tienen carácter
informativo, en ningún caso pueden sustituir a un examen
médico.
Hable de los valores que obtenga con su médico. Bajo ningún concepto debe tomar usted mismo decisiones médicas
(p.ej. sobre medicamentos y su dosificación).
•
No utilice el tensiómetro en recién nacidos o pacientes con
preeclampsia. Si va a utilizar el tensiómetro durante el embarazo, es recomendable que consulte previamente a su
médico.
•
Si existe una restricción del flujo sanguíneo en un brazo
a causa de un transtorno vascular crónico o agudo (entre
otras causas por vasoconstricción), se reduce la precisión
de la medición en la muñeca. En estos casos se recomienda utilizar un tensiómetro para el brazo.
•
Este aparato no debe ser utilizado por personas (niños in-
cluidos) con facultades físicas, sensoriales o mentales limitadas, o con poca experiencia o conocimientos, a no ser
que los vigile una persona responsable de su seguridad o
45
Page 46

que esta persona les indique cómo se debe utilizar el aparato. Se debe vigilar a los niños para asegurarse de que no
jueguen con el aparato.
• Las enfermedades cadiovasculares pueden producir errores
de medición o afectar a la precisión de la medición. Esto
también es aplicable en caso de tener la presión sanguínea
muy baja, padecer diabetes, problemas circulatorios, alteraciones del ritmo cardiaco, así como escalofríos o temblores.
•
El tensiómetro no debe utilizarse junto con un equipo qui-
rúrgico de alta frecuencia.
•
Use este aparato únicamente en personas que tengan el
contorno de muñeca especificado.
• Tenga en cuenta que durante el inflado la extremidad en la
que coloque el aparato puede sufrir limitaciones funcionales.
•
La medición de la presión arterial no debe interrumpir la cir-
culación sanguínea más tiempo del necesario. En caso de
que el aparato no funcione correctamente, retire el brazalete
del brazo.
•
Evite exponerse a la presión continuada del brazalete y no
realice mediciones frecuentes. La disminución del flujo sanguíneo que se produce puede causar lesiones.
•
Cerciórese de que no haber colocado el brazalete en un
brazo cuyas arterias o venas estén sometidas a algún tipo
de tratamiento médico, p.ej. acceso por vía endovascular,
administración de tratamiento por vía endovascular o un
shunt arteriovenoso (A-V).
•
No coloque el brazalete a personas a las que se les haya
practicado una mastectomía.
•
No coloque el brazalete sobre heridas, ya que pueden pro-
ducirse más lesiones.
•
Coloque el brazalete exclusivamente en la muñeca. No co-
loque el brazalete en otras zonas del cuerpo.
•
El tensiómetro puede funcionar con pilas exclusivamente.
•
El mecanismo de desconexión automática apaga el tensió-
metro para conservar las pilas si no se pulsa ninguna tecla
en 2 minutos.
•
Este aparato solo está diseñado para el fin descrito en estas
instrucciones de uso. Por lo tanto, el fabricante declinará
toda responsabilidad por daños y perjuicios debidos a un
uso inadecuado o incorrecto.
Indicaciones de conservación y cuidado
•
El tensiómetro está compuesto por elementos electrónicos
y de precisión. La precisión de los valores de medición, así
como la vida útil del aparato, dependen de su correcta utilización:
– Proteja el aparato de impactos, humedad, suciedad, fuer-
tes oscilaciones térmicas y exposición directa a la luz solar.
– Evite que el aparato se caiga.
– No utilice el aparato en las inmediaciones de campos
electromagnéticos de gran intensidad y manténgalo ale-
jado de instalaciones de radio y de teléfonos móviles.
•
Si no se va a utilizar el aparato durante un periodo de tiem-
po prolongado, se recomienda retirar las pilas.
Indicaciones para la manipulación de pilas
•
En caso de que el líquido de las pilas entre en contacto con
la piel o los ojos, lave la zona afectada con agua y busque
asistencia médica.
46
Page 47

•
¡Peligro de asfixia! Los niños pequeños podrían tragarse las pilas y asfixiarse. Guarde las pilas fuera del alcance
de los niños.
•
Fíjese en los símbolos más (+) y menos (-) que indican la
polaridad.
• Si se derrama el líquido de una pila, póngase guantes protectores y limpie el compartimento de las pilas con un paño seco.
•
Proteja las pilas de un calor excesivo.
•
¡Peligro de explosión! No arroje las pilas al fuego.
•
Las pilas no se pueden cargar ni cortocircuitar.
•
Si no va a utilizar el aparato durante un periodo de tiempo
prolongado, retire las pilas del compartimento.
• Utilice únicamente el mismo tipo de pila o un tipo equivalente.
•
Cambie siempre todas las pilas a la vez.
•
¡No utilice baterías!
•
No despiece, abra ni triture las pilas.
Indicaciones acerca de reparaciones y eliminación
de residuos
•
No deseche las pilas con la basura doméstica. Lleve las
pilas usadas a los puntos de recogida dispuestos para tal
finalidad.
•
No abra el aparato. El incumplimiento de esta disposición
anula la garantía.
•
No repare ni ajuste el aparato usted mismo. Si lo hace, no
se garantiza un funcionamiento correcto.
•
Las reparaciones solo deben ser realizadas por el servicio
de atención al cliente o por distribuidores autorizados. Antes de realizar cualquier reclamación, compruebe el estado
de las pilas y sustitúyalas si es necesario.
47
•
Para proteger el medio ambiente no se debe
desechar el aparato al final de su vida útil junto con
la basura doméstica. Se puede desechar en los puntos de recogida adecuados disponibles en su zona.
Deseche el aparato según la Directiva europea sobre residuos de aparatos eléctricos y electrónicos (RAEE). Para más
información, póngase en contacto con la autoridad municipal competente en materia de eliminación de residuos.
3. Descripción del aparato
1. Escala para la clasificación de los resultados de medición
2. Interfaz USB
3. Pantalla
4. Indicador de posicionamiento (altura del corazón)
5. Tecla de memorización M1
6. Tecla de memorización M2
7. Tecla de INICIO/PARADA
8. Tapa del compartimento de las pilas
9. Brazalete para muñeca
3
2
1
4
5
M1
O
M2
k
6
7
8
9
Page 48

Indicaciones en la pantalla:
SYS mmHg
1. Clasificación de los resultados de medición
2. Hora y fecha
3. Presión sistólica
4. Presión diastólica
5. Símbolo de alteración del ritmo cardiaco
Símbolo de pulso
6. Pulso medido
7. Registros de usuario /
8. Flecha de inflado y desinflado
9. Número de la posición de almacenamiento/indicación de
registros, promedio ( A ), mañanas (
AM
), tardes (
PM
)
10. Indicador de batería
11. Símbolo de transferencia por Bluetooth®
1 2
11
10
9
3
8
7
4
56
4. Preparación de la medición
Colocación de las pilas
•
Retire la tapa del com-
partimento de las pilas,
situado en el lado derecho del aparato.
•
Coloque dos pilas del
tipo 1,5 V Micro (alcalinas tipo LR03). Asegúrese de que
las pilas se han colocado correctamente con la polaridad
indicada. No utilice pilas recargables.
•
Vuelva a cerrar con cuidado la tapa del compartimento de
las pilas.
Cuando el símbolo de cambio de pilas
rece E6, no se pueden seguir realizando mediciones y se deben cambiar todas las pilas.
Todos los elementos de la pantalla se visualizan brevemente,
en la pantalla parpadea la indicación
fecha y la hora tal como se describe a continuación.
Eliminación de las pilas
• Las pilas usadas, completamente descargadas, deben eliminarse a través de contenedores de recogida señalados
de forma especial, los puntos de recogida de residuos especiales o a través de los distribuidores de equipos electrónicos. Los usuarios están obligados por ley a eliminar las
pilas correctamente.
48
parpadea y apa-
24h
. Configure ahora la
Page 49

• Estos símbolos se encuentran en pilas que
contienen sustancias tóxicas:
Pb = la pila contiene plomo,
Cd = la pila contiene cadmio,
Hg = la pila contiene mercurio.
Ajustar formato de hora, fecha y hora
Desde este menú podrá ajustar las funciones que se mencionan a continuación.
Formato de hora
➔
Fecha
Hora
➔
Es imprescindible que realice el ajuste de la fecha y la hora, ya
que solo así se podrán almacenar los datos de sus mediciones con la fecha y hora correctas para su posterior consulta.
Si mantiene pulsada la tecla de memorización M1 o M2,
podrá ajustar los valores con mayor rapidez.
Formato de hora
•
Mantenga pulsada la tecla de INICIO/PARA-
DA durante 5 segundos.
•
Seleccione con las teclas de memorización
M1/M2 el formato de hora deseado y confirme con la tecla de INICIO/PARADA .
Fecha
El indicador del año parpadea en pantalla.
•
Seleccione con las teclas de memorización
M1/M2 el año deseado y confirme con la
tecla de INICIO/PARADA .
La indicación del mes parpadea en la pantalla.
•
Seleccione con las teclas de memorización M1/
M2 el mes deseado y confirme con la tecla de
INICIO/PARADA .
La indicación del día parpadea en la pantalla.
•
Seleccione con las teclas de memorización M1/M2
el día deseado y confirme con la tecla de INICIO/
PARADA .
Si está ajustado el formato de 12 horas, se invierte el or-
den de la indicación del día y del mes.
Hora
La hora parpadea en la pantalla.
•
Seleccione con las teclas de memorización M1/
M2 la hora deseada y confirme con la tecla de
INICIO/PARADA .
Los minutos parpadean en la pantalla.
•
Seleccione con las teclas de memorización M1/
M2 los minutos deseados y confirme con la tecla
de INICIO/PARADA .
Una vez ajustados todos los datos, el aparato se apaga automáticamente.
Bluetooth
®
El símbolo de Bluetooth® parpadea en la pantalla.
•
Seleccione con las teclas de memorización M1/M2 si la
transferencia automática de datos por Bluetooth® debe es-
tar activada (el símbolo de Bluetooth® parpadea) o desac-
tivada (el símbolo de Bluetooth® no aparece) y confirme la
opción con la tecla de INICIO/PARADA .
49
Page 50

La duración de la batería se reduce por la transmisión de
1 2 3
1 cm
M1
M2
O
k
M1
M2
O
k
M1
M2
O
k
datos a través de Bluetooth®.
5. Medición de la presión arterial
Colocación del brazalete
•
Descúbrase la muñeca izquierda. Asegúrese de que la cir-
culación sanguínea en el brazo no está restringida por ropa
demasiado estrecha o por algo similar.
Coloque el brazalete en la parte interna de la muñeca.
•
Cierre el brazalete con el velcro, de forma que el borde su-
perior del aparato quede aprox. 1 cm por debajo de la base
de la mano.
•
El brazalete debe quedar bien ajustado a la muñeca, pero
no debe apretar.
Adopción de una postura correcta
•
Repose unos 5 minutos antes de cada medición. De lo con-
trario, podrían producirse variaciones.
•
Puede sentarse o recostarse
para realizar la medición.
Siéntese cómodamente para
medir la presión arterial.
Apoye la espalda y los
brazos. No cruce las piernas.
Apoye bien los pies en el suelo. Apoye el brazo y dóblelo.
Cerciórese siempre de que el brazalete se encuentra a
la altura del corazón. De lo contrario, podrían producirse
variaciones considerables. Relaje el brazo y las palmas de
las manos. Para facilitar su utilización el aparato cuenta
con una indicación O.K. que muestra la posición correcta
del tensiómetro. En la barra se muestra O.K. cuando se ha
alcanzado la posición correcta.
•
Para no falsear el resultado de la medición es importante no
moverse ni hablar durante la misma.
Medición de la presión arterial
Póngase el brazalete como se ha descrito anteriormente y
colóquese en la postura en la que desea realizar la medición.
•
Para poner en funcionamiento el
tensiómetro, pulse la tecla de INICIO/
PARADA . Todos los indicadores de
la pantalla se iluminan brevemente.
Después de 3 segundos, el tensiómetro
inicia automáticamente la medición.
La medición se ejecuta durante el proceso
de inflado.
El proceso de medición puede interrumpirse en cualquier
momento pulsando la tecla de INICIO/PARADA .
50
Page 51

En cuanto se detecta el pulso, se muestra el símbolo de pulso
.
•
Aparecen los resultados de las
mediciones de la presión sistólica, la
presión diastólica y el pulso.
• E
_ aparece cuando la medición no se
ha podido realizar correctamente.
Consulte la sección Mensajes de error/Solución
de problemas de estas instrucciones de uso y
repita la medición.
•
Seleccione el registro de usuario deseado pulsando la tecla
de memorización M1 o M2. Si no realiza ninguna selección
de registro de usuario durante la memorización, el resultado de la medición se asignará al último registro de usuario
utilizado. En la pantalla aparece el símbolo correspondiente
M1 o M2.
•
Apague el tensiómetro con la tecla de INICIO/PARADA .
De esa forma se memorizará el resultado de la medición en
el registro de usuario seleccionado.
®
Si la transmisión de datos a través de Bluetooth
está activada, los datos se transmiten tras la confirmación con la tecla
INICIO/PARADA
.
• El símbolo deBluetooth® parpadea en la pantalla. El ten-
siómetro intenta establecer una conexión con la aplicación
durante unos 30 s aproximadamente.
• Tan pronto se ha establecido una conexión, el símbolo de
Bluetooth® deja de parpadear. Los datos de medición se
transfieren automáticamente a la aplicación Una vez ha finalizado la transferencia de datos, el aparato se apaga.
•
Si después de 30 s no ha sido posible establecer una cone-
xión con la aplicación, se apaga el símbolo de Bluetooth®
y el tensiómetro se apaga automáticamente después de
3minutos.
Si olvida desconectar el aparato, este se desconecta de forma automática después de aproximadamente 3 minutos.
También en este caso se memoriza el valor en el registro de
usuario seleccionado o en el último registro utilizado.
¡Espere al menos 5 minutos para realizar una
nueva medición!
Evaluación de los resultados
Alteraciones del ritmo cardiaco:
Este aparato es capaz de reconocer eventuales alteraciones
del ritmo cardiaco durante la medición, y en caso de que esto
ocurra, lo indica tras la medición con el símbolo
.
Estas alteraciones pueden ser un indicador de arritmia. La
arritmia es una enfermedad en la que el ritmo cardiaco es
anormal debido a transtornos del sistema bioeléctrico, que
controla los latidos del corazón. Sus síntomas (palpitaciones,
pulso más lento o demasiado rápido) pueden estar provocados por enfermedades cardiacas, la edad, la predisposición
física, el exceso de estimulantes, el estrés o la falta de sueño,
entre otras causas. La arritmia solo puede diagnosticarse con
un examen médico.
Repita la medición si, tras efectuarla, aparece en la pantalla
el símbolo . Tenga en cuenta que debe reposar durante
5 minutos y que durante la medición no debe hablar ni mover-
51
Page 52

se. Si el símbolo aparece con frecuencia, consulte a su
médico. Realizar un autodiagnóstico e iniciar un tratamiento
por su cuenta puede ser peligroso. Es imprescindible seguir
las indicaciones de un médico.
Clasificación de los resultados de medición:
Los resultados de la medición pueden clasificarse y valorarse
según la tabla siguiente.
Estos valores estándar sirven únicamente como referencia,
dado que la presión arterial individual varía según la persona
y el grupo de edad.
Es importante que consulte periódicamente a su médico, que
le informará de sus valores personales de presión arterial normal, así como del valor a partir del cual puede considerarse
peligroso un incremento de la presión arterial.
La gradación de la pantalla y la escala en el aparato indican en
qué rango se encuentra la presión sanguínea medida. Si los
valores de sístole y de diástole se encuentran en dos rangos
diferentes (p. ej. la sístole en el rango de tensión „Normal alta“
y la diástole en el rango „Normal“), el gráfico de la clasificación del aparato indica siempre el rango más alto. En este
ejemplo, se muestra „Normal alta“.
Rango de los
valores de la
presión arterial
Nivel 3: hiperten
sión elevada
Nivel 2: hiperten
sión media
Sístole
(en mmHg)
≥ 180 ≥ 110 Consulte a su
-
160 – 179 100 – 109 Consulte a su
-
Diástole
(en mmHg)
Medida
médico
médico
52
Rango de los
valores de la
presión arterial
Nivel 1: hiperten
sión leve
Normal alta 130 – 139 85 – 89 Sométase a revisio
Normal 120 – 129 80 – 84 Haga un seguimien
Ideal < 120 < 80 Haga un seguimien
Fuente: OMS, 1999 (Organización Mundial de la Salud)
Sístole
(en mmHg)
140 – 159 90 – 99 Sométase a revisio
-
Diástole
(en mmHg)
Medida
nes periódicas en
la consulta de su
médico
nes periódicas en
la consulta de su
médico
to por su cuenta
to por su cuenta
-
-
6. Consultar y borrar los valores medidos
Registros de usuario
Los resultados de todas las mediciones correctamente realizadas se guardan en la memoria junto con la fecha y la hora.
Cuando hay más de 60 valores de medición, se sobrescribirá
la medición más antigua.
•
Seleccione el registro de usuario deseado pulsando la tecla
de memorización M1 o M2 ( ) cuando el aparato esté
apagado.
-
-
Page 53

–
Si desea consultar los datos medidos
del registro de usuario pulse la tecla
de memorización M1.
–
Si desea consultar los datos medidos
del registro de usuario pulse la tecla
de memorización M2.
En la pantalla se visualiza el valor promedio de todas las mediciones.
Si
Bluetooth® está activado (el símbolo parpadea en la pan-
talla) el tensiómetro intenta establecer una conexión con la
aplicación. Si entretanto pulsa la tecla M1 se interrumpirá la
transmisión de datos y se mostrarán los valores promedio.
Si pulsa la tecla M2 se interrumpirá la transmisión de datos
y se mostrarán los valores de medición del registro de usua
rio . El símbolo desaparecerá de la pantalla. Tan pronto se
establezca una conexión y se transfieran los datos, las teclas
quedan inactivas.
Si ha seleccionado el registro de usuario 1, deberá pulsar
la tecla de memorización M1.
Si ha seleccionado el registro de usuario 2, deberá
utilizar la tecla de memorización M2.
Valores medios
A
En la pantalla parpadea
Se muestra el valor promedio de todas
las mediciones guardadas de este registro de usuario.
•
Pulse la tecla de memorización co-
rrespondiente (M1 o M2).
.
En la pantalla parpadea
Se muestra la media de los 7 últimos días
en las mediciones matinales (por la mañana: de las 5.00 a las 9.00 horas).
•
Pulse la tecla de memorización co-
rrespondiente (M1 o M2).
En la pantalla parpadea PM.
Se muestra la media de los 7 últimos días
en las mediciones vespertinas (por la tarde: de las 18.00 a las 20.00 horas).
-
Valores de medición individuales
•
Si vuelve a pulsar la tecla de memo-
rización correspondiente (M1 o M2),
se mostrará en la pantalla la última
medición individual (en el ejemplo, la
medición 03).
•
Si vuelve a pulsar la tecla de memo-
rización correspondiente (M1 o M2), podrá consultar sus
respectivos valores individuales medidos.
•
Para volver a apagar el aparato, pulse la tecla de INICIO/
PARADA .
Podrá salir del menú cuando lo desee pulsando la tecla de
INICIO/PARADA .
53
AM
.
Page 54

Eliminar valores de medición
•
Para borrar la memoria del registro de usuario correspon-
diente, deberá seleccionar primero un registro de usuario.
•
Inicie la consulta de los valores promedio.
•
Mantenga pulsadas las dos teclas de memorización
M1 / M2 durante 5 segundos.
E
n la pantalla aparece CL y 00.
S
e borran todos los valores del registro
de usuario actual.
A continuación, el aparato se apaga automáticamente.
Borrar valores de medición individuales
Para borrar la memoria del registro de usuario correspondiente, deberá seleccionar primero un registro de usuario.
•
Inicie la consulta de los valores de medición individuales.
•
Mantenga pulsada la tecla de memorización M1 / M2 du-
rante 5segundos (en función del registro de usuario en el
que se encuentre).
•
Se borra el valor seleccionado. En el aparato se visualiza
brevemente CL 00.
•
Si deben borrarse más valores, repita el procedimiento indi-
cado arriba.
Puede apagar el aparato en cualquier momento pulsando la
tecla INICIO/PARADA .
7. Transmisión de los valores de medición
Transmisión por interfaz USB
Conecte el tensiómetro al PC con el cable USB.
Durante una medición no se puede iniciar una transferen-
cia de datos.
PC
En la pantalla se visualiza
transferencia de datos en el software de PC
„HealthManager“. Durante la transferencia de
datos se visualiza una animación en la pantalla. Si la transferencia se ejecuta con éxito,
se indica la imagen mostrada en la fig.1. Si
la transferencia de datos no tiene éxito, se
indica el mensaje de error representado en
la fig. 2. En este caso interrumpa la conexión
con el PC y vuelva a iniciar la transferencia
de datos.
Una vez transcurridos 30 segundos sin utilizarlo o si se interrumpe la comunicación con el PC, el tensiómetro se apaga
automáticamente.
Transferencia por Bluetooth
También existe la posibilidad de transferir valores medidos
y guardados en el aparato a un smartphone por Bluetooth®.
Para ello necesitará la aplicación „HealthManager“ de Beurer,
disponible en el App Store.
Para transferir los valores, siga los siguientes pasos:
Si el Bluetooth® está activado en el menú de ajuste, los datos
se transferirán automáticamente tras la medición. En la parte
54
. Inicie la
®
f
ig. 1
f
ig. 2
Page 55

superior izquierda de la pantalla aparece el símbolo
el capítulo 4, „Preparar la medición“).
Paso 1: BC 85
Active el Bluetooth® en su dispositivo (véase el
capítulo 4, "Preparar la medición, Bluetooth®").
Paso 2: Aplicación "HealthManager" de
Beurer
Añada el dispositivo BC 85 en la opción "Einstellungen/Meine Geräte" (Ajustes/Mis dispositivos)
de la aplicación "HealthManager" de Beurer.
Paso 3: BC 85
Realice una medición.
(véase
Paso 4: BC 85:
Transmisión de los datos
directamente después de
realizar una medición:
•
Si la transmisión de datos
a través de Bluetooth®
está activada, los datos
se transmiten tras la confirmación del registro de
usuario con la tecla INI-
CIO/PARADA .
La aplicación „HealthManager“ de Beurer debe estar
activada para realizar la transmisión de datos.
Para garantizar una transferencia perfecta, retire la lámina de
protección del smartphone. Inicie la transmisión de datos en
la aplicación „HealthManager“ de Beurer.
La marca denominativa Bluetooth
gotipo son marcas comerciales de Bluetooth® SIG, Inc. Cualquier uso de estas marcas por parte de Beurer GmbH se realiza con licencia. Las demás marcas y nombres comerciales
son propiedad de sus respectivos titulares.
Paso 4: BC 85:
Transmisión de los datos
posteriormente:
•
Acceda al modo de
consulta de la memoria
(cap. 7). Seleccione el
registro de usuario que
desee. La transmisión por
Bluetooth® comenzará de
forma automática.
®
y el correspondiente lo-
8. Mensajes de error/Solución de problemas
En caso de error, aparece en la pantalla el mensaje de error
E_. Los mensajes de error pueden aparecer en los siguientes
casos:
•
el pulso no se ha podido registrar:
•
se ha movido o ha hablado durante la medición: E2 ;
55
E 1
;
Page 56

•
el brazalete se ha colocado demasiado tenso o demasiado
flojo: E3;
•
se ha producido un error durante la medición: E4;
•
la presión de inflado es superior a 300 mmHg: E5;
•
las pilas están prácticamente agotadas E6;
• los datos no se han podido transmitir por Bluetooth®: .
En estos casos, repita la medición. Procure no moverse ni
hablar durante la misma. En caso necesario, vuelva a colocar
las pilas o sustitúyalas.
9. Limpiar y guardar la unidad y el brazalete
•
Limpie con cuidado la unidad y el brazalete solo con un
paño ligeramente humedecido.
•
No use limpiadores ni disolventes.
•
En ningún caso se deben sumergir en agua la unidad ni el
brazalete, ya que puede penetrar líquido en ellos y dañarlos.
•
Cuando guarde la unidad y el brazalete, no se deben colo-
car objetos pesados sobre ellos. Retire las pilas.
10. Características técnicas
Modelo BC 85
Tipo BC 80
Método de medición Oscilométrico, medición no invasiva de
Rango de medición Presión del brazalete 0-300mmHg,
la presión arterial en la muñeca
sistólica 50-250 mmHg,
diastólica 30-200 mmHg,
pulso 40-180 latidos/minuto
56
Precisión de la
indicación
Inexactitud de la
medición
Memoria 2 x 60 posiciones de memoria
Medidas Largo 97 mm x ancho 68 mm x
Peso Aprox. 108 g (sin pilas)
Diámetro del brazalete De 135 a 230 mm
Condiciones de
funcionamiento
admisibles
Condiciones de
almacenamiento
admisibles
Alimentación 2 pilas AAA
Vida útil de las pilas Para unas 300 mediciones, según el ni
Accesorios Instrucciones de uso, 2 pilas AAA de
Clasificación Alimentación interna, IPX0, sin AP/
sistólica ±3 mmHg,
diastólica ±3 mmHg,
pulso ±5 % del valor indicado
La desviación estándar máxima permi
tida según ensayo clínico es:
sistólica 8 mmHg/diastólica 8 mmHg
alto 22 mm
+5 °C hasta +40 °C, 15-93 % de hume
dad relativa del aire (sin condensación)
-25 °C hasta +70 °C, 15-93 % de hume
dad relativa del aire, 700-1060 hPa de
presión ambiente
de 1,5 V
vel de la presión sanguínea y la presión
de inflado
1,5 V, estuche
APG, funcionamiento continuo, pieza
de aplicación tipo BF
-
-
-
-
Page 57

Transferencia de datos por Bluetooth®
wireless technology
•
Este aparato cumple la norma europea EN60601-1-2 y está
sujeto a las medidas especiales de precaución relativas a
la compatibilidad electromagnética. Tenga en cuenta que
los dispositivos de comunicación de alta frecuencia portátiles y móviles pueden interferir en el funcionamiento de este
aparato. Puede solicitar información más precisa al servicio
de atención al cliente en la dirección indicada en este documento o leer el final de las instrucciones de uso.
•
Este aparato cumple la Directiva europea 93/42/EEC relati-
va a los productos sanitarios, las leyes relativas a productos sanitarios y las normas europeas EN1060-1 (Esfigmomanómetros no invasivos, Parte 1: Requisitos generales)
y EN1060-3 (Esfigmomanómetros no invasivos, Parte 3:
Requisitos suplementarios aplicables a los sistemas electromecánicos de medición de la presión sanguínea) y CEI
80601-2-30 (Equipos electromédicos, Parte 2-30: Requisitos particulares para la seguridad básica y funcionamiento
esencial de los esfigmomanómetros automáticos no invasivos).
• La precisión de este tensiómetro ha sido comprobada exhaustivamente y se ha diseñado para lograr una larga vida
útil.
El tensiómetro utiliza Bluetooth® low
energy technology,
banda de frecuencia de 2,4 GHz,
compatible con Bluetooth 4.0 smartphones/tablets
Lista de los smartphones/tablets
compatibles
Si se utiliza el aparato en el ejercicio de la medicina debe
rán realizarse controles metrológicos con los medios adecuados. Puede solicitar información más precisa sobre la
comprobación de la precisión de los valores de medición
al servicio de asistencia técnica en la dirección indicada en
este documento.
•
Garantizamos que este producto cumple con la Directiva
europea 1999/5/CE sobre equipos radioeléctricos y equipos terminales de telecomunicación (R&TTE).
Póngase en contacto con el servicio técnico pertinente para
obtener más información al respecto como, por ejemplo, la
declaración de conformidad CE.
57
-
Salvo errores y modificaciones
Page 58

ITALIANO
Indice
1. Introduzione .....................................................................58
2. Indicazioni importanti .......................................................58
3. Descrizione dell’apparecchio ...........................................61
4. Preparazione della misurazione ........................................62
5. Misurazione della pressione .............................................64
6. Ricerca e cancellazione dei valori misurati .......................66
7. Trasmissione dei valori misurati .....................................68
8. Messaggi di errore/Soluzioni ..........................................69
9. Pulizia e conservazione dell’apparecchio e del
manicotto .......................................................................69
10. Dati tecnici .....................................................................69
Gentile cliente,
siamo lieti che Lei abbia scelto un prodotto del nostro assortimento. Il nostro marchio è garanzia di prodotti di elevata
qualità, controllati nei dettagli, relativi ai settori calore, terapia
dolce, pressione/diagnosi, peso, massaggio,
bellezza e aria.
Leggere attentamente le presenti istruzioni per l’uso, conservarle per impieghi futuri, renderle accessibili ad altri utenti e
attenersi alle indicazioni.
Cordiali saluti
Team Beurer
1. Introduzione
Controllare l’integrità esterna della confezione e del contenuto
del misuratore di pressione BC 85 di Beurer.
Il misuratore di pressione da polso consente la misurazione
e il monitoraggio non invasivi dei valori di pressione arteriosa
nelle persone adulte. Permette di misurare in modo rapido e
semplice la propria pressione, memorizzare i valori misurati e
visualizzare l’andamento dei valori. Segnala inoltre eventuali
disturbi del ritmo cardiaco.
I valori rilevati vengono classificati e valutati graficamente.
2. Indicazioni importanti
Spiegazione dei simboli
I seguenti simboli sono utilizzati nelle istruzioni per l’uso,
sull’imballo e sulla targhetta dell’apparecchio e degli accessori:
Attenzione
Nota
Indicazione di importanti informazioni
58
Page 59

Storage
-25°C
5°C
70°C
Operating
40°C
SN
Rispettare le istruzioni per l’uso.
Parte applicativa tipo BF
Corrente continua
Smaltimento secondo le norme previste dal-
la Direttiva CE sui rifiuti di apparecchiature
elettriche ed elettroniche (RAEE).
Produttore
Temperatura e umidità di stoccaggio consentite
RH 15-93%
Temperatura e umidità di esercizio consentite
RH 15-93%
Proteggere dall’umidità.
Numero di serie
Il marchio CE certifica la conformità ai requisiti di base della direttiva 93/42/EEC sui
dispositivi medici.
Marchio di certificazione per i prodotti
esportati nella Federazione Russa e nei
paesi CSI
Indicazioni per l’uso
•
Misurare la pressione sempre allo stesso orario della giorna-
ta, anché i valori siano confrontabili.
•
Prima di ogni misurazione rilassarsi per ca. 5 minuti!
•
Per eettuare più misurazioni su una stessa persona, atten-
dere 5 minuti tra una misurazione e l’altra.
•
Evitare di mangiare, bere, fumare o praticare attività fisica
almeno nei 30 minuti precedenti alla misurazione.
•
In caso di valori dubbi, ripetere la misurazione.
•
I valori misurati autonomamente hanno solo scopo informa-
tivo, non sostituiscono i controlli medici!
Comunicare al medico i propri valori, non intraprendere in
alcun caso terapie mediche definite autonomamente (ad es.
impiego di farmaci e relativi dosaggi)!
•
Non utilizzare il misuratore di pressione su neonati e pazienti
con preeclampsia. Prima di utilizzare il misuratore di pressione in gravidanza, si consiglia di consultare il medico.
•
In caso di dicoltà di circolazione a un braccio a causa di
patologie vascolari croniche o acute (tra cui vasocostrizioni), la precisione della misurazione al polso è limitata. In tal
caso si consiglia di optare per un misuratore di pressione da
braccio.
•
L’apparecchio non deve essere utilizzato da persone (com-
presi bambini) con ridotte capacità fisiche, percettive o intellettive o non in possesso della necessaria esperienza e/o
conoscenza, se non sotto la supervisione di una persona
responsabile per la loro sicurezza o che fornisca loro le indicazioni per l’uso dell’apparecchio. Controllare che i bambini
non utilizzino l’apparecchio per gioco.
59
Page 60

•
In caso di patologie del sistema cardiovascolare possono
verificarsi errori di misurazione o una riduzione della precisione di misurazione. Gli stessi problemi si possono verificare in caso di pressione molto bassa, diabete, disturbi
della circolazione e del ritmo cardiaco nonché in presenza
di brividi di febbre o tremiti.
•
Non utilizzare il misuratore di pressione insieme ad altri ap-
parecchi chirurgici ad alta frequenza.
•
Utilizzare il misuratore di pressione solo su un polso con
misura compresa nell’intervallo indicato.
•
Tenere conto che durante il pompaggio può verificarsi una
riduzione delle funzioni dell’arto interessato.
•
La misurazione della pressione non deve impedire la circo-
lazione del sangue per un tempo inutilmente troppo lungo.
In caso di malfunzionamento dell’apparecchio, rimuovere il
manicotto dal braccio.
•
Evitare di mantenere una pressione costante nel manicotto
e di eettuare misurazioni troppo frequenti che causerebbero una riduzione del flusso sanguigno con il conseguente
rischio di lesioni.
•
Accertarsi che il manicotto non venga applicato su braccia
con arterie o vene sottoposte a trattamenti medici, quali dispositivo di accesso o terapia intravascolare o shunt arterovenoso.
•
Non applicare il manicotto a persone che hanno subito una
mastectomia (asportazione della mammella).
•
Non applicare il manicotto su ferite per evitare rischi di ulte-
riori lesioni.
•
Indossare il manicotto esclusivamente sul polso. Non in-
dossare il manicotto su altre parti del corpo.
•
Il misuratore di pressione può essere utilizzato esclusiva-
mente a batterie.
•
Se per 2 minuti non vengono utilizzati pulsanti, il dispositivo
di arresto automatico spegne l’apparecchio per preservare
le batterie.
•
L’apparecchio è concepito solo per l’uso descritto nelle pre-
senti istruzioni per l’uso. Il produttore non risponde di danni
causati da un uso inappropriato o non conforme.
Indicazioni per la conservazione e la cura
•
Il misuratore di pressione è composto da moduli elettronici
di precisione. La precisione dei valori misurati e la durata
dell’apparecchio dipendono da un utilizzo attento e scrupoloso:
– Non esporre l’apparecchio a urti, umidità, sporcizia, forti
sbalzi di temperatura e direttamente alla luce solare.
– Non far cadere l’apparecchio.
– Non utilizzare l’apparecchio in prossimità di forti campi
elettromagnetici, tenerlo lontano da impianti radio o tele-
foni cellulari.
•
In caso di non utilizzo dell’apparecchio per lunghi periodi, si
raccomanda di rimuovere le batterie.
Avvertenze sull’uso delle batterie
•
Se il liquido della batteria viene a contatto con la pelle e
con gli occhi, sciacquare le parti interessate con acqua e
consultare il medico.
•
Pericolo d’ingestione! I bambini possono ingerire le
batterie e soffocare. Tenere quindi le batterie lontano dalla
portata dei bambini!
60
Page 61

•
Prestare attenzione alla polarità positiva (+) e negativa (-).
• In caso di fuoriuscita di liquido dalla batteria, indossare
guanti protettivi e pulire il vano batterie con un panno asciutto.
•
Proteggere le batterie dal caldo eccessivo.
•
Rischio di esplosione! Non gettare le batterie nel fuoco.
•
Le batterie non devono essere ricaricate o mandate in cor-
tocircuito.
•
Qualora l’apparecchio non dovesse essere utilizzato per un
periodo prolungato, rimuovere le batteria dal vano batterie.
•
Utilizzare solo tipologie di batterie uguali o equivalenti.
•
Sostituire sempre tutte le batterie contemporaneamente.
•
Non utilizzare batterie ricaricabili!
•
Non smontare, aprire o frantumare le batterie.
Indicazioni per la riparazione e lo smaltimento
•
Le batterie non sono rifiuti domestici. Smaltire le batterie
esauste negli appositi punti di raccolta.
•
Non aprire l’apparecchio. In caso contrario la garanzia de-
cade.
•
L’apparecchio non deve essere riparato o tarato personal-
mente. In tal caso non si garantisce più il corretto funzionamento.
•
Le riparazioni possono essere eettuate solo dal Servizio
clienti o da rivenditori autorizzati. Prima di inoltrare eventuali
reclami, testare le batterie e, se necessario, sostituirle.
•
A tutela dell’ambiente, al termine del suo utilizzo
l’apparecchio non deve essere smaltito nei rifiuti
domestici. Lo smaltimento deve essere eettuato
negli appositi centri di raccolta. Smaltire l’apparec-
chio secondo la direttiva europea sui rifiuti di apparecchiature elettriche ed elettroniche (RAEE). Per eventuali chiarimenti, rivolgersi alle autorità comunali competenti per lo
smaltimento.
3. Descrizione dell’apparecchio
1. Clasificación de los resultados de medición
2. Interfaccia USB
3. Display
4. Indicatore della posizione (altezza cuore)
5. Pulsante per la memorizzazione M1
6. Pulsante per la memorizzazione M2
7. Pulsante START/STOP
8. Coperchio vano batterie
9. Manicotto da polso
3
2
1
61
4
5
M1
O
M2
k
6
7
8
9
Page 62

Indicatori sul display:
SYS mmHg
1. Classificazione dei risultati di misurazione
2. Ora e data
3. Pressione sistolica
4. Pressione diastolica
5. Icona disturbo del ritmo cardiaco
icona battito cardiaco
6. Battito cardiaco rilevato
7. Memoria utente /
8. Pompaggio, scarico aria (freccia)
9. Numero della posizione di memoria / indicazione di memoria, valore medio ( A ), mattino (
AM
), sera (
PM
)
10. Indicatore della batteria
11. Simbolo trasmissione Bluetooth®
1 2
11
10
9
3
8
7
4
56
4. Preparazione della misurazione
Inserimento della batteria
•
Rimuovere il coperchio
del vano batterie sul lato
sinistro dell’apparecchio.
•
Inserire due batterie Mi-
cro da 1,5 V (tipo alcalino
LR03). Verificare che le batterie siano inserite correttamente, con i poli posizionati in base alle indicazioni. Non utilizzare batterie ricaricabili.
•
Richiudere attentamente il coperchio del vano batterie.
Quando lampeggia l’icona di sostituzione delle batterie
e compare E6, non è più possibile eettuare alcuna misurazione ed è necessario sostituire le batterie.
Tutti gli elementi del display vengono brevemente visualizzati,
sul display lampeggia
e l’ora come descritto di seguito.
Smaltimento delle batterie
• Smaltire le batterie esauste e completamente scariche negli appositi punti di raccolta, nei punti di raccolta per rifiuti
tossici o presso i negozi di elettronica. Lo smaltimento delle
batterie è un obbligo di legge.
• I simboli riportati di seguito indicano che le
batterie contengono sostanze tossiche:
Pb = batteria contenente piombo
Cd = batteria contenente cadmio
Hg = batteria contenente mercurio.
62
24h
. A questo punto impostare la data
Page 63

Impostazione del formato dell’ora, della data e dell’ora
In questo menu è possibile impostare in sequenza le seguenti
funzioni.
Formato ora
Data
➔
Ora
➔
La data e l’ora devono essere assolutamente impostate.
Solo in questo modo è possibile memorizzare correttamente
le misurazioni con data e ora per poter essere richiamate in
seguito.
Tenendo premuto il pulsante per la memorizzazione M1
o M2, i valori possono essere impostati più velocemente.
Formato ora
•
Tenere premuto il pulsante START/STOP
per 5 secondi.
•
Con i pulsanti per la memorizzazione M1/M2
selezionare il formato dell’ora desiderato e
confermare con il pulsante START/STOP .
Data
Sul display lampeggia il numero dell’anno.
•
Con i pulsanti per la memorizzazione M1/
M2 selezionare l’anno desiderato e confermare con il pulsante START/STOP .
Sul display lampeggia l’indicazione del mese.
•
Con i pulsanti per la memorizzazione M1/M2 se-
lezionare il mese desiderato e confermare con il
pulsante START/STOP .
Sul display lampeggia l’indicazione del giorno.
•
Con i pulsanti per la memorizzazione M1/M2 sele-
zionare il giorno desiderato e confermare con il pulsante START/STOP .
Se si imposta il formato dell’ora in 12 h, la sequenza
dell’indicazione del giorno e del mese è invertita.
Ora
Sul display lampeggia l’ora.
•
Con i pulsanti per la memorizzazione M1/M2
selezionare l’ora desiderata e confermare con il
pulsante START/STOP .
Sul display lampeggia l’indicazione dei minuti.
•
Con i pulsanti per la memorizzazione M1/M2
selezionare i minuti desiderati e confermare con
il pulsante START/STOP .
Dopo avere impostato tutti i dati, l’apparecchio si spegne automaticamente.
Bluetooth
®
Sul display lampeggia l’icona Bluetooth®.
•
Con i pulsanti per la memorizzazione M1/M2, scegliere se
attivare la trasmissione dati automatica via Bluetooth® (l’icona Bluetooth® lampeggia) o disattivarla (l’icona Blueto-
oth® non viene visualizzata) e confermare con il pulsante
START/STOP .
La trasmissione via Bluetooth® riduce la durata della bat-
teria.
63
Page 64

5. Misurazione della pressione
1 2 3
1 cm
M1
M2
O
k
M1
M2
O
k
M1
M2
O
k
Applicazione del manicotto
•
Denudare il polso sinistro. Verificare che la circolazione del
braccio non sia costretta da indumenti o simili.
Applicare il manicotto all’interno del polso.
•
Chiudere il manicotto con la chiusura a strappo in modo che
il bordo superiore dell’apparecchio sia ca. 1 cm dal palmo
della mano.
•
Il manicotto deve aderire al polso senza stringere.
Postura corretta
•
Prima di ogni misurazione rilassarsi per ca. 5 minuti! In caso
contrario le misurazioni potrebbero non essere corrette.
•
La misurazione può essere
eettuata da seduti o da
sdraiati. Sedersi in posizione
comoda per la misurazione
della pressione. Appoggiare
la schiena e le braccia. Non
incrociare le gambe. Appoggiare la pianta dei piedi al pavimento. Il braccio deve essere
appoggiato e piegato ad angolo. Verificare sempre che il
manicotto si trovi all’altezza del cuore. In caso contrario le
misurazioni potrebbero essere molto imprecise. Rilassare il
braccio e le mani. Per maggiore sicurezza, l’apparecchio è
dotato di una barra di conferma, che indica la corretta posizione del misuratore di pressione. Quando sull’indicatore
compare OK, è stata raggiunta la posizione corretta.
•
Per non falsare l’esito, è importante restare tranquilli e non
parlare durante la misurazione.
Esecuzione della misurazione della pressione
Applicare il manicotto e sistemarsi nella posizione in cui si desidera eseguire la misurazione.
•
Per avviare il misuratore di pressione,
premere il pulsante START/STOP .
Tutte le spie del display si accendono
brevemente.
Dopo 3 secondi il misuratore di pressione inizia automaticamente a misurare la
pressione.
La misurazione viene eseguita durante il pompaggio.
La misurazione può essere interrotta in qualsiasi momento
premendo il pulsante START/STOP .
Appena è rilevabile il battito cardiaco, viene visualizzata l’icona corrispondente .
•
Vengono visualizzati i valori misurati per
pressione sistolica e diastolica e
battito cardiaco.
64
Page 65

•
L’icona E_ compare se la misurazione non è stata eseguita
correttamente. Consultare il capitolo Messaggi
di errore/Soluzioni delle presenti Istruzioni per
l’uso e ripetere la misurazione.
•
Con il pulsante per la memorizzazione M1 o M2 impostare
quindi la memoria utente desiderata. Se non si sceglie alcuna memoria utente, la misurazione viene salvata nella memoria utente usata per ultima. Sul display viene visualizzato
il relativo simbolo M1 o M2.
•
Spegnere il misuratore di pressione con il pulsante START/
STOP . In questo modo la misurazione viene memorizzata nella memoria utente selezionata.
®
Se la trasmissione dati via Bluetooth
è attiva, i dati vengono
trasmessi dopo la conferma con il pulsante START/STOP .
• Sul display lampeggia l’icona Bluetooth®. Il misuratore di
pressione tenta di stabilire una connessione con l’app solo
per ca. 30 secondi.
• Non appena la connessione viene stabilita, l’icona Blueto-
oth® smette di lampeggiare. Tutti i dati vengono trasmessi
automaticamente all’app. In seguito alla trasmissione corretta dei dati, l’apparecchio si spegne.
•
Se non viene stabilita una connessione con l’app entro 30
secondi, l’icona Bluetooth® si spegne e il misuratore di
pressione si spegne automaticamente dopo 3 minuti.
Se si dimentica di spegnere l’apparecchio, questo si spegne
automaticamente dopo circa 3 minuti. Anche in questo caso il
valore viene memorizzato nella memoria utente selezionata o
in quella utilizzata per ultima.
Attendere almeno 5 minuti prima di eettuare
una nuova misurazione!
Interpretazione dell’esito
Disturbi del ritmo cardiaco
Questo apparecchio è in grado di individuare
eventuali disturbi del ritmo cardiaco durante la misurazione e
in tal caso al termine della misurazione ne segnala la presenza
con l’icona
.
Può essere un’avvisaglia di aritmia. L’aritmia è una patologia
in cui il ritmo cardiaco è anormale a causa di errori nel sistema bioelettrico, che controlla il battito cardiaco. I sintomi
(battiti cardiaci accelerati o anticipati, polso rallentato o troppo veloce) possono essere determinati tra l’altro da patologie cardiache, età, costituzione, sovralimentazione, stress o
mancanza di riposo. Un’aritmia può essere diagnosticata solo
dal medico.
Ripetere la misurazione nel caso compaia sul display l’icona
dopo una prima misurazione. Assicurarsi di aver osservato 5 minuti di riposo prima di eettuare l’esame e di non parlare né muoversi durante la misurazione. Rivolgersi al proprio
medico nel caso l’icona compaia frequentemente. Diagnosi e terapie definite autonomamente in base agli esiti delle
misurazioni possono rivelarsi pericolose. Attenersi sempre alle
indicazioni del proprio medico.
Classificazione dei risultati di misurazione:
I risultati di misurazione possono essere classificati e valutati
in base alla tabella seguente.
65
Page 66

Tali valori standard costituiscono tuttavia solo un riferimento
generale in quanto la pressione individuale presenta dierenze
a seconda della persona e dell’età.
È importante consultare regolarmente il proprio medico per
sapere qual è la propria pressione normale e il limite superato
il quale il livello di pressione viene considerato pericoloso.
La classificazione sul display e la scala graduata sul misuratore di pressione indicano la classe nella quale rientra la
pressione misurata. Nel caso in cui il valore sistolico e quello
diastolico rientrino in due classi diverse (ad es. sistole nella
classe „Normale alto“ e diastole nella classe „Normale“), la
graduazione grafica dell’apparecchio indica sempre la classe
più alta, in questo caso „Normale alto“.
Intervallo dei valori di pressione
Livello 3:
forte ipertensione
Livello 2:
moderata ipertensione
Livello 1:
leggera ipertensione
Normale alto 130 – 139 85 – 89
Normale 120 – 129 80 – 84 Autocontrollo
Ottimale < 120 < 80 Autocontrollo
Fonte: OMS, 1999 (Organizzazione mondiale della sanità)
Sistole
(in mmHg)
≥ 180 ≥ 110
160 – 179 100 – 109
140 – 159 90 – 99
Diastole
(in mmHg)
Misura da
adottare
Rivolgersi a un
medico
Rivolgersi a un
medico
Controlli medici
regolari
Controlli medici
regolari
6. Ricerca e cancellazione dei valori misurati
Memoria utente
Gli esiti di ogni misurazione corretta vengono memorizzati con
data e ora. Quando i dati misurati superano le 60 unità, vengono eliminati i dati più vecchi.
•
Con il pulsante per la memorizzazione M1 o M2 selezionare
la memoria utente desiderata ( ), quando l’apparecchio
è spento.
–
Se si desidera visualizzare i dati misurati
per la memoria utente , premere il
pulsante per la memorizzazione M1.
–
Se si desidera visualizzare i dati misu-
rati per la memoria utente , premere
il pulsante per la memorizzazione M2.
Sul display viene visualizzato il valore
medio di tutte le misurazioni.
Se la trasmissione
display), il misuratore di pressione tenta di stabilire una connessione con l’app. Se nel frattempo si preme il pulsante M1,
la trasmissione viene interrotta e vengono visualizzati i valori
medi.
Se si preme il pulsante M2, la trasmissione viene interrotta e
vengono visualizzati i dati di misurazione della memoria utente
. L’icona non è più visualizzata. Non appena viene stabilita
una connessione e i dati vengono trasmessi, i pulsanti vengono
disattivati.
Se è stata selezionata la memoria utente 1, occorre
premere il pulsante per la memorizzazione M1.
66
Bluetooth® è attiva (l’icona lampeggia sul
Page 67

Se è stata selezionata la memoria utente 2, occorre
premere il pulsante per la memorizzazione M2.
Valori medi
A
AM
.
.
Sul display lampeggia l’indicazione
Viene visualizzato il valore medio di tutti
i valori misurati della memoria utente
selezionata.
•
Premere il pulsante per la memorizza-
zione corrispondente (M1 o M2).
Sul display lampeggia l’indicazione
Viene visualizzato il valore medio degli
ultimi 7 giorni di misurazioni mattutine
(mattina: dalle 5.00 alle 9.00).
•
Premere il pulsante per la memorizza-
zione corrispondente (M1 o M2).
Sul display lampeggia l’indicazione PM.
Viene visualizzato il valore medio degli
ultimi 7 giorni di misurazioni serali (sera:
dalle 18.00 alle 20.00).
Valori di misurazione singoli
•
Premendo nuovamente il pulsante per
la memorizzazione corrispondente
(M1 o M2), il display visualizza l’ulti-
ma misurazione singola (nell’esempio
la misurazione 03).
•
Premendo nuovamente il pulsante per la memorizzazione
corrispondente (M1 o M2), è possibile visualizzare i singoli
valori misurati.
•
Per spegnere l’apparecchio, premere il pulsante START/
STOP .
È possibile uscire dal menu in qualsiasi momento pre-
mendo il pulsante START/STOP .
Cancellazione dei valori di misurazione
•
Per cancellare una posizione di memoria di una determina-
ta memoria utente è necessario innanzitutto selezionare la
memoria utente.
•
Avviare l’interrogazione dei valori medi.
•
Tenere premuti i pulsanti per la memorizzazione M1 / M2
per 5 secondi.
S
ul display compare CL e 00.
T
utti i valori dell’attuale memoria utente
vengono cancellati.
Infine l’apparecchio si spegne automaticamente.
Cancellazione dei singoli valori misurati
Per cancellare singole misurazioni di una determinata memoria
utente, è necessario innanzitutto selezionare la memoria utente.
•
Avviare l’interrogazione dei singoli valori misurati.
•
Tenere premuto il pulsante per la memorizzazione M1 / M2
per 5 secondi (a seconda di quale sia la memoria utente
attiva).
67
Page 68

•
Il valore selezionato viene cancellato. L’apparecchio visua-
lizza brevemente CL 00.
•
Per cancellare ulteriori valori, procedere come descritto so-
pra.
L’apparecchio può essere spento in qualsiasi momento premendo il pulsante START/STOP .
7. Trasmissione dei valori misurati
Trasmissione tramite interfaccia USB
Collegare il misuratore di pressione al PC con un cavo USB.
Durante una misurazione non è possibile avviare la tra-
smissione dei dati.
PC
Sul display viene visualizzato
trasmissione dei dati nel software per PC
“HealthManager”. Durante la trasmissione
dei dati sul display viene visualizzata un’animazione. Una trasmissione dei dati corretta
è visualizzata nella Fig. 1. Se la trasmissione
dei dati non viene eseguita, viene visualizzato
il messaggio di errore mostrato nella Fig. 2. In
questo caso, interrompere il collegamento del
PC e avviare di nuovo la trasmissione dei dati.
Dopo 30 secondi di inattività o dopo aver interrotto la comunicazione con il PC, il misuratore di pressione si spegne automaticamente.
. Avviare la
F
F
ig. 1
ig. 2
Trasmissione via Bluetooth
I valori misurati e memorizzati sull’apparecchio possono inoltre essere trasmessi allo smartphone tramite Bluetooth®.
A tale scopo, è necessaria l’app „Beurer HealthManager“. Installarla dall’App Store.
Per trasmettere i valori, procedere come segue:
Se nel menu delle impostazioni la funzione Bluetooth® è attiva, i dati vengono trasmessi automaticamente dopo la misurazione. Sul display in alto a sinistra viene visualizzata l’icona
(vedere il capitolo 4. Preparazione della misurazione).
Fase 1: BC 85
Attivare la funzione Bluetooth
dispositivo (vedere il capitolo "4. Preparazione
della misurazione, Bluetooth®").
®
®
sul proprio
Fase 2: App "HealthManager" di Beurer
Aggiungere il BC 85 nell’app HealthManager di
Beurer in "Impostazioni/Miei dispositivi".
Fase 3: BC 85
E ettuare la misurazione.
68
Page 69

Fase 4 BC 85:
Trasmissione dei dati direttamente durante una misurazione:
•
Se la trasmissione dati
via Bluetooth® è attiva,
i dati vengono trasmessi
dopo la conferma della
memoria utente e con la
pressione del pulsante
Fase 4 BC 85:
Trasmissione dei dati in un
momento successivo:
•
Accedere alla modalità
di richiamo della memoria (cap. 7). Selezionare
la memoria utente desiderata. La trasmissione
Bluetooth® viene avviata
automaticamente.
START/STOP .
L’app „HealthManager“ di Beurer deve essere attivata per
la trasmissione.
Per garantire una trasmissione indisturbata, rimuovere eventualmente l’involucro protettivo dello smartphone. Avviare la
trasmissione dati dall’app „HealthManager“ di Beurer.
Il marchio Bluetooth
di Bluetooth
®
e il relativo logo sono marchi registrati
®
SIG, Inc. L’utilizzo di tali marchi da parte di Beurer GmbH è stato concesso in licenza. Gli altri marchi e nomi
commerciali sono di proprietà dei rispettivi titolari.
8. Messaggi di errore/Soluzioni
In caso di errore sul display compare il messaggio di errore E_
I messaggi di errore possono essere visualizzati quando
•
non è possibile misurare il battito:
•
durante la misurazione la persona si è mossa o ha parlato:
E2
;
•
il manicotto è troppo stretto o troppo allentato: E3;
E 1
;
•
si è verificato un errore durante la misurazione: E4;
•
la pressione di gonfiaggio è superiore a 300 mmHg: E5;
•
le batterie sono quasi esaurite E6;
•
dati che non è stato possibile trasferire con Bluetooth®: .
In questi casi ripetere la misurazione. Non muoversi o parlare.
Se necessario reinserire le batterie o sostituirle.
9. Pulizia e conservazione dell’apparecchio e
del manicotto
•
Pulire con attenzione l’apparecchio e il manicotto utilizzan-
do solo un panno leggermente inumidito.
•
Non utilizzare detergenti o solventi.
•
L’apparecchio e il manicotto non devono per nessun motivo
essere immersi nell’acqua, in quanto il liquido potrebbe infiltrarsi e danneggiarli.
•
Non posizionare oggetti pesanti sull’apparecchio e sul ma-
nicotto. Rimuovere le batterie.
10. Dati tecnici
Modello BC 85
Tipo BC 80
Metodo di
misurazione
Range di misurazione Pressione manicotto 0-300 mmHg,
.
69
Misurazione oscillante e non invasiva
della pressione al polso
sistolica 50-250 mmHg,
diastolica 30-200 mmHg,
pulsazioni 40-180 battiti/minuto
Page 70

Precisione
dell’indicazione
Tolleranza Scostamento standard massimo
Memoria 2 x 60 posizioni di memoria
Ingombro Lung. 97 mm x larg. 68 mm x
Peso Ca. 108 g (senza batterie)
Dimensioni manicotto Da 135 a 230 mm
Condizioni di funzio
namento ammesse
Condizioni di
stoccaggio ammesse
Alimentazione 2 x batterie AAA 1,5 V
Durata delle batterie Ca. 300 misurazioni, in base alla pres
Accessori Istruzioni per l’uso, 2 batterie AAA
Classificazione Alimentazione interna, IPX0, non fa
sistolica ±3 mmHg,
diastolica ±3 mmHg,
pulsazioni ±5% del valore indicato
ammesso rispetto a esame clinico:
sistolica 8 mmHg / diastolica 8 mmHg
alt. 22 mm
-
Da +5 °C a +40 °C, 15-93% umidità
relativa (senza condensa)
Da -25 °C a +70 °C, 15-93% umidità
relativa, 700-1060 hPa di pressione
ambiente
sione sanguigna e di pompaggio
da 1,5 V, custodia
parte della categoria AP/APG, funzio
namento continuo, parte applicativa
tipo BF
Trasmissione dei dati
tramite Bluetooth®
wireless technology
Il misuratore di pressione utilizza la
tecnologia Bluetooth® low energy
technology,
con banda di frequenza 2,4 GHz,
compatibile con smartphone/tablet
Bluetooth 4.0
Elenco degli smartphone/tablet supportati
•
L’apparecchio è conforme alla norma europea EN60601-1-
2 e necessita di precauzioni d’impiego particolari per quanto riguarda la compatibilità elettromagnetica. Apparecchiature di comunicazione HF mobili e portatili possono influire
sul funzionamento di questo apparecchio. Per informazioni
più dettagliate, rivolgersi al Servizio clienti oppure consultare la parte finale delle istruzioni per l’uso.
• L’apparecchio è conforme alla direttiva CE per i dispositivi
medici 93/42/EEC, alla legge sui dispositivi medici e alle nor-
-
me europee EN1060-1 (Misuratori di pressione non invasivi
Parte 1: Requisiti generali), EN1060-3 (Misuratori di pressione non invasivi Parte 3: Requisiti integrativi per sistemi
elettromeccanici per la misurazione della pressione arteriosa) e IEC80601-2-30 (Apparecchi elettromedicali Parte 2-30:
-
Prescrizioni particolari relative alla sicurezza fondamentale
e alle prestazioni essenziali di sfigmomanometri automatici
non invasivi).
•
La precisione di questo misuratore di pressione è stata
accuratamente testata ed è stata sviluppata per una lunga
durata di vita utile.
70
Page 71

Se l’apparecchio viene utilizzato a scopo professionale, è
necessario eettuare controlli tecnici con gli strumenti adeguati. Richiedere informazioni dettagliate sulla verifica della
precisione all’indirizzo indicato del servizio assistenza.
•
Con la presente garantiamo che il prodotto è conforme alla
direttiva europea R&TTE 1999/5/CE.
Per ulteriori informazioni, ad esempio per richiedere la dichiarazione di conformità CE, rivolgersi al servizio di assistenza indicato.
Possibili errori e variazioni
71
Page 72

TÜRKÇE
İçindekiler
1. Ürün özellikleri ..................................................................72
2. Önemli yönergeler ............................................................72
3. Cihaz açıklaması ..............................................................75
4. Ölçüme hazırlık .................................................................76
5. Tansiyon ölçme ................................................................78
6. Ölçüm değerlerini görüntüleme ve silme ..........................80
7. Ölçüm değerlerinin aktarılması .........................................82
8. Hata iletisi/Arıza giderme .................................................83
9. Cihazın ve manşetin temizlenmesi ve saklanması ............83
10. Teknik veriler ...................................................................83
Sayın müşterimiz,
Ürünlerimizden birini seçtiğiniz için teşekkür ederiz. Markamız
ısıtma, yumuşak terapi, kan basıncı/diyagnoz, ağırlık ve masaj
konularında sunduğumuz son derece değerli ve titizlikle test
edilmiş kaliteli ürünlerin göstergesidir.
Lütfen bu kullanım kılavuzunu dikkatle okuyun, ileride kullanmak üzere saklayın, diğer kullanıcıların erişebilmesini sağlayın
ve içindeki yönergelere uyun.
Yeni cihazınızı iyi günlerde kullanmanızı dileriz
Beurer Ekibiniz
şekilde tansiyonunuzu ölçebilir, ölçüm değerlerini kaydedebilir ve ölçüm değerlerinin seyrini görüntüleyebilirsiniz. Mevcut
olası kalp ritim bozukluklarında sizi uyarır.
Elde edilen değerler kademelendirilir ve grafik olarak değerlendirilir.
2. Önemli yönergeler
Cihazın ve aksesuarların kullanım kılavuzunda, ambalajında ve
model etiketinde aşağıdaki semboller kullanılır:
1. Ürün özellikleri
Beurer BC 85 tansiyon ölçme cihazının ambalajının dıştan hasar görmemiş ve içeriğin eksiksiz olduğundan emin olun.
El bileğine takılan tansiyon ölçme cihazı, yetişkinlerin atardamarlarındaki tansiyon değerlerini, invazif olmayan bir şekilde
ölçmek ve izlemek için kullanılır. Bu cihazla hızlı ve kolay bir
72
İşaretlerin açıklaması
Dikkat
Açıklama
Önemli bilgilere yönelik açıklama
Page 73

Storage
-25°C
5°C
70°C
Operating
40°C
SN
Kullanım kılavuzunu dikkate alın
Uygulama parçası tip BF
Doğru akım
Atık Elektrikli ve Elektronik Eşya Direktifine
(WEEE - Waste Electrical and Electronic
Equipment) uygun olarak bertaraf edilmelidir.
Üretici
İzin verilen depolama sıcaklığı ve nem
RH 15-93%
İzin verilen çalışma sıcaklığı ve nem
RH 15-93%
Nemden koruyunuz
Seri numarası
CE işareti, tıbbi ürünler için 93/42/EEC
yönetmeliğinin temel şartları ile uyumluluğu
belgeler.
Rusya ve Bağımsız Devletler Topluluğu ülkelerine ihraç edilecek ürünler için sertifika
işareti
Kullanım ile ilgili bilgiler
•
Değerleri karşılaştırabilmek için tansiyonunuzu her zaman
günün aynı saatlerinde ölçün.
•
Her ölçümden önce yakl. 5 dakika dinlenin!
•
Bir kişide birden fazla ölçüm yapmak istiyorsanız, ölçümler
arasında 5 dakika bekleyin.
•
Ölçüme en az 30 dakika kala yemek yememeli, bir şey içme-
meli, sigara kullanmamalı veya fiziksel egzersiz yapmamalısınız.
•
Ölçülen değerler ile ilgili şüpheniz varsa, ölçümü tekrarlayın.
•
Kendi elde ettiğiniz ölçüm değerleri yalnızca size bilgi verme
amaçlıdır ve doktor tarafından yapılan bir muayenenin yerini
tutmaz!
Ölçüm değerlerinizi doktorunuza bildirin ve hiçbir zaman
ölçüm sonuçlarından yola çıkarak kendi tıbbi kararlarınızı
vermeyin (örneğin ilaçlar ve dozları)!
•
Tansiyon ölçme cihazını yeni doğan bebeklerde ve preek-
lampsi hastalarında kullanmayın. Tansiyon ölçme cihazını
hamilelikte kullanmadan önce bir doktora danışmanızı tavsiye ederiz.
•
Kronik veya akut damar hastalıkları nedeniyle (örneğin da-
mar daralması) bir kolda kan dolaşımının kısıtlandığı durumlarda el bileğinden yapılan ölçümün doğruluğu sınırlıdır. Bu
durumda ölçümü üst koldan yapan bir tansiyon ölçme cihazı
kullanın.
•
Kısıtlı fiziksel, algısal ve akli becerileri nedeniyle ve/veya tec-
rübesizlik ve bilgisizliklerinden dolayı cihazı kullanamayacak
durumda olan kişiler (çocuklar dahil), cihazı güvenliklerinden
sorumlu olabilecek yetkili bir kişinin gözetimi veya direktifleri
73
Page 74

olmadan kullanmamalıdır. Çocuklar cihazla oynamamaları
için gözetim altında tutulmalıdır.
•
Kalp ve kan dolaşımı sistemindeki hastalıklar nedeniyle
hatalı ölçümler meydana gelebilir veya ölçüm doğruluğu
olumsuz etkilenebilir. Bu aynı zamanda çok düşük tansiyon,
diyabet, kan dolaşımı ve ritim rahatsızlıklarında ve titreme
nöbetlerinde veya titreme durumunda da meydana gelebilir.
•
Tansiyon ölçme cihazı, yüksek frekanslı bir ameliyat cihazı
ile birlikte kullanılmamalıdır.
•
Bu cihazı yalnızca, el bileklerinin kalınlığı cihaz için belirtilen
değerlere uygun olan kişilerde kullanın.
•
Şişirme sırasında ilgili uzuvda işlev kısıtlaması meydana ge-
lebileceğini dikkate alın.
•
Kan dolaşımı, tansiyon ölçümü nedeniyle gereğinden uzun
bir süre kısıtlanmamalıdır. Cihazın hatalı çalışması durumunda, manşeti koldan çıkarın.
•
Manşette sürekli basınç olmasını önleyin ve sık ölçümlerden
kaçının. Kan akışının bunun sonucunda kısıtlanması halinde
yaralanmalar meydana gelebilir.
•
Manşeti, atardamarları veya toplardamarları tıbbi tedavi gö-
ren bir kola takmamaya dikkat edin, örn. intravasküler giriş,
intravasküler tedavi veya arteriovenöz (A-V-) baypas.
•
Manşeti meme ampütasyonu yapılmış olan hastalara tak-
mayın.
•
Manşeti yaraların üzerine yerleştirmeyin, aksi takdirde başka
yaralanmalar olabilir.
•
Manşeti sadece bileğe takın. Manşeti vücudun başka bir
kısmına takmayın.
•
Tansiyon ölçme cihazını yalnızca pille çalıştırabilirsiniz.
74
•
Otomatik kapatma özelliği, 2 dakika içinde hiç bir tuşa basıl-
madığı takdirde pil tasarrufu sağlamak için tansiyon ölçme
aletini kapatır.
•
Cihaz sadece kullanım kılavuzunda açıklanan şekilde kul-
lanılmak üzere tasarlanmıştır. Amacına uygun olmayan ve
yanlış kullanımdan ötürü oluşacak hasarlardan üretici firma
sorumlu değildir.
Saklama ve bakım ile ilgili bilgiler
•
Tansiyon ölçme cihazı hassas ve elektronik parçalardan
meydana gelir. Ölçüm değerlerinin hassasiyeti ve cihazın
kullanım ömrü itinalı kullanıma bağlıdır:
– Cihazı darbelerden, nemden, kirden, aşırı sıcaklık değişik-
liklerinden ve doğrudan güneş ışığından koruyun.
– Cihazı düşürmeyin.
– Cihazı güçlü elektromanyetik alanların yakınında kullan-
mayın ve radyo sistemlerinden veya cep telefonlarından
uzak tutun.
•
Cihaz uzun bir süre kullanılmayacaksa pilleri çıkarmanız
önerilir.
Pillerle temas etme durumu için uyarılar
•
Pil hücresindeki sıvı, cilt veya gözlerle temas ettiğinde, ilgili
yeri suyla yıkayın ve bir doktora başvurun.
•
Yutma tehlikesi! Küçük çocuklar pilleri yutabilir ve bunun sonucunda boğulabilir. Bu nedenle pilleri, küçük çocukların erişmeyeceği yerlerde saklayın!
•
Artı (+) ve eksi (-) kutup işaretlerine dikkat edin.
•
Bir pil aktığında koruyucu eldiven giyin ve pil bölmesini kuru
bir bezle temizleyin.
Page 75

•
Pilleri aşırı ısıya karşı koruyun.
•
Patlama tehlikesi! Pilleri ateşle atmayın.
•
Piller şarj edilmemeli veya kısa devre yaptırılmamalıdır.
•
Cihazı uzun süre kullanmayacağınız durumlarda pilleri pil
bölmesinden çıkarın.
•
Yalnız aynı tip veya eşdeğer tip piller kullanın.
•
Her zaman tüm pilleri aynı anda değiştirin.
•
Şarj edilebilir pil kullanmayın!
•
Pilleri parçalarına ayırmayın, açmayın veya parçalamayın.
Onarım ve bertaraf hakkında bilgiler
•
Piller evsel atık değildir. Kullanılmış pilleri lütfen öngörülmüş
atık toplama yerlerine teslim edin.
•
Cihazın içini açmayın. Bu husus dikkate alınmadığı takdirde
garanti geçerliliğini yitirir.
•
Cihazı kendiniz onarmayın veya ayarlamayın. Aksi halde ci-
hazın kusursuz çalışması garanti edilemez.
•
Onarım işlemleri yalnızca müşteri servisi veya yetkili satıcılar
tarafından yapılabilir. Ancak, her şikayet öncesinde öncelikle
pilleri kontrol edin ve gerekirse değiştirin.
•
Çevreyi korumak için, kullanım ömrü sona erdikten
sonra cihazın evsel atıklarla birlikte elden çıkarılmaması gerekir. Cihaz, ülkenizdeki uygun atık toplama
merkezleri aracılığıyla bertaraf edilmelidir. Cihazı
AB Elektrikli ve Elektronik Ekipman Atık Direktifine (WEEE
- Waste Electrical and Electronic Equipment) uygun olarak
bertaraf edin. Bertaraf etme ile ilgili sorularınızı, ilgili yerel
makamlara iletebilirsiniz.
3. Cihaz açıklaması
1. Ölçüm değerlerini kademelendirme skalas
2. USB bağlantı noktası
3. Ekran
4. Konumlandırma göstergesi (kalp yüksekliği)
5. Hafıza tuşu M1
6. Hafıza tuşu M2
7. START/STOP tuşu
8. Pil yuvası kapağı
9. El bileği manşeti
3
2
1
75
4
5
M1
O
M2
k
6
7
8
9
Page 76

Ekrandaki göstergeler:
SYS mmHg
1. Ölçüm sonuçları kademelendirmesi
2. Saat ve tarih
3. Sistolik tansiyon
4. Diyastolik tansiyon
5. Kalp ritmi bozukluğu sembolü
Nabız sembolü
6. Tespit edilen nabız değeri
7. Kullanıcı hafızası /
8. Havayla şişirme, havayı tahliye etme (Ok)
9. Kayıt yerinin numarası / Hafıza göstergesi
Ortalama değer ( A ), sabah (
AM
), akşam (
PM
10. Pil göstergesi
11. Bluetooth® iletim simgesi
1 2
11
10
9
3
8
7
4
56
4. Ölçüme hazırlık
Pilleri yerleştirme
•
Cihazın sağ tarafındaki
pil yuvasının kapağını çıkarın.
•
İki adet 1,5 V mikro tip
(alkalin tip LR03) pil yerleştirin. Pilleri işaretlere göre kutupları doğru yere gelecek
şekilde yerleştirmeye mutlaka dikkat edin. Şarj edilebilen
piller kullanmayın.
•
)
Pil bölmesi kapağını tekrar dikkatle kapatın.
Pil değiştirme sembolü
yanıp sönüyor ve E6 görüntüleniyorsa, artık ölçüm yapılması mümkün değildir ve tüm pillerin
değiştirilmesi gerekir.
Tüm ekran öğeleri kısaca gösterilir, ekranda
24h
yanıp söner.
Şimdi aşağıda belirtildiği şekilde tarihi ve saati ayarlayın.
Pillerin elden çıkarılması
• Kullanılmış, tamamen boşalmış piller özel işaretli toplama
kutularına atılarak, özel atık toplama yerlerine veya elektrikli
cihaz satıcılarına teslim edilerek bertaraf edilmelidir. Pillerin
bertaraf edilmesi, yasal olarak sizin sorumluluğunuzdadır.
• Bu işaretler, zararlı madde içeren pillerin
üzerinde bulunur:
Pb = Pil kurşun içeriyor,
Cd = Pil kadmiyum içeriyor,
Hg = Pil cıva içeriyor.
76
Page 77

Saat formatının, tarihin ve saatin ayarlanması
Bu menüde aşağıdaki fonksiyonlar sırayla ayarlanabilir.
Saat formatı
Tarih
➔
Saat
➔
Tarihi ve saati mutlaka ayarlamalısınız. Yalnızca ayarı yaptığınızda ölçüm değerlerinizi tarih ve saat ile hafızaya alabilir ve
daha sonra tekrar bakabilirsiniz.
M1 veya M2 bellek tuşunu basılı tutarak değerleri hızlıca
ayarlayabilirsiniz.
Saat formatı
•
START/STOP tuşunu 5 saniye basılı tutun.
•
M1/M2 hafıza tuşu ile istediğiniz saat forma-
Saat
Ekranda saat yanıp söner.
•
Ekranda dakika yanıp söner.
•
Tüm veriler ayarlandıktan sonra cihaz otomatik olarak kapatılır.
Bluetooth
Ekranda ® sembolü yanıp söner.
•
tını seçin ve START/STOP tuşu ile onaylayın
.
Tarih
Ekranda yıl göstergesi yanıp söner.
•
M1/M2 hafıza tuşu ile istediğiniz yılı seçin
ve START/STOP tuşu ile onaylayın .
Ekranda ay göstergesi yanıp söner.
•
M1/M2 hafıza tuşu ile istediğiniz ayı seçin ve
START/STOP tuşu ile onaylayın .
Ekranda gün göstergesi yanıp söner.
•
M1/M2 tuşu ile istediğiniz günü seçin ve START/
STOP tuşu ile onaylayın .
Saat formatı olarak 12h (12 saat) ayarlanmışsa, gün
ve ay göstergesinin sırası değişir.
77
M1/M2 hafıza tuşu ile istediğiniz saati seçin ve
START/STOP tuşu ile onaylayın .
M1/M2 hafıza tuşu ile istediğiniz dakikayı seçin
ve START/STOP tuşu ile onaylayın .
®
Hafıza düğmeleri M1/M2 ile otomatik Bluetooth® veri aktarı-
mının etkinleştirilip (Bluetooth® sembolü yanıp söner) etkin-
leştirilmeyeceğini (Bluetooth® sembolü gösterilmez) seçin
ve BAŞLAT/DURDUR düğmesi ile onaylayın.
Bluetooth® üzerinden aktarımda şarj edilebilir pil ile çalış-
ma süresi azalır.
Page 78

5. Tansiyon ölçme
1 2 3
1 cm
M1
M2
O
k
M1
M2
O
k
M1
M2
O
k
Manşeti takma
•
Sol bileğinizi açık (çıplak) hale getirin. Koldaki kan dolaşımı-
nın çok dar giysiler veya benzeri eşyalar nedeniyle engellenmemesine dikkat edin.
Manşeti, el bileğinizin iç kısmına yerleştirin.
•
Manşeti, cihazın üst kenarı el ayasının yakl. 1 cm altına otu-
racak şekilde cırt cırt bant ile kapatın.
•
Manşet el bileğine sıkıca oturmalı, ancak el bileğini çok fazla
sıkıştırmamalıdır.
Doğru vücut duruşunu alma
•
Her ölçümden önce yakl. 5 dakika dinlenin! Aksi takdirde
sapmalar meydana gelebilir.
•
Ölçümü otururken veya yatar-
ken yapabilirsiniz. Tansiyon
ölçümü için rahat bir şekilde
oturun. Sırtınızı ve kollarınızı
dayayın. Bacak bacak üstüne
atmayın. Ayaklarınızı düz bir
şekilde yere koyun. Kolunuzu
mutlaka destekleyin ve bükün. Manşetin kalp yüksekliğine
gelmesine mutlaka dikkat edin. Aksi takdirde ciddi sapmalar meydana gelebilir. Kolunuzu ve el ayalarınızı gevşetin.
Daha fazla yardım için cihaza, tansiyon ölçme aletinin
doğru konumunu gösteren bir O.K. sembol çubuğu entegre
edilmiştir. Göstergede O.K. görüyorsanız doğru konuma
ulaşmışsınız demektir.
•
Ölçümde yanlışlık olmaması için, ölçüm sırasında sakin dur-
mak ve konuşmamak önemlidir.
Tansiyon ölçümünü gerçekleştirme
Manşeti yukarıda açıklandığı gibi takın ve ölçümü gerçekleştirmek istediğiniz duruşa geçin.
•
Tansiyon ölçüm cihazını çalıştırmak için
START/STOP tuşuna basın
. Tüm
ekran göstergeleri kısa bir süre yanar.
Tansiyon ölçüm cihazı 3 saniye sonra otomatik olarak ölçüme başlar.
Ölçüm şişirme işlemi sırasında yapılır.
İstediğiniz zaman START/STOP tuşuna basarak ölçümü durdurabilirsiniz.
Nabız algılanabildiği zaman nabız sembolü
gösterilir.
•
Sistolik basınç, diyastolik basınç ve nabız
ölçüm sonuçları gösterilir.
•
Ölçüm, usulüne uygun şekilde gerçek-
leştirilemediğinde görüntülenir E_. Bu kullanım
kılavuzundaki Hata iletisi/Arıza giderme bölümü-
ne bakın ve ölçümü tekrarlayın.
78
Page 79

•
M1 veya M2 hafıza düğmelerine basarak, istediğiniz kulla-
nıcı hafızasını seçin. Kullanıcı hafızası seçimi yapmazsanız,
ölçüm sonucu, en son kullanılmış olan kullanıcı hafızasına
kaydedilir. Ekranda ilgili M1 veya M2 sembolü görüntülenir.
•
Tansiyon ölçme cihazını START/STOP tuşu ile kapatın.
Böylece ölçüm sonucu, seçilmiş olan kullanıcı hafızasına
kaydedilmiş olur.
®
Bluetooth
DUR düğmesiyle
• Ekranda Bluetooth
veri aktarımı etkinleştirilmişse, BAŞLAT/DUR-
onaylandıktan sonra veriler aktarılır.
®
sembolü yanıp söner. Tansiyon ölçme
cihazı şimdi yakl. 30 saniye boyunca uygulama ile bağlantı
kurmaya çalışır
• Bir bağlantı oluştuğunda Bluetooth® simgesinin yanıp sönmesi durur. Tüm ölçüm verileri uygulamaya otomatik olarak
aktarılır. Başarılı veri aktarımının ardından cihaz kapanır.
•
30 saniye sonra uygulamaya bir bağlantı kurulamadığında,
Bluetooth® simgesi söner ve tansiyon ölçme cihazı 3 dakika
sonra otomatik olarak kapanır.
Cihazı kapatmayı unutursanız, cihaz yaklaşık 3 dakika sonra
otomatik olarak kapanır. Bu durumda da değer, seçilmiş olan
veya en son kullanılan kullanıcı hafızasına kaydedilir.
Yeniden ölçüm yapmadan önce en az 5 dakika
bekleyin!
Sonuçları değerlendirme
Kalp ritim bozuklukları:
Bu cihaz ölçüm esnasında olası kalp ritim bozukluklarını tespit
edebilir ve ölçümden sonra gerekirse
sembolü ile bir bo-
zukluk olduğunu gösterir.
79
Bu, ritim bozukluğu (aritmi) göstergesi olabilir. Ritim bozukluğu (aritmi), kalp atışına kumanda eden biyoelektrik sistemde
hatalar nedeniyle kalp ritminin anormal olduğu bir hastalıktır.
Semptomların (atlayan veya erken kalp atışları, yavaş veya çok
hızlı nabız) nedenleri arasında kalp hastalıkları, yaş, vücudun
özellikleri, aşırı derecede keyif verici madde tüketimi, stres
veya uykusuzluk olabilir. Ritim bozukluğu yalnızca doktor muayenesi ile tespit edilebilir.
Ölçümden sonra ekranda sembolü gösterilirse ölçümü
tekrarlayın. Lütfen 5 dakika dinlenmeye ve ölçüm esnasında
konuşmamaya veya hareket etmemeye dikkat edin. sembolü sık gösterilirse, lütfen doktorunuza başvurun. Ölçüm sonuçlarına göre kendi kendinize teşhis koymanız ve kendi kendinizi tedavi etmeniz tehlikeli olabilir. Mutlaka doktorunuzun
talimatlarını yerine getirin.
Ölçüm sonuçları kademelendirmesi
Ölçümler aşağıdaki tabloda kademelendirilip değerlendirilebilir.
Bu standart değerler yalnız genel kılavuz değer niteliğindedir,
çünkü bireysel tansiyon kişiden kişiye ve farklı yaş gruplarında
vs. farklılık gösterir.
Düzenli aralıklarla hekiminize danışmanız önemlidir. Hekiminiz
sizin için normal tansiyon olarak kabul edilebilecek bireysel
değeri ve hangi değerden itibaren tansiyonun tehlikeli olarak
tanımlanacağını size söyleyecektir.
Ekrandaki sınıflandırma ve cihazdaki skala, tespit edilen tansiyonun hangi aralıkta olduğunu gösterir. Sistol ve diyastol değerleri iki farklı aralıkta ise (örn. sistol “Yüksek normal” aralığında ve diyastol “Normal” alanında) cihazdaki grafiksel dağılım
her zaman daha yüksek olan aralığı gösterir; verilen örnekte
“Yüksek normal” aralığı.
Page 80

Tansiyon değerlerinin aralığı
Kademe 3:
şiddetli hipertansiyon
Kademe 2:
orta şiddette
hipertansiyon
Kademe 1:
hafif hipertansiyon
Sistol
(mmHg olarak)
≥ 180 ≥ 110
160 – 179 100 – 109
140 – 159 90 – 99
Diyastol
(mmHg olarak)
Önlem
Bir doktora
başvurun
Bir doktora
başvurun
Düzenli
doktor
kontrolü
Düzenli
Yüksek normal 130 – 139 85 – 89
doktor
kontrolü
Kendi
Normal 120 – 129 80 – 84
kendine
kontrol
Kendi
İdeal < 120 < 80
kendine
kontrol
Kaynak: WHO, 1999 (Dünya Sağlık Örgütü)
6. Ölçüm değerlerini görüntüleme ve silme
Kullanıcı hafızası
Başarılı her ölçümün sonuçları, tarih ve saat ile birlikte kaydedilir. 60’tan fazla ölçüm verisi kaydedildiğinde en eski ölçümün
üzerine yazılır.
•
Cihaz kapalıyken M1 veya M2 hafıza düğmesiyle istediğiniz
kullanıcı hafızasını ( ) seçin.
–
kullanıcı hafızasının ölçüm verilerine
bakmak istiyorsanız M1 hafıza düğmesine basın.
–
kullanıcı hafızasının ölçüm verilerine
bakmak istiyorsanız M2 hafıza düğmesine basın.
Ekranda tüm ölçümlerin ortalaması
görüntülenir.
Bluetooth® etkinleştirilmişse (ekranda simgesi yanıp söner)
tansiyon ölçme cihazı uygulamayla bağlantı kurmaya çalışıyordur. Bu sırada M1 düğmesine bastığınızda aktarım durdurulur ve ortalama değerler görüntülenir.
M2 düğmesine bastığınızda aktarım durdurulur ve
hafızasının ölçüm değerleri görüntülenir.
sembolü artık gös-
kullanıcı
terilmez. Bir bağlantı oluştuğunda ve veri aktarılırken düğmeler
devre dışı kalır.
Kullanıcı hafızası 1 seçilmişse hafıza tuşu M1’e basılmalıdır.
Kullanıcı hafızası 2 seçilmişse hafıza tuşu M2’ye basılmalıdır.
Ortalama değerler
A
Ekranda
sembolü yanıp söner.
Bu kullanıcı hafızasında kayıtlı olan tüm
ölçüm değerlerinin ortalaması gösterilir.
•
İlgili hafıza tuşuna (M1 veya M2)
basın.
80
Page 81

Ekranda AM işareti yanıp söner.
Sabah ölçümlerinin son 7 güne ait
ortalaması gösterilir (Sabah: saat 5.00
– 9.00).
•
İlgili hafıza tuşuna (M1 veya M2)
basın.
PM
Ekranda
Akşam ölçümlerinin son 7 güne ait
ortalaması gösterilir (Akşam: saat 18.00
– 20.00).
Münferit ölçüm değerleri
•
İlgili hafıza düğmesine (M1 veya M2)
•
İlgili hafıza düğmesine (M1 veya M2)
•
Cihazı kapatmak için START/STOP tuşuna basın.
işareti yanıp söner.
yeniden basarsanız ekranda son münferit ölçüm gösterilir (Buradaki örnekte
03 ölçümü).
tekrar basarsanız ölçtüğünüz münferit
ölçüm değerlerine bakabilirsiniz.
İstediğiniz zaman START/STOP tuşuna basarak
menüden çıkabilirsiniz.
Ölçüm değerlerini sil
•
İlgili kullanıcı hafızasındaki kayıtları silmek için önce bir
kullanıcı hafızası seçin.
•
Ortalama değerler sorgusunu başlatın.
•
M1 / M2 hafıza düğmelerini 5 saniye basılı tutun
E
kranda CL ve 00 görüntülenir.
O andaki kullanıcı hafızasında yer alan
tüm değerler silinir.
Ardından cihaz otomatik olarak kapanır.
Münferit ölçüm değerlerini silme
İlgili kullanıcı hafızasındaki münferit ölçümleri silmek için önce bir kullanıcı hafızası seçin.
•
Münferit ölçüm değerleri sorgusunu başlatın.
•
M1 / M2 hafıza düğmesini 5 saniye basılı tutun (hangi kulla-
nıcı hafızasında bulunduğunuza bağlı olarak).
•
İlgili ölçüm değeri silinir. Cihaz kısa süreli CL 00 gösterir.
•
Başka değerlerin silinmesi gerekiyorsa, yukarıdaki işlemi
tekrarlayın.
BAŞLAT/DURDUR düğmesine basarak cihazı kapatabilirsiniz.
81
Page 82

7. Ölçüm değerlerinin aktarılması
USB bağlantı noktası üzerinden aktarım
Tansiyon ölçme aletinizi USB kablosuyla bilgisayarınıza bağlayın.
Ölçüm sırasında veri aktarımı başlatılamaz.
PC
Ekranda
„HealthManager“ bilgisayar yazılımında veri
aktarımını başlatın. Veri aktarımı sırasında
ekranda bir animasyon gösterilir. Veri aktarımının başarıyla tamamlandığı şekil 1’deki gibi
gösterilir. Veri aktarımı başarılı olmadığında
şekil 2’deki gibi hata iletisi gösterilir. Bu durumda PC bağlantısını iptal edin ve veri aktarma işlemini yeniden başlatın.
Tansiyon ölçme aleti, 30 saniye boyunca kullanılmazsa veya PC ile iletişimin kesilmesi halinde otomatik olarak kapanır.
Bluetooth
Ölçülen ve cihazda kayıtlı olan değerleri Bluetooth
akıllı telefonunuza aktarabilirsiniz.
Bunun için Beurer “HealthManager” uygulaması gereklidir. Bu
uygulamayı App Store’dan alabilirsiniz.
Değerleri aktarmak için aşağıdaki adımları izleyin:
Ayar menüsünde Bluetooth® etkinleştirilmişse, veriler ölçümden sonra otomatik olarak aktarılır. Ekranın sol üst kısmında
sembolü (bkz. Bölüm 4 Ölçüme hazırlık) gösterilir.
(bilgisayar) gösterilir.
®
üzerinden aktarım
ş
ekil 1
ş
ekil 2
®
üzerinden
82
Adım 1: BC 85
Cihazınızda Bluetooth
(bkz. Bölüm “4. Ölçüme hazırlık, Bluetooth®”).
Adım 2: Beurer “HealthManager” uygulaması
Beurer HealthManager uygulamasında “Ayarlar / Cihazlarım” altından BC 85’yi ekleyin.
Adım 3: BC 85
Ölçüm yapın.
Adım 4: BC 85:
Ölçümden sonra verilerin
aktarılması:
•
Bluetooth® veri aktarımı
etkinleştirilmişse kullanıcı hafızasının BAŞLAT/
DURDUR düğmesiyle
onaylanmasından sonra
veriler aktarılır.
®
özelliğini etkinleştirin
Adım 4: BC 85:
Verilerin daha sonra aktarılması:
•
Hafıza sorgulama modu-
na geçin (Böl. 7). İstediğiniz kullanıcı hafızasını seçin. Bluetooth® aktarımı
otomatik olarak başlar.
Page 83

Aktarım için Beurer “HealthManager” uygulaması
etkinleştirilmiş olmalıdır.
Aktarma işleminin sorunsuzca gerçekleşmesini sağlamak için
lütfen akıllı telefonunuzun koruyucu kılıfını çıkarın. Veri aktarımını Beurer “HealthManager” uygulaması üzerinden başlatın.
®
Bluetooth
markası ve ona ait logo, Bluetooth® SIG, Inc.
şirketinin tescilli markalarıdır. Bu markaların Beurer GmbH
tarafından her türlü kullanımı lisans altında gerçekleşmektedir.
Diğer ticari markalar ve ticari adlar ilgili sahiplerinin mülkiyetindedir.
8. Hata iletisi/Arıza giderme
Hata olduğunda ekranda E_
Şu durumlarda hata iletileri görüntülenebilir:
•
Nabız saptanamadığında:
•
Ölçüm sırasında hareket ettiğinizde veya konuştuğunuzda:
E2
;
•
Manşet çok sıkı veya çok gevşek takıldığında: E3;
•
Ölçüm sırasında hata ortaya çıktığında: E4;
•
Şişirme basıncı 300 mmHg’nin üzerinde olduğunda: E5;
•
Piller tükenmek üzere olduğunda E6;
• veriler Bluetooth® ile gönderilemiyor: .
Bu durumlarda ölçümü tekrarlayın. Hareket etmemeye ve ko-
nuşmamaya dikkat edin. Gerekirse pilleri yeniden yerleştirin
veya değiştirin.
hata iletisi görüntülenir.
E 1
;
83
9. Cihazın ve manşetin temizlenmesi ve
saklanması
•
Cihazı ve manşeti dikkatli bir şekilde, sadece hafif nemlen-
dirilmiş bir bezle temizleyin.
•
Temizlik maddeleri veya çözücü maddeler kullanmayın.
•
Cihazı ve manşeti kesinlikle suyun altına tutmayın, aksi tak-
dirde içine su girerek cihaza ve manşete zarar verebilir.
•
Cihazı ve manşeti saklarken, cihaz ve manşet üzerinde ağır
cisimler olmamasına dikkat edin. Pilleri çıkarın.
10. Teknik veriler
Model BC 85
Tip BC 80
Ölçüm yöntemi El bileğinden, titreşimli, invazif olmayan
Ölçüm aralığı Manşet basıncı 0-300mmHg,
Göstergenin hassa
siyeti
Ölçüm belirsizliği Klinik kontrole göre izin verilen maksi
Hafıza 2 x 60 kayıt yeri
Ölçüler U 97 mm x G68 mm x Y22 mm
Ağırlık Yaklaşık 108 g (piller hariç)
Manşet boyutu 135 - 230 mm
tansiyon ölçümü
sistolik 50-250mmHg,
diyastolik 30-200mmHg,
nabız 40-180 atış/dakika
-
sistolik ± 3mmHg, diyastolik ±3 mmHg,
Nabız gösterilen değerin ±%5’i
mum standart sapma:
sistolik 8 mmHg /diyastolik 8 mmHg
-
Page 84

İzin verilen kullanım
şartları
İzin verilen saklama
koşulları
Güç kaynağı 2 x 1,5 V
Pil kullanım ömrü Yakl. 300 ölçüm için, tansiyonun yük
Aksesuarlar Kullanım kılavuzu, 2 x 1,5 V AAA pil,
Sınıflandırma Dahili besleme, IPX0, AP veya APG
Bluetooth® kablosuz
teknoloji ile veri iletimi
+5 °C -ilâ +40 °C, %15-93 bağıl nem
(yoğuşmasız)
-25 °C ilâ +70 °C, %15-93 bağıl nem,
700-1060 hPa ortam basıncı
AAA pil
sekliğine veya şişirme basıncına göre
saklama kutusu
yok, devamlı kullanım, uygulama par
çası tip BF
-
-
Kan şekeri ölçme cihazı Bluetooth®
low energy technology kullanmaktadır,
Frekans bandı 2,4 GHz,
Bluetooth 4.0 akıllı telefonlarla / tablet
bilgisayarlarla uyumludur
Desteklenen akıllı telefonların / tablet
bilgisayarların listesi
•
Bu cihaz Avrupa Normu EN60601-1-2’ye uygundur ve elekt-
romanyetik uyumluluk bakımından özel koruma tedbirlerine
tabidir. Lütfen taşınabilir veya mobil HF iletişim sistemlerinin
bu cihazı etkileyebileceğini dikkate alın. Ayrıntılı bilgileri belirtilen müşteri servisi adresinden talep edebilir veya kullanım kılavuzunun son kısmında bulabilirsiniz.
•
Bu cihaz, tıbbi ürünler için AB Standardı 93/42/EEC, tıbbi
ürün kanunu ve EN1060-1 normları (invazif olmayan tan-
siyon ölçme cihazları bölüm 1: Genel şartlar), EN1060-3
(invazif olmayan tansiyon ölçme cihazları bölüm 3: Elektromekanik tansiyon ölçme cihazları için tamamlayıcı şartlar)
ve IEC80601-2-30 (Tıbbi elektrikli cihazlar bölüm 2-30:
Otomatik, invazif olmayan tansiyon ölçme cihazlarının temel
özellikleri dahil olmak üzere güvenlik için özel koşullar) uyarıncadır.
•
Bu tansiyon ölçme cihazının doğruluğu dikkatli bir şekilde
kontrol edilmiştir ve cihaz uzun bir kullanım ömrüne yönelik
olarak geliştirilmiştir.
Cihazın tedavi amacıyla kullanılması halinde, uygun araçlarla ölçüm kontrolleri yapılmalıdır. Doğruluk kontrolü ile ayrıntılı bilgileri servis adresinden talep edebilirsiniz.
•
Bu ürünün Avrupa R&TTE Yönetmeliği 1999/5/EC’ye uygun
olduğunu garanti ederiz.
Detaylı bilgilere (örneğin CE Uygunluk Beyanına) ulaşmak
için lütfen belirtilen servis adresine başvurun.
84
Hata ve değişiklik hakkı saklıdır
Page 85

РУССКИЙ
Оглавление
1. Для ознакомления ..........................................................85
2. Важные указания ...........................................................85
3. Описание прибора .........................................................89
4. Подготовка к измерению ...............................................90
5. Измерение кровяного давления ...................................91
6. Просмотр и удаление результатов измерения ............94
7. Передача результатов измерения ...............................96
8. Сообщение об ошибке/устранение ошибок ...............97
9. Очистка и хранение прибора и манжеты ...................97
10. Технические данные .....................................................98
11. Гарантия ........................................................................99
Уважаемый покупатель!
Благодарим Вас за выбор продукции нашей фирмы. Мы
производим современные, тщательно протестированные,
высококачественные изделия для обогрева, мягкой терапии, измерения массы, кровяного давления, для диагностики, массажа, косметического ухода и очистки воздуха.
Внимательно прочтите данную инструкцию по применению,
сохраняйте ее для последующего использования, храните
ее в месте, доступном для других пользователей, и следуйте ее указаниям.
С наилучшими пожеланиями,
компания Beurer
1. Для ознакомления
Проверьте комплектность поставки прибора для измерения кровяного давления Beurer BС 85 и убедитесь в том,
что на упаковке нет внешних повреждений.
85
Прибор для измерения кровяного давления на запястье
служит для неинвазивного измерения и контроля кровяного давления взрослого человека. С ним Вы сможете
легко и быстро измерить кровяное давление, сохранить
результаты измерений в памяти и вывести на экран кривую измерений. При наличии нарушений сердечного ритма Вы получите предупреждение.
Полученные результаты измерений классифицируются
иотображаются вграфическом виде.
2. Важные указания
Пояснения к символам
В инструкции по применению, на упаковке и на типовой
табличке прибора и принадлежностей используются следующие символы:
Page 86

Storage
RH 15-93%
-25°C
5°C
Operating
70°C
40°C
SN
Осторожно!
Указание
Важная информация
Соблюдайте инструкцию поприменению
Рабочая часть типа BF
Постоянный ток
Утилизация прибора в соответствии с Ди-
рективой ЕС по отходам электрического
и электронного оборудования— WEEE
(Waste Electrical and Electronic Equipment)
Производитель
Допустимая температура хранения и
влажность воздуха
Допустимая рабочая температура и
влажность воздуха
RH 15-93%
Хранить в сухом месте
Серийный номер
Символ CE подтверждает соответствие
основным требованиям директивы о ме
дицинских изделиях 93/42/EEC.
Сертификационный знак для изделий,
экспортируемых в Российскую Федера
цию и страны СНГ
Указания по применению
•
Чтобы обеспечить сопоставимость данных, всегда из-
меряйте кровяное давление в одно и то же время суток.
•
Отдохните в течение 5минут перед каждым измерением
давления!
•
При проведении нескольких сеансов измерения у одно-
го пользователя интервал между измерениями должен
составлять 5минут.
•
В течение как минимум 30 минут перед измерением
следует воздерживаться от приема пищи и жидкости,
курения или физических нагрузок.
•
При наличии сомнений относительно полученных ре-
зультатов повторите измерение.
•
Результаты измерений, полученные Вами самостоя-
тельно, предназначены исключительно для Вас и не могут заменить медицинского обследования!
Обсудите результаты Ваших измерений с врачом, ни в
коем случае не используйте их для принятия самостоятельных решений относительно лечения (например, о
приеме лекарств и их дозировке)!
•
Не используйте прибор для измерения кровяного дав-
ления у новорожденных детей и у женщин, страдающих
86
-
-
Page 87

преэклампсией. Перед использованием прибора для
измерения кровяного давления во время беременности
рекомендуется проконсультироваться с врачом.
•
В случае ограничений кровоснабжения на одной руке в
результате хронических или острых заболеваний кровеносных сосудов (в том числе сужения сосудов) точность
измерения кровяного давления на запястье также ограничена. В этом случае используйте прибор для измерения кровяного давления на плече.
•
Данный прибор не предназначен для использования
лицами (включая детей) с ограниченными физическими,
сенсорными или умственными способностями, или лиц
с недостаточными знаниями или опытом, за исключением случаев, когда за ними осуществляется надлежащий
надзор со стороны ответственного за них лица, либо
они получили от этого лица указания по использованию
прибора. Необходимо следить за детьми и не разрешать им играть с прибором.
•
Заболевания системы кровообращения могут привести
к неправильным результатам измерения или снижению
их точности. Погрешности в результатах измерения
также возможны при пониженном кровяном давлении,
диабете, нарушениях кровоснабжения и сердечного
ритма, при ознобе или треморе.
•
Не используйте прибор для измерения кровяного дав-
ления вместе с высокочастотным хирургическим прибором.
•
Применяйте прибор только для лиц с обхватом запя-
стья, предусмотренным параметрами прибора.
•
Обратите внимание на то, что во время накачивания
может быть нарушена подвижность соответствующей
части тела.
•
Во время измерения кровяного давления не допускает-
ся прерывание циркуляции крови на длительное время.
При сбое в работе прибора снимите манжету с руки.
•
Избегайте длительного давления в манжете и частых из-
мерений. Вызванное ими нарушение кровообращения
может привести к травмам.
•
Убедитесь в том, что к кровеносным сосудам руки, на
которую накладывается манжета, не подсоединено медицинское оборудование (через внутрисосудистый доступ, артериовенозный шунт или при внутрисосудистой
терапии).
•
Не используйте манжету у женщин, перенесших ампута-
цию груди.
•
Во избежание дальнейших повреждений не наклады-
вайте манжету на раны.
•
Накладывайте манжету только на запястье. Не накла-
дывайте манжету на другие части тела.
•
Питание прибора для измерения кровяного давления
производится исключительно от батареек.
•
В целях экономии энергии батареек прибор для изме-
рения кровяного давления отключается автоматически,
если в течение 2минут не была нажата ни одна кнопка.
•
Допускается использование прибора только в целях,
описываемых в данной инструкции по применению.
Изготовитель не несет ответственности за ущерб, вызванный неквалифицированным или неправильным использованием прибора.
87
Page 88

Указания по хранению и уходу
•
Прибор для измерения кровяного давления состоит из
прецизионных и электронных компонентов. Точность
измерений и срок службы прибора зависят от бережного обращения с ним:
— Защищайте прибор от ударов, влажности, загрязне-
ния, сильных колебаний температуры и прямых сол-
нечных лучей.
— Не роняйте прибор.
— Не используйте прибор вблизи сильных электромаг-
нитных полей, держите его на значительном расстоя-
нии от радиоустановок или мобильных телефонов.
•
Если прибор не используется длительное время, извле-
ките батарейки.
Обращение с элементами питания
• При попадании жидкости из аккумулятора на кожу или
в глаза необходимо промыть соответствующий участок
большим количеством воды и обратиться к врачу.
•
Опасность проглатывания мелких частей! Маленькие дети могут проглотить батарейки и подавиться
ими. Поэтому батарейки необходимо хранить в недоступном для детей месте!
• Обращайте внимание на обозначение полярности: плюс
(+) и минус (-).
• Если батарейка потекла, очистите отделение для батареек сухой салфеткой, надев защитные перчатки.
• Защищайте батарейки от чрезмерного воздействия тепла.
•
Опасность взрыва! Не бросайте батарейки в огонь.
• Не заряжайте и не замыкайте батарейки накоротко.
• Если прибор длительное время не используется, извлеките из него батарейки.
• Используйте батарейки только одного типа или равноценных типов.
• Заменяйте все батарейки сразу.
• Не используйте перезаряжаемые аккумуляторы!
• Не разбирайте, не открывайте и не разбивайте батарейки.
Указания по ремонту и утилизации
•
Не выбрасывайте использованные батарейки в быто-
вой мусор. Утилизируйте использованные батарейки в
предусмотренных для этого пунктах сбора.
•
Не разбирайте прибор. Несоблюдение этого требова-
ния ведет к потере гарантии.
•
Ни в коем случае не ремонтируйте и не регулируйте
прибор самостоятельно. В противном случае надежность работы прибора больше не гарантируется.
•
Ремонтные работы должны производиться только сер-
висной службой или авторизованными торговыми представителями. Перед предъявлением претензий проверьте и при необходимости замените батарейки.
•
Винтересах защиты окружающей среды
по окончании срока службы следует утилизировать прибор отдельно от бытового мусора.
Утилизация должна производиться через соответствующие пункты сбора вВашей стране. Прибор
следует утилизировать согласно Директиве ЕС по от-
88
Page 89

ходам электрического и электронного оборудова-
SYS mmHg
ния – WEEE (Waste Electrical and Electronic Equipment).
Припоявлении вопросов обращайтесь вместную коммунальную службу, ответственную заутилизацию отходов.
3. Описание прибора
1. Шкала оценки результатов измерения
2. Интерфейс USB
3. Дисплей
4. Индикация положения (на высоте сердца)
5. Кнопка сохранения M1
6. Кнопка сохранения M2
7. Кнопка START/STOPP
8. Крышка отделения для батареек
9. Манжета на запястье
3
2
1
4
5
M1
O
M2
k
6
7
8
9
Индикация на дисплее:
1. Оценка результатов измерений
2. Время и дата
3. Систолическое давление
4. Диастолическое давление
5. Символ нарушения сердечного ритма
Символ пульса
6. Измеренное значение пульса
7. Пользовательская память /
8. Накачивание, выпускание воздуха (стрелка)
9. Номер ячейки памяти/индикация памяти
среднее значение ( A ), утром (
AM
), вечером (
10. Индикатор уровня заряда батарейки
11. Символ передачи данных по Bluetooth®
1 2
11
3
10
9
8
7
4
56
89
PM
)
Page 90

4. Подготовка к измерению
Установка батарейки
• Снимите крышку от-
деления для батареек с
правой стороны прибора.
•
Вставьте две алкали-
новые батарейки 1,5 В Micro (тип LR03). Обязательно
проследите за тем, чтобы батарейки были установлены
с правильной полярностью в соответствии с маркировкой. Не используйте заряжаемые аккумуляторы.
•
Снова тщательно закройте крышку отделения для бата-
реек.
Если мигает символ смены батарейки
плее появляется E6, то проведение измерений невозможно, следует полностью заменить батарейки.
Все элементы дисплея отобразятся на короткое время, на
дисплее будет мигать индикация
время, выполнив описанные ниже действия.
Утилизация батареек
• Выбрасывайте использованные, полностью разряжен-
ные батарейки в специальные контейнеры, сдавайте
впункты приема спецотходов или вмагазины электрооборудования. Закон обязывает пользователей обеспечить утилизацию батареек.
24 ч
или на дис-
. Установите дату и
• Следующие знаки предупреждают оналичии
вбатарейках токсичных веществ:
Pb = свинец,
Cd = кадмий,
Hg = ртуть.
Настройка часового формата, времени и даты
В этом меню можно последовательно настроить следующие функции.
Формат
времени
Обязательно установите дату и время. Только так можно
сохранять в память и выводить на экран измеренные значения с правильной датой и временем.
Удерживая нажатой кнопку сохранения M1 или M2,
можно быстрее настроить значения.
Формат времени
•
Удерживайте кнопку START/STOP нажа-
той в течение 5секунд.
•
С помощью кнопок сохранения M1/M2 вы-
берите желаемый часовой формат и подтвердите выбор нажатием кнопки START/STOP
Дата
На дисплее замигает индикация года.
•
С помощью кнопок сохранения M1/M2
выберите нужный год и подтвердите выбор нажатием кнопки START/STOP .
90
Дата
➔
➔
Время
.
Page 91

На дисплее замигает индикация месяца.
1 2 3
1 cm
M1
M2
O
k
M1
M2
O
k
M1
M2
O
k
•
С помощью кнопок сохранения M1/M2 выбе-
рите нужный месяц и подтвердите выбор нажатием кнопки START/STOP .
На дисплее замигает индикация дня.
•
С помощью кнопок сохранения M1/M2 выбери-
те день и подтвердите выбор нажатием кнопки
START/STOP
.
Если выбирается 12-часовой формат, последователь-
ность отображения дня и месяца меняется.
Время
На дисплее замигают часы.
•
С помощью кнопок сохранения M1/M2 выбе-
рите нужное количество часов и подтвердите
выбор нажатием кнопки START/STOP .
На дисплее замигает число минут.
•
С помощью кнопок сохранения M1/M2 выбе-
рите нужное число минут и подтвердите вы-
бор нажатием кнопки START/STOP .
После установки всех данных прибор автоматически отключится.
Bluetooth
®
На дисплее замигает символ Bluetooth®.
•
С помощью кнопок сохранения M1/M2 включите (за-
мигает символ Bluetooth®) или отключите (символ
Bluetooth® не будет отображаться на дисплее) автома-
тическую активацию переноса данных через Bluetooth®
и подтвердите выбор нажатием кнопки ВКЛ./ВЫКЛ. .
Во время переноса данных через Bluetooth® расходу-
ется заряд аккумулятора.
5. Измерение кровяного давления
Накладывание манжеты
•
Оголите левое запястье. Следите за тем, чтобы кровос-
набжение руки не было нарушено из-за слишком узкой
одежды и т.п.
Наложите манжету на внутреннюю сторону запястья.
•
Зафиксируйте манжету с помощью застежки-липучки
таким образом, чтобы верхний край прибора находился ниже подушечки у основания большого пальца руки
примерно на 1см.
•
Манжета должна плотно облегать запястье, но не стяги-
вать его.
Правильное положение тела
•
Отдохните в течение 5минут перед каждым измерени-
ем давления! В противном случае возможны отклонения
результатов измерения.
91
Page 92

•
Измерение можно проводить
сидя или лежа. Для изме-
рения кровяного давления
займите удобное положение
сидя. Спина и руки должны
иметь опору. Не скрещи-
вайте ноги.
ни ровно на пол. Необходимо подпереть руку и согнуть
ее в локте. Обязательно следите за тем, чтобы манжета
находилась на уровне сердца. В противном случае воз-
можны значительные отклонения результатов измерения.
Расслабьте руку и ладони. Для подсказки в приборе уста-
новлена панель со значком O.K., которая поможет Вам
выбрать правильное положение прибора для измерения
кровяного давления. Значок O.K. на индикаторе означает,
что выбрано верное положение.
•
Чтобы избежать искажения результатов, во время из-
мерения следует вести себя спокойно и не разговари-
вать.
Измерение кровяного давления
Наложите манжету, как описано выше, и займите удобное для измерения положение.
•
Для запуска прибора для измерения
кровяного давления нажмите кнопку
START/STOP
на дисплее загорятся все индикато-
ры.
Процесс измерения начнется автоматически через 3секунды.
Поставьте ступ-
. На короткое время
Измерение осуществляется во время накачивания манжеты воздухом.
Измерение можно прервать в любой момент, нажав
кнопку START/STOPP .
Как только прибор распознает пульс, отобразится
символ пульса.
•
Отобразятся результаты измерения
систолического давления,
диастолического давления и
пульса.
•
Сообщение E_ появляется, если измерение не удалось
выполнить правильно. Прочитайте главу «Сообщение об ошибке/устранение неисправностей» в данной инструкции по применению и
повторите измерение.
•
Теперь при помощи кнопок сохранения M1 или M2 вы-
берите пользовательскую память. Если Вы не выбрали
пользовательскую память, то результат измерения будет сохранен в пользовательской памяти последнего
пользователя. На дисплее появляется соответствующий
символ M1 или M2.
•
Выключите прибор для измерения кровяного давления,
нажав кнопку START/STOP . При этом результат измерения сохранится в выбранной пользовательской памяти.
92
Page 93

Если активирована функция передачи данных через
Bluetooth®, то после нажатия кнопки ВКЛ./ВЫКЛ. начнется передача данных.
• На дисплее замигает символBluetooth®. В течение 30
секунд прибор для измерения кровяного давления устанавливает связь с приложением.
• Как только соединение будет установлено, символ
Bluetooth® перестанет мигать. Все результаты изме-
рения автоматически передаются приложению. После
успешной передачи данных прибор отключается.
•
Если втечение 30 секунд прибор несможет установить
соединение сприложением, символ Bluetooth
®
погаснет
иприбор для измерения кровяного давления отключится через 3 минуты.
Если Вы забудете выключить прибор, он выключится автоматически через 3минуты. Даже в этом случае результат измерения будет сохранен в выбранной или последней использованной пользовательской памяти.
Перед повторным измерением подождите
не менее 5минут!
Оценка результатов
Нарушения сердечного ритма
Данный прибор во время измерения может идентифицировать возможные нарушения сердечного ритма и при их
наличии сообщает о них после измерения символом
.
Это может указывать на аритмию. Аритмия— это болезнь,
при которой возникает аномальный сердечный ритм, вызванный сбоями в биоэлектрической системе, регулирующей биение сердца. Симптомы (неравномерное или пре-
93
ждевременное сердцебиение, медленный или слишком
быстрый пульс) могут быть вызваны заболеваниями сердца, возрастом, предрасположенностью к соответствующим
заболеваниям, чрезмерным употреблением кофе, никотина
и алкоголя, стрессом или недостатком сна. Аритмия может
быть выявлена только в результате обследования у врача.
Если после первого измерения на дисплее отображается
символ , повторите измерение. Обратите внимание на
то, что в течение 5минут перед измерением нельзя заниматься активной деятельностью, а во время измерения
нельзя говорить или двигаться. Если символ появляется часто, обратитесь к врачу. Самодиагностика и самолечение на основе результатов измерения могут быть опасны. Обязательно следуйте рекомендациям своего врача.
Оценка результатов измерений:
Оценку результатов измерений можно провести спомощью таблицы, представленной ниже.
Однако эти стандартные значения служат только общим
ориентиром, так как индивидуальные значения кровяного
давления уразных людей варьируются взависимости от
принадлежности ктой или иной возрастной группе ит.п.
Важно регулярно консультироваться сврачом. Врач определит Ваши индивидуальные значения нормального кровяного
давления, атакже значения, выше которых кровяное давление следует классифицировать как опасное.
Градация на дисплее и шкала на приборе показывают,
вкаком диапазоне находится измеренное давление. Если
значения систолического идиастолического давления находятся вразных диапазонах (например, систолическое
давление — высокое вдопустимых пределах, адиастоли-
Page 94

ческое — нормальное), то графическое деление на приборе всегда будет отображать более высокие пределы, как
вописанном примере: высокое вдопустимых пределах.
Диапазон
значений
кровяного
давления
Степень3:
тяжелая
гипертония
Степень2:
пограничная
гипертония
Степень1:
слабая
степень
гипертонии
Высокое
вдопу
стимых
пределах
Нормальное
Оптимальное
Источник: ВОЗ, 1999 (World Health Organization)
Систолическое
давление
(вммрт.ст.)
≥ 180 ≥ 110 обращение
160–179 100–109 обращение
140–159 90–99 регулярное
130–139 85–89 регулярное
-
120–129 80–84 Самоконтроль
< 120 < 80 Самоконтроль
Диастолическое
давление
(вммрт.ст.)
Рекомендуе
мые меры
кврачу
кврачу
посещение
врача
посещение
врача
-
6. Просмотр и удаление результатов
измерения
Пользовательская память
Результаты каждого успешного измерения сохраняются
суказанием даты ивремени измерения. Когда количество
сохраненных результатов измерения превышает 60, более
ранние данные перезаписываются.
•
Спомощью кнопок сохранения M1 или M2 выберите
нужную пользовательскую память (
), когда прибор
выключен.
–
Для просмотра сохраненных
в пользовательской памяти результатов измерений нажмите кнопку сохранения M1.
–
Для просмотра сохраненных
в пользовательской памяти результатов измерений нажмите кнопку сохранения M2.
Надисплее появится среднее значение всех измерений.
Если Bluetooth® активирован (на дисплее отображается
мигающий символ ), прибор для измерения кровяного
давления пытается установить соединение с приложением. Нажатием кнопки M1 Вы можете прервать передачу данных, на дисплее отобразятся средние значения.
Нажатием кнопки M2 Вы можете прервать передачу данных, и на дисплее отобразятся результаты измерения
пользовательской памяти . Символ исчезнет сдисплея.
Кнопки становятся неактивными после установки соединения ив процессе передачи данных.
Если Вы выбрали пользовательскую память1,
нажмите кнопку сохранения M1.
Если Вы выбрали пользовательскую память2,
нажмите кнопку сохранения M2.
94
Page 95

Средние значения
A
AM
PM
.
.
.
На дисплее замигает
Отобразится среднее значение всех
сохраненных в данной ячейки памяти
результатов измерений данного
пользователя.
•
Нажмите соответствующую кнопку
сохранения (M1 или M2).
На дисплее замигает
Отобразится среднее значение
результатов утренних измерений за
последние 7дней (утро: 5.00–9.00).
•
Нажмите соответствующую кнопку
сохранения (M1 или M2).
На дисплее замигает
Отобразится среднее значение
результатов вечерних измерений за
последние 7дней (вечер: 18.00–20.00).
Результаты отдельных измерений
•
При повторном нажатии соответ-
ствующей кнопки сохранения (M1
или M2) на дисплее отобразится
результат последнего измерения
(в качестве примера используется
измерение 03).
•
Если еще раз нажать кнопку сохранения (M1 или M2),
можно просмотреть результаты отдельных измерений.
•
Для выключения прибора нажмите кнопку START/
Удаление результатов измерения
• Для удаления содержимого соответствующей пользова-
•
Запустите запрос средних результатов измерений.
•
Нажмите обе кнопки сохранения M1 / M2 и удерживай-
Н
Все значения текущей пользователь-
ской памяти будут удалены.
После этого прибор автоматически
отключится.
Удаление результатов отдельных измерений
Для удаления отдельных результатов измерения соответствующей пользовательской памяти сначала выберите
пользовательскую память.
•
Запустите запрос результатов отдельных измерений.
•
Удерживайте нажатой втечение 5секунд кнопку сохра-
•
Выбранный результат измерения будет удален. Надис-
95
.
STOP
Из меню можно в любое время выйти нажатием
кнопки START/STOPP .
тельской памяти выберите пользовательскую память.
те их нажатыми в течение 5секунд.
а дисплее появятся символы CL и 00.
нения M1 / M2 взависимости оттого, вкакой пользова-
тельской памяти Вы находитесь.
плее нанекоторое время отобразится значение CL 00.
Page 96

•
Если Вы хотите удалить другие результаты измерений,
повторите действия, описанные выше.
Вы в любое время можете выключить прибор нажатием
кнопки ВКЛ./ВЫКЛ. .
7. Передача результатов измерения
Передача через интерфейс USB
С помощью USB-кабеля подключите Ваш прибор для измерения артериального давления к компьютеру.
Во время измерения давления передача данных не-
возможна.
На дисплее отобразится индикатор
подключения к компьютеру (
те передачу данных на компьютер в программе HealthManager. Во время передачи
данных на дисплее отображается анимация. В случае успешной передачи данных
появится сообщение, как показано на рис.
1. Если во время передачи данных произошла ошибка, на дисплее появится соответствующее сообщение, представленное на
рис. 2. В этом случае прервите соединение
с компьютером и перезапустите передачу
данных.
Прибор для измерения артериального давления автоматически отключается, если он не используется в течение
30секунд, а также в случае прерывания связи с компьютером.
PC
). Запусти-
р
ис. 1
р
ис. 2
96
Передача данных спомощью Bluetooth
УВас есть возможность перенести измеренные исохраненные на приборе значения на смартфон при помощи
Bluetooth®.
Вам понадобится приложение Beurer HealthManager. Оно
доступно для загрузки вApp Store.
Для переноса данных выполните следующие действия.
Если вменю настроек активирована функция Bluetooth®,
то после проведения измерений передача данных произойдет автоматически. Влевом верхнем углу дисплея появится символ (см. главу 4 «Подготовка кизмерению»).
Шаг 1: BC 85
Активируйте Bluetooth
ре (см. главу 4 «Подготовка к измерению,
Bluetooth®»).
®
®
на Вашем прибо-
Шаг 2: Приложение Beurer HealthManager
Добавьте BC 85 в приложении Beurer
HealthManager в разделе «Настройки/Мои
устройства».
Шаг 3: BC 85
Проведите измерение давления.
Page 97

Шаг 4: BC 85
Передача данных сразу
после измерения:
•
Если активирована
функция передачи данных через Bluetooth
то после подтверждения пользовательской
памяти нажатием кнопки ВКЛ./ВЫКЛ. начнет-
передача данных.
ся
Для передачи данных необходимо запустить
Шаг 4: BC 85
Передача данных вдругое
время:
•
Перейдите врежим вы-
зова данных из памяти
®
,
(гл.7). Выберите нужную
пользовательскую память. Передача данных
через Bluetooth
запущена автоматически.
®
будет
приложение Beurer HealthManager.
Чтобы обеспечить передачу данных без помех, снимите
чехол со смартфона, если он есть. Запустите передачу
данных вприложении Beurer HealthManager.
Словесный товарный знак Bluetooth
логотип являются зарегистрированными товарными знаками Bluetooth
®
SIG, Inc. Любое использование данных
®
и соответствующий
знаков компанией Beurer GmbH осуществляется по лицензии. Прочие торговые знаки и наименования являются
собственностью соответствующих обладателей.
8. Сообщение об ошибке/устранение
ошибок
При возникновении ошибок на дисплее появляется сообщение об ошибке E_
.
Сообщения об ошибках появляются, если
•
не удалось измерить пульс:
•
во время измерения Вы двигаетесь или говорите: E2;
•
манжета прилегает слишком плотно или слишком
E 1
;
слабо: E3;
•
произошли ошибки во время измерения: E4;
•
давление накачивания превышает 300 ммрт.ст.: E5;
•
батарейки почти разряжены E6;
• не удалось передать данные по Bluetooth®: .
В таких случаях выполните повторное измерение. Помните, что Вы не должны двигаться или говорить в процессе
измерения. При необходимости установите батарейки на
место заново или замените их.
9. Очистка и хранение прибора и манжеты
•
Производите очистку прибора и манжеты с осторожно-
стью. Используйте только слегка увлажненную салфетку.
•
Не используйте чистящие средства или растворители.
•
Ни в коем случае не опускайте прибор и манжету в воду,
так как попадание воды приведет к повреждению прибора и манжеты.
•
При хранении на приборе и манжете не должны стоять
тяжелые предметы. Извлеките батарейки.
97
Page 98

10. Технические данные
Модель BC 85
Тип BC 80
Метод измерения Осциллометрическое неинвазивное
Диапазон измерения Давление в манжете 0–300ммрт.ст.,
Точность индикации ± 3ммрт.ст. для систолического,
Погрешность
измерения
Память 2блока по 60ячеек памяти
Размеры Д97ммxШ68ммxВ22мм
Масса Примерно 108г (без батареек)
Размер манжеты 135–230мм
Допустимые условия
эксплуатации
измерение кровяного давления на
запястье
систолическое 50–250ммрт.ст.,
диастолическое 30–200ммрт.ст.,
пульс 40–180ударов/мин
± 3ммрт.ст. для диастолического,
пульс ± 5% от указываемого значения
Максимально допустимое стандарт
ное отклонение по результатам клинических испытаний:
8ммрт.ст. для систолического/
8ммрт.ст. для диастолического
давления
от +5 до +40°C, относительная
влажность воздуха 15–93% (без об
разования конденсата)
-
Допустимые условия
хранения
Электропитание 2батарейки типа ААА
Срок службы
батареек
Принадлежности Инструкция по применению, 2бата
Классификация Внутреннее питание, IPX0, без AP
Передача данных
спомощью
беспроводной
технологии Blue-
®
tooth
От -25 до +70°C, относительная влажность воздуха 15–93%,
давление окружающей среды
700–1060гПа
Примерно 300измерений, в зависи
мости от высоты кровяного давления
или давления накачивания
рейки типа ААА 1,5В, коробка для
хранения
или APG, продолжительное исполь
зование, рабочая часть типа BF
Прибор для измерения кровяного
давления работает сBluetooth® low
energy technology,
частотный диапазон 2,4ГГц,
совместим сосмартфонами
ипланшетными компьютерами,
оснащенными Bluetooth 4.0
Список поддерживаемых
смартфонов ипланшетных
компьютеров
•
Данный прибор соответствует европейскому стандарту
-
EN60601-1-2 и требует особых мер предосторожности
в отношении электромагнитной совместимости. Следует учесть, что переносные и мобильные высокочастотные коммуникационные устройства могут повлиять на
98
1,5В
-
-
-
Page 99

работу данного прибора. Более точные данные можно
запросить по указанному адресу сервисной службы или
найти в конце инструкции по применению.
•
Прибор соответствует требованиям директивы ЕС
93/42/EEC о медицинском оборудовании, закона о медицинском оборудовании, а также европейских стандартов EN1060-1 (неинвазивные приборы для измерения кровяного давления, часть1: общие требования) и
EN1060-3 (неинвазивные приборы для измерения кровяного давления, часть3: дополнительные требования
к электромеханическим системам измерения кровяного
давления) и IEC80601-2-30 (медицинские электрические
приборы, часть 2-30: особые предписания по обеспечению безопасности, включая основные характеристики
автоматизированных неинвазивных приборов для измерения кровяного давления).
•
Точность данного прибора для измерения кровяного
давления была тщательно проверена, прибор был разработан с расчетом на длительный срок эксплуатации.
При использовании прибора в медицинских учреждениях следует выполнять метрологический контроль с
помощью соответствующих средств. Подробные данные для проверки точности прибора можно запросить
в сервисном центре.
•
Настоящим мы гарантируем, что данное изделие соот-
ветствует европейской директиве R&TTE (Директива ЕС
по средствам радиосвязи и телекоммуникационному
оконечному оборудованию) 1999/5/EC.
Обратитесь в сервисный центр по указанному адресу
для получения подробных сведений— например, осоответствии директивам ЕС.
11. Гарантия
Мы предоставляем гарантию на дефекты материалов и изготовления этого прибора на срок 36 месяцев со дня продажи через розничную сеть.
Гарантия не распространяется:
– на случаи ущерба, вызванного неправильным использо-
ванием,
– на быстроизнашивающиеся части (батарейки, манжета),
– на дефекты, о которых покупатель знал в момент покупки,
– на случаи собственной вины покупателя.
Товар подлежит декларированию:
Срок эксплуатации изделия: минимум 5 лет
Фирма-изготовитель: Бойрер Гмбх,
Софлингер штрассе 218,
89077-УЛМ, Германия
Фирма-импортер: OOO БОЙРЕР, 109451 г. Москва,
ул. Перерва 62, корп. 2, офис 3
Сервисный центр: 109451 г. Москва, ул. Перерва 62,
корп. 2,
Тел(факс) 495 – 658 54 90
bts-service@ctdz.ru
Дата продажи
Подпись продавца
Штамп магазина
Подпись покупателя
99
Возможны ошибки и изменения
Page 100

POLSKI
Spis treści
1. Informacje o urządzeniu .................................................100
2. Ważne wskazówki ..........................................................100
3. Opis urządzenia ..............................................................103
4. Przygotowanie do pomiaru ............................................104
5. Pomiar ciśnienia tętniczego ............................................106
6. Odczyt i usuwanie wyników pomiaru .............................108
7. Przenoszenie danych pomiarowych .............................110
8. Komunikaty błędów/usuwanie błędów .........................111
9. Czyszczenie i dbałość o urządzenie oraz mankiet .......111
10. Dane techniczne ...........................................................111
Szanowna Klientko, szanowny Kliencie!
Cieszymy się, że wybrali Państwo nasz produkt. Nasza marka
jest znana z wysokiej jakości produktów poddawanych surowej
kontroli, przeznaczonych do ogrzewania, łagodnej terapii, pomiaru ciśnienia i badania krwi, pomiaru ciężaru ciała, masażu,
zabiegów upiększających i polepszania właściwości powietrza.
Należy dokładnie przeczytać i zachować niniejszą instrukcję
obsługi, przechowywać ją w miejscu dostępnym dla innych
użytkowników i przestrzegać podanych w niej wskazówek.
Z poważaniem
Zespół Beurer
1. Informacje o urządzeniu
Ciśnieniomierz Beurer BC85 należy sprawdzić pod kątem zewnętrznych uszkodzeń opakowania oraz kompletnej zawartości.
Ciśnieniomierz nadgarstkowy służy do nieinwazyjnego pomiaru i monitorowania ciśnienia tętniczego krwi u osób dorosłych.
Umożliwia on łatwy i szybki pomiar ciśnienia krwi, a także
zapisanie zmierzonych wartości i wyświetlenie ich w formie
wykresu. Użytkownik jest ostrzegany o wystąpieniu zaburzeń
rytmu serca.
Zmierzone wartości są klasyfikowane i oceniane w formie
graficznej.
2. Ważne wskazówki
Objaśnienie symboli
W instrukcji obsługi, na opakowaniu i tabliczce znamionowej
urządzenia oraz akcesoriów znajdują się następujące symbole:
Uwaga
Wskazówka
Ważne informacje
100
 Loading...