

Page 1

AS 50
G
Activity sensor
Instruction for use
D
Aktivitätssensor
Gebrauchsanleitung
Beurer GmbH • Söinger Str. 218 • D-89077 Ulm (Germany)
Tel.: +49 (0)7 31 / 39 89-144 • Fax: +49 (0)7 31 / 39 89-255
www.beurer.de • Mail: kd@beurer.de
Page 2

Page 3

TABLE OF CONTENTS
Scope of delivery.............................................................................2
Important Notes...............................................................................3
Activity, health and fitness.............................................................5
Interesting facts about the activity sensor....................................6
Functions of the activity sensor.....................................................9
Getting started...............................................................................10
General operation of the activity sensor.....................................12
Buttons on the activity sensor ..................................................12
Display...................................................................................... 13
Power saving mode..................................................................14
Basic settings ................................................................................15
Recording the activity...................................................................19
Overview ..................................................................................19
Display activity data.................................................................. 20
Attaching the activity sensor..................................................... 21
Change basic settings .............................................................. 23
Switch off pace measurement .................................................. 27
Storage function............................................................................28
The EasyFit and Healthmanager software products..................29
Technical specifications and batteries........................................30
Frequently asked questions and answers ..................................31
List of abbreviations......................................................................33
Index ...............................................................................................34
G
B
1
Page 4

SCOPE OF DELIVERY
Activity sensor
Belt clip
Wristband
PC interface cable (USB)
In addition:
Operating instructions
Short instructions "Quick Start"
2
Page 5
IMPORTANT NOTES
Please carefully read through these operating instructions, keep it for
future reference and also make it available to others. Pay attention to
all information in these operating instructions!
Activity
Did you know that walking at least 10.000 paces or exercising for
half an hour daily (depending on the person's health condition, less
for older persons, more for children) is good for your health?
The activity sensor is designed as a running sensor. It measures
your paces when you walk or jog and displays your daily amount of
exercise.
Application
The activity sensor is only intended for private use.
The activity sensor may only be used in the manner outlined in the
operating instructions. The manufacturer is not liable for damages
that are caused by improper or incorrect use.
The activity sensor should be temporarily deactivated for specific
activities such as driving a car to avoid incorrect measurements.
Please refer to the Beurer HR Monitors to record the training and
measure the pulse of any other kind of sport. As both the EasyFitcompatible Beurer HR Monitors as well as the Beurer Activity Sensor can transmit the values to the EasyFit Software, comprehensive evaluations are possible for all your physical activities.
G
B
3
Page 6

Cleaning and care
From time to time, clean the activity sensor carefully with soapy
water. Do not put the device in water.
Repair, Accessories and Disposal
Prior to use, you have to ensure that the activity sensor is free of
damage. If in doubt, do not use the activity sensor and consult your
sales representative or the customer service address provided.
Repairs may only be conducted by customer service or authorized
dealers. Please do not in any case attempt to repair the device! In
the case of complaints, please consult your dealer or the service
address. If you have a complaint, please replace the battery beforehand.
Use the device only with the original accessories of Beurer.
Avoid contact with sunscreen or the like since these can cause
damage to the imprint or plastic components.
The warranty expires if the screws are unscrewed or due to im-
proper use.
Please dispose the activity sensor and used batteries
of the device in accordance with Waste Electric and
Electronic Equipment 2002/96/EC - WEEE. For inquiries, please contact the municipal authority responsible
for disposal in your area.
4
Page 7
ACTIVITY, HEALTH AND FITNESS
Exercise is a prerequisite for healthy living. Physical activity keeps
you fit and reduces the risk of cardiovascular diseases. If you exercise, it also helps you to reduce weight and you will find that it stabilizes your psychological well-being.
Physical activities refer to all energy consuming exercises. A significant share includes daily activities such as walking, bicycling, climbing
stairs and housework. The Beurer Activity Sensor is useful for assessing and recording your daily physical activity objectively. In this way it
can also motivate you to increase your exercise in everyday life. At
least 7.000 – 10.000 paces or 30 minutes exercise a day would be
ideal (Source: acc. to WHO, Dr. Catrine Tudor-Locke, Dr. David R.
Bassett jr.).
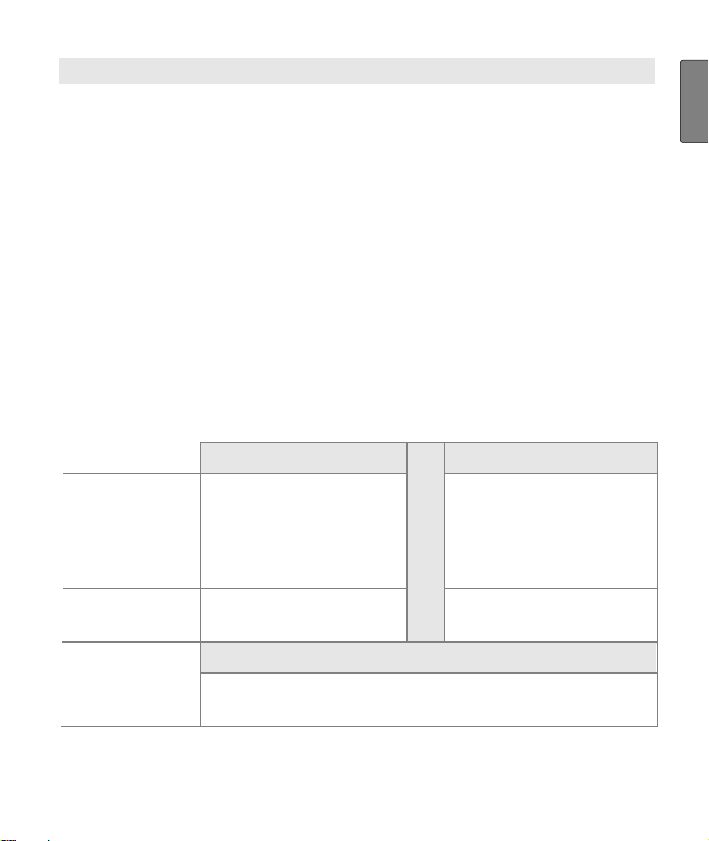
Physical activity recommendations for adults (based on the WHO
recommendations, 2002):
Average intensity High intensity
Description For example:
Dancing, gardening,
housework or brisk
walking
Activity time 30 minutes a day,
5 days a week
AND
Muscle build-
up
8-10 exercises with 8-12 repetitions each, 2 days a
week
For example:
Running, aerobics,
competitive sports
OR
such as football
20 minutes a day,
3 days a week
G
B
5
Page 8

INTERESTING FACTS ABOUT THE ACTIVITY SENSOR
This activity sensor enables you to check your daily amount of exercise. It gives you an overview of your daily physical activity, determines the number of your paces and thus calculates your calorie
consumption.
The activity sensor has a dual display function which can show you,
for example, the time and number of paces simultaneously. You can
specify your typical pace length with the basic settings, so that the
activity sensor is able to calculate your activity data from the walking/running speed. Depending on what type of exercise person you
are or what type of activity you do - slow, gentle movements or quick
hard movements - the sensitivity of the activity sensor can be adjusted in five steps.
Reward system
Your activity sensor has a "reward system", which gives a continual
assessment of your ongoing daily activities. The reward system is
divided into three activity levels. Depending on the level, the device
shows the corresponding symbol.
The following table shows the three levels of activity. The levels are
based either on the number of paces or the duration of the activity. In
turn, the number of paces are divided into two types of activities:
"Quick walking": more than 90 paces per minute
"Normal walking": less than 90 paces per minute
During the walking period it is possible to take breaks of 2 minutes
each which do not interrupt the evaluation.
Example: You have been walking quickly for 5 minutes in one go
and now want to cross a road. You have to wait at the traffic lights
for approx. 2 minutes before you can cross it. You then walk quickly
again for 5 minutes in one go. Your activity sensor now shows you
an activity time of 10 minutes. Even though you had a break of
6
Page 9
2 minutes at the traffic lights and did not walk for 10 minutes in one
go, you have reached the next activity level.
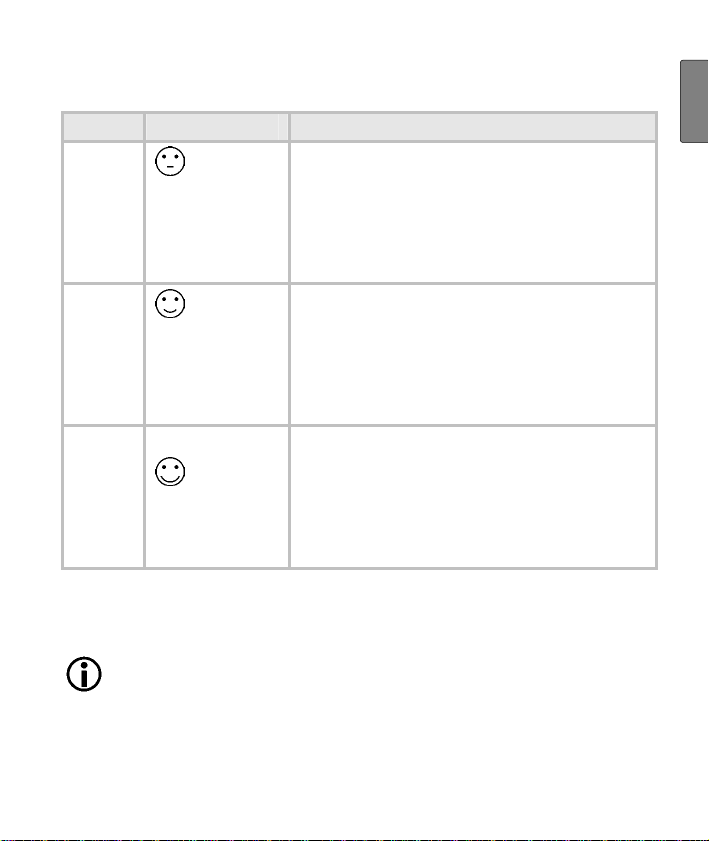
Level Symbol Activity
1
from 3.333 paces "quick walking" and
"normal walking" or
from 10 minutes "quick walking" in
one go. A break of up to 2 minutes is
possible.
G
B
2
from 6.667 paces "quick walking" and
"normal walking" or
from 20 minutes "quick walking" in
one go. A break of up to 2 minutes is
possible.
3
Alternatively
and
from 10.000 paces "quick walking"
and "normal walking" or
from 30 minutes "quick walking" in
one go. A break of up to 2 minutes is
possible.
For individuals with reduced physical fitness, the target daily
amount of exercise can be decreased for "normal walking"
from 10.000 down to 3.000 paces in multiples of 1.000 paces.
The three activity levels are adjusted accordingly by around a
third each. That means for example the 2
reached already after 2.000 paces and the 3
nd
level can be
rd
3.000 paces.
The activity times for each level (10-20-30 minutes) for "quick
walking" cannot be adjusted.
7
level after
Page 10

Analysis of the Training
You can transfer your training data to a computer using the PC interface on your activity sensor (mini USB on the side of the device) and
evaluate it there. The data cable required for this is included in delivery.
The EasyFit and Healthmanager computer software products are
available for free download when you register on the website
www.beurer.de/.com.
The EasyFit computer software controls the transfer of data from
your activity sensor and offers a range of evaluation options, including pulse measurements. In addition, EasyFit provides useful calendar and administrative functions, which also support optimal training
over longer periods of time. Using the software, you can also control
and monitor your weight management.
The Healthmanager computer software evaluates training data,
blood pressure, weight, glucose levels and other heath-related statistics.
8
Page 11

FUNCTIONS OF THE ACTIVITY SENSOR
Activity functions
Number of paces
Total time of activity
Reward system (adjustable)
Calorie consumption in [kcal]
(based on the walking/running
speed)
Fat burning in [g] / [oz]
(based on the walking/running
speed)
Automatic deletion and storage
of the activity values every day
at 00:00 hours
Storage function for 14 days
Total time of activity
Number of paces
Calorie consumption
Fat burning
Saved data can be selected using the software products. Only
the current day's data can be recalled directly on the activity
sensor.
Time functions
Time of day
The date is adjustable and is
transmitted to the PC via the
EasyFit software. The date is
not visible on the display.
Settings
Time of day in [12h] / [24h]
Weight in [kg] / [lb]
Pace length for walking and
running in [cm] / [ft/in]
Sensitivity of the device for
pace counting (5 levels)
Target for ‘normal walking’
(steps)
G
B
9
Page 12

GETTING STARTED
Insert battery/Change battery
If you do not want to insert or change the battery yourself,
please bring it to a watchmaker.
Change the battery in the morning before recording the activity. This is the only way to ensure that none of the daily recordings are overwritten in the computer software.
At first remove the activity sensor from the belt clip (see chapter “Attaching the activity sensor”, section “Wearing the activity sensor on
your belt/trouser waistband“).
The battery compartment of the activity sensor is located on the back
of the monitor. Place the monitor with the front facing downwards on a
soft surface and insert the battery as follows:
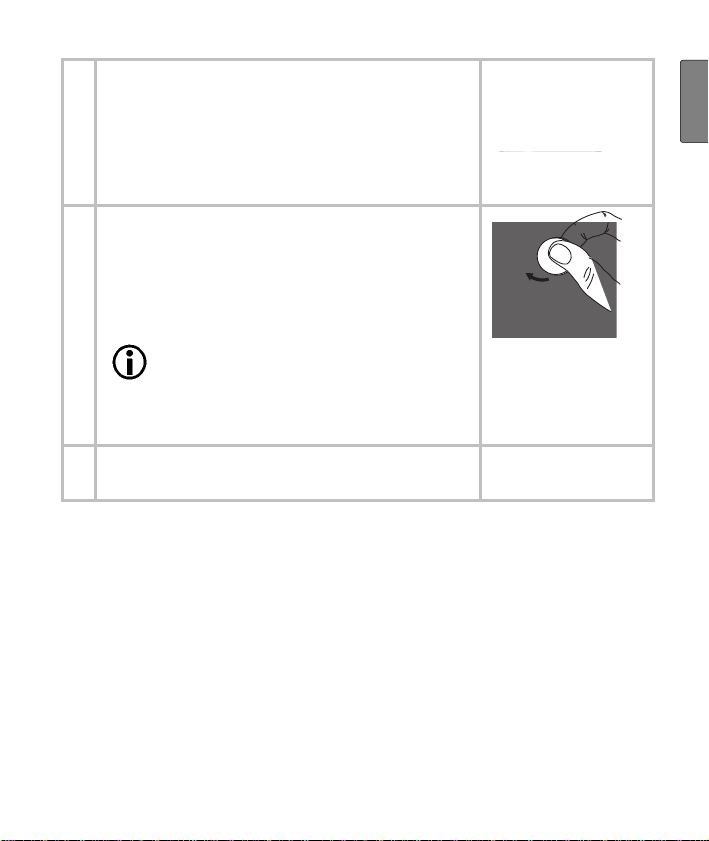
1
Using a coin, turn the lid of the battery
compartment anticlockwise until the lid
comes off.
Remove the battery from the battery compartment with the aid of a pointed, nonmetallic tool, e.g. toothpick.
2
Put the battery into the battery compartment in such a way that the battery is on
top of the spring underneath the clip (1)
and the positive pole (+) faces upwards.
Check the seal. The seal has to lie flat in
the casing and there must be no visible
damage to it. The impermeability cannot
be guaranteed otherwise.
10
Page 13
3
Put the lid of the battery compartment into
the battery compartment so that it is flush
with the casing.
Pay attention that the arrow on the lid and
the arrow on the casing point against each
other.
4
To guarantee continued impermeability,
tighten the lid clockwise with the coin until
it stops.
Caution! Do not continue to turn the
lid, if it cannot be turned into the
battery compartment without resistance. Repeat the process after
changing the position of the lid. The
catch mechanism could be damaged otherwise.
5
Your activity sensor switches automatically
into the setting menu.
G
B
11
Page 14

GENERAL OPERATION OF THE ACTIVITY SENSOR
Buttons on the activity sensor
1
2
Switches between the different settings in the setting menu and activity menu.
Sets values. Keep pressed to accelerate input
of the values.
Switches between the displays of the activity
values.
Pressing the button for 3 seconds in the activity
menu (Display: Activity time - Total number of
paces) switches the pace counter off (no symbol) and on again (symbol
).
12
Page 15
Display
1
Top line
2
Middle line
3
Bottom line
4
Symbols:
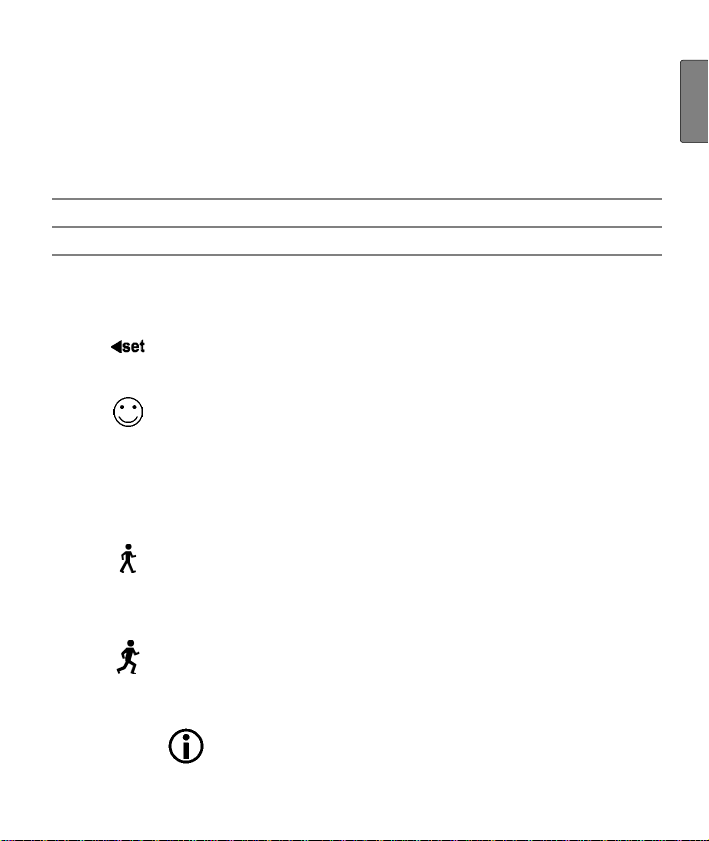
Switches between the different setting displays in the
setting menu (arrow flashing).
Symbols of the reward system, they change depending
on the activity level (once a new activity level has been
reached, the symbol flashes for 1 minute). Once the
highest activity level has been reached, the display
switches between the big and the small Smiley. Press
any button to stop the display switching.
“Walking” symbol. This symbol is displayed if the time
for “normal walking” is longer than the time for “quick
walking” or the number or paces for “normal walking” is
bigger than the number of paces for “quick walking”.
“Running” symbol. This symbol is displayed if the time
for “quick walking” is longer than the time for “normal
walking” or the number or paces for “quick walking” is
bigger than the number of paces for “normal walking”.
G
B
“Normal walking”: < 90 paces per minute
“Quick walking”: > 90 paces per minute
13
Page 16
To continue getting exact results, the battery has to be
replaced as soon as possible after this symbol has been
displayed.
An explanation of the display abbreviations can be found in the list of
abbreviates at the end of the operating instructions.
Power saving mode
In time display press the button for
approx. 3 sec. to switch on the power saving
mode. The display of the activity sensor is
switched off in this mode to increase the battery
life. Only the time of day function is still working.
Pace counting and activity functions are
switched off in the same manner as the display
of the activity sensor. Press any button for
approx. 3 sec. to reactivate the display.
14
Page 17

BASIC SETTINGS
Overview
Adjust values with
Short press = single entry, press and hold = accelerates the entry.
In the setting menu you can:
Adjust your desired target amount of daily exercise for the number
of paces
Set the desired units
Enter your personal weight. The activity sensor uses it to calculate
your calorie consumption and your fat burning during physical activity!
Specify the basic functions of the activity sensor.
Set the time and the date.
After inserting the battery (see chapter "Insert battery/Change battery") you automatically get into the setting menu.
.
15
G
B
Page 18

Set target amount of exercise
for number of paces
StEP 10000 is displayed. The
number of paces flashes.
Set the desired target
amount of exercise (10.000 -
3.000 paces per day) in multiples
of 1.000 paces.
Set weight units
KG is displayed.
Set the desired units:
Kilograms kg or
Pounds lb
This setting also converts the fat
burning unit into grams
ounces
Set weight
KG is displayed.
oz.
g or
Please select your
weight (20-200 kg).
Set stride units
CM is displayed.
Set the desired units:
Centimetres cm or
Feet/Inches ft/in
Set activity data
An important presetting is to
16
Page 19

enter your individual pace length
as accurately as possible.
Run or walk a distance where
you know the exact length (reference distance). For example
the 100 meter track in the athletics stadium.
Count the paces you require
for it.
Divide the reference distance
by the number of paces, and
you will get the step length
(e.g. 100 m / 125 paces =
0.8 m = 80 cm).
CM and are displayed.
Set your pace length
for slow walking (20-250 cm).
CM and are displayed.
Set your pace length
for quick walking (20-250 cm).
Set time format
FORM is displayed. The 24h-
setting blinks.
Set the time of day
format (12h or 24h).
G
B
17
Page 20
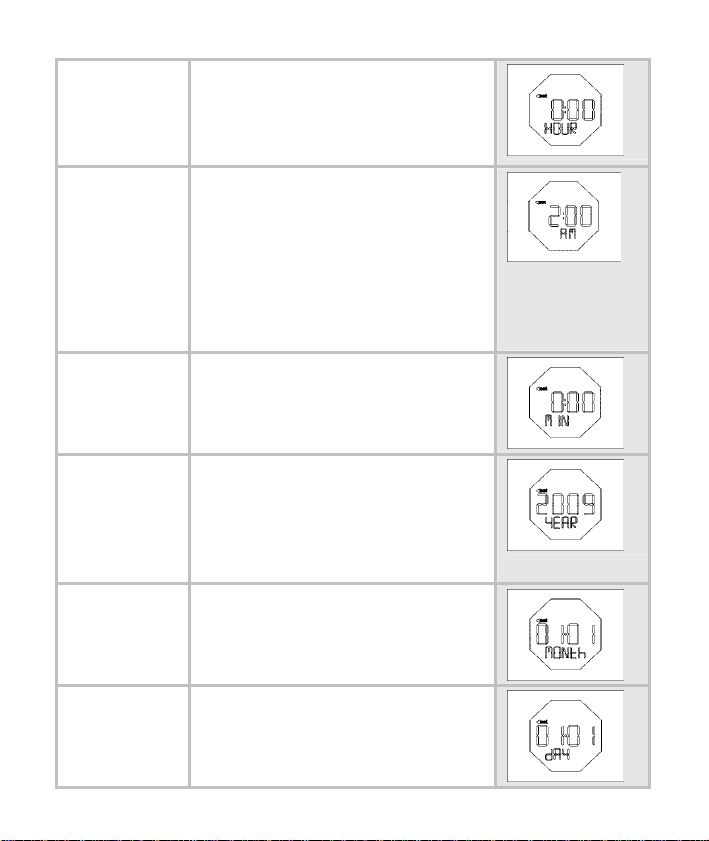
Set time of day
HOUR is displayed. The hour
setting blinks.
Set the hour (0-23).
If the 12h setting is active:
AM is displayed and it blinks.
Set AM or PM:
AM (ante meridiem): for ex-
ample, 2:00 AM means 2:00
PM (post meridiem): for ex-
ample, 2:00 PM means 14:00
MIN is displayed. The minute
setting blinks.
Set the minute (0-59).
Set date
YEAR is displayed. The year
setting blinks.
Set the year (2008-
2050)
MONTH is displayed. The
monthly setting blinks.
Set the month (1-12).
DAY is displayed. The day setting
blinks.
Set the day (1-31).
18
Page 21

RECORDING THE ACTIVITY
Overview
Adjust values with
Short press = single entry, press and hold = accelerates the entry.
.
G
B
19
Page 22
In the activity menu you can:
Display your activity data.
Set the sensitivity of the device for pace
counting.
Change the basic settings of the activity sen-
sor.
Switch off the pace counter.
As soon as you are in the activity menu, your
active time will be displayed in the middle line
(after deletion: 00:00:00) and the paces you
have already walked or run will appear in the
bottom line.
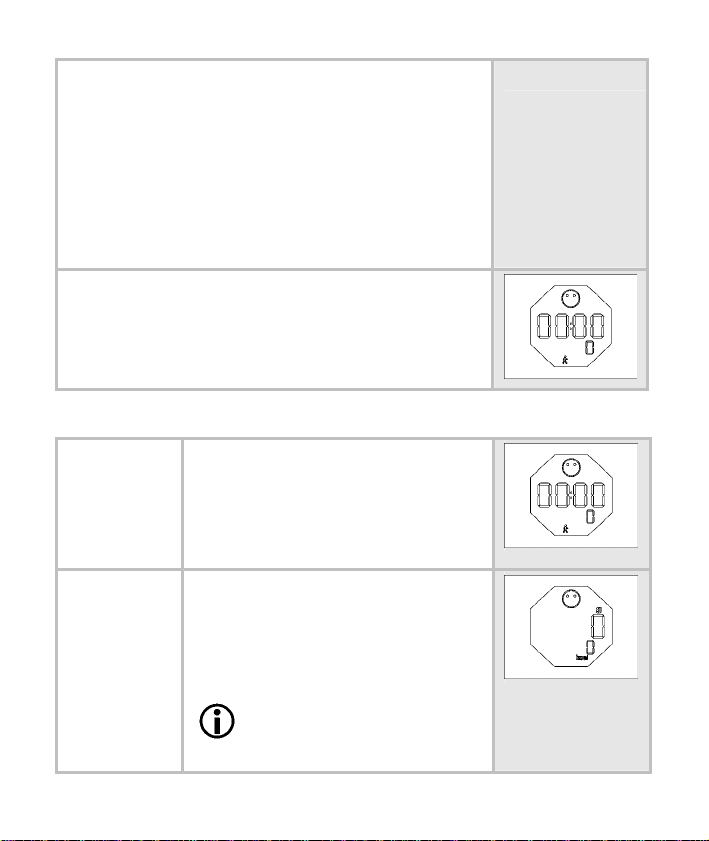
Display activity data
You are in the activity menu.
Display 1:
Middle line: active time
Bottom line: paces already
walked or run
Display 2:
Middle line: fat burning [g] / [oz]
Bottom line: calorie consumption
[kcal]
The calculation of the total
fat and calorie consumption is based on the walking/running speed.
20
Page 23

Display 3:
Middle line: Time of day
Back to Display 1.
Attaching the activity sensor
There are various possibilities to wear the activity sensor: on your
belt/trouser waistband (recommended wearing method), in your trouser pocket or as a wristwatch.
Pay attention to adjust the sensitivity of the device differently
depending on how it is attached. We recommend wearing the
activity sensor on your belt to get the most accurate results of
the device as possible!
Only change between belt clip and wristband if necessary.
Changing too frequently wears out the material of the wristband.
Wearing the activity sensor on your belt/trouser waistband
You can attach your activity sensor to your belt or your trouser waistband with the supplied belt clip. To do this, put the activity sensor into
the belt clip as follows:
Put the casing into the belt clip. Pay
attention that the USB connector (1) is
fixed on the side of the clip with the
notch. The casing has to be firmly and
directly attached to the belt clip, it must
not be loose. Otherwise there is a risk
of the device detaching itself and possibly getting damaged.
G
B
21
Page 24

Removing the activity sensor from the
belt clip:
There is a small groove between the
belt clip and the activity sensor. Put
your fingernail into this groove and
press slightly to separate the belt clip
and the activity sensor.
Do not pull on the buttons!
For the majority of users, sensitivity levels 3 or 4 are ideal when wearing the activity sensor on your belt/trouser waistband. However the
value should be adjusted individually.
Carrying the activity sensor in your trouser pocket
Basically you can also carry your activity sensor in your trouser
pocket.
Do not carry the activity sensor in the back pocket of your
trousers to prevent damages to the device or injuries by sitting on it unintentionally.
Do not carry the activity sensor in large trouser pockets to
avoid getting inaccurate values as a result of the great freedom
of movement of the device.
For the majority of users, sensitivity levels 2 or 3 are ideal when carrying the activity sensor in your trouser pocket. However the value
should be adjusted individually.
22
Page 25

Wearing the activity sensor as a wristwatch
Your activity sensor can be worn on your wrist like a wristwatch. To
do this, please use the wristband supplied. To attach the device to the
wristband proceed as follows:
Put the casing into the wristband. Lift
the bars (1), which enclose the buttons
on the side, carefully over the buttons.
Pay attention to the position of the USB
connector (2).
The casing has to be firmly and directly
attached to the wristband, there must
be no gap. Otherwise, there is a risk of
the activity sensor's casing detaching
itself.
For the majority of users, sensitivity levels 1 or 3 are ideal when
wearing the activity sensor as a wristwatch. However the value
should be adjusted individually.
Pace counting on the activity sensor
As soon as you have run at least 10 paces in one go, the number of
paces and the activity time are updated on the display. These initial
paces are taken into account for pace counting.
Change basic settings
Set sensitivity and change basic functions
To achieve an optimum result, the sensitivity of the device should be
individually set for the user. Five sensitivity levels can be selected
here (1=Low sensitivity, 5=High sensitivity). The slower your running
speed, the higher sensitivity level you should select.
G
B
23
Page 26

Recommended levels of the sensitivity you will find in the
description of the different wearing methods (see chapter
„Getting started“).
You are in the activity menu.
Dis-
3 sec.
Your activity sensor shows
play 1
.
Set sensitivity
SENSI is displayed.
Set the sensitivity of the
device at first to Level 1. You can
test the sensitivity at a later date
in the menu flow and adapt it if
necessary (see below „Test sensitivity“).
Change basic functions
CM
and are displayed.
Set your pace length
for slow walking (20-250 cm).
CM and are displayed.
Set your pace length
for quick walking (20-250 cm).
Back to
Test sensitivity
Display 1.
Walk a distance between 20 and
50 paces. To do this, wear the
24
Page 27

device in the place in which you
will be using it every day (as a
wristwatch, as a belt clip or in
your trouser pocket).
Do not look at the display
while you are running to
avoid accidents by stumbling.
If the paces counted agree with
the pace display on the device,
then this intensity level is appropriate. If not, you should proceed
with the other intensity levels in
the same way.
If the number of paces displayed
is too high, you should set a
lower sensitivity level. If the number of paces displayed is too low,
you should set a higher level.
Change weight
You are in the activity menu. Your
activity sensor shows
Display 2.
G
B
3 sec.
KG is displayed.
weight (20-200 kg).
Please select your
25
Page 28

Back to Display 2.
Change time of day and date
3 sec.
You are in the activity menu. Your
activity sensor shows
Change time format
FORM is displayed. The 24h-
setting blinks.
Set the time of day for-
mat (12h or 24h).
Change time of day
HOUR is displayed. The hour set-
ting blinks.
Set the hour (0-23).
If the 12h setting is active:
AM is displayed and it blinks.
Set AM or PM:
AM (ante meridiem): for exam-
ple, 2:00 AM means 2:00
PM (post meridiem): for exam-
ple, 2:00 PM means 14:00
MIN is displayed. The minute set-
ting blinks.
Set the minute (0-59).
Display 3.
26
Page 29

Change date
YEAR
is displayed. The year set-
ting blinks.
Set the year (2008-
2050).
MONTH is displayed. The monthly
setting blinks.
Set the month (1-12).
DAY is displayed. The day setting
blinks.
Set the day (1-31).
Back to
Display 3.
Switch off pace measurement
The activity sensor is not able to record any exact activity data for
specific means of transport, such as e.g. driving a car. Therefore
switch the activity sensor off so as not to affect your actual activity
times.
If you also calculate your fitness values (bicycling, swimming
etc.) with an EasyFit-compatible Beurer HR Monitor, you can
evaluate the measured data of both devices together via the
EasyFit software. You thus get an overview of all your activity
and fitness values.
G
B
27
Page 30

It is possible to switch off the pace measurement
of the activity sensor:
You are in the activity menu. The activity time is
displayed in the middle line and your number of
paces in the bottom line. Press the
button for approx. 3 sec. to switch off the pace
measurement. Pressing the button again for
approx. 3 sec. reactivates the pace measurement (
).
STORAGE FUNCTION
Your activity sensor has a storage function which stores your activity
data for up to 14 days. Your data is stored every day at 0:00 hours
and then reset to "0" on the display. From the 15th day, the oldest day
respectively is overwritten by the new day.
From the 13
at the bottom of the display reminds you to
transfer the data as soon as possible. The
display
completely transferred the data to the PC.
To be able to control your physical activity
optimally in the long term, we recommend
that you transfer your activity data at the
latest after 13 days.
Please note that when changing the battery, all the stored
data is deleted. Therefore, only change the battery in the
morning to avoid data overwriting.
th
day, the Memory symbol
only disappears once you have
28
Page 31

THE EASYFIT AND HEALTHMANAGER SOFTWARE PRODUCTS
With the EasyFit or Healthmanager software, you can optimally
evaluate your training data and check your progress over a longer
period of time. In addition to that, you will find many other functions
for weight management and for workout planning.
Calendar functions
Transferring all records
Weekly workout planning for achieving the desired weight
Various analyses and graphics for observing the training progress
Installation of the software
The EasyFit and Healthmanager software products are available to
download from our website www.beurer.de/.com. The download is
free when you register.
Under high electrostatic discharge environment, it could be
required to reconnect the PC communication.
EasyFit system requirements
Operating system Windows XP, Vista, 7, 8
CPU optimal from 1.2 GHz
Main memory optimal from 256 MB RAM
Hard disk optimal from 200 MB free storage space,
minimum 100 MB
Graphic resolution at least 1024 x 768 pixels
Other requirements USB port 1.0
G
B
29
Page 32

Healthmanager system requirements
Operating system Windows XP (SP3), Windows Vista SP1
or later, Windows 7, Windows 7 SP1
CPU min. Pentium 1 GHz or faster
Main memory min. 1 GB RAM
Hard disk drive x86 architecture (32 bit): 600 MB
x64 architecture (64 bit): 1.5 GB
Graphic resolution at least 1024 x 768 pixels
Other requirements USB port 1.0 or later
TECHNICAL SPECIFICATIONS AND BATTERIES
Activity sensor Spray proof
Battery 3V lithium battery, type CR2032
Replacing the batteries
Used batteries do not belong in the household garbage. Dispose of these through your electronics
dealer or your local collecting point for recoverables.
You are legally required to do this. We will find this
symbol on batteries containing toxic chemicals:
Pb = battery contains lead, Cd = battery contains
cadmium, Hg = battery contains mercury.
30
Page 33

FREQUENTLY ASKED QUESTIONS AND ANSWERS
Why don't I reach the next activity level (Smiley symbol), even
though my activity sensor displays an activity time of 10 minutes?
You have not run quickly for at least 10 minutes in one go or you
have not walked for 3,333 paces. Only then can you reach the next
activity level.
Explanation: The
sensor. The activity time is the total time you have been active on
this day. It is not evident how many breaks you made during this
time.
How can I change my personal data?
You can change your personal data in the activity menu. Read also
chapter “Set sensitivity and change basic functions”, “Change weight”
and “Change time of day and date”.
What can be done if the activity sensor accidentally gets wet?
The activity sensor is protected against small amounts of water
(spray). If the device should be washed or falls into water accidentally, proceed as follows:
Remove the battery from the activity sensor. Read chapter "Re-
place the batteries" for more details.
Dry the entire device with a dry lint-free cloth and leave it open for
one day.
activity time appears on the display of the activity
G
B
Do not put the device on the heating or in the sun to dry!
Insert the battery into the device again. Read chapter "Insert bat-
tery/Change battery" for more details.
31
Page 34

In which position does the device provide the most accurate
measurements?
The measuring precision of the activity sensor depends on the setting for sensitivity, the running style of the user and also the position
of the device during measuring.
The sensitivity of the device has to be individually set depending on the way it is worn.
The activity sensor provides the best measuring results when attached to your belt or trouser waistband.
Why does nothing happen when you press the buttons?
Check the state of the battery!
If the battery is dead, then no display is possible. Insert a new battery
(see chapter “Insert battery/Change battery").
Why is nothing shown on the display?
Check the state of the battery!
If the battery is dead, then no display is possible. Insert a new bat-
tery (see chapter “Insert battery/Change battery").
Check whether the battery has been inserted properly!
If not, insert the battery again (see chapter “Insert battery/Change
battery").
Please note: If the contact is incorrect, the device can be damaged
and it can possibly no longer work.
Why are my paces not recorded correctly?
Set the sensitivity of the device to your personal pace sequence
(see chapter "Recording the activity", section "Set the sensitivity").
Check the state of the battery!
If the battery is dead, then the device cannot measure correctly.
Insert a new battery (see chapter “Insert battery/Change battery").
32
Page 35

Why can't I download my data from the activity sensor?
Check cable attachment to the mini-USB. If the cable is not inserted
properly, then no connection can be made.
Can I use the activity sensor for bicycling as well?
The activity sensor is capable of counting pedalling movements when
bicycling, provided it is worn in an appropriate position (best: on leg or
in a tightly closing or side pocket of your pants. Not recommended: on
the belt). However, the movements counted are not equivalent to
steps walked. Continuous pedalling is mostly added to the “normal
walking” activity time.
LIST OF ABBREVIATIONS
Abbreviations on the display in alphabetical order:
Abbreviation English
CM Centimeter
dAY Day
FORM Day of time format (12h/24h)
g Fat burning in grams [g]
HOUR Hour
kcal Calorie consumption in [Kcal]
KG Kilogram
lb Pound
MIN Minute
MONth Month
oz Fat burning in ounces [oz]
SENSI Sensitivity of the device for pace counting (5 levels)
StEP Number of paces
YEAR Year
G
B
33
Page 36

INDEX
Accessories 4
Activity 3, 5
Application 3
Attaching the activity sensor 21
Basic settings 15
Batteries 30
Buttons 12
Care 4
Change basic functions 24
Change date 27
Change time format 26
Change time of day 26
Change weight 25
Cleaning 4
Display 13
Display activity data 20
Disposal 4
EasyFit software 8, 29
Fitness 5
Getting started 10
Health 5
Healthmanager software 8, 29
Installation of the Software 29
List of abbreviations 33
Notes 3
A
B
C
D
E
F
G
H
I
L
N
Pace counting 23
P
Power saving mode 14
Q
Questions and answers 31
R
Recording the Activity 19
Repair 4
Reward system 6
S
Scope of delivery 2
Set activity data 16
Set date 18
Set fat burning units 16
Set sensitivity 24
Set stride units 16
Set target amount of exercise for
paces 16
Set time format 17
Set time of day 18
Set weight 16
Set weight units 16
Software
EasyFit 8, 29
Healthmanager 8, 29
Storage function 28
Switch off pace measurement 27
Symbol 13
T
Technical specifications 30
Test sensitivity 24
W
Wearing the activity sensor
as a wristwatch 23
in your trouser pocket 22
on your belt/trouser waistband
21
34
Page 37

INHALTSVERZEICHNIS
Lieferumfang..................................................................................36
Wichtige Hinweise.........................................................................37
Aktivität, Gesundheit und Fitness................................................39
Wissenswertes über den Aktivitätssensor .................................40
Funktionen des Aktivitätssensors...............................................43
Inbetriebnahme..............................................................................44
Allgemeine Bedienung des Aktivitätssensors............................46
Knöpfe des Aktivitätssensors ...................................................46
Display...................................................................................... 47
Stromsparmodus ...................................................................... 48
Grundeinstellungen.......................................................................49
Aufzeichnung der Aktivität...........................................................54
Übersicht ..................................................................................54
Aktivitätsdaten anzeigen ..........................................................55
Anbringen des Aktivitätssensors ..............................................56
Grundeinstellungen ändern ...................................................... 59
Schrittmessung ausschalten ....................................................64
Speicherfunktion ...........................................................................65
Software-Produkte EasyFit und Healthmanager ........................66
Technische Daten, Batterien und Garantie.................................67
Häufige Fragen und Antworten....................................................69
Abkürzungsverzeichnis ................................................................71
Stichwortverzeichnis.....................................................................72
D
35
Page 38

LIEFERUMFANG
Aktivitätssensor
Gürtelclip
Armband
PC-Schnittstellenkabel (USB)
Zusätzlich:
Diese Gebrauchsanleitung
Kurzanleitung „Schnellstart“
36
Page 39

WICHTIGE HINWEISE
Lesen Sie diese Gebrauchsanleitung sorgfältig durch, bewahren Sie
sie auf, und machen Sie sie auch anderen Personen zugänglich.
Beachten Sie alle Hinweise in dieser Gebrauchsanleitung!
Aktivität
Wussten Sie schon, dass es für Ihre Gesundheit gut ist, täglich
mindestens 10.000 Schritte zu gehen oder sich eine halbe Stunde
zu bewegen (je nach Gesundheitszustand der Person, ältere Personen weniger, Kinder mehr).
Der Aktivitätssensor ist als Laufsensor ausgelegt. Er misst Ihre
Schritte beim Gehen, Walken oder Joggen und zeigt Ihnen Ihr tägliches Bewegungspensum an.
Verwendungszweck
Der Aktivitätssensor ist nur für den privaten Gebrauch bestimmt.
Der Aktivitätssensor darf nur in der Gebrauchsanleitung angege-
bene Art und Weise verwendet werden. Der Hersteller haftet nicht
für Schäden, die durch unsachgemäßen oder falschen Gebrauch
verursacht wurden.
Der Aktivitätssensor sollte bei bestimmten Aktivitäten wie Autofah-
ren vorübergehend deaktiviert werden, um Fehlmessungen zu
vermeiden.
Zur Trainingsaufzeichnung und Pulsmessung von jeglichen ande-
ren Sportarten wird auf die Beurer Pulsuhren verwiesen. Da sowohl die Easy-Fit kompatiblen Beurer Pulsuhren als auch der Beu-
rer Aktivitätssensor die Werte in die EasyFit Software übertragen
können, sind übergreifende Auswertungen über alle Ihre körperlichen Aktivitäten möglich.
D
37
Page 40

Reinigung und Pflege
Reinigen Sie den Aktivitätssensor von Zeit zu Zeit sorgfältig mit
einer Seifenwasserlösung. Legen Sie das Gerät nicht ins Wasser.
Reparatur, Zubehör und Entsorgung
Vor dem Gebrauch müssen Sie sicherstellen, dass der Aktivitäts-
sensor keine sichtbaren Schäden aufweist. Benutzen Sie den Aktivitätssensor im Zweifelsfall nicht, und wenden Sie sich an Ihren
Händler oder an die angegebene Kundendienstadresse.
Reparaturen dürfen nur vom Kundendienst oder von autorisierten
Händlern durchgeführt werden. Versuchen Sie in keinem Fall, den
Aktivitätssensor selbständig zu reparieren! Bei Reklamationen
wenden Sie sich an Ihren Händler oder an die Serviceadresse.
Batterie vor der Reklamation austauschen.
Benutzen Sie den Aktivitätssensor nur mit Beurer Original-
Zubehörteilen!
Vermeiden Sie Kontakt mit Sonnencremes oder ähnlichem, da
diese die Kunststoffteile beschädigen könnten.
Beim Öffnen der Schrauben oder unsachgemäßer Behandlung
erlischt die Gewährleistung.
Entsorgen Sie den Aktivitätssensor und verbrauchte
Batterien nur gemäß Elektro- und Elektronik AltgeräteVerordnung 2002/96/EC – WEEE (Waste Electrical and
Electronic Equipment). Bei Rückfragen wenden Sie sich
bitte an die für die Entsorgung zuständige kommunale
Behörde.
38
Page 41

AKTIVITÄT, GESUNDHEIT UND FITNESS
Bewegung ist Voraussetzung für ein gesundes Leben. Körperliche
Aktivität hält Sie fit und senkt das Risiko für Herz- und Kreislauferkrankungen. Wenn Sie sich bewegen, hilft Ihnen das auch bei einer
Gewichtsreduzierung und Sie werden feststellen, dass sich Ihr psychisches Wohlbefinden stabilisiert.
Körperliche Aktivität bezieht sich auf alle energieverbrauchenden
Bewegungen. Dabei kommt den täglichen Aktivitäten wie Gehen,
Radfahren, Treppensteigen und Hausarbeit ein wesentlicher Anteil
zu. Um Ihre tägliche Bewegungsaktivität objektiv einschätzen zu
können und zu erfassen, nutzt Ihnen der Beurer Aktivitätssensor. Er
kann Sie auf diese Weise auch zu verstärkter Bewegung im Alltag
motivieren. Ein tägliches Pensum von mindestens 7.000 - 10.000
Schritten oder 30 Minuten Aktivität sind optimal (Quelle: nach WHO,
Dr. Catrine Tudor-Locke, Dr. David R. Bassett jr.).
Empfehlungen zur körperlichen Aktivität von Erwachsenen (basierend auf WHO-Empfehlungen, 2002):
Beschreibung zum Beispiel:
Aktivitätszeit 30 Minuten pro Tag
UND
Muskelaufbau 8–10 Übungen mit jeweils 8–12 Wiederholungen
Mittlere Intensität
Tanzen, Gartenarbeit,
Hausarbeit oder zügiges Gehen
und dies an 5 Tagen
pro Woche
an 2 Tagen pro Woche
Hohe Intensität
zum Beispiel:
Laufen, Aerobic, Wett-
kampfsportarten wie
Fußball
ODER
20 Minuten pro Tag
und dies an 3 Tagen
pro Woche
D
39
Page 42

WISSENSWERTES ÜBER DEN AKTIVITÄTSSENSOR
Der Aktivitätssensor bietet Ihnen die Möglichkeit, Ihr tägliches Bewegungspensum zu kontrollieren. Er gibt einen Überblick über Ihre
tägliche körperliche Aktivität, ermittelt die Anzahl Ihrer Schritte und
errechnet daraus Ihren Kalorienverbrauch.
Der Aktivitätssensor verfügt über eine zweifache Anzeigefunktion,
die Ihnen z. B. Aktivitäts-Zeit und Schrittanzahl anzeigen kann. Über
die Grundeinstellungen können Sie Ihre typische Schrittlänge vorgeben, so dass der Aktivitätssensor aus der Geh-/LaufGeschwindigkeit Ihre Aktivitätsdaten berechnen kann. Je nachdem,
was für ein Bewegungstyp Sie sind oder welche Art der Aktivität Sie
ausführen – eher langsame, weiche Bewegungen oder rasche, harte
Bewegungen – können Sie die Empfindlichkeit des Aktivitätssensors
in fünf Stufen anpassen.
Belohnungssystem
Ihr Aktivitätssensor verfügt über ein „Belohnungssystem“, das Ihnen
eine kontinuierliche Bewertung Ihrer fortgesetzten Tagesaktivität
gibt. Das Belohnungssystem ist in drei Aktivitätsstufen eingeteilt. Je
nach Stufe zeigt das Gerät ein entsprechendes Symbol an.
Die folgende Tabelle zeigt die drei Stufen zur Aktivität. Ausschlaggebend für die Stufen sind entweder die Anzahl der Schritte oder die
Zeitdauer der Aktivität. Bei der Anzahl der Schritte wiederum werden
zwei Aktivitätsarten unterschieden:
„Schnelles Gehen“: mehr als 90 Schritte pro Minute
„Normales Gehen“: weniger als 90 Schritte pro Minute
Bei der Zeitdauer des Gehens sind jeweils 2 Minuten Pause möglich, die die Wertung nicht unterbrechen.
Beispiel: Sie sind 5 Minuten schnell am Stück gegangen und wollen
jetzt eine Straße überqueren. Sie müssen ca. 2 Minuten an der Ampel warten, bevor Sie diese überqueren können. Anschließend gehen Sie erneut 5 Minuten schnell am Stück. Ihr Aktivitätssensor zeigt
40
Page 43

Ihnen jetzt eine Aktivitätszeit von 10 Minuten an. Obwohl Sie an der
Ampel eine Pause von 2 Minuten eingelegt haben und die 10 Minuten nicht an einem Stück durchgelaufen sind, haben Sie die nächste
Aktivitätsstufe erreicht.
Stufe Symbol Aktivität
1
ab 3.333 Schritten bei „schnellem
Gehen“ und „normalem Gehen“ oder
ab 10 Minuten „schnelles Gehen“ am
Stück. Bis zu 2 Minuten Pause sind
möglich.
D
2
ab 6.667 Schritten bei „schnellem
Gehen“ und „normalem Gehen“ oder
ab 20 Minuten „schnelles Gehen“ am
Stück. Bis zu 2 Minuten Pause sind
möglich.
3
Abwechselnd
und
ab 10.000 Schritten bei „schnellem
Gehen“ und „normalem Gehen“ oder
ab 30 Minuten „schnelles Gehen“ am
Stück. Bis zu 2 Minuten Pause sind
möglich.
Bei verminderter körperlicher Leistungsfähigkeit lässt sich das
tägliche Zielpensum für „normales Gehen“ von 10.000 auf bis
zu 3.000 Schritte in 1.000er Schritten verringern. Die drei
Aktivitätsstufen werden entsprechend jeweils um ein Drittel
angepasst. So lässt sich beispielsweise die 2. Stufe bereits
nach 2.000 Schritten und die 3. Stufe nach 3.000 Schritten
erreichen. Die Aktivitätszeiten je Stufe (10-20-30 Minuten) für
„schnelles Gehen“ können nicht angepasst werden.
41
Page 44

Auswertung des Trainings
Über die PC-Schnittstelle Ihres Aktivitätssensors (Mini-USB an der
Seite des Gerätes) können Sie Ihre Trainingsdaten an einen PC
übertragen und dort auswerten. Das dafür notwendige Übertragungskabel ist im Lieferumfang enthalten.
Die PC Software-Produkte EasyFit und Healthmanager stehen
zum Download kostenfrei gegen Registrierung auf der Website
www.beurer.de/.com zur Verfügung.
Die PC-Software EasyFit steuert die Übernahme der Daten von
Ihrem Aktivitätssensor und bietet vielfältige Auswertungsmöglichkeiten einschließlich der Pulsmessungen. Zudem verfügt EasyFit über
nützliche Kalender- und Verwaltungsfunktionen, die ein optimales
Training, auch über längere Zeiträume, unterstützen. Mit der Software können Sie darüber hinaus Ihr Gewichtsmanagement steuern
und überwachen.
Die PC-Software Healthmanager bietet Auswertungen für Trainingsdaten, Blutdruck, Gewicht, Glukose und weitere Gesundheitswerte.
42
Page 45

FUNKTIONEN DES AKTIVITÄTSSENSORS
Aktivitätsfunktionen
Anzahl der Schritte
Gesamt-Aktivitätszeit
Belohnungssystem (anpassbar)
Kalorienverbrauch in [kcal] (Ba-
sis: Geh-/Lauf-Geschwindigkeit)
Fettverbrennung in [g]/[oz] (Ba-
sis Geh-/Lauf-Geschwindigkeit)
Automatisches Löschen und
Speichern der Aktivitätswerte
täglich um 00:00 Uhr
Zeit-Funktionen
Uhrzeit
Datum (einstellbar, über Soft-
ware an den PC übermittelbar).
Datum auf Display nicht sichtbar.
Einstellungen
Uhrzeit-Format (12h/24h)
Gewicht in [kg]/[lb]
Schrittlänge für Gehen und
Laufen in [cm]/[ft/in]
Empfindlichkeit des Gerätes
zur Schrittzählung (5 Stufen)
Zielpensum für „normales
Gehen“ (Schritte)
Speicherfunktion für 14 Tage
Gesamt-Aktivitätszeit, Anzahl
der Schritte
Kalorienverbrauch, Fett-
verbrennung
Gespeicherten Daten können
über die Software-Produkte
ausgelesen werden. Direkt am
Aktivitätssensor sind nur aktuelle
Tagesdaten sichtbar.
D
43
Page 46

INBETRIEBNAHME
Batterie einlegen/Batteriewechsel
Falls Sie die Batterie nicht selbst einlegen oder wechseln
möchten, wenden Sie sich an eine Uhrmacherwerkstätte.
Nehmen Sie den Batteriewechsel morgens vor der Aufzeichnung der Aktivität vor. Nur so kann sichergestellt werden,
dass keine Tagesaufzeichnung in der PC-Software überschrieben wird.
Entfernen Sie den Aktivitätssensor vom Gürtelclip (Beschreibung
siehe Kapitel „Anbringen des Aktivitätssensors“, Abschnitt „Aktivitätssensor am Gürtel/Hosenbund tragen“).
Das Batteriefach des Aktivitätssensors befindet sich auf der Rückseite des Gerätes. Legen Sie das Gerät mit der Vorderseite auf eine
weiche Unterlage und gehen Sie beim Einlegen der Batterie vor wie
folgt:
1
Drehen Sie den Deckel des Batteriefachs
mit Hilfe einer Münze gegen den Uhrzeigersinn bis sich der Deckel löst.
Nehmen Sie die Batterie mit Hilfe eines
spitzen, nicht metallischen Werkzeugs
z. B. Zahnstocher aus dem Batteriefach.
2
Legen Sie die Batterie so in das Batteriefach, dass die Batterie unter dem Bügel (1)
auf der Feder liegt und der Pluspol (+)
nach oben zeigt.
Überprüfen Sie den Dichtungsring. Der
Dichtungsring muss glatt im Gehäuse
anliegen und darf keine sichtbaren Schä-
44
Page 47

den aufweisen. Andernfalls kann die Wasserdichtigkeit nicht gewährleistet werden.
3
Legen Sie den Batteriefachdeckel so in
das Batteriefach, dass er flach mit dem
Gehäuse abschließt.
Achten Sie darauf, dass der Pfeil auf dem
Deckel und der Pfeil auf dem Gehäuse
gegeneinander zeigen.
4
Ziehen Sie den Deckel mit der Münze im
Uhrzeigersinn bis zum Anschlag fest, damit die Wasserdichtigkeit weiterhin gewährleistet ist.
Vorsicht! Nicht weiter drehen,
falls der Deckel sich nicht ohne
Widerstand ins Batteriefach drehen lässt. Wiederholen Sie den
Vorgang bei geänderter Lage
des Deckels. Andernfalls könnte
die Rasterung beschädigt werden.
5
Ihr Aktivitätssensor wechselt automatisch
in das Einstell-Menü.
D
45
Page 48

ALLGEMEINE BEDIENUNG DES AKTIVITÄTSSENSORS
Knöpfe des Aktivitätssensors
1
Wechselt zwischen den verschiedenen Einstellungen im Einstell-Menü und Aktivitäts-Menü.
2
Stellt Werte ein. Gedrückt Halten beschleunigt
die Eingabe von Werten.
Wechselt zwischen den Anzeigen der Aktivitäts-
werte.
Drücken des Knopfes für 3 Sekunden im Aktivi-
täts-Menü (Anzeige: Aktivitätszeit – Gesamtzahl
der Schritte) schaltet den Schrittzähler aus (kein
Symbol) und wieder ein (Symbol
).
46
Page 49

Display
1
Obere Zeile
2
Mittlere Zeile
3
Untere Zeile
4
Symbole:
Wechsel zwischen den verschiedenen Einstell-Anzeigen
im Einstell-Menü (Pfeil blinkend).
Symbole des Belohnungssystems, wechseln je nach
Aktivitätsstufe (bei Erreichen einer neuen Aktivitätsstufe
blinkt das Symbol für 1 Minute). Bei Erreichen der höchsten Aktivitätsstufe wechselt die Anzeige zwischen dem
großen und kleinen Smiley. Um diesen Wechsel zu
beenden, drücken Sie einen beliebigen Knopf.
„Gehen“-Symbol. Das Symbol wird angezeigt, wenn die
Zeit des „normalen Gehens“ gegenüber der Zeit des
„schnellen Gehens“ überwiegt oder die Anzahl der
Schritte bei „normalem Gehen“ größer ist als die Anzahl
der Schritte bei „schnellem Gehen“.
„Laufen“-Symbol. Das Symbol wird angezeigt, wenn die
Zeit des „schnellen Gehens“ gegenüber der Zeit des
„normalen Gehens“ überwiegt oder die Anzahl der
Schritte bei „schnellem Gehen“ größer ist als die Anzahl
der Schritte bei „normalem Gehen“.
„Normales Gehen“: < 90 Schritte pro Minute
„Schnelles Gehen“: > 90 Schritte pro Minute
D
47
Page 50

Batterie muss nach Anzeige dieses Symbols baldmöglichst gewechselt werden, um weiterhin genaue Ergebnisse zu erhalten.
Eine Erklärung der Display-Abkürzungen finden Sie im Abkürzungsverzeichnis am Ende der Gebrauchsanleitung.
Stromsparmodus
Drücken Sie aus der Zeit-Anzeige heraus den
Knopf
modus einzuschalten. Die Anzeige des Aktivitätssensors wird in diesem Modus ausgeschaltet, um
die Batterielebensdauer zu erhöhen. Dabei bleibt
die Zeitfunktion (Uhrzeit) in Betrieb. Schrittzählung,
Aktivitätszeitmessung wie auch die Displayanzeige
werden ausgeschaltet. Drücken Sie einen beliebigen Knopf für ca. 3 sec., um die Anzeige wieder zu
aktivieren.
für ca. 3 sec., um den Stromspar-
48
Page 51

GRUNDEINSTELLUNGEN
Übersicht
D
Werte einstellen mit
Kurzes Drücken = Einzelwerte, langes Drücken = durchlaufend.
.
Im Einstell-Menü können Sie:
Ihr gewünschtes, tägliches Zielpensum für die Schrittanzahl an-
passen
Die gewünschten Einheiten einstellen
Ihr persönliches Gewicht eingeben. Der Aktivitätssensor errechnet
daraus Ihren Kalorienverbrauch und Ihre Fettverbrennung während
der körperlichen Aktivität!
Grundfunktionen des Aktivitätssensors festlegen.
Die Uhrzeit und das Datum einstellen.
Sie gelangen automatisch nach dem Einlegen der Batterie (siehe
Kapitel „Batterie einlegen / Batteriewechsel“) in das Einstell-Menü.
49
Page 52

Zielpensum für Schrittanzahl
einstellen
StEP 10000 wird angezeigt.
Die Schrittanzahl blinkt.
Stellen Sie das ge-
wünschte Zielpensum (10.000 -
3.000 Schritte pro Tag) in
1.000er Schritten ein.
Gewichts-Einheiten einstellen
KG wird angezeigt.
Stellen Sie die ge-
wünschten Einheiten ein:
Kilogramm kg oder
Pfund lb
Mit dieser Einstellung wird auch
die Fettverbrennungs-Einheit in
Gramm
Gewicht einstellen
KG wird angezeigt.
g / Unzen oz umgestellt.
Stellen Sie Ihr Gewicht
(20-200 kg) ein.
Längen-Einheiten einstellen
CM wird angezeigt.
Stellen Sie die ge-
wünschten Einheiten ein:
Zentimeter cm oder
Feet/Zoll ft/in
50
Page 53

Aktivitätsdaten einstellen
Eine wichtige Voreinstellung ist
die möglichst genaue Eingabe
Ihrer individuellen Schrittlänge.
Laufen oder gehen Sie eine
Strecke, von der Sie die exakte Länge kennen (Referenzstrecke). Zum Beispiel die
100-Meter-Bahn im Leichtathletik-Stadion.
Zählen Sie Ihre dafür benötig-
ten Schritte.
Teilen Sie die Referenzstrecke
durch die Schrittzahl, und Sie
erhalten Ihre Schrittlänge
(z. B. 100 m/125 Schritte =
0,8 m = 80 cm).
CM und werden angezeigt.
Stellen Sie Ihre Schrittlänge für langsames Gehen (20250 cm) ein.
CM und werden angezeigt.
Stellen Sie Ihre Schrittlänge für schnelles Gehen (20250 cm) ein.
D
51
Page 54

Uhrzeit-Format einstellen
FORM wird angezeigt. Die 24-
Stundenanzeige blinkt.
Stellen Sie das UhrzeitFormat (12- oder 24-Stundenanzeige) ein.
Uhrzeit einstellen
HOUR wird angezeigt. Die Stun-
den-Einstellung blinkt.
Stellen Sie die Stunde
(0-23) ein.
Nur bei 12-Stundenanzeige:
AM wird blinkend angezeigt.
Stellen Sie ein:
AM: vor Mittag, zum Beispiel
2:00 AM bedeutet 2:00 Uhr
PM: nach Mittag, zum Beispiel
2:00 PM bedeutet 14:00 Uhr
MIN wird angezeigt. Die Minuten-
Einstellung blinkt.
Stellen Sie die Minuten
(0-59) ein.
Datum einstellen
YEAR wird angezeigt. Die Jah-
res-Einstellung blinkt.
Stellen Sie das Jahr
(2008-2050) ein.
52
Page 55

MONth wird angezeigt. Die Mo-
nats-Einstellung blinkt.
Stellen Sie den Monat
(1-12) ein.
dAY wird angezeigt. Die Tages-
Einstellung blinkt.
Stellen Sie den Tag (1-
31) ein.
D
53
Page 56

AUFZEICHNUNG DER AKTIVITÄT
Übersicht
Werte einstellen mit
Kurzes Drücken = Einzelwerte, langes Drücken = durchlaufend.
.
54
Page 57

Im Aktivitäts-Menü können Sie:
-
Ihre Aktivitätsdaten anzeigen.
Die Empfindlichkeit des Gerätes zur Schrittzäh
lung einstellen.
Die Grundeinstellungen des Aktivitätssensors
ändern.
Den Schrittzähler ausschalten.
Sobald Sie im Aktivitäts-Menü sind, wird in der
mittleren Zeile Ihre aktive Zeit (nach dem Löschen: 00:00:00) und in der unteren Zeile Ihre
bereits zurückgelegten Schritte angezeigt.
Aktivitätsdaten anzeigen
Sie befinden sich im Aktivitäts-
Menü.
Anzeige 1:
Mittlere Zeile: aktive Zeit
Untere Zeile: zurückgelegte Schritte
Anzeige 2:
Mittlere Zeile: Fettverbrennung
[g] / [oz]
Untere Zeile: Kalorienverbrauch
[kcal]
Die Berechnung des gesamten Fett- und Kalorienverbrauchs erfolgt auf
Basis der Geh-/LaufGeschwindigkeit.
55
D
Page 58

Anzeige 3:
Mittlere Zeile: Uhrzeit
Zurück zu Anzeige 1.
Anbringen des Aktivitätssensors
Sie haben verschiedene Möglichkeiten Ihren Aktivitätssensor zu
tragen: am Gürtel/Hosenbund (empfohlene Tragweise), in der Hosentasche oder als Armbanduhr.
Achten Sie darauf, dass die Empfindlichkeit des Gerätes je
nach Anbringung unterschiedlich einzustellen ist. Um möglichst genaue Ergebnisse des Gerätes zu bekommen, wird
empfohlen, den Aktivitätssensor am Gürtel zu tragen!
Wechseln Sie zwischen Gürtelclip und Armband nur, wenn
nötig. Zu häufiges Wechseln strapaziert das Material des
Armbands.
Aktivitätssensor am Gürtel/Hosenbund tragen
Ihren Aktivitätssensor können Sie mit Hilfe des mitgelieferten Gürtelclips an Ihrem Gürtel oder am Hosenbund anbringen. Legen Sie
dazu den Aktivitätssensor wie folgt in den Gürtelclip ein:
56
Page 59

Legen Sie das Gehäuse in den Gürtelclip ein. Achten Sie darauf, dass der
USB-Stecker (1) auf der Seite des
Clips mit der Einbuchtung fixiert wird.
Das Gehäuse muss direkt an den
Gürtelclip anschließen, es darf nicht
wackeln. Anderenfalls besteht die
Gefahr, dass sich das Gerät löst und
eventuelle Schäden davon tragen
kann.
Entfernen des Aktivitätssensors vom
Gürtelclip:
Zwischen Gürtelclip und Aktivitätssensor befindet sich ein kleiner Schlitz.
Führen Sie Ihren Fingernagel in diesen Schlitz und trennen Sie Gürtelclip
und Aktivitätssensor mit leichtem
Druck voneinander.
Nicht an den Knöpfen ziehen!
Für das Tragen des Aktivitätssensors am Gürtel/Hosenbund sind die
Sensitivitätsstufen 3 oder 4 für die Mehrheit der Benutzer optimal.
Der Wert sollte jedoch individuell angepasst werden.
D
57
Page 60

Aktivitätssensor in der Hosentasche tragen
Grundsätzlich können Sie Ihren Aktivitätssensor auch in der Hosentasche tragen.
Tragen Sie den Aktivitätssensor nicht in der hinteren Hosentasche, um Schäden am Gerät oder Verletzungen durch versehentliches Draufsetzen zu verhindern.
Tragen Sie den Aktivitätssensor nicht in weiten Hosentaschen, um ungenaue Wertangaben durch eine große Bewegungsfreiheit des Gerätes zu verhindern.
Für das Tragen des Aktivitätssensors in der Hosentasche sind die
Sensitivitätsstufen 2 bis 3 für die Mehrheit der Benutzer optimal. Der
Wert sollte jedoch individuell angepasst werden.
Aktivitätssensor als Armbanduhr tragen
Ihr Aktivitätssensor kann am Handgelenk wie eine Armbanduhr getragen werden. Verwenden Sie dazu das mitgelieferte Armband.
Zum Befestigen des Gerätes am Armband gehen Sie wie folgt vor:
Legen Sie das Gehäuse in das Armband ein. Führen Sie die Stege (1), die
die seitlichen Knöpfe umschließen,
vorsichtig über die Knöpfe. Achten Sie
auf die Position des USB-Steckers (2).
Das Gehäuse muss direkt an das
Armband anschließen, es darf keine
Lücke entstehen. Anderenfalls besteht
die Gefahr, dass sich das Gehäuse
des Aktivitätssensors lösen kann.
Für das Tragen des Aktivitätssensors als Armbanduhr sind die Sensitivitätsstufen 1 bis 3 für die Mehrheit der Benutzer optimal. Der
Wert sollte jedoch individuell angepasst werden.
58
Page 61

Schrittzählung am Aktivitätssensor
Sobald Sie mindestens 10 Schritte am Stück gelaufen sind, aktualisieren sich Schrittzahl und Aktivitätszeit auf dem Display. Diese
ersten Schritte werden Ihnen bei der Schrittzählung angerechnet.
Grundeinstellungen ändern
Empfindlichkeit einstellen und Grundfunktionen ändern
Um ein optimales Ergebnis zu erzielen, sollte die Empfindlichkeit
des Gerätes auf den Benutzer individuell eingestellt werden. Hierzu
stehen fünf Empfindlichkeitsstufen zur Auswahl (1=Empfindlichkeit
gering, 5=Empfindlichkeit hoch). Je geringer Ihre Laufgeschwindigkeit ist, umso höher sollten Sie die Empfindlichkeitsstufe wählen.
Richtwerte zur Sensitivität finden Sie in der Beschreibung der verschiedenen Tragweisen (siehe Kapitel „Inbetriebnahme“).
Sie befinden sich im Aktivitäts-
Menü. Ihr Aktivitätssensor zeigt
Anzeige 1 an.
Empfindlichkeit einstellen
3 sec.
SENSI wird angezeigt.
Stellen Sie die Empfindlichkeit des Gerätes zunächst
auf Stufe 1 ein. Sie können die
Empfindlichkeit später im MenüAblauf testen und gegebenenfalls
anpassen (siehe weiter unten
„Empfindlichkeit testen“).
D
59
Page 62

Grundfunktionen ändern
CM
und werden angezeigt.
Stellen Sie Ihre Schrittlänge für langsames Gehen (20250 cm) ein.
CM und werden angezeigt.
Stellen Sie Ihre Schrittlänge für schnelles Gehen (20250 cm) ein.
Zurück zu
Empfindlichkeit testen
Anzeige 1.
Gehen Sie eine Strecke zwischen 20 und 50 Schritten ab.
Tragen Sie hierzu das Gerät an
der Stelle, an der Sie es täglich
benutzen werden (als Armbanduhr, als Gürtelclip oder in der
Hosentasche).
Schauen Sie während des
Laufens nicht auf das
Display, um Unfälle durch
Stolpern zu verhindern.
Wenn Ihre gezählten Schritte mit
der Schrittanzeige auf dem Gerät
übereinstimmen, ist diese Empfindlichkeitsstufe passend. Wenn
zu viele Schritte angezeigt werden, sollten Sie eine niedrigere
Empfindlichkeitsstufe einstellen.
60
Page 63

Zeigt das Gerät zu wenige Schritte an, sollten Sie eine höhere
Empfindlichkeitsstufe einstellen.
Gewicht ändern
Sie befinden sich im Aktivitäts-
Menü. Ihr Aktivitätssensor zeigt
Anzeige 2 an.
KG wird angezeigt.
3 sec.
(20-200 kg) ein.
Zurück zu Anzeige 2.
Stellen Sie Ihr Gewicht
Uhrzeit und Datum ändern
3 sec.
Sie befinden sich im AktivitätsMenü. Ihr Aktivitätssensor zeigt
Anzeige 3 an.
Uhrzeit-Format ändern
FORM wird angezeigt. Die 24-
Stundenanzeige blinkt.
Stellen Sie das UhrzeitFormat (12- oder 24-Stundenanzeige) ein.
D
61
Page 64

Uhrzeit ändern
HOUR wird angezeigt. Die Stun-
den-Einstellung blinkt.
Stellen Sie die Stunde
(0-23) ein.
Nur bei 12-Stundenanzeige:
AM wird blinkend angezeigt.
Stellen Sie ein:
AM: vor Mittag, zum Beispiel
2:00 AM bedeutet 2:00 Uhr
PM: nach Mittag, zum Beispiel
2:00 PM bedeutet 14:00 Uhr
MIN wird angezeigt. Die Minuten-
Einstellung blinkt.
Stellen Sie die Minuten
(0-59) ein.
Datum ändern
YEAR
wird angezeigt. Die Jahres-
Einstellung blinkt.
Stellen Sie das Jahr
(2008-2050) ein.
MONth wird angezeigt. Die Mo-
nats-Einstellung blinkt.
Stellen Sie den Monat
(1-12) ein.
62
Page 65

dAY wird angezeigt. Die Tages-
Einstellung blinkt.
Stellen Sie den Tag (1-
31) ein.
Zurück zu
Anzeige 3.
D
63
Page 66

Schrittmessung ausschalten
Bei bestimmten Fortbewegungsarten wie z. B. Autofahren kann der
Aktivitätssensor keine exakten Aktivitätsdaten aufnehmen. Schalten
Sie den Aktivitätssensor aus, um Ihre tatsächlichen Aktivitätszeiten
nicht zu beeinträchtigen.
Wenn Sie auch mit einer EasyFit-kompatiblen Beurer Pulsuhr
Ihre Fitnesswerte (Fahrrad fahren, Schwimmen etc.) ermitteln, können Sie die Messdaten beider Geräte über die Software EasyFit gemeinsam auswerten. So erhalten Sie einen
Überblick über alle Ihre Aktivitäts- und Fitnesswerte.
Sie haben die Möglichkeit, die Schrittmessung
des Aktivitätssensors auszuschalten:
Sie befinden sich im Aktivitäts-Menü. In der mittleren Zeile wird Ihre Aktivitätszeit und in der unteren Zeile Ihre Schrittzahl angezeigt. Drücken Sie
den Knopf
Schrittmessung auszuschalten. Erneutes Drücken des Knopfes für 3 sec. aktiviert die Schrittmessung wieder (
für ca. 3 sec., um die
).
64
Page 67

SPEICHERFUNKTION
Ihr Aktivitätssensor verfügt über eine Speicherfunktion, die Ihre Aktivitätsdaten bis zu 14 Tagen speichert. Ihre Daten werden täglich um
0.00 Uhr gespeichert und anschließend auf dem Display auf „0“
zurückgesetzt. Ab dem 15. Tag wird der jeweils älteste Tag durch
den neuen Tag überschrieben.
Ab dem 13. Tag erinnert Sie das Memory-Symbol
rand, die Daten baldmöglichst zu übertragen. Die Anzeige
wenn Sie die Daten vollständig an den
PC übertragen haben.
Um eine optimale Langzeitkontrolle
Ihrer körperlichen Aktivität zu ermöglichen, empfehlen wir, Ihre Aktivitätsdaten spätestens nach jeweils 13 Tagen
zu übertragen.
Beachten Sie, dass bei einem Batteriewechsel alle gespeicherten Daten gelöscht werden. Nehmen Sie deshalb den
Batteriewechsel nur morgens vor, um keine Daten zu überschreiben.
am unteren Display-
erlischt erst,
D
65
Page 68

SOFTWARE-PRODUKTE EASYFIT UND HEALTHMANAGER
Mit der Software EasyFit oder Healthmanager können Sie Ihre
Trainingsdaten optimal auswerten und Ihren Erfolg über einen längeren Zeitraum hinweg kontrollieren. Darüber hinaus finden Sie viele
weitere Funktionen zum Gewichtsmanagement und zur Trainingsplanung.
Kalenderfunktionen
Übertragen aller Aufzeichnungen
Wöchentliche Trainingsplanung zum Erreichen des Wunschge-
wichtes
Verschiedene Auswertungen und Grafiken zur Beobachtung des
Trainingsfortschritts
Installation der Software
Die Software-Produkte EasyFit und Healthmanager stehen zum
Download auf unserer Homepage www.beurer.de/.com bereit. Der
Download ist kostenfrei gegen Registrierung.
In Umgebungen mit elektrostatischen Entladungen müssen Sie
eventuell die Verbindung mit dem PC wieder neu herstellen!
EasyFit Systemvoraussetzungen
Betriebssystem Windows 2000/XP (SP2), Windows Vista
CPU optimal ab 1,2 GHz
Hauptspeicher optimal ab 256 MB RAM
Festplatte optimal ab 200 MB freier Speicher
mind. 100 MB
Grafische Auflösung ab 1024 x 768 Pixel
Sonstige Anforderungen CD-ROM Laufwerk, USB-Anschluss
66
Page 69

Healthmanager Systemvoraussetzungen
Betriebssystem Windows XP (SP3), Windows Vista SP1
oder höher, Windows 7, Windows 7 SP1
CPU mind. Pentium 1 GHz oder schneller
Hauptspeicher mind. 1 GB RAM
Festplatte Architektur x86 (32 Bit): 600 MB
Architektur x64 (64 Bit): 1,5 GB
Grafische Auflösung ab 1024 x 768 Pixel
Sonstige Anforderungen USB-Anschluss 1.0 oder höher
TECHNISCHE DATEN, BATTERIEN UND GARANTIE
Aktivitätssensor Sprühwasser geschützt
Batterie 3V Lithium-Batterie, Typ CR2032
Austausch der Batterien
Verbrauchte Batterien gehören nicht in den Hausmüll. Entsorgen Sie diese über Ihren Elektrofachhändler oder Ihre örtliche Wertstoff-Sammelstelle.
Dazu sind Sie gesetzlich verpflichtet. Diese Zeichen
finden Sie auf schadstoffhaltigen Batterien:
Batterie enthält Blei, Cd = Batterie enthält Cadmium,
Hg = Batterie enthält Quecksilber
Pb =
D
67
Page 70

Garantie
Wir leisten drei Jahre Garantie ab Kaufdatum für Material- und Fabrikationsfehler des Produktes. Die Garantie gilt nicht:
im Falle von Schäden auf Grund unsachgemäßer Bedienung
für Verschleißteile, wie zum Beispiel Batterien oder das Armband
für Mängel, die dem Kunden bereits bei Kauf bekannt waren
bei Eigenverschulden des Kunden
Die gesetzlichen Gewährleistungen des Kunden bleiben durch die
Garantie unberührt. Für Geltendmachung eines Garantiefalles innerhalb der Garantiezeit ist durch den Kunden der Nachweis des
Kaufes zu führen. Die Garantie ist innerhalb eines Zeitraumes von
drei Jahren ab Kaufdatum gegenüber der Beurer GmbH, 89077 Ulm,
Germany, geltend zu machen. Der Kunde hat im Garantiefall das
Recht zur Reparatur der Ware bei unseren eigenen oder bei von uns
autorisierten Werkstätten.
68
Page 71

HÄUFIGE FRAGEN UND ANTWORTEN
Warum erreiche ich nicht die nächste Aktivitätsstufe (Symbol
Smiley), obwohl mein Aktivitätssensor eine Aktivitätszeit von
10 Minuten anzeigt?
Sie sind noch keine 10 Minuten am Stück schnell gelaufen oder
keine 3333 Schritte gegangen. Nur so können Sie die nächste Aktivitätsstufe erreichen.
Erläuterung: Auf dem Display des Aktivitätssensors wird Ihnen die
Aktivitätszeit angezeigt. Die Aktivitätszeit ist die gesamte Zeit, in
der Sie an diesem Tag aktiv sind. Wie viele Pausen Sie während
dieser Zeit gemacht haben, ist nicht ersichtlich.
Wie kann ich meine persönlichen Angaben ändern?
Ihre persönlichen Angaben können Sie im Aktivitäts-Menü ändern.
Lesen Sie dazu die Kapitel „Empfindlichkeit einstellen und Grundfunktionen ändern“, „Gewicht ändern“ und „Uhrzeit und Datum ändern“.
Was ist zu tun, wenn der Aktivitätssensor versehentlich nass
geworden ist?
Der Aktivitätssensor ist gegen eine geringe Menge Wasser (Sprühwasser) geschützt. Sollte das Gerät versehentlich gewaschen oder
ins Wasser gefallen sein, gehen Sie wie folgt vor:
Nehmen Sie die Batterie aus dem Aktivitätssensor. Lesen Sie dazu
das Kapitel „Austausch der Batterien“.
Trocknen Sie das gesamte Gerät mit einem fusselfreien, trockenen
Tuch ab und lassen Sie es einen Tag geöffnet.
D
Legen Sie das Gerät nicht zum Trocknen auf die Heizung
oder in die Sonne!
Legen Sie die Batterie wieder in das Gerät ein. Lesen Sie dazu das
Kapitel „Batterie einlegen / Batteriewechsel“.
69
Page 72

In welcher Position misst das Gerät am genauesten?
Die Messgenauigkeit des Aktivitätssensors hängt von der Einstellung der Sensitivität, dem Laufstil des Benutzers sowie der Position
des Gerätes während der Messung ab.
Die Sensitivität des Gerätes muss je nach Tragevariante individuell eingestellt werden.
Die besten Messergebnisse liefert der Aktivitätssensor bei der Befestigung des Gerätes am Gürtel bzw. Hosenbund.
Warum passiert beim Drücken der Knöpfe nichts?
Überprüfen Sie den Batteriezustand!
Bei leerer Batterie ist keine Displayanzeige möglich. Legen Sie
eine neue Batterie ein (siehe Kapitel „Batterie einlegen / Batteriewechsel“).
Warum ist auf dem Display keine Anzeige zu sehen?
Überprüfen Sie den Batteriezustand! Bei leerer Batterie ist keine
Displayanzeige möglich. Legen Sie eine neue Batterie ein (siehe
Kapitel „Batterie einlegen / Batteriewechsel“).
Überprüfen Sie, ob die Batterie richtig eingelegt wurde!
Wenn nicht, legen Sie die Batterie erneut ein (siehe Kapitel „Batterie einlegen / Batteriewechsel“).
Hinweis: Bei falscher Kontaktierung kann das Gerät beschädigt
werden und kann eventuell nicht mehr funktionieren.
Warum werden meine Schritte nicht korrekt aufgezeichnet?
Stellen Sie die Sensitivität des Gerätes auf Ihre persönliche Schritt-
folge ein (siehe Kapitel „Aufzeichnung der Aktivität“, Abschnitt
„Empfindlichkeit des Gerätes zur Schrittzählung einstellen“).
Überprüfen Sie den Batteriezustand! Bei leerer Batterie kann keine
korrekte Messung stattfinden. Legen Sie eine neue Batterie ein
(siehe Kapitel „Batterie einlegen/Batteriewechsel“).
70
Page 73

Wieso kann ich meine Daten nicht vom Aktivitätssensor laden?
Überprüfen Sie die Befestigung des Kabels mit dem Mini-USB. Ist
das Kabel nicht ordnungsgemäß eingesteckt, kann keine Verbindung hergestellt werden.
Kann ich den Aktivitätssensor zum Fahrrad fahren benutzen?
Der Aktivitätssensor kann auch Tretbewegungen beim Fahrradfahren feststellen. Voraussetzung dafür ist, dass Sie den Sensor an
geeigneter Stelle tragen. Eine Platzierung des Sensors am Bein
oder in einer engen bzw. seitlichen Hosentasche ist gut geeignet,
nicht geeignet ist das Tragen am Gürtel. Die erfassten Bewegungen
entsprechen jedoch nicht gegangenen Schritten. Kontinuierliche
Tretbewegungen werden vorwiegend zur Aktivitätszeit des „normalen Gehens“ hinzugerechnet.
ABKÜRZUNGSVERZEICHNIS
Abkürzungen auf dem Display in alphabetischer Reihenfolge:
Abkürzung Erläuterung
CM Zentimeter
dAY Tag
FORM Uhrzeit-Format (12- oder 24-Stundenanzeige)
g Fettverbrennung in Gramm [g]
HOUR Stunde
kcal Kalorienverbrauch in Kilokalorien [kcal]
KG Kilogramm
lb Pfund
MIN Minute
MONth Monat
oz Fettverbrennung in Unzen [oz]
SENSI Empfindlichkeit des Gerätes zu Schrittzählung (5 Stufen)
StEP Schrittanzahl
YEAR Jahr
D
71
Page 74

STICHWORTVERZEICHNIS
A
Abkürzungsverzeichnis 71
Aktivität 37, 39
Aktivität aufzeichnen 54
Aktivitätsdaten anzeigen 55
Aktivitätsdaten einstellen 51
Anbringen Aktivitätssensor 56
Aufzeichnung der Aktivität 54
B
Batterien 67
Belohnungssystem 40
D
Datum ändern 62
Datum einstellen 52
Display 47
E
EasyFit Software 42, 66
Empfindlichkeit einstellen 59
Empfindlichkeit testen 60
Entsorgung 38
F
Fettverbrennungs-Einheiten
einstellen 50
Fitness 39
Fragen und Antworten 69
G
Garantie 68
Gesundheit 39
Gewicht ändern 61
Gewicht einstellen 50
Gewichts-Einheiten einstellen 50
Grundeinstellungen 49
Grundeinstellungen ändern 59
H
Healthmanager Software 42, 66
Hinweise 37
Inbetriebnahme 44
I
Installation der Software 66
K
Knöpfe 46
L
Längen-Einheiten einstellen 50
Lieferumfang 36
P
Pflege 38
R
Reinigung 38
Reparatur 38
S
Schrittmessung ausschalten 64
Schrittzählung 59
Software EasyFit 42, 66
Software Healthmanager 42, 66
Speicherfunktion 65
Stromsparmodus 48
Symbol 47
T
Technische Daten 67
Tragen des Aktivitätssensors
am Gürtel 56
in der Hosentasche 58
wie eine Armbanduhr 58
U
Uhrzeit ändern 62
Uhrzeit einstellen 52
Uhrzeit-Format ändern 61
Uhrzeit-Format einstellen 52
V
Verwendungszweck 37
Z
Zielpensum Schritte einstellen 50
Zubehör 38
72
Page 75

Page 76

753.753 · 0613 Irrtum und Änderungen vorbehalten
 Loading...