

Page 1

Installation Instructions - Fabric Replacement Top for Trektop NX
Installation Instructions
Fabric Replacement Top for Trektop NX
© 2013 Bestop, Inc.P1 - 52821 - Rev. B 1013
Vehicle Application:
Jeep Wrangler Unlimited TJD
2004 – 2006
Part Number: 52821
Before you begin installing your new Trektop NX, please read
all the instructions thoroughly.
For a smooth fit:
For easier installation, the top should be installed at a temperature above
72º F. Below this temperature, the fabric may contract an inch or more,
making it difficult to fit the vehicle.
It is normal for the fabric to contract and wrinkle when stored in the shipping carton. Within a few days after installation, the fabric will relax and the
wrinkles will disappear.
Installation Tips
Safety glasses should be worn at all
times when installing this product.
This product is designed primarily to enhance the appearance of the vehicle and to shield the occupants from ordinary weather conditions. Do not rely in
any way on the components of this product to contain the occupants within the vehicle, or to protect against injury or death in the event of an accident, This product will not protect
the occupants from falling objects. Never operate the vehicle in excess of manufacturer’s specications.
WEAR SEAT BELTS AT ALL TIMES
Read and follow, precisely, all installation instructions provided when installing this product. Failure to do so may result in a poor t and could place occupants of the vehicle in a
potentially dangerous situation.
Tools Installation Time
Skill Level
Support
We’re here to help!
Go to www.Bestop.com and
click “Contact Us”
See a video showing
installation of this top at
www.bestop.com/video
1/2 Hour
2 - Moderately Easy
Safety
Glasses
Phillips
Screwdriver
Utility Knife
Page 2

Installation Instructions - Fabric Replacement Top for Trektop NX
Installation Instructions
Fabric Replacement Top for Trektop NX
© 2013 Bestop, Inc.P2 - 52821 - Rev. B 1013
Vehicle Application:
Jeep Wrangler Unlimited TJD
2004 – 2006
Part Number: 52821
Page 3

Installation Instructions - Fabric Replacement Top for Trektop NX
Installation Instructions
Fabric Replacement Top for Trektop NX
© 2013 Bestop, Inc.P3 - 52821 - Rev. B 1013
Vehicle Application:
Jeep Wrangler Unlimited TJD
2004 – 2006
Part Number: 52821
Rear Bow
Qty - 1
Door Surround - Left
Qty - 1
!STOP! Do not proceed unless you have a Trektop NX already installed.
You will need these parts to complete the installation
Tailgate Bar
Qty - 1
M8 x 75mm
Knob
Qty - 1
Tailgate Mount - Left
Qty - 1
Tailgate Mount - Right
Qty - 1
Door Surround Right Qty - 1
M8 x 75mm
Knob
Qty - 1
Windshield Header, Side
Bow Assembly
Qty - 1
Page 4

Installation Instructions - Fabric Replacement Top for Trektop NX
Installation Instructions
Fabric Replacement Top for Trektop NX
© 2013 Bestop, Inc.P4 - 52821 - Rev. B 1013
Vehicle Application:
Jeep Wrangler Unlimited TJD
2004 – 2006
Part Number: 52821
Fabric Top
Right Side Window
Left Side Window
Rear Window
J-Hook Buckle Strap,
Qty - 2
Part # 486.23
Included Parts
Used in Sections 9 and 11
Used in Sections 5 – 16
Buckle Strap and Stiffeners
Fabric Top and Windows
Used on Pages 14 and 16
Used on Pages 10 – 22
Stiffeners
Qty - 1 per side
Part # 505.40 (R) & 505.41 (L)
Page 5
Installation Instructions - Fabric Replacement Top for Trektop NX
© 2013 Bestop, Inc.P5 - 52821 - Rev. B 1013
Page 5
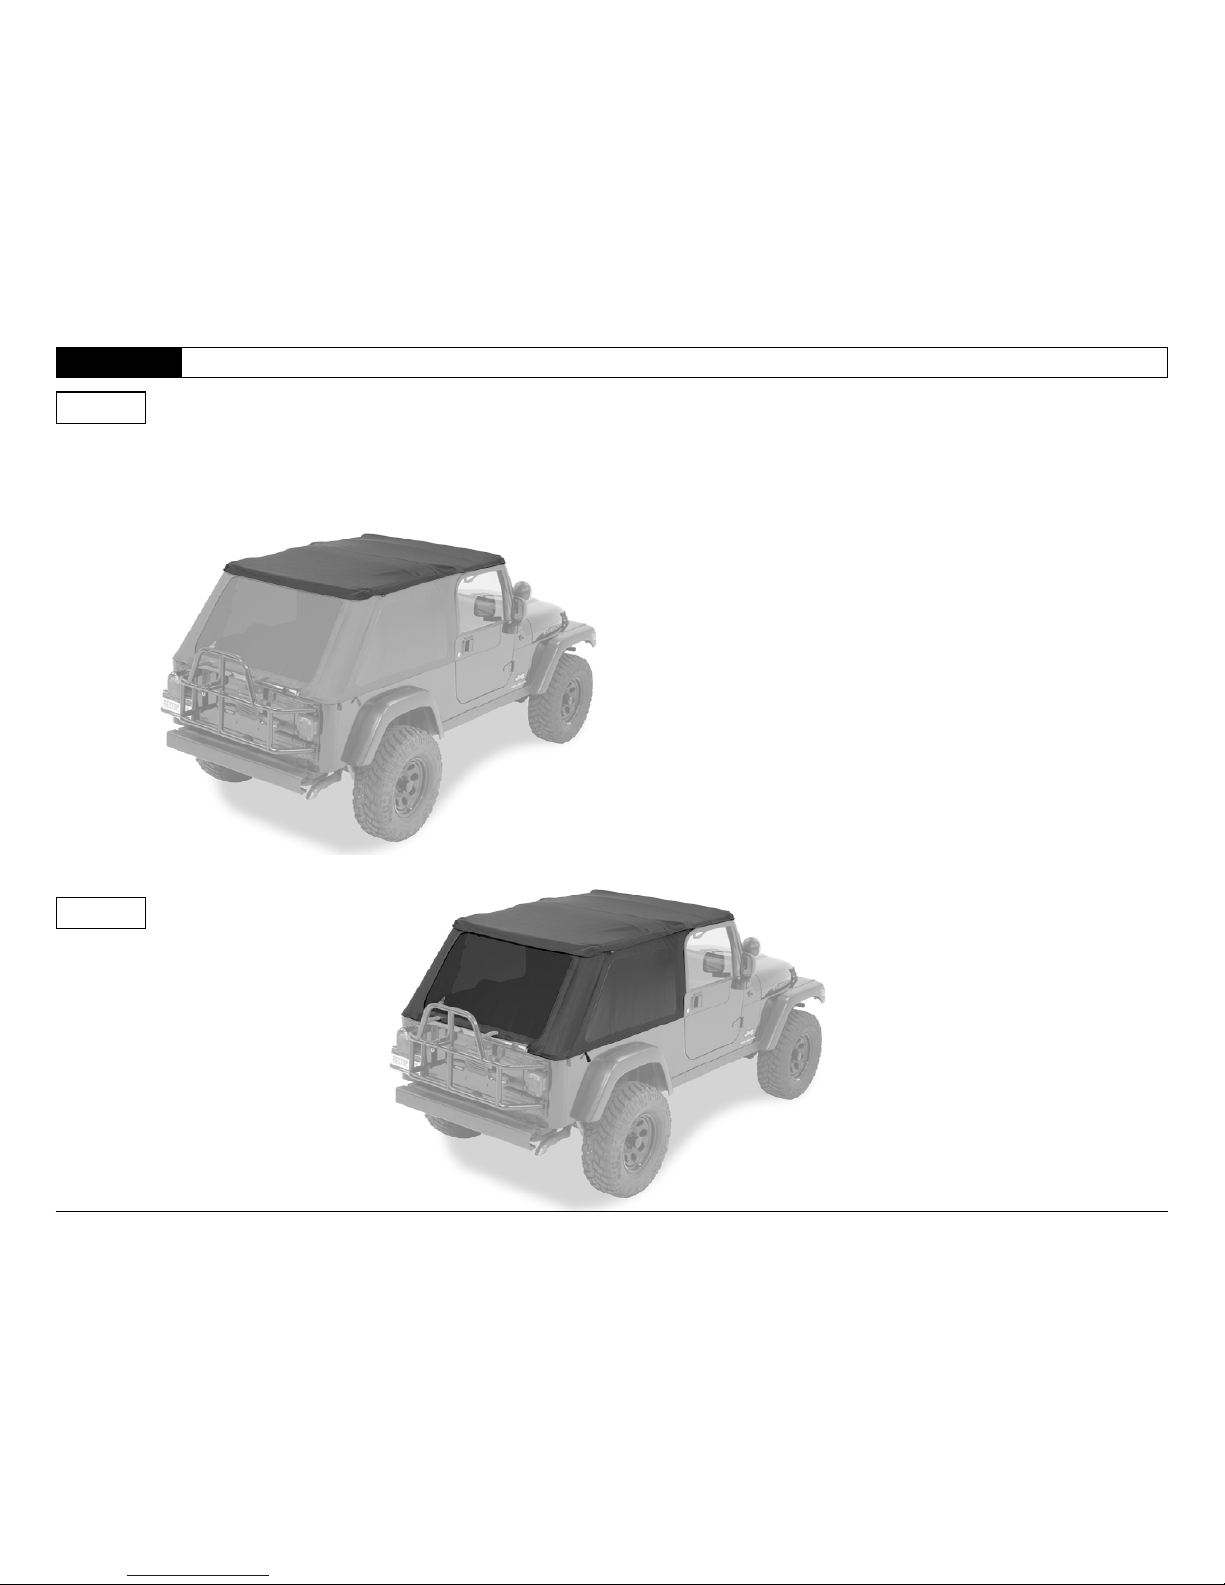
Remove Side and Rear Windows
Section 1
Step 1
Step 1
Remove Side Windows and Rear Window.
Page 6
Installation Instructions - Fabric Replacement Top for Trektop NX
© 2013 Bestop, Inc.P6 - 52821 - Rev. B 1013
Page 6
Section 2
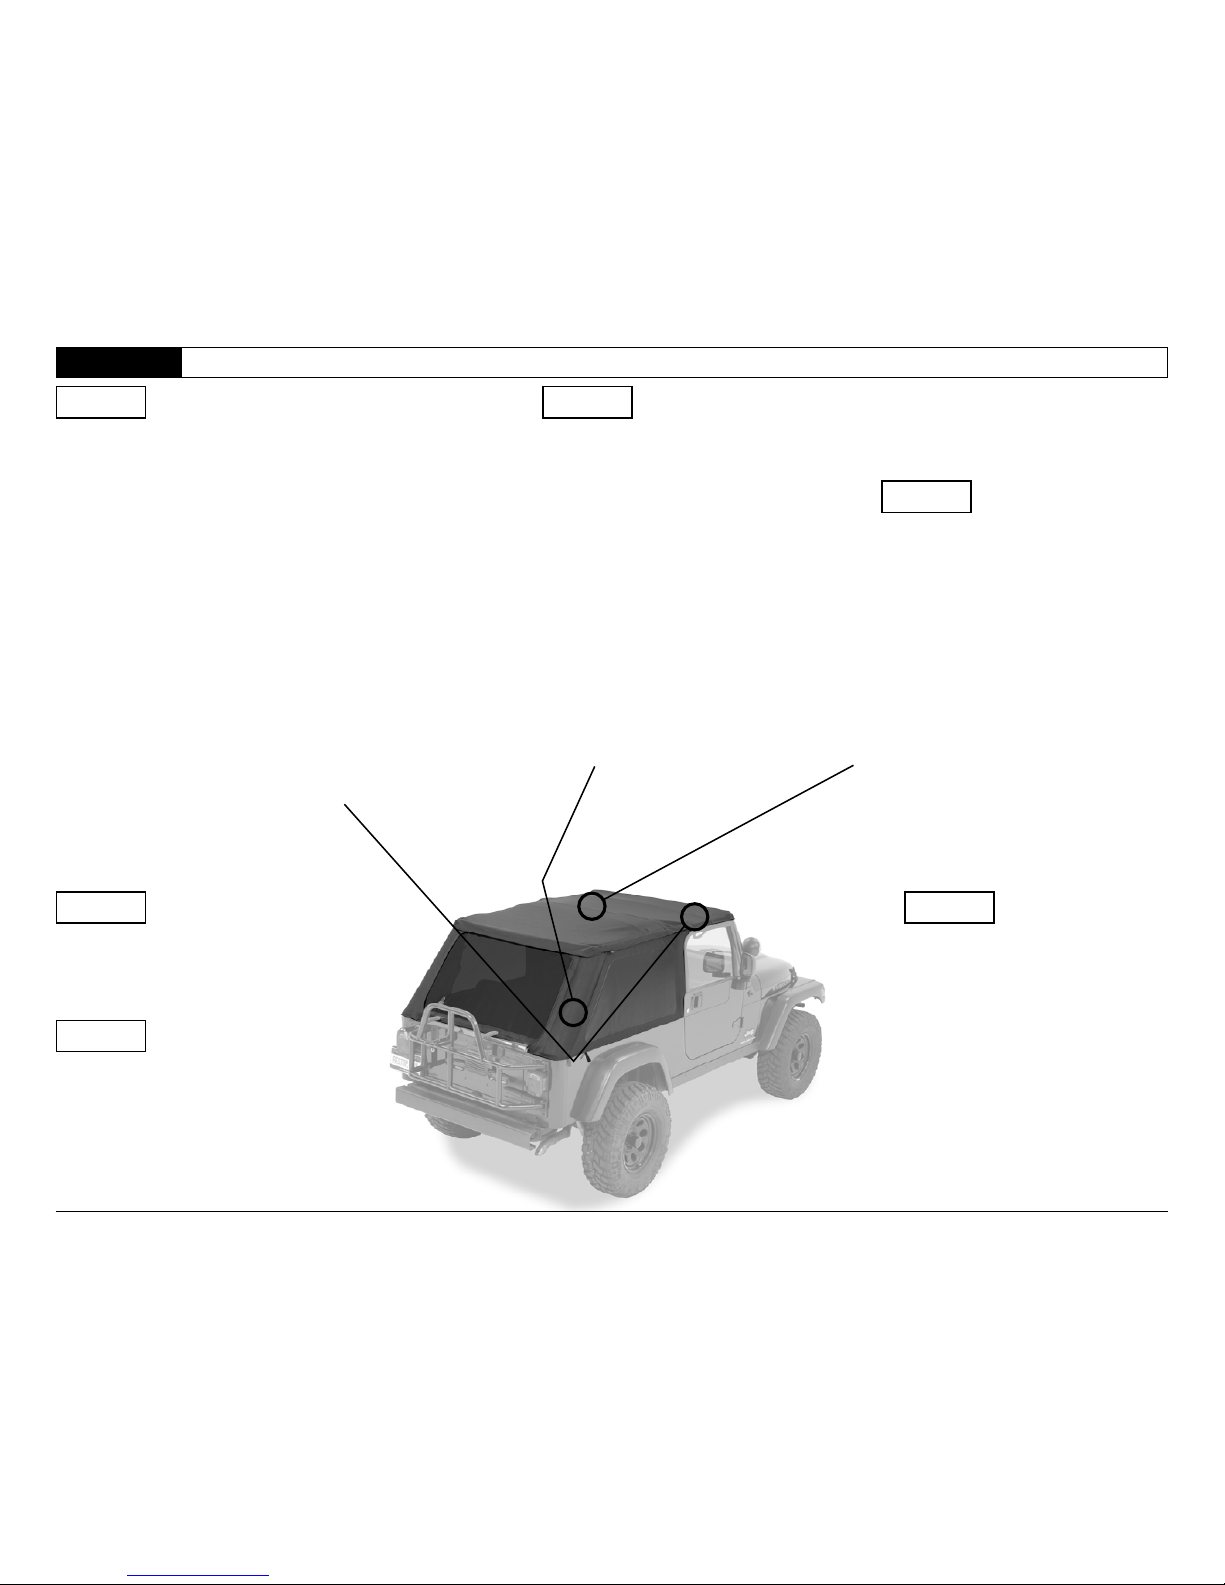
Release Plastic Strips and Web Straps
Step 1 Step 2
Step 3
Step 1 Step 3
Step 2
Release plastic strips above the doors
from the channel in the Door Surround on
each side of the vehicle.
Release straps around sport bar.
Loosen, remove, and discard Rear Strap.
Page 7
Installation Instructions - Fabric Replacement Top for Trektop NX
© 2013 Bestop, Inc.P7 - 52821 - Rev. B 1013
Page 7
Section 3
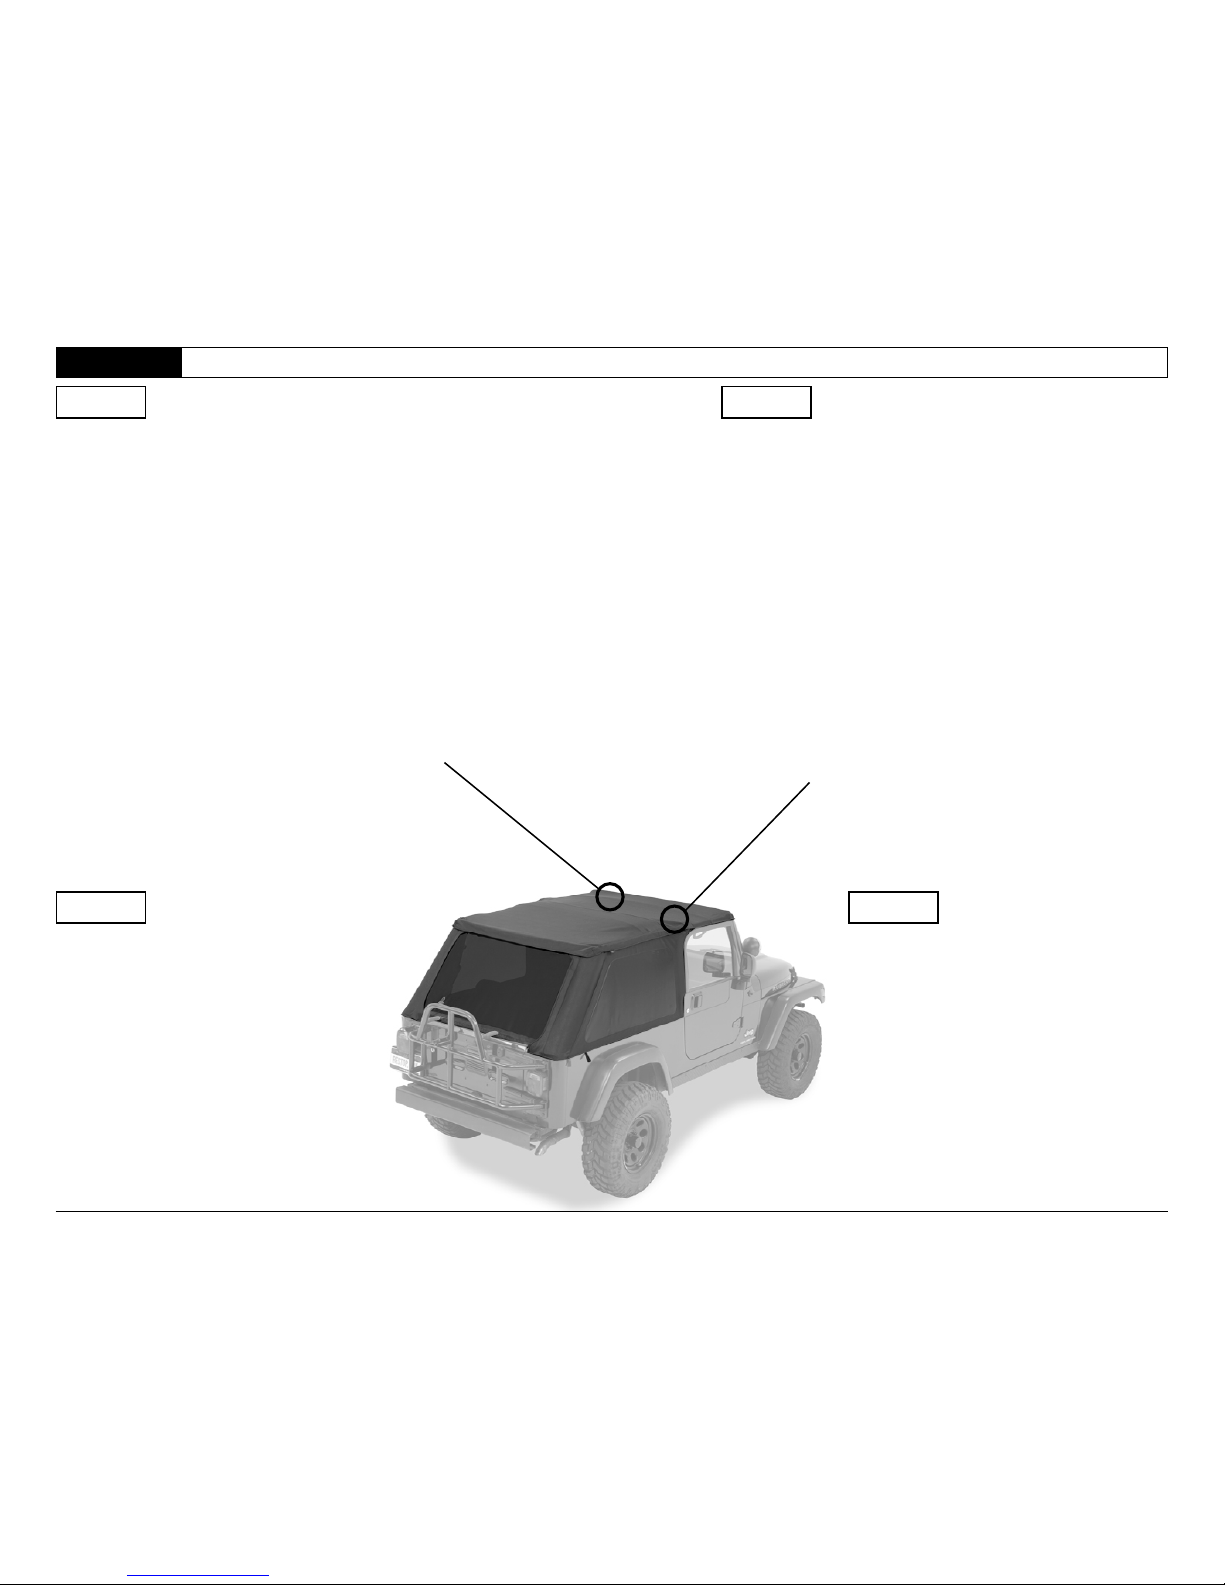
Remove Header and Fabric From Vehicle
Step 1 Step 2
Step 1 Step 2
Release the latch that secures the header
to the windshield. Pull up on the lever and
then down and out to release the hook
from the slot in the windshield frame
Fold the Top Fabric toward the front of the Header.
Pull the release knob on the Side Bow to release
the pin from the Door Surround Bracket. Repeat on
the other side of the vehicle.
Page 8
Installation Instructions - Fabric Replacement Top for Trektop NX
© 2013 Bestop, Inc.P8 - 52821 - Rev. B 1013
Page 8
Section 3
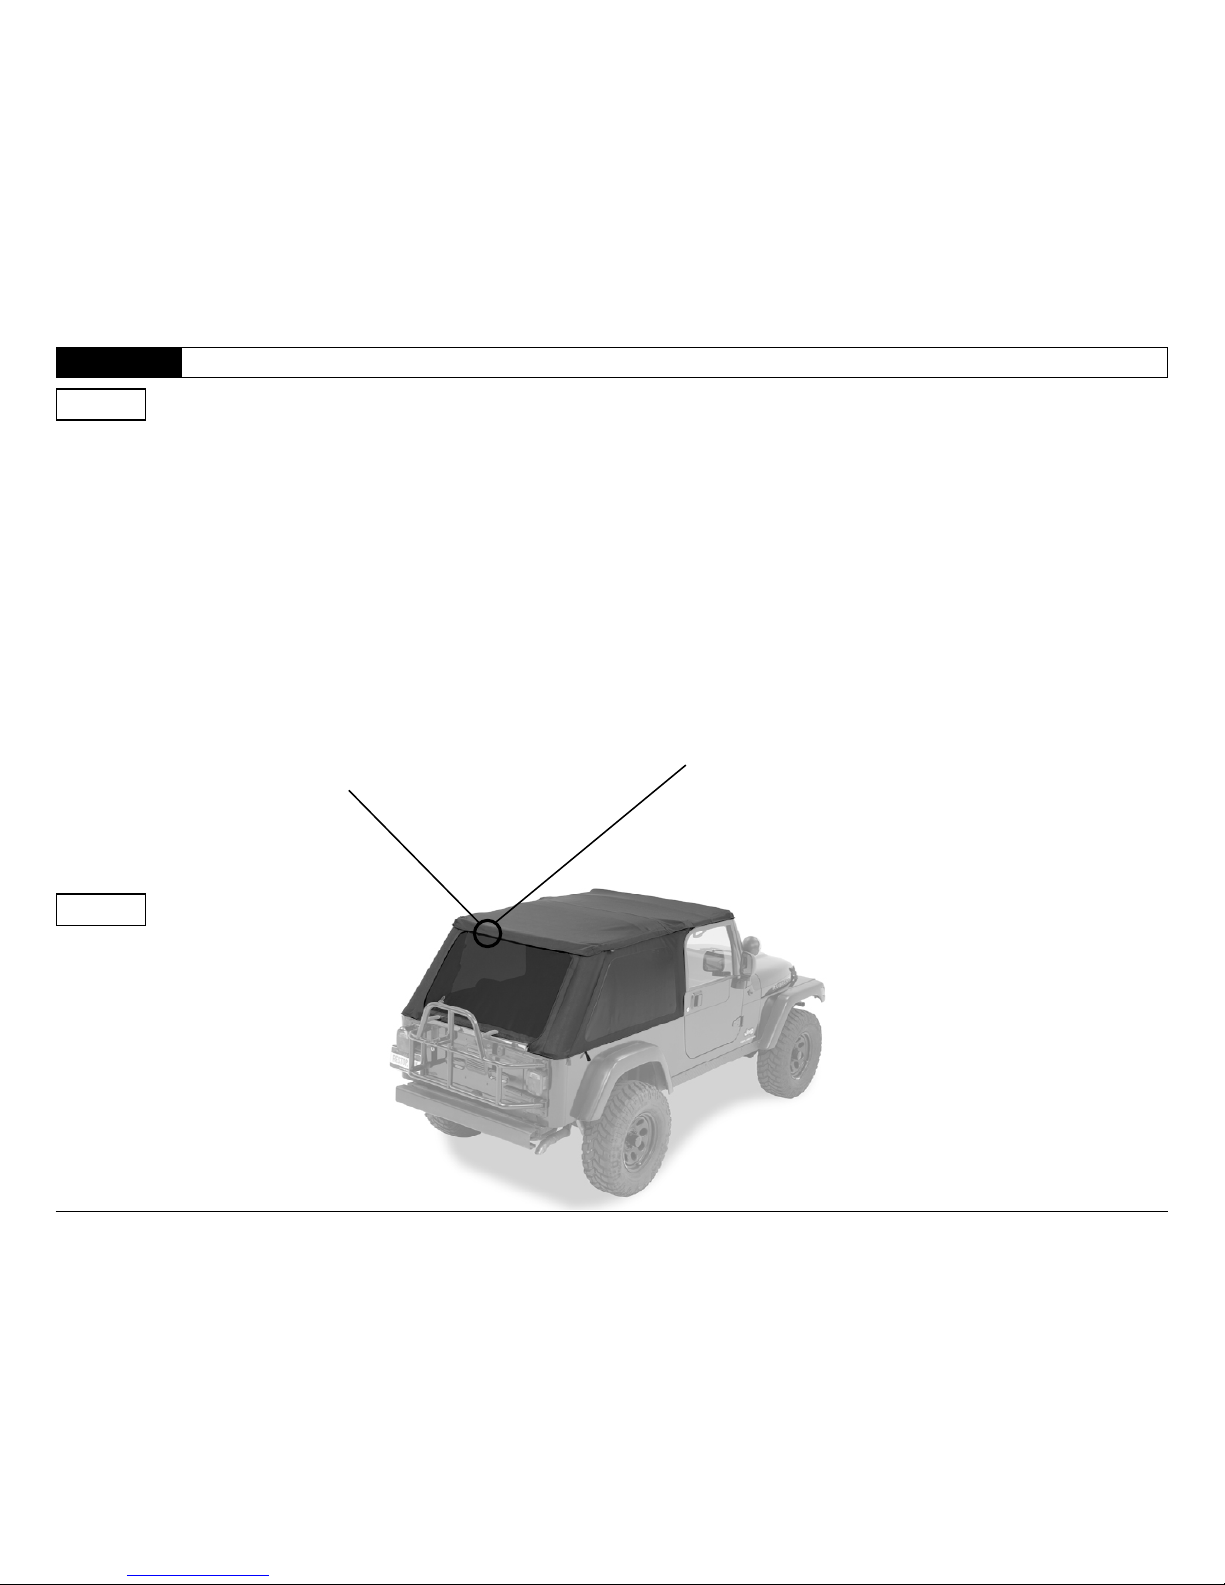
Remove Header and Fabric From Vehicle (cont.)
Step 3
Step 3
Release the J-Hooks on the rear bow aps
from the ends of the Rear Bow. Slide the
Rear Bow out of the pocket in the Top
Fabric.
Page 9

Installation Instructions - Fabric Replacement Top for Trektop NX
© 2013 Bestop, Inc.P9 - 52821 - Rev. B 1013
Page 9
Section 4
Remove Fabric From Header
Step 1
Phillips
Screwdriver
Step 1
Remove the #8 x 5/8” Pan Head Screws
along the front of the header.
Remove the Oval Head Screw in the outside holes on each side of the Header.
Set all screws aside to be reused.
Page 10

Installation Instructions - Fabric Replacement Top for Trektop NX
© 2013 Bestop, Inc.P10 - 52821 - Rev. B 1013
Page 10
Phillips
Screwdriver
Utility Knife
Section 5
Install Top Fabric On Header
Step 1
Top Fabric
Step 1
Lay the top fabric, backing side up and
aligned with the front edge of the Header.
Use a utility knife to slit the fabric over
each screw position. Locate the round hole
that marks the center of the plastic strip
(all other holes are slotted). Install a #8 x
5/8” Pan Head Screw in the round hole
to secure the fabric to the header as well
as to center the top. Then install #8 x 5/8”
Pan Head Screws in the remaining holes
along the front of the header.
Install an Oval Head Screw in the outside
holes on each side of the Header.
Page 11

Installation Instructions - Fabric Replacement Top for Trektop NX
© 2013 Bestop, Inc.P11 - 52821 - Rev. B 1013
Page 11
Section 6
Install Rear Bow
Step 1
Step 1
Slide the Rear Bow into the pocket inside
the rear of the Top Fabric. Secure the J-
Hooks on the rear bow aps to the ends of
the Rear Bow.
Page 12
Installation Instructions - Fabric Replacement Top for Trektop NX
© 2013 Bestop, Inc.P12 - 52821 - Rev. B 1013
Page 12
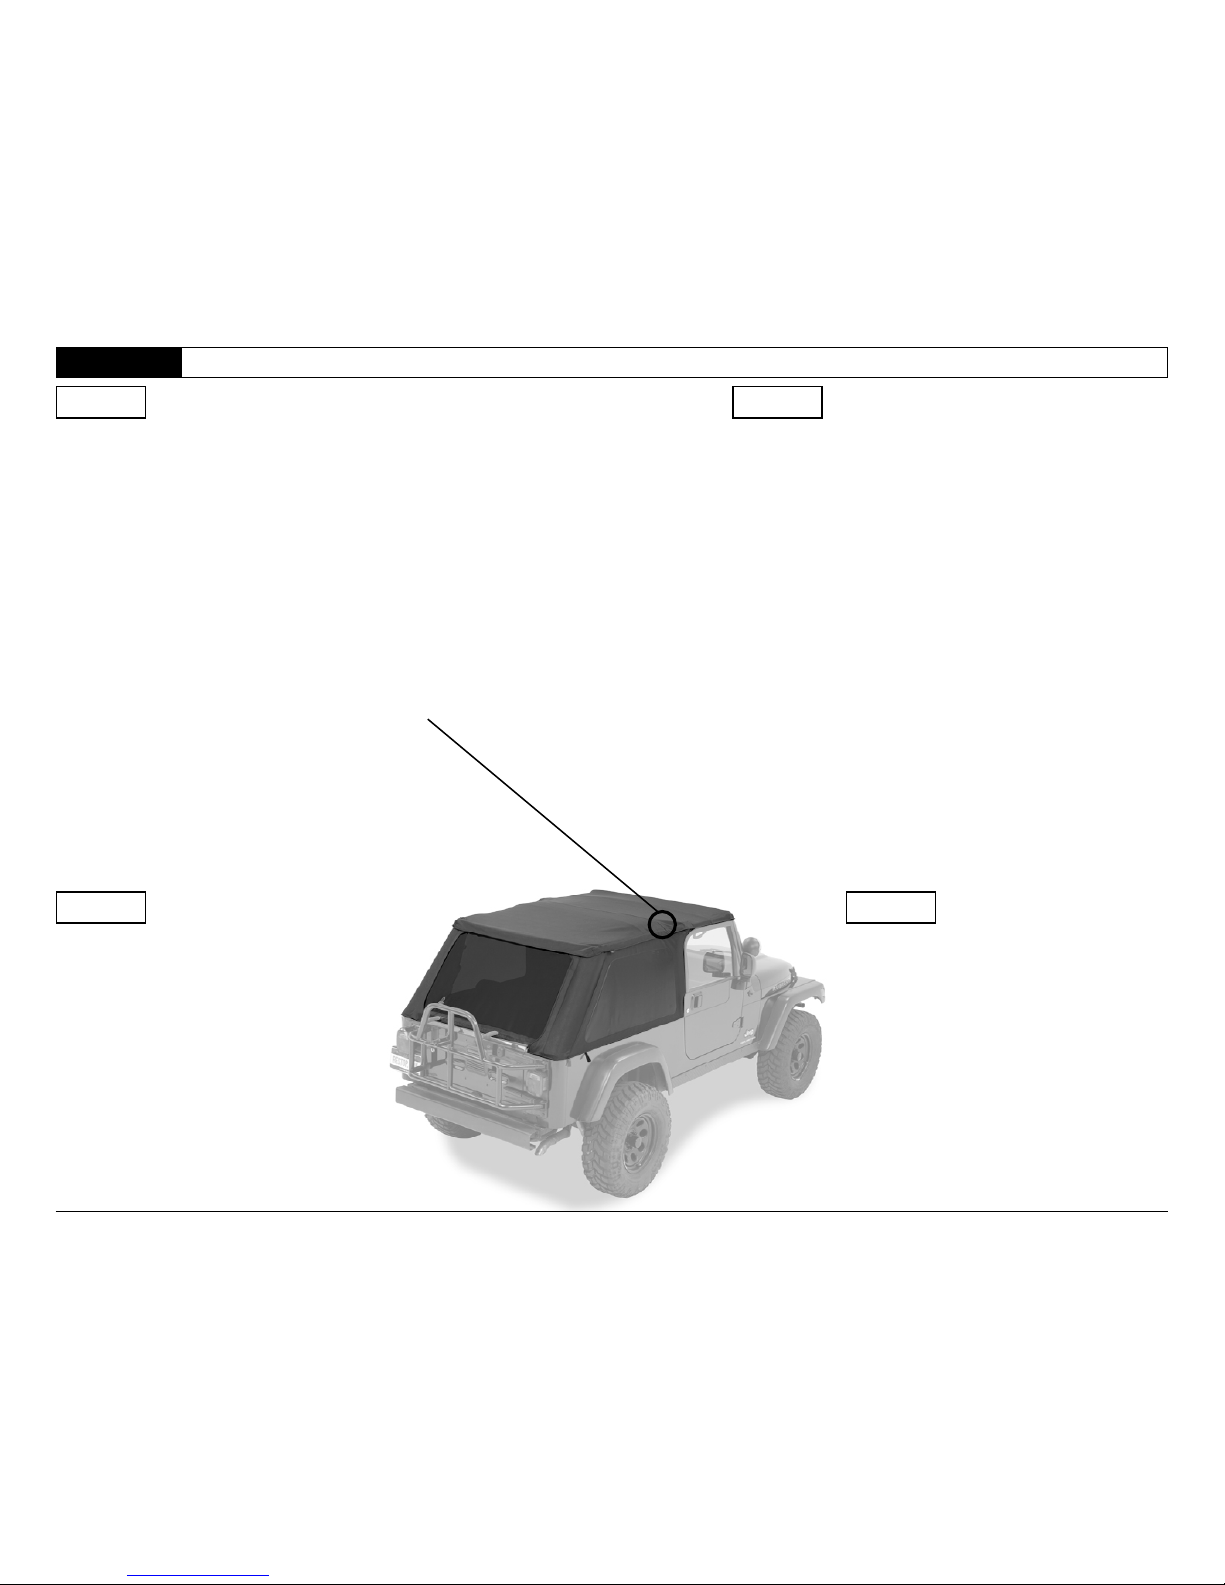
Section 7
Mount Header Assembly to Door Surround
Step 1 Step 2
Step 1 Step 2
Fold the Top Fabric toward the front of the
Header. Place the Header on the vehicle.
Pull the release knob on the Side Bow
and insert the pin into the Door Surround
Bracket. Repeat on the other side of the
vehicle.
Pull the Top Fabric back over the sport bar.
Page 13
Installation Instructions - Fabric Replacement Top for Trektop NX
© 2013 Bestop, Inc.P13 - 52821 - Rev. B 1013
Page 13
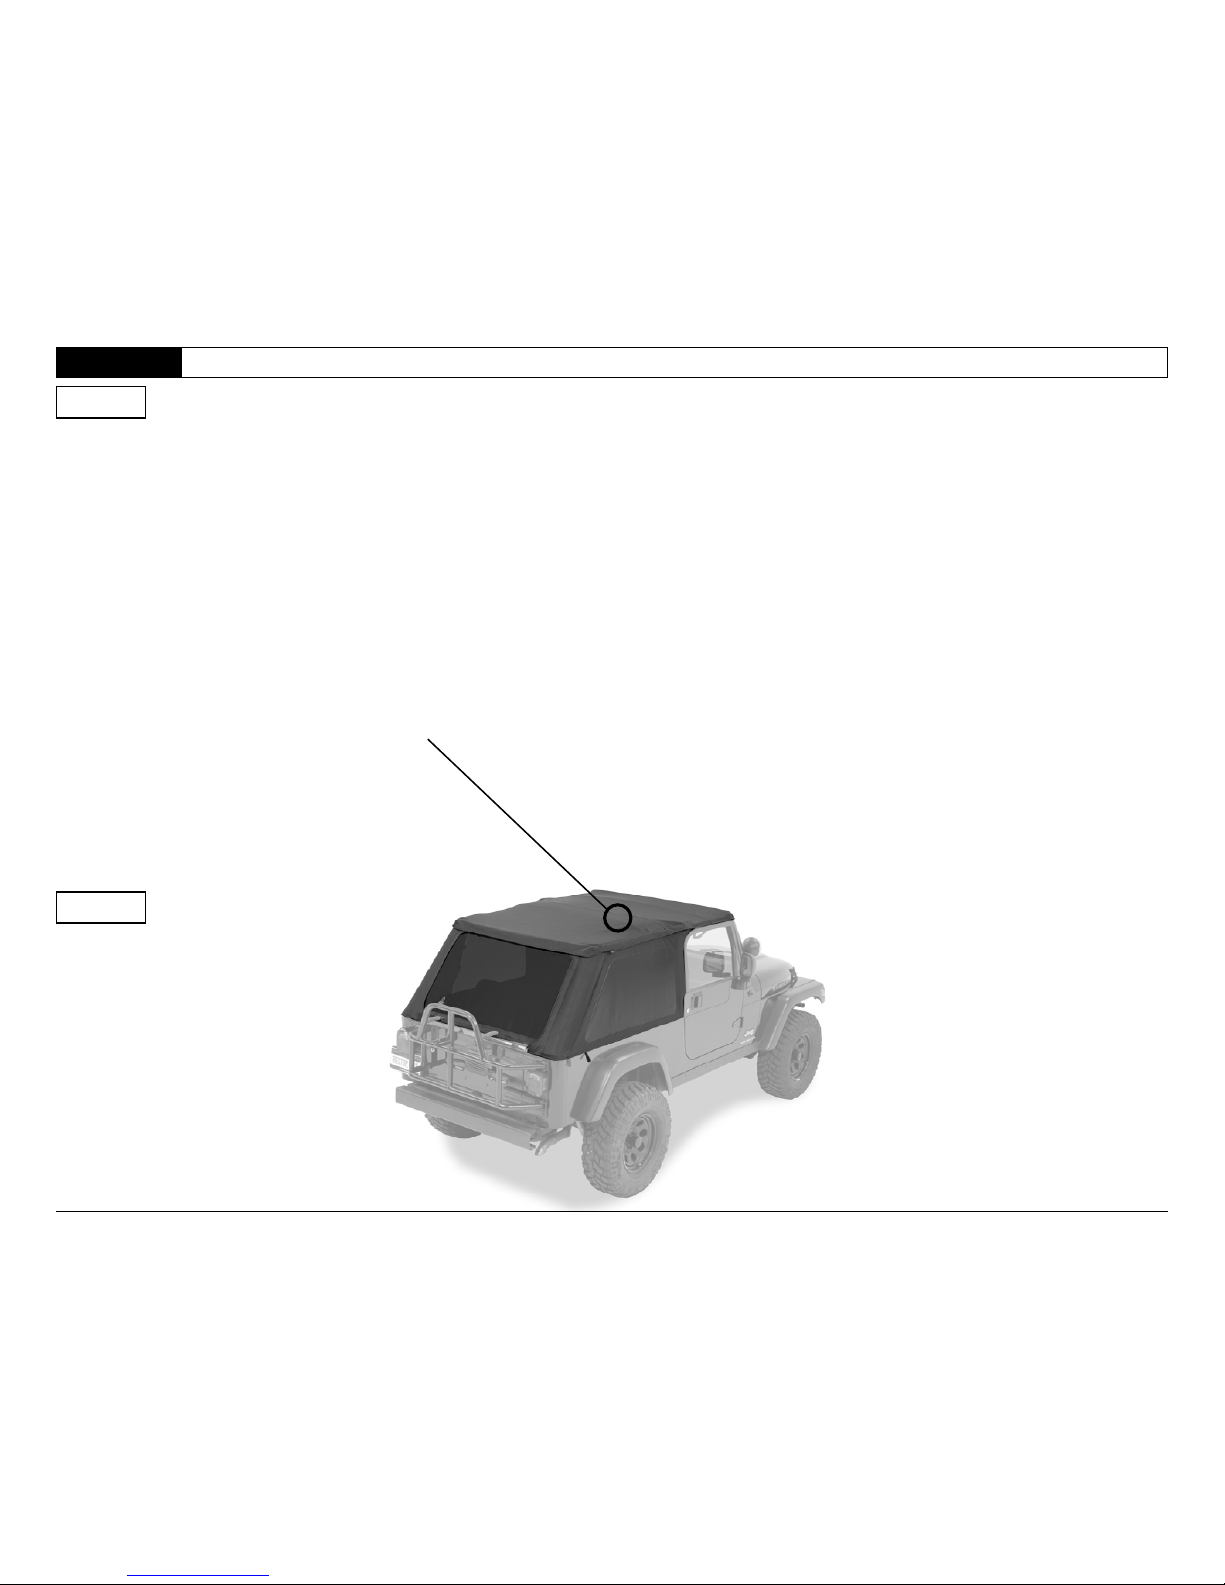
Section 8
Secure Straps to Sport Bar
Step 1
Step 1
Loosen the speaker pod. Slip the straps
between the speaker pod and the sport
bar. Wrap the straps around the sport bar
on each side of the vehicle. Thread the
ends of the straps through the buckles and
tighten. Tighten the speaker pod.
Page 14
Installation Instructions - Fabric Replacement Top for Trektop NX
© 2013 Bestop, Inc.P14 - 52821 - Rev. B 1013
Page 14
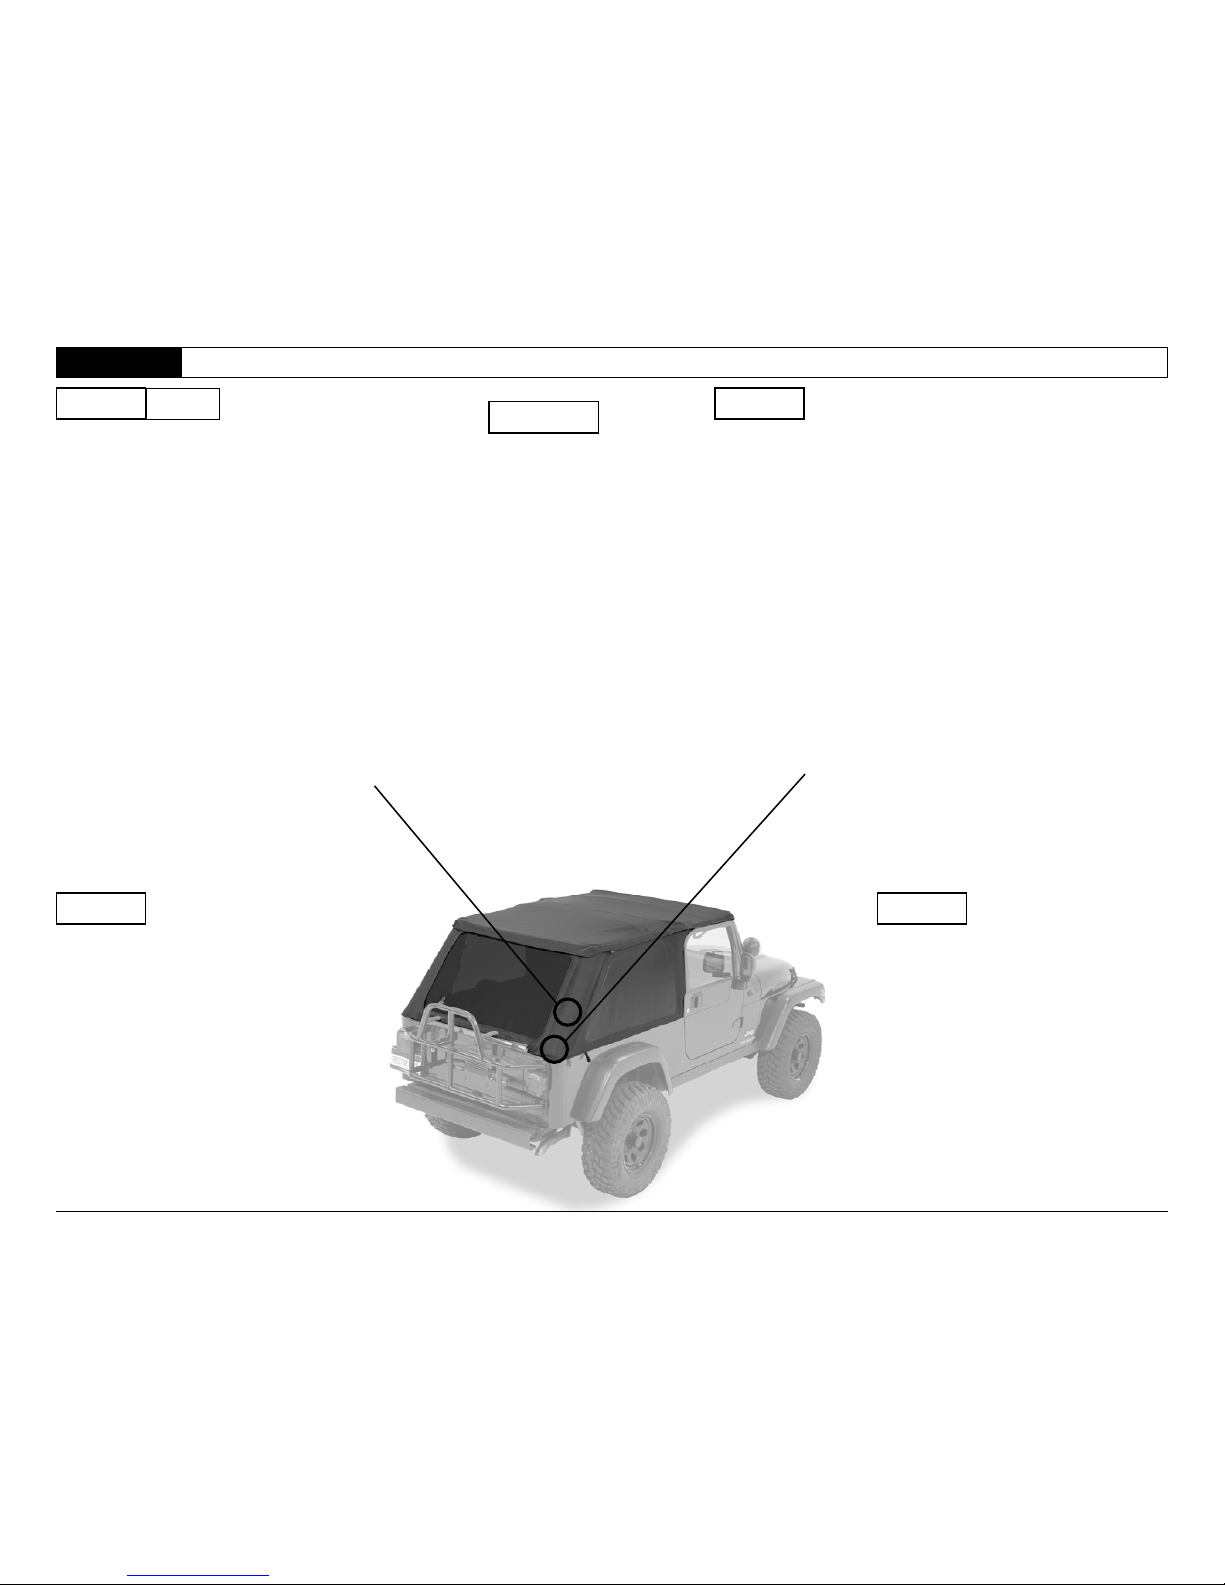
Section 9
Secure Rear Strap
Step 1 Step 2
479.29
J-Hook Buckle Strap,
Qty - 1 per side
Part # 486.23
Hardware
Step 1 Step 2
Thread a J-Hook Buckle Strap through the
buckle on one of the rear straps.
Hook the strap to the ledge inside the rear
corner of the vehicle. Repeat on both sides
of the vehicle.
Page 15
Installation Instructions - Fabric Replacement Top for Trektop NX
© 2013 Bestop, Inc.P15 - 52821 - Rev. B 1013
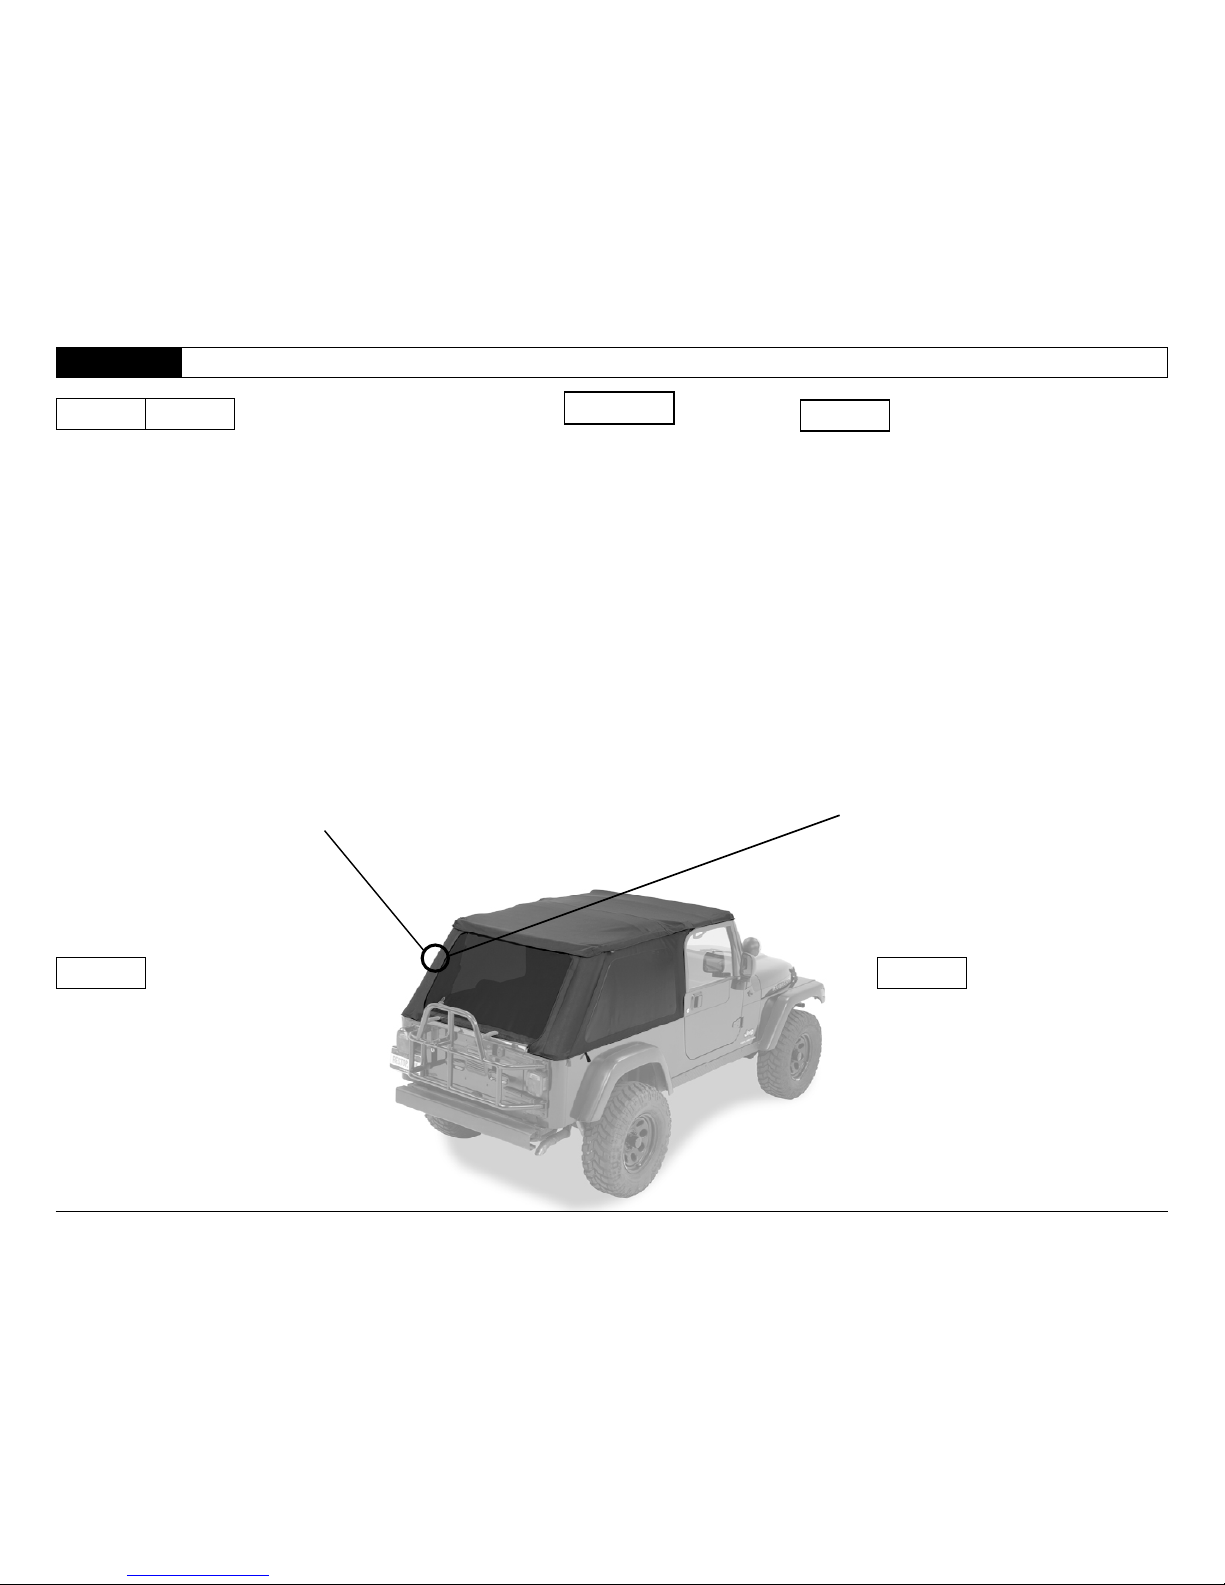
Page 15Install Rear Window
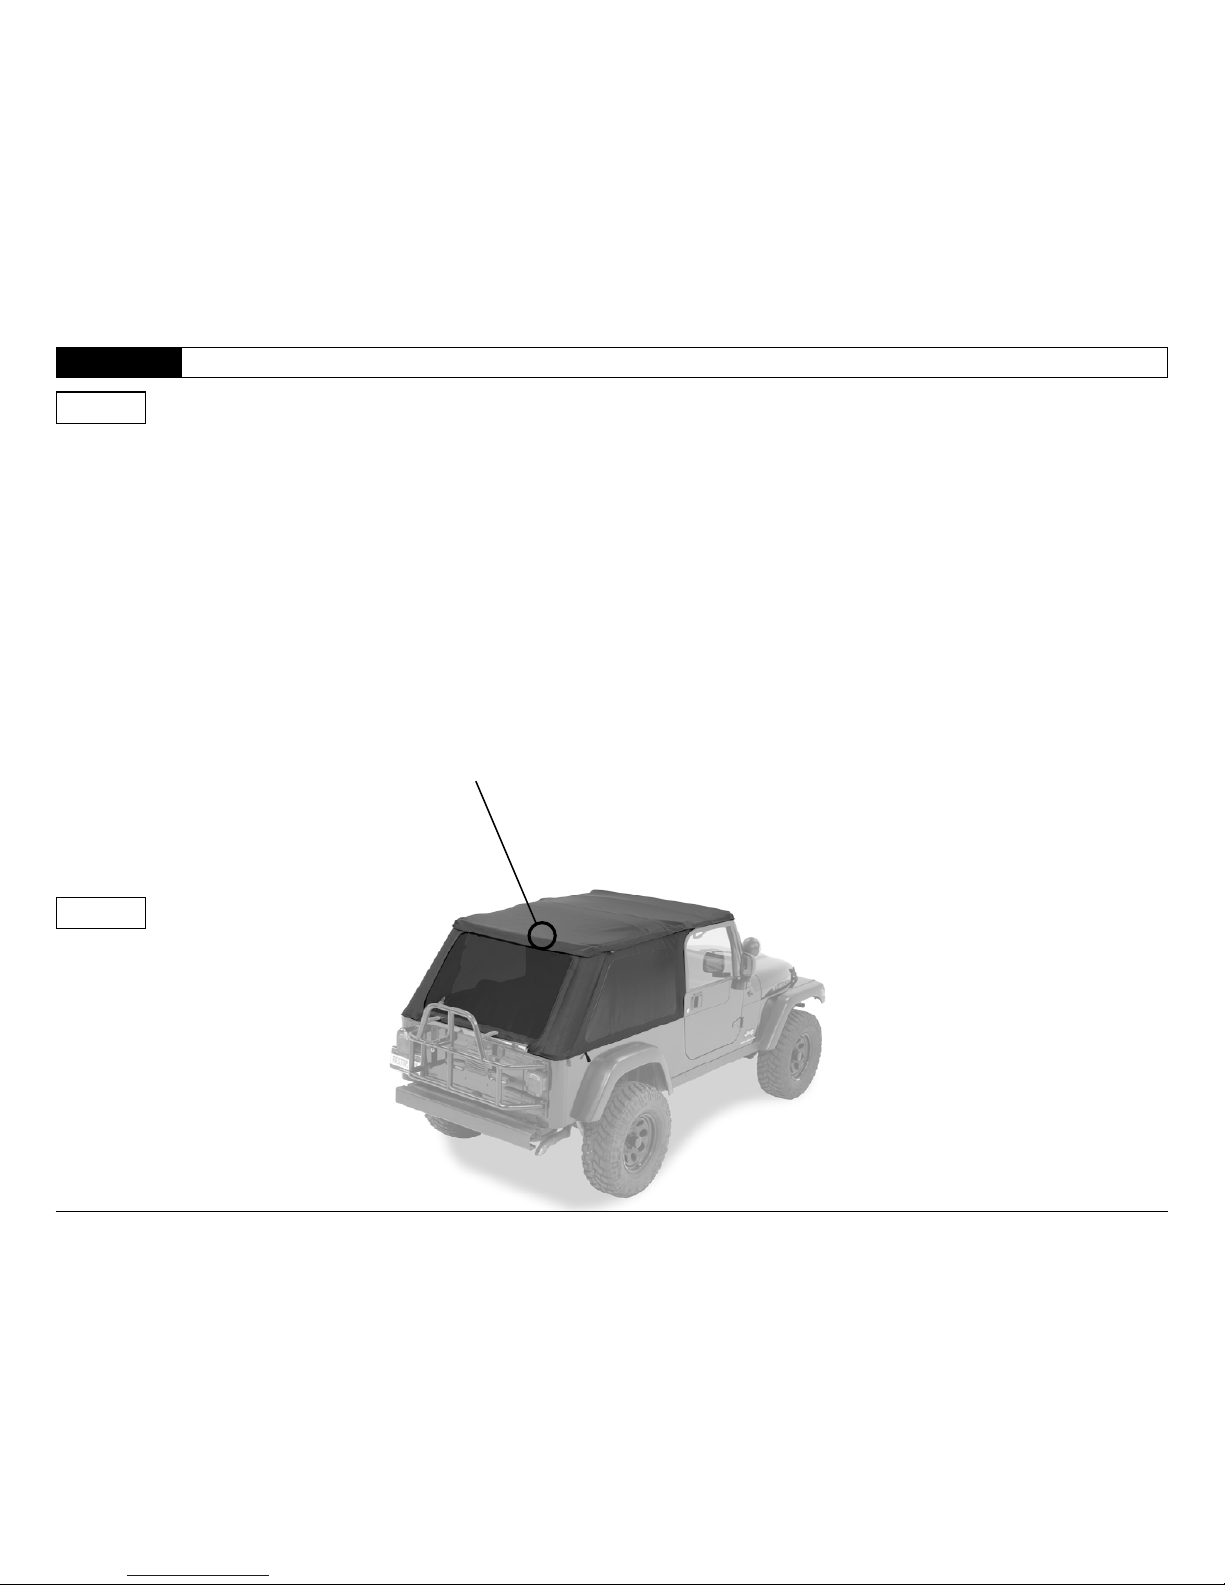
Section 10
Step 1
Step 1
Align the J-slide with the J-slide sewn into
the rear of the Top. Slide them together
until the Rear Window is centered in the
opening.
Page 16
Installation Instructions - Fabric Replacement Top for Trektop NX
© 2013 Bestop, Inc.P16 - 52821 - Rev. B 1013
Page 16
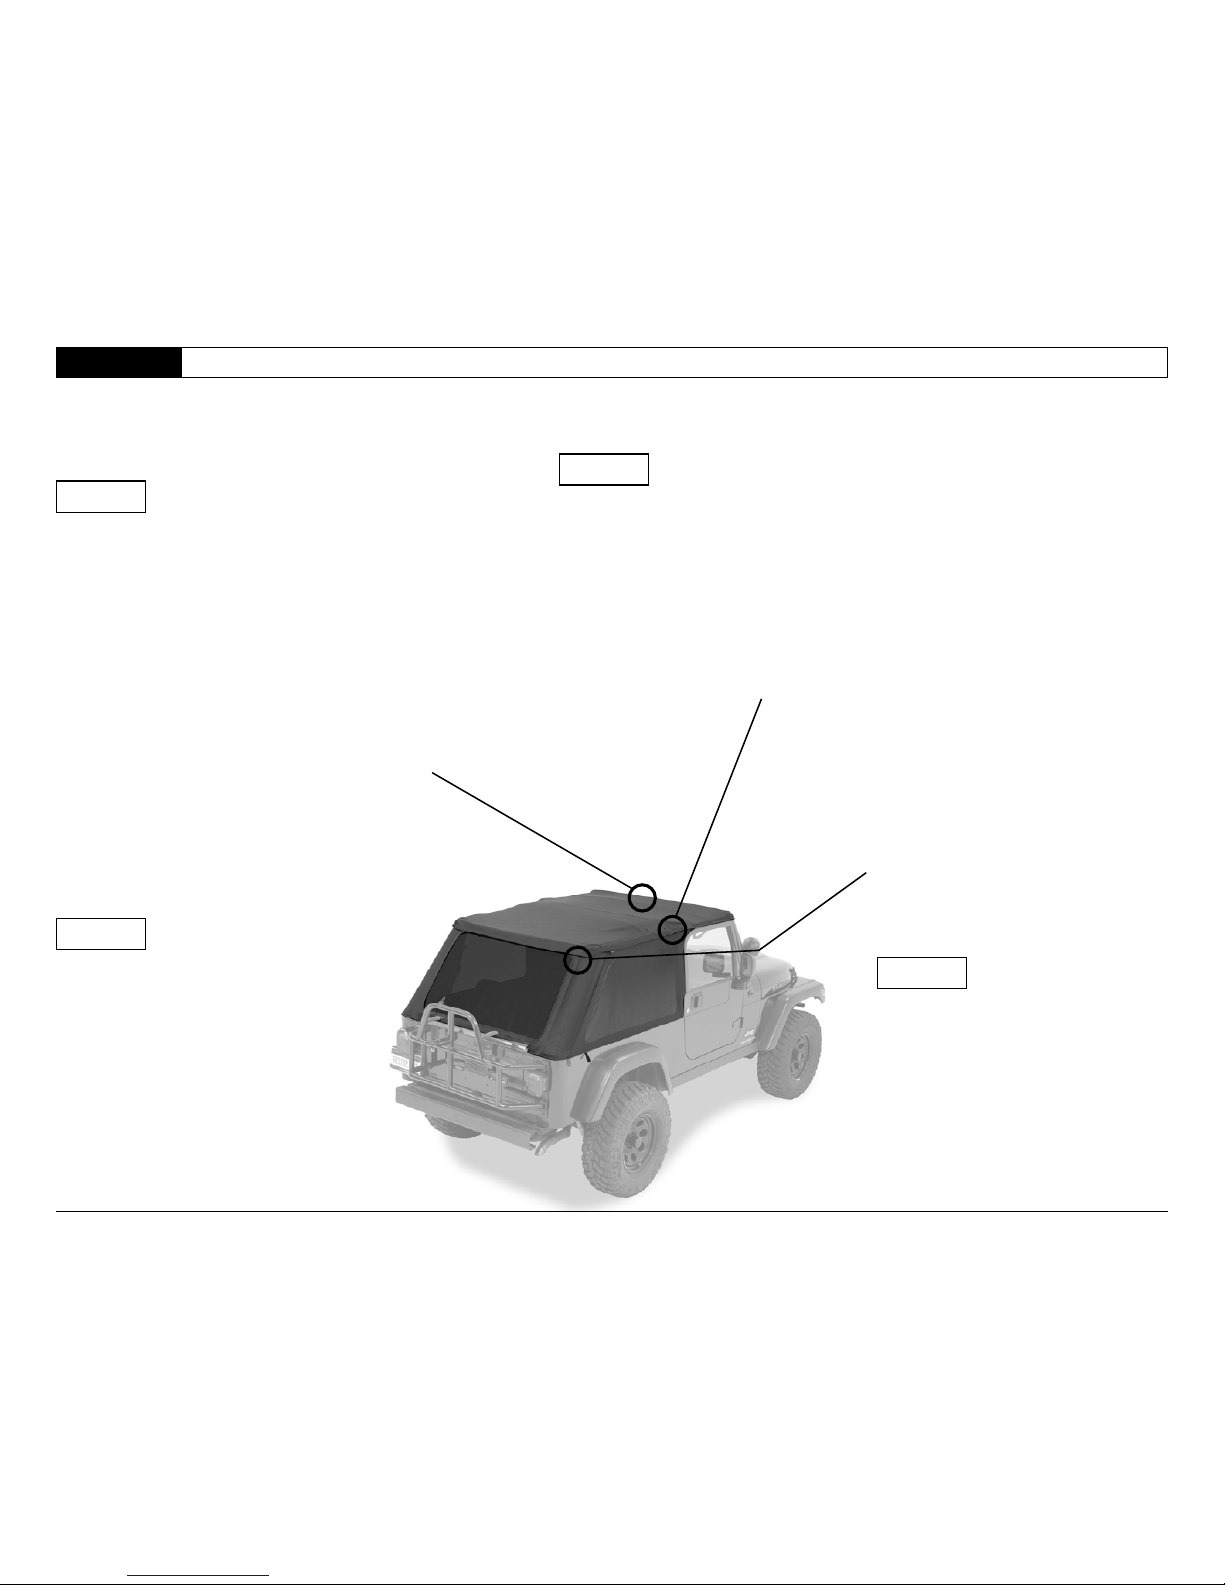
Install Stiffeners
Section 11
Step 2
Step 1 505.41
Stiffeners, Qty - 1 per side
505.40 (R)
505.41 (L) (Shown)
Hardware
Slide Stiffener to bottom of Side Window.
Stiffener will show at top of pocket when
properly installed.
Repeat with both Stiffeners.
Step 1 Step 2
Leave the Stiffeners in the fabric
sleeves to keep the curve shape.
Squeeze sides of Stiffener to increase
curve. Slide into pocket in Side Window.
Page 17
Installation Instructions - Fabric Replacement Top for Trektop NX
© 2013 Bestop, Inc.P17 - 52821 - Rev. B 1013
Page 17
Install Side Window
Section 12
Step 2
Step 1
Separate the protective ap covering the hook
strip on the side of the Deck. Open the ap
toward the inside of the vehicle.
Start the zipper along the top of the Side
Window with the zipper in the Top. Only close
the zipper 1-2". Repeat with the rear zipper
and the zipper on the Rear Window. Repeat
with both Side Windows.
Step 1
Step 2
Open the header to make it easier to
install the Side Windows and the Rear
Window.
Page 18

Installation Instructions - Fabric Replacement Top for Trektop NX
© 2013 Bestop, Inc.P18 - 52821 - Rev. B 1013
Page 18
Install Side Window (cont.)
Section 12
Step 3
Step 4
Step 5
Step 3
Step 4 Step 5
Close the zippers along the top of each
Side Window.
Push Plastic Reinforcement down to
make it easier to close zipper.
Slip the plastic strip along the
bottom of the Side Windows into
the channel in the belt rail on
each side of the vehicle.
Slip the plastic strip on the
front of a Side Window into the
channel in the Door Surround.
Repeat with both Quarter
Windows.
Page 19

Installation Instructions - Fabric Replacement Top for Trektop NX
© 2013 Bestop, Inc.P19 - 52821 - Rev. B 1013
Page 19
Install and Secure Tailgate Bar
Section 13
Step 1
Step 2
Tailgate Bar
Qty - 1
Required, but not
included
Hardware
Step 1
Step 2
Open the tailgate. Orient the Tailgate Bar with the
rubber bulb facing down, in order to form a seal
with the top of the tailgate. Slide the groove in the
Tailgate Bar onto the tube inside the bottom of the
Rear Window. Roll the Tailgate Bar into the top of
the Tailgate Mounts.
Close the Rear Window zippers.
Slip the plastic strips along the bottom of the
Rear Window into the channel in the Tailgate
Mounts on each side of the tailgate.
Wrap the Quarter Windows over the Rear
Window and slip the plastic strips on each
Quarter Window into the channel in the
Tailgate Mounts on each side of the tailgate.
Page 20
Installation Instructions - Fabric Replacement Top for Trektop NX
© 2013 Bestop, Inc.P20 - 52821 - Rev. B 1013
Page 20
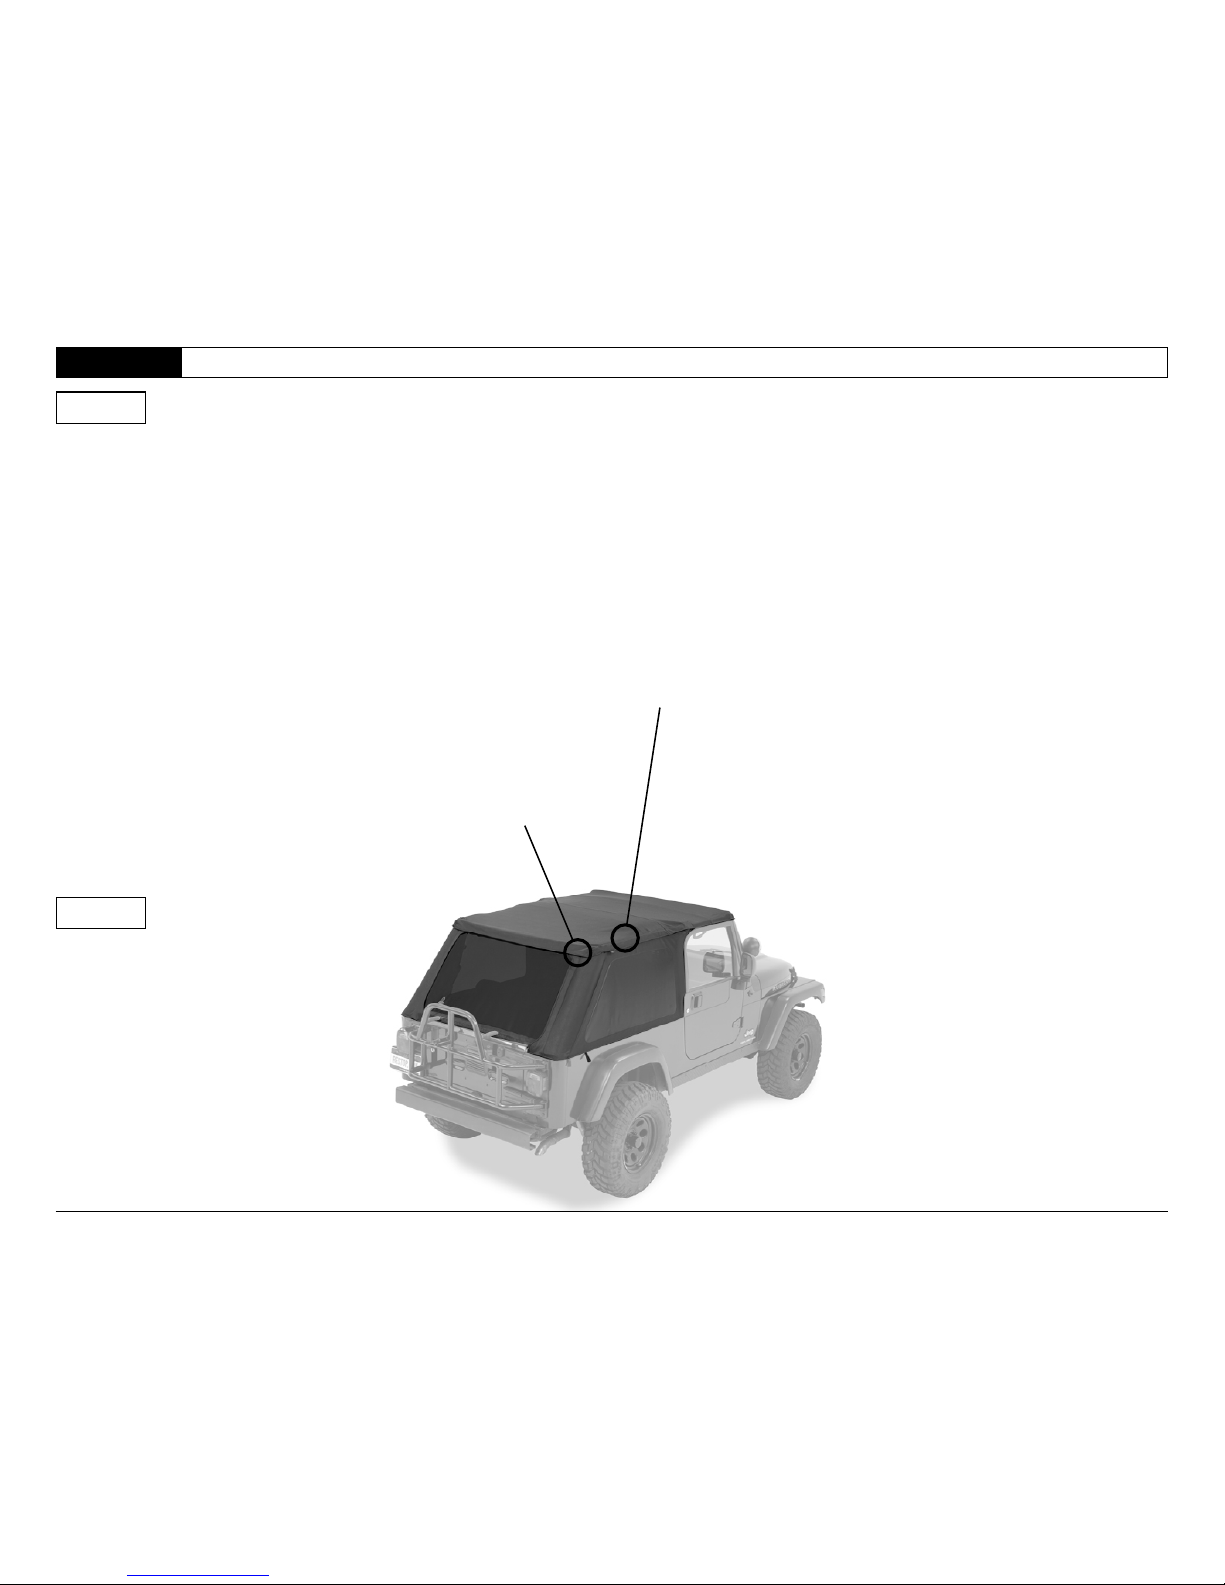
Secure Top Fabric to Side Windows
Section 14
Step 1
Step 1
Step One
Fasten the loop strip sewn inside the Top to the
hook strip along the top of the Quarter Window on
each side of the vehicle.s.
Page 21
Installation Instructions - Fabric Replacement Top for Trektop NX
© 2013 Bestop, Inc.P21 - 52821 - Rev. B 1013
Page 21
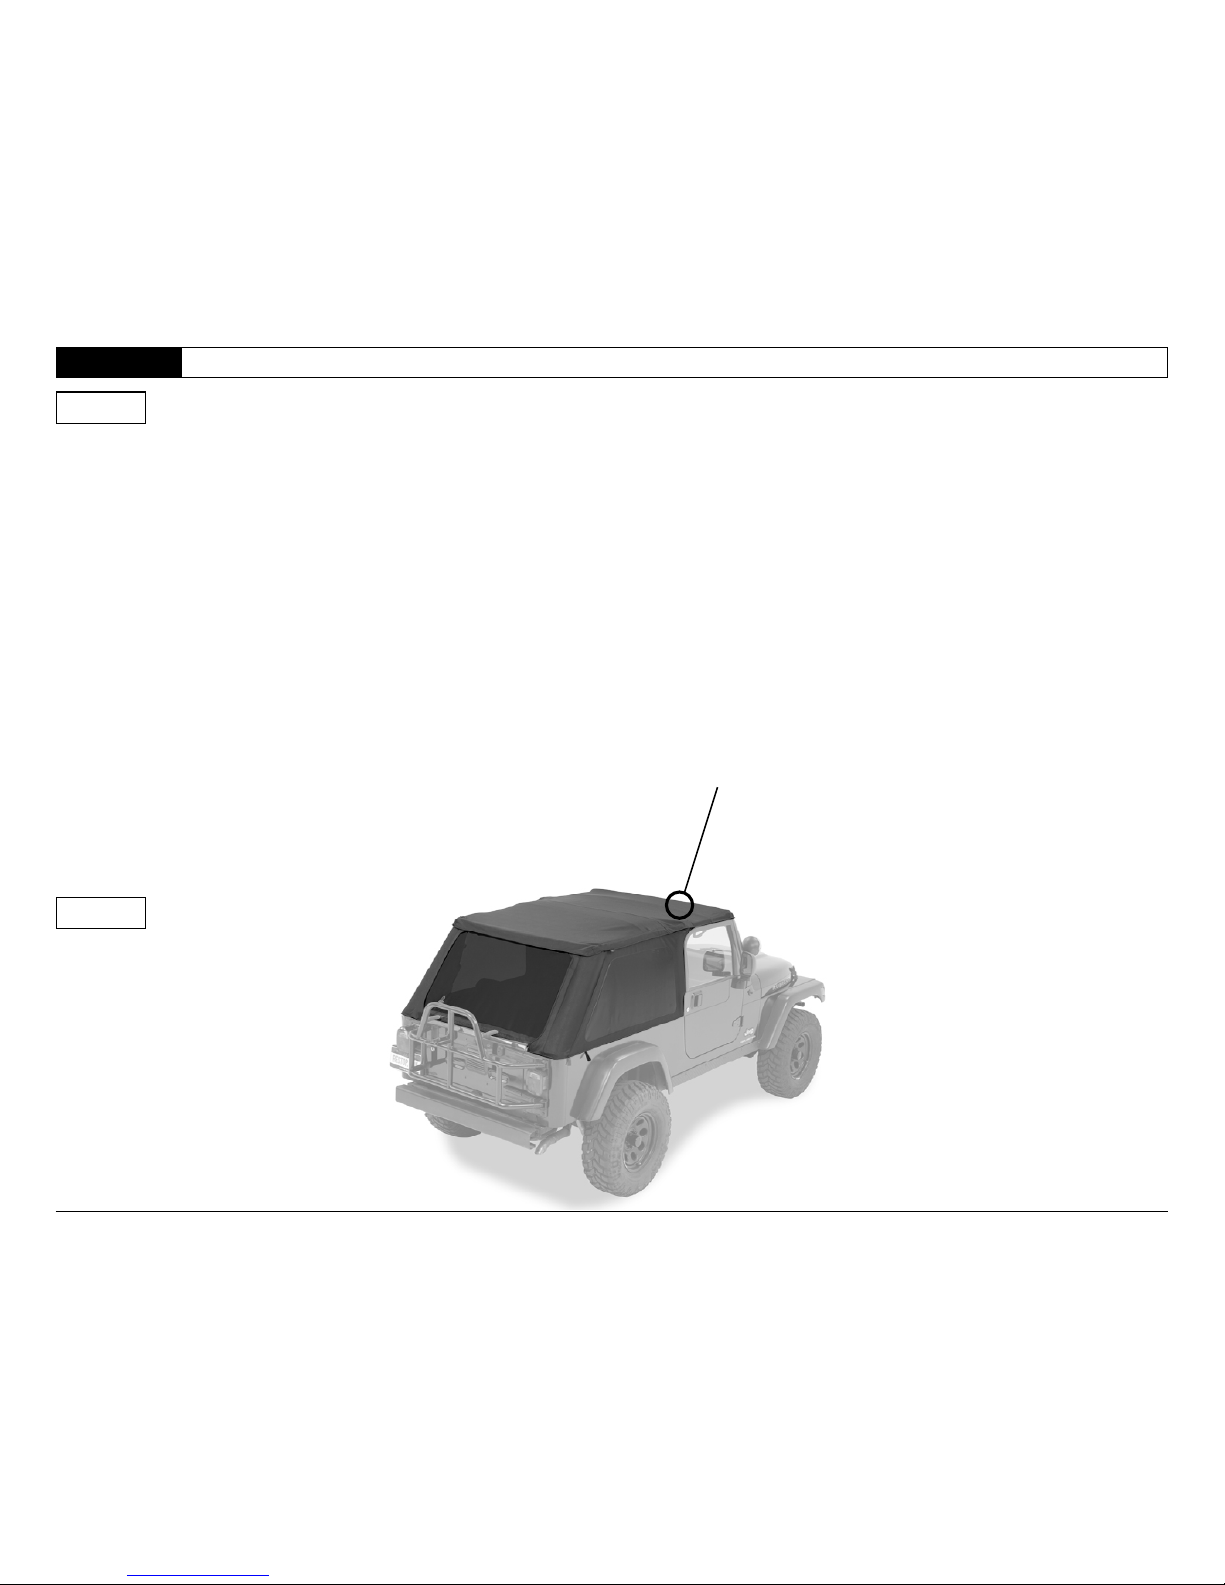
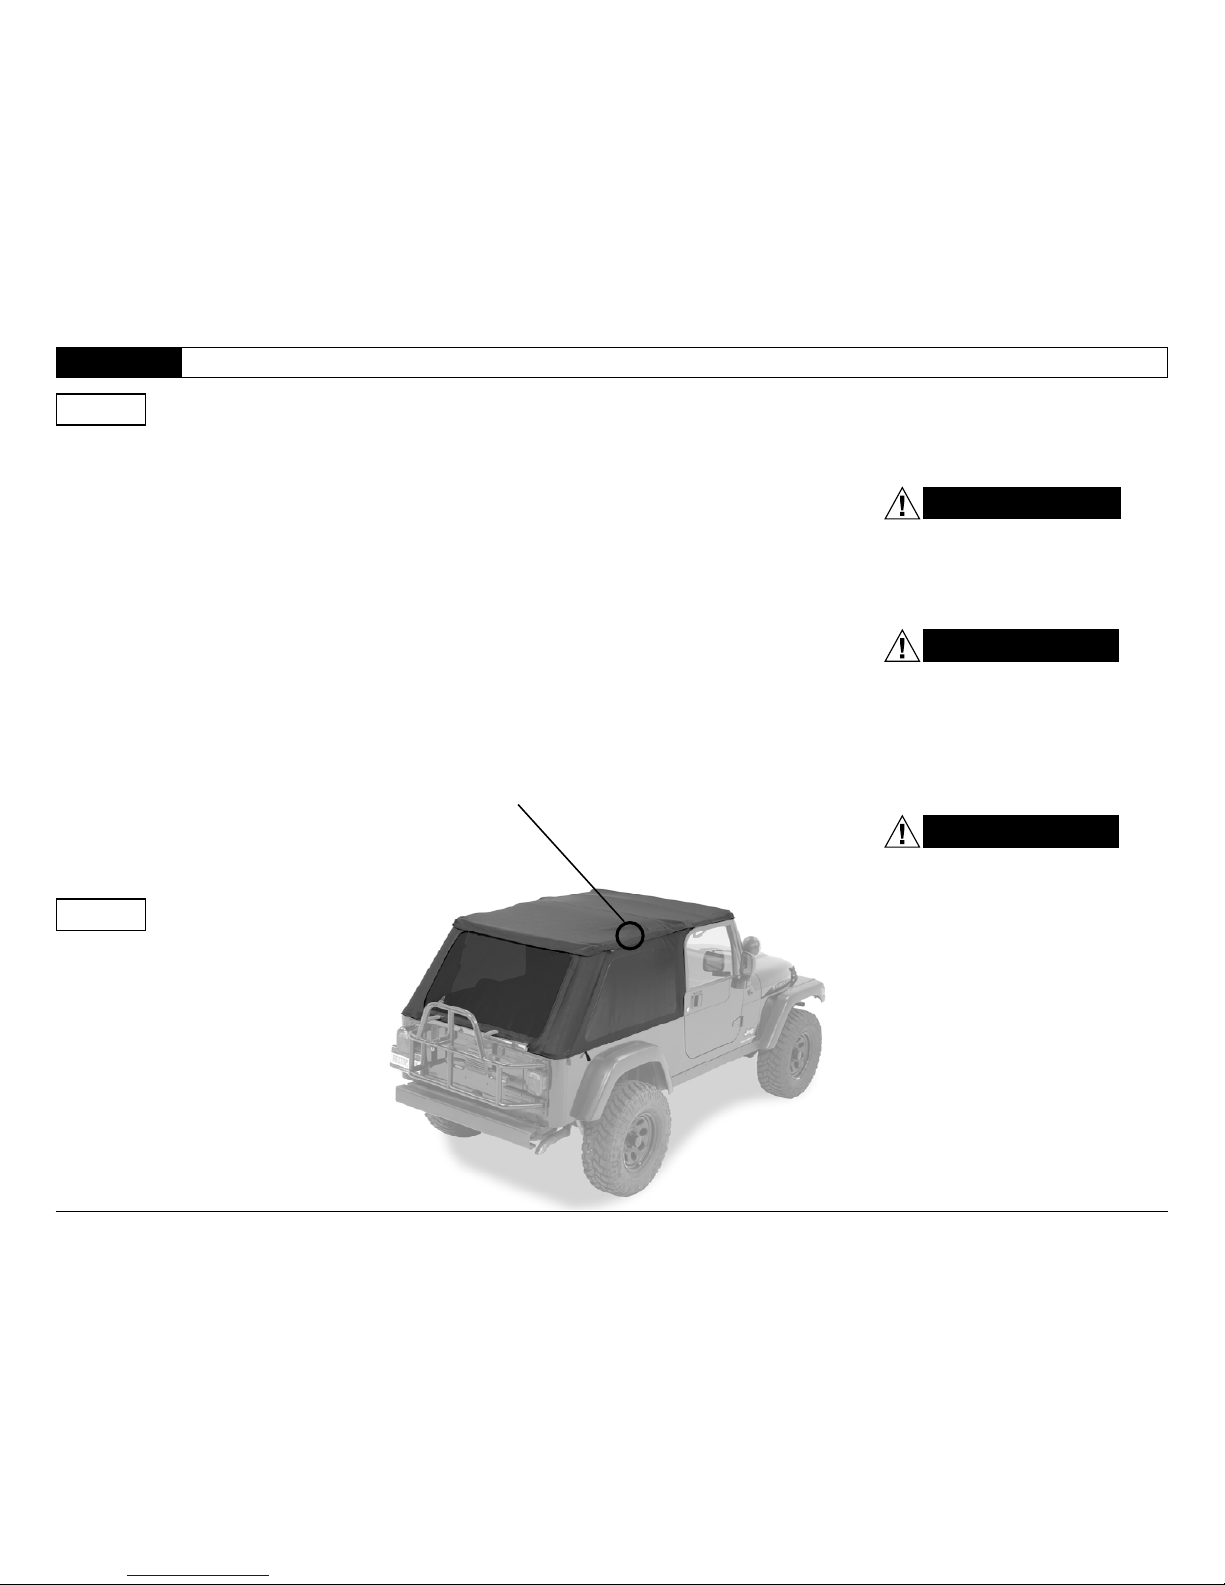
Close Sunrider and Secure Header Latches
Section 15
Step 1
Step 1
Close Sunrider.
Hook the latches on the Header into
the holes in the windshield and close
them.
Page 22
Installation Instructions - Fabric Replacement Top for Trektop NX
© 2013 Bestop, Inc.P22 - 52821 - Rev. B 1013
Page 22
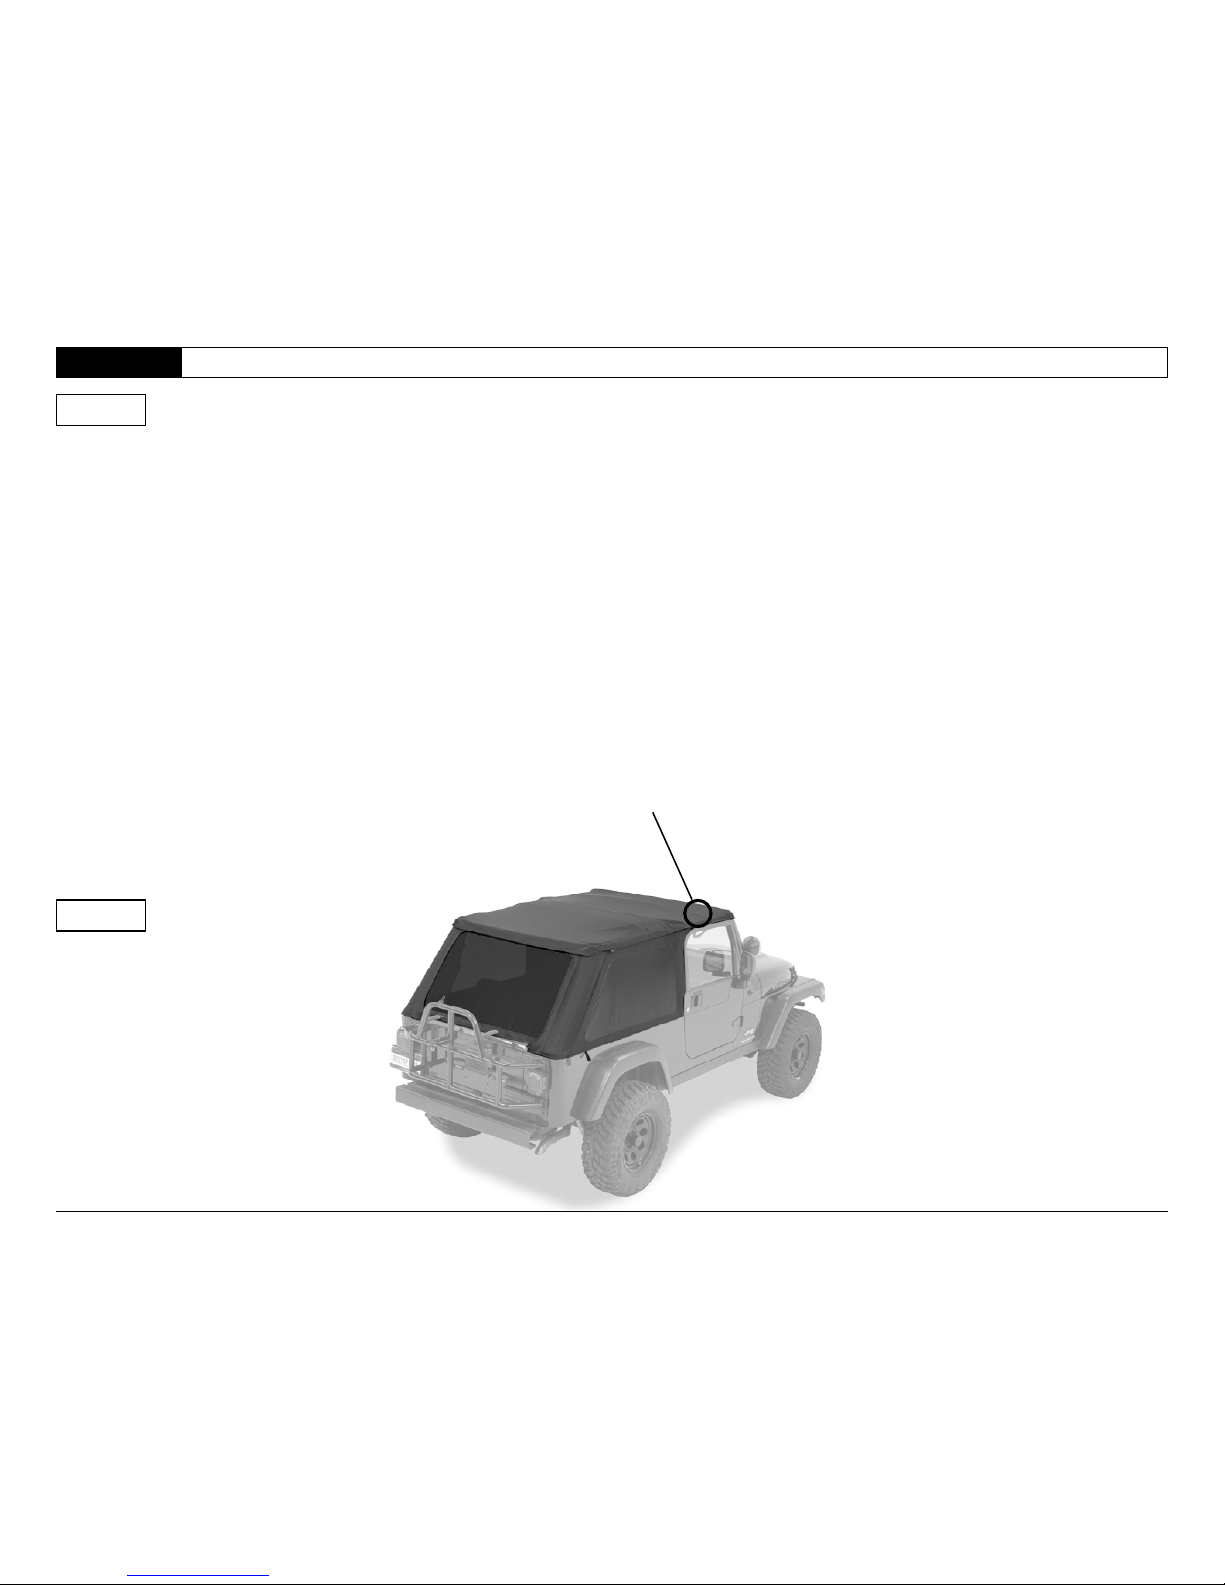
Secure Top Fabric to Door Surround
Section 16
Step 1
Step 1
Slip the plastic strips above the doors into
the channel in the Door Surround on each
side of the vehicle..
Page 23
Installation Instructions - Fabric Replacement Top for Trektop NX
© 2013 Bestop, Inc.P23 - 52821 - Rev. B 1013
Page 23
To Use Trektop NX as a Bikini
Section 17
Step 1
WARNING
AVERTISSEMENT
AVERTENCIA
When operating the vehicle
without the Side Windows,
remove the Rear Window for
proper ventilation.
Retirez la vitre arrière an
d’obtinir une bonne ventilation
si les vitres de custode ne
sont pas utilisées alors que le
véhiclule fonctionne.
Cuando el veículo
foncione sin ventanas de
los cuartos traseros, quite
el medallón para asegurar
la ventilación adecuadta.
Step 1
Your Trektop NX can be used as a Bikini
by removing the Side Windows and Rear
Window and storing them carefully. Fold
the protective aps over to engage the
hook and loop tape.
Page 24

Installation Instructions - Fabric Replacement Top for Trektop NX
Installation Instructions
Fabric Replacement Top for Trektop NX
© 2013 Bestop, Inc.P24 - 52821 - Rev. B 1013
Vehicle Application:
Jeep Wrangler Unlimited TJD
2004 – 2006
Part Number: 52821
Care and Maintenance of your Bestop Product
Your Bestop product is made of the nest materials available. To keep it looking new and for the maximum possible wear, it will need periodic cleaning and maintenance.
Fabric: The fabric should be washed often using soap, warm water and a soft bristle brush Rinse with clear water to remove all traces of soap. Bestop recommends using Bestop Cleaner (part no.
11201-00) and Bestop Protectant (part no. 11202-00) Bestop Cleaner and Bestop protectant are specially formulated to provide a total cleaning and protection system. Bestop Cleaner safely removes
the toughest stains, will not harm vehicle nishes, is biodegradable and environmentally friendly. Bestop Protectant protects against UV-fading, cracking and hardening, and repels dust, grease, dirt and
mildew.
Windows: Keep windows clean to avoid scratching. DO NOT use a brush on the windows! Wash with a water-soaked cloth or sponge and a mild dishwashing detergent. Bestop recommends Bestop
Vinyl Window Cleaner (part no. 11203-00), which safely cleans and protects vinyl windows and helps prevent UV damage. NEVER WIPE THE WINDOWS WHEN THEY ARE DRY. Be careful when
cleaning snow or frost from the vinyl windows since they are easily scratched and may crack at low temperatures. DO NOT roll the sides or rear window in cold weather. The windows become stiff and
will crack. Cracks caused by misuse in cold temperatures are not covered under warranty.
Zippers: Keeping zippers cleaned and lubricated with Bestop’s Zipper Cleaner (part no. 11206-00) will help prevent damage and keep the
zippers in smooth working condition. If a zipper opens behind the slider, the slider may have been spread apart. This problem can usually be
repaired by using an ordinary pair of pliers to bring the sides back into parallel. Return slider to the end of the zipper in the normal Open position.
Squeeze lightly at rst and test the zipper. If the zipper continues to remain open squeeze more rmly with the pliers and try the zipper again.
Repeat this procedure until the zipper operates correctly.
Water: Seeping through at the seams may be stopped by applying 3-M Scotchgard® on the inside of the seams. Rips in the fabric may be repaired
with Bondex® iron on patches. Iron the patches to the Inside of the top, carefully following the Bondex® instructions.
Snaps: Keep snaps cleaned and lubricated with silicone to help prevent snaps from sticking to the studs. If a snap does become stuck to a stud,
use a screwdriver and GENTLY pry apart to prevent permanent damage to the snap or the top fabric.
Damaged Slider Jaws Spread Apart
(sometimes broken)
Normal Slider Jaws Parallel
LIMITED WARRANTY
We warrant our product to be free from defects in material and workmanship, for the terms specied below, provided there has been normal use and proper maintenance. This warranty applies to the original
purchaser only. All remedies under this warranty are limited to the repair or replacement of any item or items found by the factory to be defective within the time period specied. If you have a warranty claim,
rst you must call our factory at the number below for instructions. You must retain proof of purchase and submit a copy with any items returned for warranty work. Upon completion of warranty work, if any,
we will return the repaired or replaced item or items to you freight prepaid. Damage to our products caused by accidents, re, vandalism, negligence, misinstallation, misuse, Acts of God, or by defective parts
not manufactured by us, is not covered under this warranty.
THE WARRANTY TIME PERIOD IS AS FOLLOWS FOR REPLACE-A-TOP™, SAILCLOTH REPLACE-A-TOP™, SUPERTOP®, SUPERTOP® REPLACEMENT SKINS, SUNRIDER®, AND TIGERTOP®:
TWO YEARS FROM DATE OF PURCHASE.
THE WARRANTY TIME PERIOD IS AS FOLLOWS FOR ALL OTHER “SOFT GOODS” MANUFACTURED BY OUR COMPANY (USING PRIMARILY VINYLS, PLASTICS, AND/OR FOAM): ONE YEAR
FROM DATE OF PURCHASE.
THE WARRANTY TIME PERIOD IS AS FOLLOWS FOR ALL OTHER “HARD GOODS” MANUFACTURED BY OUR COMPANY (USING PRIMARILY METALS, PLASTICS, AND/OR FIBERGLASS): ONE
YEAR FROM DATE OF PURCHASE.
ANY IMPLIED WARRANTIES OF MERCHANTABILITY AND/OR FITNESS FOR A PARTICULAR PURPOSE CREATED HEREBY ARE LIMITED IN DURATION TO THE SAME DURATION AND SCOPE AS
THE EXPRESS WRITTEN WARRANTY. OUR COMPANY SHALL NOT BE LIABLE FOR ANY INCIDENTAL OR CONSEQUENTIAL DAMAGE.
Some states do not allow limitations on how long an implied warranty lasts, or the exclusion or limitation of incidental or consequential damages, so the above limitations or exclusions may not apply to you.
This warranty gives you specic legal rights, and you may also have other rights which vary from state to state.
For further information or request for warranty work, please contact:
Bestop Inc., Customer Service
Toll-Free: (800) 845-3567
Main: (303) 465-1755
E-mail: [email protected]
Website: www.Bestop.com
Page 25

Installation Instructions - Fabric Replacement Top for Trektop NX
Installation Instructions
Fabric Replacement Top for Trektop NX
© 2013 Bestop, Inc.P25 - 52821 - Rev. B 1013
Vehicle Application:
Jeep Wrangler Unlimited TJD
2004 – 2006
Part Number: 52821
Para obtener más información o solicitar un trabajo de garantía, comuníquese con:
Atención a clientes de Bestop Inc
Número para llamar sin costo: (800)845-3567
Conmutador: (303)465-1755
Courriel : [email protected]
Sitio web: www.Bestop.com
GARANTÍA LIMITADA
Garantizamos que nuestro producto estará exento de defectos en materiales y mano de obra durante los plazos que se indican a continuación, siempre que se les dé el uso normal y el mantenimiento
adecuado. Esta garantía aplica únicamente al comprador original. Todos los recursos previstos en esta garantía se limitan a la reparación o sustitución de cualquier artículo o artículos que la fábrica
determine que efectivamente presentan defectos dentro del período especifi cado. Si desea presentar una reclamación de garantía, primero debe llamar a nuestra fábrica al número que se indica
a continuación para recibir instrucciones. Debe conservar el comprobante de compra y enviar una copia junto con los artículos devueltos para la reparación de garantía. Al término del trabajo de
garantía, si lo hubo, devolveremos el o los artículos reparados o sustituidos a su domicilio por fl ete prepagado por usted. Esta garantía no cubre los daños que sufran nuestros productos a causa
de accidentes, incendio, vandalismo, negligencia, errores de instalación, mal uso, causas de fuerza mayor o provocados por partes defectuosas que no fabricamos nosotros.
EL PERÍODO DE GARANTÍA DE REPLACE-A-TOP™, SAILCLOTH REPLACE-A-TOP™, SUPERTOP®, SUPERTOP® REPLACEMENT SKINS, SUNRIDER® Y TIGERTOP® ES EL SIGUIENTE:
DOS AÑOS A PARTIR DE LA FECHA DE COMPRA.
EL PERÍODO DE GARANTÍ
A PARA TODOS LOS DEMÁS “PRODUCTOS BLANDOS” FABRICADOS POR NUESTRA EMPRESA (EN CUYA FABRICACIÓN SE UTILIZARON SOBRE TODO
VINILOS, PLÁSTICOS O ESPUMA) ES EL SIGUIENTE: UN AÑO A PARTIR DE LA FECHA DE COMPRA.
EL PERÍODO DE GARANTÍA PARA TODOS LOS DEMÁS “PRODUCTOS RÍGIDOS” FABRICADOS POR NUESTRA EMPRESA (EN CUYA FABRICACIÓN SE UTILIZARON SOBRE TODO
METALES, PLÁSTICOS O FIBRA DE VIDRIO) ES EL SIGUIENTE: UN AÑO A PARTIR DE LA FECHA DE COMPRA.
TODAS LAS GARANTÍAS IMPLÍCITAS DE COMERCIABILIDAD O IDONEIDAD PARA UN FIN ESPECÍFICO QUE AQUÍ SE CREAN SE LIMITAN EXACTAMENTE A LA MISMA DURACIÓN Y
ALCANCE QUE LA GARANTÍA EXPLÍCITA ESCRITA. NUESTRA COMPAÑÍA NO SERÁ RESPONSABLE POR NINGÚN DAÑO INCIDENTAL O EMERGENTE.
En algunos estados no se permiten las limitaciones respecto a la duración de las garantías implícitas ni la exclusión o limitación de los daños incidentales o emergentes, por lo que es posible que
las anteriores limitaciones o exclusiones no apliquen a usted. Esta garantía le confi ere derechos legales específi cos, y también puede tener otros derechos, los cuales varían de un estado a otro.
Cuidado y mantenimiento de su producto Bestop
Su producto Bestop está hecho con materiales de la más alta calidad. Para mantener su apariencia nueva y alargar su uso al máximo posible, necesitará limpieza y mantenimiento periódicos.
Tela: debe lavar la tela con frecuencia usando jabón, agua tibia y un cepillo de cerdas suaves. Enjuague con agua limpia para eliminar todos los residuos de jabón. Bestop recomienda utilizar el
Limpiador Bestop (número de parte 11201-00) y el Protector Bestop (número de parte 11202-00). El limpiador y el protector Bestop están formulados especialmente para ofrecen un sistema de
limpieza y protección total. El limpiador Bestop quita las manchas más difíciles, no daña los acabados del vehículo, es biodegradable y no daña el medio ambiente. El protector Bestop protege contra la
decoloración que causan los rayos UV y contra el agrietamiento y endurecimiento; además, repele el polvo, grasa, suciedad y moho.
Cremalleras: conserve las cremalleras limpias y lubricadas con el limpiador de cremalleras Bestop (número de parte 11206-00), que ayuda a prevenir daños y
mantiene las cremalleras en óptimas condiciones de funcionamiento. Si la cremallera se abre detrás de la corredera, es posible que las mordazas
de la corredera se hayan separado. Por lo general, este problema se repara fácilmente con unas pinzas comunes para volver a poner los lados en
paralelo. Regrese la corredera al extremo de la cremallera en la posición abierta normal. Apriete un poco al principio y pruebe la cremallera. Si la
cremallera sigue abierta, apriete con mayor rmeza con las pinzas y vuelva a probar la cremallera. Repita este procedimiento hasta que la cremallera
funcione correctamente.
Agua: para eliminar la ltración de agua a través de las costuras, aplique cinta Scotchgard® de 3-M en la parte interior de las costuras. Los desgarres de la
tela pueden repararse con parches Bondex® para aplicar con plancha. Planche los parches en el interior del toldo, siguiendo con cuidado las instrucciones de
Bondex®.
Broches: conserve los broches limpios y lubricados con silicona para evitar que se peguen a los corchetes de encaje. Si se quedan pegados a un corchete, use
un destornillador y CON CUIDADO separe las dos piezas para evitar daño permanente al broche o a la tela del toldo.
Corredera normal Mordazas paralelas
Corredera dañada -
Mordazas abiertas
(a veces, rotas)
Page 26

Installation Instructions - Fabric Replacement Top for Trektop NX
Installation Instructions
Fabric Replacement Top for Trektop NX
© 2013 Bestop, Inc.P26 - 52821 - Rev. B 1013
Vehicle Application:
Jeep Wrangler Unlimited TJD
2004 – 2006
Part Number: 52821
Soin et entretien de votre produit Bestop
Votre produit Bestop est fabriqué des meilleurs matériaux disponibles. Il devra être nettoyé et entretenu régulièrement an de maintenir son apparence neuve et pour une durée d’utilisation maximale.
Tissu : Le tissu doit être lavé régulièrement à l’aide de savon, d’eau chaude et d’une brosse à soies douces. Rincer à l’eau claire an d’éliminer toute trace de savon. Bestop recommande d’utiliser le
nettoyant Bestop Cleaner (no de pièce 11201-00) et le protecteur Bestop Protectant (no de pièce 11202-00). Le nettoyant Bestop Cleaner et le protecteur Bestop Protectant sont spécialement formulés
pour fournir un système de nettoyage et de protection complet. Le nettoyant Bestop Cleaner élimine de manière sécuritaire les taches les plus tenaces, n’endommagera pas les nis du véhicule, est
biodégradable et respectueux de l’environnement. Le protecteur Bestop Protectant prévient la décoloration, la ssuration et le durcissement causés par les UV, et repousse la poussière, la graisse, la
saleté et les moisissures.
Fermetures à glissière : Maintenir les fermetures à glissière propres et lubriées à l’aide du nettoyant Zipper Cleaner (no de pièce 11206-00) de
Bestop aidera à protéger des dommages et maintiendra les fermetures à glissière en bon état de fonctionnement. Si une fermeture à glissière
ouvre derrière la glissière, la glissière peut avoir été forcée au point de s’ouvrir. Le problème peut habituellement être réparé en utilisant des
pinces ordinaires pour remettre les côtés parallèles. Remettre la glissière au bout de la fermeture à glissière, dans la position Ouverte normale.
Serrer légèrement au début et vérier le fonctionnement de la fermeture à glissière. Si la fermeture à glissière continue de rester ouverte, serrer
plus fortement à l’aide des pinces et essayer la fermeture à glissière de nouveau. Répéter le processus jusqu’à ce que la fermeture à glissière
fonctionne correctement.
Eau : Les inltrations d’eau aux coutures peuvent être arrêtées par l’application de ScotchgardMD 3M sur l’intérieur des coutures. Les déchirures
dans le tissu peuvent être réparées grâce aux pièces thermocollantes BondexMD. Fixer les pièces thermocollantes à l’aide d’un fer à repasser sur
l’intérieur du toit, en suivant soigneusement les instructions de BondexMD.
Boutons pression : Maintenir les boutons pression propres à l’aide de silicone pour empêcher les boutons pression de coller aux rivets. Si un bouton pression reste collé à un rivet, utiliser un tournevis et
appliquer une FAIBLE PRESSION an d’éviter d’endommager le bouton pression ou le tissu du toit.
Damaged Slider Jaws Spread Apart
(sometimes broken)
Normal Slider Jaws Parallel
Pour de plus amples renseignements et demander une réparation, communiquer avec:
Le service à la clientèle Bestop Inc.
Sans frais : (800)845-3567
Local: (303)465-1755
Courriel: [email protected]
Site Web: www.Bestop.com
GARANTIE LIMITÉE
Nous garantissons que notre produit est exempt de défauts de matériaux et de fabrication, pour les modalités précisées ci-dessous, pourvu qu’il ait été utilisé de façon normale et entretenu de
manière adéquate. Cette garantie s’applique à l’acheteur original seulement. Tous les recours sous cette garantie sont limités à la réparation ou au remplacement de tout article ou articles reconnus
par l’usine comme étant défectueux pendant la période de temps spécifi ée. Si vous devez faire une réclamation, vous devez d’abord appeler notre usine au numéro ci-dessous pour obtenir des
instructions. Vous devez conserver la preuve d’achat et en transmettre une copie avec tous les articles retournés pour réparation sous garantie. À la fi n des travaux de garantie, le cas échéant, nous
vous retournerons l’article ou les articles réparés ou remplacés en port payé à l’avance. Les dommages à nos produits causés par les accidents, les incendies, le vandalisme, la négligence, une
mauvaise utilisation, une mauvaise installation, les cas fortuits ou par des pièces défectueuses qui ne sont pas fabriqués par nous, ne sont pas couverts par cette garantie..
LA PÉRIODE DE GARANTIE EST COMME SUIT POUR REPLACE-A-TOPMC, SAILCLOTH REPLACE-A-TOPMC, SUPERTOPMD, LES PEAUX DE RECHANGE SUPERTOPMD, SUNRIDERMD
ET TIGERTOPMD : DEUX ANS À COMPTER DE LA DATE D’ACHAT.
LA PÉRIODE DE GARANTIE EST COMME SUIT
POUR TOUS LES AUTRES “BIENS DE CONSOMMATION NON DURABLES” FABRIQUÉS PAR NOTRE SOCIÉTÉ (EN UTILISANT
PRINCIPALEMENT DES VINYLES, DES MATIÈRES PLASTIQUES ET/OU DE LA MOUSSE): UN AN À COMPTER DE LA DATE D’ACHAT.
LA PÉRIODE DE GARANTIE EST COMME SUIT POUR TOUS LES AUTRES “BIENS DE CONSOMMATION DURABLES” FABRIQUÉS PAR NOTRE SOCIÉTÉ (EN UTILISANT PRINCIPALEMENT
DES MÉTAUX, DES MATIÈRES PLASTIQUES ET/OU DE LA FIBRE DE VERRE): UN AN À COMPTER DE LA DATE D’ACHAT.
TOUTE GARANTIE IMPLICITE DE QUALITÉ MARCHANDE ET/OU D’ADÉQUATION À UN USAGE PARTICULIER CRÉÉ PAR LES PRÉSENTES EST LIMITÉE AUX MÊMES CONDITIONS ET
AU MÊME CHAMP D’APPLICATION QUE LA GARANTIE EXPRESSE ÉCRITE. NOTRE SOCIÉTÉ NE SERA PAS TENUE POUR RESPONSABLE POUR TOUT DOMMAGE ACCESSOIRE OU
INDIRECT
Certaines provinces et certains territoires n’autorisent pas les limitations sur la durée d’une garantie implicite, ou l’exclusion ou la limitation des dommages accessoires ou indirects, et il se pourrait
donc que les limitations ou exclusions susmentionnées ne s’appliquent pas à vous. Cette garantie vous donne des droits légaux spécifi ques, et vous pouvez également avoir d’autres droits qui varient
d’une province à l’autre et d’un territoire à l’autre.
 Loading...