

Page 1
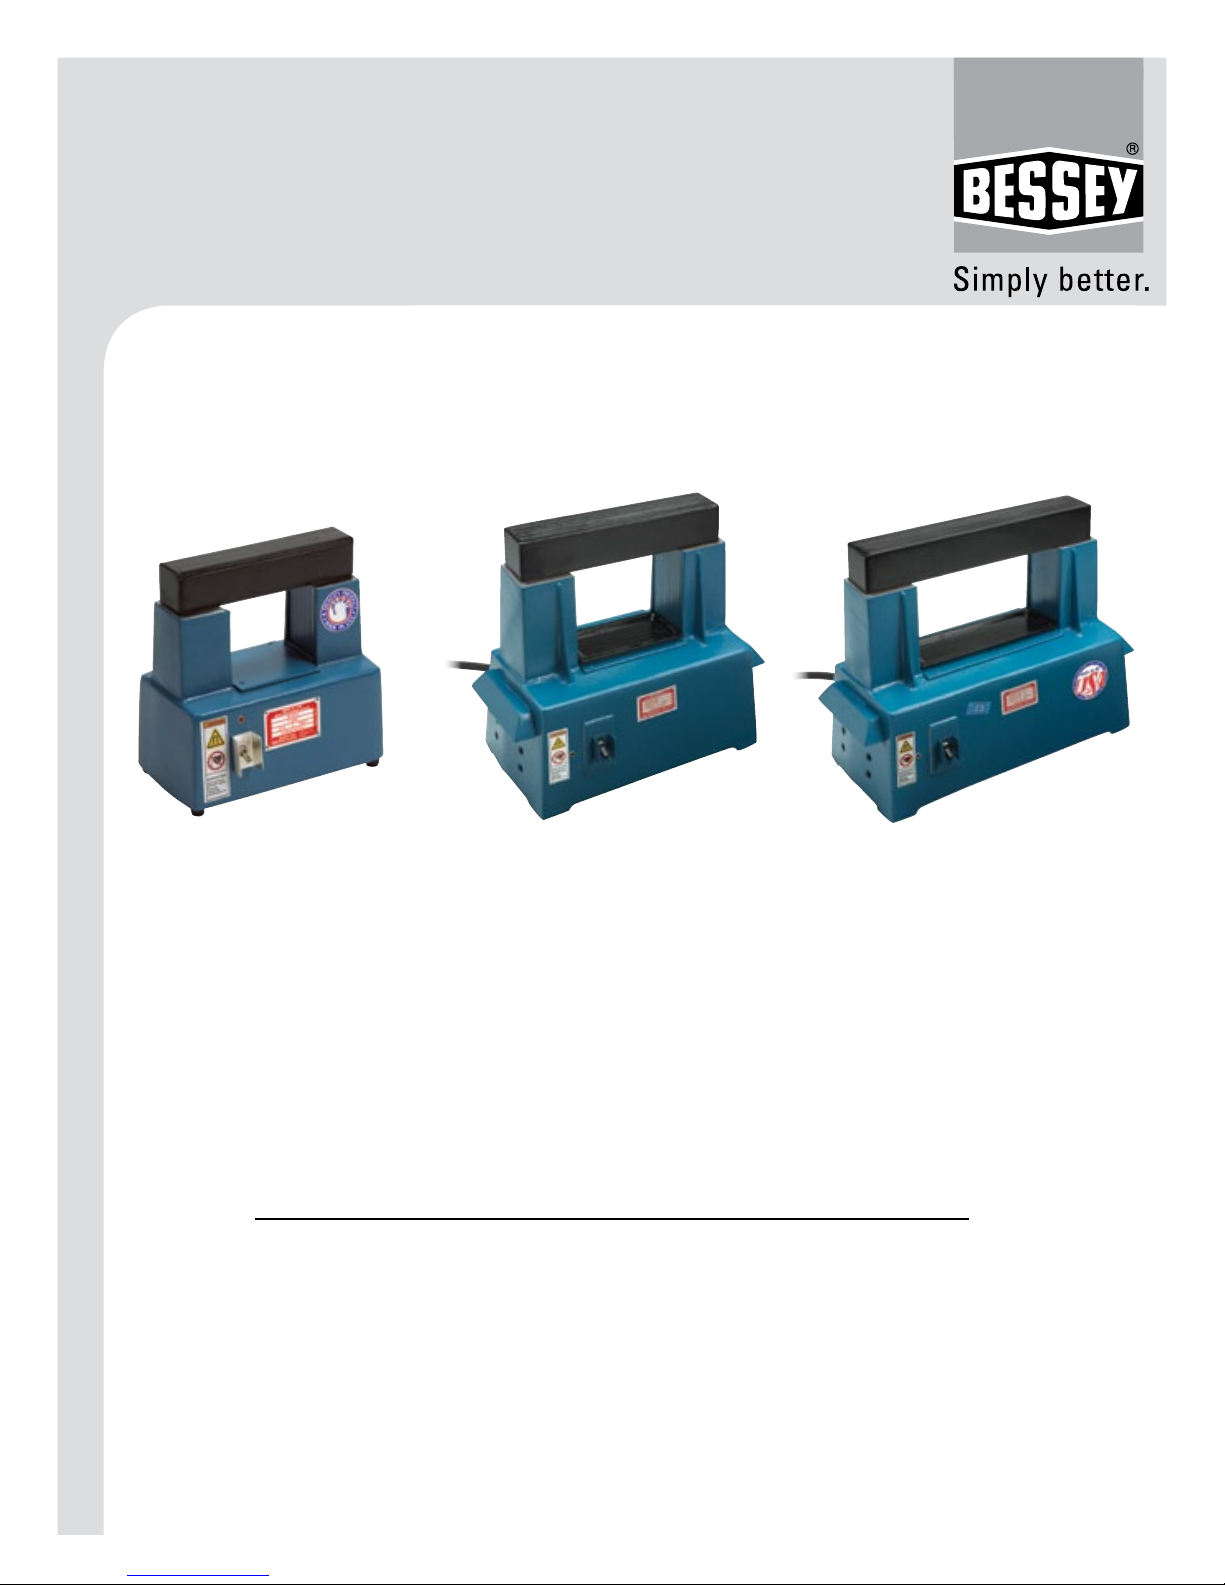
Induction Bearing Heaters
User Manual
SC110D, SC110V, BC and BCS models
READ THE MANUAL AND
SAFETY INSTRUCTIONS
Check all parts for possible transport damage.
If any damage is apparent, inform carrier immediately.
besseytools.com
Page 2

TABLE OF CONTENTS
1. Safety Instructions ....................................................................................................................... 2
2. Application
....................................................................................................................................... 3
2.1 SC110V, BC and BCS Models
2.2 SC110D Model
2.3 Bearing heater operating conditions
2.4 Principle of Operation
3. Installation ........................................................................................................................................ 6
4. Cleaning and Maintenance
5. Pyrometer
........................................................................................................................................... 7
................................................................................................... 7
1. Safety Instructions
WARNING!
These indicate potential risk of serious personal injury
CAUTION!
These indicate danger of damaging the heater or workpiece
WARNING!
■
Induction heaters generate a magnetic induction field, which may affect or impair
medical devices such as pacemakers or hearing aids, resulting in a high risk of serious
bodily harm. Do not operate, or be within a suggested minimum distance of 5m (16ft) of
the machine while wearing such devices.
■
Hot workpieces may burn. Use protective gloves when handling such workpieces
(suitable up to 150°C (302°F).
■
Do not operate an Induction heater in areas where there is a risk of an explosion.
■
Do not use the induction heater if the cord is damaged.
■
Proper maintenance and handling practices are critical. Failure to follow user manual
can result in equipment failure, creating a risk of serious bodily harm.
CAUTION!
■
Sensitive electronic equipment (e.g. portable telephones, computers, watches, etc.)
may be affected by the magnetic field and should not be used within the vicinity of the
heater.
besseytools.com
2
Page 3

Safety precautions
■
The user should have an appreciation of the contents of this manual, and be familiar
with safe workshop practices.
■
Ensure that the machine operates at the correct supply voltage. If the heater has been
supplied without a plug the connection to the power supply should only be made by a
suitably qualified person. Pay close attention to voltage, amperage, and cycle times as
indicated on the unit’s faceplate
■
Do not use or store the heater in humid environments. Induction heaters are designed
for indoor use only.
■
Use proper handling equipment, appropriate for the weight of the workpiece or crossbar/
yoke.
■
Never support parts with a metal cable or have anything metallic hanging in the
proximity of the magnetic field. Extremely high currents can flow through the cable,
causing the cable to heat up.
■
Do not hold metal objects near the crossbars/yokes and poles.
■
While heating, keep at least 1 metre (3.3 ft) distance from the heater.
■
Never remove the crossbars/yokes during the heating cycle.
■
Do not modify the heater and do not use self-fabricated crossbars/yokes.
■
Always check that the crossbar/yoke is correctly adjusted to the poles otherwise,
excessive vibration may occur.
■
Only switch the machine on when the crossbar/yoke is positioned correctly.
NOTE: Since our products are subject to continuous improvement, we reserve the right to
make changes.
CAUTION!
■
Induction bearing heaters work due a magnetic field. Please always keep at least
a meter (39 IN) from the unit during operation. Bear in mind that this can influence
electronic equipment, e.g. watches, magnetic charts etc.
2. Application
2.1 Application (SC110V, BC and BCS models)
Induction heaters are designed to heat bearings, bushings, gear wheels, couplings or other
metallic workpieces which form a closed electrical loop. This facilitates mounting where an
interference fit is required. Generally, it is not possible to mount a larger bearing onto a shaft
when it is cold so, a differential in temperature (150 – 160 F, 90 C) has to be undertaken to allow an
accurate fit. One part can be heated (to expand), one part can be cooled (to shrink) or, one part
can be heated AND the other cooled. This creates a size differential for a precise placement of
3
Page 4

the bearing without risking damage to the shaft (if done correctly and within tolerances).
■
Always heat to the temperature specified by the bearing manufacturer and consult the
technical specifications. It is important to define what the temperature differential shall
be for mounting a specific bearing safely. This will usually depend on the diameter of the
bearing.
■
Use a pyrometer (such as the Model HH11 provided by BESSEY®, which includes a good
surface probe) to measure bearing temperature accurately.
■
Use the largest bar that will pass through the inner diameter (I.D.) of the bearing and
ensure that crossbar/yoke is fitted over upright posts. Center bearing between the
posts. Do not allow bearing to touch upright posts when heating.
■
Models SC110V, BC & BCS also have optional raising blocks for larger sized bearings.
Adding a level of raising blocks will increase time to heat by approximately 20%.
■
For models SC110V, BC & BCS, plug the bearing heater in, turn the On/Off switch to
“On.” NOTE SC110D has specific and separate instructions. See page 5.
■
When the pyrometer shows the desired and proper temperature, turn the bearing
heater On/Off switch to “Off”, remove the now-heated bearing and install in a timely
manner. Use gloves – it’s now “hot”.
■
Bearing Heaters may also be used to heat metal sleeves, gears, sprockets, etc.
■
Bearing Heaters should not be used on metal floors, platforms or benches or near
machines, steel columns, reinforcing bars or other metal objects, the heating process
will be slower.
Make sure heater is turned off when not in use. Do not operate crossbar/yoke without crossbar/
yoke in place. Bearing Heaters also demagnetize bearings: simply remove bar, turn heater on
and pass bearing several times between the two upright columns without contacting them.
Bearing heaters SC, BC and BCS have a 20 minute duty cycle and should be turned off
after and allowed to cool before being re-started.
CAUTION!
■
Bearings generally should only be heated up to a maximum temperature of 120°C
(248°F).
■
Precision bearings should only be heated up to a maximum temperature of 70°C (158°F).
■
Normally a temperature differential of 150° F between the shaft and the bearing
provides sufficient expansion to effectively mount a bearing. Bearings should not be
overheated as it will affect the metallurgical properties and dimensional stability of the
bearing unit and may change the absolute size permanently. Standard ball bearings
fitted with seals or shields should not be heated in excess of 210° F because of the
grease and oil sealants.
■
Do not use induction heaters for bearings or workpieces, which are outside the
minimum, or maximum dimensions as specified in the sales data sheet.
besseytools.com
4
Page 5
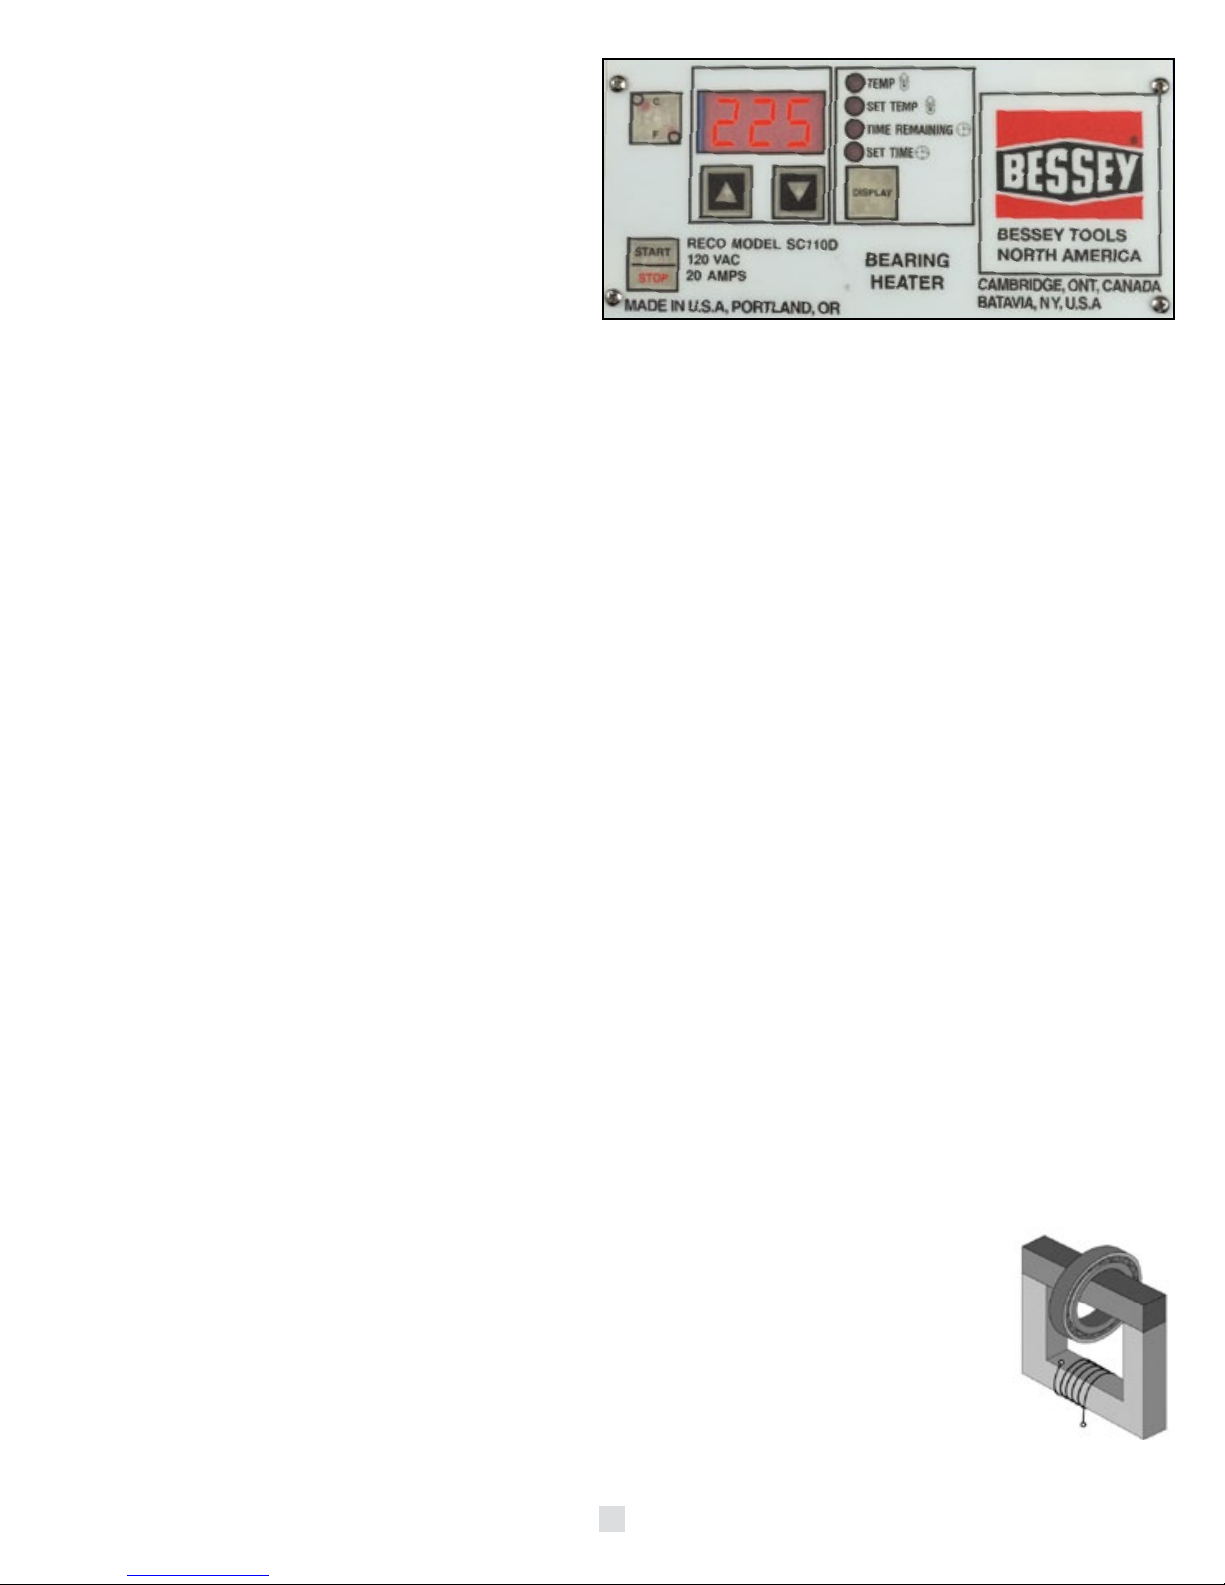
2.2 Application (SC110D)
The SC110D is a similar version to the
SC110V, but has a temperature control
mechanism integrated into the unit.
Operating the SC110D
■
Place crossbar/yoke through bore of
bearing (using the largest bar that fits).
■
Place crossbar/yoke on top of bearing heater posts - making sure the crossbar/yoke is
fully seated over the locating pins.
■
Plug magnetic probe into the mini plug socket and attach magnetic tip of probe to inner
race of bearing.
■
Turn “On” the large red power switch in center of front side.
■
Select temperature scale (deg C/F) by pressing C/F switch.
■
Press “DISPLAY” switch repeatedly until “SET TEMP” indicator is lit. Use the Up/Down
switches directly below readout to set the target temperature.
■
Press “DISPLAY” switch repeatedly until “SET Time” indicator is lit. Use the Up/Down
switches directly below readout to set length of time that the machine should maintain
the bearing at the target temperature.
■
To view current bearing temperature press “DISPLAY” so that “TEMP” indicator is lit.
■
Press “START/STOP” switch to start heating the bearing.
■
When bearing is up to temperature & ready to install press “START/STOP” to stop the heater.
■
Remove bearing from machine & install immediately. Turn off the large red power
switch. Always turn off the main power switch when not in use and unplug from wall.
2.3 Bearing Heater Operating conditions
Designed to be used in an industrial environment with an ambient temperature of 0°C to
50°C (32°F to 122°F), and an atmospheric humidity of between 5% to 90%. The induction
heater is meant for indoor use only.
2.4 Principle of Operation
Bearing heaters offer a simple value proposition. Heating bearings evenly during
installation and maintenance avoids expensive damage to valuable tools. This is
true when
compared to past methods of bearing heating (oil baths, torches etc).
The induction heater works in the same way as a transformer. The primary
coil is the heater and the secondary coil is the workpiece. When the heater
is switched on, a high voltage, low alternating current passes through the
numerous windings of the primary coil. This induces a low voltage, high
current in the workpiece acting as the secondary coil. This high current
results in the heating up of the workpiece.
5
especially
Page 6

To understand the process in greater detail: Induction heating works when an alternating
electrical current is applied to the primary of a transformer creating an alternating magnetic
field. According to Faraday’s Law, if the secondary of the transformer is located within the
magnetic field, an electric current will be induced. For example: an AC current is sent through
an inductor (like a copper coil in an induction bearing heater), and the part to be heated (the
workpiece) is placed within or around the inductor (crossbar/yoke). The inductor serves as
the transformer primary and the part to be heated becomes a short circuit secondary. When
a metal part is placed within the inductor and enters the magnetic field, circulating eddy
currents are induced within the part. An eddy current is a localized electric current induced
in a conductor by a varying magnetic field and when these electrical currents flow against
the electrical resistance of metal they generate precise and localized heat without any direct
contact between the part being heated and the bearing heater.
The efficiency of a bearing heater depends on several factors: size and weight of the material
being heated, the design of the inductor, the capacity of the power supply, and the amount of
temperature change required for the application. It is important to note that induction heating
works directly only with conductive materials, normally metals. With conductive materials,
about 85% of the heating effect occurs on the surface or “skin” of the part; the heating
intensity diminishes as the distance from the surface increases. Small or thin parts generally
heat more quickly than large thick parts, especially if the larger parts need to be heated all
the way through. Also, the type of material can affect the speed of induction heating. Some
materials like steel – along with carbon, tin and tungsten – have high electrical resistivity.
Because these metals strongly resist the current flow, heat builds up quickly. Low resistivity
metals such as copper, brass and aluminum take longer to heat. Temperature can also
affect the speed of induction heating. Resistivity increases with temperature, so a very hot
piece of steel will be more receptive to induction heating than a cold piece.
3. Installation
■
Remove packing material and place the induction heater on a non-ferrous, stable, flat surface.
The box will normally contain the heater and a crossbar/yoke, or set of crossbars/yokes.
■
Check that supply voltage and current meet the specifications on the type plate, found on
the back of the machine.
■
When the heater is not provided with a plug, a suitable one must be affixed by a qualified
electrician.
■
Make sure the supply cable cannot come into contact with the bearing that is to be
heated. Insert the plug into a shockproof wall socket.
■
Use the main switch to switch on the current. The machine will emit a short beep and the
display will show a “pre-set goal temperature” set by the manufacturer.
■
The induction heater is now ready to be used.
Isolate larger workpieces from the environment by packing them in isolation material like
welding cloth. This keeps the heat in the workpiece and avoids heat transmitting to the air.
besseytools.com
6
Page 7

Set up the workpiece where the crossbar/yoke passes through it.
■
Make sure the bright sides are greased sufficiently (improve
contact, avoid excessive vibration)
■
Always choose a crossbar/yoke, which fills the bore of the bearings
& aligned on top of the poles.
Correct Incorrect
as fully as possible. Combine 2 crossbars/yokes - to help heat more
quickly
■
Always treat crossbars/yokes carefully; falling, jolting, etc, can damage
them. Always put the crossbars/yokes away immediately after use.
&
evenly.
Correct Incorrect
CAUTION!
■
Always treat the crossbar/yoke carefully. They can easily be damaged through
dropping, jolting etc. Always store the crossbars/yokes immediately after use.
WARNING!
■
If in any doubt, isolate the machine and contact your local distributor.
4. Cleaning and Maintenance
■
Store in a dry, frost-proof area, free from humidity.
■
Keep clean with a soft, dry cloth.
■
Keep the contact parts of the poles clean. Grease regularly with acid-free grease for
optimal contact with the crossbars/yokes and to prevent corrosion (on swing-arm
models, also grease the vertical pin regularly).
■
Contact your supplier if there is any suspicion of malfunctioning.
WARNING!
■
Proper maintenance and handling practices are critical. Failure to follow installation
instructions and maintain proper lubrication can result in equipment failure, creating a
risk of serious bodily harm.
5. Pyrometer
HH11 handheld thermometers are a quick & easy method of verifying bearing
temperatures when using bearing heaters supplied by BESSEY
The unit is designed to use an external “Type K” thermocouple as temperature sensor and
features a front panel offset adjustment, maximum reading and display hold functions and
is °C/°F switchable. It has a single input with a user selectable resolution of 0.1 or 1°.
The HH11 digital meter is capable of measuring temperatures from -200 to 1372°C (-328 to
1999°F) with an appropriate probe. The included SMP-HT-K-6H ceramic tip probe is rated
for a maximum temperature of 650°C (1200°F). This is adequate for monitoring bearing
®
Tools.
temperatures since bearings as a rule should never be heated above 110°C (230°F). An
extension handle with coiled cord is included. The ceramic tip of the probe features a
spring loaded thermocouple to ensure consistent readings.
NOTE: Detailed descriptions are provided with the HH11 unit when it is received.
7
Page 8
BESSEY
®
Join us on...
facebook.com/BesseyToolsNorthAmerica
twitter.com/BesseyTools
youtube.com/user/BesseyTools
besseytools.com
Sign up to receive our e-newsletter at
[email protected]
BESSEY® Tools North America
1-800-828-1004 · Fax (519) 621-3442
REV.04.2018
 Loading...