

Besa Lighting Renfro User Manual
CEILING FIXTURE INSTALLATION GUIDE
Models using Renfro Series (T5 Circline Base 120V)
Renfro 16, Rev.1 11-12
6695 Taylor Rd. Blacklick, OH 43004
www.besalighting.com
Use With
these Models:
• Renfro 16
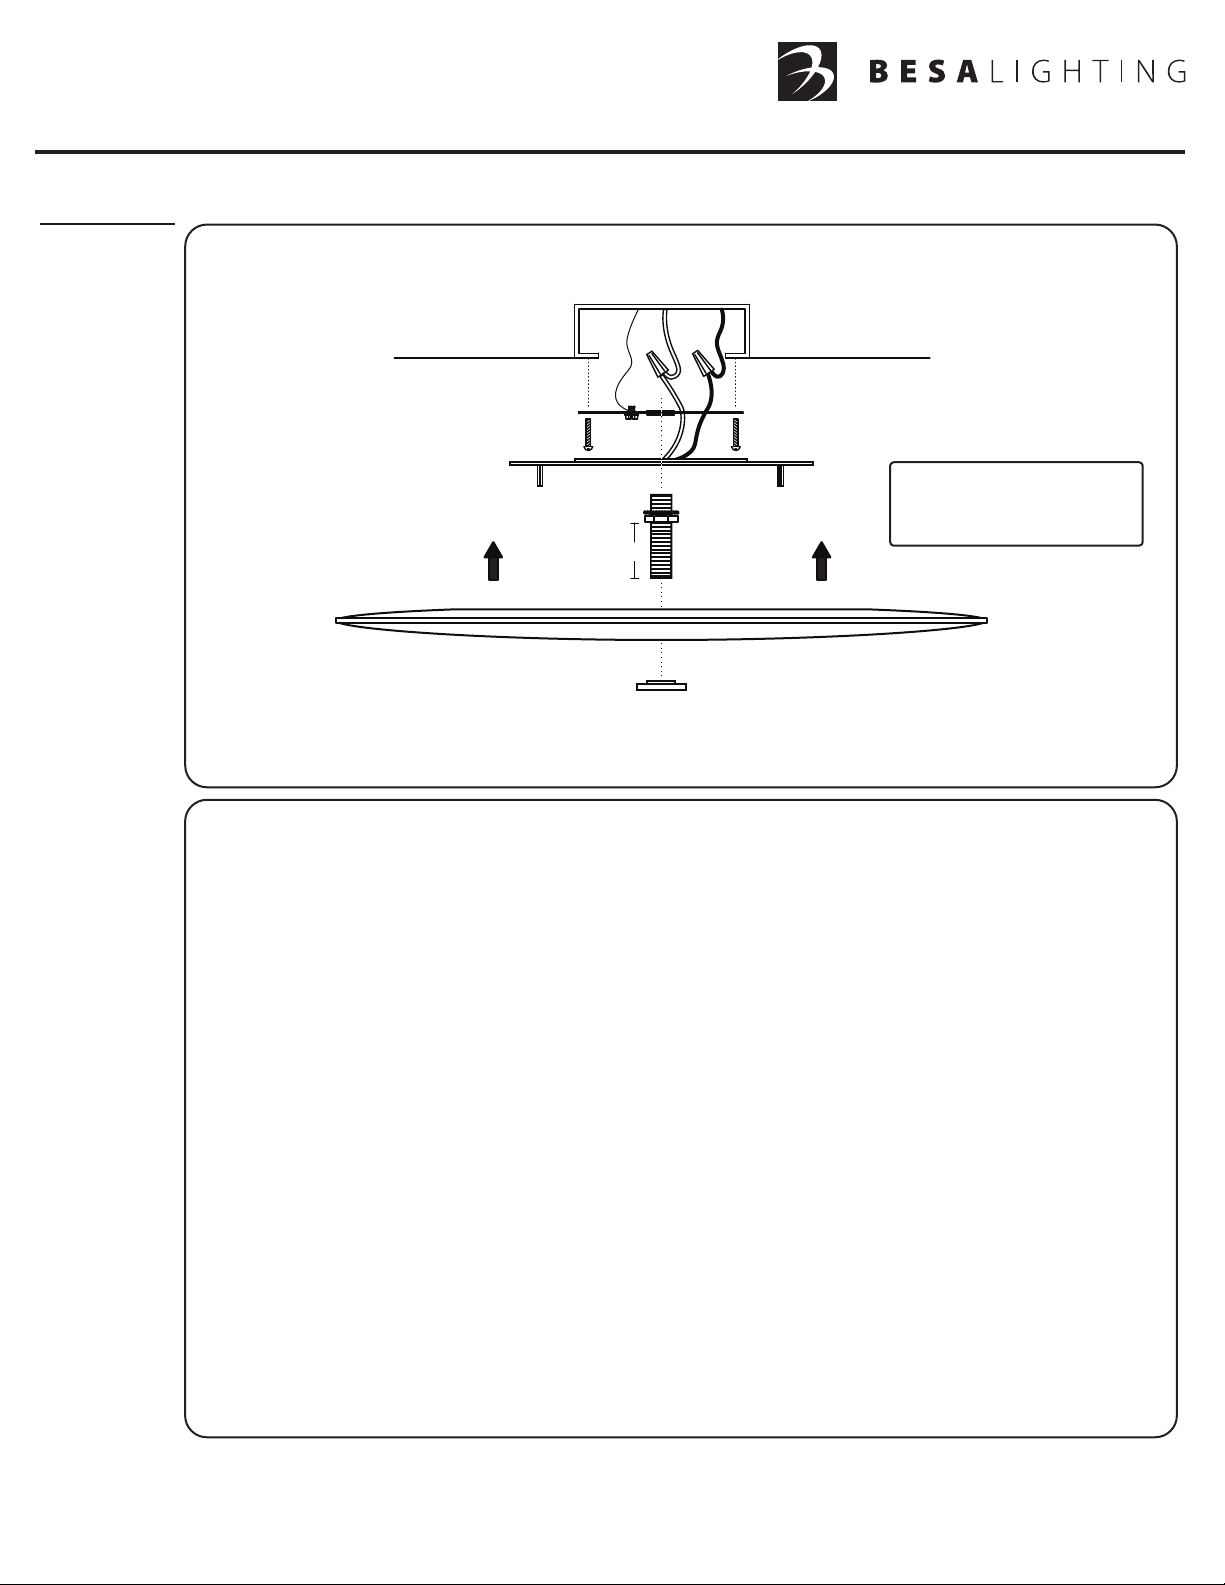
Caution: Turn off power to electrical box before installing
D
C
1 1/2”
G
I
A
B
H
E
F
NOTE:
Glass Shade is for instructional
purposes. Actual Glass Shade
may vary in size and shape.
J
1. Carefully unpack parts. Install Mounting Bracket (A) onto Outlet box and secure with
Machine Screws (B).
2. Connect the house supply ground wire to the Ground Screw (C) on the Mounting Bracket.
3. Connect the electrical leads from the fixture to the house supply wires, black to black and
white to white, and secure with wirenuts provided (D).
4. Thread Washer (E) and Hex Nut (F) onto the Threaded Nipple (G). Leave approximately 1 1/2” of
Threaded Nipple below the Hex Nut.
5. Align the openings in Fixture Pan (H) and Mounting Bracket (A) and install the Threaded Nipple to
secure the Fixture Pan to the Mounting Bracket.
6. Install lamp. Do not exceed the wattage marked, as that could cause fixture to overheat.
7. Install Glass Diffuser (J) by aligning glass opening with Threaded Nipple (G), then screw on
Decorative Cap (I).
8. Restore power.
All electrical connections and the installation of this fixture must be in agreement with local codes,
ordinances or the NEC (National Electric Code) or CEC (Canadian Electrical Code).
Do not connect this fixture to an electrical system that does not provide a means for equipment grounding.
CEILING FIXTURE INSTALLATION GUIDE
Models using Renfro Series (T5 Circline Base 120V/277V)
Renfro 20, Rev.1 11-12
6695 Taylor Rd. Blacklick, OH 43004
www.besalighting.com
Use With
these Models:
• Renfro 20
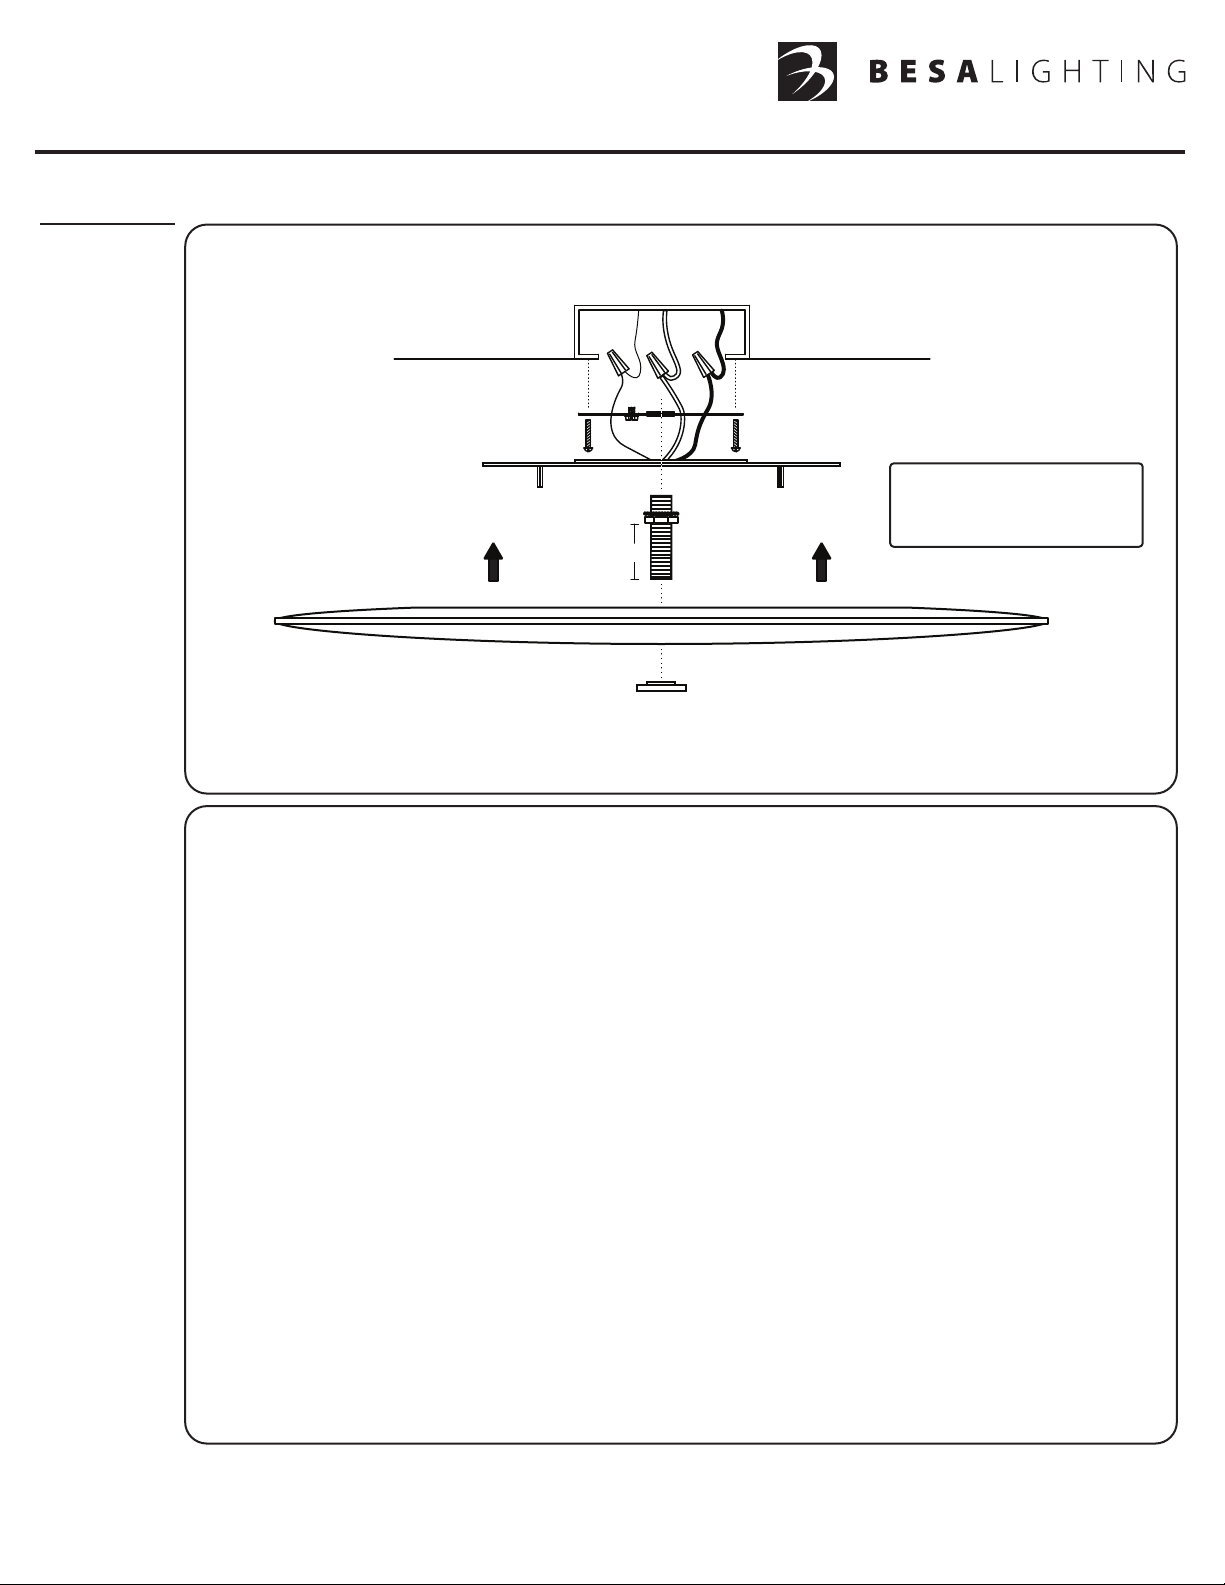
Caution: Turn off power to electrical box before installing
C
1 7/8”
D
A
B
H
E
F
G
I
NOTE:
Glass Shade is for instructional
purposes. Actual Glass Shade
may vary in size and shape.
J
1. Carefully unpack parts. Install Mounting Bracket (A) onto Outlet box and secure with
Machine Screws (B).
2. Connect green ground wire from fixture to house supply ground wire with wire nut connector (C).
3. Connect the electrical leads from the fixture to the house supply wires, black to black and
white to white, and secure with wirenuts provided (D).
4. Thread Washer (E) and Hex Nut (F) onto the Threaded Nipple (G). Leave approximately 1 7/8” of
Threaded Nipple below the Hex Nut.
5. Align the openings in Fixture Pan (H) and Mounting Bracket (A) and install the Threaded Nipple to
secure the Fixture Pan to the Mounting Bracket.
6. Install lamp. Do not exceed the wattage marked, as that could cause fixture to overheat.
7. Install Glass Diffuser (J) by aligning glass opening with Threaded Nipple (G), then screw on
Decorative Cap (I).
8. Restore power.
All electrical connections and the installation of this fixture must be in agreement with local codes,
ordinances or the NEC (National Electric Code) or CEC (Canadian Electrical Code).
Do not connect this fixture to an electrical system that does not provide a means for equipment grounding.
 Loading...