

Page 1
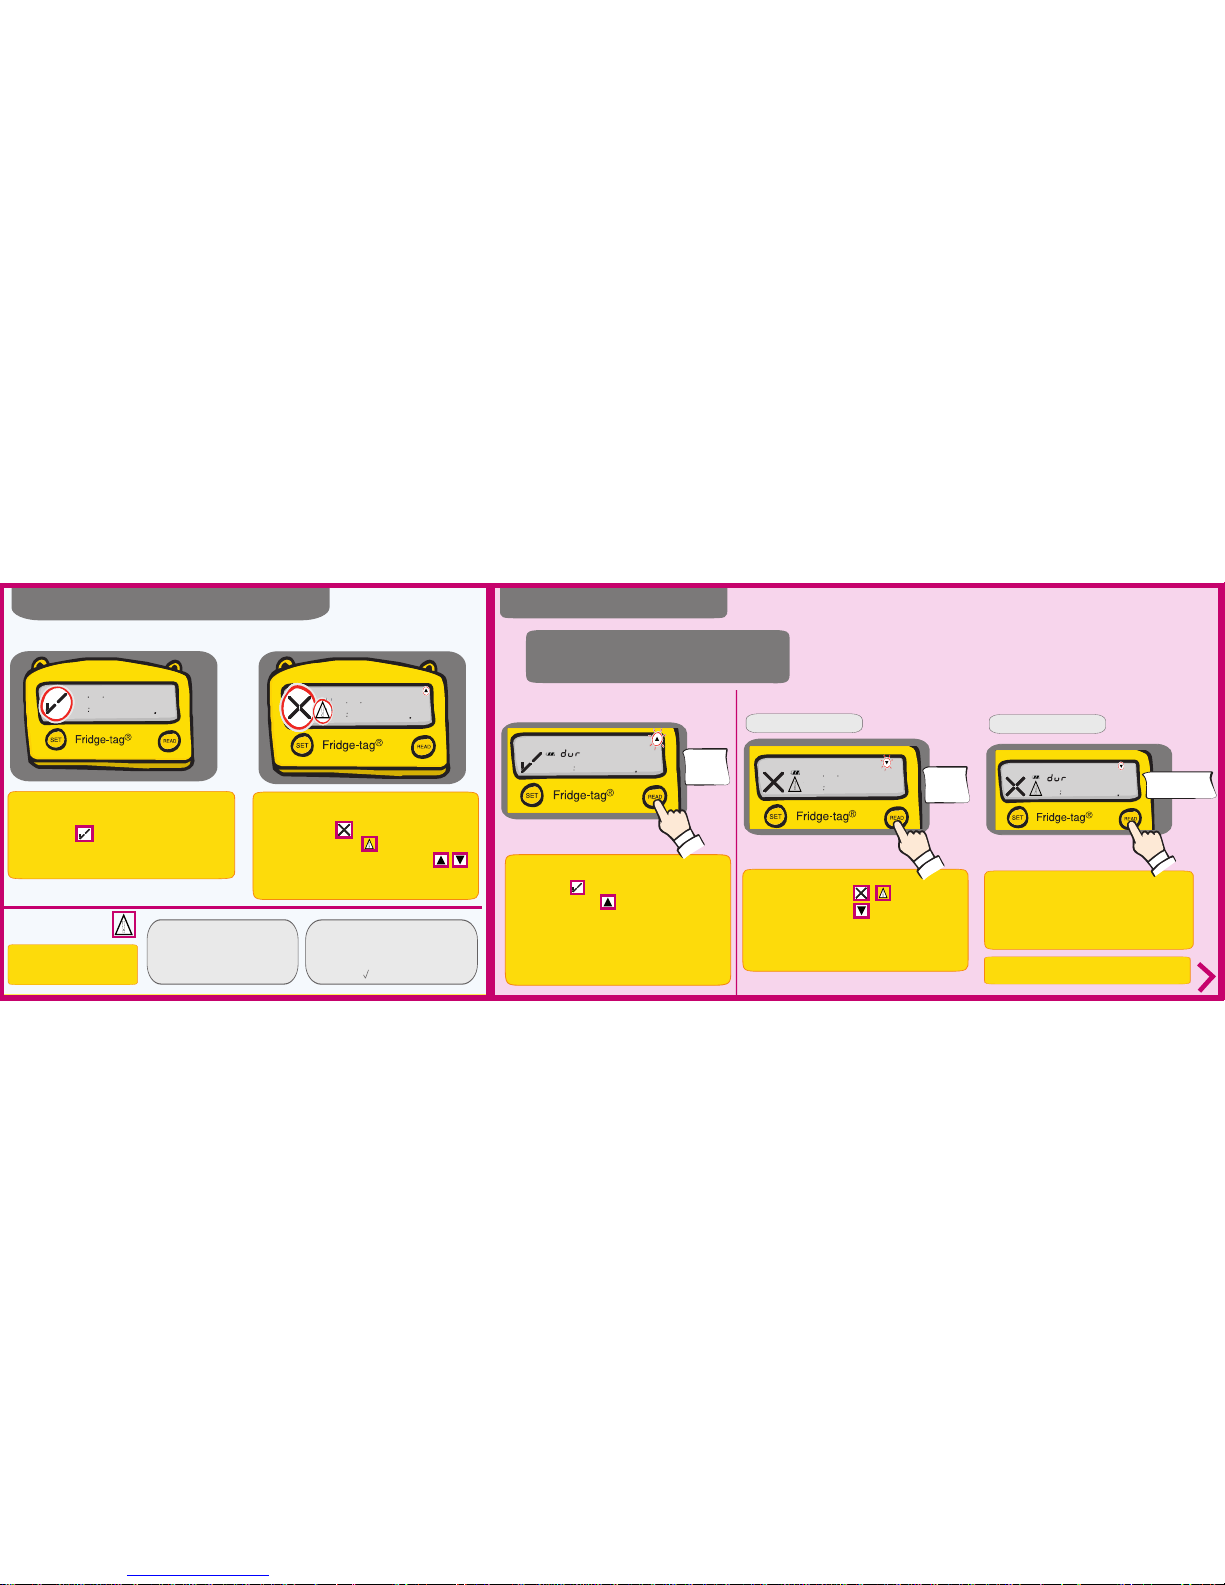
In measurement mode, when no ALARM has been triggered, the
following information is indicated on the screen:
• The OK symbol
• The current date and time:16.09.2016 /13:47
• The current temperature: +5.6 °C
Indication of an OK display
2
6101 2096
05 6
1 4 73
°C
Int.
Sensor
• the ALARM symbol
• an additional warning symbol
• the corresponding arrow: upper/lower alarm
• the current date and time:16.09.2016 /15:42
• the current temperature: +8.8 °C
In measurement mode, when an ALARM has been triggered, the
following information is indicated on the screen:
Indication of an ALARM display
2
6101 2096
08 8
1 4 25
°C
Int.
Sensor
!
!
!
2
55
0 0 00
max.
°C
Int.
Sensor
• the OK symbol
• the corresponding arrow
(example: high limit records of the current day today)
• the highest recorded temperature of that day:
+5 .5 ° C
• the time duration out of the preset temperature
high limit: 00:00 (hrs: min)
The following information is indicated on the display:
Reading the history
Option 1:
Read out day-per-day directly on the
device (30 day history)
Example of an OK display
Press
READ
once
2
6101 2099
1 2 18
!
1st displayed screen
Press
READ
The following information is indicated on the display:
• the ALARM symbol
• the corresponding arrow
(example: Low limit records and the day of ALARM)
• the date of alarm:1 9.09.2016
• the time of alarm:18:21
Example of an ALARM display
!
Reading the display during measurement
2
-
01 1
0 351
min.
Int.
Sensor
!
Press READ
a second time
The following additional information is indicated on the display:
Note: Continue repetitively pressing the READ button to read
out the details of the past 30 days.
• Lowest recorded temperature of that day: -1. 1° C
• The time duration out of the preset temperature
low limit: 01:35 (hrs:min)
2nd displayed screen
!
In addition to the ALARM symbol
each newly triggered alarm is
indicated by the warning symbol.
!
Option 2: The warning and ALARM symbol (X)
will remain visible until the user reads the details of
the triggered alarm/s from the display. After that both
symbols will disappear and the display will go back to
the OK Symbol ( ).
The warning symbol
Option 1: The warning and ALARM symbol
(X) will remain visible until the user reads the
details of the triggered alarm/s from the display.
After that the warning symbol will disappear.
The ALARM symbol (X) cannot be changed.
Page 2
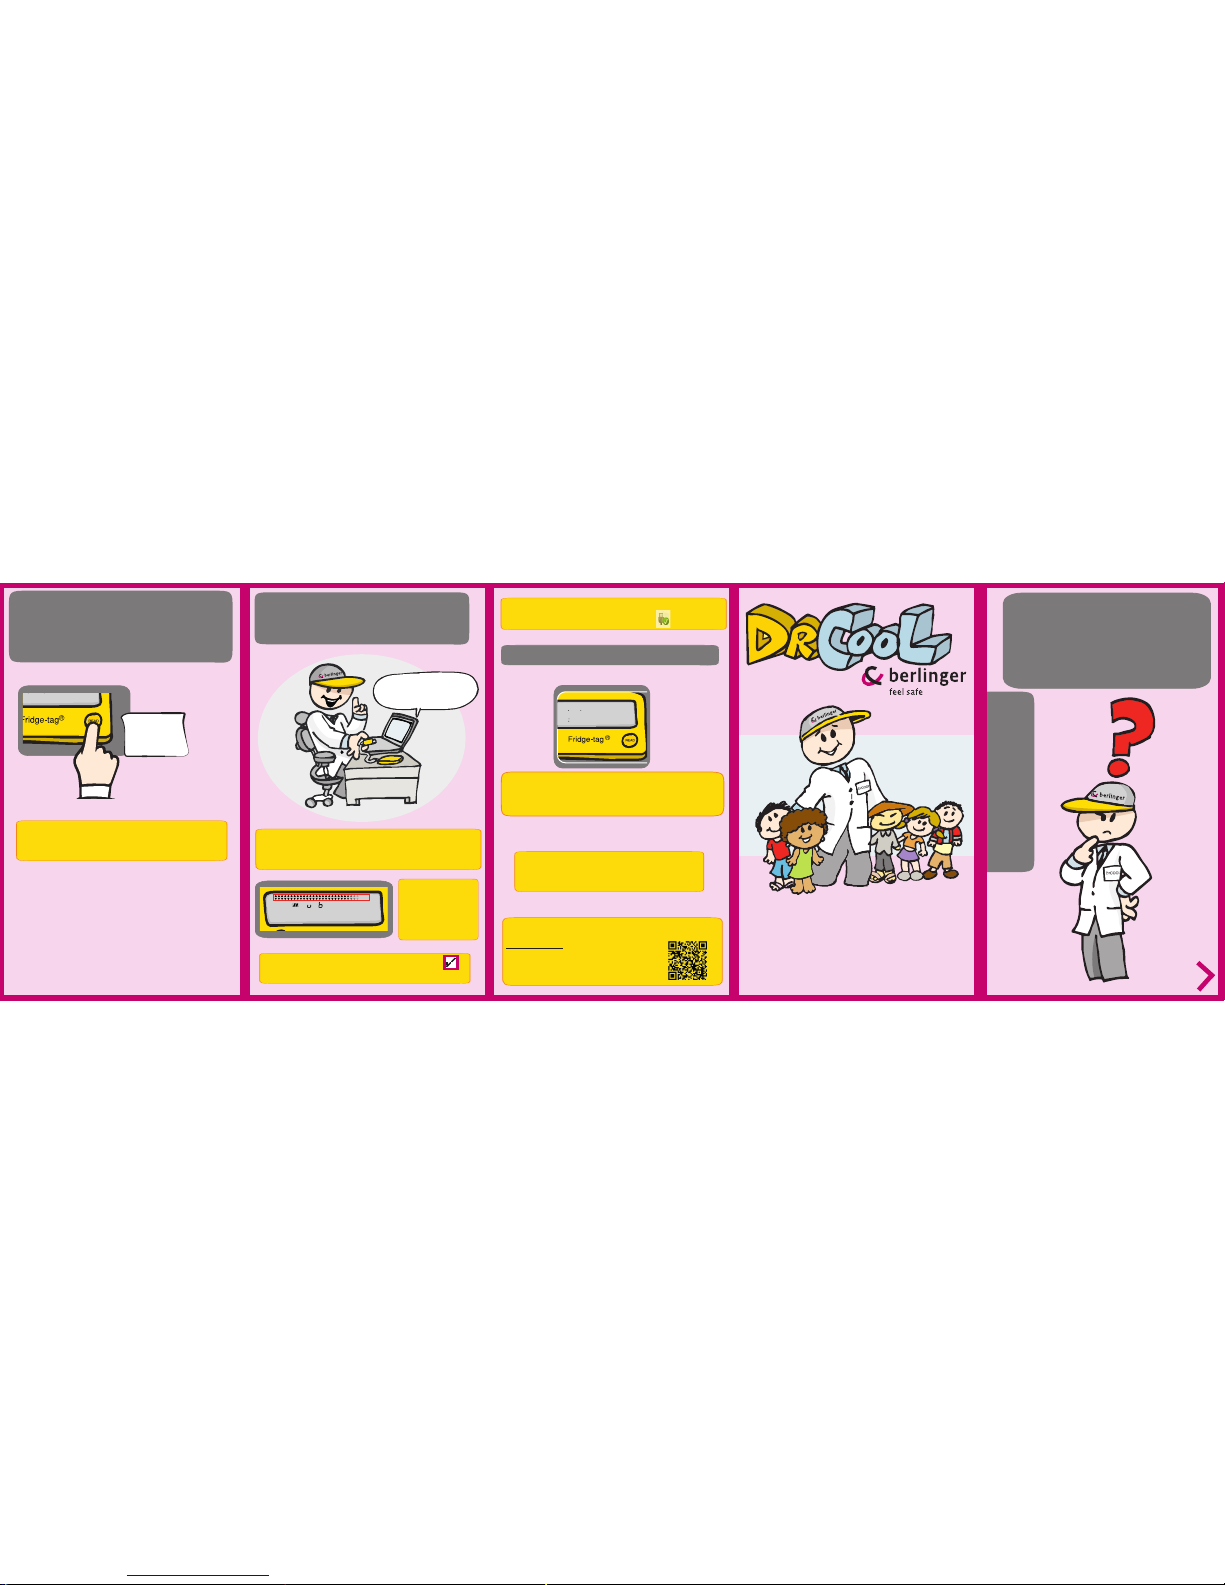
Option 2:
Read out only the alarms directly on the
device - use Alarm-Super- Jump function
(30 day history)
2
yyyd y__d
Press and hold
READ for
3 seconds
Option 3:
Read out data from the les generated by
connecting the device with a computer
Connect the device via
USB with your PC / MAC
The device will now generate a PDF and ASCII report of the last 60
days. Depending on the programming, this process may take up to 30
seconds.
Note: Press and hold the READ button again for at least 3
seconds and the next alarm event will appear on the screen
QUICK INFO
User guide of
Fridge-tag® 2 E
with internal /
external sensor
5
You can see that the
device is working from
the coninuously appearing arrows in the upper
display area.
For more information visit our website:
www.berlinger.com
or watch our traning videos
(www.youtube.com - Chanel: Berlinger & Co. AG):
Note: This process must not be interrupted, until the tick
appears on the display.
Note: For a proper USB-port disconnection of the device, please
always use the “safely remove hardware” function on your PC/Mac.
with internal sensor
with external sensor
back to normal operation
The device resumes the measuring operation right away.
Connect it immediately to the external sensor to avoid a
possible connection error.
The display indicates the word LOC for a period of 10 minutes,
during this time the device does not measure the temperature to avoid
false readings. Place the device immediately to the supervised goods.
6101 2096
2
lo C
1 4 73
Berlinger & Co. AG
Mitteldorfstrasse 2
9608 Ganterschwil
Switzerland
20161110_V1.0
Tel.: +41 71 982 88 11
Fax: +41 71 982 88 39
[email protected]
www.berlinger.com
 Loading...