

Berkey Blue Travel Berkey, Big Berkey, Royal Berkey, Imperial Berkey, Crown Berkey User Manual
Page 1

Berkey® Users Manual
Presented by:
© 2012 Berkey Blue All Rights Reserved
Page 2

Contents
Setting Up Your Berkey® System for the First Time
Assembly Instructions
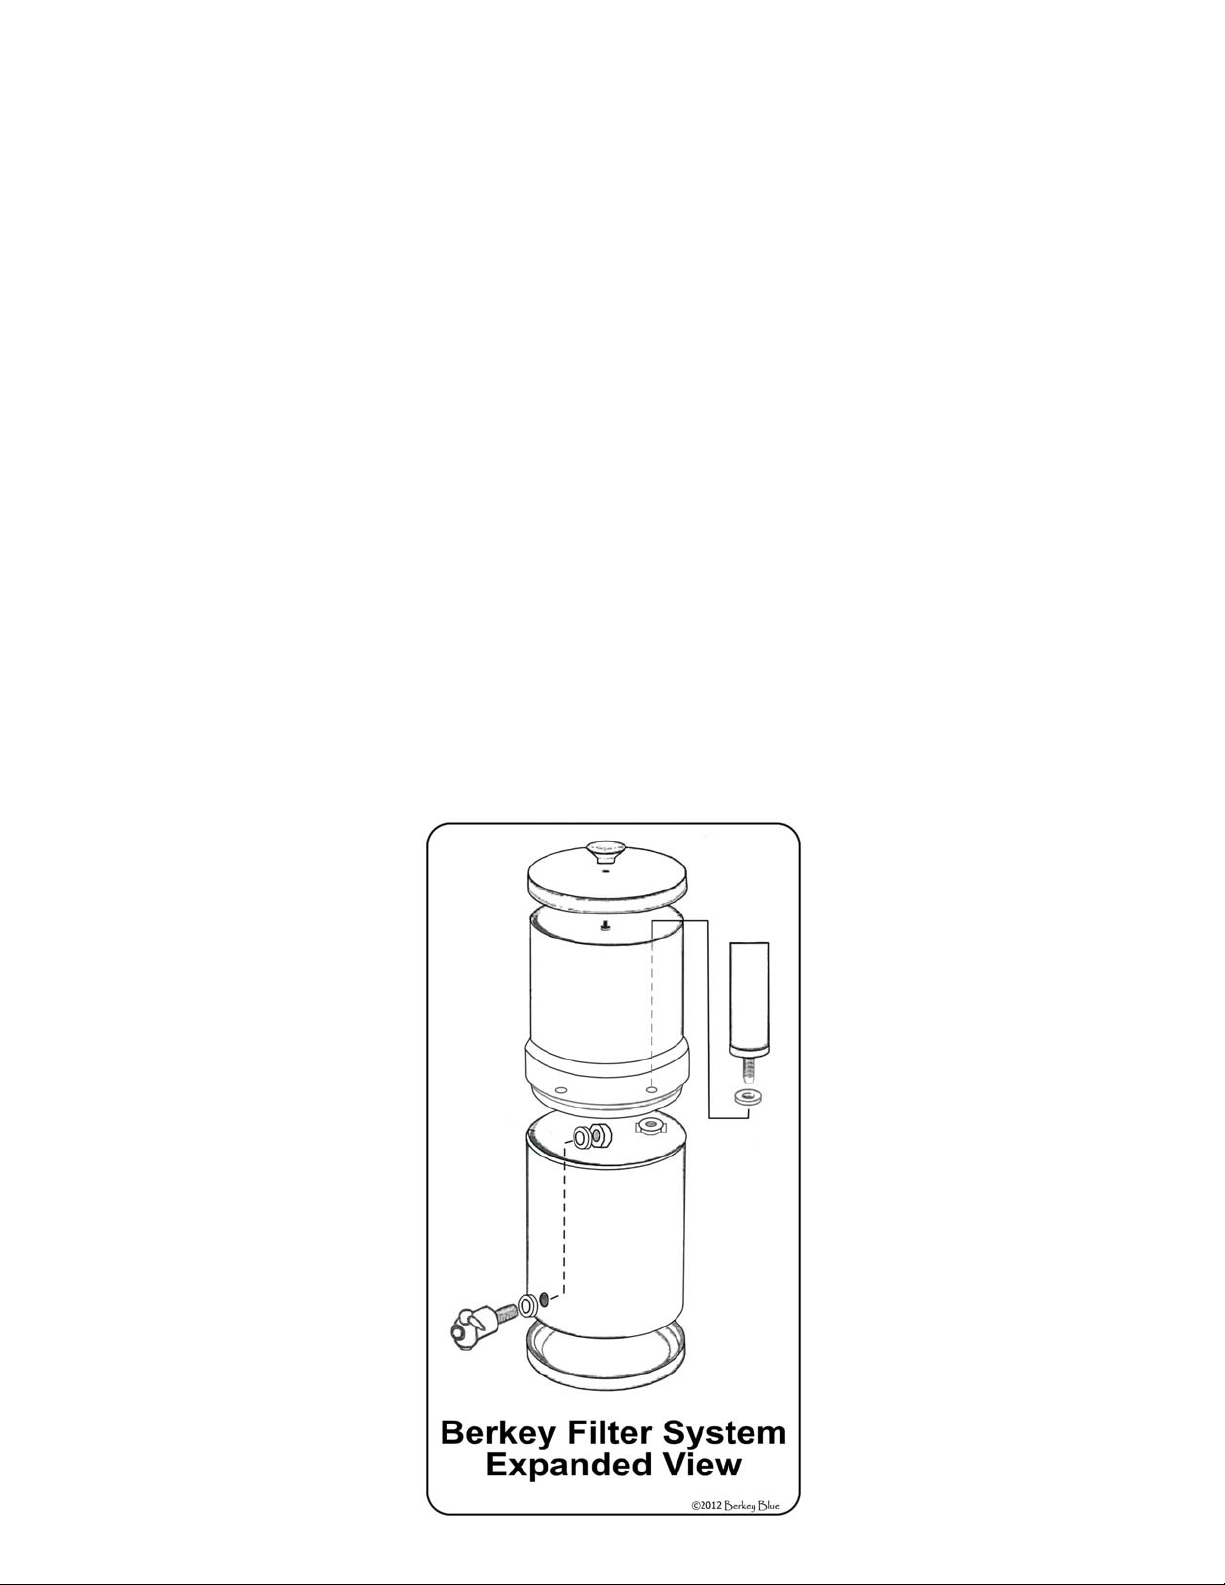
Berkey Filter System Expanded View
Priming Black Berkeys
Household Priming Method
No Water Pressure Priming Method
Priming PF-2 Fluoride Water Filters
Cleaning and Operation
Cleaning the Berkey Purification System
Cleaning the Black Berkey Filters
Household Cleaning Instructions
Field Cleaning Instructions
Operation Tips
Replacing the Black Berkey® Elements
Replacing the PF-2 Filter Elements
Red Food Coloring Filter Test
Berkey Warranty
General Warranty Information
Black Berkey Pro-Rated Warranty
Page 3
Setting Up Your Berkey®
System for the First Time
Congratulations, on your purchase of the finest Water Purifier in the world. You have shown a desire
to protect the health and well being of your family by protecting them from water borne contaminates
and pathogens. These are detailed instructions on how to setup your Berkey water filter system for
the first time. Retain these instructions for reinstalling the filters elements after cleaning or to answer
any questions about assembling your filter.
Models Covered: Travel Berkey®, Big Berkey®, Royal Berkey®,
Imperial Berkey® & Crown Berkey®
Precautions
Extreme cleanliness is vital especially in hostile environments where the filter maybe easily
contaminated. Wash hands and system thoroughly with purified water before proceeding to insure
that no contamination of the filter takes place during assembly.
Assembly Instructions
Un-package your filter and check to see if you have the following parts. Be sure to check for any
shipping damage, pay particularly close attention to the Black Berkey elements for damage.
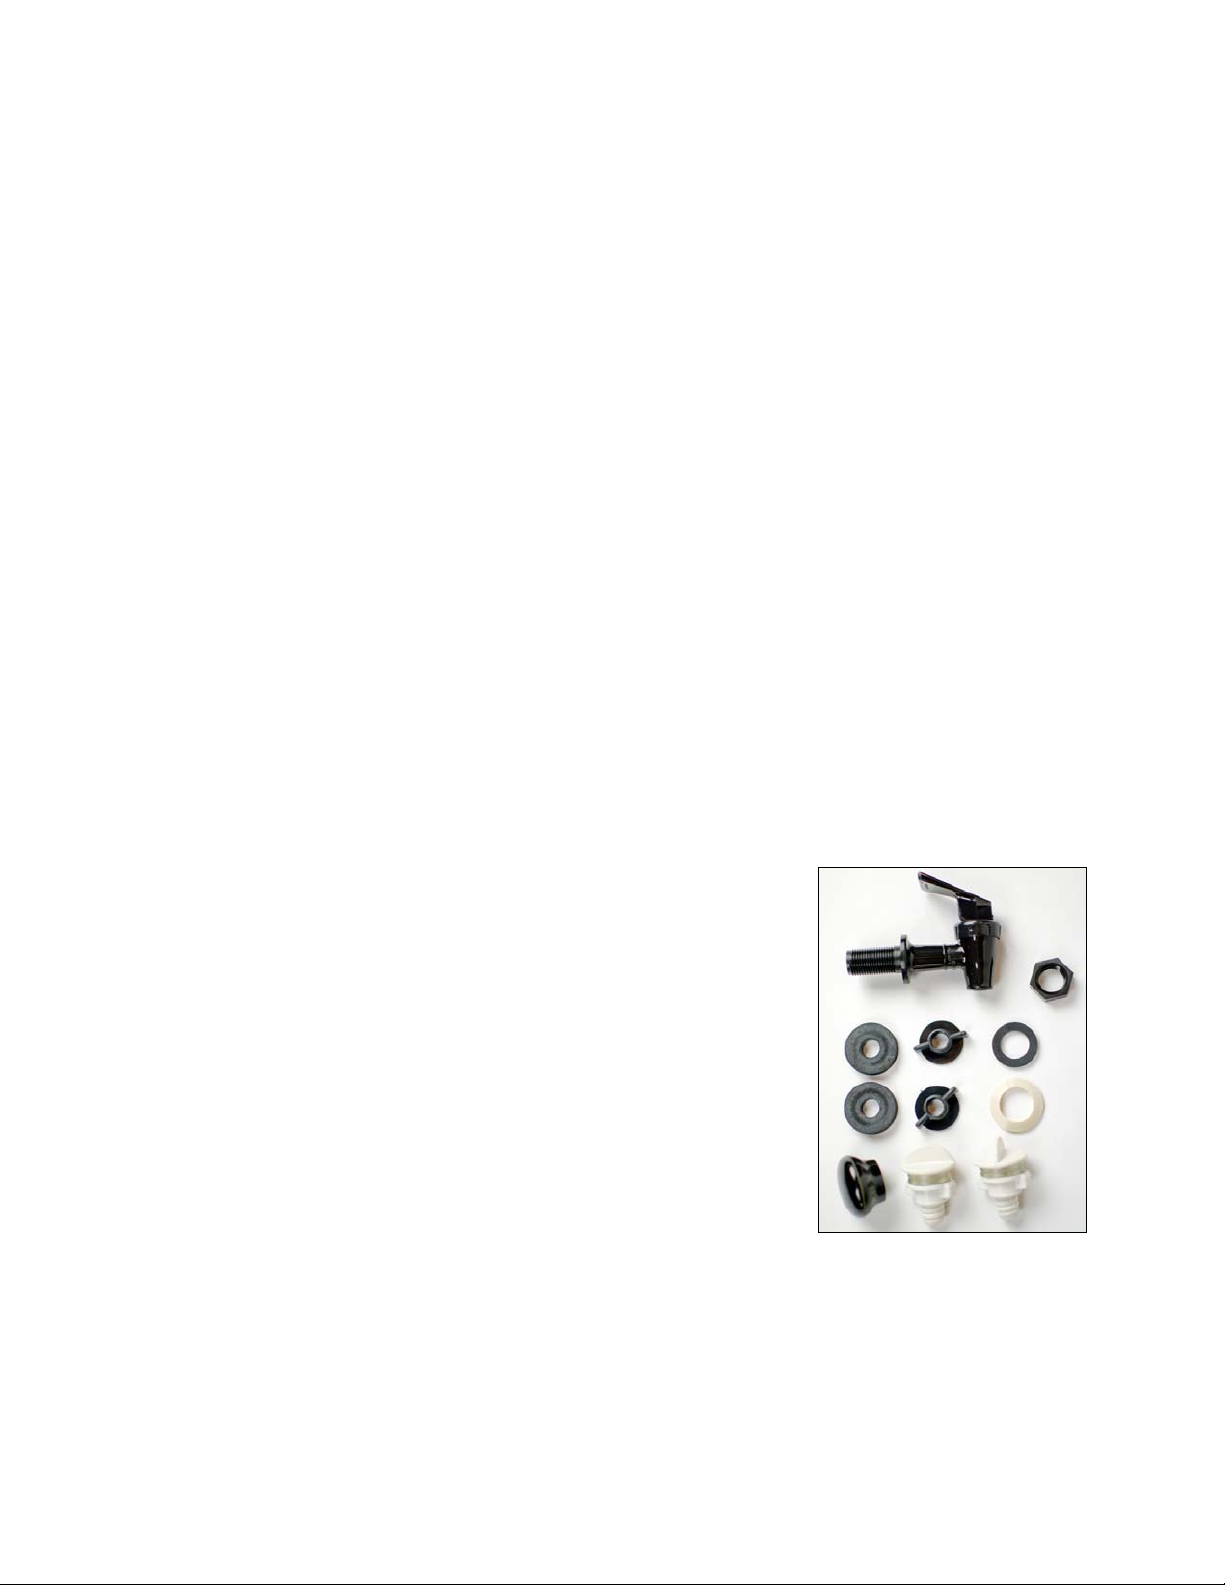
Quantity Description
1 Upper Water Chamber (Depending on the model
purchased it will have from 2 to 8 holes in the bottom)
1 Lower Water Chamber (Has one hole in the side near
the bottom)
1 Lid
1 Knob (Black plastic with screw)
1 Black Plastic Spigot with nut
1 Spigot washers (one convex white washer & one black
washer)
2 - 8 Purification Elements including washer & wing nut
(quantity depends on model)
0 - 6 Hole plugs (quantity depends on model, i.e. the Travel
Berkey needs none)
1. Clean all parts of the filter housing with warm soapy water. Air dry the parts.
2. Install the knob onto the lid by removing the screw, inserting it up thorough the hole in the lid
and screwing the knob back onto the screw, hand tighten only.
3. Place the black washer onto the threaded stem of the spigot. Insert the spigot stem through
the hole near the bottom on the side of the lower chamber. Placing the curved side of the
white washer toward the wall of the chamber slide it onto the spigot stem from inside the
chamber. Screw the nut onto the stem and hand tighten securely.
Page 4
4. Depending on the number of filter elements that came with your system, you may have to
install plugs into the remaining expansion holes of the upper chamber. Plan on installing each
filter set into its opposite position within the upper chamber. Fill each remaining holes with a
plug as follows: Place one plastic washer onto each plug required. From inside the upper
chamber insert a plug into the appropriate hole, place another plastic washer on the plug’s
stem from the bottom side of the chamber, thread and tighten securely the wing nut. Repeat
for each remaining plug required.
5. Prime the Black Berkey elements per the instructions detailed below.
6. Once primed slide the black rubber washer onto the threaded stem of the Black Berkey
element. Insert the stem of the element into one of the holes from inside of the upper
chamber. Thread and securely tighten the wing nut onto the Black Berkey’s stem. Repeat for
the remaining elements.
7. If you have purchased the optional PF-2 filter elements prime those according to the directions
details below otherwise skip to Step 9. Once primed thread each PF-2 onto the stem of a
Black Berkey element protruding from the bottom of the upper chamber. Only thread the PF-2
for a maximum of eight revolutions onto the Black Berkey’s stem to prevent internal damage to
the PF-2 filter. Once installed these filters will protrude into the lower chamber of your Berkey
System.
8. Place the upper chamber onto the lower chamber and situate in a convenient location near
your sink. Fill the upper chamber completely with water; allow the filter to completely cycle all
water from the upper chamber into the lower storage reservoir. It is normal for ½ to 1 inch of
water to remain in the upper chamber. Waste this first cycle of water and refill the upper
chamber, once this cycle is complete your delicious healthy and refreshing Berkey water is
ready for use.
Note: It is recommended to perform the Red Food Color Test detailed below prior to using the water
to insure proper installation and operation of your Berkey purification system.
Page 5
Priming Black Berkeys Elements
Household Priming Method
The micro pores on the Black Berkey® purification elements are extremely small, in fact they are
small enough to filter pathogenic bacteria and other contaminates. But the high water tension created
by the micro pores requires that the purification elements be primed before water will flow through
them properly. When your elements arrive, they are dry and air is trapped within the micro fine pores.
Use the following procedure to prime your elements for use.
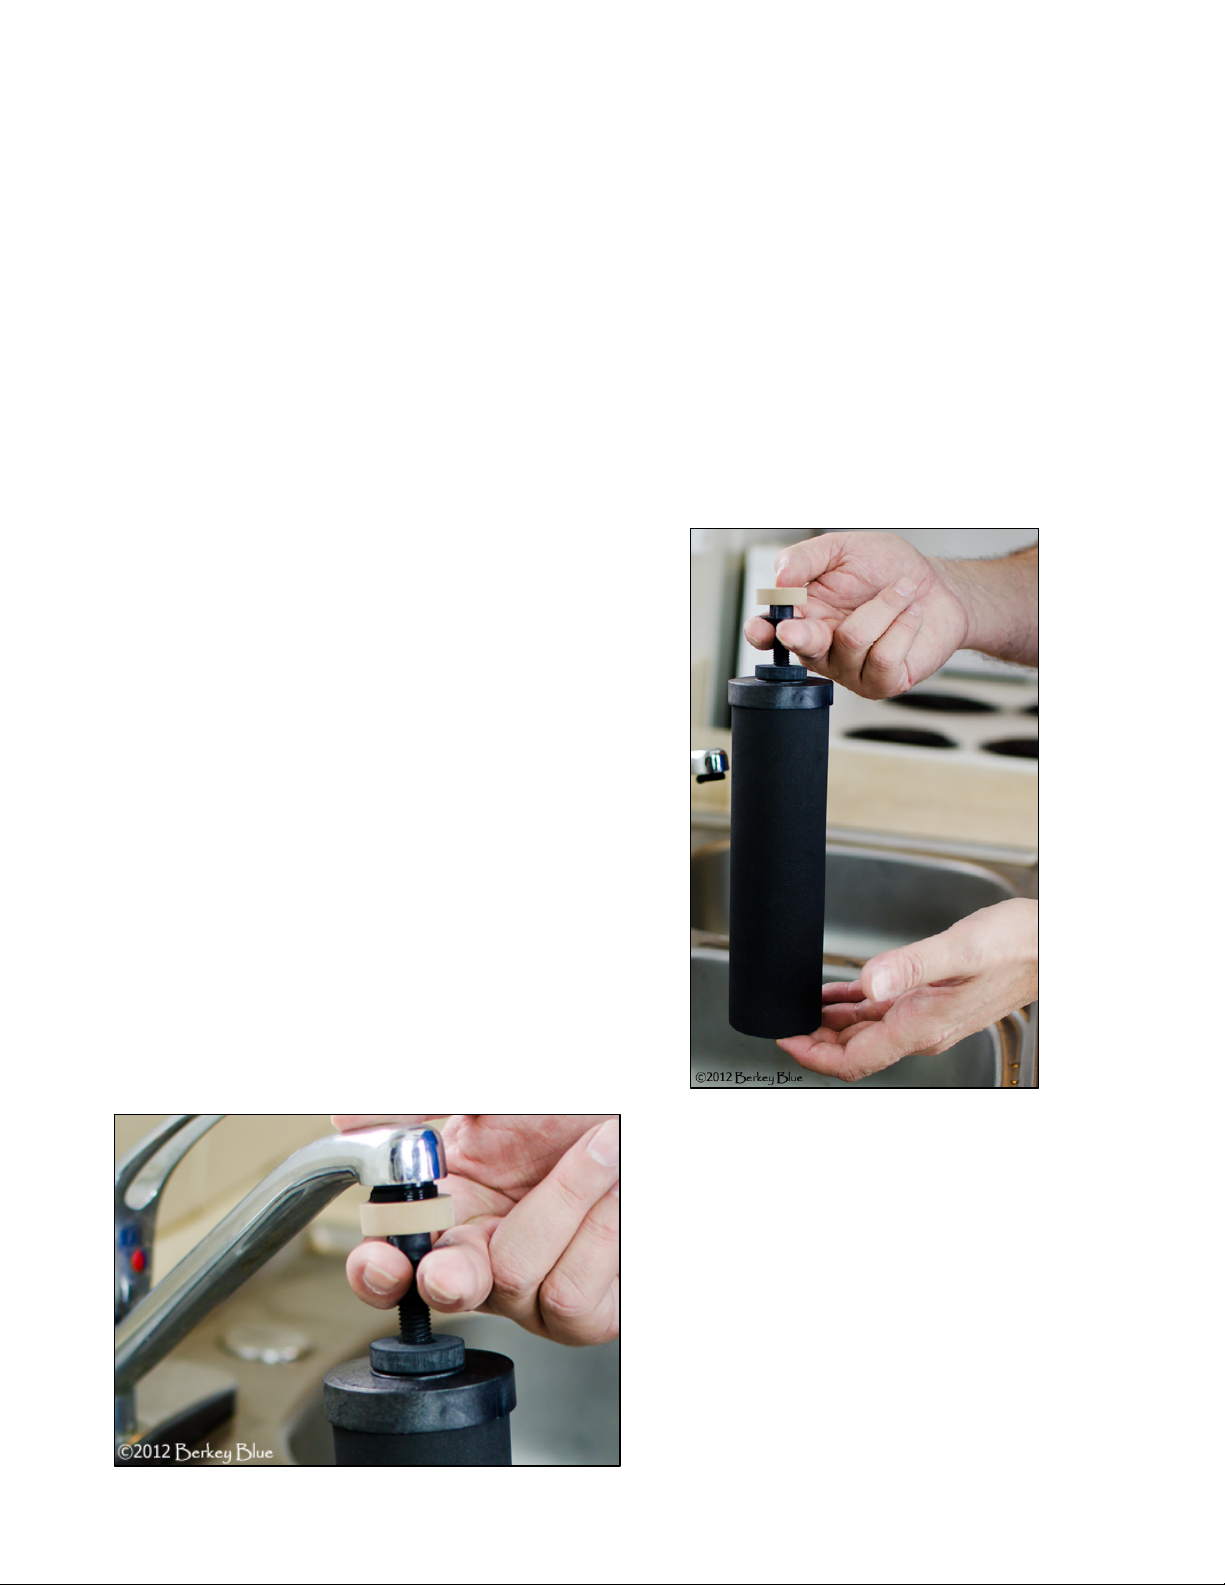
Step 1) Place the washer and wing nut onto the Black
Berkey element as shown. Press the tan colored
rubber priming button onto the stem of the Black Berkey
purification element with the small end facing the
element.
Step 2) Place the stem of the Black Berkey element
between your fingers and using the wing nut for grip
press the large end of the priming button against the
faucet.
 Loading...