


HDT913AEP

BEN125 HD
www.bensat.cz
User’s manual
Uživatelský manuál
Užívateľský manuál
Instrukcja użytkownika
Felhasználói kézikönyv
Uporabniški priročnik
English
Read this manual before installation and use.
SET TOP BOX
Digital receiver
OWNER'S MANUAL
HDT913AEP
TO REDUCE THE RISK OF FIRE AND ELECTRIC SHOCK, DO NOT EXPOSE THIS UNIT TO RAIN OR
MOISTURE.
IMPORTANT SAFEGUARDS
: To reduce the
risk of fire and electric shock, do
not remove the cover (or back) of
the unit. Refer servicing only to qualified service personnel.
The lightning flash with arrowhead symbol, within an equilateral
triangle, is intended to alert the user to the presence of uninsulated
"dangerous voltage" within product's enclosure that may be of
sufficient magnitude to constitute a risk of electric shock.
The exclamation point within an equilateral triangle is intended to
alert the user to the presence of important operation and servicing
instructions in the literature accompanying the appliance.
WARNING: TO REDUCE THE RISK OF FIRE OR ELECTRIC SHOCK, DO
NOT EXPOSE THIS APPLIANCE TO RAIN OR MOISTURE.
CAUTION: TO PREVENT ELECTRIC SHOCK, MATCH WIDE BLADE OF
PLUG TO WIDE SLOT AND FULLY INSERT.
In addition to the careful attention devoted to quality standards
in the manufacture of your video product, safety is a major factor
in the design of every instrument. However, safety is your
responsibility, too. This sheet lists important information that will
help to assure your enjoyment and proper use of the video
product and accessory equipment. Please read them carefully
before operation and using your video product.
Installation
10.
11.
11a.
12.
13.
14.
15.
16.
17.
18.
19.
20.
21.
22.
CAUTION
The apparatus shall not be exposed to dripping or splashing, and that no
objects filled with liquids, such as vases, shall be place on the apparatus.
SAFETY INFORMATION
1.
2.
3.
4.
5.
6.
7.
8.
9.
Read and Follow Instructions- All the safety and operation instructions
should be read before the video product is operated. Follow all
operating instructions.
Retain Instructions- The safety and operating instructions should be
retained for future reference.
Heed all Warnings-Comply with all warnings on the video product and
in the operating instructions.
Polarization- Some video products are equipped with a polarized
alternating -current line plug. This plug will fit into the power outlet, try
reversing the plug. If the plug still fails to fit, contact your electrician to
replace your obsolete outlet. To prevent electric shock, do not use this
polarized plug with an extension cord, receptacle, or other outlet unless
the blades can be fully inserted without blade exposure. If you need an
extension cord, use a polarized cord.
Power Sources- This video product should be operated only from the
type of power source indicated on the marking label. If you are not sure
of the type of power supply to your home, consult your video dealer or
local power company. For video products intended to operate from
battery power, or other sources, refer to the operating instructions.
Overloading- Do not overload wall outlets or extension cords as this can
result in a risk of fire or electric shock. Overloaded AC outlets, extension
cords, frayed power cords, damaged or cracked wire insulation, and
broken plugs are dangerous, They may result in a shock or fire hazard.
Periodically examine the cord, and if its appearance indicated damage or
deteriorated insulation, have it replaced by your service technician.
Power-Cord Protection- Power-supply cords should be routed so that
they are not likely to be walked on or pinched by items placed upon or
against them, paying particular attention to cords at plugs, convenience
receptacles, and the point where they exit from the video product.
Where the MAIN plug or an appliance coupler is used as the disconnect
device, the disconnect device shall remain readily operable.
Ventilation- Slots and openings in the case are provided for ventilation
to ensure reliable operation of the video product and to protect it from
overheating. These openings must not the blocked or covered. The
openings should never be blocked by placing the video product on a bed,
sofa, rug, or heat register. This video product should not be placed in a
built-in installation such as a book case or rack, unless proper ventilation
is provided or the video product manufacturer's instructions have been
followed.
Attachments- Do not use attachments unless recommended by the video
product manufacturer as they may cause hazards.
The apparatus shall not be exposed to dripping or splashing and that no objects
filled with liquids ,such as vases shall be placed on the apparatus.
Caution: Maintain electrical safety. Powerline operated equipment or accessories
connected to this unit should bear safety certification mark on the accessory itself
and should not be modified so as to defeat the safety features. This will help avoid
any and should not be modified so as to defeat the safety features. This will help
avoid any potential hazard from electrical shock or fire. If in doubt, contact
qualified service personnel.
Accessories- Do not place this video product on an unstable cart, stand, tripod,
bracket, or table. The video product may fall, causing serious injury to a child or
adult as well as serious damage to the video product. Use this video product only
with a cart, stand, tripod, bracket, or table recommended by the manufacturer's
or sold with the video product. Any mounting of the product should follow the
manufacturer's instructions and use of a mounting accessory recommended by
the manufacturer.
A video product and cart combination should be moved with care. Quick stops,
excessive force, and uneven surfaces may cause the video product and cart
combination to overturn.
Note to CATV system installer
This reminder is provided to call the CATV system installer's attention to
Section 820-40 of the NEC which provides guidelines for proper grounding
and, in particular, specifies that the cable ground shall be connected to the
grounding system of the building, as close to the point of cable entry as
practical.
Outdoor Antenna Grounding- If an outside antenna or cable system is connected to
the video product, be sure the antenna or cable system is grounded so as to provide
some protection against voltage surges and built-up static charges. Section 810 of
the National Electrical Code, ANSI/NFPA No.70-1984 (Section 54 of Canadian
Electrical Code, Part1) provides information with respect to proper grounding of
the mast and supporting structure, grounding of the lead-in wire to an antennadischarge unit, connection to grounding electrodes, and requirements for the
grounding electrode.
Power Lines-An outside antenna system should not be located in the vicinity of
overhead power lines, other electric light or power circuits, or where it can fall into
such power lines or circuits. When installing an outside antenna system, extreme
care should be taken to keep from touching or approaching such power lines or
circuits, as contact with them might be fatal. Installing an outdoor antenna can be
hazardous and should be left to a professional antenna installer.
Use
Cleaning- Unplug this video product from the wall outlet before cleaning.
Do not use liquid cleaners or aerosol cleaners. Use a damp cloth for cleaning.
Objects that may touch dangerous voltage points or "short-out" parts could result in
a fire or electric shock. Never spill liquid of any kind on the video product.
Lightning-For added protection for this video product during a lightning storm, or
when it is left unattended and unused for long periods of time, unplug it from the
wall outlet and disconnect the antenna or cable system. This will prevent damage to
the video product due to lightning and power line surges.
Service
Servicing-Do not attempt to service this video product yourself, as opening or
removing covers may expose you to dangerous voltage or other hazards. Refer all
servicing to qualified service personnel.
Conditions Requiring Service-Unplug this video product from the wall outlet and
refer servicing to qualified service personnel under the following conditions:
A. When the power-supply cord or plug is damaged.
B. If liquid has been spilled, or objects have fallen into the video product.
C. If the video product has been exposed to rain or water.
D. If the video does not operate normally by following the operating
instructions.
Adjust only those controls that are covered by operating instructions.
Improper adjustment of other controls may result in damage and will often
require extensive work by a qualified technician to restore the video product
to its normal operation.
E. If the video product has been dropped or cabinet has been damaged.
F. When the video product exhibits a distinct change in performance-this
indicates a need for service.
Replacement Parts-When replacement parts are required, have the service
technician verify that the replacements he uses have the same safety
characteristics as the original parts. Use of replacements specified by the video
product manufacturer can prevent fire, electric shock, or other hazards.
Safety Check-Upon completion of any service or repairs to this video product, ask
the service technician to perform safety checks recommended by the manufacturer
to determine that the video product is in safe operating condition.
Wall or Ceiling Mounting- The product should be mounted to a wall or ceiling only
as recommended by the manufacturer.
Heat-The product should be situated away from heat sources such as radiators,
heat registers, stoves, or other products (including amplifiers) that products heat.

CONTENTS
SAFETY INFORMATION
INTRODUCTION
Front panel
Rear panel
Remote control
SYSTEM CONNECTION
General
Connecting the TV
Connecting a HiFi System
GETTING STARTED
Welcome
Installation
OPERATION
Changing channels
Access the Electronic Programme Guide(EPG)
EDIT CHANNEL
Edit Channel menu
TV Channel list
Radio Channel list
Delete All
SYSTEM SETUP
System setup menu
Language
TV System
Local Time Setting
Timer Setting
Parental Lock
OSD Setting
Favorite
Audio Description Setting
Other
TOOLS
Tools main menu
Information
Factory Setting
Software Upgrade
Remove USB device safely
GAMES
Game
REC
REC main menu
Media Player
PVR Information
PVR Setting
TIMESHIFT/RECORD
Timeshift
Record
TROUBLESHOOTING
SPECIFICATIONS
3
3
3
4
4
5
5
6
6
6
6
7
7
7
7
8
8
8
8
9
9
10
10
10
10
10
11
12
12
13
13
14
14
15
16
1
1
2
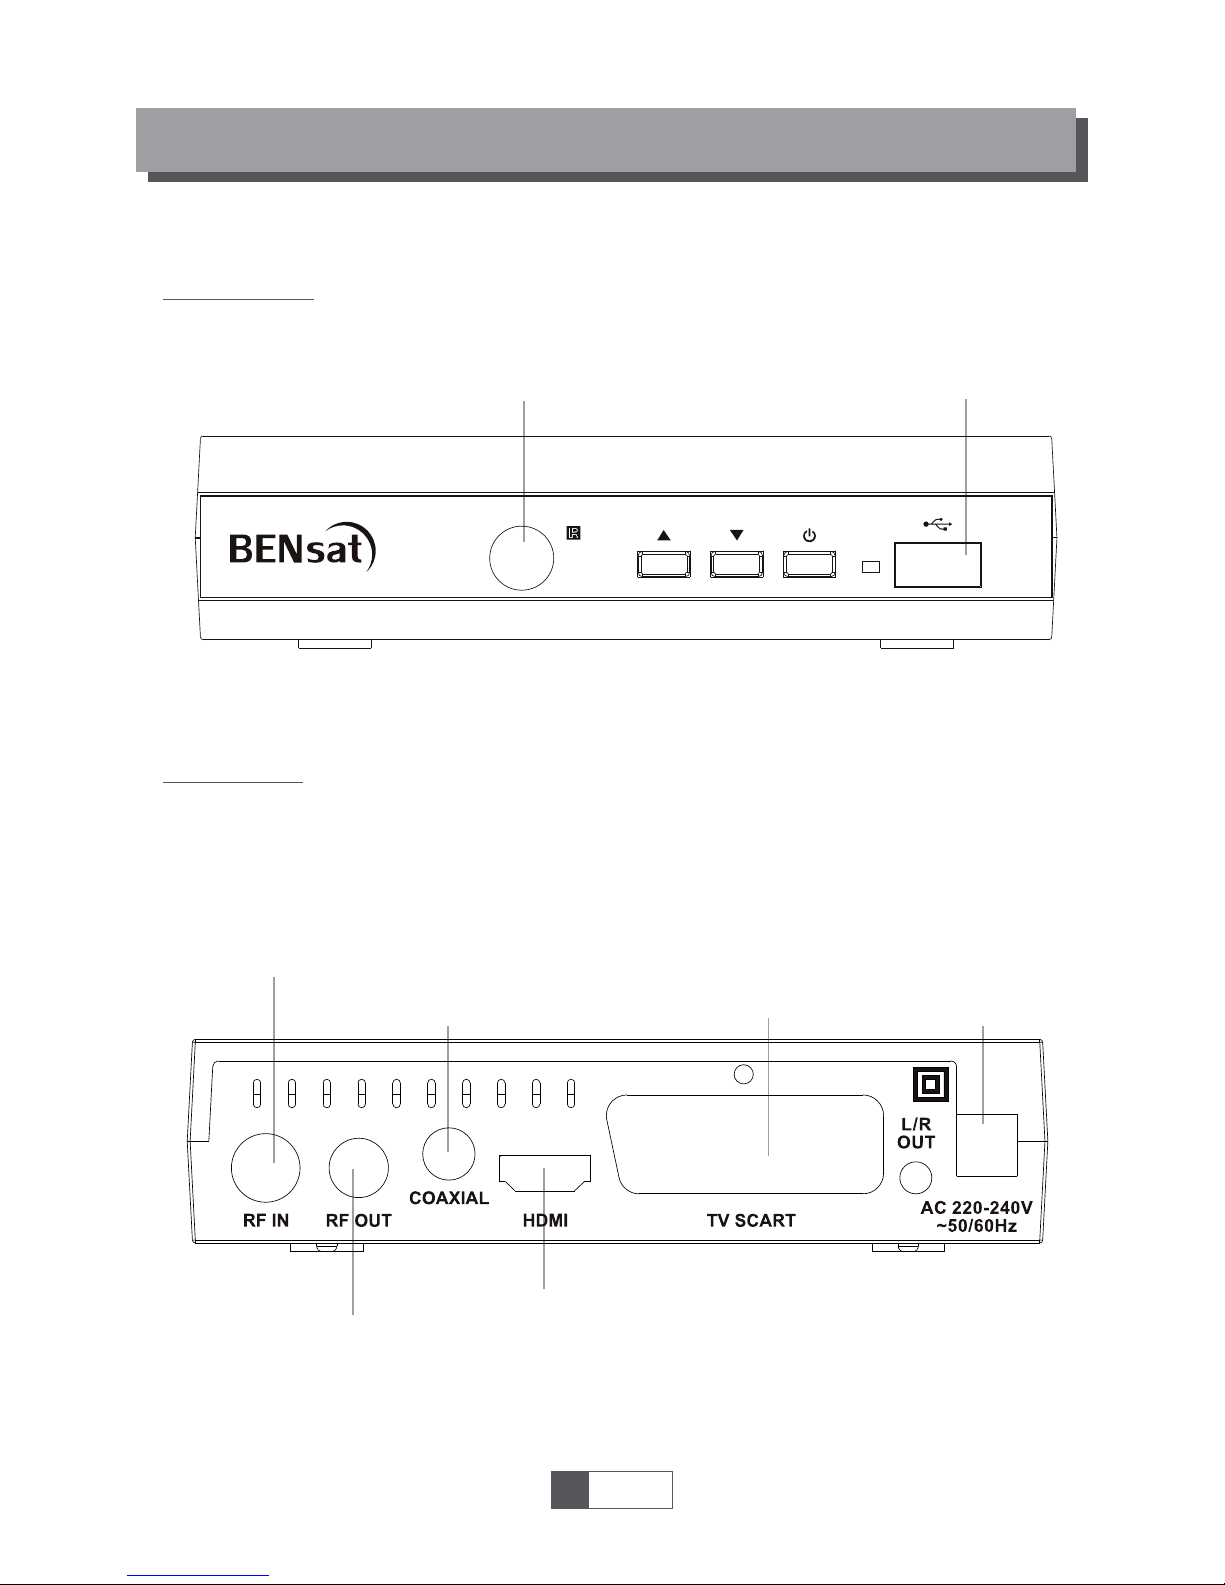
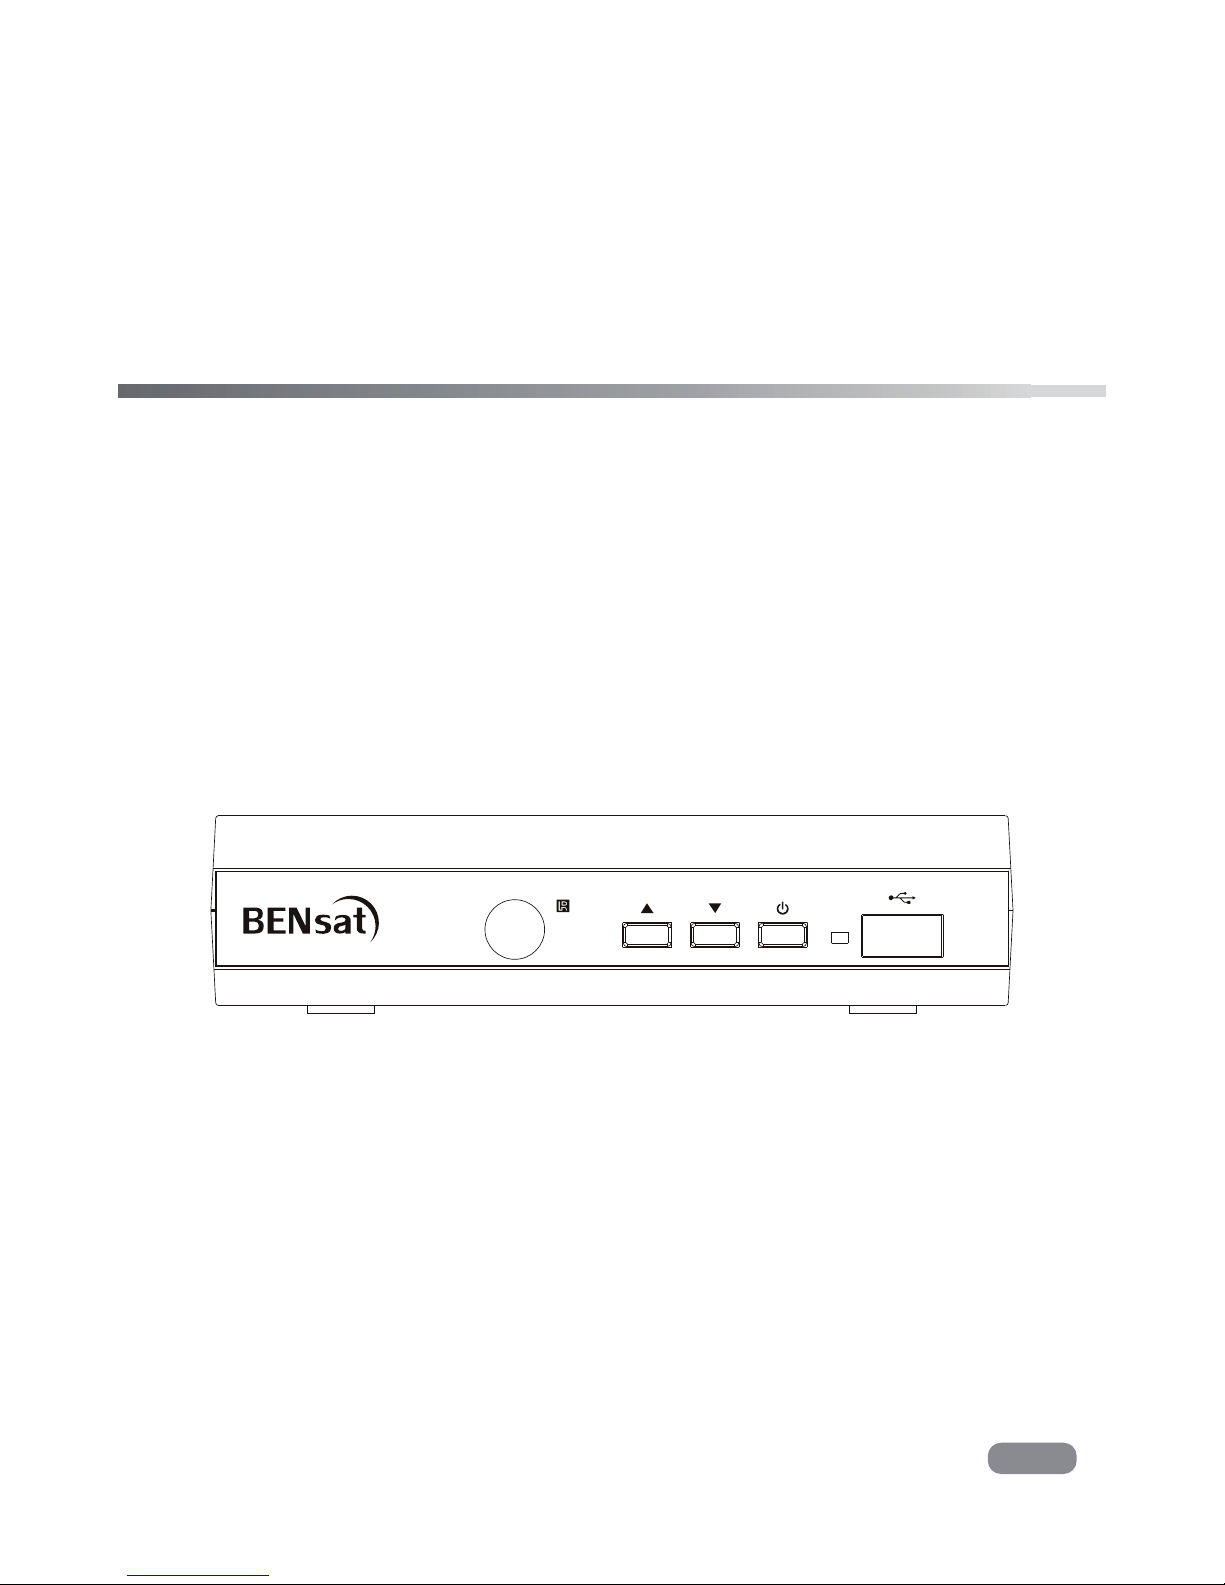
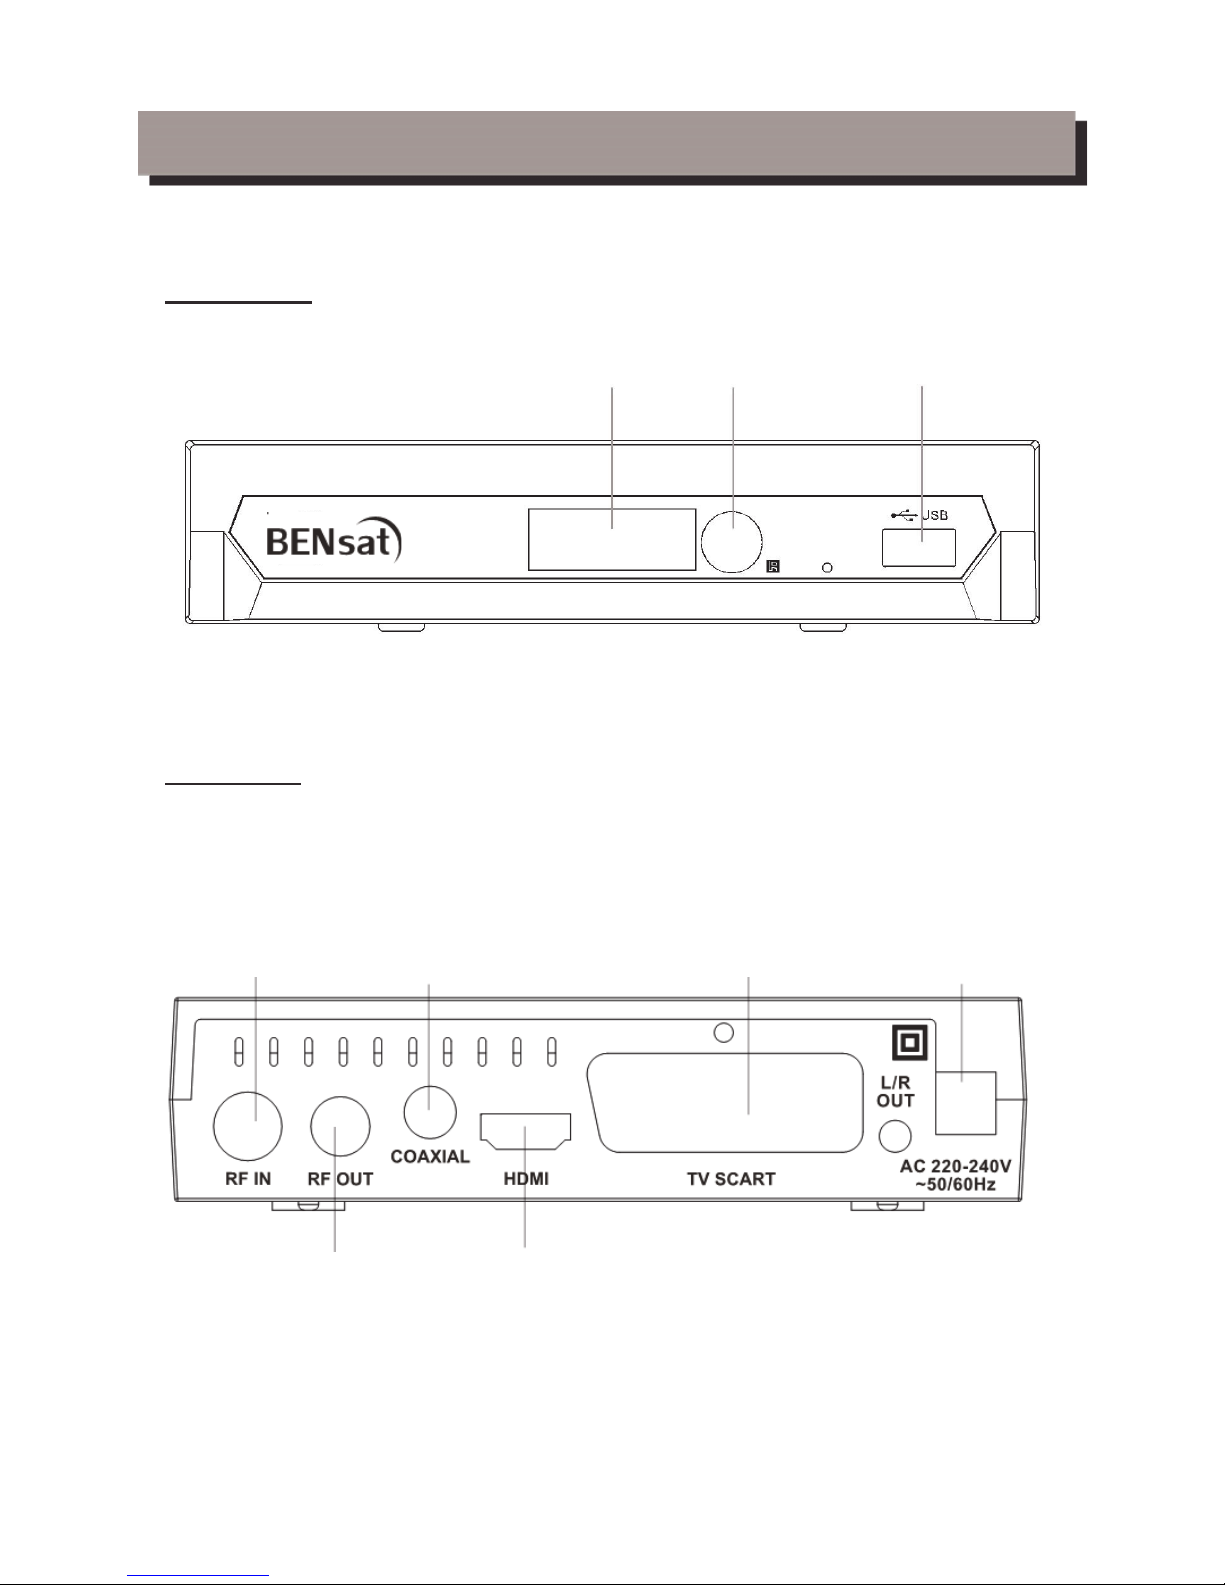
Front panel
Rear panel
INTRODUCTION
1
English
1
Remote sensor
USB port
AC Mains
Coaxial Digital Audio
TV aerial
for an external TV aerial
RF Loop through
for an external device
HDMI Output
TV Scart
for connection to the TV
STANDBY
INFO
SUBTITLE
OK
AUDIOUSB
TV/RADIO
VOL+
VOL-
CH+
CH-
TTX TIMER
FAV
MUTE
MEDIA
RES
EXIT
MENU
RECORD
DF00
EPG
BACK
INTRODUCTION
1
English
2
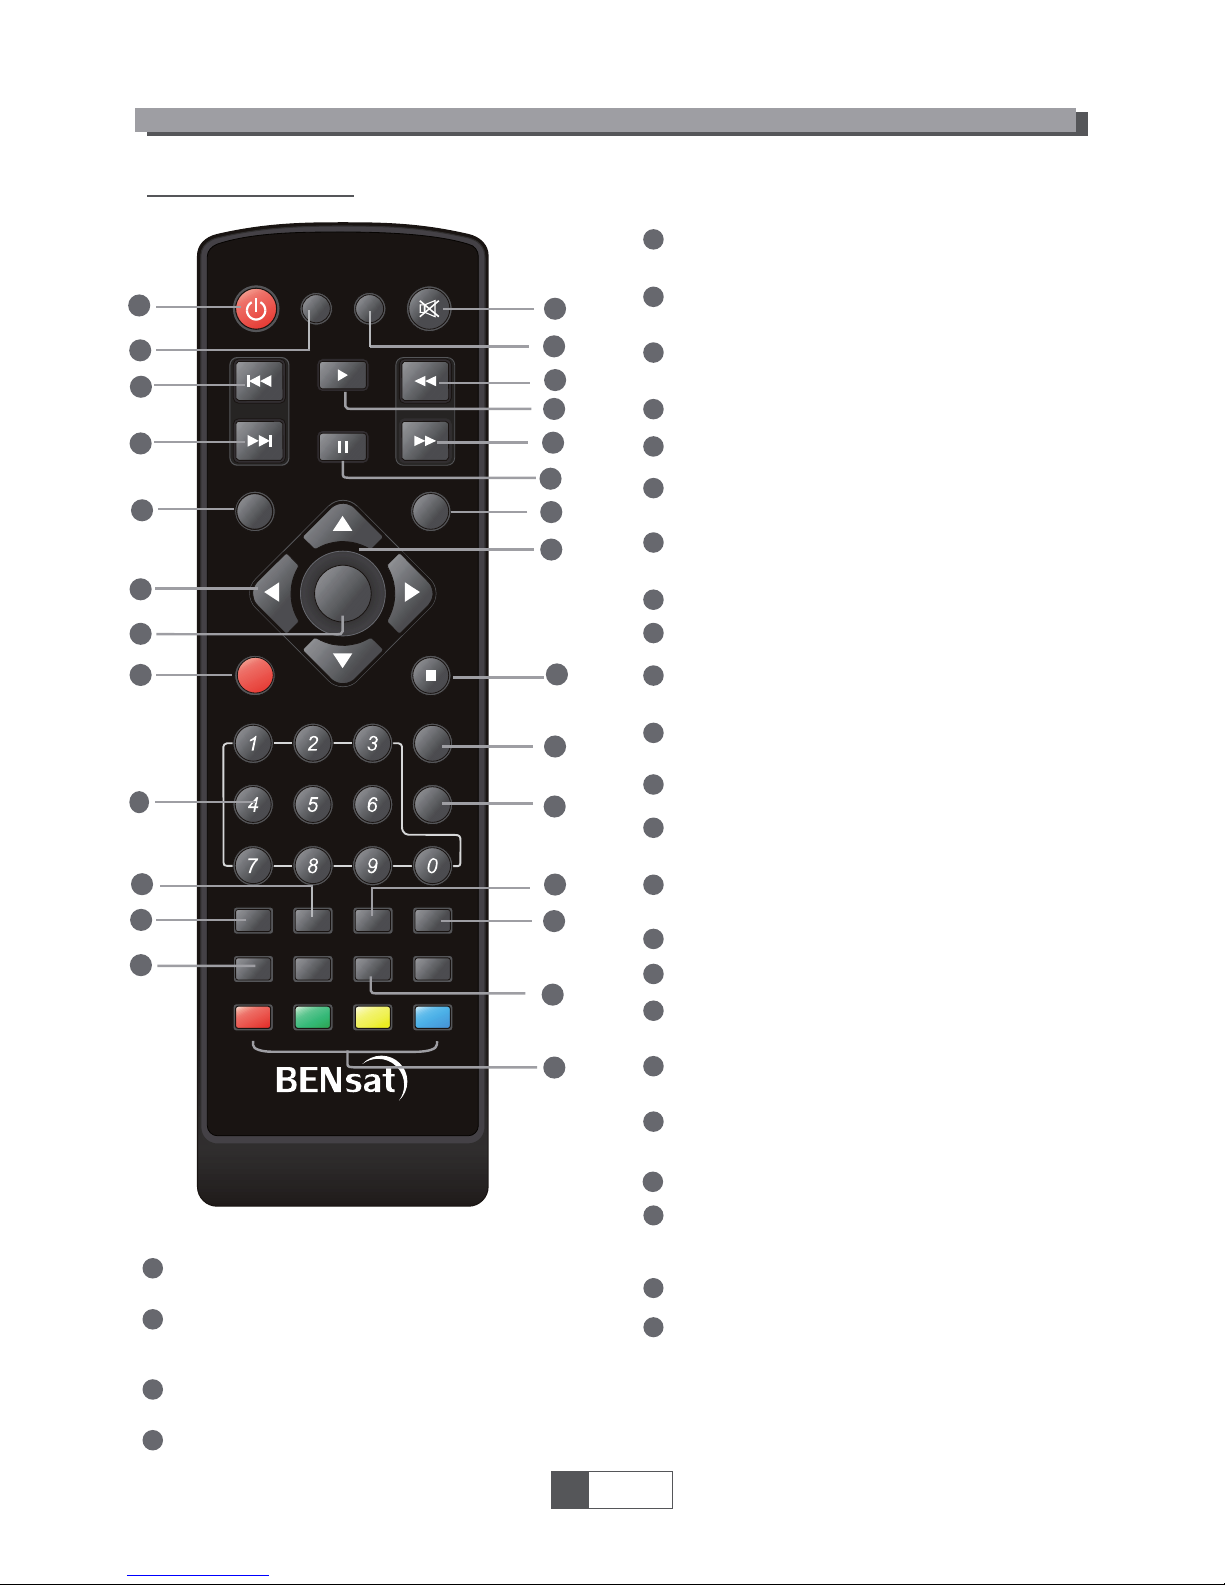
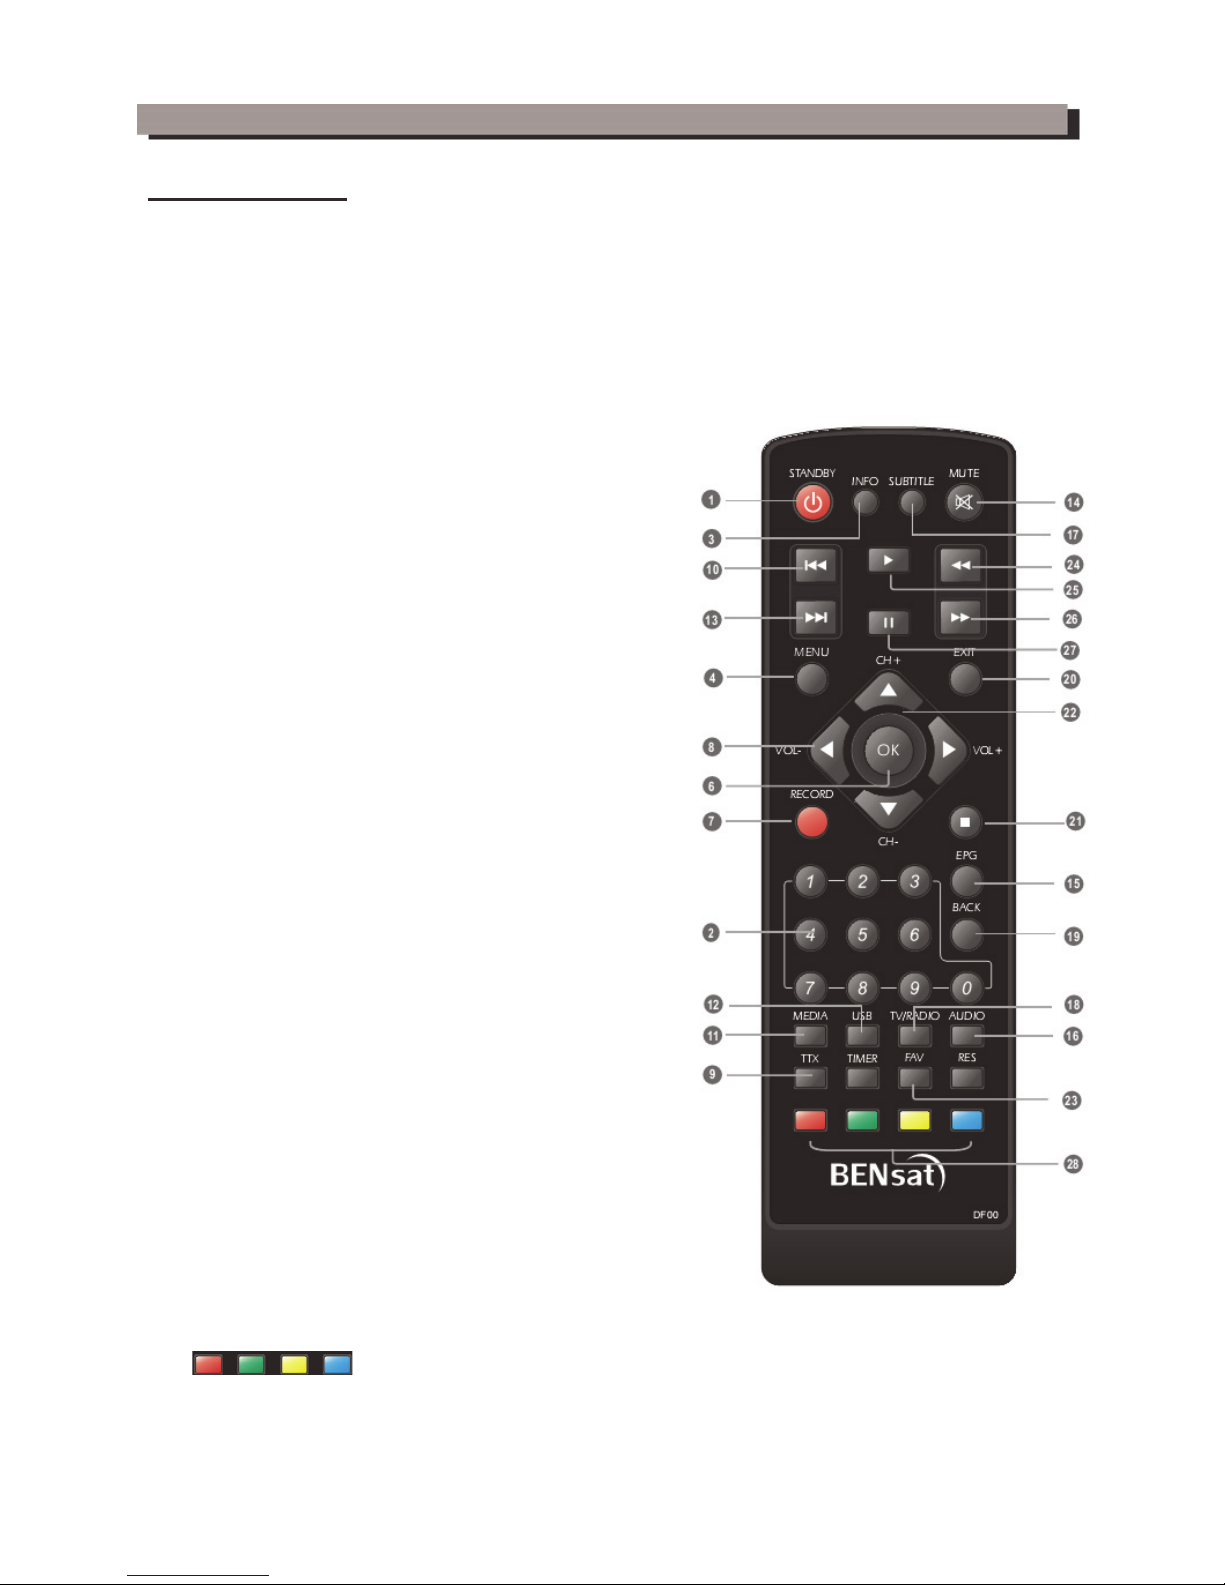
Remote control
1
3
4
2
6
7
8
9
25
27
27
19
9
11
13
15
17
16
18
20
21
24
26
22
28
26
27
28
20
21
22
23
24
25
EXIT (Exit from menu)
CH+,(CH+/-: Channel Up and Down
FAV
(Open the Favorite list)
RED/GREEN/YELLOW/BLUE Buttons
(For interactive function/Submenu
function buttons)
PAUSE(Pause/Active timeshift function)
STOP
PLAY
OK button
(Confirm a selection within a menu)
AUDIO
(Select audio mode and audio track)
SUBTITLE (On/Off Subtitle)
TTX (Open interactive service)
8
9
11
10
12
13
15
14
6
7
16
17
18
19
EPG
(Open up Electronic Program Guide Menu)
RECORD
(Record the TV program)
VOL+,(VOL+/-:Volume Up and Down)
MUTE (Turn off/on the volume)
MEDIA
(Enter Record menu)
USB
(Enter Music menu)
TV/RADIO
(Switch between TV and Radio)
PREV(previous)
NEXT
BACK
(Switch to previous channel)
REV
(Press REV button to rewind the playback)
FWD
(Press FWD button to fast forward
the playback)
1
2
3
STANDBY
(switch the STB on and standby)
INFO
(Press for current channel information )
Numeric entry
(Enter numeric values and select the channel
directly by entering it's number)
4
Menu
(Open and close the menu screen)
10
12
13
14
23
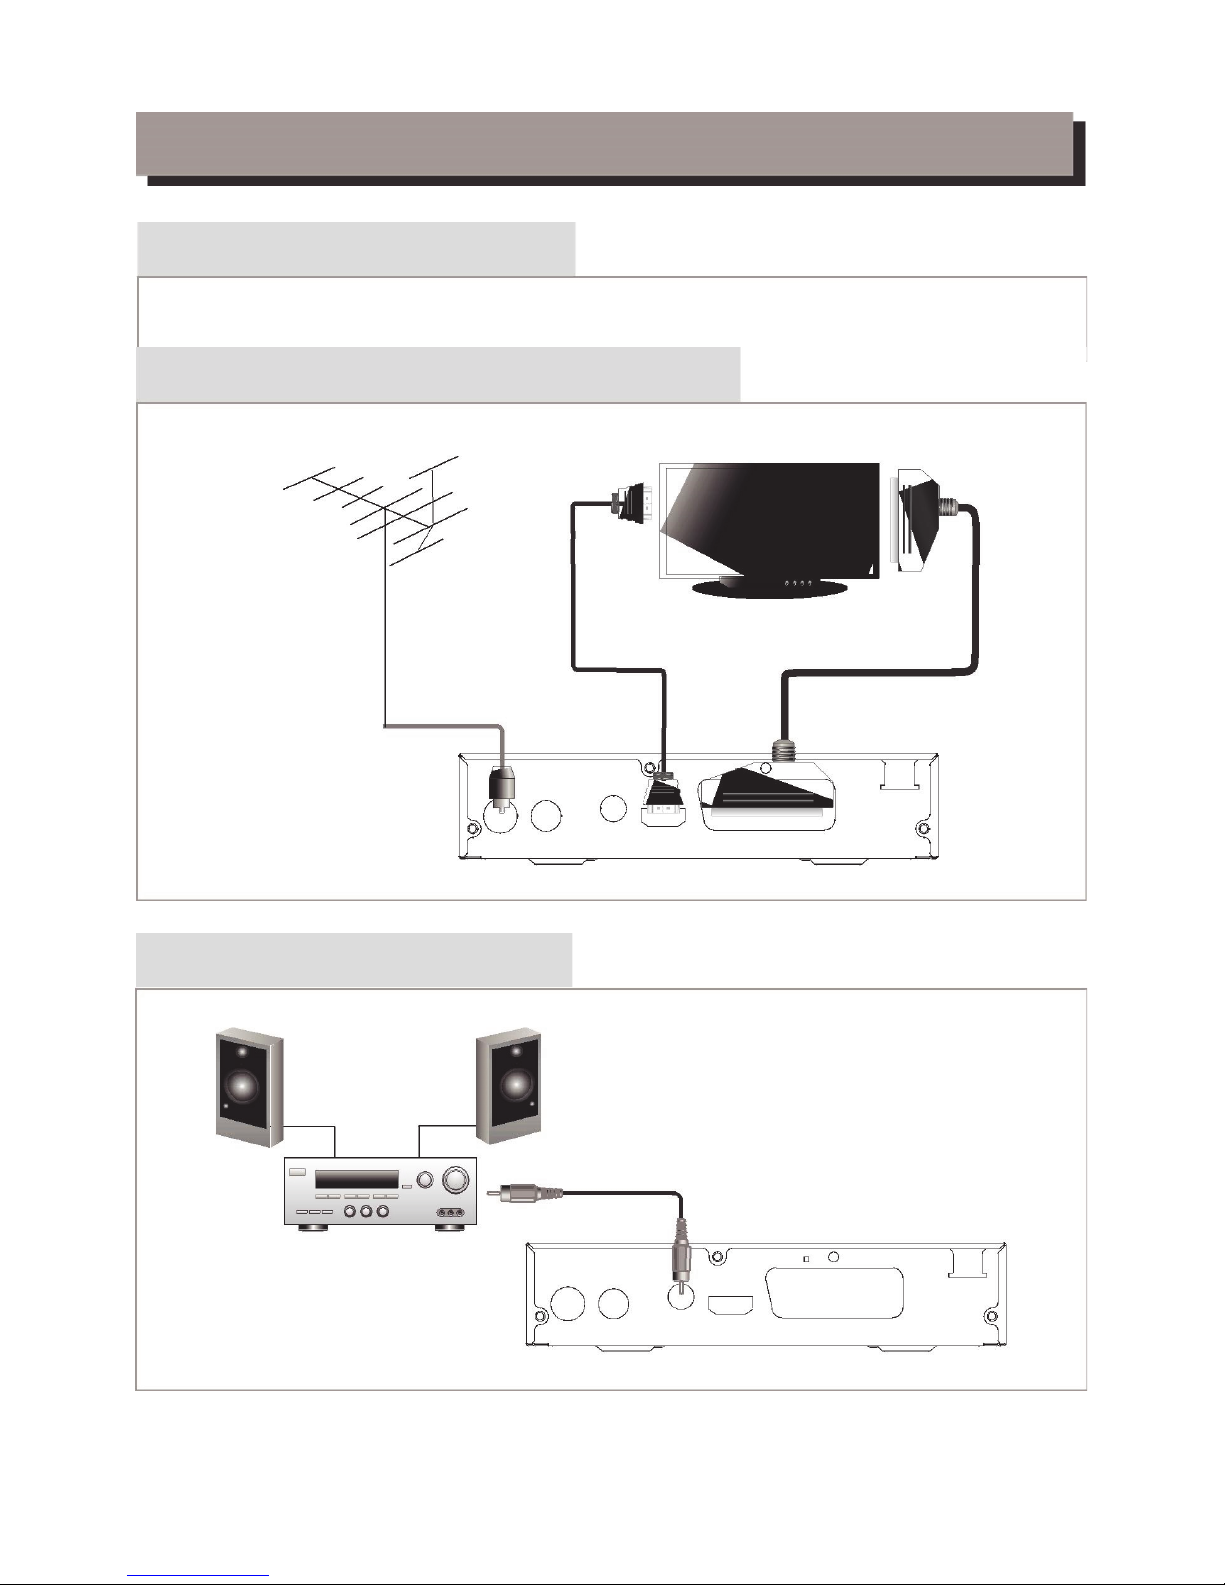
SYSTEM CONNECTION
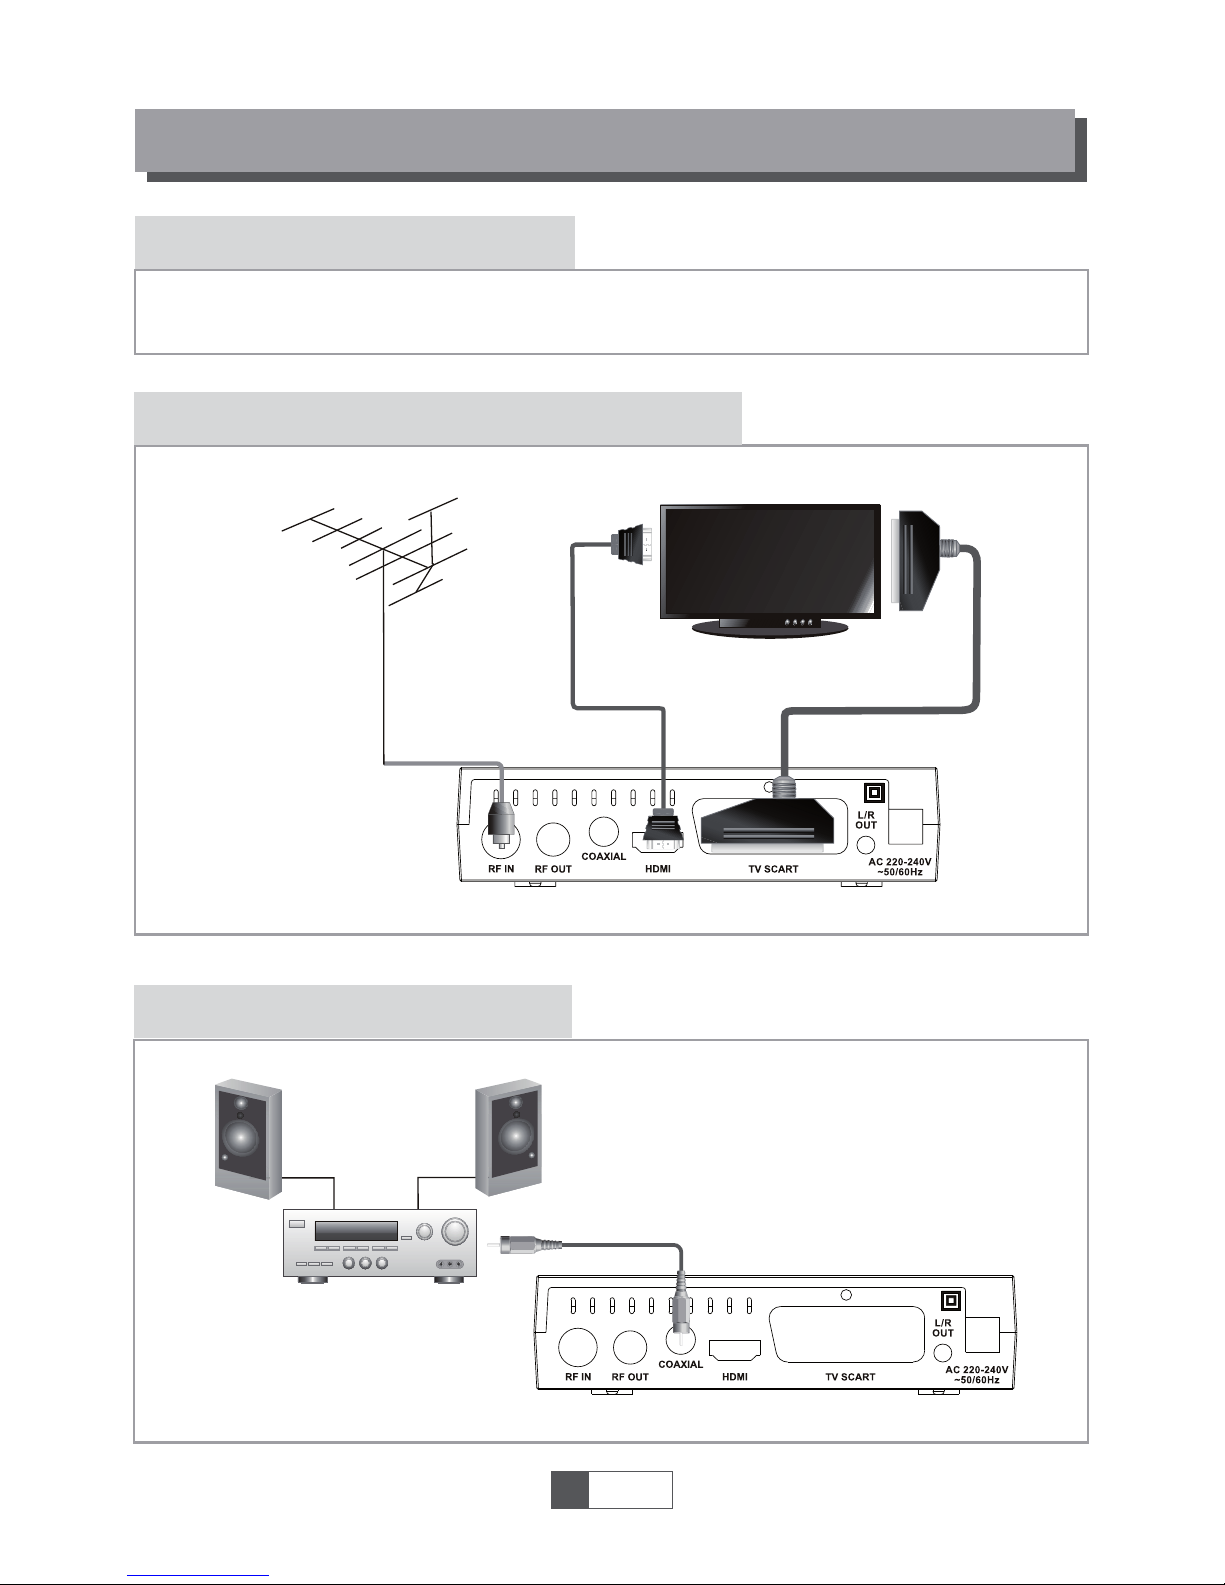
There are many different types of TV and other equipment that you can connect to the STB.
In this manual you will see some of the most common ways to connect your equipment.
General
Connecting a HiFi system
Connecting the TV
1
English
3
Coaxial cable
Hi-Fi
HDMI TV
RF cable
Scart cable
Antenna
HDMI cable
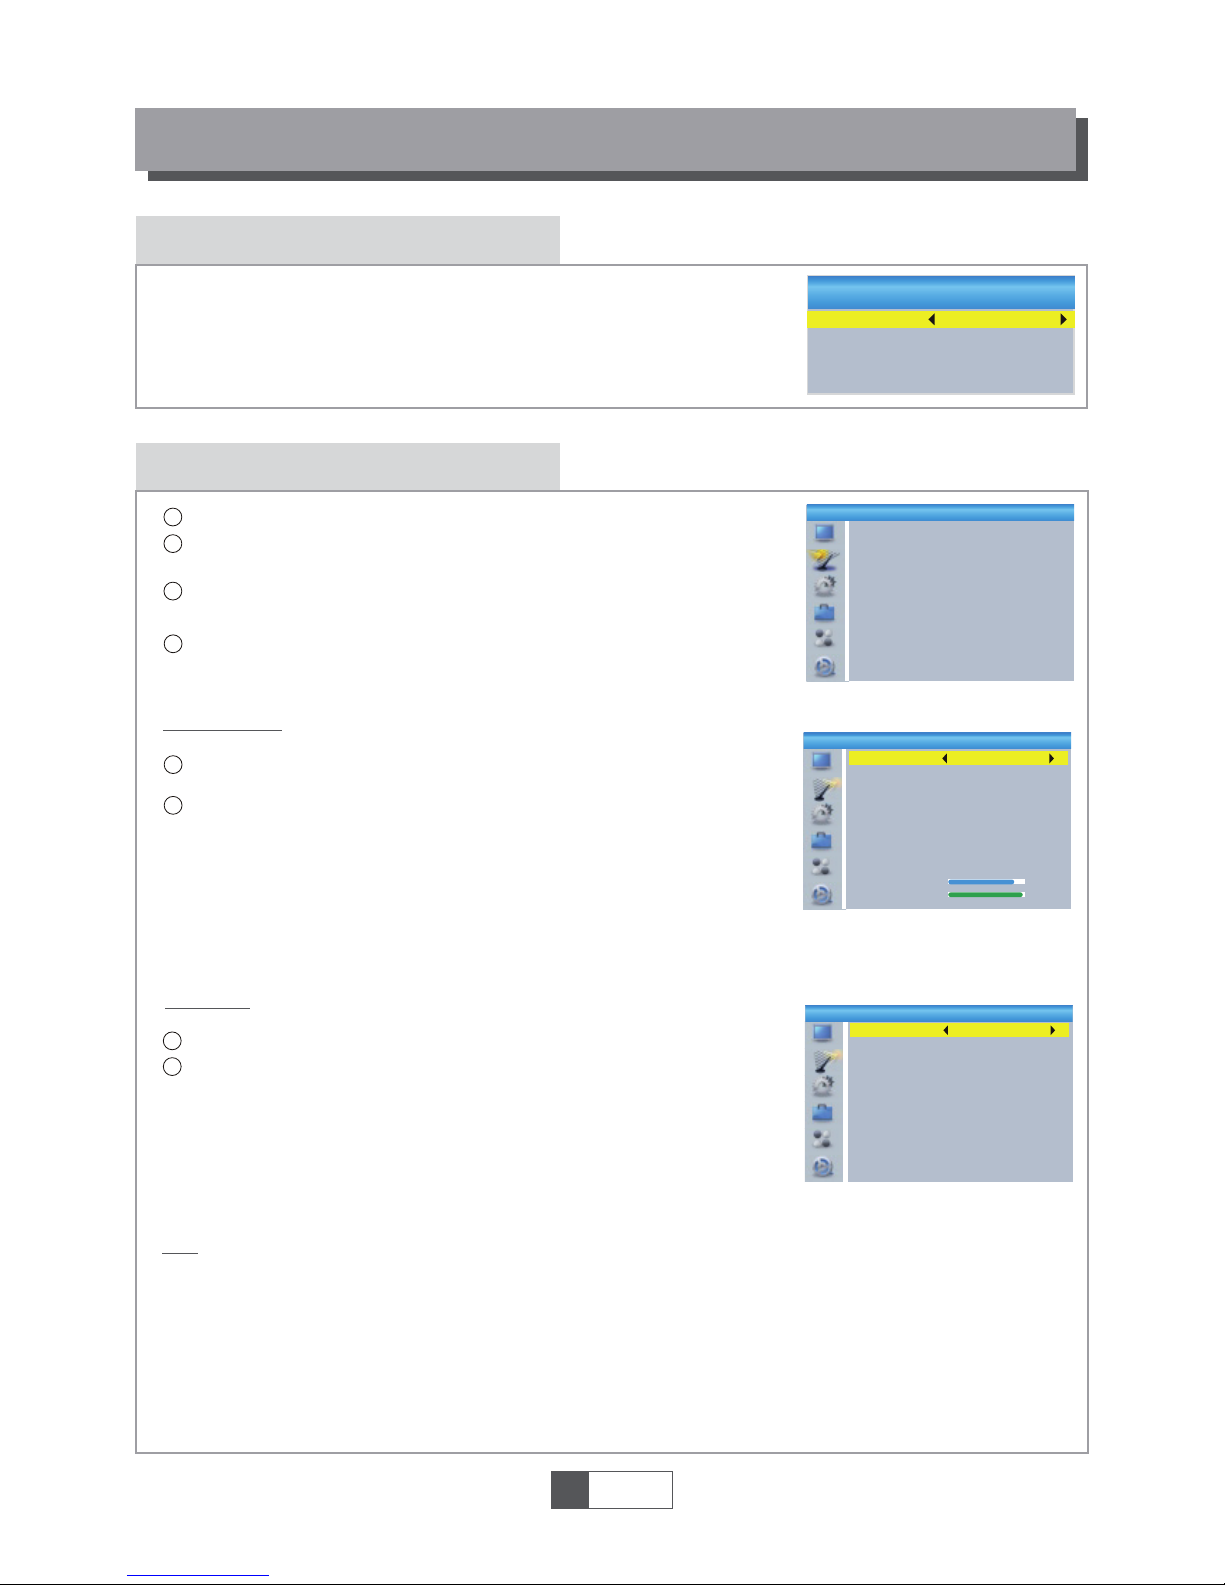
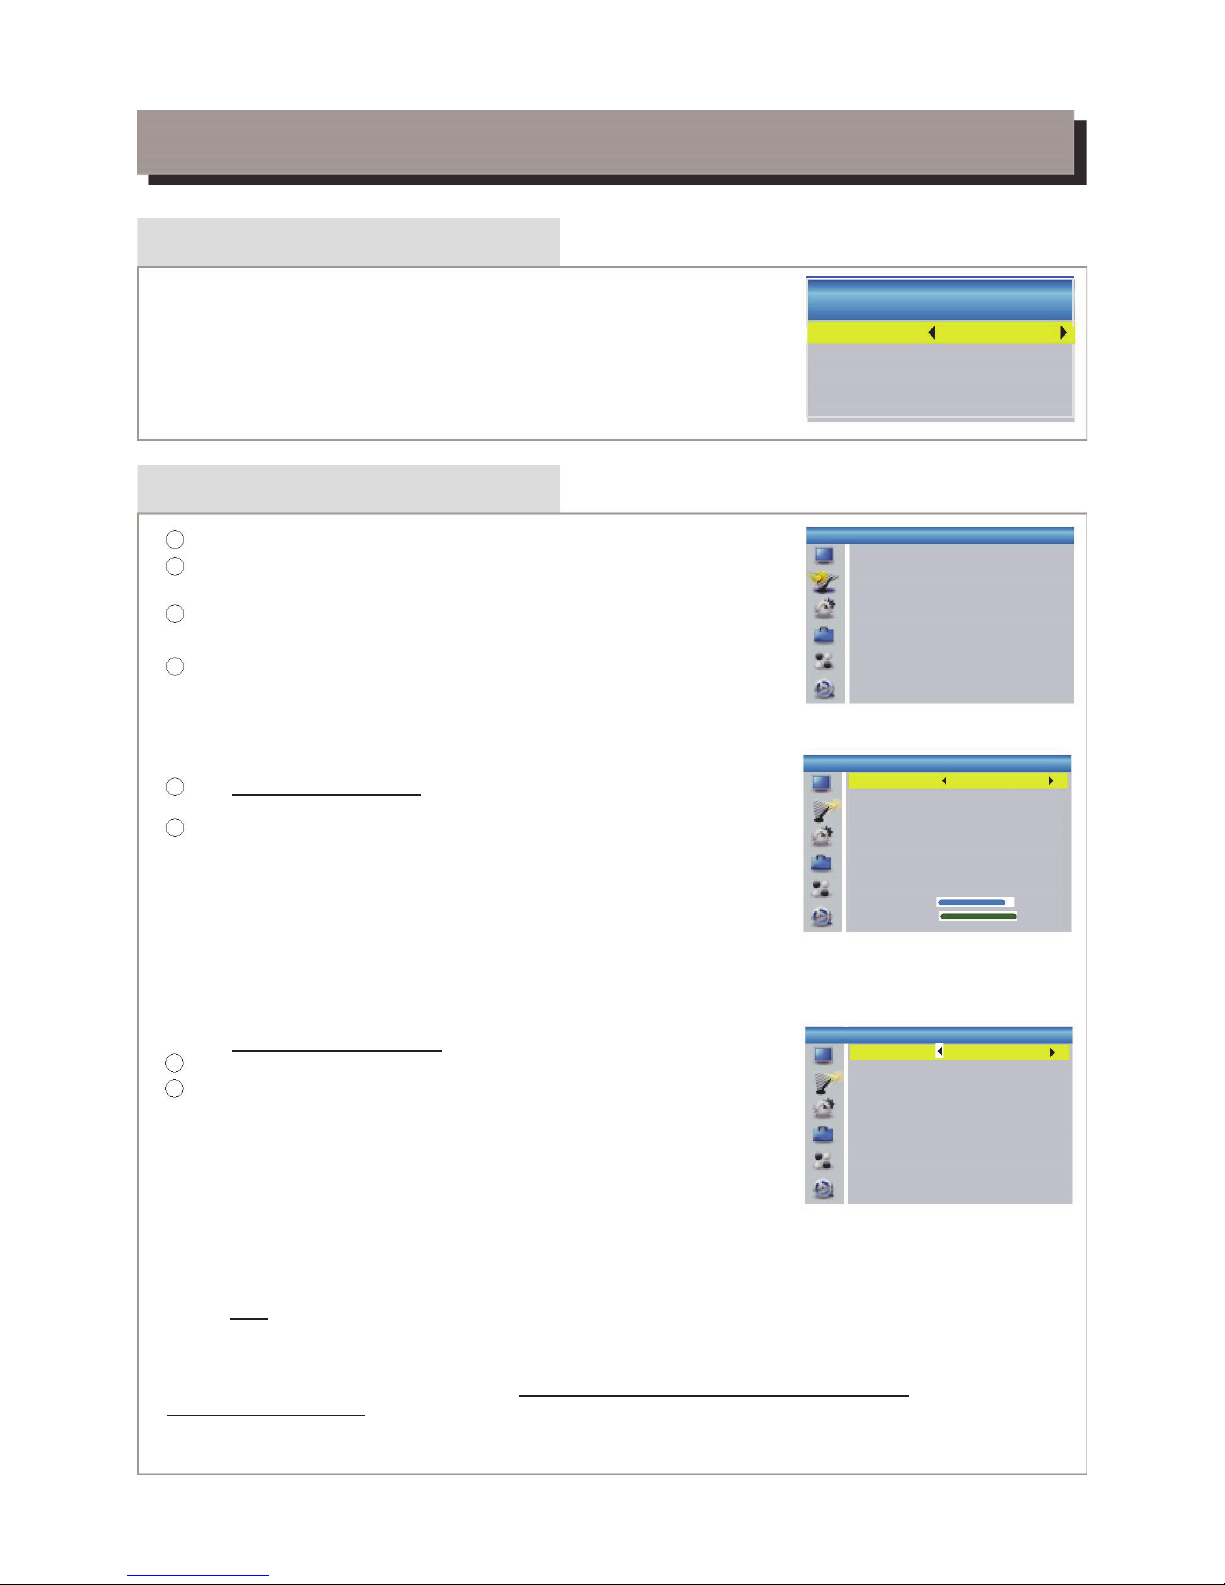
Welcome
If you use the STB for the first time, the "Welcome" menu appears.
Press cursor button to setup the Region, Language, Display Mode
and Aspect Mode.
Highlight "OK" and press the "OK" button to start channel search.
GETTING STARTED
Installation
Select "DVBT Channel Scan", press the "OK" button to enter the
Channel Scan menu.
Press cursor button to set Scan mode, Scan Band ,Channel No.,
Frequency and Bandwidth, then highlight "Search", press "OK"
button to start channel scan .
1
1
2
2
4
Press the cursor button to set "FTA Only", then highlight "Search",
press the "OK" button to start auto scan .
1
2
3
1
English
4
Welcome
Region
Language
Display Mode
Aspect Mode
Poland
English
720p_50
4:3LB
OK
Auto Scan
Channel Scan
LCN
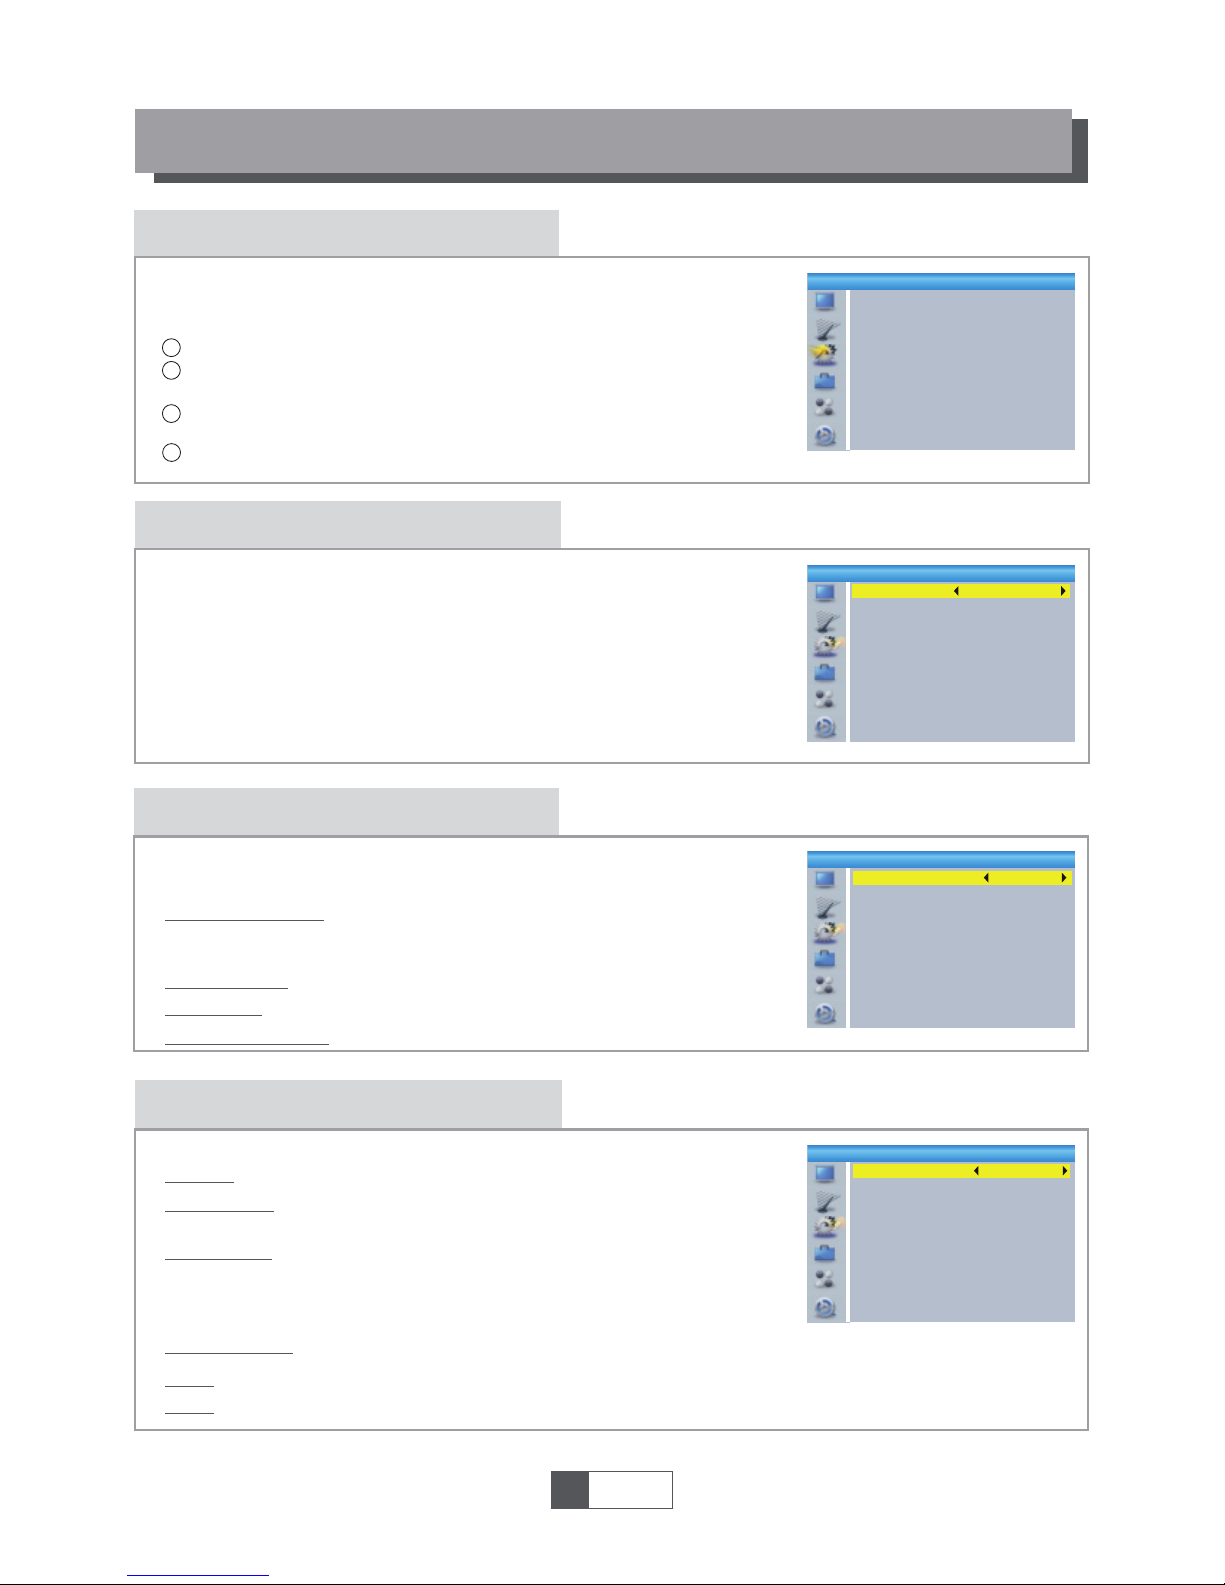
Press the "MENU" button to enter main menu.
Press "UP"or " DOWN " button to highlight "Installation", press
"RIGHT" button to enter the Installation menu.
Press "UP" or "DOWN" cursor button to highlight the desired item
and press "OK"button to enter the sub-menu .
Press "EXIT" button to exit.
Select the "Auto Scan", press "OK" button to enter the Auto Scan menu.
If LCN( Logical Channel Number) Select function is activated, you can't change the original
number of TV channels by scanning .
You can activate/disactivate the LCN function by setting the "LCN " to on/off.
Channel Scan
Auto Scan
LCN
Installation
Auto Scan
FTA Only
Search
No
Channel Scan
Scan Mode
Scan Band
Ch No.
Search
Frequency
Bandwidth
By channel
UHF
CH37(666000KHz)
666000KHz
8MHz
Signal Intensity
Signal Quality
81%
97%
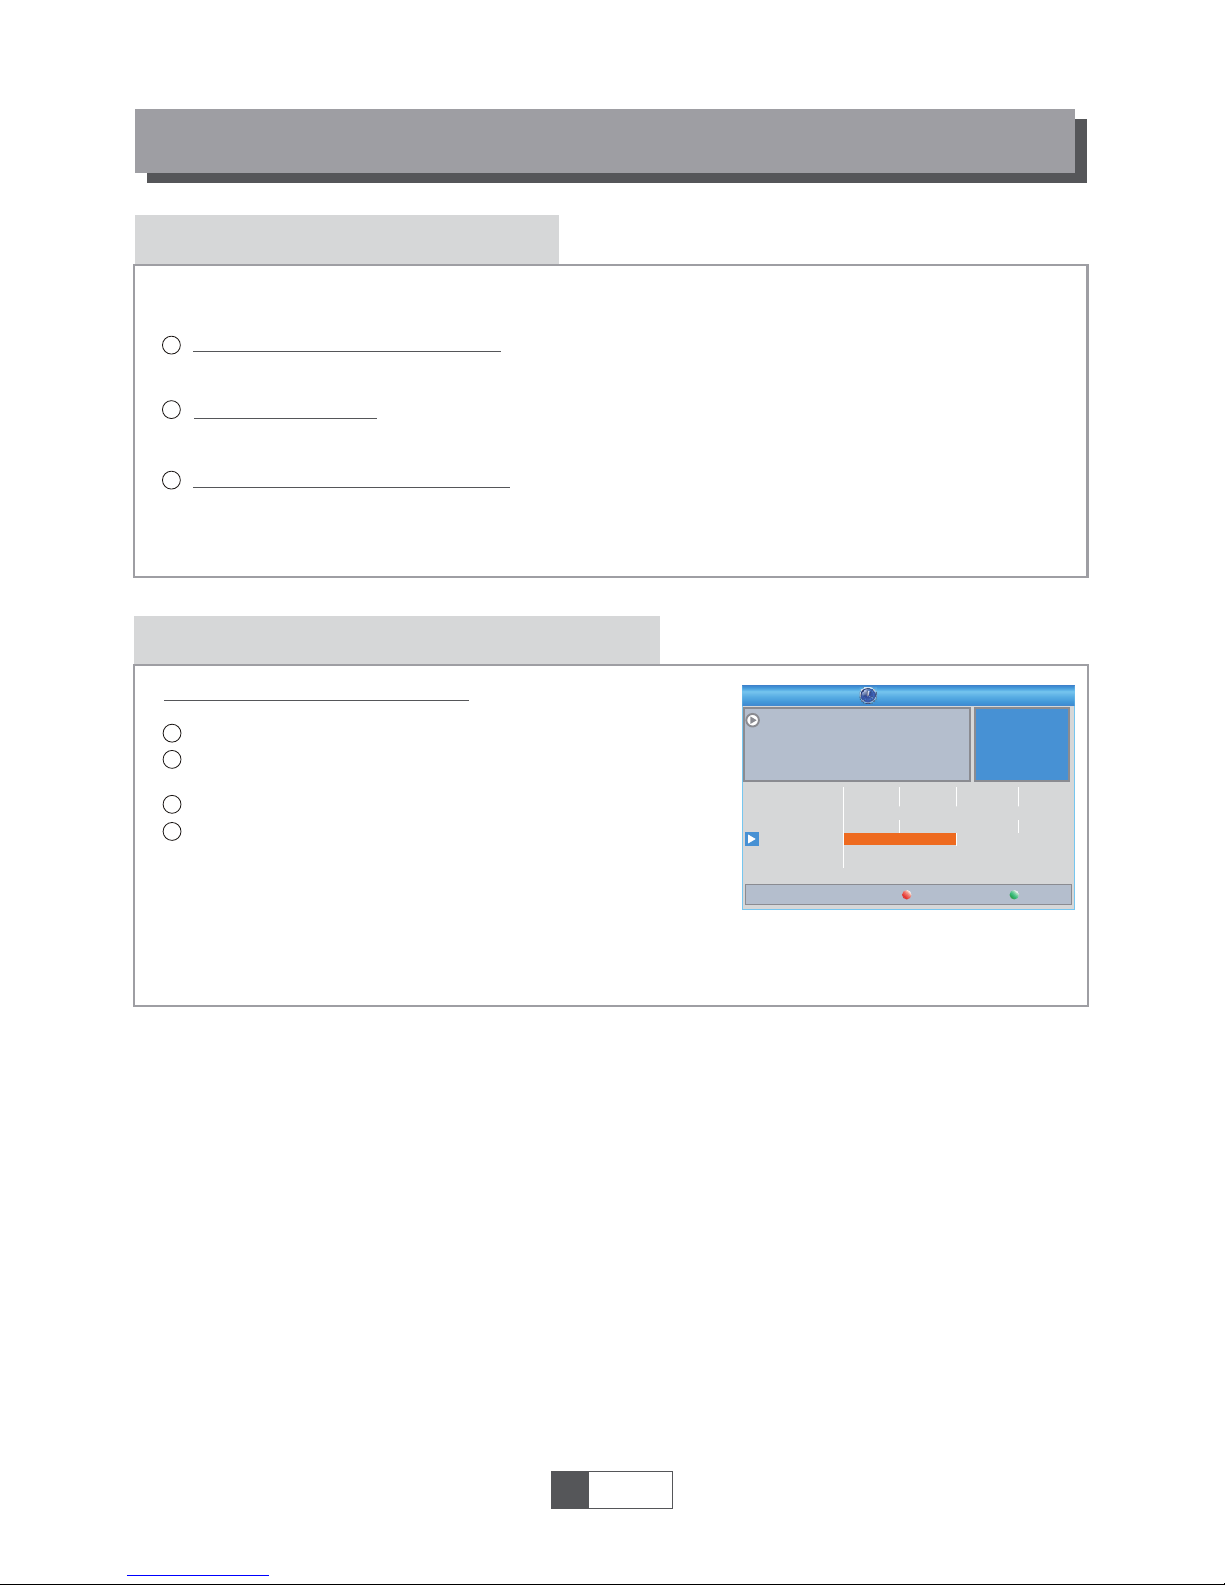
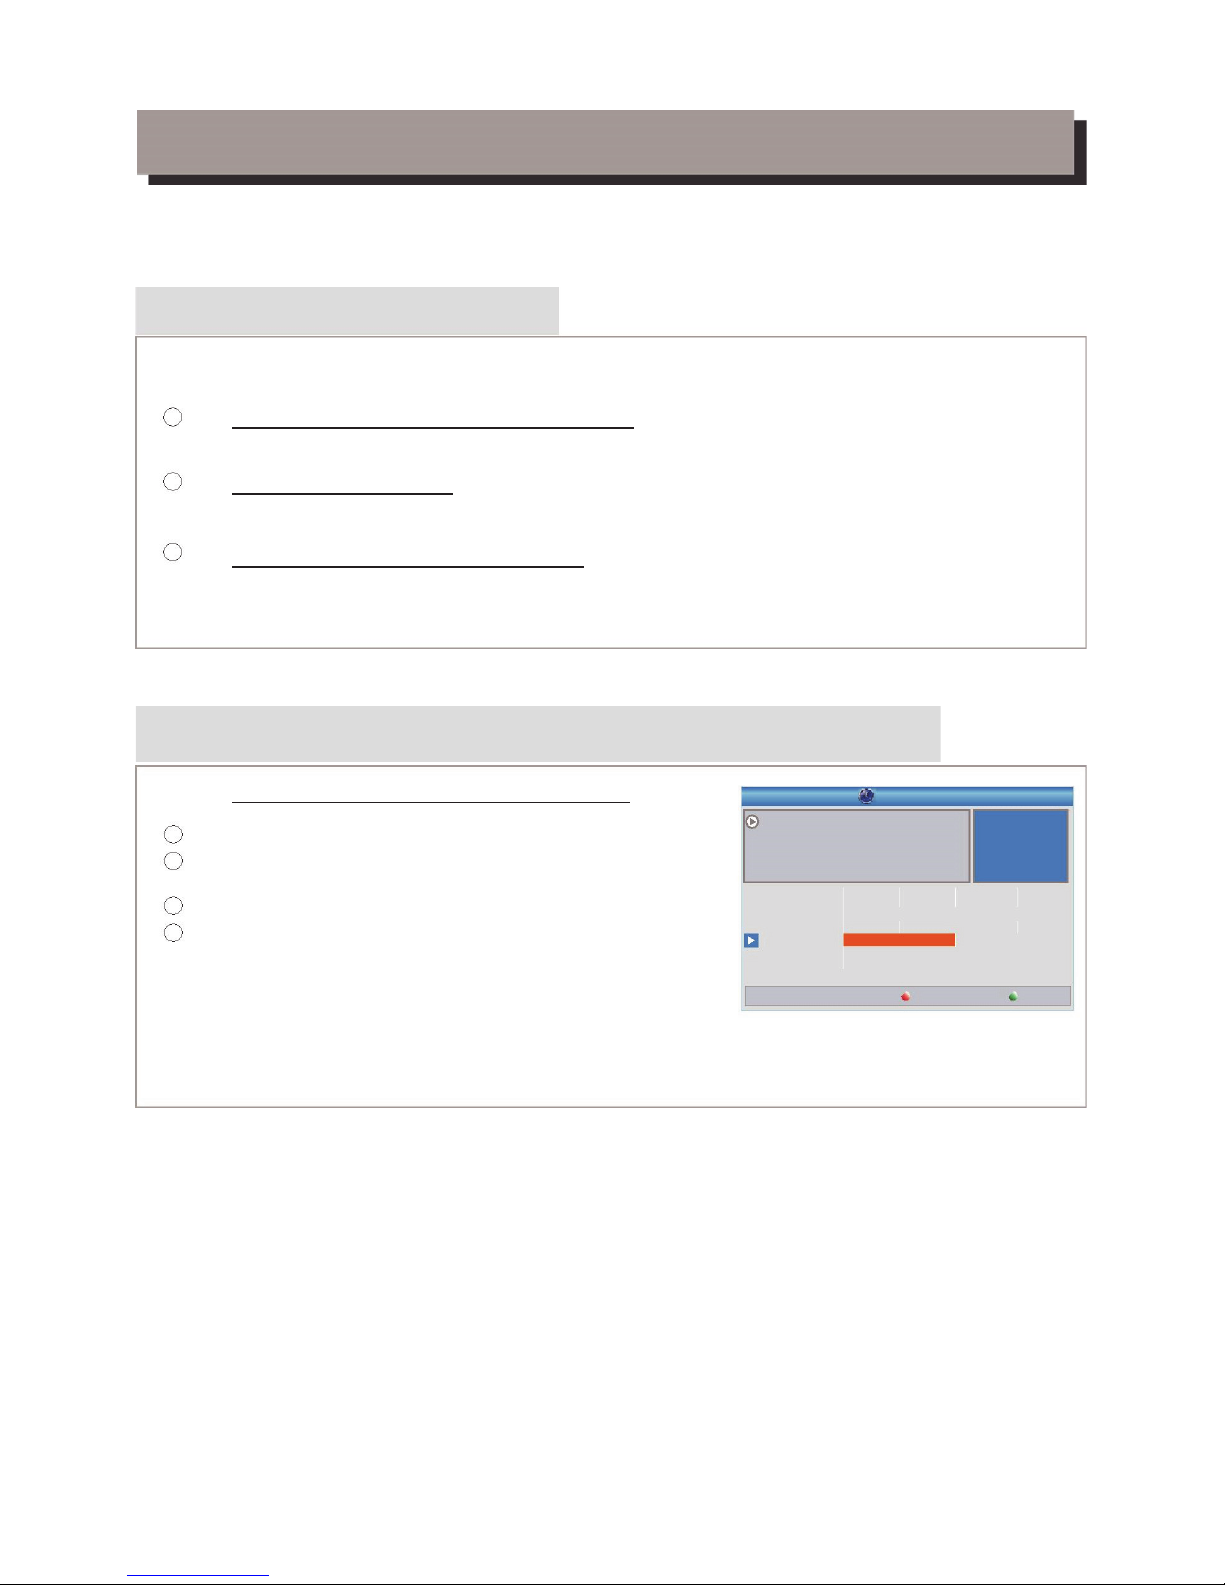
Accessing the Electronic Program Guide (EPG)
OPERATION
Changing Channels
There are three ways of channel selection - stepping through the channel list, selection by number
and from the on-screen channel list.
Stepping through the channel list:
To move through the channel list, press the upward arrow or downward arrow key on the
remote control.
Selected by number:
Enter the channel number directly by pressing numeric buttons ,and press the "OK" button
to select desired channel.
Selected by on-screen channels list:
You can also select the required channel directly from on-screen channel list. This is
displayed using the STB's main menu. See "Edit Channel" in this manual for operation detail.
1
2
3
Accessing the EPG of all channels:
1
2
3
Press "EPG" button to enter EPG menu .
Press cursor button to switch between channel list, events
schedule of the selected channel and now/next events.
Press "Green" button to Timer the events.
Press "Red" button to display " Time Bar" menu.
4
1
English
5
0008
0009
0010
0011
0012
Interecon
BBC Parl
BBC FO
CBeebie
301
0010 BBC FOUR
The Recor
This is CBeebies!
Auntie's War on Smut
The Recor
Commons Questions
Proms on FOUR
Auntie's War on Smut
01:30-02-30
Timer
Time
EPG
3/19
01:30 02:00 02:30 03:00
01:39 xx/xx/xxxx
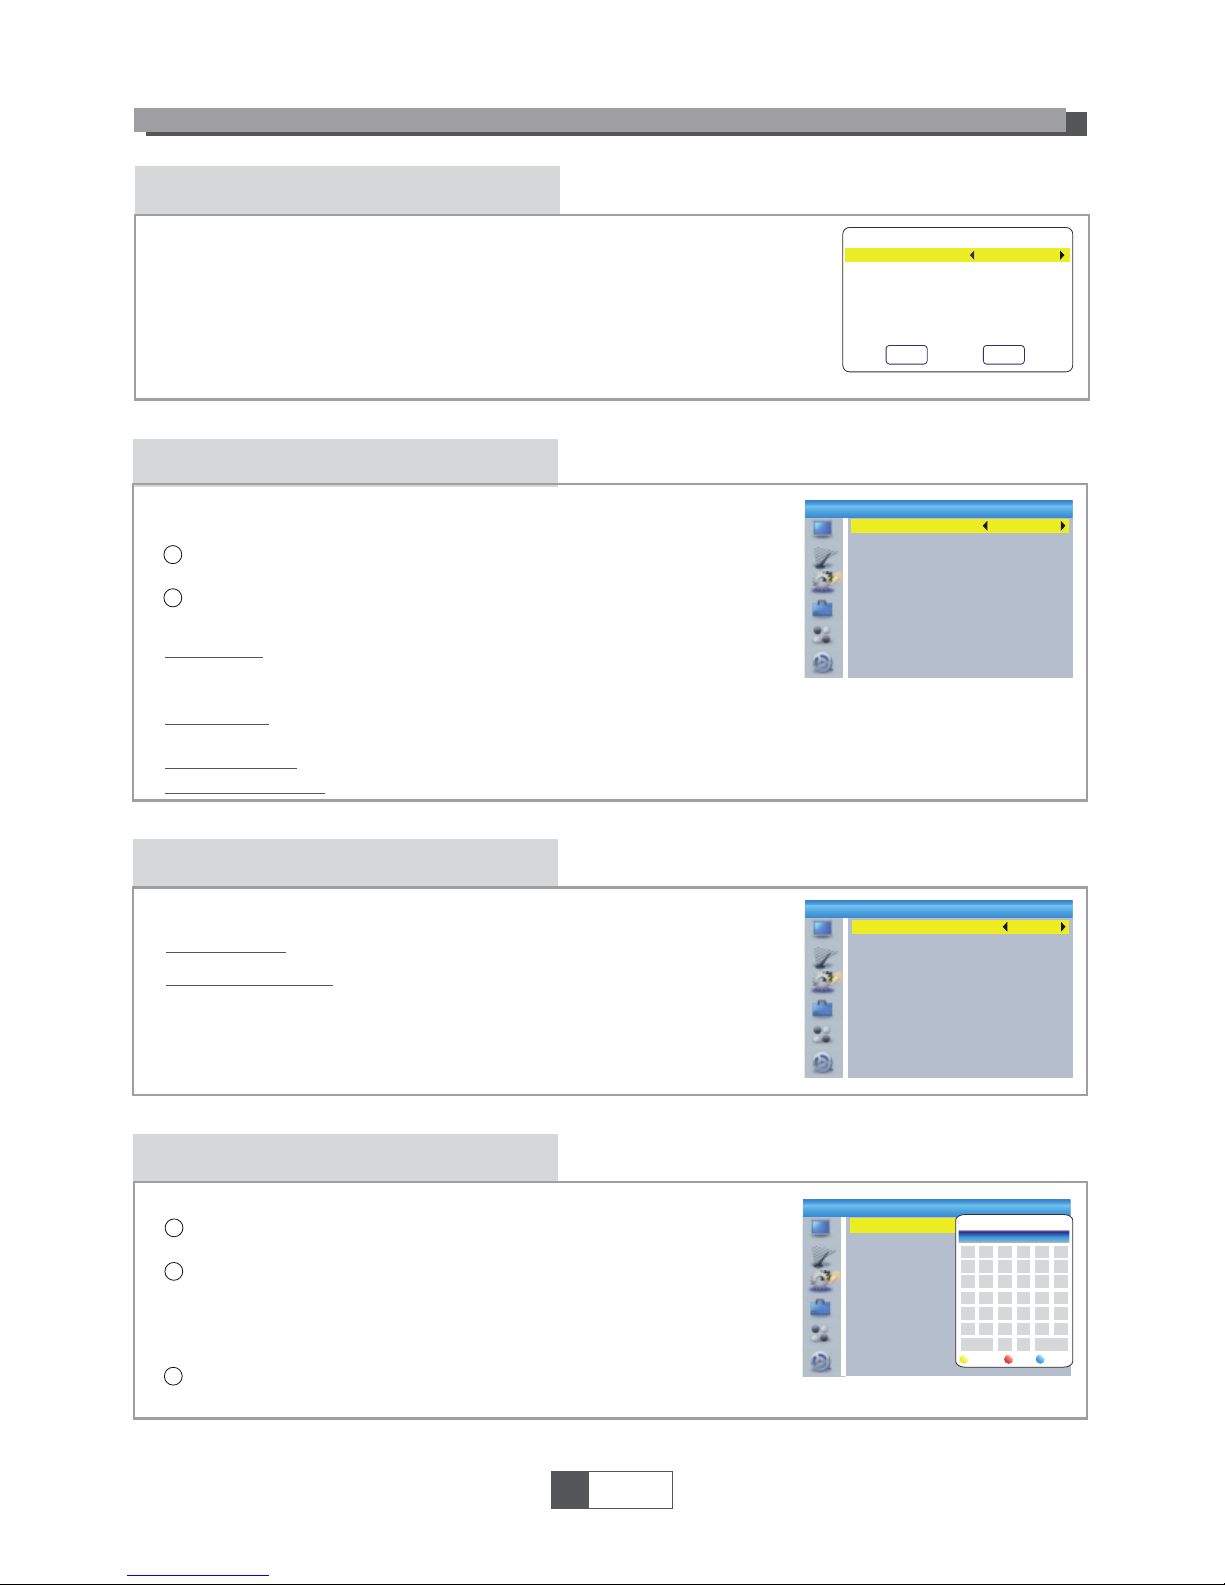
Edit Channel menu
EDIT CHANNEL
TV Channel list
In the Edit Channel menu, select "TV Channel List", press "OK"
button to enter TV channel list menu.
1
2
Use this menu to favor, lock, skip, move, sort, delete and rename
channel.
Press "FAV" button, then press "OK" button to edit the FAV
function.
Press "UP" or "DOWN" button to highlight channel, press the "OK"
button to preview the desired TV channel.
1
English
6
4
1
2
3
Press the "MENU" button to enter main menu.
Press "UP" or "DOWN " button to highlight "Edit Channel", press
"RIGHT" button to enter the Edit Channel menu.
Press "UP" or "DOWN" cursor button to highlight the desired item
and press "OK" button to enter the sub-menu .
Press "EXIT" button to exit.
Sort
YooPlay Ga
xxxxxxxx
xxxxxx
xxxx
xxx
TV Channel List
FAV
Lock
Skip
Move
Edit
All TV
0001 No Name
0002 YooPlay Ga
0003 E4+1
0004 UKTV Histor
0005 SKY THREE
0006 Sky Spts Ne
0007 Sky News
0001 No Name
0002 YooPlay Ga
0003 E4+1
0004 UKTV Histor
0005 SKY THREE
0006 Sky Spts Ne
0007 Sky News
i
Radio Channel list
In the Edit Channel menu, select "Radio Channel List", press "OK" button to enter the Radio
Channel list menu.
Press "UP" or "DOWN" button to highlight channel press the "OK" button to listen the desired Radio
channel.
1
2
NOTE:
Basically, the operation of "Radio Channel List" is the same as "TV Channel List",
but there is one point different: In "Radio Channel List" mode, there is no video
information, so it will always display Radio's logo in the right side preview window.
Delete All
1
2
Warning! Do you really want to delete
all channels?
Yes
No
Press "color" button, then press "OK" button to edit the
corresponding function.
TV Channel List
Radio Channel List
Delete All
Edit Channel
Rename
Delete
YooPlay Ga
xxxxxxxx
xxxxxx
xxxx
xxx
Edit Channel
All TV
i
A warning window appears.
Select "Yes", press "OK" button to delete all channels.
Select "No", Press "OK" button to cancel deleting.
In the Edit Channel menu, select "Delete All", press "OK" button.
You are asked to input a password(the default password is"0000").
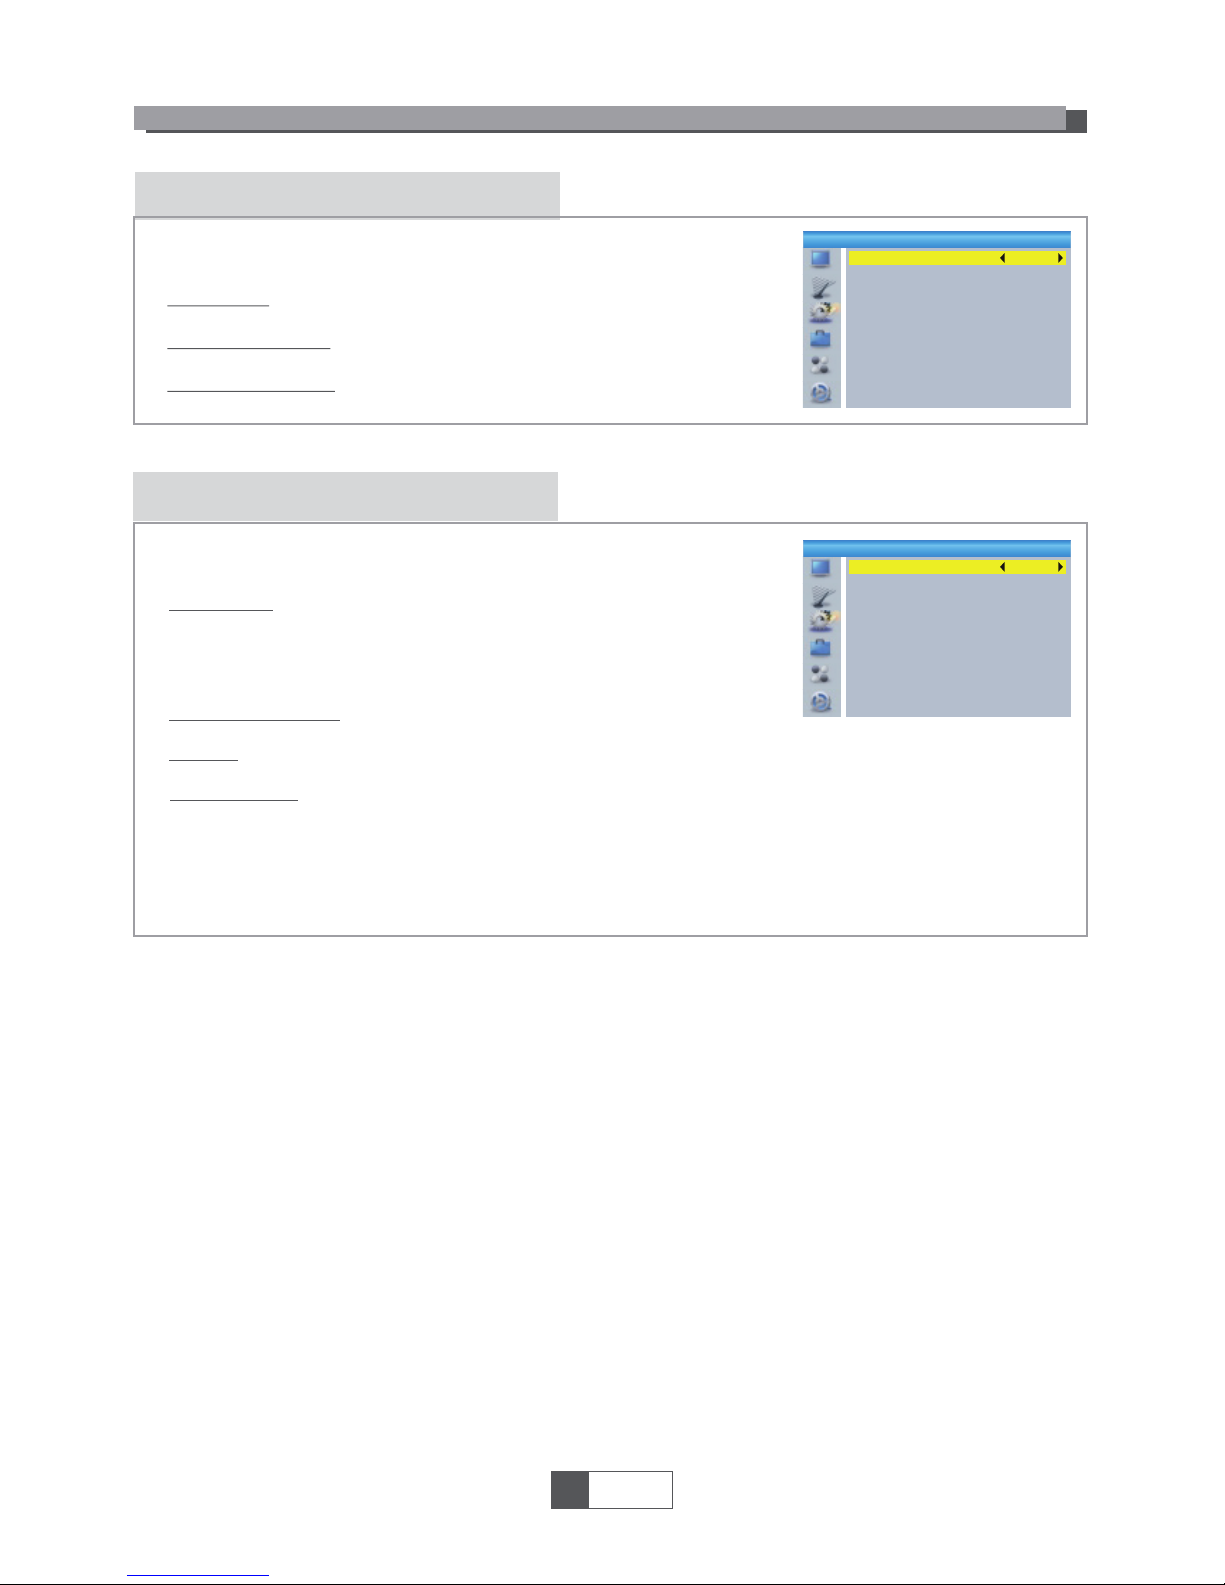
System setup menu
System setup menu allows us to set Language, TV System, Local Time
Setting, Timer Setting, Parental Lock, OSD Setting, Favorite, Auto
Description Setting and Other.
Language
This menu allows you to set Language.
SYSTEM SETUP
TV System
This menu allows us to set Video Resolution, Aspect Mode,
Video Out and Digital Audio Out.
Local Time Setting
This menu allows you to set the region and time.
GMT Usage:
This menu is used for open the usage of GMT.
The options are : By Region/User Define/Off
GMT Offset:
This menu is valid only when selected "User Define"
in GMT Usage menu .
The GMT offset range is "-11:30 ~ +12:00", increasing
half hour progressively.
Date:
Time:
"Date" and "Time" menus are valid only when selected "Off" in GMT Usage menu.
Press numeric button to input the time.
Region:
This menu is used for changing the region setting.
Aspect Mode:
Auto/4:3PS/4:3LB/16:9
Video Out:
Digital Audio Out:
SCART CVBS+ HDMI/ SCART RGB
Video Resolution:
LPCM Out/ BS Out
By Source/By Native TV/480i/480p/576i/
576p/720p_50/720p_60/1080i_25/
1080i_30/1080p_50/1080p_60
1
English
7
Video Resolution
Aspect Mode
Video Out
Digital Audio Out
720p_50
4:3LB
SCART RGB
LPCM Out
TV System
4
1
2
3
Press the "MENU" button to enter main menu.
Press "UP" or "DOWN" button to highlight "System Setup",
press "RIGHT" button to enter the System Setup menu.
Press "UP" or "DOWN" cursor button to highlight the desired
item and press "OK" button to enter the sub-menu.
Press "EXIT" button to exit.
Language
First Audio
Second Audio
Subtitle Language
Teletext
Subtitle
English
English
German
English
English
On
Language
System Setup
Language
TV System
Local Time Setting
Timer Setting
Parental Lock
OSD Setting
Favorite
Auto Description Setting
Other
Region
GMT Usage
GMT Offset
Summer Time
Date
Time
France
By Region
GMT+01:00
Off
xxxx/xx/xx
01:51
Local Time Setting
xxxx,xxx,xxxx
Summer Time:
The options are: On/Off
OSD Setting
This menu allows you to set OSD Timeout and OSD Transparency .
This menu allows you to rename the favorite group.
OSD Timeout:
1-10
OSD Transparency:
To set the OSD transparency to Off/10%/20%/30%/
40%.
SYSTEM SETUP
Parental Lock
In "System Setup" menu, select "Parental Lock" and press "OK" button,
you are asked to input a password(the default password is"0000").
After inputting the correct password by pressing numeric buttons,
the parental lock menu appears.
1
2
Menu Lock:
New Password:
To change the password.
Confirm Password:
To confirm the new password.
Rating Lock:
Off/ AGE 4/AGE5/AGE6/AGE7/AGE8/AGE9/AGE10/AGE11/AGE12/
AGE13/AGE14/AGE15/AGE16/AGE17/AGE18
1
English
8
To lock the Edit channel/ Installation menu. When you
want to enter these menus, you must input the password.
You can set menu lock to on/off.
This menu allows you to protect menu and channel, and change the
Password.
Favorite
In Channel menu, select "Favorite", press "OK" button to enter
Favorite menu.
Select desired group, press "OK" button to open the mock keypad.
Input letter and numeric one by one by pressing the cursor button
and press "OK" button to confirm. After finishing input, highlight
"OK" on mock keypad to confirm, you change Favorite group name
successfully.
Press "EXIT" button to quit the group rename menu.
1
2
3
Menu Lock
Rating Lock
New Password
Confirm Password
Off
Off
----
----
Parental Lock
OSD Timeout
OSD Transparency
5
Off
OSD Setting
1
2
3
4
5
6
7
8
Favorite
Fav group 1
Fav group 2
Fav group 3
Fav group 4
Fav group 5
Fav group 6
Fav group 7
Fav group 8
CAPS
A
Fav group 1
G
M
S
Y
4
SP
Rename
Del
OK
BCDEF
KLHJI
N
T
Z
5
O
U
0
6
?
P
V
1
7
<-
Q
W
2
8
OK
R
X
3
9
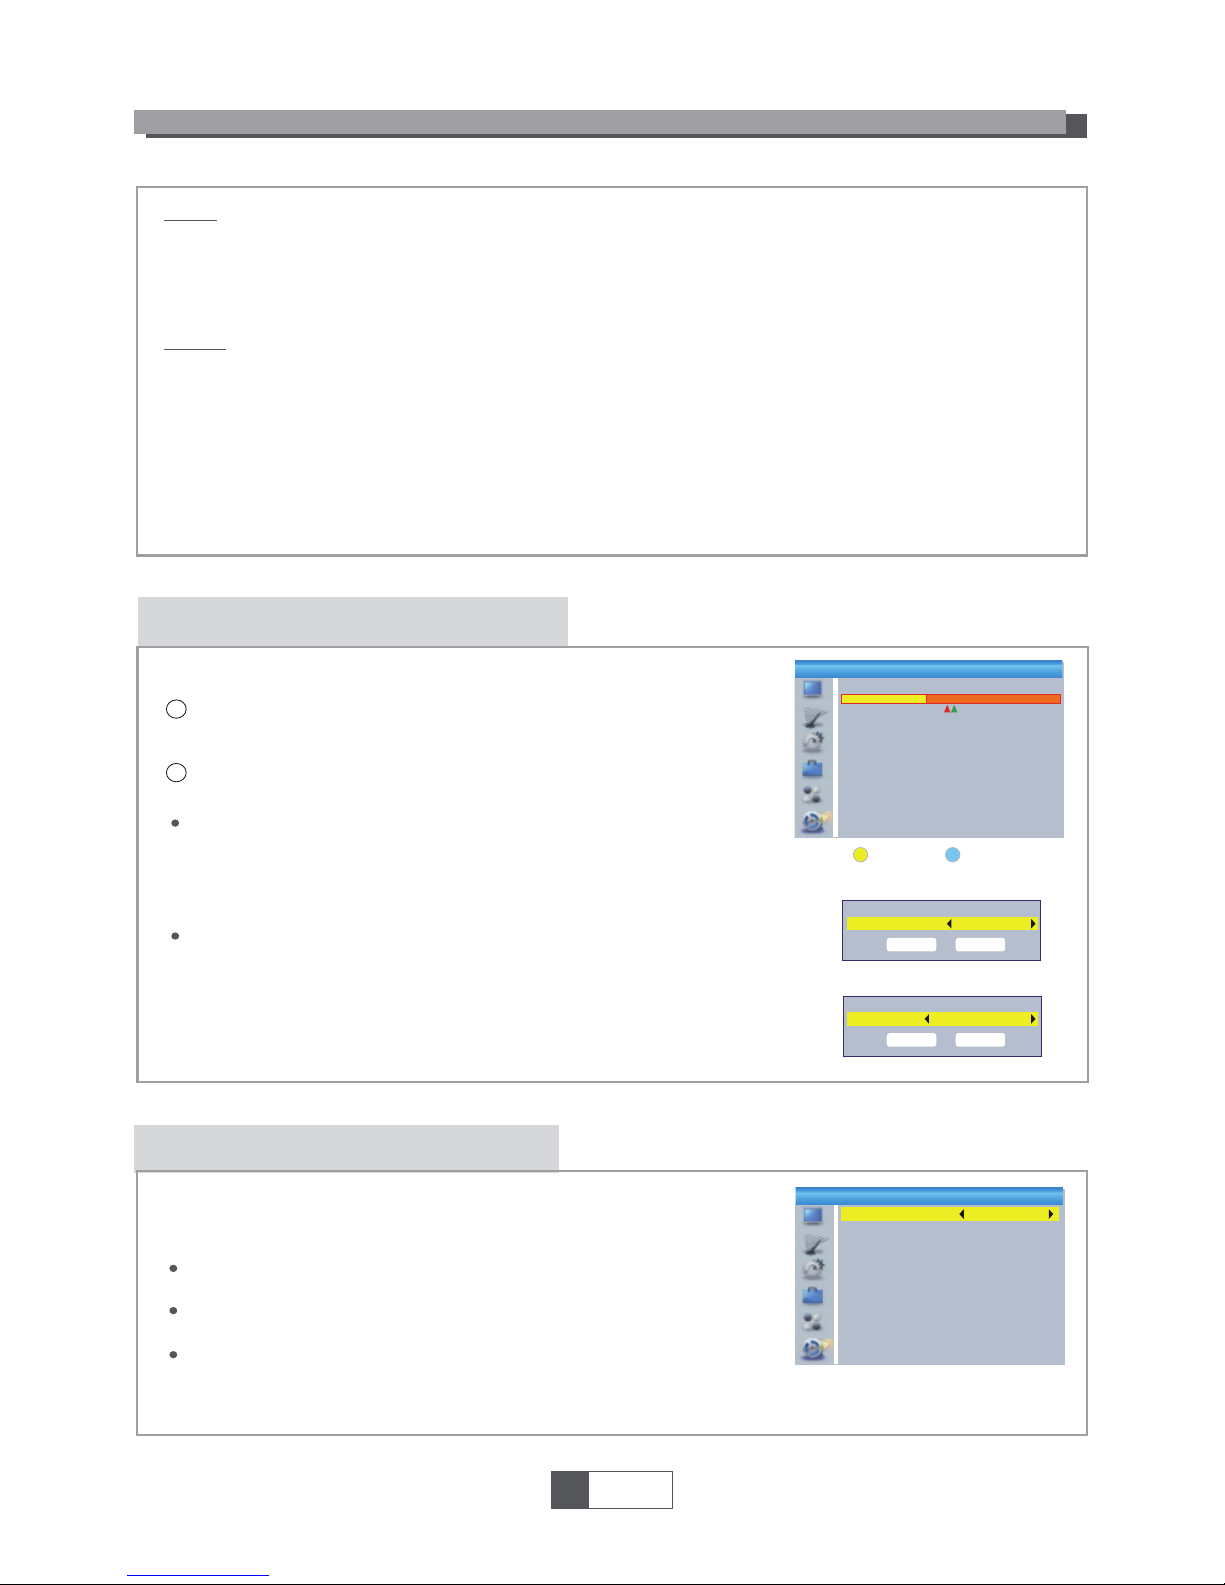
Timer Setting
This menu allows us to set the program timer. You can set 8 timers.
Timer Mode:
Timer Service:
Wakeup Channel:
Wakeup Date:
On Time:
Duration:
Off/Once/Daily/Weekly/Monthly
Channel/Record
You can select a desired channel as the wakeup channel.
Press numeric button to input date.
Press numeric button to input the time.
Press numeric button to input the duration time.
Save
Cancel
Current Time/date: 01:36PM xx/xx/xxxx
Timer Mode
Timer Service
Wakeup Channel
Wakeup Date
On Time
Duration
Daily
Channel
BBC FOUR
xx/xx/xxxx
xx:xx
xx:xx
Other
No command to STB on front panel or Remoter in 30 Min- 3 hours and no timer event,
the STB will enter standby mode automatically.
If Off is selected, the STB can't enter standby mode automatically.
LNB Power
Channel Play Type
Beeper
Auto Standby
Off
All
Off
Off
Other
SYSTEM SETUP
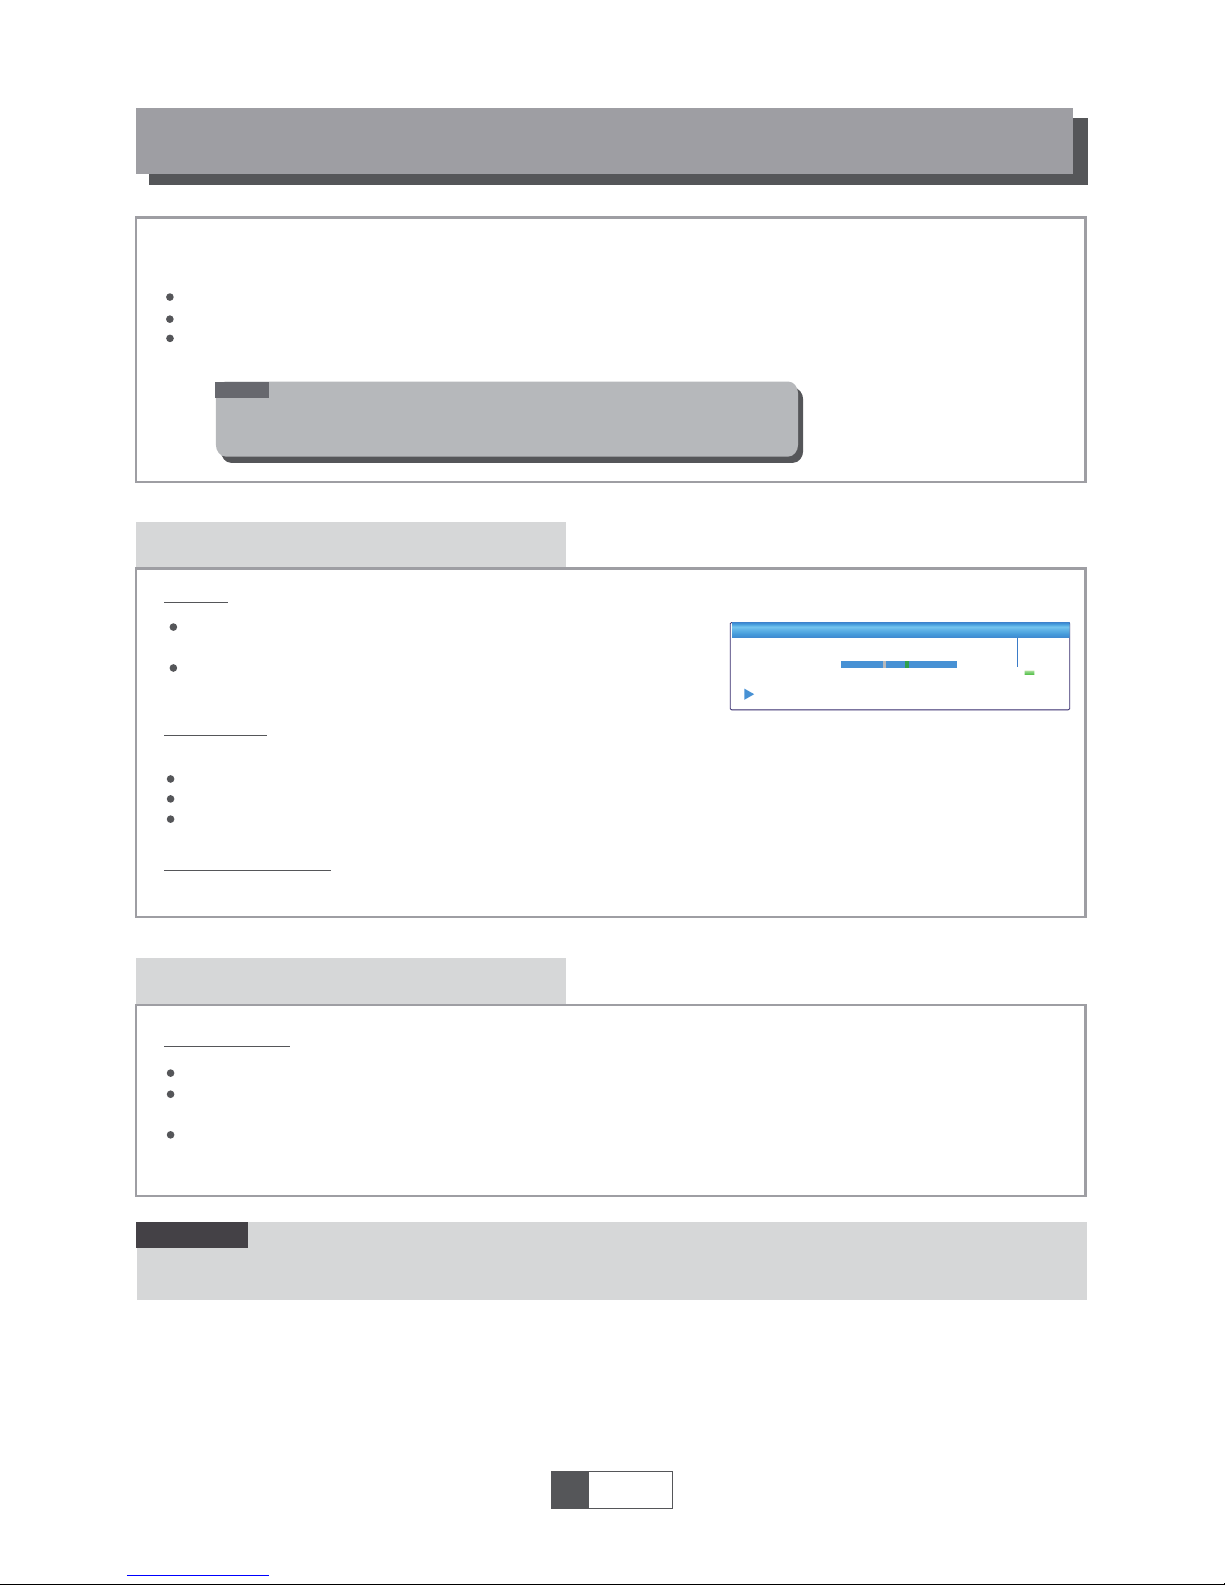
Auto Description Setting
On/Off
On/Off
-3~3
AD Service:
Use AD as default:
AD Volume Offset:
AD Service
Use AD as default
AD Volume Offset
On
Off
0
Auto Description Setting
LNB Power:
Channel Play Type:
Beeper:
Auto Standby:
This menu allows us to set LNB Power, Channel Play Type, Beeper and
Auto Standby.
When "LNB Power" is selected "On", the STB will provide 5V power
to antenna.
It will not provide when selected "Off".
On/Off
All/Free/Scrambled
On/Off
30Min/1 Hour/2 Hour/3 Hour/Off
This menu allows us to set AD Service, Use AD as default and
AD Volume Offset:
1
English
9
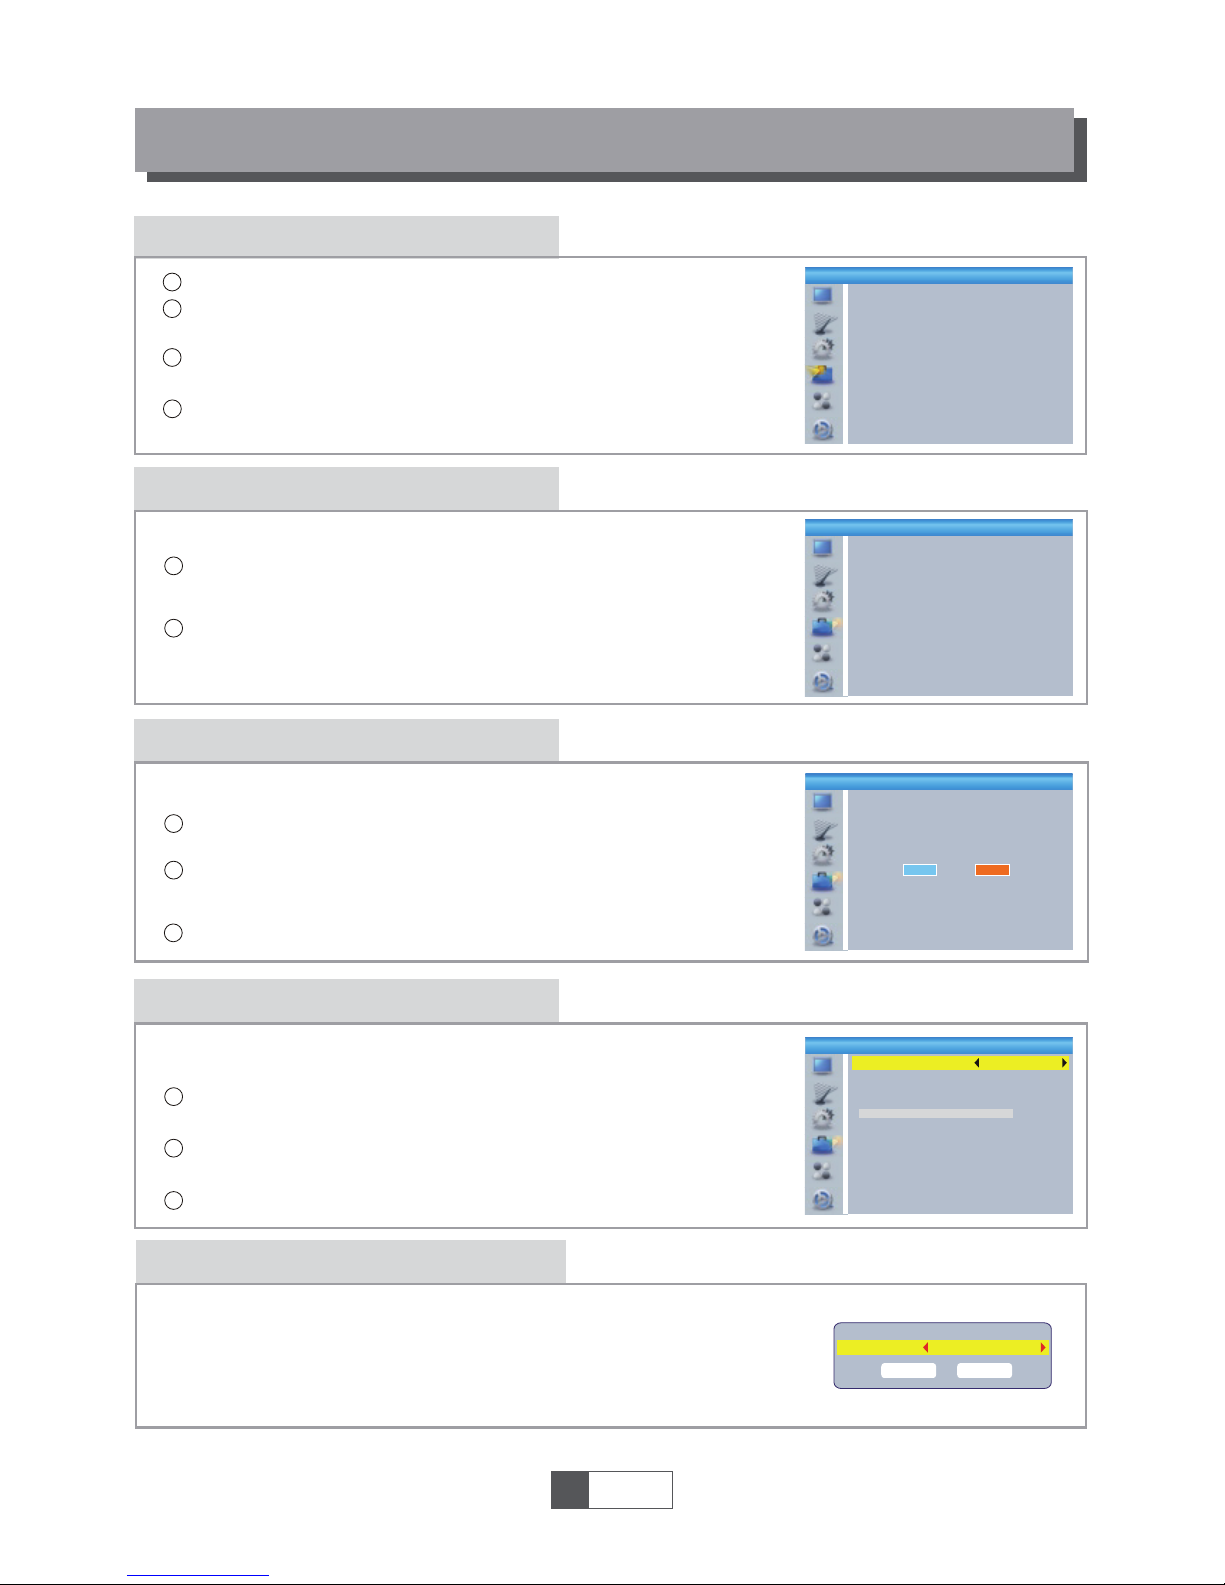
Tools main menu
Information
In "Tools" menu, select "Information", press "OK" button to open
information window.
Press "EXIT" button to exit.
1
2
TOOLS
This menu can display some parameters information in this STB.
Factory Setting
This menu allows you to re-set the STB back to factory settings,
clear all existed channels.
In the "Tools" menu, select "Factory Default", press "OK" button.
You are asked to input a password(the default password is"0000").
1
2
Software Upgrade
Press "EXIT" button to exit.
Enter "Tools" menu, select "S/W Upgrade by OTA" or "Upgrade
by USB", press "OK" button, Software Upgrade menu is shown.
1
2
Press cursor button to select the desired item, then highlight
"Start" and press "OK" button to start upgrade.
3
A confirmation window is displayed.
Select "Yes" to return back to factory settings and clear all channels.
Select "No" to cancel back to factory settings.
Press "EXIT" button to exit .
We offer the functions for user to upgrade software version by OTA
or by USB .
4
1
2
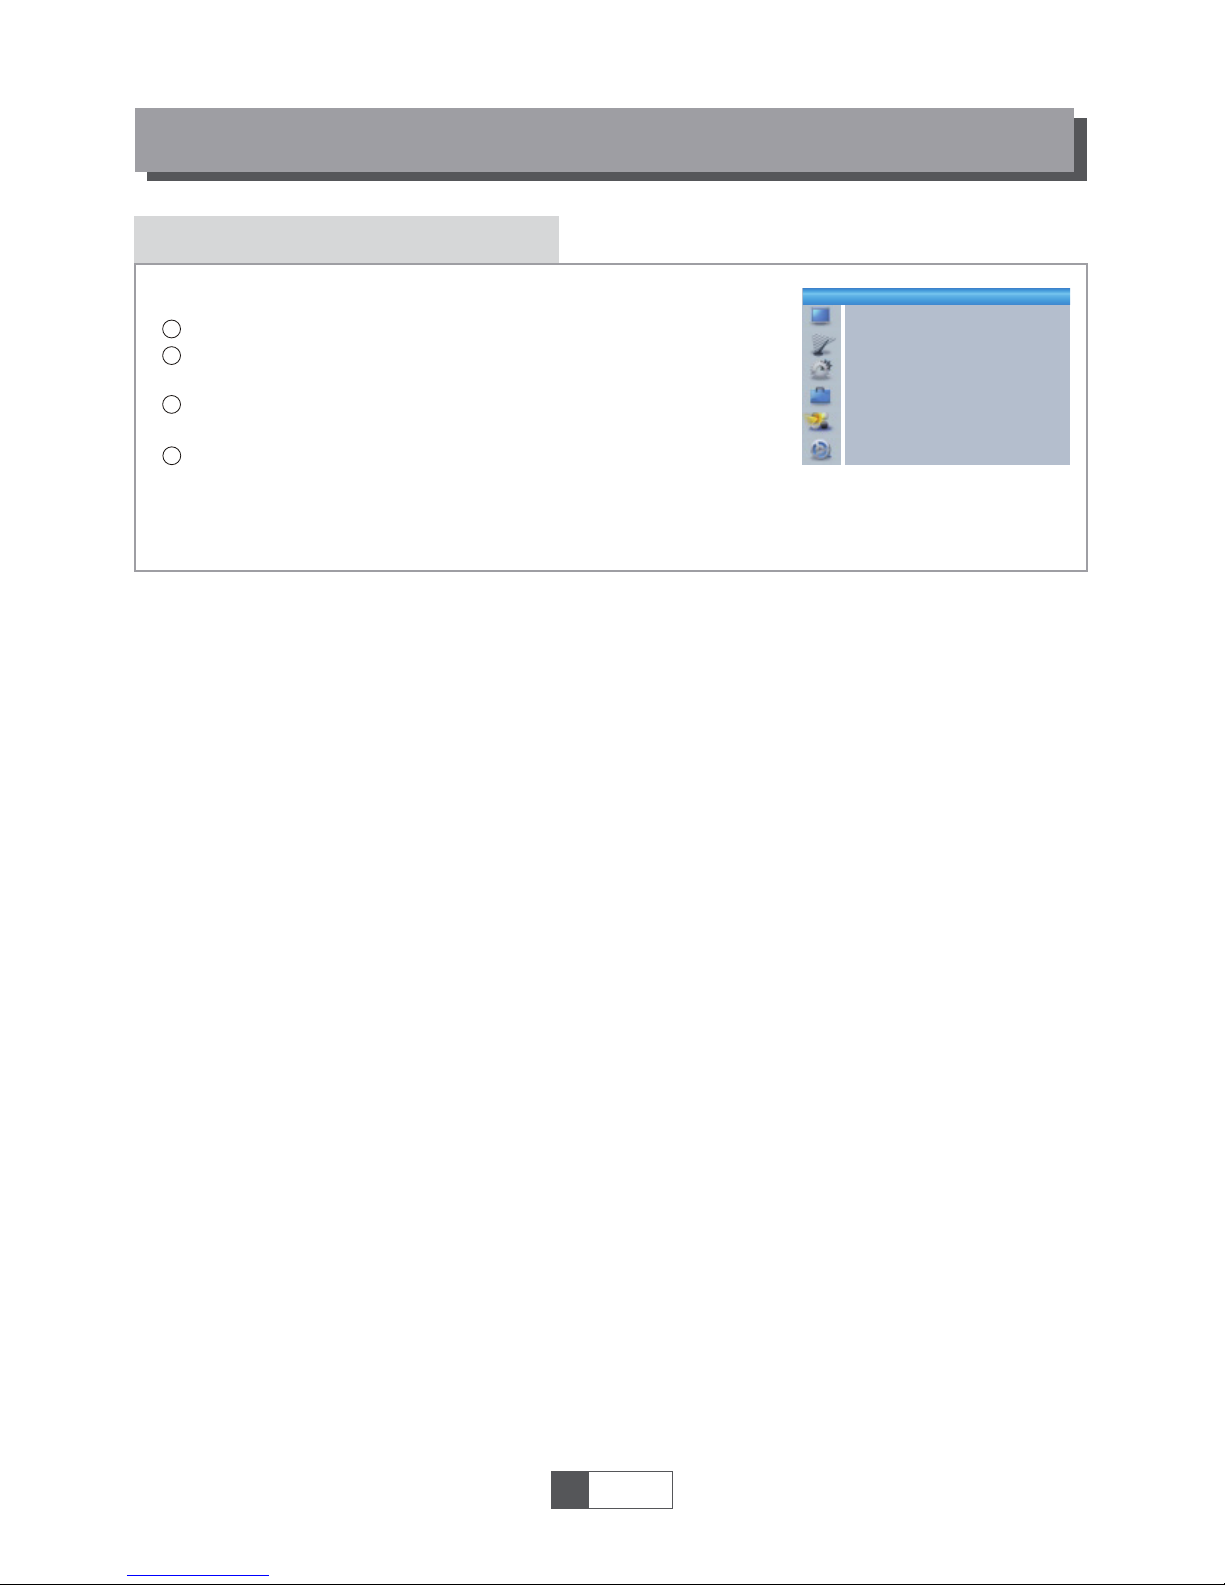
3
Press the "MENU" button to enter main menu.
Press "UP" or " DOWN " button to highlight "Tools", press "RIGHT"
button to enter the Tools menu.
Press "UP" or "DOWN" cursor button to highlight the desired item
and press "OK" button to enter the sub-menu.
Press "EXIT" button to exit.
3
Tools
Information
Factory Setting
S/W Upgrade by OTA
Upgrade By USB
Remove USB device safely
Information
x.x.x
xxxxx
xxxxx
x.x.x
x.x.x
xxx
xxxxx
xxxxx
xxx
xxx
Factory Setting
This operation will load default and erase all
the channels that user added, continue?
Yes No
Upgrade by USB
Upgrade Mode
Upgrade File
Start
Allcode
No File
0%
Remove USB device safely
In "Tools" menu, select "Remove USB device safely",
Press "OK" button to confirm. Then a window is displayed.
Press "OK" button again.
Disk Remove
Remove
OK
USB Disk A-3 GB
Cancel
1
English
10
Game
This menu allows you to play games.
GAME
4
1
2
3
Press the "MENU" button to enter main menu.
Press "UP" or "DOWN" button to highlight "Game", press "RIGHT"
button to enter the Game menu.
Press "UP" or "DOWN" cursor button to highlight the desired item
and press "OK" button to enter the game.
Press "EXIT" button to exit.
1
English
11
Game
Othello
Sudoku
REC main menu
REC
1
English
12
4
1
2
3
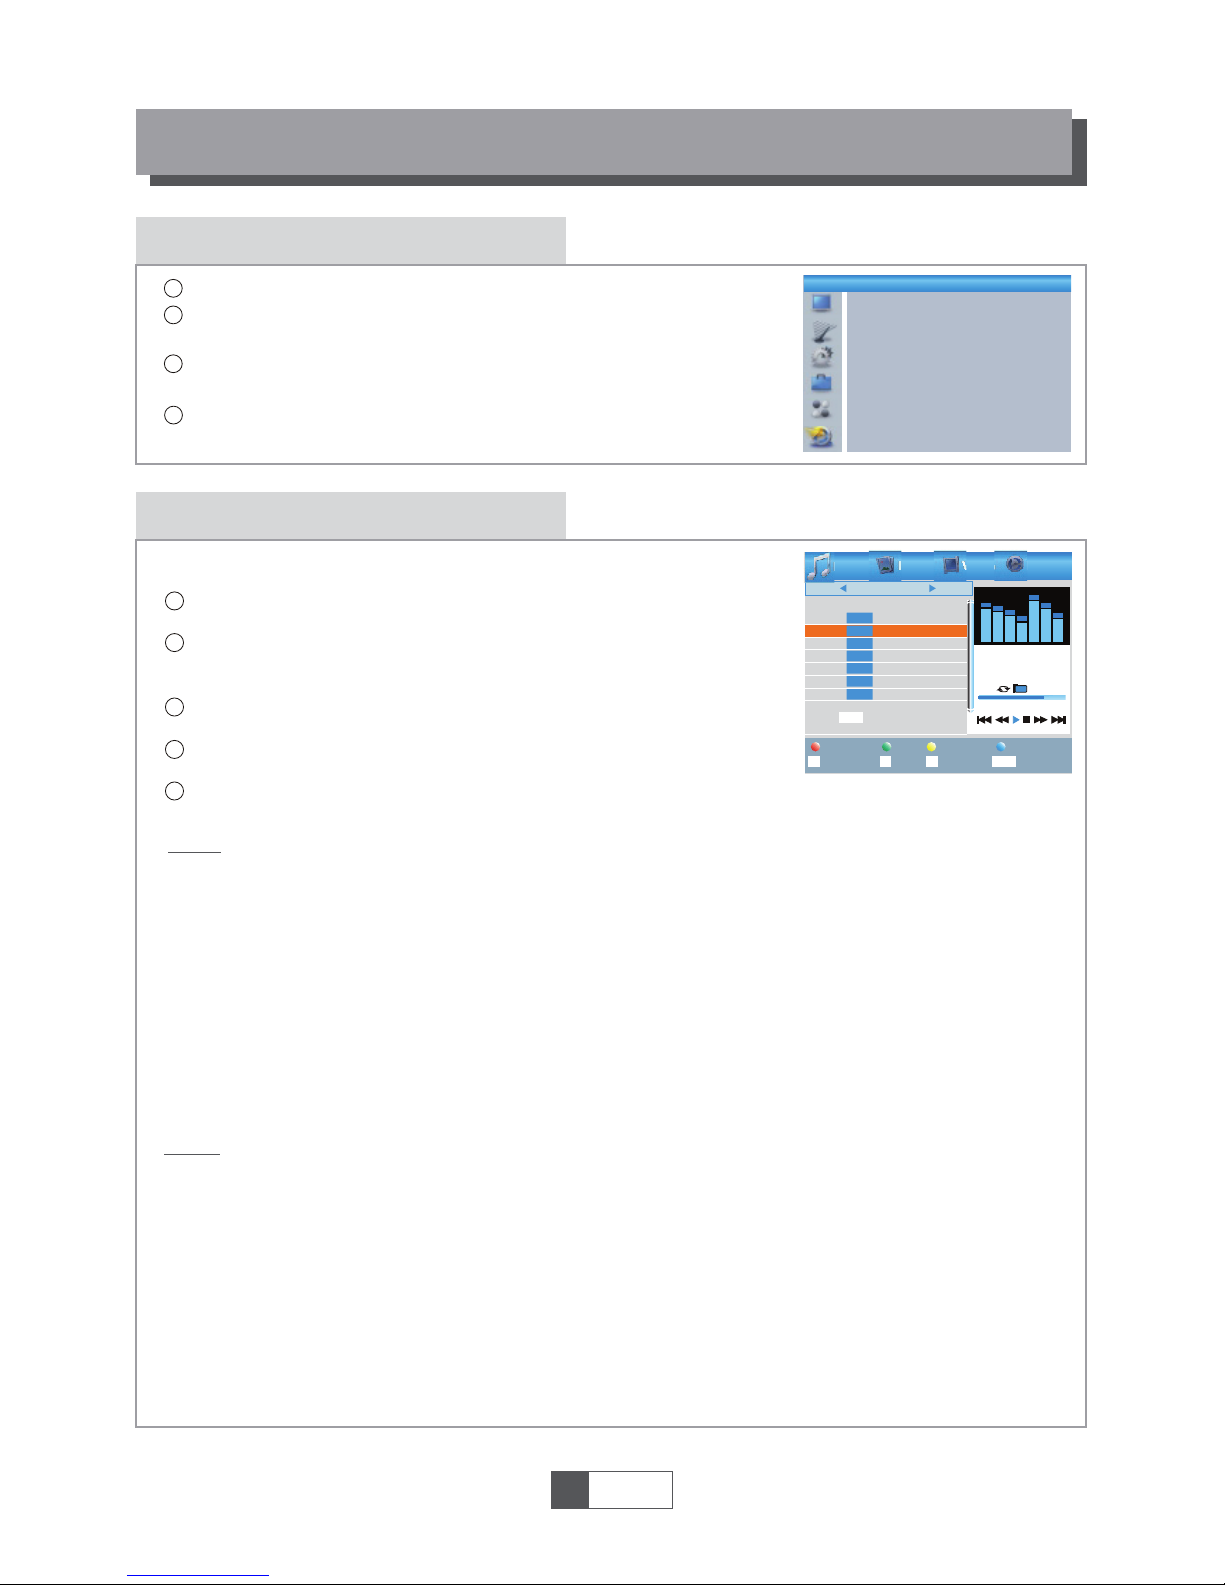
Press the "MENU" button to enter main menu.
Press "UP"or "DOWN" button to highlight "REC", press
"RIGHT" button to enter the REC menu.
Press "UP" or "DOWN" cursor button to highlight the desired item
and press "OK"button to enter the sub-menu.
Press "EXIT" button to exit.
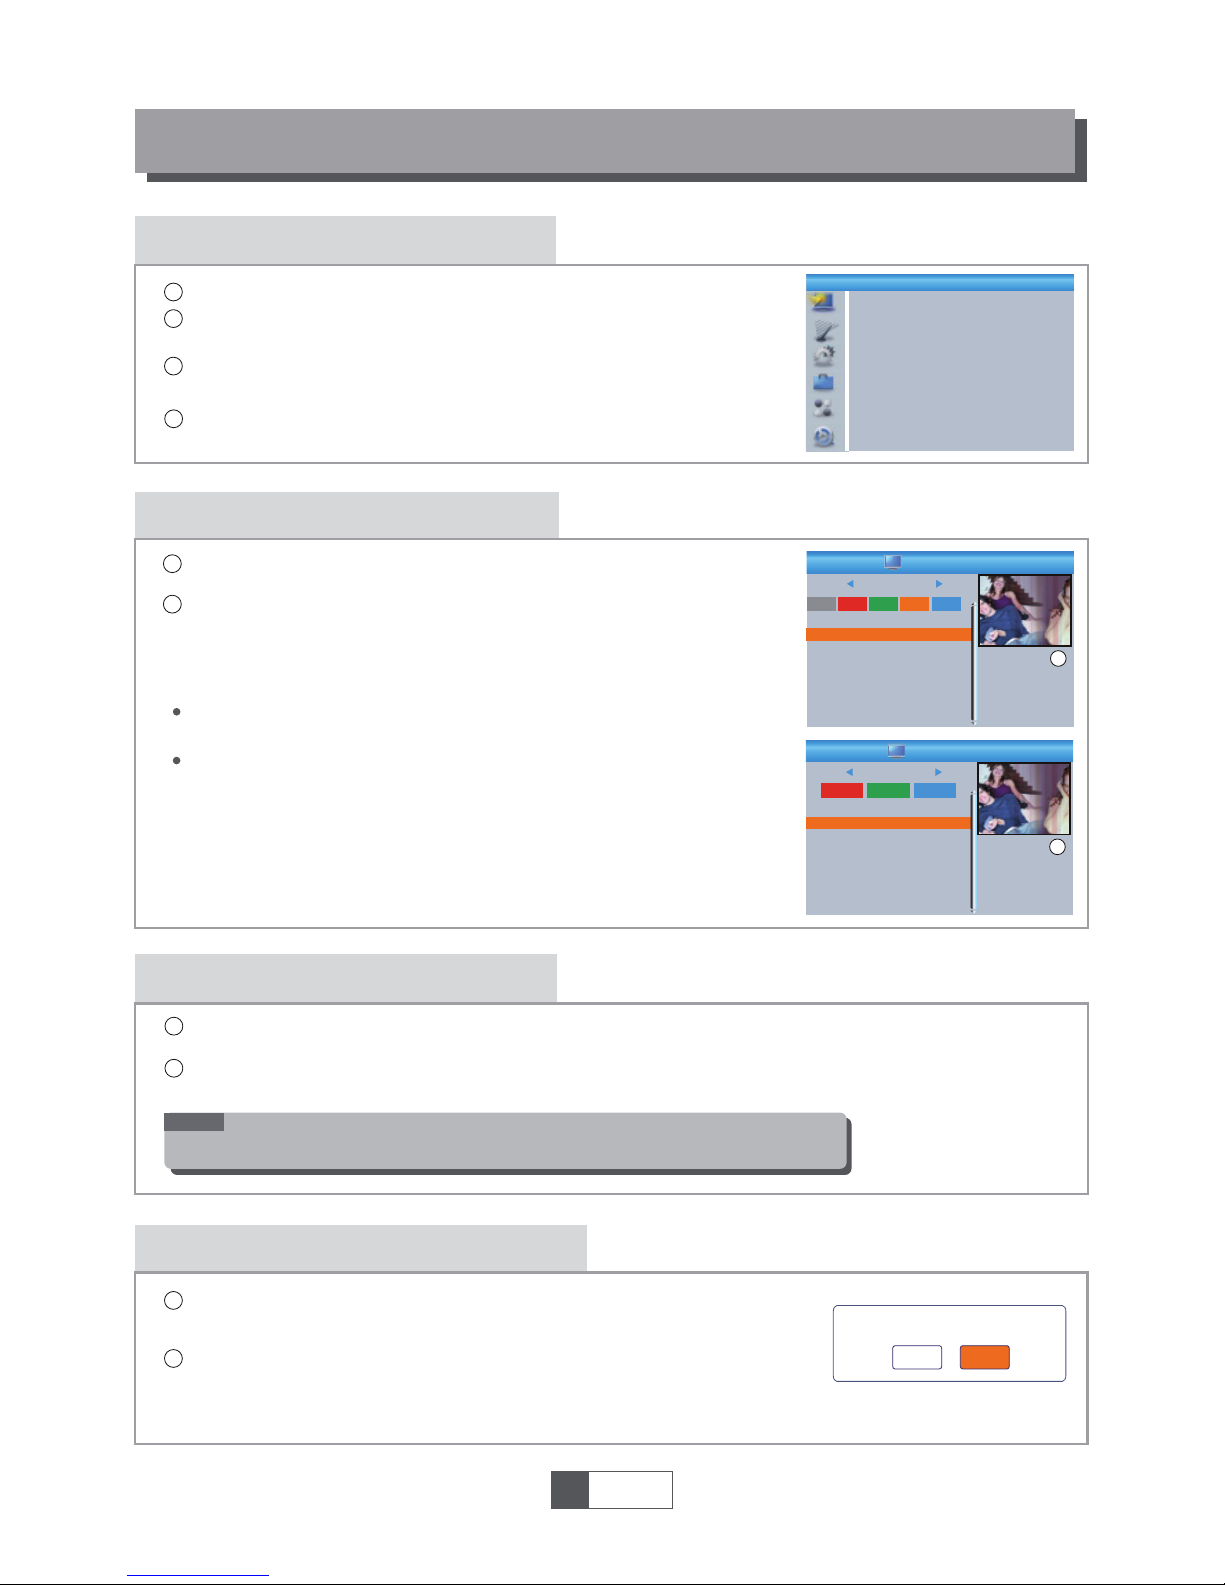
Media Player
3
In "REC" menu, select "Media Player", press "OK" button to enter
Media Player menu.
First you enter media player window, the highlight is on the
USB/HDD device. Press "Down" button to move the highlight to
directory and file field.
Press "1" button ,you can switch TAB between
Music/Image/Video/Record.
Press "UP" or "DOWN" cursor button to select a desired item,
and press "OK" button to play the desired files.
Press "EXIT" button to exit.
1
2
This function allows you to play files from USB port .
REC
Media Player
PVR Storage Information
PVR Setting
Music:
Image:
Press "RED" button to show Play List.
Move the highlight to the file which you want to add to play list, then press
"Green" button to add. It will mark a favorite icon on the file.
Press "Yellow" button to add all file of current directory to play list. Press again to
delete all file of current directory from the play list.
Press "Blue" button to enter to edit sub-menu.
Press "2" button to open the sort window.
You can sort by Name/Time/Size/Favorite.
Press "INFO" button to set repeat mode. The option is Repeat Folder/
Random Folder/Repeat One.
Return to parent directory.
4
5
Press "Red" button to show play list.
Move the highlight to the file which you want to add to play list, then press
"Green" button to add. It will mark a favorite icon on the file.
Press "Yellow" button to add all file of current directory to play list. Press again to
delete all file of current directory from the play list.
Press "Blue" button to enter to edit sub-menu.
Press "2" button to open the sort window.
You can sort by Name/Time/Size/Favorite.
Press "INFO" button to open image setup
Press "3" button to view image in multi view mode
Return to parent directory.
"RED" button:
"GREEN" button:
"YELLOW" button:
"BLUE" button:
"2" button:
"INFO" button:
"EXIT" button:
"RED" button:
"GREEN" button:
"YELLOW" button:
"BLUE" button:
"2" button:
"INFO" button:
"3" button:
"EXIT" button:
I swear.mp3
3319KB
00:03:32
00:03:15 00:03:32
1
3
4
5
6
7
2
Music
840.mpg
Why.mp3
Lonely.mp3
Because.mp3
Rose.jpg
Fly.jpg
I swear.mp3
USB 1
/..
Play List
Switch
Repeat
Sort
MPG
MP3
MP3
MP3
MP3
JPG
JPG
INFO
2
1
FAV FAV All Edit
Exit
EXIT
Image Video Record
i
This menu allows us to set the PVR Setting.
Press "UP" or "DOWN" cursor button to select desired item,
press "LEFT" or "RIGHT" cursor button to change the setting.
TimeShift AUTO/Pause/Off
Timeshift to Record On/Off
PS Record On/Off
PVR Setting
1
English
13
REC
PVR Storage Information
In "REC" menu, select "HDD Information", press "OK"
button to open HDD information window.
Press "EXIT" button to exit.
This menu can display some parameters of Removable Disk.
1
2
PVR Storage Information
USB Disk A: xxxG bytes
Volume
Tot al S ize
Free Size
Rec Size
TMS Size
File System
xxxx
xxxx
xxxx
xxxx
xxxx
xxx
Format DVR Set
Timeshift
Timeshift to Record
PS Record
Pause
ON
OFF
PVR Setting
DVR Set REC&TMS/Record/Timeshift
Press BLUE button to open DVR Set menu.
Press "LEFT" or "RIGHT" cursor button to change DVR Type.
Select "OK" to confirm. Select "Cancel" to cancel.
Press YELLOW button to open Format menu.
Press "LEFT" or "RIGHT" cursor button to change Disk Mode.
Select "OK" to format. Select "Cancel" to cancel.
Format FAT/NTFS
DVR Set
DVR Type
OK
REC& TMS
Cancel
Format
Disk Mode
OK
FAT
Cancel
Record:
Press "Red" button to open rename window.
Move the highlight to the program which you want to lock. Pressing "Green"
button, it will ask you to input password. Default password is "0000". After
input correct password, the program is locked. If you want to unlock the
program, press the "Green" button again.
Press "Yellow" button to make a delete mark on the program which
you want to delete.
Return to parent directory.
Video:
Press "Blue" button to enter to edit sub-menu.
Press "2" button to open the sort. You can sort by Name/Time/Size.
Return to parent directory.
"BLUE" button:
"2" button:
"EXIT" button:
"RED" button:
"GREEN" button:
"YELLOW" button:
"EXIT" button:
TIMESHIFT/RECORD
Timeshift
Plugging an external Mass Storage Device on the USB port gives you access to Time Shift/Record
a broadcast programme.
Pause a broadcast programme and continue watching it later (Time Shift )
Record a broadcast programme.
When the space available on the Mass Storage Device runs out, recording operation of
broadcast will stop.
Initiate
Trickmodes
Stop the Time Shift
Time Shift can be done in viewing mode by pressing the
"PAUSE" button.
Press "RIGHT" or "LEFT" button to move the cursor to
the time you desired to view. Press "OK" button to confirm.
During the playback, it is possible to perform the following actions :
Press "PAUSE" button to pause the playback
Press "FORWARD" button to fast forward the playback
Press "BACKWARD" button to rewind the playback
Record
Instant record
In viewing mode, press "RECORD" button to instantaneously start a record on the current channel.
Press "RECORD" button again can input duration.
Press "STOP" button to stop recording, then a confirmation window appears.
Select "Yes" to stop recording. Select "No" to continue recording.
Press "STOP" button to stop TimeShift.
BBC FOUR
Play 00:02:37 00:07:12
TS
2%
03/19
01:36
1
English
14
NOTE:
Please use USB 2.0 disk when recording or timeshift.
For timeshift and recording feature, you need take bigger size USB pen
driver or HDD (>2GB) for recording.
Please select famous brand USB 2.0 USB HDD or USB stick for Recording and Timeshift, such as SAMSUNG,
HITACHI and SONY. Some USB devices maybe can't be supported due to its quality.
NOTE:
In some region, the digital terrestrial signal may be weak. So you'd better use the antenna in
which the booster was built, for watching the weak signal channels.
TROUBLESHOOTING
Problem
Standby light not lit
No signal found
No picture or sound
Scrambled channel
message
No response to remote
control
Forgotten channel lock
code
Forgotten menu lock
code
The remote control will
not operate your STB
After moving the STB to
another room you find you
are no longer able to
receive digital reception
Possible cause What to do
Mains lead unplugged
Mains fuse blown
Aerial is disconnected
Aerial is damaged/misaligned
Out of digital signal area
Scart/AV is not selected on your TV
Channel is scrambled
Receiver off
Handset not aimed correctly
Front panel obstructed
Hand set batteries exhausted
(1) The batteries in your remote
control need replacing
(2) There is an obstruction
blocking the signal path
between the remote control
and the box.
The aerial feed former new point
may come through a distribution
system which may reduce the
digital signal now received by the
box.
Check mains lead
Check fuse
Check aerial lead
Check aerial
Check with dealer
Reduce to another channel
Select alternative channel
Plug in and turn on plug
Aim handset at front panel
Check for obstructions
Replace handset batteries
Re-install channels to cancel
channel lock
Contact help line
(1) Replace the batteries
(2) Check that there is nothing in
the way of the path between
the remote control and the
receiver
Try a direct feed from the antenna
1
English
15
Design and Specifications are subject to change without notice.
TUNER & CHANNEL
RF INPUT CONNECTOR x1
(IEC-TYPE, IEC169-2, FEMALE)
RF OUTPUT CONNECTOR x1
(IEC-TYPE, IEC169-2, MALE (LOOPTHROUGH))
FREQUENCY RANGE:
174MHz~230MHz(VHF)
470MHz ~862MHz (UHF)
SIGNAL LEVEL:
-15 ~ -70 dbm
DECODER
Video decoder
Audio decoder
VIDEO FORMATS
MODULATION
VIDEO OUTPUT
INPUT RATE
MAX. 48Mbit/s
4:3/,16:9 SWITCHABLE
HDMI, RGB
QPSK,16QAM,64QAM
CONNECTION
MAIN POWER CABLE
TUNER
SCART
SPDIF
FIXED TYPE
ANTENNA INPUTx1, RF OUTPUT x1
COAXIAL x1
USB slot
POWER SUPPLY
INPUT VOLTAGE
POWER CONSUMPTION
AC220~240V, 50/60Hz
MAX. 6W
DATA PORT
TO TV x1
1
English
16
MPEG-2 MP@HL, AVC/H.264 HP @L4.1
MPEG-4 ASP SUPPORTED
MPEG-1 Layer 1,2/PCM/HE-AAC V1.0
ICE958 SPDIF
SPECIFICATIONS
NOTE:
HDMI
HDMI OUTPUT x1
SET TOP BOX
Digitální pĜijímaþ
BEN 125 HD
Uživatelský manuál
ĒG
G
G
G

esky
Bezpeþnostní upozornČní
DĤležité upozornČní pro bezpeþné používání pĜístroje
PĜed použitím výrobku si peþlivČ pĜeþtČte celý návod. Pod pojmem pĜístroj se v tomto návodu rozumí samotný
pĜístroj, pĜíslušenství a montážní materiál, jako jsou síĢové a signálové kabely, dálkový ovladaþ, baterie, a
napájecí zdroje apod.
Výrobce pĜístroje v žádném pĜípadČ neodpovídá za jakékoliv pĜímé i nepĜímé škody zapĜíþinČné nedodržením
jak obecnČ platných tak v tomto návodu uvedených pokynĤ pro zacházení s pĜístrojem.
Pokyny uvedené v následujícím textu obsahují dĤležité informace související s bezpeþným používáním pĜístroje
a jsou podle rizik vznikajících jejich nedodržením zaĜazeny do tĜí kategorií oznaþovaných v návodu údaji
• Varování
Oznaþuje situaci, která mĤže vest k vážnému zranení a ohrožení života.
• UpozornČní
Oznaþuje situaci, která mĤže poškodit, nebo zniþit pĜístroj.
• Poznámka
Oznaþuje doplĖující text, nebo informace, jak se má uživatel vyhnout možným problémĤm pĜ
i
obsluzepĜijímaþe.
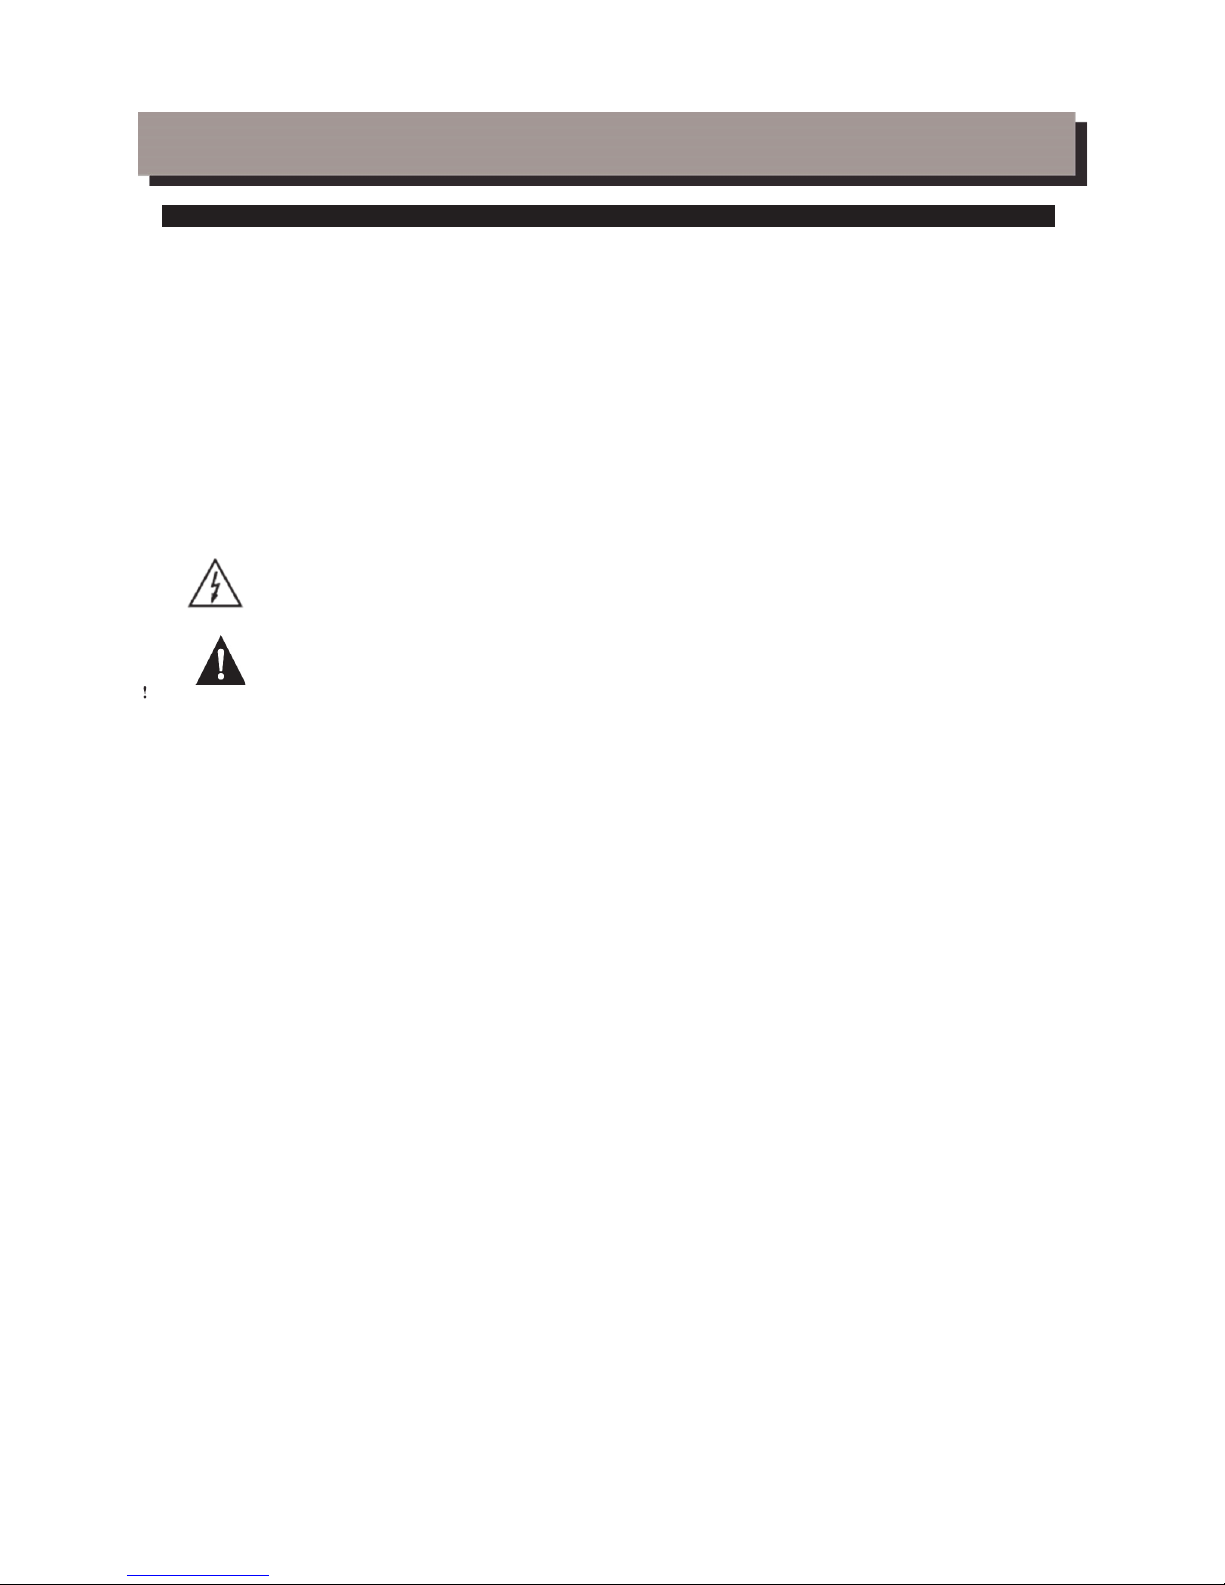
Význam symbolĤ
K omezení rizika úrazu elektrickým proudem neotvírejte skĜíĖ pĜístroje. UvnitĜ nejsou díly, které
by mohl opravit nebo seĜídit uživatel. S požadavky na opravy se obracejte na pracovníky s
odpovídající kvalifikací.
Symbol blesku umístČný v rámeþku tvoĜeným rovnostranným trojúhelníkem upozorĖuje uživatele
na existenci neizolovaného „nebezpeþného napČtí“ pĜístroje, které mĤže mít takovou intenzitu,
že mĤže zpĤsobit úraz elektrickým proudem.
Tento výrobek byl vyroben v souladu s mezinárodními bezpeþnostními standardy. PĜeþtČte si prosím
peþlivČ následující bezpeþnostní pokyny.
NAPÁJENÍ: 90-260V AC 50/60Hz
Provozujte tento výrobek pouze pomocí napájení uvedeného na štítku. Nejste-li si jisti ohlednČ typu napájení ve
vaší domácnosti, kontaktujte vašeho místního distributora elektrické energie.
PĜed zahájením jakékoliv údržby nebo instalace odpojte výrobek od napájení.
PěETÍŽENÍ: NepĜetČžujte zásuvku, mohlo by dojít k požáru, nebo k zasažení elektrickým proudem.
KAPALINA: Výrobek nesmí být vystaven pĤsobení žádné kapaliny. RovnČž se na pĜístroj nesmČjí stavČt žádné
pĜedmČty naplnČné kapalinou.
ýIŠTċNÍ: PĜed zahájením þištČní odpojte výrobek od napájení. K setĜení prachu z výrobku použijte lehce
navlhþenou tkaninu, nikoliv rozpouštČdla.
VENTILACE: ŠtČrbiny na horní þásti výrobku musí zĤstat nezakryté, aby umožĖovaly potĜebné proudČní
vzduchu do pĜístroje. NeumísĢujte výrobek na mČkká bytová zaĜízení nebo koberce. Nepokládejte jiné
elektronické pĜístroje na výrobek.
PěÍSLUŠENSTVÍ: Nepoužívejte žádná nepodporovaná pĜíslušenství, aby nedošlo k poškození výrobku.
PěIPOJENÍ K ANTÉNċ: PĜed pĜipojováním nebo odpojováním kabelu z antény odpojte výrobek od napájení,
aby nedošlo k poškození antény.
PěIPOJENÍ K TV: PĜed pĜipojováním nebo odpojováním kabelu z TV odpojte výrobek od napájení, aby
nedošlo k poškození televizoru.
UMÍSTċNÍ: UmístČte výrobek uvnitĜ budovy, aby bylo zamezeno pĤsobení blesku, deštČ nebo slunce.
NeumísĢujte pĜístroj do blízkosti radiátoru nebo výmČníku tepla. ZajistČte odstup nejménČ 10 cm. Neblokujte
otvory žádnými pĜedmČty a neumísĢujte výrobek na postel, pohovku, pokrývku ani jiný podobný povrch.
Umístíte-li výrobek na polici nebo do knihovny, ujistČte se, že je zajištČno adekvátní odvČtrávání a že jste
dodrželi pokyny výrobce k montáži.
NeumísĢujte výrobek na nestabilní vozík, stojan, stativ, podpČru nebo stĤl, z nichž mĤže spadnout. Pád výrobku
mĤže zpĤsobit vážné zranČní dítČte i dospČlé osoby a vážné poškození pĜístroje.
ENERGETICKÉ RÁZOVÉ IMPULSY: Odpojte výrobek ze zásuvky a od antény za bouĜe, nebo pokud jej
nepoužíváte dlouhou dobu, abyste pĜedcházeli poškození pĜístroje bleskem a energetickými rázovými impulsy.
CIZÍ PěEDMċTY: Nestrkejte žádné pĜedmČty do pĜístroje. Mohlo by dojít ke styku s body nebezpeþného napČtí
nebo k poškození souþástí.
VÝMċNA SOUýÁSTEK: VýmČnu souþástí smí provádČt pouze servisní technik urþený výrobcem.
VÝSTRAHA!
Dodržujte prosím následující body, aby nedošlo k poškození kabelu nebo zástrþky:
- Neupravujte svévolnČ napájecí kabel nebo zástrþku.

- Neohýbejte ani nezkrucujte napájecí kabel.
- PĜi odpojování držte napájecí kabel za zástrþku.
- Držte napájecí kabel co nejdále od tepelných spotĜebiþĤ, abyste zabránili tavení krycího vinylu.
- Zástrþka musí zĤstat snadno dostupná.
Dodržujte prosím následující body, aby nedošlo k zasažení elektrickým proudem:
- Neotevírejte hlavní jednotku.
- Nestrkejte do vnitĜní þásti výrobku kovové nebo vznČtlivé pĜedmČty.
- Nedotýkejte se zástrþky mokrýma rukama.
- V pĜípadČ výskytu blesku odpojte napájecí kabel.
Dodržujte prosím následující body, aby nedošlo k poškození výrobku:
- Nepoužívejte výrobek, nefunguje-li správným zpĤsobem, aby nedošlo k jeho vážnému poškození. Kontaktujte
místního prodejce.
- Nestrkejte do slotĤ pro moduly nebo Smart karty kov nebo cizí materiály, aby nedošlo k poškození výrobku a
zkrácení jeho životnosti.
-Zásuvka musí být nainstalovaná blízko pĜístroje a musí být snadno pĜístupná.
UpozornČní pro použití USB zaĜízení
Pro plnohodnotné využití USB portu musí, pamČĢ k nČmu pĜipojená, podporovat
standard USB 2.0. Pro bezchybné, stabilní nahrávaní a pĜehrávaní jsou
vyžadovány USB zaĜízení s rychlostí zápisu 9.0 MB/s nebo rychlejší. Pomalejší
pevné disky a flash pamČti mohou mít problémy s nahráváním, které se projeví
zasekáváním obrazu, nebo nemusí vĤbec pracovat.
SprávnČ pracují pouze disky s jedním základním oddílem se souborovým systémem
NTFS nebo FAT32 Pokud se na disku nachází jiný souborový systém, naformátujte
tento disk v PC na doporuþeny souborový systém ještČ pĜedtím, než jej p
Ĝipojíte k
pĜijímaþi.
SilnČ fragmentované nebo pĜeplnČnČ pamČti také nemusí fungovat správnČ a
plynule.
Externí pevné disky HDD musí mít vlastni napájení, port USB zabudovaný v
pĜijímaþi není schopen dodat dostateþnČ napČtí pro napájení pĜenosného USB
pevného disku.
BČhem nahrávaní nebo pĜehrávaní nelze USB zaĜízeni v žádném pĜípadČ odpojovat
od pĜijímaþe. Jeho odpojení bČhem práce pĜijímaþe mĤže zpĤsobit poškozeni
pĜijímaþe nebo flash pamČti a také poškodí data, která se na mediu nacházejí.
pĜijímaþ disponuje funkcí minimálního odbČru elektrické energie v pohotovostním stavu
a je tedy šetrnČjší k životnímu prostĜedí
ovládací software pro tento pĜijímaþ se neustále vyvíjí. Nová verze software mĤže
zmČnit nČkteré funkce a chování p
Ĝijímaþe. Obrázky a popisy v tomto návodu mají
pouze informativní charakter. Pokud si všimnete chyby, prosíme o její nahlášení, udČláme všechno pro to,
abychom ji opravili.
NejnovČjší firmware naleznete vždy na stránkách produktu www.bensat.cz
pĜijímaþ je vybaven HDMI rozhraním ve verzi 1.3c pro pĜipojení nejnovČjších typĤ
televizorĤ v nejvyšší kvalitČ obrazu I zvuku. Pokud je Váš televizor vybaven tímto vstupem, využijte ho.

OBSAH
Bezpeþnostní upozornČní
PěEDSTAVENÍ
PĜední panel
1
Z
adní panel
1
Dálkové ovládán
í
2
ZAPOJENÍ PěIJÍMAýE
Z
ákladní informace
3
PĜi
poj
ení k televizoru
3
PĜi
poj
ení k HIFI systému
3
ZAýÍNÁME
První zapnutí pĜijímaþe
4
I
nstalace a ladČní kanálĤ
4
OVLÁDÁNÍ PěIJÍMAýE
Z
mČna kanálu
5
Ovládání Elektronického
prog
ramového prĤvodce (EPG
)
5
ÚPRAVA KANÁLģ
M
enu editace kanálĤ
6
Editace seznamu TV kanálĤ
6
Editace seznamu Rádio kanálĤ
6
V
y
mazání všech kanálĤ ze seznamu
6
NASTAVENÍ SYSTÉMU
M
enu nastavení systému
7
Nastavení jazyka
7
TV Systém, Rozlišení videa
7
Nastavení místního þasu
7
Nastavení þasovaþe
8
Rodiþovsk
ý
záme
k
8
Nastavení OSD menu
8
Oblíbené kanál
y
8
Nastavení funkce Audio description (popis dČje pro zrakovČ postižené)
M
ultiview (zobrazení náhledĤ více stanic)
9
Ostatn
í
(napájení antény, zvuková signalizace síly signálu, automatické vypnutí
)
9
NÁSTROJE
H
lavní menu nástrojĤ
10
Inf
ormace
10
Tovární nastaven
í
(Vymazání dat
)
10
A
ktualizace software
10
Bez
p
eþnČ odpojení USB zaĜízen
í
11
HRY
H
ry
11
MENU NAHRÁVÁNÍ, MULTIMEDIÁLNÍ PěEHRÁVAý
M
enu nahrávání
12
M
ultimediální pĜehráva
þ
12
PVR In
f
ormace
13
PVR Nastaven
í
13
TIMESHIFT/NAHRÁVÁNÍ
Timeshif
t
14
Nahráván
í
14
ěEŠENÍ ýASTÝCH PROBLÉMģ
15
TECHNICKÁ SPECIFIKACE
16
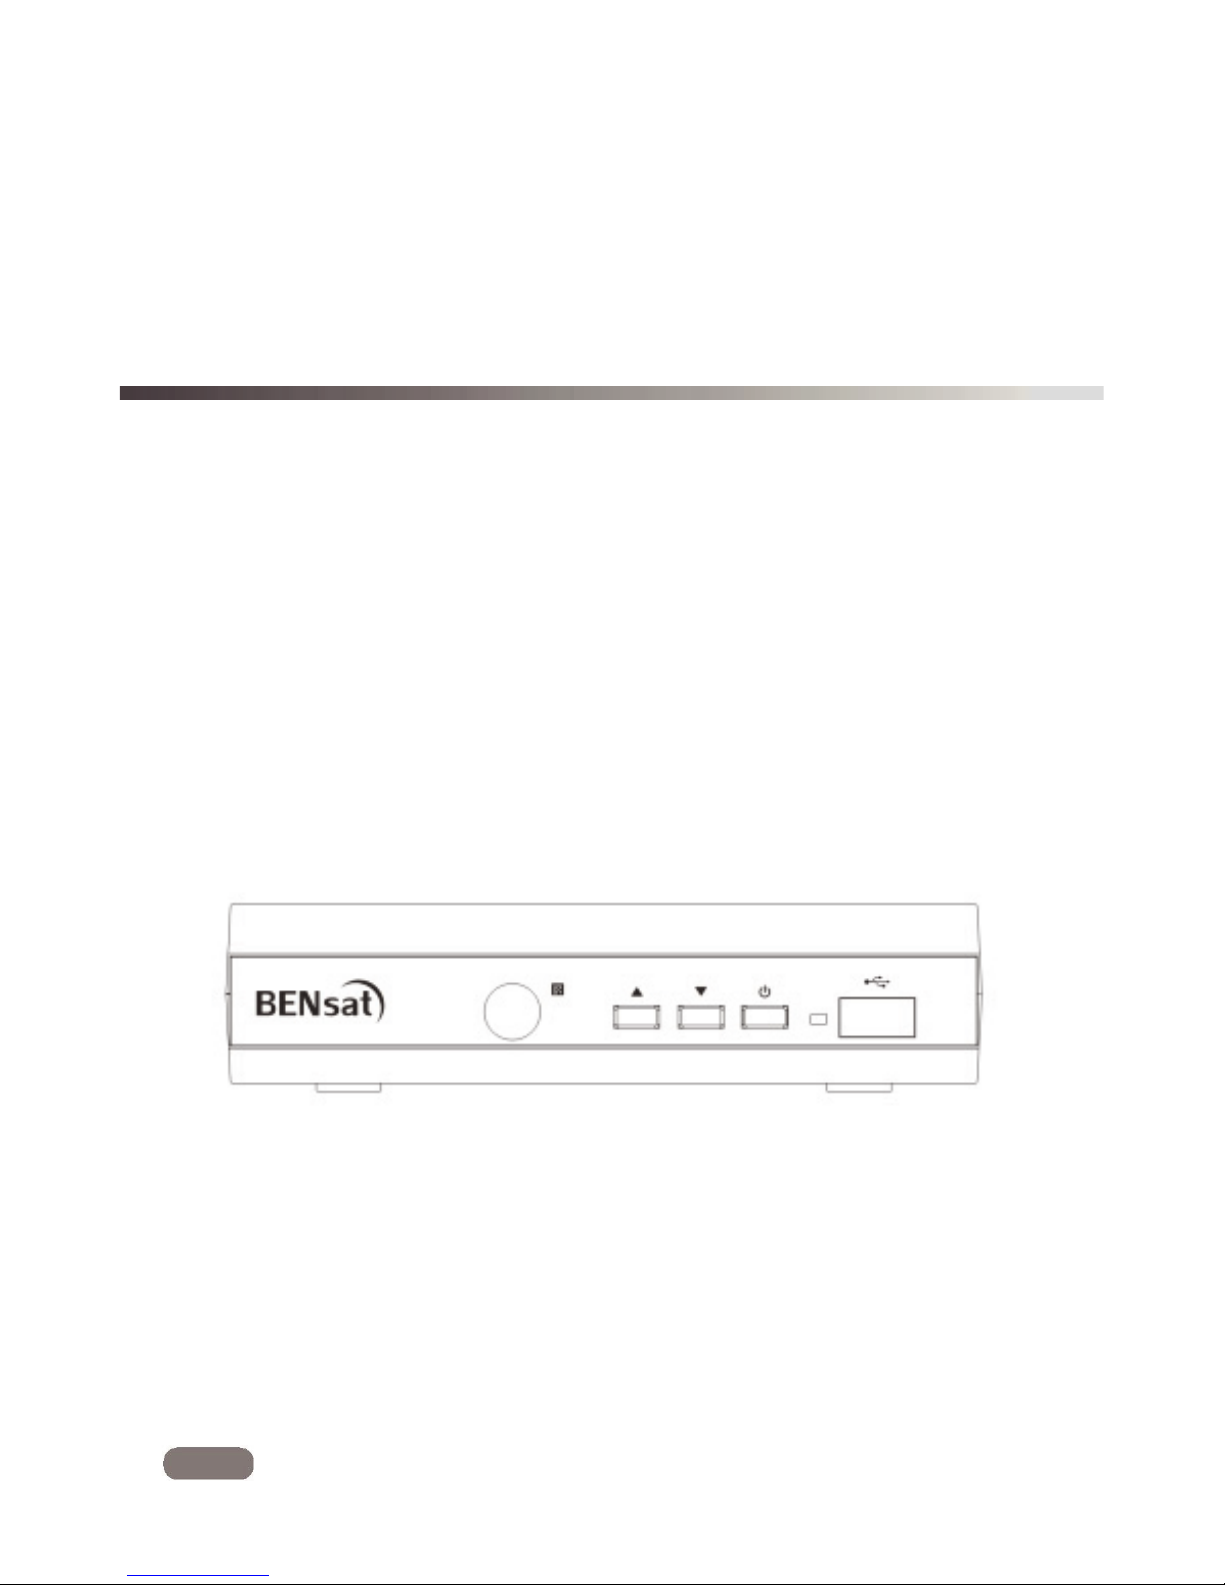
PěEDSTAVENÍ
PĜední panel
ýidlo dálkového ovládání USB port
BEN125 HD
Zadní panel
Vstup od antény Digitální audio výstup SCART výstup 230V/AC
PěEDSTAVENÍ
Dálkový ovladaþ
1. STANDBY (slouží
k
zapnutí/ vypnutí pƎijímaēe)
2. Numerická klávesnice
(zadáním ēísla pƎepnete pƎímo na požadovanou pƎedvolbu
3. INFO (zobrazení informací o vysílaném programu)
4. MENU (zobrazení hlavního MENU pƎijímaēe)
6. Tlaēítko OK
(zobrazení seznamu kanálƽ/ potvrzení nabídky v MENU)
7. RECORD (okamžité nahrávání)
8. VOL+/-
(
zvýšení / snížení hlasitosti)
9. TTX (teletext)
10. PREV (pƎedchozí soubor v play listu/ nahrávka )
11. MEDIA(zobrazení seznamu nahraných poƎadƽ)
12. USB (zobrazení multimediálního pƎehrávaēe)
13. Next (další soubor v play listu/ nahrávce)
14. MUTE (ztišení zvuku)
15. EPG (Elektronický programový prƽvodce)
16. AUDIO (zmĢna audio stopy)
17. SUBTITLE (zmĢna/ zapnutí titulkƽ)
18. TV/RADIO (pƎepnutí mezi sledováním TV a poslechem radia)
19. BACK (návrat k pƎedchozímu menu, návrat na poslednĢ
sledovaný kanál)
20. EXIT (ukonēení/ výstup z menu)
21. STOP (zastavení pƎehrávání)
22 CH+/- ( zmĢna kanálu)
23. FAV (zobrazení seznamu oblíbených kanálƽ)
24. REV (rychlý posuv zpĢt)
25. PLAY (pƎehrávání souborƽ, nebo nahraných poƎadƽ)
26. FWD (rychlý posuv v pƎed)
27. PAUSE (pozastavení pƎehrávání/ spušt
Ģní funkce Timeshift)
28.
(interaktivní tlaēítka)
ZAPOJENÍ PěIJÍMAýE
Hlavní
Existuje mnoho rĤzných typĤ TV a jiných zaĜízení, které mĤžete pĜipojit k pĜijímaþi. V této pĜíruþce uvidíte
nČkteré z nejþastČjších zpĤsobĤ, jak pĜipojit vaše zaĜízení.
PĜipojení k TV
HDMI TV
Anténa
HDMI kabel Scart kabel
RF koax
TV
COAXIAL
HDMI
AC 220-240V
~50/60H
Z
RF IN RF OUT
PĜipojení k HIFI systému
Hi-Fi
Coaxial audio kabel
TV
COAXIAL
HDMI
AC 220-240V
~50/60H
Z
RF IN RF OUT
3
ZAýÍNÁME
PrĤvodce prvotním nastavením
P
o prvním zapnutí pĜijímaþe se zobrazí „Úvodní menu“
Welcome
P
omocí šipek na dálkovém ovladaþi vyberte zemi použití, Jazyk OSD menu,
Region
R
ozlišení a pomČr stran obrazu.
Poland
Oznaþte a stisknČte tlaþítko OK pro automatické vyhledání kanálĤ.
Language
English
Display Mode
720p@50
Aspect Mode
4:3LB
OK
Instalace
Stisknutím tlaþítka "MENU" vstupte do hlavního menu.
a.
b. Pomocí tlaþítek Ÿź oznaþte nabídku „Instalace",
stisknČte tlaþítko
൘
pro vstup do instalaþního menu.
c.
d. Pomocí tlaþítek
Ÿź oznaþte požadovanou funkci a
potvrćte tlaþítkem OK.
Manuální ladČní kanálĤ
Pokud znáte parametry pro naladČní jednotlivých kanálĤ, použijte funkci
Manuálního hledání kanálĤ. Vyberte položku "Manuální ladČní" a
stisknČte tlaþítko "OK" pro vstup do pod menu ruþního ladČní.
Vyberte zpĤsob vyhledávání: pásmo, þíslo i frekvenci kanálu a šíĜku pásma.
Na ukazatelích signálu sledujte ukazatel „Kvalita signálu“. Pokud tento ukazatel
zobrazuje kvalitu signálu pomocí tlaþítek Ÿź oznaþte položku Hledat a spusĢte
vyhledávání tlaþítkem OK na dálkovém ovladaþi.
Automatické ladČní kanálĤ
Pokud neznáte parametry k naladČní pĜijímaþe, mĤžete nechat prohledat celé
pásmo pomocí funkce Automatické ladČní.
Vyberte položku "Automatické ladČní" a stisknČte tlaþítko "OK" pro vstup do pod
menu Automatického ladČní. Vyberte, jestli chcete vyhledat všechny kanály,
placené kanály, nebo pouze FTA (neplacené kanály). Pomocí tlaþítek Ÿź
oznaþte položku Hledat a spusĢte vyhledávání tlaþítkem OK na dálkovém ovladaþi.
Po dokonþení vyhledávání pĜijímaþ automaticky uloží všechny nalezené kanály
podle poĜadí v jakém byly nalezeny.
Installation
Channel Scan
Auto Scan
LCN
Channel Scan
Scan Mode
By channel
Scan Band
UHF
Ch No.
CH37(666000KHz)
Frequency
666000KHz
Bandwidth
8MHz
Search
Signal Intensity 81%
Signal Quality 97%
Auto Scan
FTA Only No
Search
LCN
LCN ( Logical Channel Number) – logické þíslování kanálĤ. Tato funkce, pokud ji operátor podporuje,
zajistí automatické seĜazení kanálĤ. V pĜípadČ zmČny v seznamu kanálĤ, tato funkce zajistí automatické
provedení doplnČní, smazání seznamu kanálĤ. Pokud je zapnuta volba LCN je znemožnČno ruþní
tĜídČní a seĜazení kanálĤ.
Pokud chcete ruþnČ seĜadit naladČné kanály vypnČte tuto funkci.
OVLÁDÁNÍ
ZmČna kanálĤ
PĜijímaþ nabízí tĜi zpĤsoby zmČny kanálu – krokování pomocí tlaþítek CH+/CH-, pĜímá volba þísla, volba z menu
Krokování mezi kanály pomocí tlaþítek CH+ a CH-:
Pro pohyb mezi kanály použijte tlaþítka Ÿź na dálkovém ovladaþi .
PĜímá volba þísla pĜedvolby:
Pro pĜímou volbu stisknČte tlaþítko s þíslem pĜedvolby na numerické klávesnici dálkového ovladaþe
VýbČr pomocí zobrazeného seznamu kanálĤ:
PĜi sledování živého vysílání TV stisknČte tlaþítko OK na dálkovém ovladaþi. Na obrazovce bude zobrazena
nabídka naladČných kanálĤ. Pomocí tlaþítek Ÿź na dálkovém ovladaþi oznaþte kanál, který chcete
sledovat a potvrćte volbu tlaþítkem OK.
PĜístup a použití funkce Elektronického Programového PrĤvodce (EPG)
PĜístup do EPG menu se zobrazením všech kanálĤ:
StisknČte tlaþítko "EPG" pro vstup do EPG menu.
Pro pohyb v menu EPG použijte tlaþítka Ÿźa
ൖ൘UG
Oznaþte požadovaný poĜad a G
StisknČte "ZELENÉ" tlaþítko pro pĜidání poĜadu do þasovaþe.
PĜi pĜidání poĜadu do þasovaþe je nutné zvolit, jestli chcete poĜad
pouze sledovat (mód kanál), nebo i nahrávat na USB (mód
rekordér).
StisknČte "ýERVENÉ" tlaþítko pro zobrazení " EPG v þasové linii"
menu.
EPG 01:39 xx/xx/x xxx
0010 BBC FOUR
Auntie's War on Smut
01:30-02-30
3/19 01:30 02:00 02:30 03:00
0008 Interecon
0009 BBC Parl
The Recor Commons Questions
The Recor
0010
BBC FO
Auntie's War on Smut Proms on FOUR
0011 CBeebie
This is CBeebies!
0012 301
Time
Timer
 Loading...