

BENQ-SIEMENS E71 User Manual
E71

0
Table of Contents
Phone overview .......................................... 1
Safety precautions ..................................... 2
Getting started ........................................... 4
Inserting battery/SIM Card/
MicroSD card .............................................. 4
Charging the battery ..................................5
Entering the PIN ........................................6
Emergency number (SOS) ........................6
General instructions .................................. 6
PIN, PUK, Phonecode ............................... 8
Text input with T9 ..................................... 9
Calling ...................................................... 10
Last number redial ...................................10
Call options ...............................................10
Direct call ..................................................10
Contacts ................................................... 11
All contacts ................................................11
Groups .......................................................11
Distribution list ........................................11
SIM .............................................................11
Online status .............................................11
Filter ...........................................................11
General functions .....................................11
Call records .............................................. 12
Durat./charges ..........................................12
Camera ..................................................... 12
Take a picture ...........................................12
Record video .............................................13
SMS .......................................................... 13
MMS ......................................................... 13
E-mail ....................................................... 14
Inst. messaging (IMSG) ........................... 15
WAP push ................................................ 15
Voice mailbox .......................................... 15
Internet .................................................... 15
Settings .................................................... 16
Profiles .......................................................16
Ringtones ...................................................16
Themes .......................................................16
Display .......................................................16
Vibration ...................................................16
Connectivity ..............................................16
Shortcuts ....................................................17
Divert .........................................................17
Call settings ...............................................17
Phone settings ...........................................17
Clock ..........................................................17
Security ......................................................17
Network .....................................................17
Accessories ................................................17
Organiser ................................................. 18
Calendar ....................................................18
Alarm clock ...............................................18
Appointments ...........................................18
Tasks ...........................................................18
Notes ..........................................................18
Time zones ................................................18
Remote synchronisation ..........................18
Extras ....................................................... 18
SIM services (optional) ............................18
Sound recorder .........................................18
My applications ........................................19
Calculator ..................................................19
Unit converter ...........................................19
Online status .............................................19
Stopwatch ..................................................19
Radio ........................................................ 19
Media player ............................................ 20
My stuff .................................................... 21
Mobile Phone Manager ........................... 22
Customer Care ......................................... 22
Care and maintenance ............................. 23
Product data ............................................ 24
SAR .......................................................... 25
Guarantee certificate (UK) ...................... 25
Guarantee certificate (IRL) ..................... 26
Licence Agreement .................................. 27
This is a summarised version of the User Guide. The complete version
can be found on the Internet at this address:
www.BenQ-Siemens.com/e71
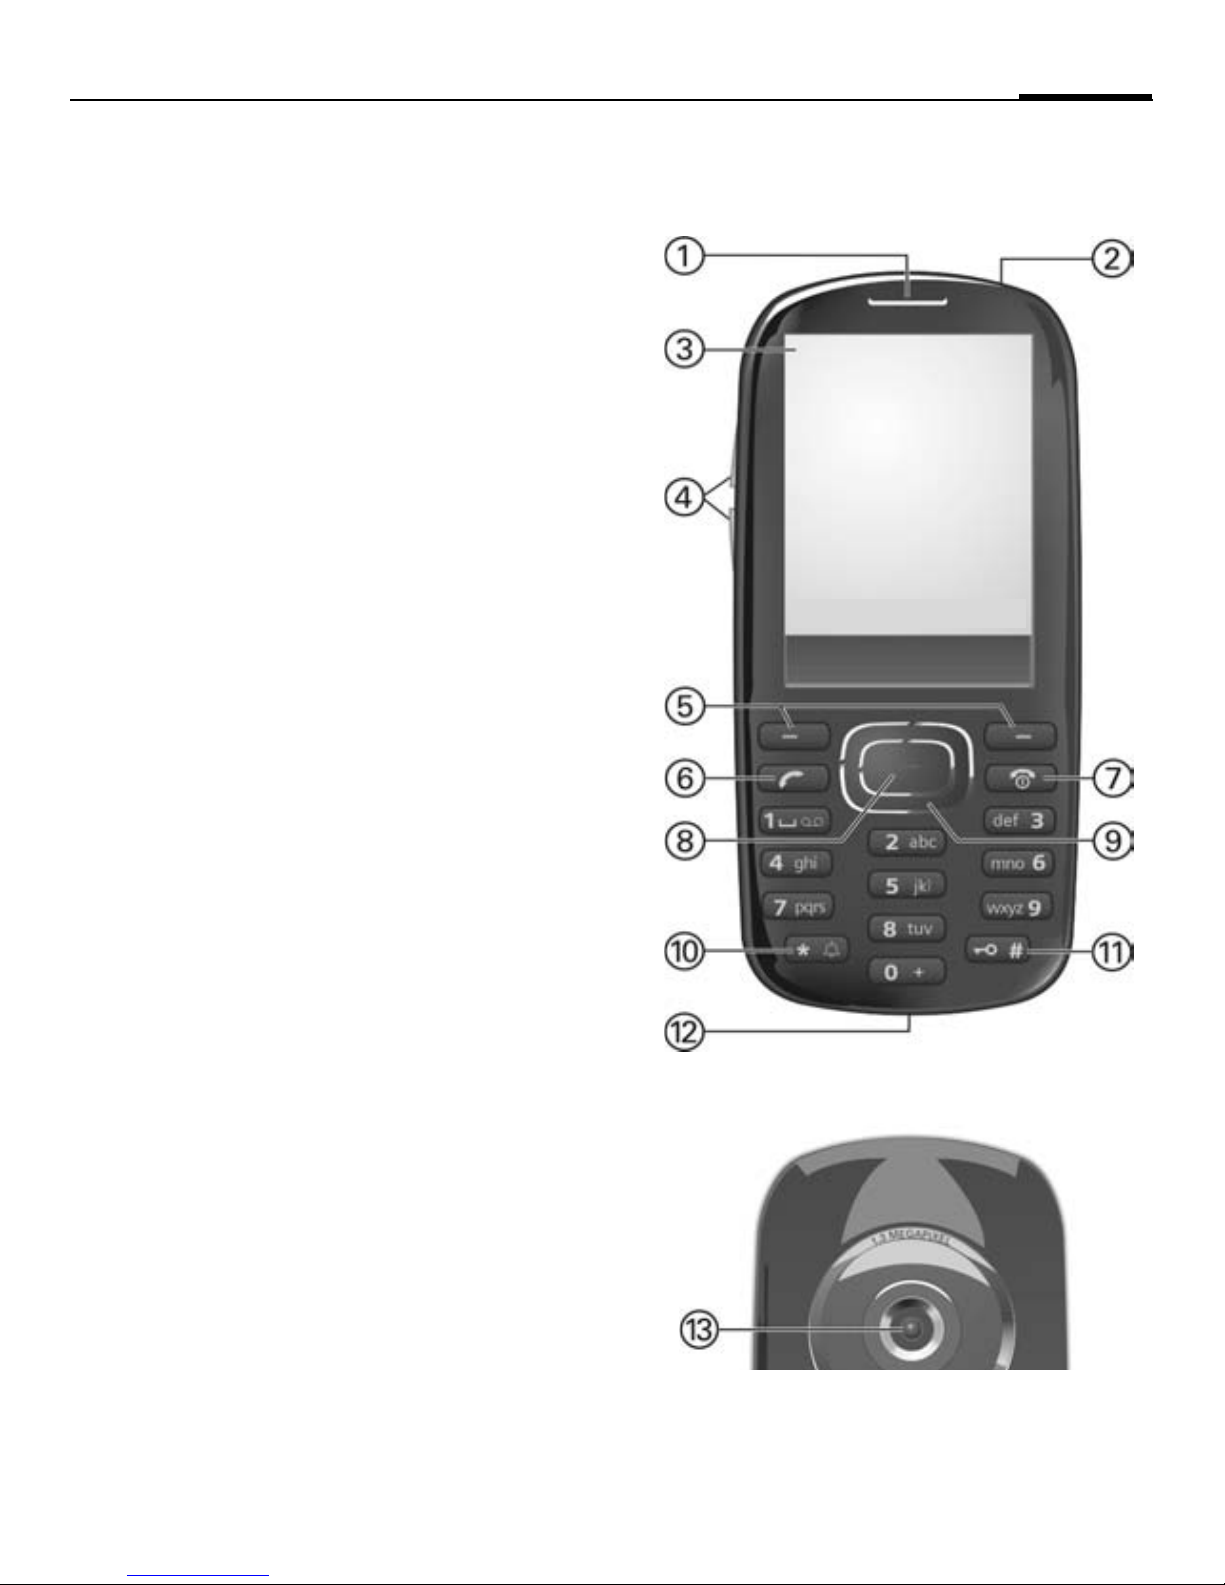
Phone overview
Loudspeaker
1
Standby indicator LED
2
LED indicates that the phone is still on, when
phone display is switched off.
Status indicator line
3
[ / \ Volume control
4
Softkeys
5
The current functions of these keys are
shown as
A Call key
6
Dial displayed/highlighted phone
numbers/names, accepts calls.
§text§/symbols (e.g.
p
Phone overview
1
á ß
28.09.2006 10:10
Service provider
).
í
Inbox
Menu
B On/Off/End key
7
• Switched off: press and hold to switch on.
• In standby mode: press and hold to
switch off. Press briefly: switch-off
menu.
•During a conversation or in an application: press briefly to end and return to
standby mode.
• In menus: return to standby mode.
Centre key
8
Press the centre key to open the main menu
and to start an application or function (p. 7).
Navigation keys (p. 7)
9
*
:
• Press and hold in standby mode:
switch all acoustic signals on/off
(except alarm clock).
• Press and hold during incoming call:
switch off ringtone for this call only.
Ringtone
#
*
• Press and hold in standby mode:
Plug socket
"
Camera lens
§
Key lock
activate/deactivate key lock.
2
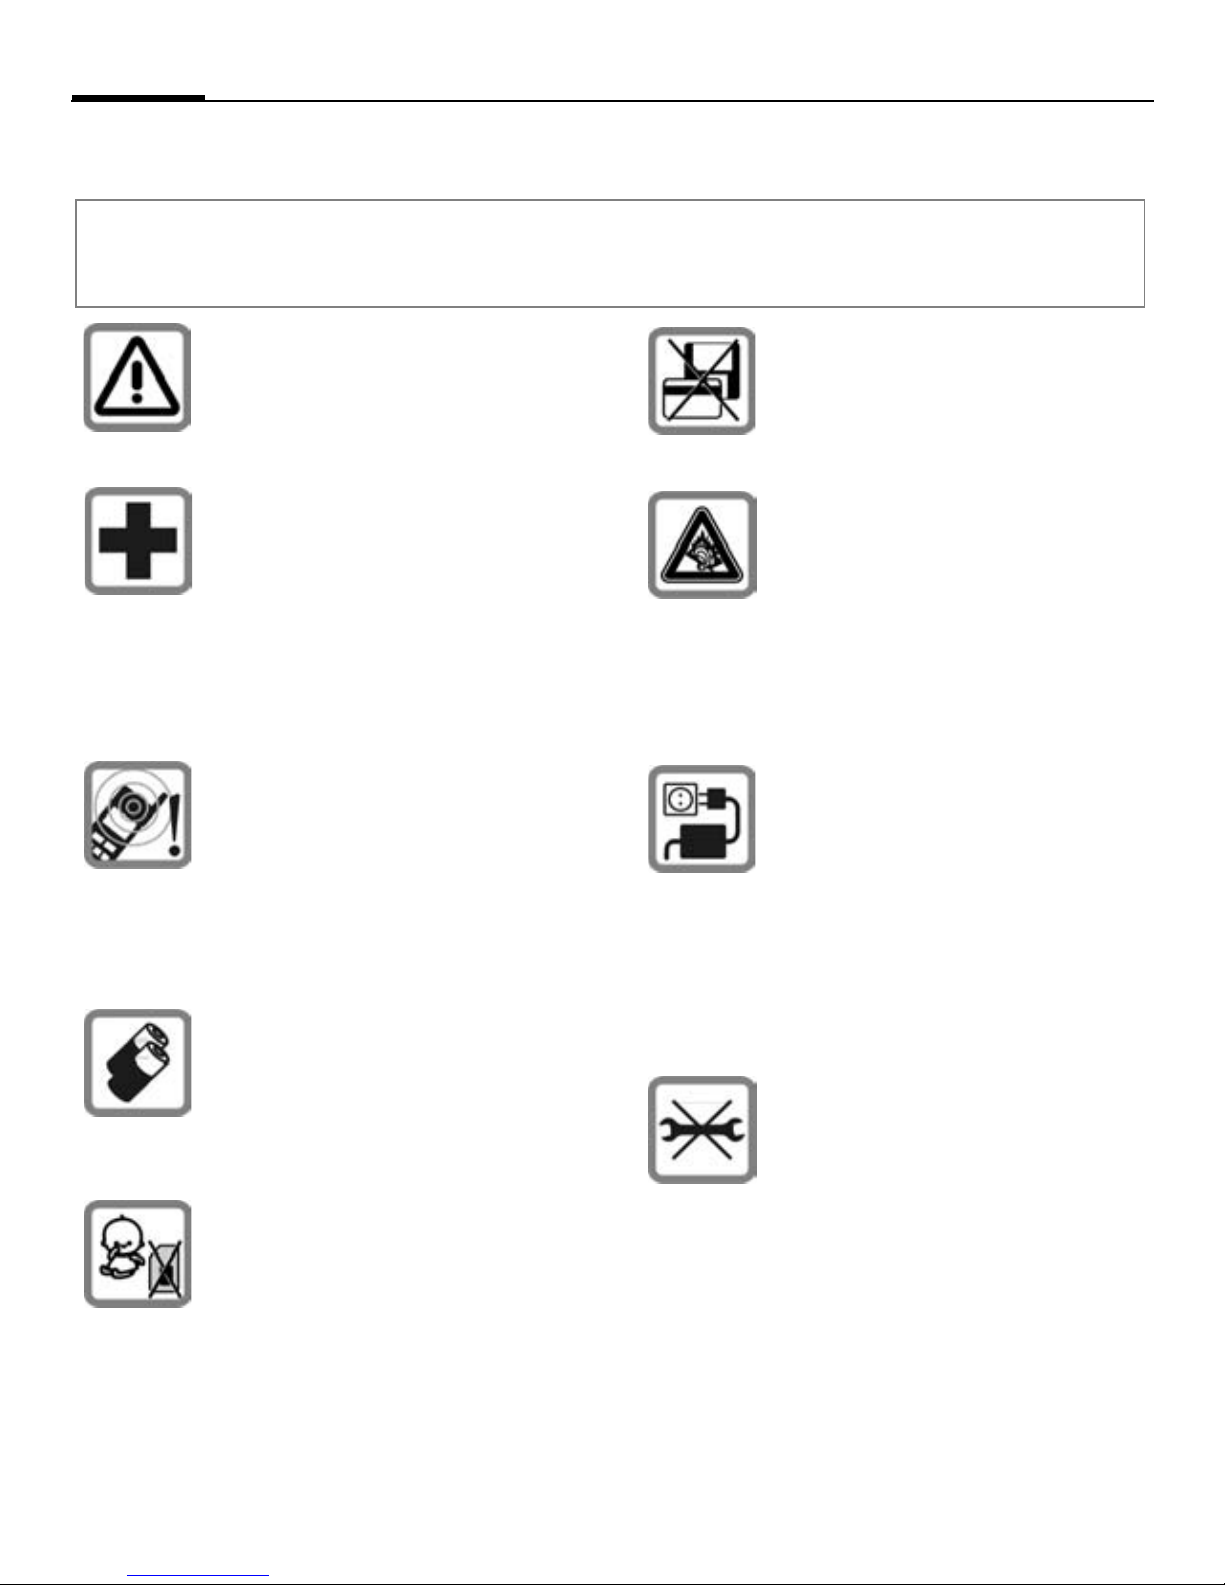
Safety precautions
Safety precautions
Information for parents
Please read the operating instructions and safety precautions carefully before use.
Explain the content and the hazards associated with using the phone to your children.
Remember to comply with legal requirements and local restrictions
when using the phone. For example
in aeroplanes, petrol stations, hospitals or whilst driving.
Mobile phones can interfere with the
functioning of medical devices such
as hearing aids or pacemakers. Keep
a distance of at least 20cm/ 9 inches
between the phone and pacemaker.
Whilst using the mobile phone, hold
it to the ear furthest away from the
pacemaker. For more information
consult your doctor.
Tones, music and handsfree talking
are reproduced through the loudspeaker. Do not hold the phone to
your ear when it rings or when you
have switched on the handsfree
function. Otherwise you risk serious permanent damage to your
hearing.
Only use original batteries
(100 % mercury-free) and –
charging devices. Otherwise you
risk serious damage to health and
property. For instance, the battery
may explode.
Small parts such as the SIM Card,
dust cap, lens ring and lens cap as
well as the Micro SD Card can be
dismantled and swallowed by small
children. The phone must therefore
be stored out of the reach of small
children.
Do not place the phone near to electromagnetic data carriers such as
credit cards and floppy disks. Information stored on them could be
lost.
Permanent hearing loss may occur
if you use ear- or headphones at
high volume.You can adapt over
time to a higher volume, which may
sound normal but can be damaging
to your hearing. Set your volume to
a safe level. If you experience ringing in your ears, reduce the volume
or discontinue use of your system.
The mains voltage specified on the
power supply unit (V) must not be
exceeded. Otherwise the charging
device may be destroyed.
The power supply must be plugged
into an easily accessible AC mains
power socket when charging the
battery. The only way to turn off the
charging device after charging the
battery is to unplug it.
You may only open the phone to replace the battery (100 % mercuryfree) or SIM Card and Micro SD
Card. You must not open the battery under any circumstances. All
other changes to this device are
strictly prohibited and will invalidate the guarantee.
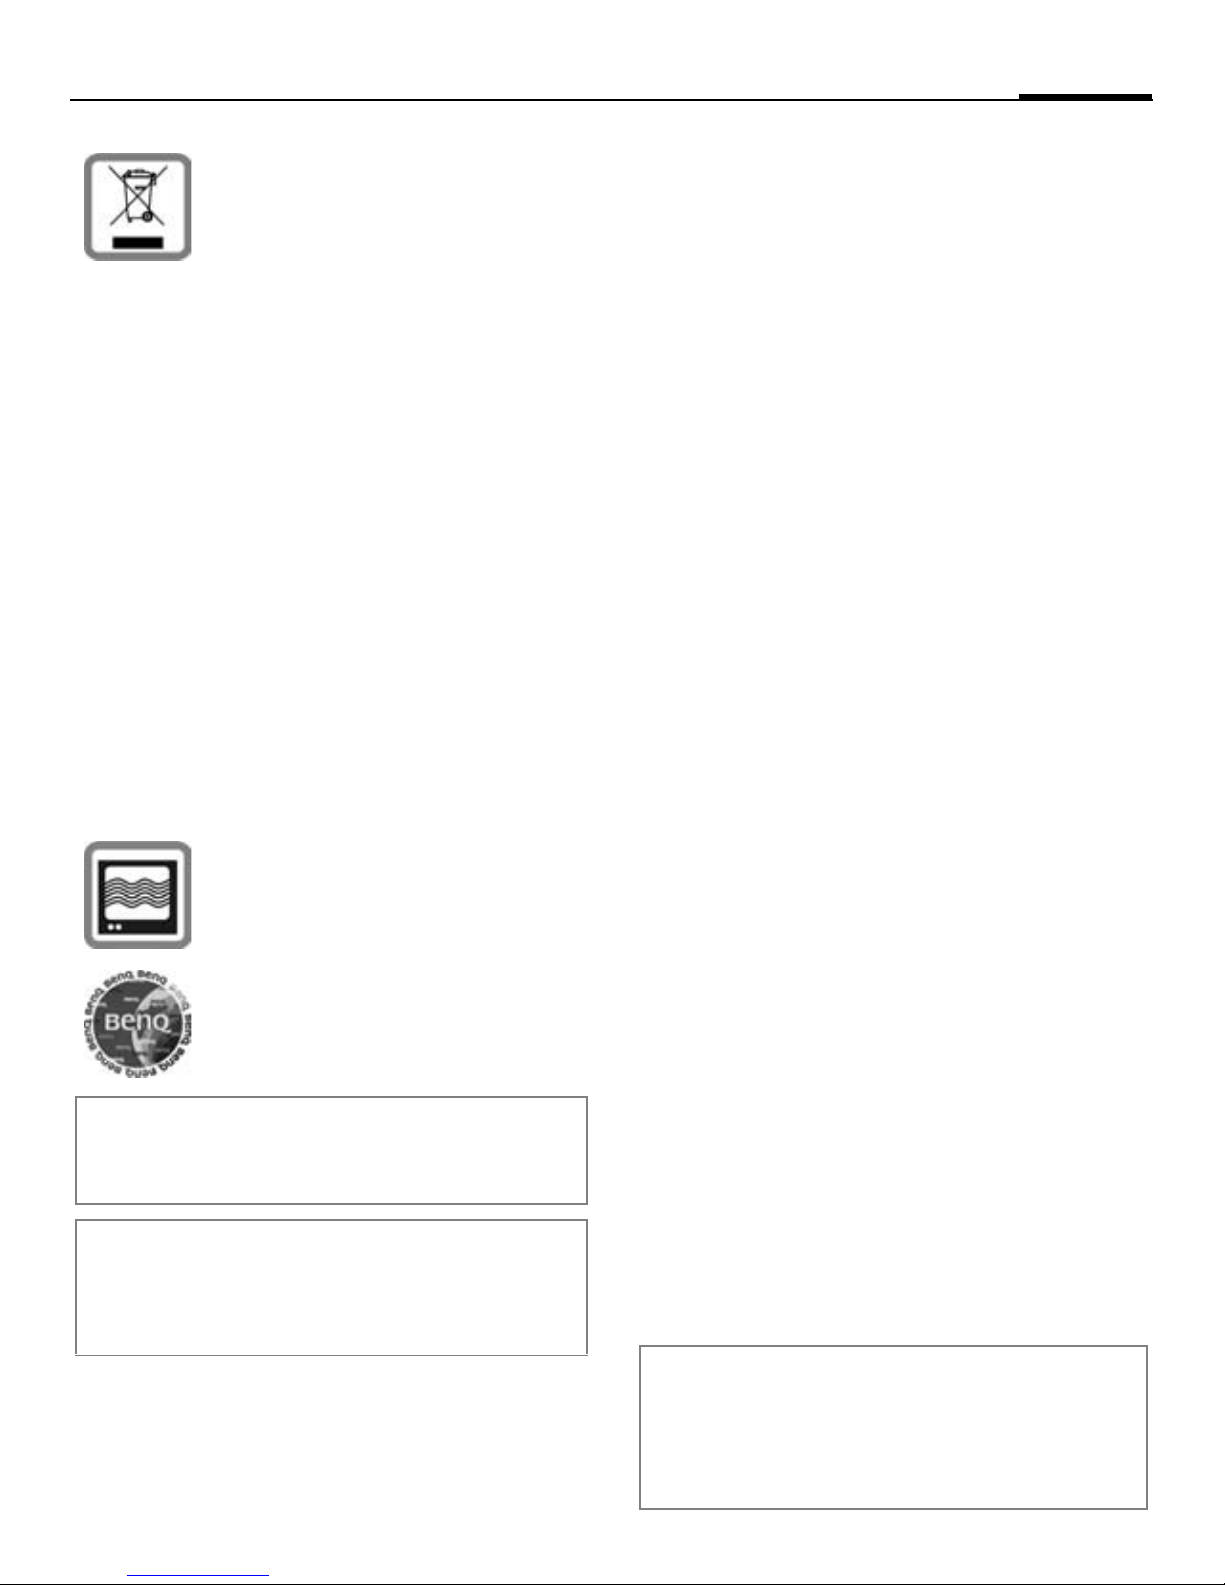
Safety precautions
3
All electrical and electronic products should be disposed of separately from the municipal waste stream
via designated collection facilities
appointed by the government or the
local authorities.
This crossed-out wheelie bin symbol on the product means the product is covered by the European
Directive 2002/96/EC.
The correct disposal and separate
collection of your old appliance will
help prevent potential negative consequences for the environment and
human health. It is a precondition
for re-use and recycling of used
electrical and electronic equipment.
For more detailed information
about disposal of your old appliance, please contact your local
council, waste disposal service or
the shop where you purchased the
product.
Bluetooth
Your phone has a Bluetooth interface. This makes
it possible to establish a wireless connection with
your phone and a headset, a Car Kit or other
Bluetooth-enabled devices.
In order to establish a secure link between the devices and to prevent a third party from having access to your phone, you should observe the
following points:
• The initial connection between two devices,
what is called "pairing", should take place in familiar surroundings.
• Both devices must be able to identify themselves one time by using a password/PIN. To
ensure sufficient security, you should choose a
16-digit number combination for a password
that would be difficult to guess (if a PIN has
not been assigned).
• An automatic connection acceptance ("connection without confirmation") should only be
used in exceptional cases.
• In general, only trustworthy devices should be
linked in order to minimize security risks.
®
The phone may cause interference
in the vicinity of TV sets, radios and
PCs.
Use only original accessories. This
will avoid potential risks to health
or property and ensure compliance
with all relevant regulations.
Improper use will invalidate the guarantee!
These safety instructions also apply to original
accessories.
As mobile devices offer a range of functions,
they can be used in positions other than the
head, such as on the body. In this case,
separation distance of 1.5 cm is required.
• You should restrict the "visibility" of your
phone if possible. This will make it much more
difficult for unknown devices to establish a
connection with your phone. To do this, in the
Bluetooth menu, set the option Visible t.
others from Always visible to Not visible.
• The name of your phone is transmitted in
a Bluetooth connection. The factory default is
the "Bluetooth ID". The first time Bluetooth is
activated, or later in the Bluetooth menu, you
can change this name (My BT info).
• If Bluetooth is not needed, this function should
be deactivated.
Before using Bluetooth accessories, or a mobile
phone inside a vehicle, check the vehicle user
guide for any limitations on the use of these
products.
The Bluetooth® word mark and logos are
owned by Bluetooth SIG, Inc. and any use of
such marks by BenQ Corp. is under licence.
Other trademarks and trade names are those of
their respective owners.
4
Getting started
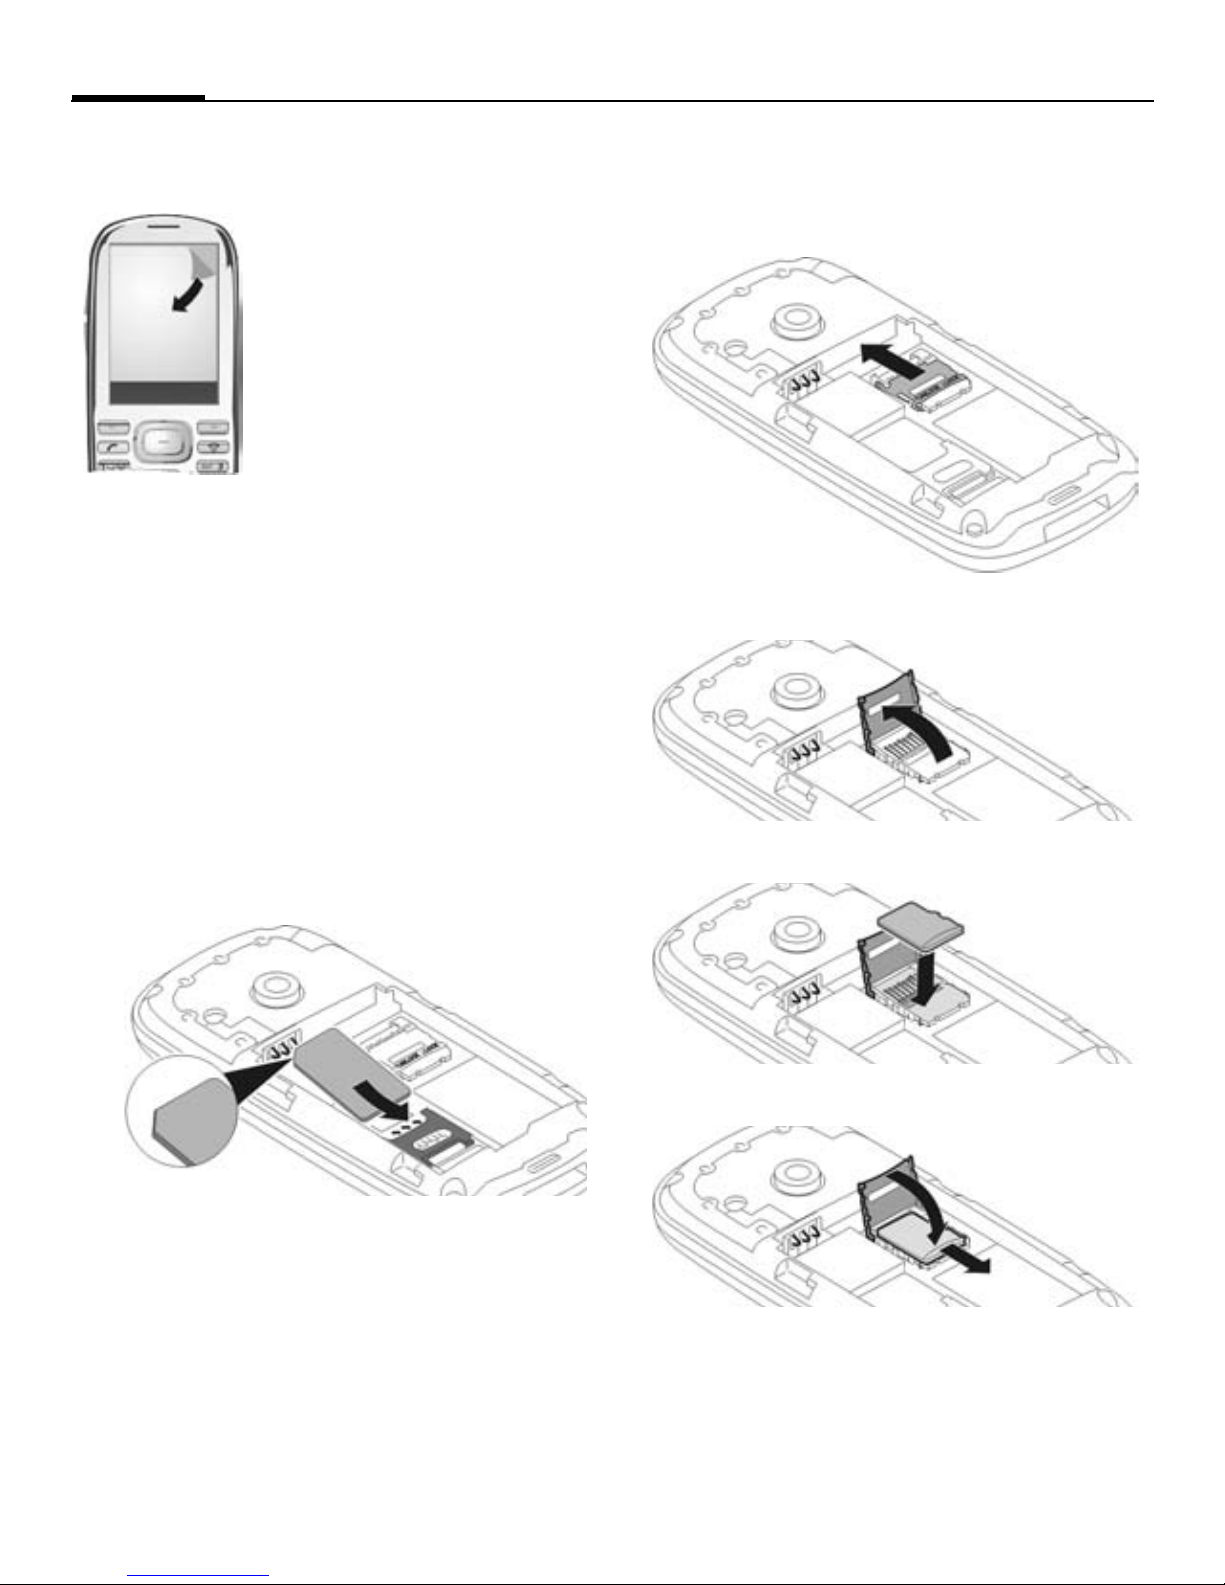
Getting started
Your phone's display is covered with a protective film.
Remove this before using the
phone.
In rare cases static discharge
can cause temporary discolouration in the display.
However, this will disappear
within approx. 10 minutes.
Inserting battery/SIM Card/
MicroSD card
The service provider supplies you with a SIM
Card on which all the important data for your
line is stored. If the SIM Card has been delivered in credit-card size, snap the smaller segment out and remove any rough edges. Please
follow the instructions in the diagrams when
inserting SIM Card, MicroSD card (optional)
and battery.
Insert MicroSD card (optional)
1
2
Insert SIM Card
Ensure that the cut-off corner is in the correct
position.
1
3
4
5
Getting started
5
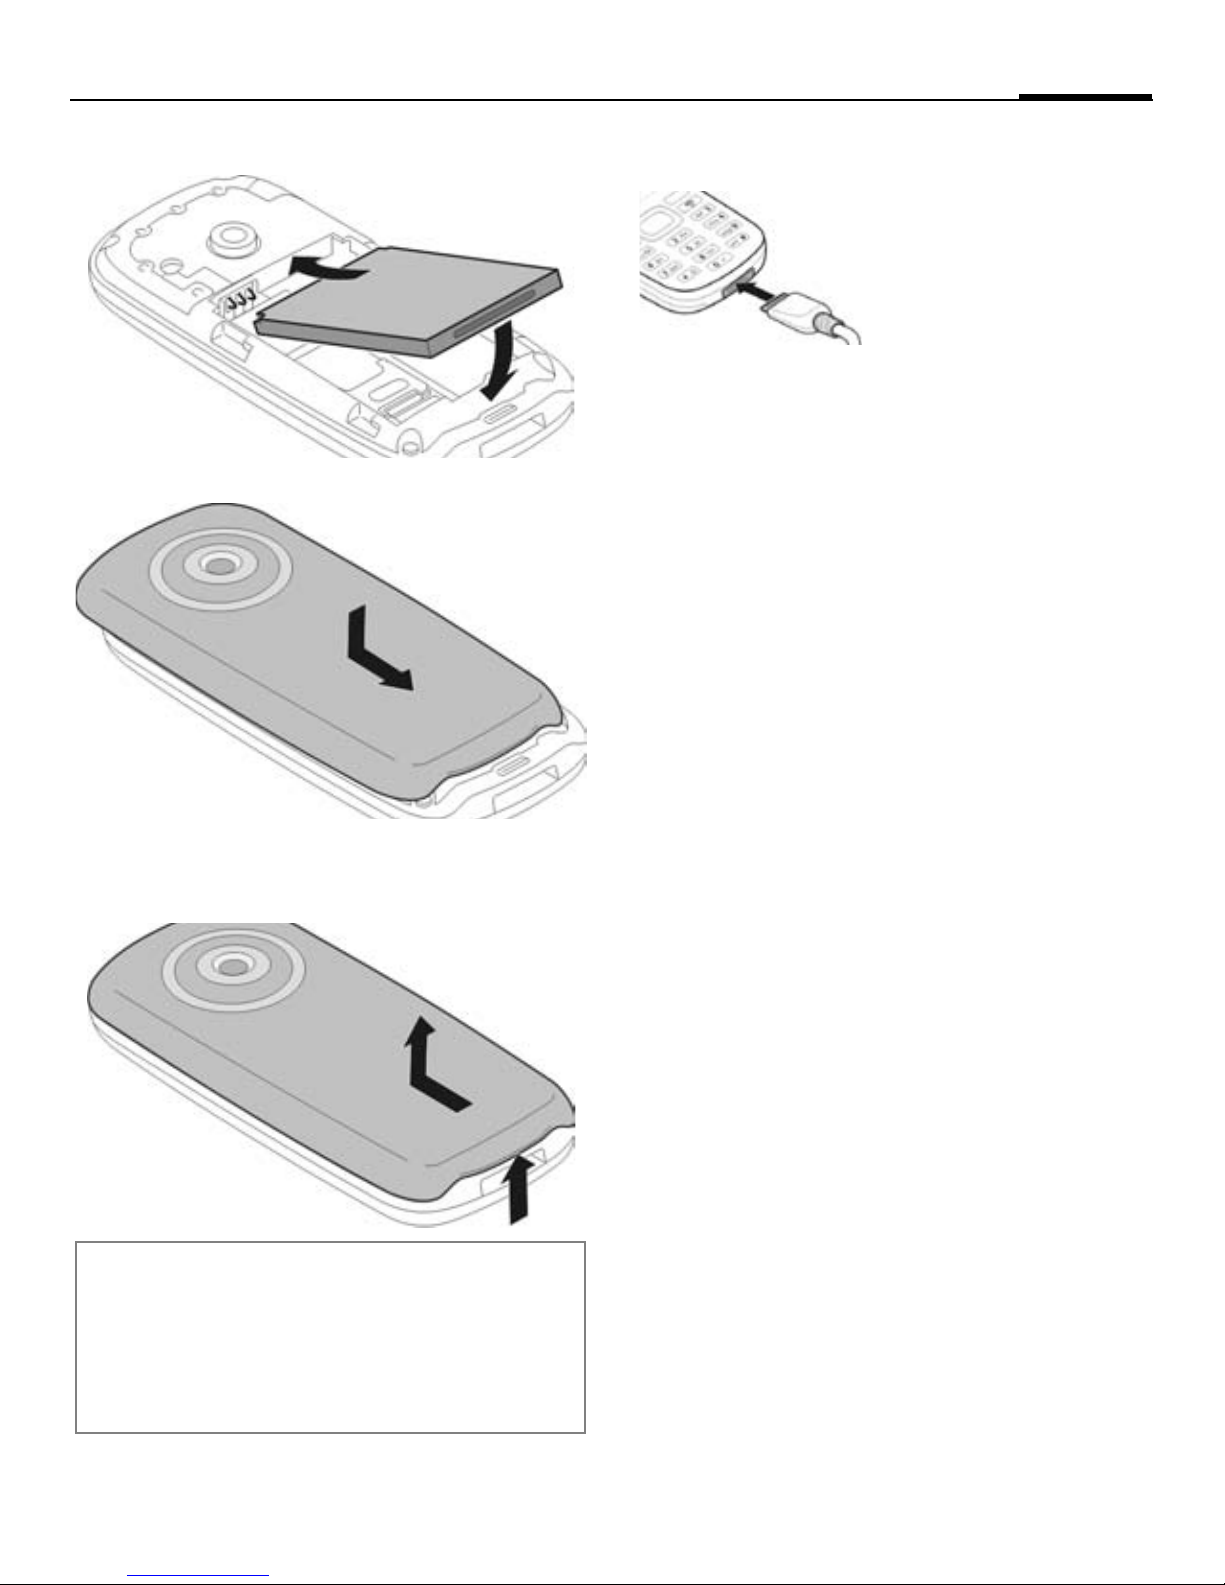
Insert battery
Close battery cover
1
1
2
2
Charging the battery
The battery is not fully
charged when delivered. Plug the charger
cable into the side of the
phone, plug the power
supply unit into a mains
power socket and charge for at least two
hours (for charging via USB, see p. 17). Do
not interrupt the charging procedure
prematurely.
à
Charging time
An empty battery is fully charged after about
2 hours. Charging is only possible within a
temperature range of +5 °C to +45 °C. If the
temperature rises/falls 5 °C above/below this,
the charge symbol flashes a warning. The
mains voltage specified on the power supply
unit must not be exceeded.
Display when charging is in
progress.
Remove battery cover
To remove the battery cover, lift it up
slide it off the phone
2
.
1
and
2
1
Additional information
Please switch off your phone before removing
the battery! Do not remove the SIM Card as long
as the battery is inserted. If the battery is removed for longer than 30 seconds, the clock
must be reset.
Operating time
The operating time depends upon the respective network conditions and conditions of
use. Extreme temperatures considerably reduce the phone’s standby time. You should
therefore avoid the leaving the phone in the
sun or on a radiator (talktime, standby time
see p. 24).
Charge icon not visible
If the battery has been discharged fully, the
charge icon is not immediately visible when
the power supply is plugged in. It will appear
after up to two hours. In this case the battery
is fully charged after 3 to 4 hours.
Only use the plug-in power supply unit
included in delivery!
Display during operation
Charge level display during operation
(empty–full):
Ý Þ ß
6
General instructions
A beep sounds when the battery is nearly
empty. The charge level of the battery is only
displayed correctly after an uninterrupted
charging/discharging cycle. You should
therefore not remove the battery
unnecessarily and where possible not
terminate the charging process before
completion.
The power supply unit heats up when used for
long periods. This is normal and not dangerous.
Switching on/off
B
Press and hold the On/Off/End key.
Press briefly to open the "Switch off
menu".
Entering the PIN
The SIM Card can be protected with
a 4-to 8-digit PIN.
J
§OK§ Press the left softkey to confirm.
Set the clock once after getting started (p. 17)
Enter the PIN using the number
keys. The characters
the display to ensure nobody can
read your PIN. Correct with
Logging on to the network will take
a few seconds.
appear in
****
].
Emergency number (SOS)
Only to be used in real emergencies!
By pressing the left softkey
make an emergency call on any network
without a SIM Card and without entering a
PIN (not available in all countries).
§SOS§ you can
General instructions
User guide
The following symbols are used to explain
operation:
§Menu§
=
Standard functions which appear repeatedly
in the options menu are not listed in this
short user guide. The complete description
can be found on the Internet at this address:
www.BenQ-Siemens.com/e71
Main menu
í
§Options§
Search
My menu
Shortcuts
Illumination
Displays a softkey function.
Function dependent on the service
provider.
Call up from standby mode using
the centre key.
Open menu.
List output of the menu. You can
use the search option to directly
access any menu item just by
browsing for the keyword.
Create your own menu
with frequently used functions,
phone numbers or Internet pages. The list of 20 entries is preset.
You can, however, change it as
you wish.
You can assign a function to the
right softkey, navigation keys
and number keys (p. 17).
Set display light brighter/darker.
General instructions
7
Centre key
The symbol in the centre of the lower line of
the display shows the current function when
the centre key is pressed.
í
ì
ñ
ð
ü
÷
ú
ù
Main menu
OK, confirm
Change
Call
Edit
Insert
Options
Camera
ý
ö
û
ò
ô
ó
õ
ø
Send
View
Save
Play
Record
Pause
Stop
Zoom
Mark mode
For some applications (e.g. deleting several
SMS messages) you can mark several entries
on the tab in order to perform multiple functions at once.
§Options§ Open menu.
Mark Activate mark mode.
I
ñ
Additional mark mode functions:
§Options§ Open menu.
Mark all
Unmark all
Delete marked
Select entry/entries.
Mark or unmark.
Mark all entries.
Unmark all marked entries.
All marked entries are deleted.
Navigation keys
In standby mode/during conversation:
H
G
Open contacts.
Start Profiles.
Open inbox.
E
Start the camera.
D
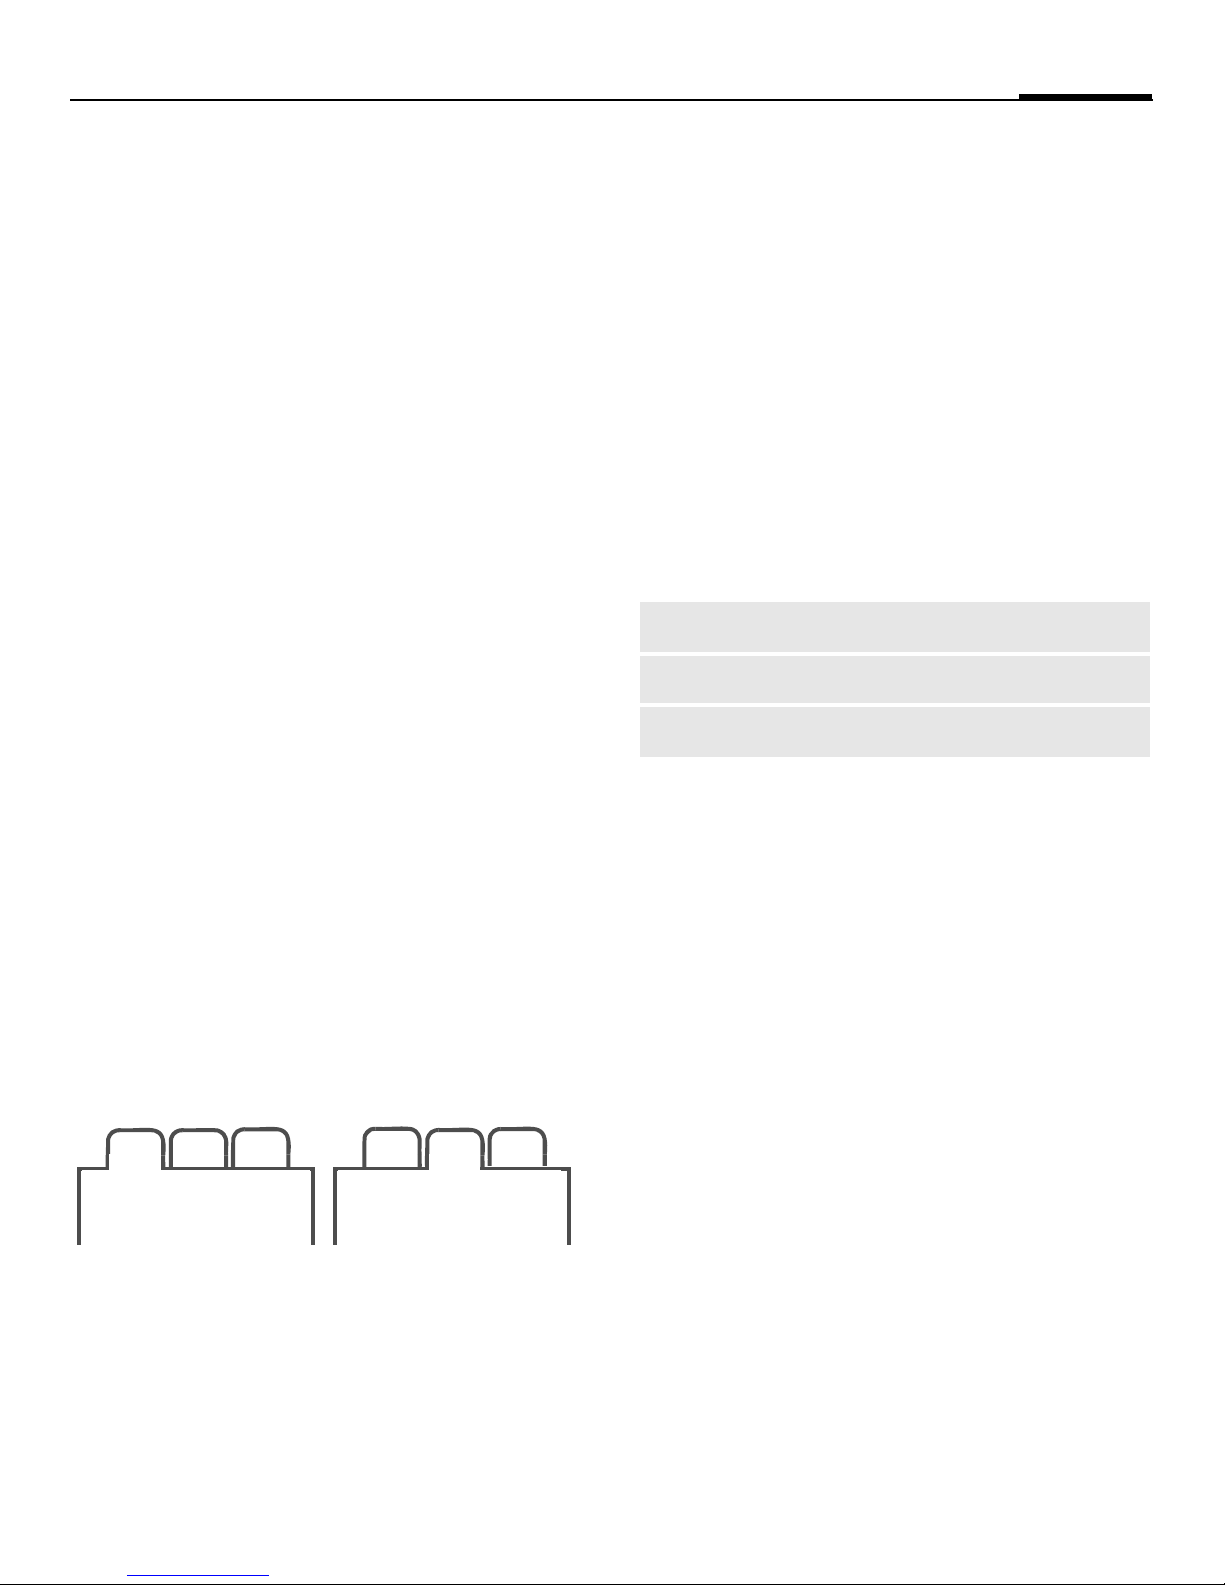
Tabs
The handy tabs offer you fast access to
information and functions.
23
1
F
If an input field is activated on a tab, it is only
possible to navigate within the field using the
navigation key.
Switch between the individual tabs.
2
31
Printing via USB
First select Print, then Via USB and then connect the mobile phone to the printer with the
USB cable.
Connection with PCs
You can connect your phone to a PC using
Bluetooth or a data cable (accessories). The
PC program MPM (Mobile Phone Manager)
enables you to store data on your PC and, for
example, synchronise the contacts with
Outlook
download it from the Internet at:
www.BenQ-Siemens.com/e71
and Lotus Notes™. You can
®
Digital Rights Mgmt. (DRM)
Remember that your phone has Digital Rights
Management. The use of downloaded pictures, sounds or applications can be restricted
by the suppliers, e.g. copy protection, use for a
limited period of time only, number of times
it can be used etc.
8
PIN, PUK, Phonecode
PIN, PUK, Phonecode
T
í
¢
¢PIN codes¢Select function.
The phone and SIM Card are protected
against misuse by several security codes.
Keep these security codes in a safe
place where you can access them again
if required.
PIN codes
PIN
PIN2
PUK
PUK2
Phonecode
¢Security
Personal Identification Number. Provided by service provider. Protects
your SIM Card. If PIN is entered incorrectly three times, SIM Card is
barred. Unbar with PUK.
Provided by service provider to
access additional functions on special
SIM Cards.
Master PIN. Provided by service provider. Used to unlock SIM Cards after
PIN is entered incorrectly more than
three times. If PUK has been lost,
please contact your service provider.
Defined by you (4-8 digits) the first
time you call up a phone-code protected function (e.g. Direct call,
p. 10). If phone code is entered incorrectly three times, access to the phone
code and the functions that use it is
denied. For your reference please
note your phone code here:
________________
PIN control
The PIN is usually requested each time the
phone is switched on. You can deactivate this
feature but you risk unauthorised use of the
phone. If PIN use is deactivated confirmation
is required to switch on the phone. This prevents the phone from being switched on accidentally, e.g. when carried in a pocket or
whilst you are on an aircraft.
ñ
ì
Edit, enter PIN.
Confirm entry.
Change PIN/Change PIN2
You can change the PIN to any 4- to 8-digit
number you find easier to remember.
ñ
ì
ì
ì
Edit, enter current PIN.
Confirm, enter new PIN.
Confirm, repeat new PIN.
Confirm.
Chg.phonecode
You define the phone code (4-8 digit number)
the first time you call up a phone-code protected function (e.g. Direct call, p. 17). It is
then valid for all phone-code protected
functions.
If the phone code is entered incorrectly three
times, access to the phone code and the functions that use it is denied. If this happens
please contact the Service Centre (see p. 22).
Clearing SIM Card barrings
If the PIN is entered incorrectly three times,
the SIM Card is barred. Enter the PUK
(MASTER PIN) provided by your service
provider with the SIM Card in accordance
with the instructions. If the PUK (MASTER
PIN) has been lost, please contact your
service provider.
 Loading...