

Page 1

User’s manual
1
LCDTV User manual
Model: Q150
Table of Contents
iii
Page 2

BENQ Corporation
2
Table of Contents
INTRODUCTION.............................................................................5
Features and Benefits
.................................................................................................5
IMPORTANT SAFETY INST RUCTIONS ........................................6
SAFETY TIPS
WARNING
CAUTION
...................................................................................................................10
...........................................................................................................................11
.............................................................................................................................11
SUPPLIED ACCESSORIES .........................................................13
PREPARATION.............................................................................14
A. Power Connection
..................................................................................................14
B. Antenna Connection (USA NTSC system)
............................................14
FRONT AND REAR CONTROL OPTIONS...................................16
C. How to connect the AV Input Terminals
D. How to connect the PC Input Terminals
...................................................20
..................................................21
USING THE BASE........................................................................22
REMOTE CONTROL ....................................................................23
Using the Remote Control
.......................................................................................24
OPERATION: Basic Operation................................ ....................26
Basic Operation
...............................................................................................................26
Turning On/Off and Standby...........................................................................................26
Switching TV/VIDEO/PC [PC/AV/Y Pb Pr/Y Cb Cr/TV] Modes.................................26
Safety Precaution
Page 3

User’s manual
3
Sound Volume Adjustment..............................................................................................27
Changing the Channels...................................................................................................27
How to use the OSD menu.............................................................................................28
OPERATION: In PC Mode ...........................................................29
Main Menu in PC mode ...................................................................................................29
Picture Adjustments .........................................................................................................29
Advanced Picture Adjustments......................................................................................30
Sound Adjustment in OSD..............................................................................................31
Selecting the Utility ...........................................................................................................31
Using Remote Control to Adjusting the Utility Settings..............................................32
Auto Function .....................................................................................................................33
OPERATION: In AV Mode................................ ............................34
Main Menu in AV mode....................................................................................................34
Picture Adjustments .........................................................................................................34
Using Remote Control to Adjusting the Aspect Ratio Settings..................................35
Advance Picture Adjustments.........................................................................................35
Using Remote Control to Adjusting the Aspect Ratio Settings..................................36
Aspect Controls ................................................................................................................36
Sound Adjustment in OSD..............................................................................................36
Please refer to the sound adjustment section in PC Mode........................................................36
Selecting the Utility ...........................................................................................................36
Using Remote Control for Convenient Functions........................................................37
Freeze ................................................................................................................................37
Auto Function .....................................................................................................................37
How to Use Hot Key Function for Adjustment
...........................................38
OPERATION: In TV Mode................................ ............................39
Main Menu in TV Mode ...................................................................................................39
Selecting TV Options.......................................................................................................39
Setting Favorite Channel.................................................................................................40
Using Remote Control to Adjusting TV Options..........................................................41
TV system with Closed Caption and V-chip (USA only)
Set Up Closed Caption....................................................................................................42
Set Up CLOSE D CAPTION............................................................................................42
Set Up Parental Control (V-CHIP) .................................................................................43
iii
.....................42
Table of Contents
Page 4

BENQ Corporation
4
TROUBLESHOOTING..................................................................47
SPECIFICATIONS ........................................................................49
FRONT ACRYLIC SHEET CLEANING Error! Bookmark not defined.
SUPPORTED OPERATING MODES................................ ............50
DIMENSIONAL DRAWINGS .........................................................51
FCC STATEMENT.....................................................................52
FCC Notice
LCD TV Q150: A CLASS B digital device.....................................................................52
.........................................................................................................................52
Safety Precaution
Page 5

User’s manual
INTRODUCTION
Congratulations on your purchase of the B enQ LCD TV Q150 . Your Q150 will provide you with many years
of enjoyment no other LCD TV can match. It is compatible with today’s current NTSC, PAL and SECAM
systems, as well as tomorrow’s DTV standards. This TV is extremely easy to use and features high
performance picture quality. The Q150 is extremely versatile; it can be mounted on a wall or table stand, and
it can be easily car ry to use in any environment.
This manual will explain how to use your LCD TV Q150, as well as its features, benefits and other important
information. Please be sure to read this manual before installing or operating your LCD TV, especially the
safety pre cautions!
Features and Benefits
Your LCD TV Q150 has many useful features, including:
?? 1024 x 768 native resolution
?? 450 nit brightness
?? 500:1 contrast ratio
?? Accepts all DTV formats (via outboard tuner), including 1080i, 720p, 480p
?? Easy-to-use on-screen menus
?? Dynamic Cinema Scanning
?? Hot keys as follows:
1. Freeze
2. MTS
3. Sleep Timer
4. Back Light Adjustment
5. Auto Calibration
6. Aspect Ratio Adjustment
7. Graphic OSD
Introduction
1
Page 6
BENQ Corporation
6
But IMPROPER USE CAN RESULT IN POTENTIAL ELECTRICAL SHOCK OR FIRE
lease observe the following instructions when installing,
product. To ensure your safety and prolong the service life of your LCD TV
safe place for future
Do not use this
for example, near a
bathtub, washbowl, kitchen sink, or laundry tub,
basement, or near a swimming pool,
Do not use immediately after moving from a low
,
as this causes condensation, which may result
IMPORTANT SAFETY INSTRUCTIONS
Electrical energy can perform many useful functions, but it can also cause personal injuries and property
damage if improperly handled. This product has been engineered and manufactured with the highest
priority on safety.
HAZARD. In order to prevent potential danger, p
operating and cleaning the
product, please read the following precautions carefully before using the product.
1.Read instructions —All operating instructions must be read and understood before the product is
operated.
2.Retain instructions—These safety and operating instructions must be kept in a
reference.
3.Observe warnings—All warnings on the product and in the instructions must be observed closely.
4.Follow instructions—All operating instructions must be followed.
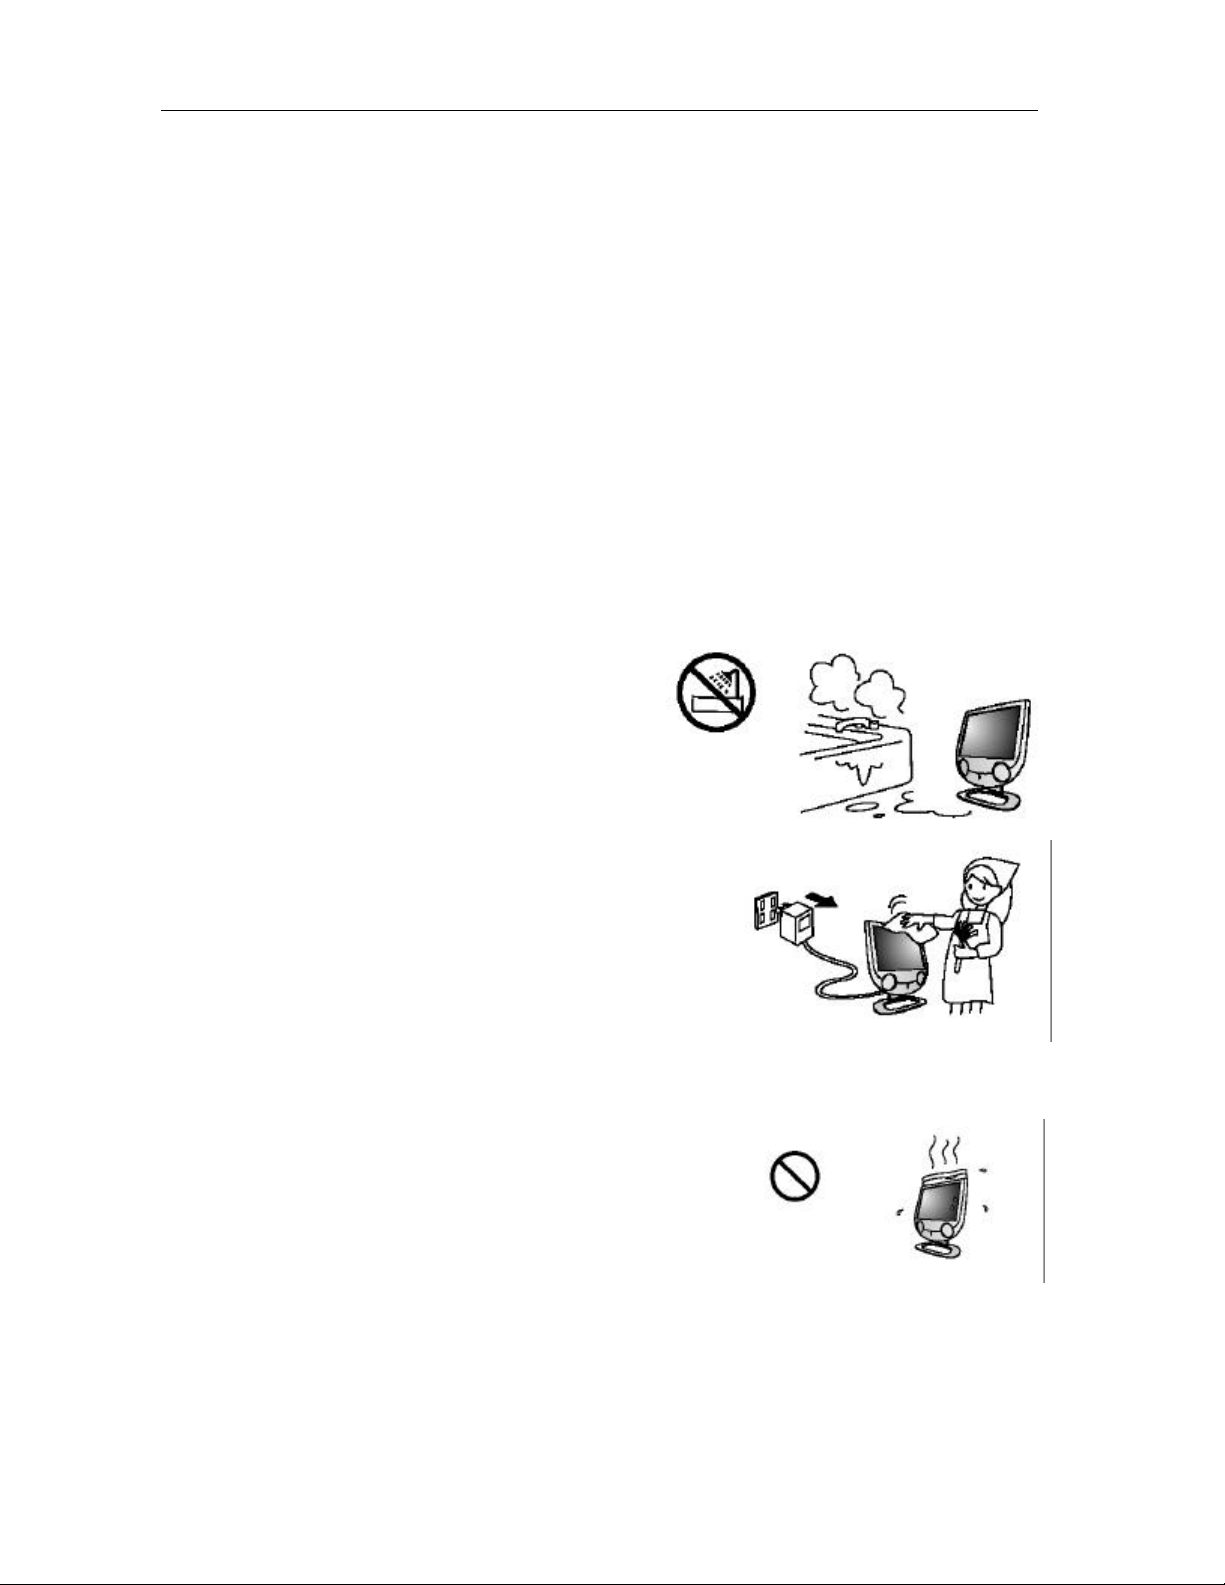
5.Water and moisture—
product near water in a wet
and the like.
temperature to high temperature environment
in fire, electric shock, or other hazards.
6.Cleaning— Unplug this product from the wall
outlet before cleaning. Do not use liquid
cleaners or aerosol cleaners. Use a damp cloth
for cleaning.
7.Ventilation —The vents and other openings in
the cabinet are designed for ventilation. Do not
cover or block these vents and openings since
insufficient ventilation can cause overheating
and/or shorten the life of the product. Do not
place the product on a bed, sofa, rug or other
similar surface, since they can block ventilation
openings. This product is not designed for builtin installation; do not place the product in an
enclosed place such as a bookcase or rack,
unless proper ventilation is provided or the
manufacturer’s instructions are followed.
Safety Precaution
Page 7
User’s manual
wire AC line plug (a
plug, a plug having a third
wire polarized plug will fit into the power outlet only one way. This is a safety feature.
t,
the safety purpose of
type plug will fit into a grounding type power outlet.
e unable to insert the plug into the outlet, contact your electrician to replace
by items
on to cords at doors, plugs, receptacles, and the point
improper
, care should be taken to avoid quick stops,
to overturn, damaging
,
stand, pedestal, bracket, or table. The product may fall, causing serious injury to a child or adult and
The product should be mounted according to the manufacturer’s
pedestal, bracket, or table recommended by the
high
person
and
shock and/or other
,
supply to your home,
For added protection for this product during a lightning
storm, or when it is left unattended and unused for long periods of time, unplug it from the wall outlet and
ble system. This will prevent damage to the product due to lightning and power line
power cable must be
near the equipment and easily
240V. The power cord
attached conforms to the following power supply voltage. Use only the power cord designated by our dealer
When connecting other products such as VCRs and personal computers, you
If the AC adapter is misplaced or
Do not overload wall outlets, extension cords, or convenience receptacles on other
17.
Entering of objects and liquids
—
Never insert an object
into the product through vents or openings.
short internal
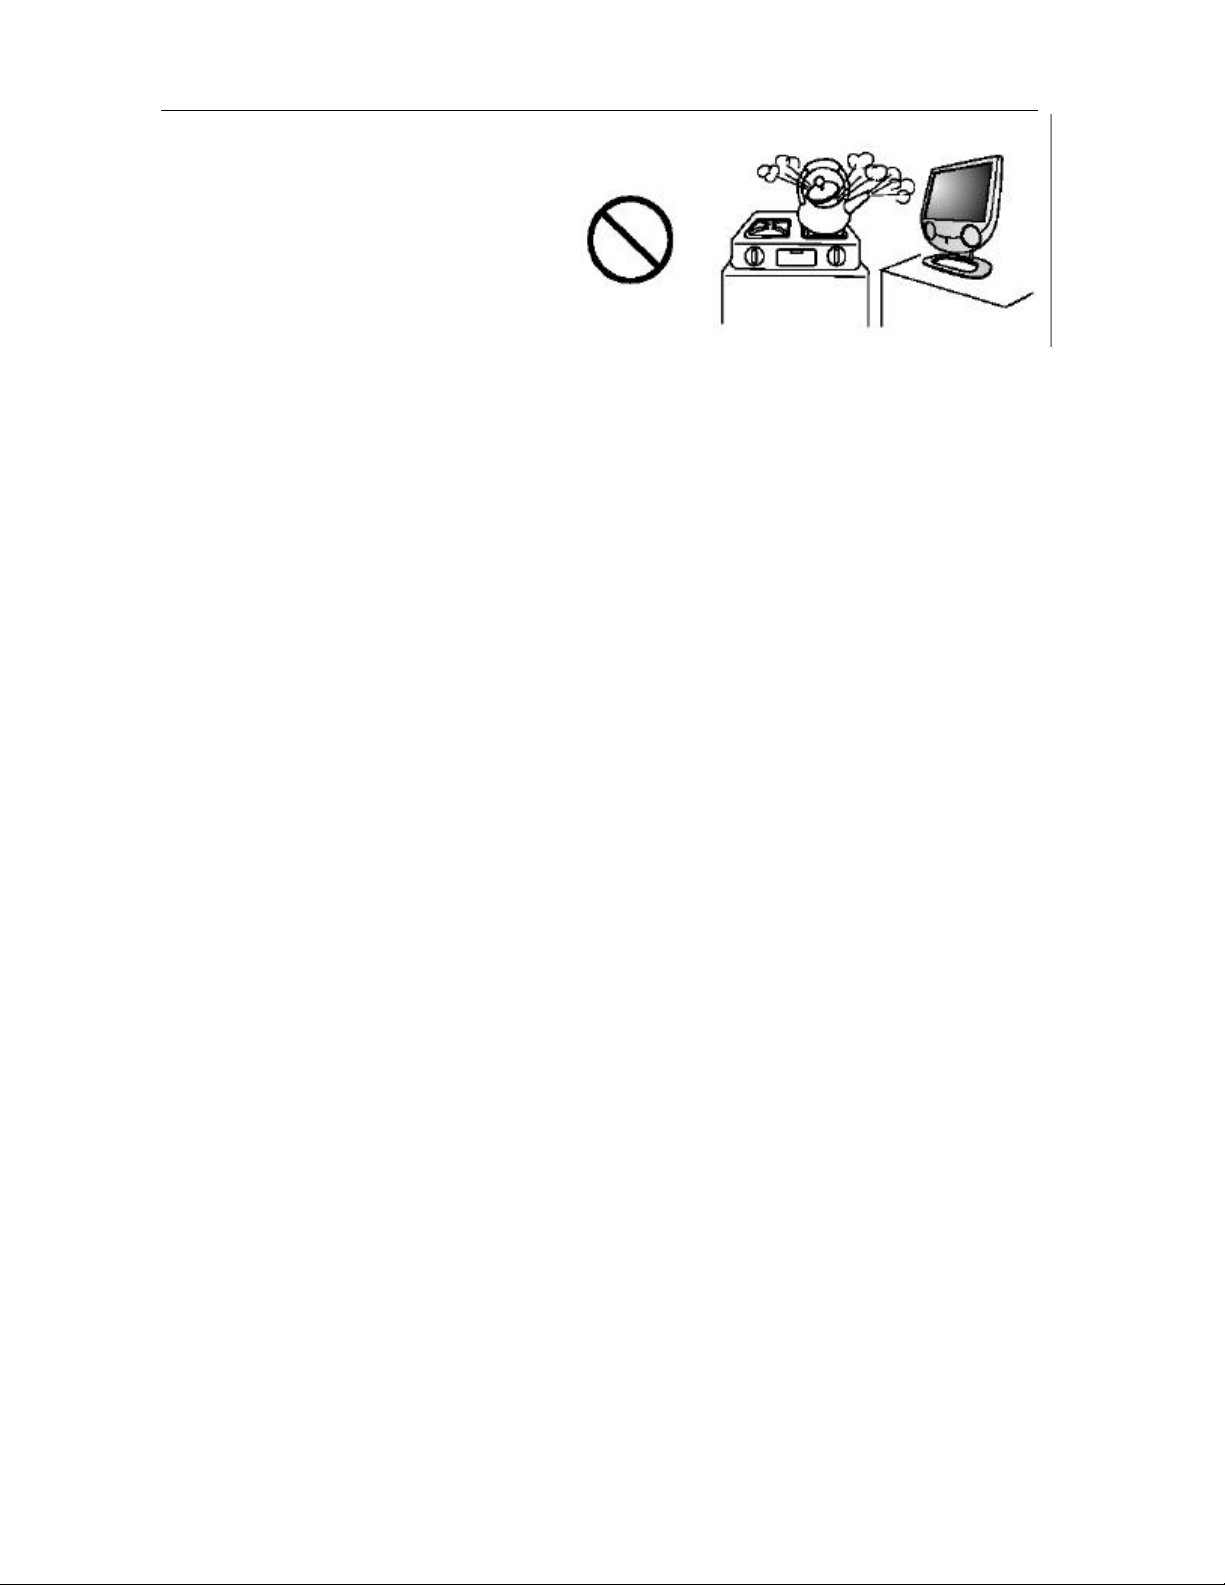
8.Heat sources —Keep the product away from
heat sources such as radiators, heaters, stoves
and other heat -generating products (including
amplifiers).
9.Grounding or Polarization —This product may be equipped with either a polarized 2 plug having one blade wider than the other) or a 3-wire grounding-type
(grounding) pin. The 2If you are unable to insert the plug fully into the outlet, try reversing the plug. If the plug still fails to fi
contact your electrician to replace your incompatible outlet. Do not attempt to bypass
the polarized and grounded plug. The 3-wire groundingThis is a safety feature. If you ar
your incompatible outlet. Do not attempt to bypass the safety purpose of the grounding type plug.
10.Power cord protection—The power cords must be routed properly to prevent people from stepping on
them or objects from resting on them. Check the cords at the plugs and product.
Power-supply cords should be routed so that they are not likely to be walked on or snagged
placed upon or against them. Pay particular attenti
where they exit from the product.
11.Attachments—Do not use attachments not recommended by the manufacturer. Use of
attachments can result in accidents.
12.Accessories—When the product is used on a trolley
excessive force, and uneven surfaces that may cause the product and trolley
equipment or causing possible injury to the operator. Do not place this product on an unstable trolley
serious damage to the product.
instructions, and use only with a trolley, stand,
manufacturer.
13.Servicing—Do not attempt to service the product yourself. Removing covers can expose you to
voltage and other dangerous conditions. Request a qualified service person to perform servicing.
14.Replacement parts—In case the product needs replacement parts, make sure that the service
uses replacement parts specified by the manufacturer, or those with the same characteristics
performance as the original parts. Use of unauthorized parts can result in fire, electric
danger.
15.Power source—This product is intended to be supplied by a listed power supply, output rated 19 V DC
3A minimum , indicated on the marking label. If you are not sure of the type of power
consult your product dealer or local power company.
disconnect the ca
surges. When the unit has to be used with another power supply voltage, the
changed. Consult your product dealer. The socket outlet should be installed
accessible. The power supply voltage rating of this product AC adaptor is AC100 -
to ensure safety and EMC.
should turn off the power of the unit for protection against electric shock.
needs to be replaced, obtain the same type of adapter from a BenQ service center or your dealer.
16.Overloading—
equipment as this can result in a risk of fire or electric shock.
High voltage flows in the product, and inserting an object can cause electric shock and/or
Introduction
1
Page 8
BENQ Corporation
8
orm
parts. For the same reason, do not spill water or liquid on the product.
18.Damage requiring service —If any of the following conditions occurs, unplug the power cord from the
AC outlet, and request a qualified service person to perform repairs.
a. When the power cord or plug is damaged.
b. When a liquid is spilled on the product or when objects have fallen into the product.
c. When the product has been exposed to rain or water.
d. When the product does not operate properly as described in the operating instructions.
Do not touch the controls other than those described in the operating instructions. Improper adjustment of
controls not described in the instructions can cause damage, which often requires extensive adjustment
work by a qualified technician.
e. If the product has been dropped or the cabinet has been damaged in any way.
f. When the product displays an abnormal condition or exhibits a distinct change in performance. Any
noticeable abnormality in the product indicates that the product needs servicing.
19.Safety checks —Upon completion of service or repair work, request the service technician to perf
safety checks to ensure that the product is in proper operating condition.
20.Wall or ceiling mounting —When mounting the product on a wall or ceiling, be sure to install the
product according to the method recommended by the manufacturer.
This is a safety feature.
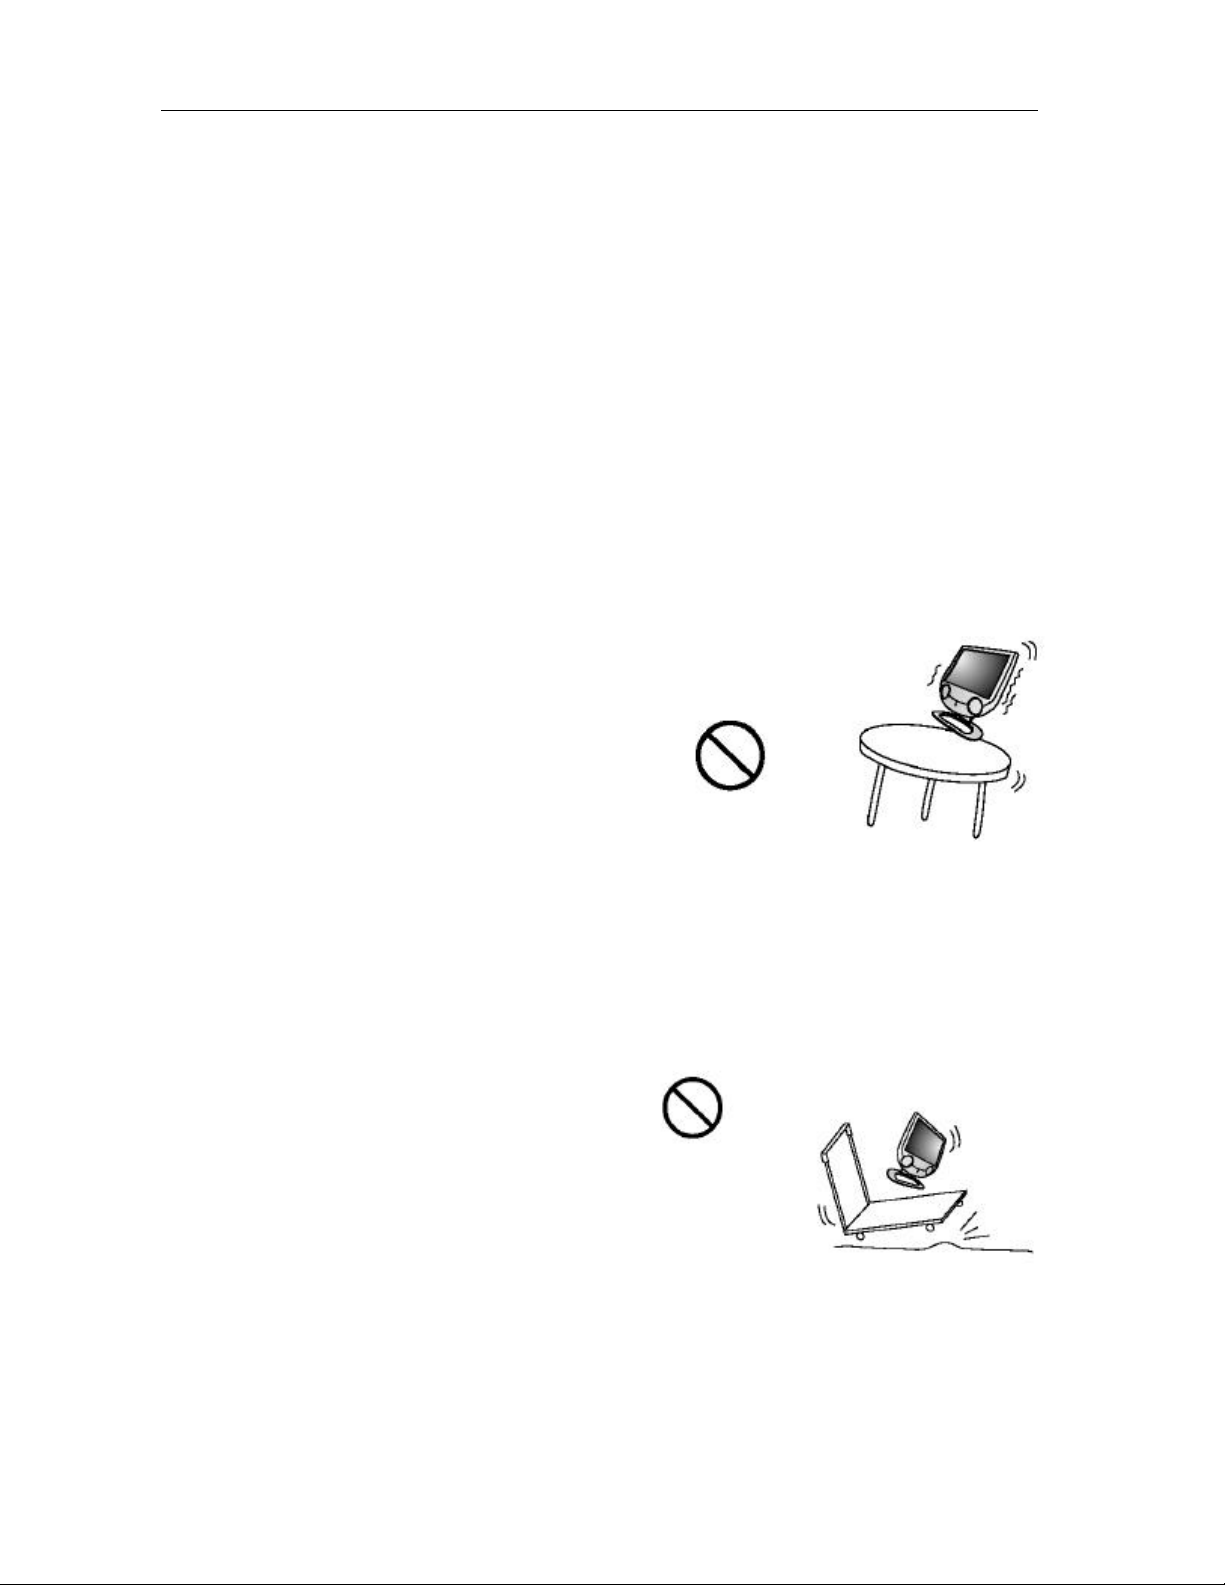
21.Stand—Do not place the product on an
unstable trolley , stand, tripod or table. Placing
the product on an unstable base can cause the
product to fall, resulting in serious personal
injuries as well as damage to the product. Use
only a trolley, stand, tripod, and bracket or table
recommended by the manufacturer or sold with
the product. When mounting the product on a
wall, be sure to follow the manufacturer’s
instructions.
Use only the mounting hardware recommended
by the manufacturer.
Notice: For “Location Free” function, Q150
provides “Simple Stand“ and “ Regular
Stand” options. When putting the simple
stand on the base, please make sure the
key to lock the base. This prevents the
base from falling down when picking the
set up.
22.Careful move— When relocating the
product placed on a trolley, it must be moved
with the utmost care. Sudden stops, excessive
force and uneven floor surfaces can cause the
product to fall from the trolley.
Safety Precaution
Page 9

User’s manual
23.Panel protection—The LCD panel used in
this product is made of glass.
Therefore, it can break when the product is
dropped or impacted upon by other objects. Be
careful not to be injured by broken glass pieces
in case the LCD panel breaks.
24.Pixel defect —The LCD panel is a very high technology product, giving you finely detailed pictures.
Occasionally, a few non-active pixels may appear on the screen as a fixed point of blue, green or red.
Please note that this does not affect the performance of your product.
If an outside antenna is connected to the television
equipment, be sure the antenna system is grounded
so as to provide some protection against voltage
surges and built-up static charges.
Section 810 of the National Electrical Code provides
information with respect to proper grounding of the
mast and supporting structure, grounding of the
lead-in wire to an antenna discharge unit, size of
grounding conductors, location of antenna discharge unit, connection to grounding electrodes,
and requirements for the grounding electrode.
For added protection for this television equipment
during a lightning storm, or when it is left
unattended and unused for long periods of time,
unplug it from the wall outlet and disconnect the
antenna. This will prevent damage to the equipment
due to lightning and power-line surges.
EXAMPLE OF ANTENNA GROUNDING AS PER NATIONAL
ELECTRICAL CODE
NEC—NATIONAL ELECTRICAL CODE
An outside antenna system should not be located in
the vicinity of overhead power lines or other electric
light or power circuits, or where it can collide with
such power lines or circuits. When installing an
outside antenna system, extreme care should be
taken to keep from touching such power lines or
circuits, as contact with them might be fatal.
Introduction
1
Page 10
BENQ Corporation
10
user to
(servicing)
uninsulated
that may be of
not expressly
PLUG TO
“Note to CATV system installer: This reminder is provided to call the CATV system installer’s attention to
that provides guidelines for proper grounding and, in
ground shall be connected to the grounding system of the building, as
Important Information
WARNING: TO REDUCE THE RISK OF FIRE OR ELECTRIC SHOCK, DO
NOT EXPOSE THIS PRODUCT TO RAIN OR MOISTURE.
The exclamation point within a triangle is intended to alert the
the presence of important operating and maintenance
instructions in the literature accompanying the product.
The lightning flash with arrowhead symbol, within an equilateral
triangle, is intended to alert the user to the presence of
“dangerous voltage” within the product’s enclosure
sufficient magnitude to constitute a risk of electric shock to persons.
WARNING: FCC Regulations state that any unauthorized changes or modifications to this equipment
approved by the manufacturer could void the user’s authority to operate this equipment. (U.S.A. ONLY )
CAUTION: TO PREVENT ELECTRIC SHOCK, MATCH WIDE BLADE OF
WIDE SLOT, FULLY INSERT.
Article 820-40 of the National Electrical Code
particular, specifies that the cable
close to the point of cable entry as practical.”
SAFETY TIPS
Please read and follow the safety tips listed below to ensure the equipment is free
from damage, and to ensure that no injury will occur as a result of improper use.
?? Do not insert any object, especially metal or liquids, into the TV.
?? Do not place any objects containing water or any other liquid on top of the TV.
?? Do not place the unit in direct sunlight, near heaters or in extremely dusty or humid locations.
?? Do not install this system outdoors or otherwise expose it to the elements.
?? Do not place heavy objects on top of the TV.
?? If the power cord is damaged or frayed in any way, electrical shock and/or fire may result.
?? Please do not place objects on the power cord, and keep the cord away from heat-emitting devices.
Should the power cord become damaged in any way, please contact your dealer for a replacement
cord.
?? Do not remove the cover of the TV for any reason. If any problems arise with the unit, please contact
your dealer for service. Removing the covers will void the warranty.
Safety Precaution
Page 11

User’s manual
WARNING
Before Setting Up
Do not place the TV on sloped or unstable surfaces.
?? The TV may fall or tip over.
Do not place any objects on top of the TV.
??
If water spills onto the Q150 or foreign objects get inside it, a short-circuit may occur which could result
in fire or electric shock. If any foreign objects get inside the Q150, please consult an Authorized Dealer.
Do not cover the ventilation holes.
Doing so may cause the Q150 to overheat, which can cause fire or damage to the set.
AC Power Supply Cord
The Q150 is designed to operate on 100~240 V AC, 50/60 Hz.
Securely insert the power cord plug as far as it will go.
?? If the plug is not fully inserted; heat may be generated which could cause fire. If the plug is damaged or
the wall socket plate is loose, they should not be used.
Do not handle the power cord plug with wet hands.
?? Doing so may cause electric shocks.
Do not do anything that might damage the power cable. When disconnecting the power cable, hold
the plug, not the cable.
?? Do not make any modifications, place heavy objects on, place near hot objects, heat, bend, twist or
forcefully pull the power cable. Doing so may cause damage to the power cable, which can cause fire
or electric shock. If damage to the cable is suspected, have it repaired at an Authorized Service Center
If the Q150 is not in use for a long p eriod of time, unplug the power cord from the wall outlet.
If problems occur during use
If a problem occurs (such as no picture or no sound), or if smoke or an abnormal odor is detected
from the Q150, unplug the power cord immediately.
?? Continuous use of the Display under these conditions might cause fire or permanent damage to the unit.
Have the Display evaluated at an Authorized Service Center. Services to the Display by any
unauthorized personnel are strongly discouraged due to its dangerous high voltage nature.
If water or foreign objects get inside the TV, if the TV is dropped, or if the cabinet becomes damaged,
disconnect the power cord plug immediately.
?? A short-circuit may occur, which could cause fire. Contact an Authorized Service Center for any repairs
that need to be made.
CAUTION
When using the LCD TV Q150
To turn off the main power, be sure to remove the plug from power outlet. The power outlet socket should be
Introduction
1
Page 12

BENQ Corporation
12
installed as near to the equipment as possible, and should be easily accessible.
Be sure to disconnect all cables before moving the LCD TV.
?? Moving the Display with its cables attached might damage the cables, which, in turn, can cause fire or
electric shock.
Disconnect the power plug from the wall outlet as a safety precaution before carrying out any
cleaning.
?? Electric shocks can result if this is not done.
Clean the power cable regularly to prevent it from becoming dusty.
?? Built-up dust on the power cord plug can increase humidity, which might damage the insulation and
cause fire.
Unplug the cord from the wall outlet and clean it with a dry cloth.
?? Do not insert any objects or liquids into the unit.
?? Do not expose the unit to water or moisture, or otherwise to the elements
?? Do not open the unit for any reason. Doing so will void the warranty !
?? Unplug the unit if it will not be used for an extended period of time
?? Avoid placing the unit near sources of heat
?? Avoid placing the unit in direct sunlight
?? In any event, if any problems arise, contact your dealer immediately!
Safety Precaution
Page 13
User’s manual
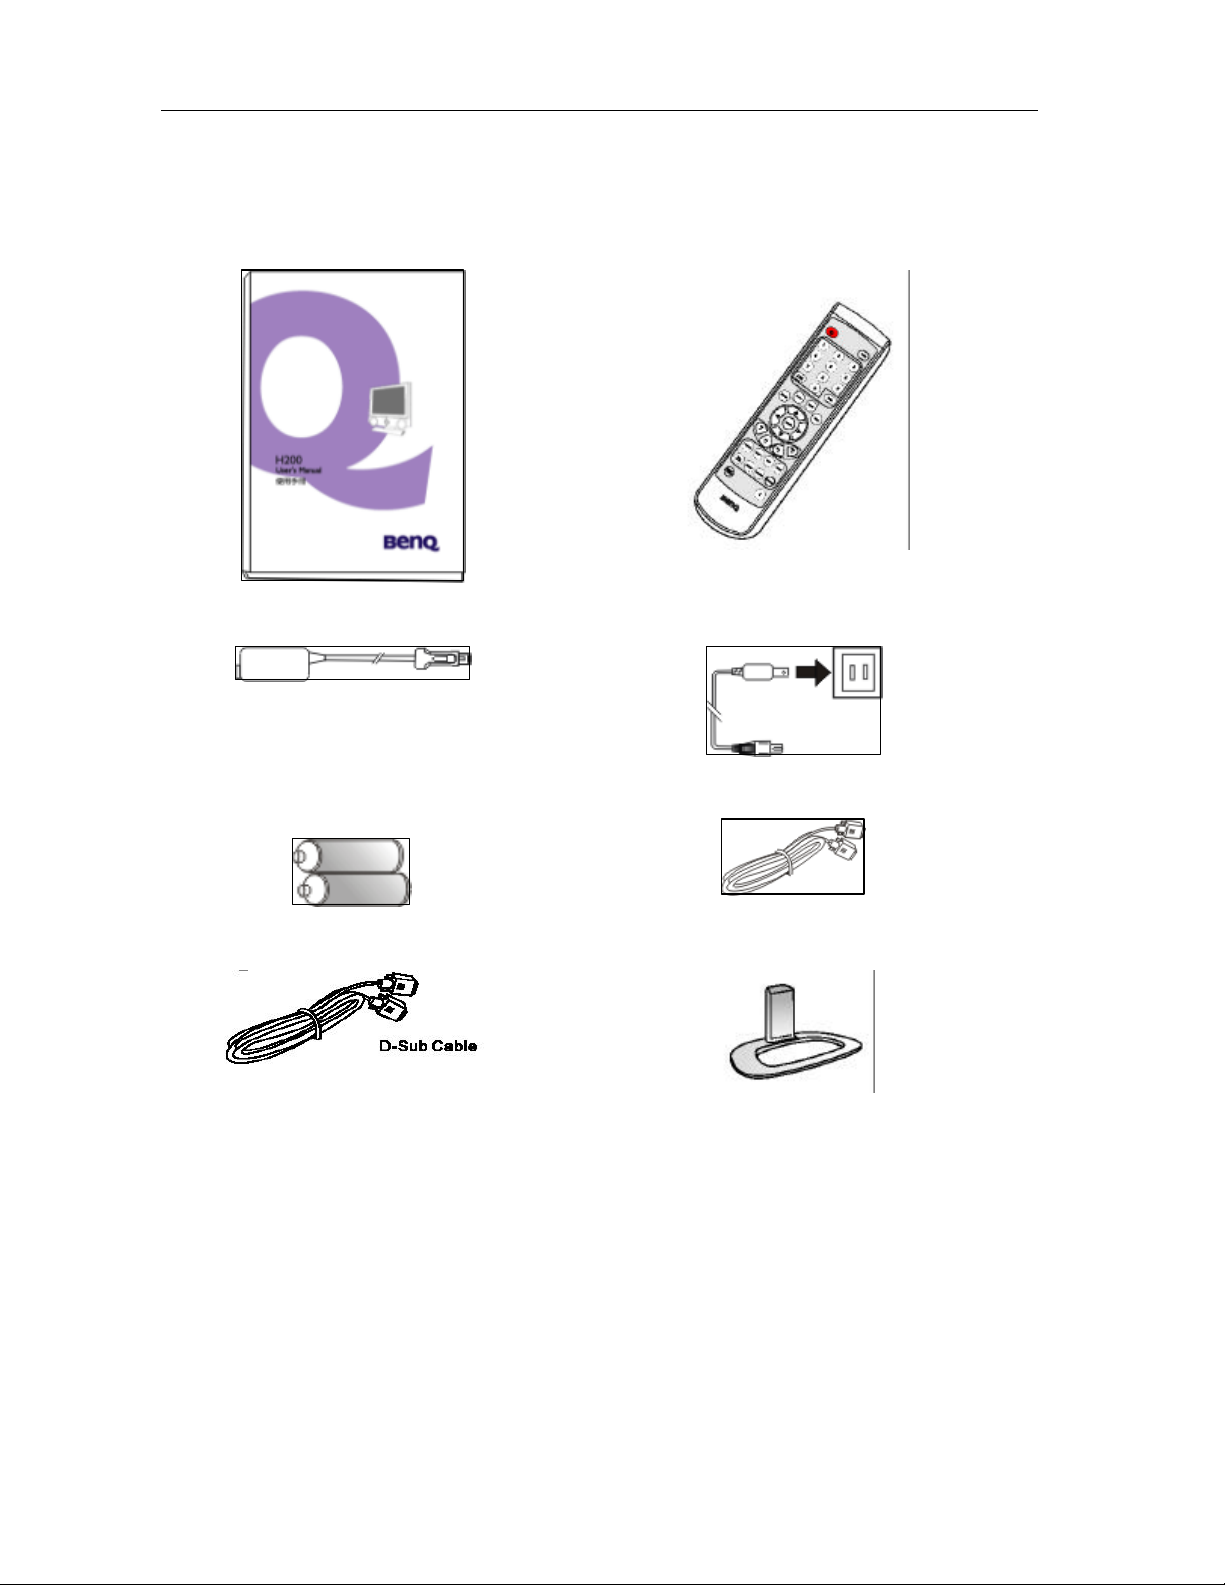
SUPPLIED ACCESSORIES
Make sure the following accessories are provided with the product.
Operation Manual (x1)
Power Adapter (x1)
Remote Control (x1)
Power Cord (x1)
Size AAA Dry Battery (x2)
D-sub to compo nent cable
Note: The AC Power core type is different in different territories.
D -Sub Cable (x1)
Base
Basic information and preparations
13
Page 14

BENQ Corporation
14
Connecting the female plug to the AC
Connecting the AC adaptor to the DC
Connecting the male plug to the wall
Use a commercially available AC plug adapter, if necessary, depending on the design of the wall
Always unplug the AC adapter from the product and power outlet when not using for a long period
PREPARATION
A. Power Connection
1.
socket on AC adaptor.
2.
power input of the set.
3.
outlet as illustrated.
Notes:
??
outlet.
?? This product should be operated only from the type of power source indicated on the marking label
(AC 100~240 50/60 Hz )
??
of time.
B. Antenna Connection (USA NTSC system)
CABLE TV (CATV) CONNECTION
A 75 -ohm coaxial cable connector is built into the set for easy hookup. When connecting the 75- ohm
coaxial cable to the set, screw the 75 -ohm cable to the ANT. terminal.
Some cable TV companies offer “premium pay channels”. Since the signals of these premium pay
channels are scrambled, a cable TV converter/descrambler is generally provided to the subscriber by the
cable TV company. This converter/descrambler is necessary for normal viewing of the scrambled
channels. For more specific instructions on installing cable TV, consult your cable TV company. One
possible method of utilizing the converter/descrambler provided by your cable TV company is explained
below. Please note: An RF switch provided with two inputs (A and B) is required (not supplied).
Basic information and preparations
Page 15

User’s manual
“A” position on the RF switch (not supplied) : You can view all unscrambled channels by using the
TV’s channel keys.
“B” position on the RF switch (not supplied) : You can view the scrambled channels via the converter/
descrambler by using the converter’s channel keys.
Note:
Consult your BenQ Dealer or Service Center for the type of splitter, RF switch or combiner that might be
required.
ANTENNAS
The antenna requirements for good color television reception are more important than those for black &
white television reception. For this reason, a good quality outdoor antenna is strongly recommended.
The following is a brief explanation of the type of connections that are provided with the various antenna
systems.
1. A 75 -ohm system is generally a round cable with F-
type connector that can easily be attached to a terminal
without tools (not supplied).
2. A 300-ohm system is a flat “twin-lead” cable that can
be attached to a 75 -ohm terminal through a 300-75-ohm
adapter (not supplied).
OUTDOOR ANTENNA CONNECTION
Use one of the following two diagrams if you connect an outdoor antenna.
A: Using a VHF/UHF combination outdoor antenna.
B: Using separate VHF and/or UHF outdoor antennas.
Connect the outdoor antenna cable lead-in to the ANT. terminal on the rear of the TV set.
Basic information and preparations
15
Page 16
BENQ Corporation
16
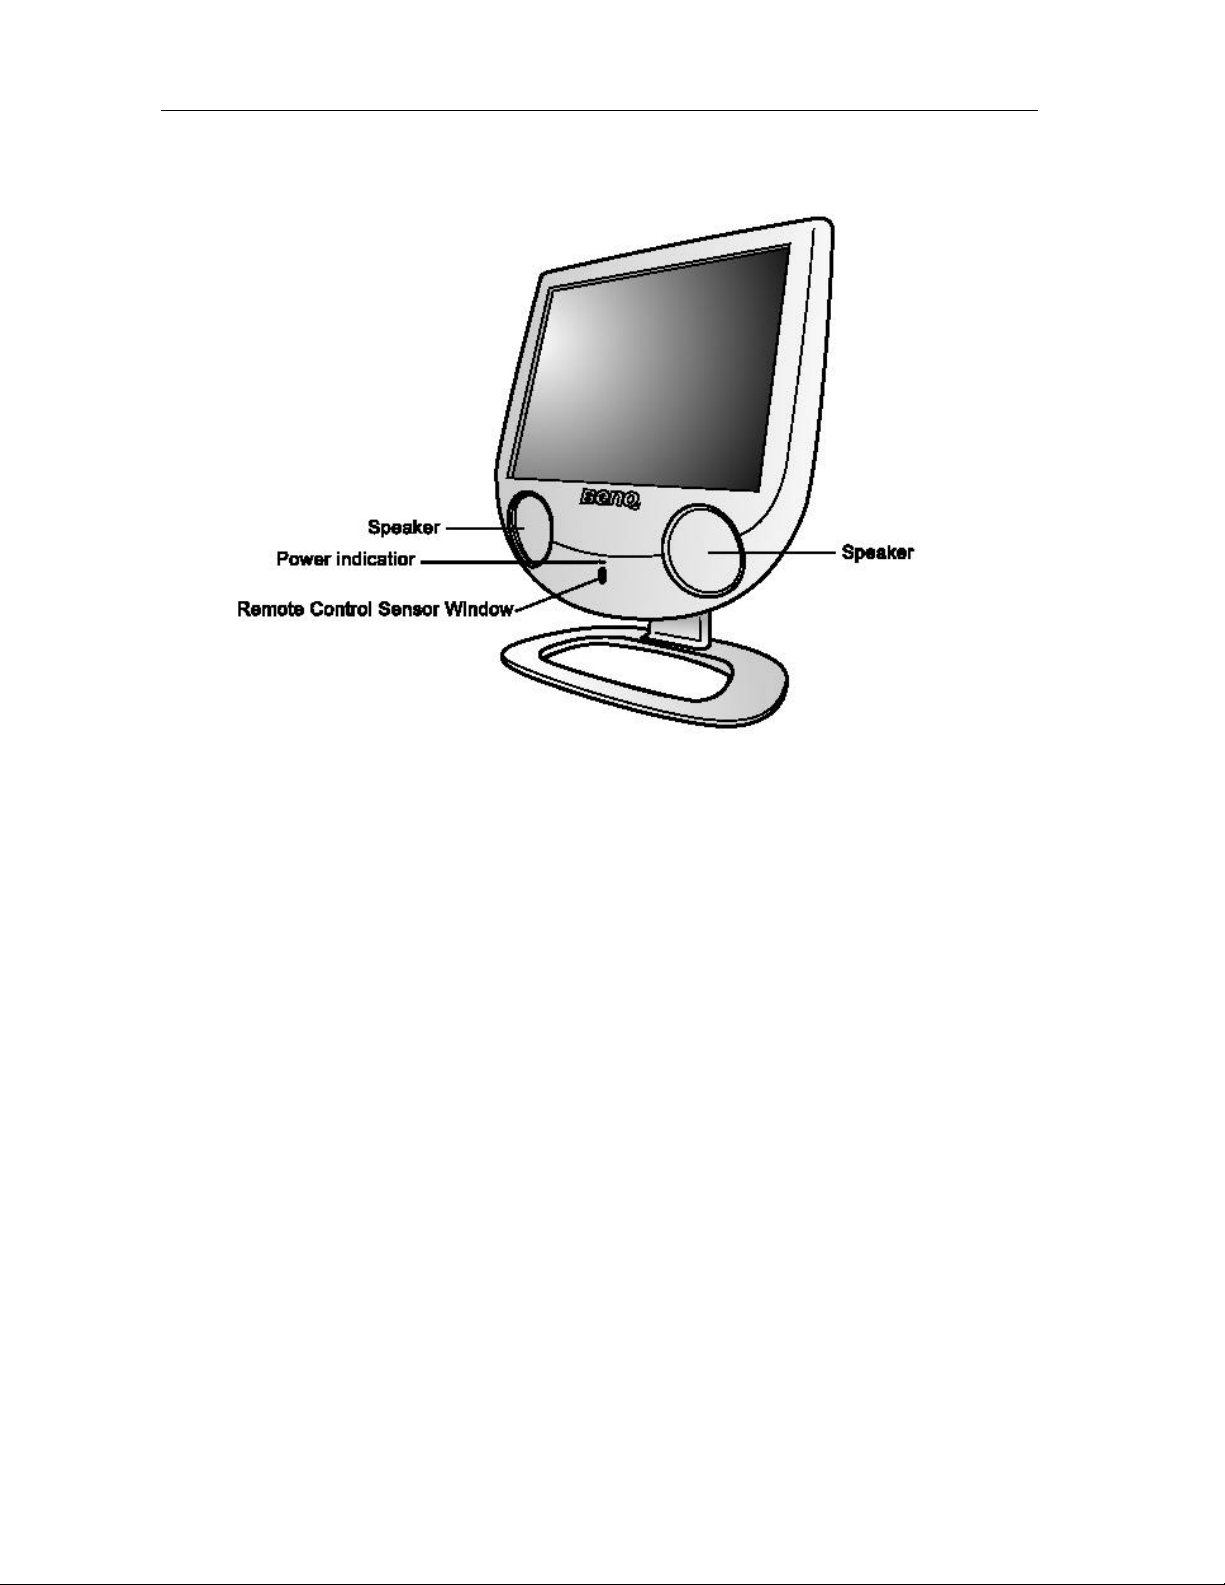
FRONT AND REAR CONTROL OPTIONS
Main unit (Front vi ew)
POWER indicator
A BLUE indicator lights when the power is on.
The light is off when in the standby mode (the
indicator will flash when the set is in power
saving mode.).
To change the vertical angle of the LCD TV set,
tilt the screen up to 20 degrees forward. Please
adjust the angle so that the TV set can be
watched most comfortably.
Connections
Page 17

User’s manual
ON from
main page. Each time you press Menu button, the OSD main
Front Control Panel
1. Power:
The Q150 must first be plugged into the wall outlet. Press this button to turn the Q150
STANDBY mode. Press it again to turn the set OFF to STANDBY mode.
2. Menu:
Press this button to display the OSD
page will display in sequence.
3. Volume (+)/(-):
Press the Volume Up” +” or Down” –“ button to directly increase or decrease the sound volume level.
In OSD Menu, press these buttons to adjust the value or setting of each item and press Volume (+)
as an “Execute ”, “? ” or “ENTER” action.
4. Channel (?)/( ?):
Press these two buttons to directly adjust the TV channel.
In OSD Menu, press these buttons to choose the OSD items.
5. Input:
Press this button to open and select the TV/Video/PC input source.
If the OSD menu is displayed, press this button for 1 sec. to exit the OSD menu.
Note:
Power, Channel (?)/(?), Volume (+)/(–), Input and Menu on the main unit have the same
functions as the same buttons on the remote control. Fundamentally, this operation manual provides
a description based on operation with the remote control.
Connections
17
Page 18

BENQ Corporation
18
Connect this terminal to the Composite Video output terminal of your DVD Player or other Video
nal to the PC’s display (analog RGB) output terminal. This terminal also supports
the component video output (color different output) of a progressive, standard DVD Player or HDTV
Main unit (Rear view)
1.Power Input terminal (DC 19V):
Connect this terminal to the power Adapter and power cord supplied with the TV.
2.Antenna terminal:
Connect this terminal to the antenna cable (not supplied)
3.Composite video Input (RCA Connector):
source.
4.Audio Input (L/R):
Connect this terminal to the sound output terminal of you DVD Player or other Video source.
This terminal is for composite, S-video and component signals.
5.S-Video Input:
Connect this terminal to the S-Video output terminal of your DVD Player or other Video source.
6.PC signal input (D-Sub 15 pin):
Connect this termi
unit.
7.PC audio:
Connect this terminal to the sound output terminal of your PC or Notebook.
8.DC output (DC 19V):
Connect this terminal to the wireless kit (optional accessory).
Removing the Back Cover
Before linking a connection cord to the rear
terminal, remove the back cover. Push up the
button to open sign “¦” and remove out the
back cover carefully.
To mount the cover, insert the hooks on the
left of the cover into the cabinet and push left
the back cover. Finally push down the button
to lock sign “ ¦” to make sure the back cover
lock ready.
Connections
Page 19

User’s manual
is connected into
Listening with Headphones
Plug the headphone mini-plug into the
HEADPHONE jack located on the rear of the
TV set.
Notes:
Headphones are not included in the supplied accessories.
No sound will be heard from the main unit speakers when a headphone mini -plug
the HEADPHONE jack.
CONNECTIONS
?? Carefully check the terminals for position and type before making any connections.
?? Loose connectors can result in image or color problems. Make sure that all connectors are securely
inserted into their terminals.
?? You can enjoy picture and sound by connecting a DVD Player, VCR or a home video game system to
the terminals located on the rear of the TV set.
?? When connecting an external device, turn off the power of the main unit first to prevent any possible
damage.
?? Q150 signal terminal introduction:
Terminal Connector
Antenna input Antenna Terminal x 1
Composite Video Input RCA x 1
S-Video Input S terminal x 1
RGB Input Min D-sub 15-pin x 1
PC Audio input Pin jack x 1
AV Audio Input RCA (L/R) x 2
Connections
19
Page 20

BENQ Corporation
20
C. How to connect the AV Input Terminals
Composite VIDEO Signal Connection (RCA)
Example of input signal source
Connect the composite signal terminal on the TV to the
output of AV equipment through composite cable (RCA
connector) as illustrated
Note:
Composite video is the most common type of signal used, but is also the lowest in picture quality. Many
sources have outputs that are limited to Composite video, such as some VCR’s and camcorders.
Others, such as Laser Disc players, actually produce slightly better results when using Composite
video.
S-VIDEO Signal Connection
Example of input signal source
Connect S-video terminal on the TV to the signal output
of AV equipment through S-video cable as illustrated
Note:
S-Video is the second-best type of signal that can be used, but is MUCH better than Composite
video. Using such sources as satellite receivers, high -quality VCRs and DVD players (with no
Component output) will produce a MUCH cleaner and sharper signal.
Connections
Page 21

User’s manual
sub signal terminal also support
Please
terminal on the TV to the signal
sub to
on is 1024 x 768. If the signal resolution exceeds the native
sub 15P) to connect a Macintosh
sub 15P
or PC signals, which are
For more information about external device connections, see the manuals of your
D. How to connect the PC Input Terminals
RGB signal (min D-SUB 15 pin) connection
Example of input signal source
Connect the D-sub signal terminal on the TV
to the output of PC equipment through min Dsub 15 pin cable as illustrated.
Connect a cable, which matches the audio
output terminal on the computer.
This DComponent (Y Cb/Pb Cr/Pr) Signal.
connect D -sub
output of AV equipment through Dcomponent cable.
Note:
1. The display native resoluti
resolution, it may not be possible to show fine detail with sufficient clarity.
2. An adapter is required to use the PC cable (D-
computer to the set.
3. Some PC models cannot be connected to the set.
4. There is no need to use an adapter for computers with DOS/V compatible D-
terminals.
5. D-sub supports PC and Component (Y Cb/Pb Cr/Pr) signal. Component video is the
best type of signal that can be used. The most common sources that use Component
outputs are DVD players, and it is highly recommended that Component be used when
possible. Component video goes one step beyond S-Video in picture quality. All HDTV
signals must be input into this port. It may also be used for other high -resolution signals
such as progressive DVD players or computers.
6. We can support 480p, 720p and 1080i HDTV signal.
7. D-sub supports Component (Y Cb/Pb Cr/Pr) signal in TV/AV mode. It is normal to
display green page on the screen when choose PC mode in Component (Y Cb/Pb
Cr/Pr) signal connection.
8. The computer shown in the illustration is for example purposes only.
9. Additional equipment and cables shown are not supplied with this set
10. Do not set the horizontal and vertical scanning frequencies f
above or below the specified frequency range.
11.
external devices.
Connections
21
Page 22

BENQ Corporation
22
USING THE BASE
Regular Stand
Q150 provides “Location Free” function .
Users can choose to use“Simple Stand“ or
“ Regular Stand” to place Q150. When
using “Simple Stand”, please press the
button on the back of the regular stand and
take the grip in the set to pull it out from
the regular stand. Then, separate the legs
of simple stand to make it stand firmly on
surface.
Simple Stand
Connections
Page 23

User’s manual
the TV set. Press
is button to turn on the TV channel
message and any signal message (Including
Press these buttons to select the TV channel
Press this button to jump to user’s favorite
for
and
page
on to open the input source
input
ress this button to exit the controls of OSD
;
REMOTE CONTROL
There are 37 keys on the remote control:
1.POWER:
Press this button to turn on
again to enter the standby mode.
2.INFO:
Press th
Video and PC). Press again to turn off.
3.Channel Select:
you want to enter.
4.CHRTN:
Press this button to jump between two chann els.
5.FAVOR
channel.
6.MENU:
Press this button to display the OSD menu
adjusting the image, sound and functions
choose the menu content from right or left
sequence.
7.INPUT:
Press this butt
selection menu or directly choose the
source.
8.EXIT:
P
9.?/?/?/?(Cursor control) and ENTER:
??: Use these Up/Down buttons to select items or settings and to adjust settings.
??: Press these Right/Left buttons to adjust the OSD menu setting. And Press ?button as a “Select”
“Execute” or “Enter” sub menu setting.
Press this “ENTER” button to “Execute ” the selection or “Enter” the sub menu you desire.
10.CH+and CH -:
Press these two buttons to change the TV channel.
11.VOL+ and VOL-
Press the Volume Up “+” or Down “-” button to increase or decrease the sound volume level.
12.PRESET:
Press this button to select between 5 user situation modes.
13.MUTE: Press this button to silence the sound system. Press again to activate it.
14.CH+/-:
Press this button to add the current TV channel. Press again to erase the current TV channel.
15.MTS:
Press this button to choose different audio system. (Different TV systems have different selections.)
16.TV/CA TV:
Press this button to choose the mode for TV and Cable TV systems.
17.SLEEP:
Press this button to set up the LCD TV auto turn off time.
18.FREEZE:
Press this button to freeze the screen (the video source still runs). Press again to exit this function.
19.ASPECT:
Press the button to adjust the image display screen format.
20.BACK LIGHT:
Press this button to adjust the LCD backlight brightness.
menu directly.
Operation
23
Page 24

BENQ Corporation
24
21. “i” key
Press this button to automatically and properly adjust the frequency, phase and Image position in PC mode
and automatically search the video source and properly display the video format in Video mode .
Using the Remote Control
Use the remote control by pointing it towards the
remote sensor window of the se t. Objects between the
remote control and sensor window may prevent proper
operation
Cautions regarding use of remote control
?? Do not expose the remote control to shock. In
addition, do not expose the remote control to
liquids, and do not place in an area with high
humidity.
??
Do not install or place the remote control under
direct sunlight. The heat may cause deformation
of the unit.
?? The remote control may not work properly if the
remote sensor window of the main unit is under
direct sunlight or strong lighting. In such a case,
change the angle of the lighting or LCD TV set, or
operate the remote control closer to the remote
sensor window.
Batteries for the Remote Control
If the remote control fails to operate the LCD TV functions, replace the batteries in the remote control.
Open the battery cover. Insert batteries (two size-AAA
batteries, supplied with product).
(Slide the cover while
pressing down.)
Precaution on battery use
Improper use of batteries can result in a leakage of chemicals and/or explosion. Be sure to follow the instructions below.
?? Place batteries with their terminals corresponding to the (+) and (–) indications.
?? Different types of batteries have different characteristics. Do not mix batteries of different types.
?? Do not mix old and new batteries. Mixing old and new batteries can shorten the life of new batteries and/or cause
(Place the batteries with their
terminals corresponding to the
(+) and (–) indications in the
battery compartment.
Replace the cover and slide in
reverse until the lock snaps.
Operation
Page 25

User’s manual
old batteries to leak chemicals.
?? Remove batteries as soon as they are non-operable. Chemicals that leak from batteries can cause a rash. If
chemical leakage is found, wipe with a cloth.
?? The batteries supplied with the product may have a shorter life expectancy due to storage conditions.
?? If the remote control is not used for an extended period of time, remove the batteries from the remote control.
Operation
25
Page 26

BENQ Corporation
26
(When you do so,
(Power Indicator:
OPERATION: Basic Operation
Before using the TV set, please check your TV system first and adjust TV set to comply with the TV
broadcasting system in your territory. (There will be slightly different selection items in different TV systems)
Basic Operation
Turning On/Off and Standby
POWER
1. Connecting the power plug of LCD TV to the Wall Outlet.
the main power turns ON and enters into standby mode.
no light)
2. Press “POWER “button , located on the top control panel of the main unit or
on the Remote Control, to turn on the TV.
3. The BenQ logo appears on screen (Power Indicator: Blue)
4. The display will automatically search last selected signal input and display it
if it connects to any source.
To turn off the LCD TV
5. Press “POWER” button agai n to enter standby mode (Power Indicator: no
light (standby)) .
Switching TV/VIDEO/PC [PC/AV/Y Pb Pr/Y Cb Cr/TV] Modes
INPUT
1. Turn on the power of the connected video equipment or PC.
2. Press “ INPUT” button on the top control panel of the main unit or on the
Remote Control to display the input selected menu.
3. Press “INPUT” button directly to select input source you want or you can
also press ?or? to select the applicable input source .
Operation
Page 27

User’s manual
Sound Volume Adjustment
SOUND FUNCTION 1. Press “VOL+” to increase the sound volume. The length of the indicator
increases.
2. Press “VOL– “to decrease the sound volume. The length of the indicator
decreases.
To mute the sound
1. Press “MUTE” to temporarily turn off the sound. The MUTE
mark is displayed.
2. Press “MUTE” or “VOL+/–“ to restore the sound back to the
previous level.
3. The mute function is automatically turned off when any of the following
buttons are pressed: ”POWER”, ”VOL+/-“, ”MUTE”, “MTS”.
To select different TV audio system
Press “MTS” to display and select different TV audio systems (There will be
different selections in different TV systems).
Example 1: NTSC MTS system:
[STEREO]: stereo audio
[SAP]: second audio program
[MONO]: monophonic audio
Example 2: PAL Nicam
[STEREO], [MONO], [LANGUAGE A], [LANGUAGE B]
Changing the Channels
Changing channels by using Channel Select on the remote control.
Depending on different territories, this LCD TV set allows you to select a varied number of channels.
To select a 1- or 2-digit channel number (e.g., Channel 7):
Complete the following procedure within 3 seconds.
1. Press the “0” button.
2. Press the “7” button.
CHANNEL FUNCTION
To select a 3-digit channel number
(e.g., Channel 120):
Complete each digit within 3 seconds.
1. Press the “1” button.
2. Press the “2” button.
3. Press the “0” button.
Changing channels with CH +/ - on the remote control or on
Front control panel.
Press ”CHRTN” on the remote control to quickly return to the
previous channel you selected
Operation
27
Page 28

BENQ Corporation
28
the
Main
ress
How to use the OSD menu
This LCD TV set allows you to adjust the various settings using the menu screen. Select the desired menu
item by following the steps below and then refer to the indicated page for details.
MENU FUNCTION
1. Press “MENU” buttons on the Remote Control as in
illustration or “Menu” button on Control Panel to show the “
Menu” page, which appears as follows:
2. Press ?or?buttons to select the option items in the M ain Menu.
3. Press ? or Enter button to choose the menu you want to adjust.
4. Follow the instruction in the sub menu to adjust the functions.
5. Choose “Return” function to go back to the main menu or p
“EXIT” button to leave the menu in each situation.
Operation
Page 29

User’s manual
OPERATION: In PC Mode
Main Menu in PC mode
Main menu
1. Press “MENU ” button on the Remote control or “MENU” button
on control panel to display the Main Menu page as illustrated.
2. Press ?or?button to choose the “Picture ” and press ? or
“ENTER” button to enter the picture menu.
Picture Adjustments
Picture menu
Option Function Operation Range
Auto Adjustment A utomatically adjusts Phase, Clock,
Picture Position in PC mode .
Brightness Adjusts screen brightness.
Contrast Adjusts image contrast.
DPMS Protects screen and power saving
when no signal received.
Resolution Notifier Reminds user of the Optimal resolution.
Reset Restores all settings to default values.
Return Return to Main menu
1. Press ?or?button to choose the option items you want to
adjust.
2. When you finish selecting a desired option in the “Picture”
menu screen, use ?or?button to change the value for the
option or select it.`
Press ? or “ENTER” to
execute it.
?Brighter screen.
?Darker screen.
?Higher contrast.
?Lower contrast.
Use?or?for switching.
Use?or?for switching.
Press? or “ENTER” to
execute it.
Press ? or “ENTER” to
execute it.
0 to 100
0 to 100
On and Off
On and Off
Note:
Resolution Notifier
?? If you activate the Resolution Notifier, the Set will display the following information if it doesn’t receive
the optimal resolution (1024 x 768)
?? If the information is displayed on the screen, set your signal
input as optimal resolution (1024x768) and you will get the best
picture in PC mode.
Operation
29
Page 30

BENQ Corporation
30
DPMS
?? When set is ready to go into DPMS mode, the screen will display the information as follows:
?? The power indicator lamp flashes blue while the DPMS is on.
?? The power turns ON automatically when the display receives a signal again.
?? “DPMS” which stand for “display power management signaling” allows the
display to maintain an automatic power saving function.
Advanced Picture Adjustments
Advanced Picture menu
1. Press “MENU ” button on the Remote control or “MENU”
button on control panel to display the Main Menu page.
2. Press ?or?button to choose the “Advanced Picture” and
press ?or “ENTER” button to enter the picture menu.
3. Press ?or?button to choose the option items you want to
adjust.
4. When you finish selecting a desired option in the
“Advanced Picture ” menu screen, use ? or?button to
change the value for the option or select it.
Option Function Operation Range
H. Position Adjust s the horizontal position
of the image.
V. Position Adjust s the vertical position of
the image.
Phase Adj. Adjusts the Phase.
Sync. Adj. Adjust s the Sync.
Color Temp. Adjusts preset color
temperature.
User Color Temp. Adjust s and memorizes the
Color Temperature based on
user special preference. (If you
don’t choose “User” in Color
Temp. option, this function is no
use.)
Return Return to Main menu
?? You may find that images blur, depending on the clock phase of your PC’s Processor. If you experience
?Moves screen to the
right
?Moves screen to the
left
?Moves screen up
?Moves screen down
Use?or?to select a
value.
Use?or?to select a
value.
Use?or?for switching.
Press? or “ENTER” to
enter the sub menu.
Press ? or “ENTER ” to
execute it.
0 to 100
0 to 100
0 to 31
0 to 100
Warm, Standard, Cool
and User
blurring, you can obtain a clearer image by adjusting the “Phase”.
?? Adjusts the clock frequency of the set’s internal clock signal. If shimmering or rainbow -like noise is
apparent in the image, try adjusting ”Sync” .
?? Flickering and distortion can be eliminated by using the ? and ?buttons to carry out Phase and Sync.
Adjustment.
Operation
Page 31

User’s manual
buttons to choose the option items you
When you finish selecting a desired option in the
or
(left
Higher volume from right hand
Higher volume from left hand
buttons to choose the option items you
”
Sound Adjustment in OSD
Audio Menu
1. Press “MENU” button on the Remote control or “MENU”
button on control panel to display the Main Menu page.
2. Press ?or?button to choose the “Sound” and press ?
or “ENTER” button to enter the picture menu.
3. Press?or?
want to adjust.
4.
“Sound” menu screen, use ?or?to change the value
select it for that option.
Option Function Operation Range
Volume Adjusts volume value.
Treble Adjusts Treble (high sounds).
Bass Adjusts Bass (low sounds).
Balance Adjusts volume balance
and right volumes).
Mute Mutes the sound.
Return Return to Main menu
?Stronger volume.
?Weaker volume.
?Stronger treble.
?Weaker treble.
?Stronger bass.
?Weaker bass.
?
speaker.
?
speaker.
Use?or?for switching.
Press ? or “ENTER” to execute it.
0 to 63
-7 to +7
-7 to +7
-63 to +63
On and Off
Selecting the Utility
Utility Menu
Option Function Operation Range
OSD Language Selects language used for
OSD menus.
Sleep Timer Set the Sleep Timer to
automatically turn off the
Set.
Backlight Adjust s the panel backlight.
Reset to default Restores all functions to
default values.
Information To display the signal
information (TV, AV or PC)
on the screen
Return Return to Main menu
1. Press “MENU” button on the Remote control or “MENU”
button on control panel to display the Main Menu page.
2. Press ?or?button to choose the “Utility” and press ?
or “ENTER” button to enter the picture menu.
3. Press?or?
want to adjust.
4. When you finish selecting a desired option in the “Utility
menu screen, use ?or?to change the value or select it
for that option.
Directly press?or?to
change the language.
Use?or?to select it.
Use?or?to select it.
Use?or “ENTER”
confirm action.
Press ? or “ENTER” to
execute it.
Press ? or “ENTER” to
execute it.
English, French, German, Italian,
Spanish, Portuguese, Japan ese,
Simplified Chinese, Traditional
Chinese.
0,30,60,90,120,150 Min.
Bright, Normal, Soft Light
Operation
31
Page 32

BENQ Corporation
32
When the set is going into sleep mode, the screen display
To adjust the panel backlight, you also can directly press the
he Remote Control to display
Using Remote Control to Adjusting the Utility Settings
You can set the utilities on the menu screen or by the remote control directly
SLEEP TIMER & BACKLIGHT
Directly setting the SLEEP TIMER
1. You can directly press “SLEEP” button on Remote Control as
illustrated to set the sleep timer (in minutes) and the screen
display information as follows:
Backlight
2. Press “SLEEP ” again to select different setting value.
3. The time can be set in increments of 30 minutes and in the
range between 0 and 150 minutes.
information appears as follows:
Adjusting the Backlight
“BACKLIGHT” button on the Remote Control
Info
Operation
Display the Signal Information
You can press the “INFO” button on t
the signal information.
Page 33

User’s manual
the illustration
Auto Function
AUTO
Pressing the “i” button on the Remote Control as in
will automatically adjust Phase, Clock, Picture Position in PC mode.
And the screen display information is as follows:
Operation
33
Page 34

BENQ Corporation
34
for easier
dark pictures such as night
OPERATION: In AV Mode
Main Menu in AV mode
Main menu
1. Press “MENU ” button on the Remote control or “MENU” button
on control panel to display the Main Menu page as illustrated.
2. Press ?or?button to choose the “Picture ” and press ? or
“ENTER ” button to enter the picture menu.
Picture Adjustments
Picture menu
1. Press ?or?button to choose the option items you want to
adjust.
2. When you finish selecting a desired option in the “Picture”
menu screen, use ?or?button to change the value for the
option or select it.
Option Function Operation Range
Preset Mode Adjusts the preset user situation mode.
Brightness Adjusts screen brightness
viewing of
scenes and black hair.
Contrast Adjust s image contrast
Saturation Adjusts color saturation.
Reset Restores all settings to default value.
Return Return to Main menu
Note
* While choosing the Preset Mode, the brightness, contrast and saturation will be blocked in Standard, Vivid,
Colorful, Bright Room and Dark Room Modes. You can adjust your own settings in Personal Mode.
Use?or?for switching.
?Brighter screen.
?Darker screen.
Higher contrast.
?
?Lower contrast.
?Higher color saturation.
?Lower color saturation.
Press?or “ENTER” to
execute it.
Press ? or “ENTER” to
execute it.
Standard, Vivid,
Colorful, Bright
Room, Dark Room,
Personal
0 to 100
0 to 100
0 to 100
Operation
Page 35

User’s manual
Fill Screen, Anamorphic,
Less sharp
Using Remote Control to Adjusting the PRESET Settings
To select between 6 user situation modes( Standard, Vivid, Colorful,
Bright Room, Dark Room and Personal) , you can directly press the
“PRESET” button on the Remote Control
Advance Picture Adjustments
Picture menu
1. Press ?or?button to choose the option items you want to
adjust.
2. When you finish selecting a desired option in the “Advanced
Picture ” menu screen, use ?or?button to change the value
for the option or select it.
Option Function Operation Range
Aspect Ratio Adjusts the image aspect ratio.
Hue Adjusts for nice skin color.
Sharpness Adjusts image sharpness and
display a sharp image.
Color Temp. Adjusts Image color
temperature.
User Color Temp. Adjusts and memorizes the
color Temp. based on user
special preferences. (If you do
not choose “User” in Color
Temp. option, this function is no
use)
Return Return to Main menu
Use?or?for
switching.
?More green -tinged
colors.
?More purple-tinged
colors.
?Sharper images.
?
images.
Use?or?to specify
a desire d color
temperature.
Use? or “ENTER ” to
enter the sub menu.
Press ? or “ENTER”
to execute it.
HDTV (4:3)
0 to 100
0 to 100
?? Warm: More red -tinged
?? Standard: Standard color
?? Cool: More blue -tinged
?? User
colors
temperature
colors
Operation
35
Page 36

BENQ Corporation
36
button on Remote Control
er and
directly translate 4:3 material to 16:9
both sides. Use this mode to
This mode will
cause more of the picture on each side to be cropped and will cause a little loss of the
Note
* The ”Hue” setting can be adjusted for NTSC signal, Composite and S-Video signal only.
Using Remote Control to Adjusting the Aspect Ratio Settings
You can set the utilities on the menu screen or by the remote control directly
Aspect Controls
ASPECT
1. You can directly press “ASPECT”
as illustrated to select the Image Aspect Ratio you pref
the screen display information appears as follows:
Mode
Fill Screen Any input signal scale to fit the 4:3 full screen.
Anamorphic This mode is suitable for HDTV signal and DVD titles marked with "Squeeze" or
HDTV (4:3) This mode is suitable for HDTV signals that
Explanation
"Anamorphic". When playing this kind of DVD title, remember to set the TV type setting
in DVD player to 16:9 mode (wide screen). And use "Anamorphic" mode to present the
movies in correct aspect ratio and better image quality. It will lose a little information of
both sides an d a little bit of the picture will be cropped from each side .
format. This kind of HDTV signal will have black areas on
remove the black area and present the 4:3 materials in full screen.
16:9 HDTV signal.
Sound Adjustment in OSD
Please refer to the sound adjustment section in PC Mode.
Selecting the Utility
Please refer to the sound adjustment section in PC Mode.
Operation
Page 37

User’s manual
button on the Remote Control to
es still
in
has no
the illustration
(NTSC, PAL,
Using Remote Control for Convenient Functions
Freeze
FREEZE
Press the “FREEZE”
hold on the image on the screen (the video sourc
run). Press again to reactivate the image.
The icon will show on the right bottom on the screen as
the following illustration.
Auto Function
AUTO
Note: In PC or Y/Pr/Pr mode, the freeze function
effect.
Pressing the “i” button on the Remote Control as in
will automatically search for correct Video formats
SECAM) in Video mode.
Operation
37
Page 38

BENQ Corporation
38
” buttons to
buttons to adjust the option
appears
How to Use Hot Key Function for Adjustment
1. You can directly press”?”or”?
?
start the hot key function
2. Press?or?
?
?
?
?
value .
3. The hot key function sequence
as illustrated.
Operation
Page 39

User’s manual
button
on the Remote control
button on control
OPERATION: In TV Mode
Except the TV Options and CC/ Parental Control functions, most adjustments on the screen in TV Mode are
the same in AV Mode. The guide of above 2 functions is as following, as for other adjustments, please refer
to the previous AV Mode section.
Main Menu in TV Mode
Main menu
1. Press “MENU ” button on the Remote control or “MENU” button
on control panel to display the Main Menu page as illustrated.
2. Press ?or?button to choose the “Picture ” and press ? or
“ENTER” button to enter the picture menu.
Note
CC/Parental Control function provide to USA NTSC system only
Selecting TV Options
TV Options menu
Option Function Operation Range
MTS Selects TV audio system. Press “ENTER” button
1. Press ?or?button to choose the option items you want to
adjust.
2. When you finish selecting a desired option in the “TV Options”
menu screen, use ?or?button to change the value for the
option or select it.
STEREO, SAP, MONO
on the Remote control
or ? button on control
panel to select it.
(NTSC) STEREO, MONO,
LANGUAGE A, LANGUAGE
B (PAL)
TV/CATV Selects the mode for TV and Cable
Add Channel Adds weak or additional channels
TV system.
or erases unwanted channels from
TV memory .
Press “ENTER ”
or ?
panel to select it.
Use?or?to select it.
AIR, CATV STD, CATV HRC,
CATV IRC
Added and Erased
Operation
39
Page 40

BENQ Corporation
40
to
rmation
”
button to jump to CH2 no matter what channel you are
button to save the new favorite channel
Option Function Operation Range
Auto Scan
Channel
Save Favorite
Channel
Return Return to Main menu
Note
* The option items may be a little different in different TV systems.
* Only USA has CATV HRC and CATV IRC options (NTSC system)
The tuner will search through all
available channels in your area and
add them to the TV’s memory.
Save and change as favorite
channel.
Use “ENTER” or?
search the channel
Press ? or “ENTER” to
execute it.
Setting Favorite Channel
Favorite Channel
Setting Favorite Channel
1. Select the channel you want to set as the favorite channel, for
example, CH2.
2. Press th e “Favor” button, and the screen display info
appears as follows:
Remote control
3. CH2 will be save as the favorite channel. Press the “Favor
watching.
Changing Favorite Channel
1. When you want to cha nge the favorite channel setting, select
the new channel you want to set first. For example, if you want
to change favorite channel to CH5, choose CH5 by remote
control or control panel first.
2. Press ”Menu ” button to enter the Main Menu.
3. Choose the “TV Options” to enter the sub menu.
4. Press ?or?button to choose “Save Favorite Channel”
function.
5. Press ? or “Enter”
(CH5), and the screen display information appears as follows:
Page 41

User’s manual
to CH5. Press the
To choose the TV/CATV system, you can also
button on the Remote
To add or erase channel, you can also directly press
6. Favorite Channel will be change from CH2
“Favor” button will jump to CH5 after changing the setting.
Using Remote Control to Adjusting TV Options
TV/CATV CH+/-
directly press the “TV/CATV ”
Control.
the “CH+/-“ button on the Remote Control
.
Operation
41
Page 42

BENQ Corporation
42
V system with Closed Caption and V-chip (USA only)
Set Up Closed Caption
CC/Parental Control menu
1. Press ?or?button to choose the option items you want to
adjust.
2. When you finish selecting a desired option in the “CC/Parental
Ctrl. ” menu screen, use ?or?button to change the value for
the option or select it.
Set Up CLOSED CAPTION
SETTING CLOSED CAPTION
??
This TV set is equipped with an internal Closed Caption decoder. “Closed Caption” is a system which
allows conversations, narration, and sound effects in TV programs and home videos to be viewed as
captions on the TV screen (see the illustration).
?? Not all the programs and videos will offer closed captioning. Please look for the “ ” symbol to
ensure that captions will be shown.
Notes:
??
Closed Caption may malfunction (white blocks, strange characters, etc.) if signal conditions are poor or
if there are problems at the broadcast source. This does not necessarily indicate a problem with your
set.
?? If no TEXT broadcast is being received while viewing in the [TEXT] mode, the screen may become dark
and blank for some programs. Should this occur, switch the Closed Caption mode to OFF.
Remote control
Page 43

User’s manual
Set Up Parental Control (V -CHIP)
?? This function allows TV programs to be restricted and TV usage to be controlled based on FCC data. It
prevents children from watching violent or sexual scenes that may be harmful.
?? Restriction of TV programs includes two ratings that contain information about the program: the MPAA
rating and the TV Parental Guidelines. The MPAA rating is restricted by age. TV Parental Guidelines
are restricted by age and content.
?? Since a TV program may use either the MPAA rating or the TV Guidelines, both should be adjusted for
complete control.
[1] MPAA RATING
RATING
Age base
MPAA RATING (examples)
G GENERAL AUDIENCES. All ages admitted.
PG
PG-13 PARENTAL STRONGLY CAUTIONED. Some material may be
R RESTRICTED. Under 17 requires accompanying parent or
NC-17 NO ONE 17 AND UNDER ADMITTED.
X X is an older rating that is unified with NC-17 but may be
PARENTAL GUIDANCE SUGGESTED. Some material may not
be suitable for children.
inappropriate for children under 13.
adult guardian.
encoded in the data of older movies.:
Example 1:
PG-13 in the age-based rating is blocked, this will also automatically block the higher ratings R, NC-17 and X.
Example 2:
R in the age-based rating is blocked, this will also automatically block the higher ratings NC-17 and X.
Note: The MPAA rating is only age -based.
[2] TV PARENTAL GUIDELINES
Content base RATING
Age
Base
TV-Y (All
children)
TV-Y7 (Direct to
Older Children)
TV-G (General
Audience)
TV-PG (Parental
Guidance
Suggested)
TV-14 (Parents
Strongly
Cautioned)
TV-MA (Mature
Audience Only)
FV
(Fantasy
Violence)
V V V V V
X V V V V
V V V V
X X X X
X X X X
X X X
V (Violence) S (Sexual
Situation)
L (Adult
Language)
D (Sexually
Suggestive
Dialog)
Operation
43
Page 44

BENQ Corporation
44
V: The content ra ting is always blocked.
X: you can set the content rating.
TV PARENTAL GUIDELINES (examples)
Example 1:
When TV-Y7 in the age-based rating is set to BLOCK, this will automatically block the higher ratings: TV-G,
TV-PG, TV-14 and TV -MA. In addition, D, L, S, Settings are blocked automatically and FV can be set
manually.
?? Age -based ratings can be modified by the content-based ratings, but only in the combinations indicated
by an X in the table above.
?? Choosing a lower age -based rating blocks the higher age-based ratings regardless of content rating
settings.
Adjust V-Chip setting
[1] FIRST TIME SET UP V-CHIP
CC/Parental Control menu
1. Press?or?buttons to select “V-CHIP Blocking Setting…”
item and Press?or “ENTER” to enter the sub menu.
2. You should set the password before using this function.
The sequence is as follows:
Back to new password
Input 4 digit.
Password mismatch.
Password match
Remote control
Page 45

User’s manual
FIRST TIME SET UP
. Input the password
t number by
to switch between available choices for the
password
3. Press ?or?buttons to select “MPAA” or “TV Guide” items.
4. Use ?or?to switch between available choices for the selected option or change the option value.
[2] MPAA RATING
1. Repeat the steps 1 and 2 of [1]
Parental Control
2. “Enter Password” will be displayed
you have set before. Input the 4-digit secre
using the channel select keys.
3. Press ?or?buttons to select “MPAA” item.
4. Use ?or?
selected option.
[3] TV GUIDELINES
1. Repeat the steps 1 and 2 of [2] MPAA RATING.
2. Press?or?buttons to select “TV Guide” setting.
3. Each time you select different settings, it display different
V(FV), L, S, D settings.
4. Press ?or?buttons to select V (FV), L, S, D items and
press?or?to select Block or Show.
[4] CANCELING THE V-CHIP BLOCK SCREEN WHILE V-CHIP BLOCK IS ACTIVATED
1. “The program is blocked” will be displayed if you watch the program with Program Rating data as same
as you configured.
2. Input the 4 -digit secret number by using the channel select keys; V CHIP BLOCK is temporarily canceled.
If you input an incorrect secret number, it cannot be unblocked.
3. The sequence is as follows:
Incorrect
Correct password
Operation
45
Page 46

BENQ Corporation
46
Change Blocking Password
1. Press ?or?buttons to select the “Change
Blocking Password” item and press?or “ENTER”
to execute it.
2. The sequence is as follows:
Press “EXIT ”
Correct password
Incorrect password
Back to new password Password mismatch
Password match
If you forget the password you set before, you can press “ 2” “4” “6” “8” when the “old password” information
is displayed, then you can set a new password.
Remote control
Page 47

User’s manual
g is securely inserted into the
(Indicated by the blue LED on
can be
g terminal or for wrong input
Ensure the communication cable is properly connected between
The screen is greenish while using
Check whether you select the right input. The screen will be
Check whether your AV equipments is affected by interference
voltage transmission lines, neon
Check whether all image adjustments have been properly
Check whether screen position and size have been properly
Check the "Component" or "RGB" setting in the LCD TV and set
The image appears too bright, and
there is a loss of definition in the
The video signal has not been terminated properly somewhere
The image appears too 'washed
out', or the darkest areas of the
” appears, the
image or signal cannot be
Check for connection to proper terminal or for proper input
the
nd the
strong
TROUBLESHOOTING
Before you call for service, determine the symptoms and make a few
simple checks as shown below.
TV set:
SYMPTOMS POSSIBLE CAUSES
Power does not turn ON ?? Ensure whether the power plu
receptacle.
There is no picture or sound ?? Ensure the LCD TV power is ON
the front of the unit)
?? Reception other than those of broadcasting stations
considered.
?? Check for connection to wron
mode.
??
the Video Source and the LCD TV.
??
D-Sub to Component cable
There are spots on the screen ??
Degraded colors or tints ??
Improper screen position or size ??
The image appears distorted
The image is purple
brightest areas of the image.
image appear too bright.
If “xxx searching
produced by display.
Power indicator lamp appears
flashes blue
“Out of range” appears ?? Check whether the input signal is acceptable to the display.
Remote Control does not function
properly
There is no picture or sound, just
noise.
Picture is not clear. ?? Make sure the antenna cable is properly connected.
No sound ?? Check whether you have selected “Mute” for Audio setting.
greenish if choose PC input.
?? Select YPbPr input.
from automobiles, trains, highsigns or other potential sources of interference.
adjusted.
adjusted.
??
Ensure the TV's aspect ratio is properly set.
??
it for the appropriate signal type.
??
Check whether the contrast setting is too high.
??
The DVD player is set for a high-level output.
??
in the system.
??
Check whether Brightness is set too high.
?? The DVD player may be set at too high a brightness level.
?? Check the cable for disconnection.
??
mode.
?? Check the cable for disconnection.
?? Check whether the screen is on power saving status (DPMS)
?? Check for incorrect battery orientation.
?? Check for dead batteries
?? Check for distance and angle from the display.
?? Check whether remote control is properly being pointed at
display’s receiver.
?? Check for any obstacle between the remote control a
display.
?? Check that the remote sensor window is not under
fluorescent lighting.
?? Make sure the antenna cable is properly connected.
?? Consider whether TV signals are being properly received.
?? Consider whether TV signals are being properly received.
?? Make sure the volume is not set to minimum.
?? Make sure that headphones are not connected.
?? Check cables for disconnection.
Troubleshooting
47
Page 48

BENQ Corporation
48
Some lines occur at the bottom of
pictures when playing VHS tapes.
The video picture is abnormal. ?? Press "i" key on the remote control to force the LCD TV to
??
VHS tapes sometimes can't provide stable pictures when
playing or pausing. And the unstable pictures may cause the
LCD TV to display incorrectly. If this situation happens, please
press "i" key on the remote controller to let the LCD TV check
the signal again and display the pictures correctly.
check the signal system again and auto select the correct
video system.
Antenna:
The picture is not sharp or the
picture moves.
The picture is doubled or tripled. ?? Make sure the antenna is facing the right direction.
The picture is spotted. ?? There may be interference from automobiles, trains, high
There are stripes on the screen or
colors fade.
?? The reception may be weak.
?? The state of the broadcast may also be bad.
?? Make sure the outside antenna is not disconnected.
?? Make sure the antenna is facing the right direction.
?? There may be reflected electric waves from mountains or
buildings.
voltage lines, neon lights, etc.
?? There may be interference between the antenna cable and
power cable. Try positioning them further apart.
?? Is the unit receiving interference fro m other devices?
Transmission antennas of radio broadcasting stations and
transmission antennas of amateur radios and cellular phones
may also cause interference.
??
Use the unit as far apart as possible from devices that may
cause possible interference.
Troubleshooting
Page 49

User’s manual
SPECIFICATIONS
Model Name Q150
Size 15”
Aspect Ratio 4:3
Resolution 1024 x 768
Pixel Pitch 0.297 x 0.297 (mm)
Brightness 450 nit
Contrast Ratio 500:1
Audio amplifier Satellite speaker 2.5W x 2; Subwoofer 5W
Signal Input Terminal TV:
TV Tuner x1
Video:
Composite video input (RCA pin) x 1
S-Video (Mini din 4 pin) x 1
Audio input (L/R RCA pin) x 2
PC:
PC D-sub (Mini D-sub 15 pin) x 1
PC Audio (M3.5 jack) x 1
Output Terminal Headphone (Mini-jack) x 1
19V DC 1A (Maximum)
Video Color System NTSC, PAL, SECAM
Scanning format 480p, 720p, 1080i
PC Horizontal Frequency 31.5~ 60 kHz
PC Vertical Frequency 50~ 70 Hz
Power supply DC 19 V, AC 100 –240 V, 50/60 Hz
Accessories
Note:
Manual, Remote control, Batteries x 2, AC Power adapter, AC cord,
PC D-sub cable, D -sub to component cable
Design and specifications are subject to change without notice. Weight and dimensions shown are
approximate.
Specifications and external appearance may be changed for the sake of improvement.
Specifications
49
Page 50

BENQ Corporation
50
SUPPORTED OPERATING MODES
Resolution Horizontal
Frequency(Khz)
720×400 31.47 70.08 28.322 DOS
640×480 31.50 60.00 25.18 DOS
640×480 35.00 67.00 30.24 Mac. (SOG)
640×480 37.50 75.00 31.50 VESA
640×480 37.86 72.81 31.50 VESA
800×600 35.16 56.25 36.00 VESA
800×600 37.90 60.32 40.00 VESA
800×600 46.90 75.00 49.50 VESA
800×600 48.08 72.19 50.00 VESA
832×624 49.00 74.00 57.27 Mac. (H+V)
1024×768 48.40 60.00 65.00 VESA
1024×768 56.50 70.00 75.00 VESA
1024×768 60.00 75.00 78.75 VESA
Vertical
Frequency(Hz)
Dot Clock
Frequency(Mhz)
Remark
Dimensional drawings
Page 51

User’s manual
51
DIMENSIONAL DRAWINGS
Specifications
Page 52

BENQ Corporation
52
FCC STATEMENT
FCC Notice
LCD TV Q150: A CLASS B digital device
This equipment has been tested and found to comply with the limits for a Class B digital device, pursuant to
part 15 of the FCC Rules. These limits are designed to provide reasonable protection against harmful
interference when the equipment is operated in a commercial environment.
This equipment generates, uses, and can radiate radio frequency energy and, if not installed and used in
accordance with the instruction manual, may cause harmful interference to radio communications. Operation
of this equipment in a residential area is likely to cause harmful interference in which case the user will be
required to correct the interference at his own expense.
FCC CAUTION:
Pursuant to 47CFR, Part 15.21 of the FCC rules, any changes or modifications to this monitor not
expressly approved by BENQ Corporation could cause harmful interference and would void the
user's authority to operate this device.
WARNING: This is a CLASS B product. In a domestic environment this product may cause radio
interference in which case the user may be required to take adequate measures to counter
interference .
WARNING: To reduce the risk of fire and electric shock, do not expose this product to rain or
moisture.
Dimensional drawings
 Loading...