

Page 1

PE7800 Digital Projector
Home Theater
User’s Manual
Welcome
Page 2

Copyright
Copyright © 2004 by BENQ Corporation. All rights reserved. No part of this publication may be
reproduced, transmitted, transcribed, stored in a retrieval system or translated into any language
or computer language, in any form or by any means, electronic, mechanical, magnetic, optical,
chemical, manual or otherwise, without the prior written permission of BENQ Corporation.
Disclaimer
BENQ Corporation makes no representations or warranties, either expressed or implied, with
respect to the contents hereof and specifically disclaims any warranties, merchantability or fitness
for any particular purpose. Further, BENQ Corporation reserves the right to revise this
publication and to make changes from time to time in the contents hereof without obligation of
BENQ Corporation to notify any person of such revision or changes.
*Windows, Internet Explorer and Outlook Express are trademarks of Microsoft Corporation. DLP, Digital
Micromirror Device and DMD are trademarks of Texas Instruments. Others are copyrights of their respective
companies or organizations.
2 Copyright
Page 3

Table of Contents
Safety, Regulatory and Legal Information ............................................... 5
Warning Label ......................................................................................................................... 5
FCC Statement (for United State users) ................................................................................ 5
EEC Statement (for European users) .................................................................................... 5
MIC Statement ........................................................................................................................ 5
Precautions .............................................................................................................................. 6
Safety Instructions .................................................................................................................. 7
Moisture Condensation ..........................................................................................................8
Avoid Volatile Liquid ............................................................................................................. 8
Disposal ................................................................................................................................... 8
Overview ................................................................................................... 9
Features ................................................................................................................9
Shipping Contents ...............................................................................................10
Installing or Replacing Batteries ............................................................................................ 10
Projector Exterior View ....................................................................................... 11
Front / Upper Side .................................................................................................................. 11
Rear Side .................................................................................................................................. 11
Bottom Side ............................................................................................................................. 11
Connector Panel ..................................................................................................................... 12
Controls and Functions .......................................................................................13
Control Panel .......................................................................................................................... 13
Remote Control ..................................................................................................................... 14
Connecting ................................................................................................ 15
Connecting Video Inputs ....................................................................................15
Connecting to DVD players ................................................................................................... 15
Connecting Progressive Component (DTV Y/PB/PR) ........................................................ 15
Connecting RGBHV (DTV RGB) .......................................................................................... 16
Connecting Video Equipment, a PC or another Computer using the DVI-I Connector .. 16
Setting Up Your Projector ........................................................................ 17
Preparations .........................................................................................................17
Adjust the Height .................................................................................................17
Setting Up the Screen ..........................................................................................18
Ceiling Installtion for 16 : 9 Screen ....................................................................................... 18
Floor Installation for 16 : 9 Screen ........................................................................................ 18
Basic Operation ......................................................................................... 19
Turning the Power on .........................................................................................19
Zoom / Focusing .................................................................................................. 19
Selecting Input Source .........................................................................................19
Selecting Aspect Ratio .........................................................................................20
Selecting the Video Memory ...............................................................................20
Setting Menu ........................................................................................................ 20
PIP (Picture-In-Picture)/POP (Picture-On-Picture) functions .......................21
Turning the Power Off ........................................................................................21
Menus ........................................................................................................ 22
Menu Structure .................................................................................................... 22
3 Table of Contents
Page 4

Using the Menus ................................................................................................. 23
PICTURE Menu .................................................................................................. 23
DISPLAY Menu ................................................................................................... 24
ENVIRONMENT Menu ..................................................................................... 26
INSTALLATION Menu ...................................................................................... 27
PRO-PICTURE Menu ........................................................................................ 28
Additional Information ............................................................................ 30
Warning Message ............................................................................................... 30
Replacing the Lamp (Contact your BenQ dealer for assistance) ...................... 31
Indicators ............................................................................................................. 32
Troubleshooting .................................................................................................. 33
Specifications ....................................................................................................... 34
Optical Characteristics ............................................................................................................34
Electrical Characteristics .........................................................................................................34
Input/Output ...........................................................................................................................34
General Characteristics ............................................................................................................34
Dimensions ......................................................................................................... 35
4 Table of Contents
Page 5
Safety, Regulatory and Legal Information
Thank you for your purchase of this quality BenQ video projector! It has been designed to provide you with a
home theater viewing experience. For the best result, please read this manual carefully as it is your guide
through the control menus and operation.
Warning Label
This symbol is intended to alert the user to the
CAUTION
RISK OFELECTRIC SHOCK
DO NOTOPEN
presence of dangerous voltage within the product's
enclosure that may cause electric shock.
CAUTION: TOREDUCE THE RISKOF ELECTRIC SHOCK.
DO NOTREMOVE COVER (ORBACK)
NO USERSERVICEABLE PARTSINSIDE.
REFER SERVICINGTO QUALIFIED SERVICEPERSONNEL.
This symbol is intended to alert the user to the
presence of important operating and maintenance
(servicing) instructions in the literature
accompanying the appliance.
FCC Statement (for United State users)
This equipment has been tested and found to comply with the limits for a Class B digital device, pursuant to
Part 15 of the FCC Rules. These limits are designed to provide reasonable protection against harmful
interference in a residential installation.
CLASS B: This equipment generates, uses and can radiate radio frequency energy and, if not installed and used
in accordance with the instructions, may cause harmful interference to radio communications. However, there
is no guarantee that interference will not occur in a particular installation. If this equipment does cause harmful
interference to radio or television reception, which can be determined by turning the equipment off and on, the
user is encouraged to try to correct the interference by one or more of the following measures:
— Reorient or relocate the receiving antenna.
— Increase the distance between the equipment and receiver.
— Connect the equipment into an outlet on a circuit different from that to which the receiver is
connected.
— Consult the dealer or an experienced radio/TV technician for help.
EEC Statement (for European users)
This machine was tested against the 89/336/EEC (European Economic Community) for EMC (Electro Magnetic
Compatibility) and fulfills these requirements.
MIC Statement
A class equipment (Business purpose info/telecommunications equipment)
As this equipment has undergone EMC registration for business purpose, the seller and/or the buyer is asked to
beware of this point and in case a wrongful sale or purchase has been made, it is asked that a change to
household use be made.
B class equipment (Household purpose info/telecommunications equipment)
As this equipment has undergone EMC registration for household purpose, this product can be used in any area including residential areas.
5 Safety, Regulatory and Legal Information
Page 6
Precautions
Your BenQ projector is designed and tested to meet the lastest standards for safety of information technology
equipment . However, to ensure safe use of this product, it is important that you follow the instructions
mentioned in this manual and marked on the product.
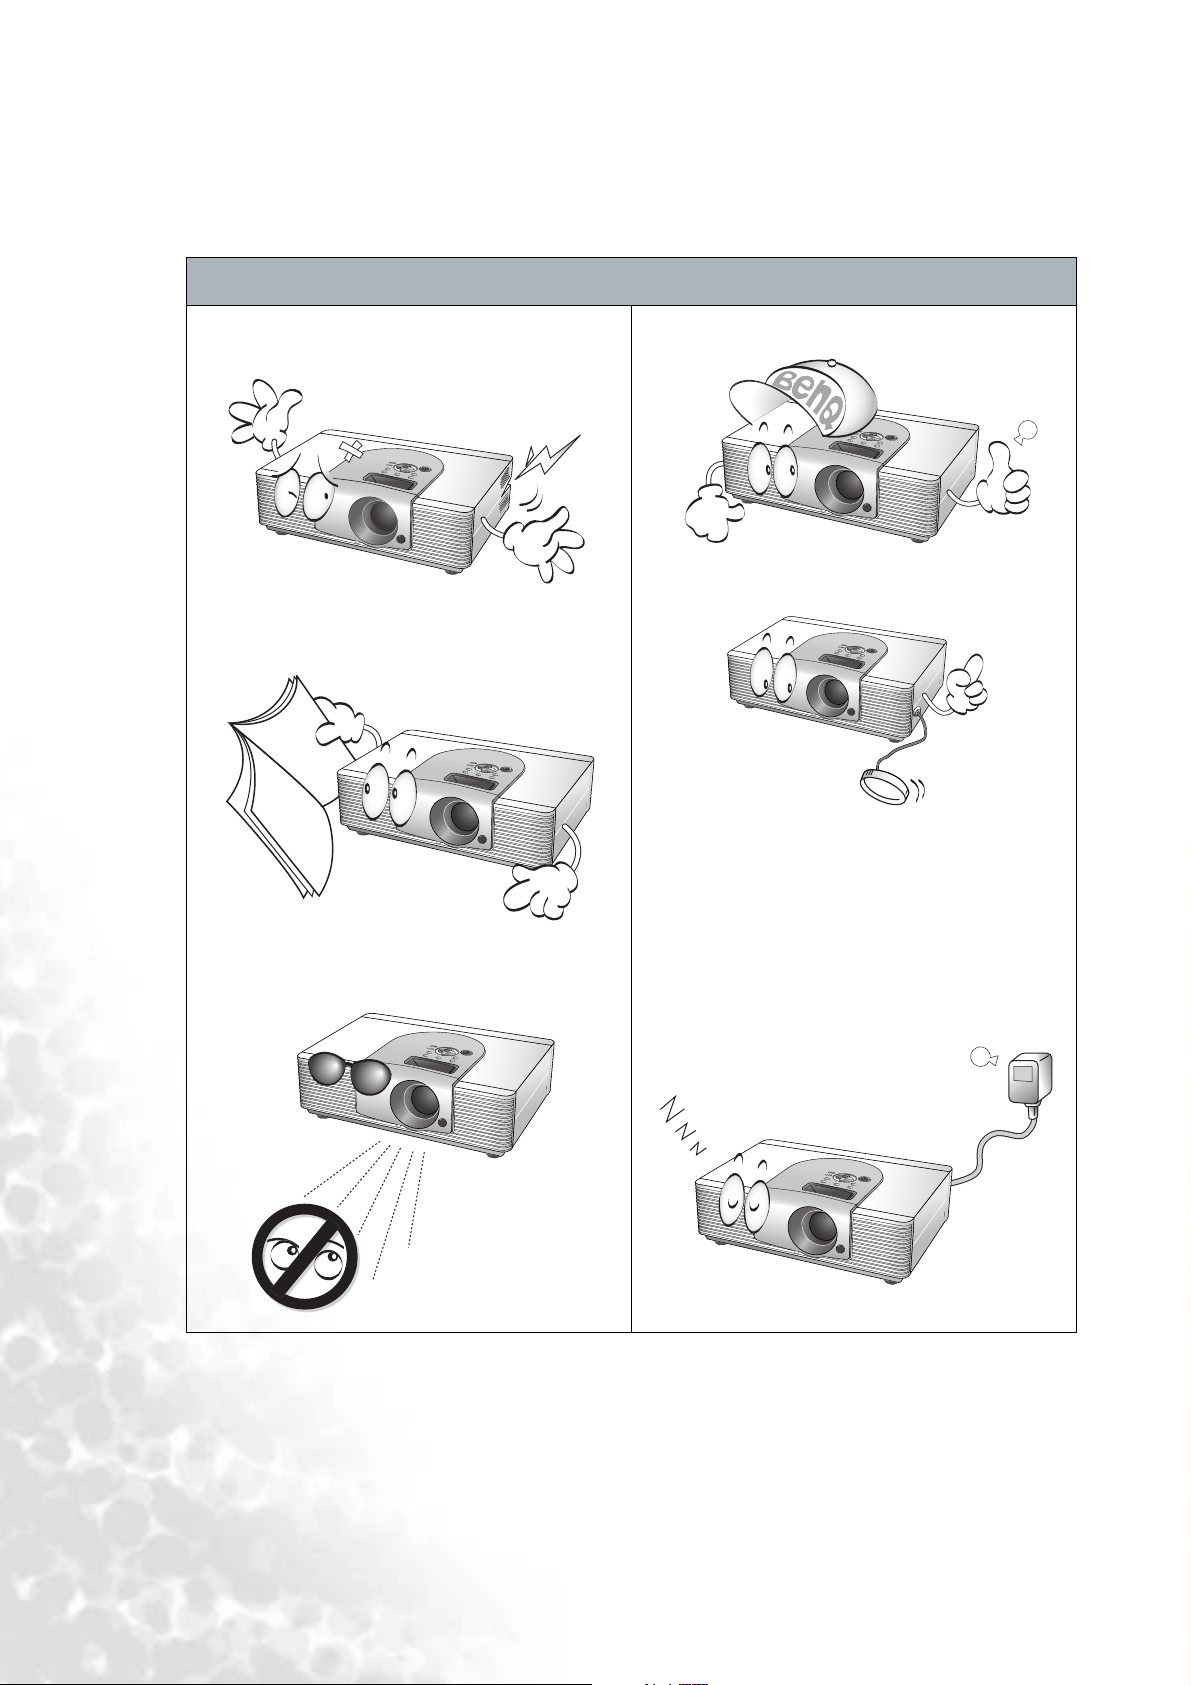
Precautions
• To prevent shock, do not open the cabinet.
There are no user serviceable parts inside.
• Please read this user’s manual before you
operate your projector. Save this user’s manual
for future reference.
• Do not look straight at the projector lens during
operation. The intense light beam may damage
your eyes.
• Refer servicing to qualified service personnel.
• Always open the lens shutter or remove the lens
cap when the projector lamp is on.
• In some countries, the line voltage is NOT
stable. This projector is designed to operate
safely with a mains voltage between 100 and 240
volts AC, but could fail if power cuts or surges of
±10 volts occur. In areas where the mains
voltage may fluctuate or cut out, it is
recommended that you connect your projector
through a power stabilizer, surge protector or
uninterruptible power supply (UPS).
6 Safety, Regulatory and Legal Information
Page 7
Safety Instructions
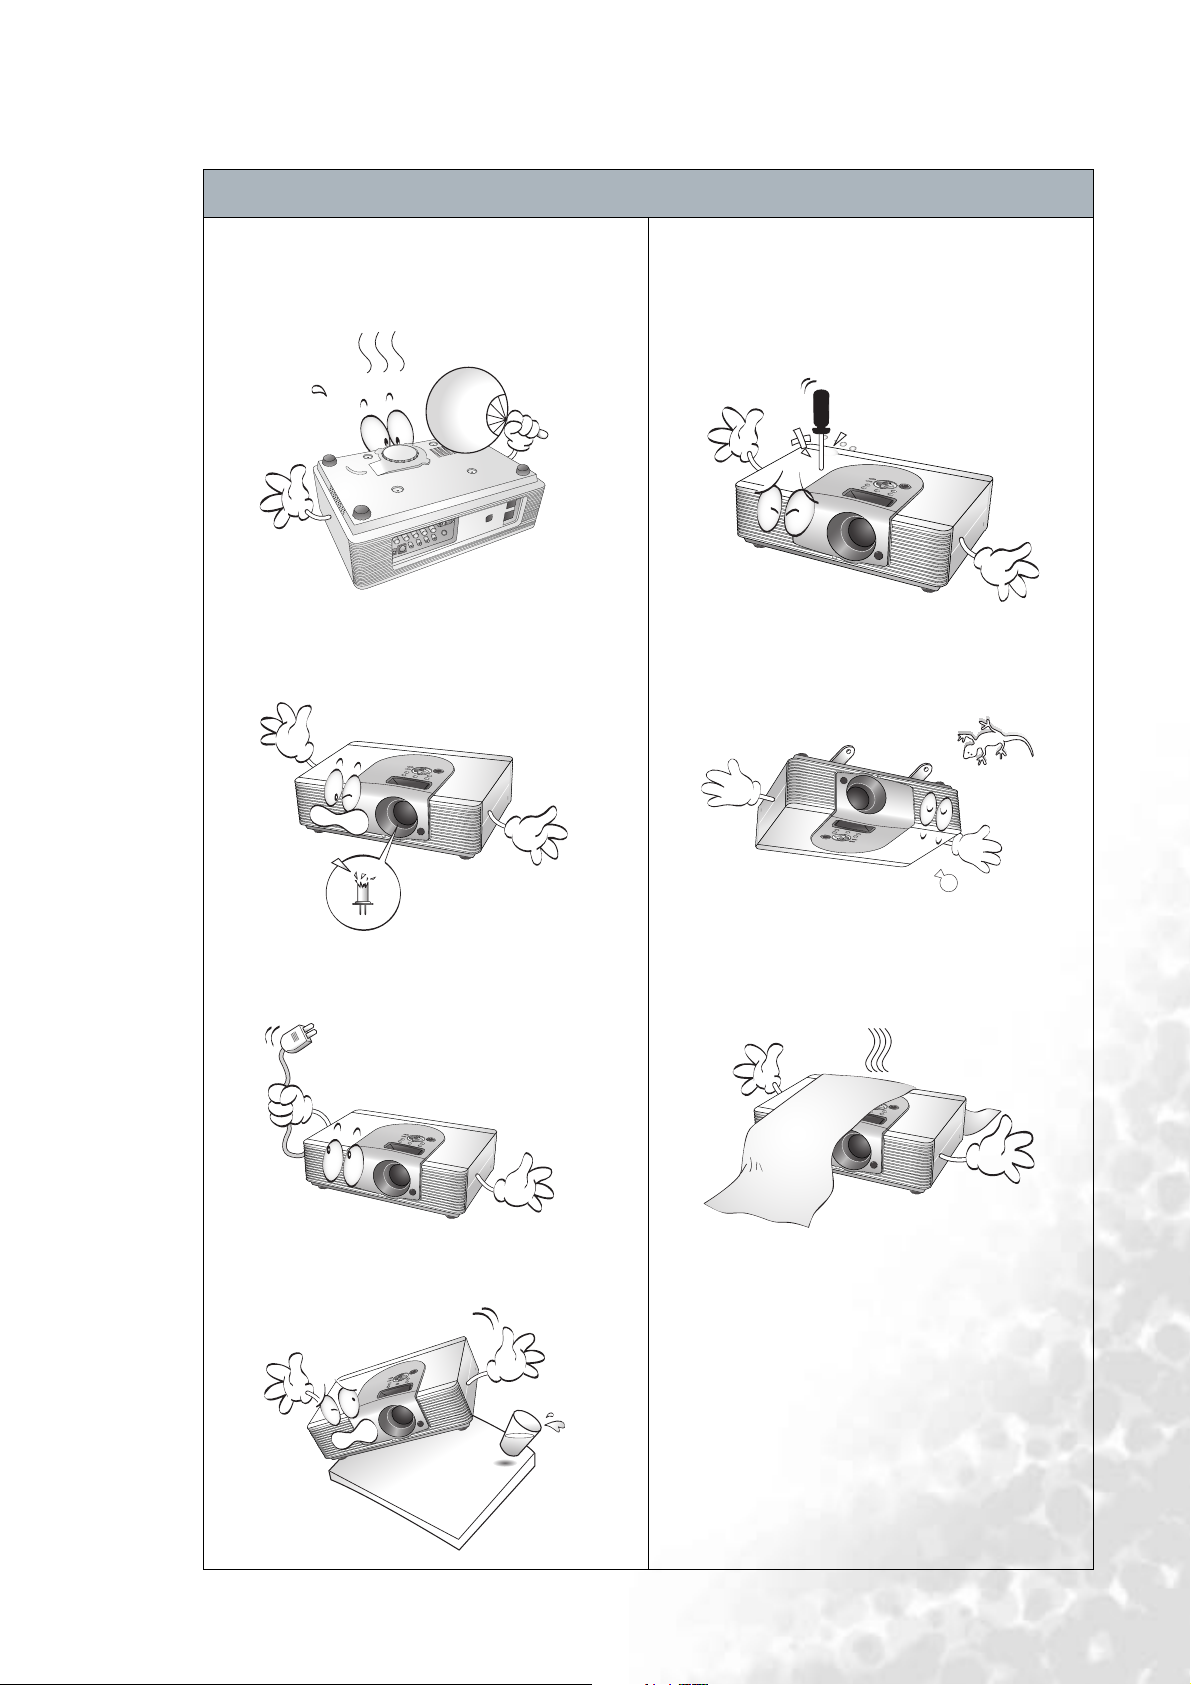
Safety Instructions
1. The lamp becomes extremely hot during
operation. Allow the projector to cool for
approximately 45 minutes prior to removing the
lamp assembly for replacement.
2. Do not operate lamps beyond the rated lamp
life. Excessive operation of lamps beyond the
rated life could cause them to explode on rare
occasions.
5. To reduce the risk of electric shock, do not
disassemble this appliance. Take it to a qualified
technician when service or repair is required.
Incorrect reassembly can cause malfunction of
the projector or electric shock when the
appliance is subsequently used.
6. This product is capable of displaying inverted
images for ceiling mount installation. Please use
BenQ’s Ceiling Mounting Kit for mounting the
unit and ensure it is securely installed.
3. Never replace the lamp assembly or any
electronic components unless the projector is
unplugged.
4. Do not place this product on an unstable cart,
stand, or table. The product may fall, sustaining
serious damage.
7. Do not block the ventilation holes.
- Do not place this unit on a blanket, bedding or any
other soft surface.
- Do not cover this unit with a cloth or any other item.
- Do not place inflammables near the projector.
If the ventilation holes are seriously obstructed,
overheating inside the unit may cause damage to the
lamp, the projector to fail or result in fire.
7 Safety, Regulatory and Legal Information
Page 8
Safety Instructions (Continued)
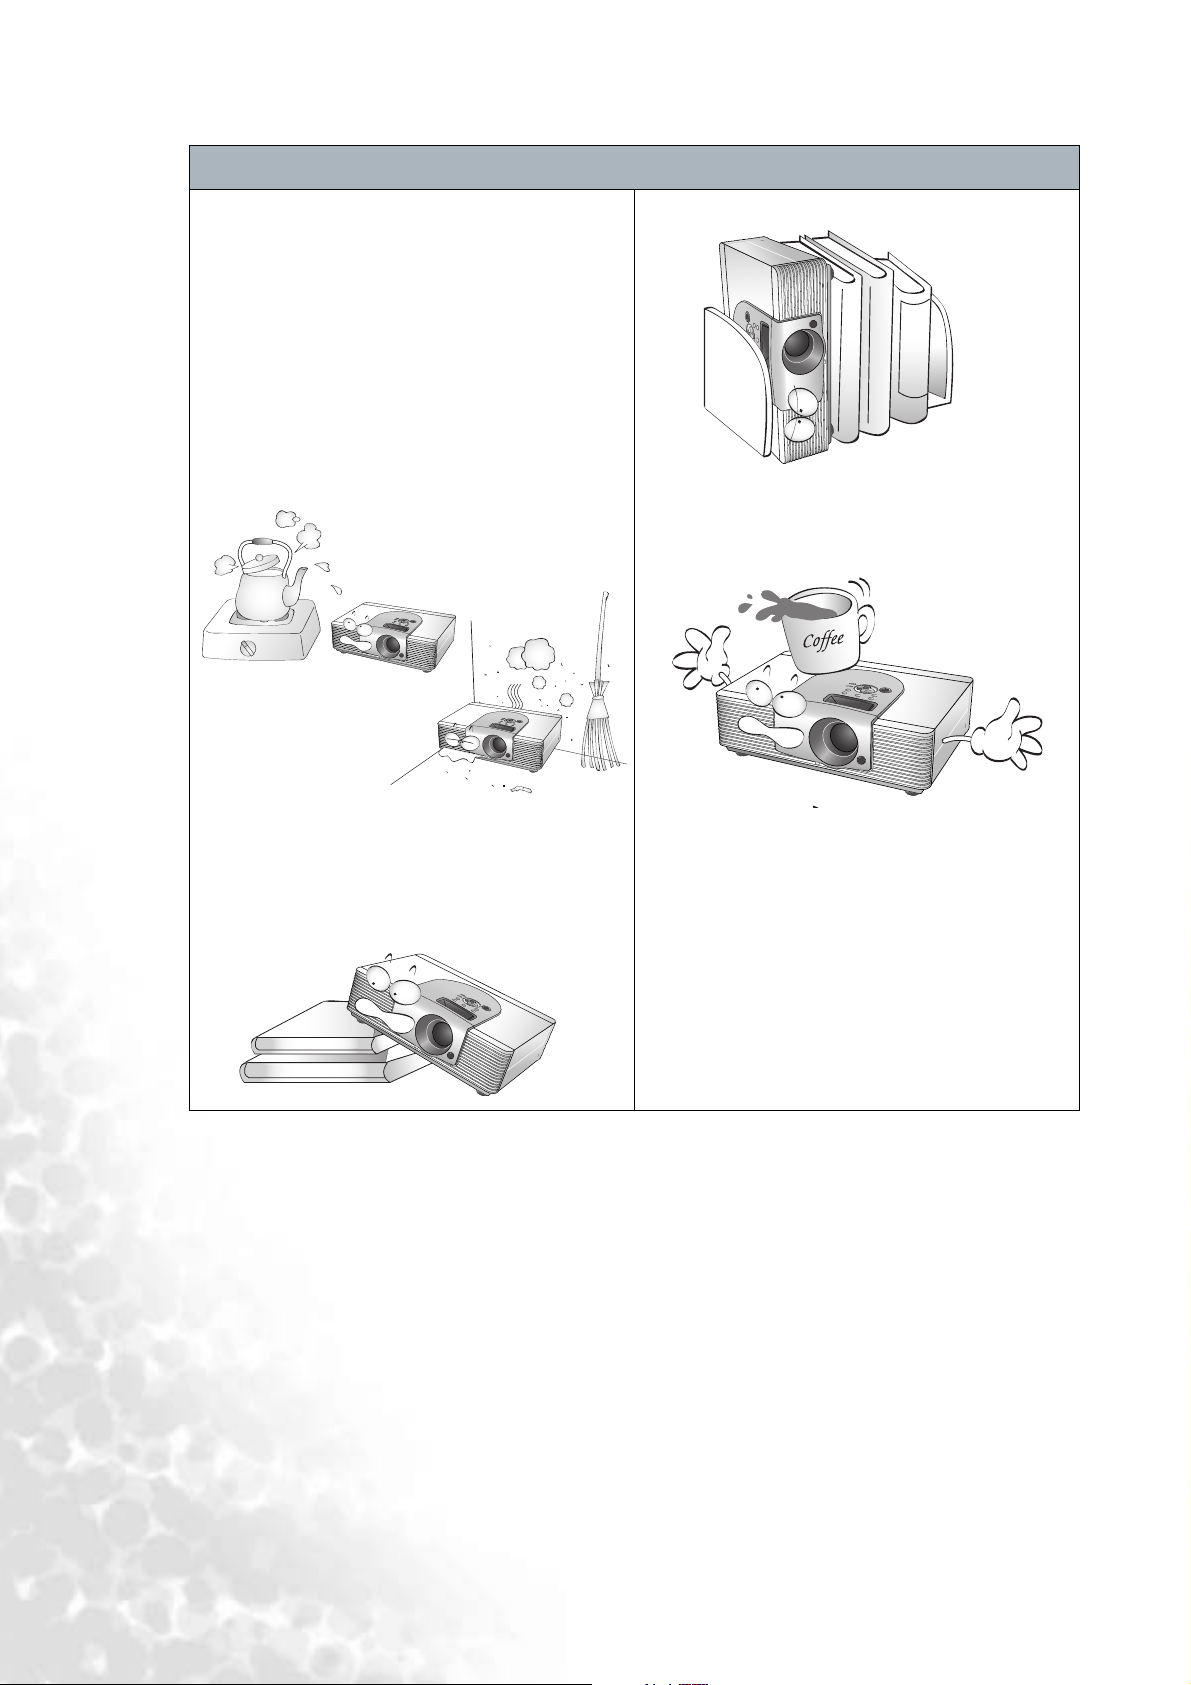
8. Do not place this unit in any of the following
environments.
- Space where is poorly ventilated or confined. Allow at
least 50 cm clearance from walls and free flow of air
around the projector.
- Locations where temperatures may become excessively
high, such as the inside of a car with all windows rolled
up.
- Locations where excessive humidity, dust, or cigarette
smoke may contaminate optical components,
shortening the projector’s lifespan and darkening the
screen.
- Locations near fire alarms
- Locations with an ambient temperature above 35°C /
95°F
10. Do not stand the unit on end vertically.
Doing so may cause the unit to fall over, causing injury
or resulting in damage to the unit.
11. Do not step on this unit or place any objects
upon it.
9. Always place the unit on a level, horizontal
surface during operation.
- Do not use if tilted at an angle of more than 10 degrees
left to right, nor at angle of more than 15 degrees front
to back. Using the unit when it is not fully horizontal
may cause a malfunction of, or damage to, the lamp or
other components.
Besides probable physical damage to the unit, doing so
may result in accidents and possible injury.
12. Do not place liquids near or on the projector.
Liquids spilled into the projector may cause it to
fail. If the projector does become wet, disconnect
it from the power supply’s wall socket and call
BenQ to have the projector serviced.
Moisture Condensation
Never operate the projector immediately after moving it from a cold loaction to a hot location. When the
projector is exposed to such a change in temperature, moisture may condense on the crucial internal parts. To
prevent the projector from possible damage, do not use the projector for at least 2 hours when there is a sudden
change in temperature.
Avoid Volatile Liquid
Do not use volatile liquids, such as insecticide or some types of cleaner, near the projector. Do not have rubber
or plastic products touching the projector for a long time. They will leave marks on the finish. If cleaning with a
chemically saturated cloth, be sure to follow the product’s safety instructions.
Disposal
This product contains the following materials which are harmful to human bodies and environment.
• Lead, which is contained in solder.
• Mercury, which is used in lamp.
To dispose the product or used lamps, consult your local environment authorities for regulations.
8 Safety, Regulatory and Legal Information
Page 9

Overview
Features
Q High Picture Quality
This single DMD DLP™ projector provides excellent picture quality, a high contrast ratio and very good
color uniformity.
Q Dynamic Performance and Rich Gray-Scale
With a 6-segment color wheel, the projector can attain refresh rates of up to 300 Hz which provides dynamic
performance and rich gray-scale without the 'color flicker' or 'rainbow effect' associated with other singleDMD DLP™ projectors.
Q Sealed Optical Engine with a High-Quality Lens Design
The optical engine uses a high-quality lens for maximizing optical performance. The sealed optical engine
prevents light leakage and any dust from entering the engine, which could cause annoying 'spots' in the
projected image.
Q Low-Noise Operation
The projector's unique cooling system design prevents annoying fan noise, and is rated at less than 30 dB.
Q Wide Variety of Inputs
The projector can support a wide variety of video formats including Composite, S-Video, Component
(YP
bPr / YCbCr) and DVI-I (digital and analogue RGB). The two component inputs are used to connect the
projector to HDTV receivers and DVD players. They use RCA connectors to minimize signal degradation
that may be caused by installations that have longer cables.
Q HDTV Ready
The projector is compatible with 480i, 480P, 576i, 576p, 1080i and 720P formats.
Q De-interlacing with 3:2 Pull-Down
Using BenQ's proprietary de-interlacing technology, the projector provides exceptional scaling and film-tovideo (3:2 pull-down) conversion for the most artifact-free images possible.
Q PIP/POP function
The Picture-In-Picture (PIP) and Picture-On-Picture (POP) functions allow you to display two inputs on the
screen at the same time.
Q Video Memory
This projector allows users to store up to three different configurations in its video memories to optimize the
image for different types of signal.
Q Multilingual OSD (On-Screen Display) menus
9 Overview
Page 10
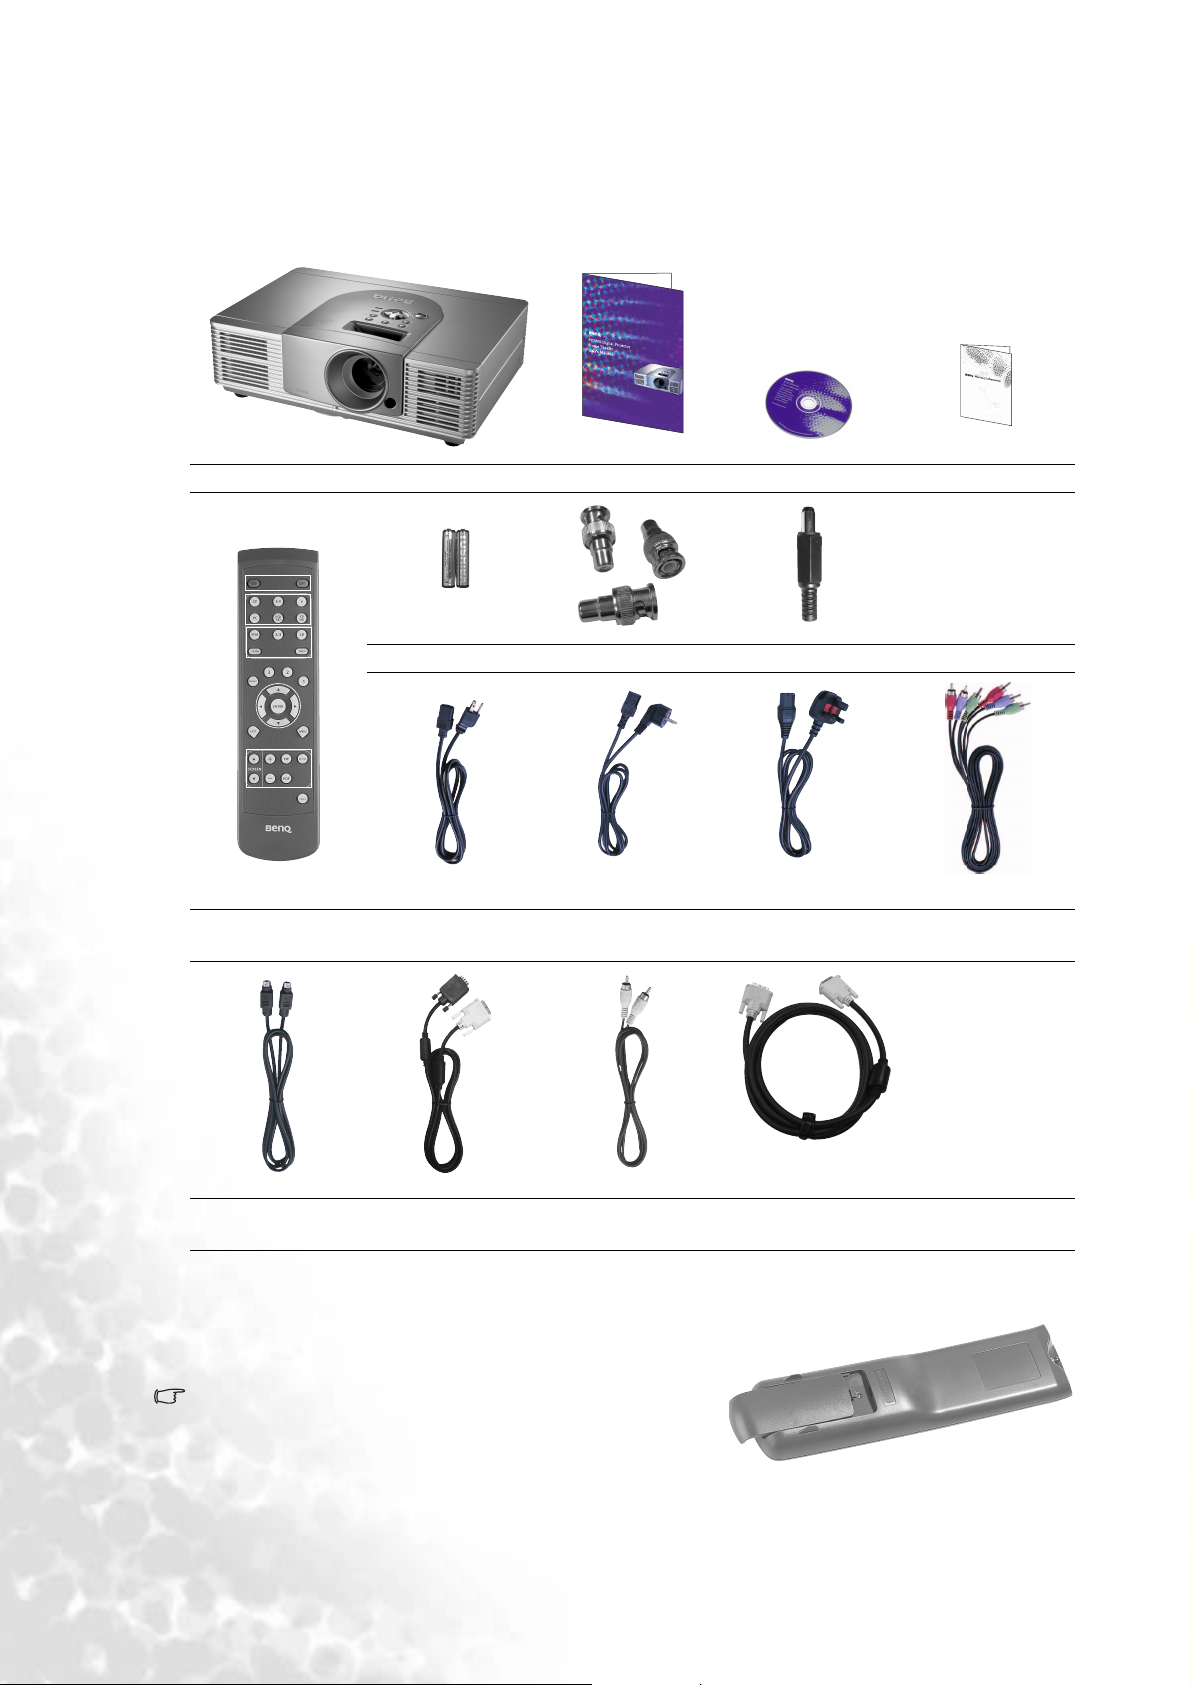
Shipping Contents
The projector is shipped with the cables required for connection to a PC and video equipment. Carefully
unpack and verify that you have all of the items shown below. If any of these items are missing, please contact
your place of purchase.
Projector User’s manual User’s manual CD Warranty card
Batteries BNC-RCA adapter 12V DC-plug
US (110V) EU (220V)
Remote control Power cord Component video
S-Video cable D-Sub - DVI-I
cable
Composite video
cable
UK (240V)
cable
DVI-DVI cable
Installing or Replacing Batteries
Push on the cover and slide it to open. Install two AAA batteries
with the correct polarity, then close the cover.
Notes on Batteries
Q Make sure that the polarities are correct when installing the
batteries.
Q Do not mix an old battery with a new one, or mix different types of batteries.
Q If the remote control will not be used for an extended period of time, remove the batteries to avoid
damage from battery leakage.
10 Overview
Page 11
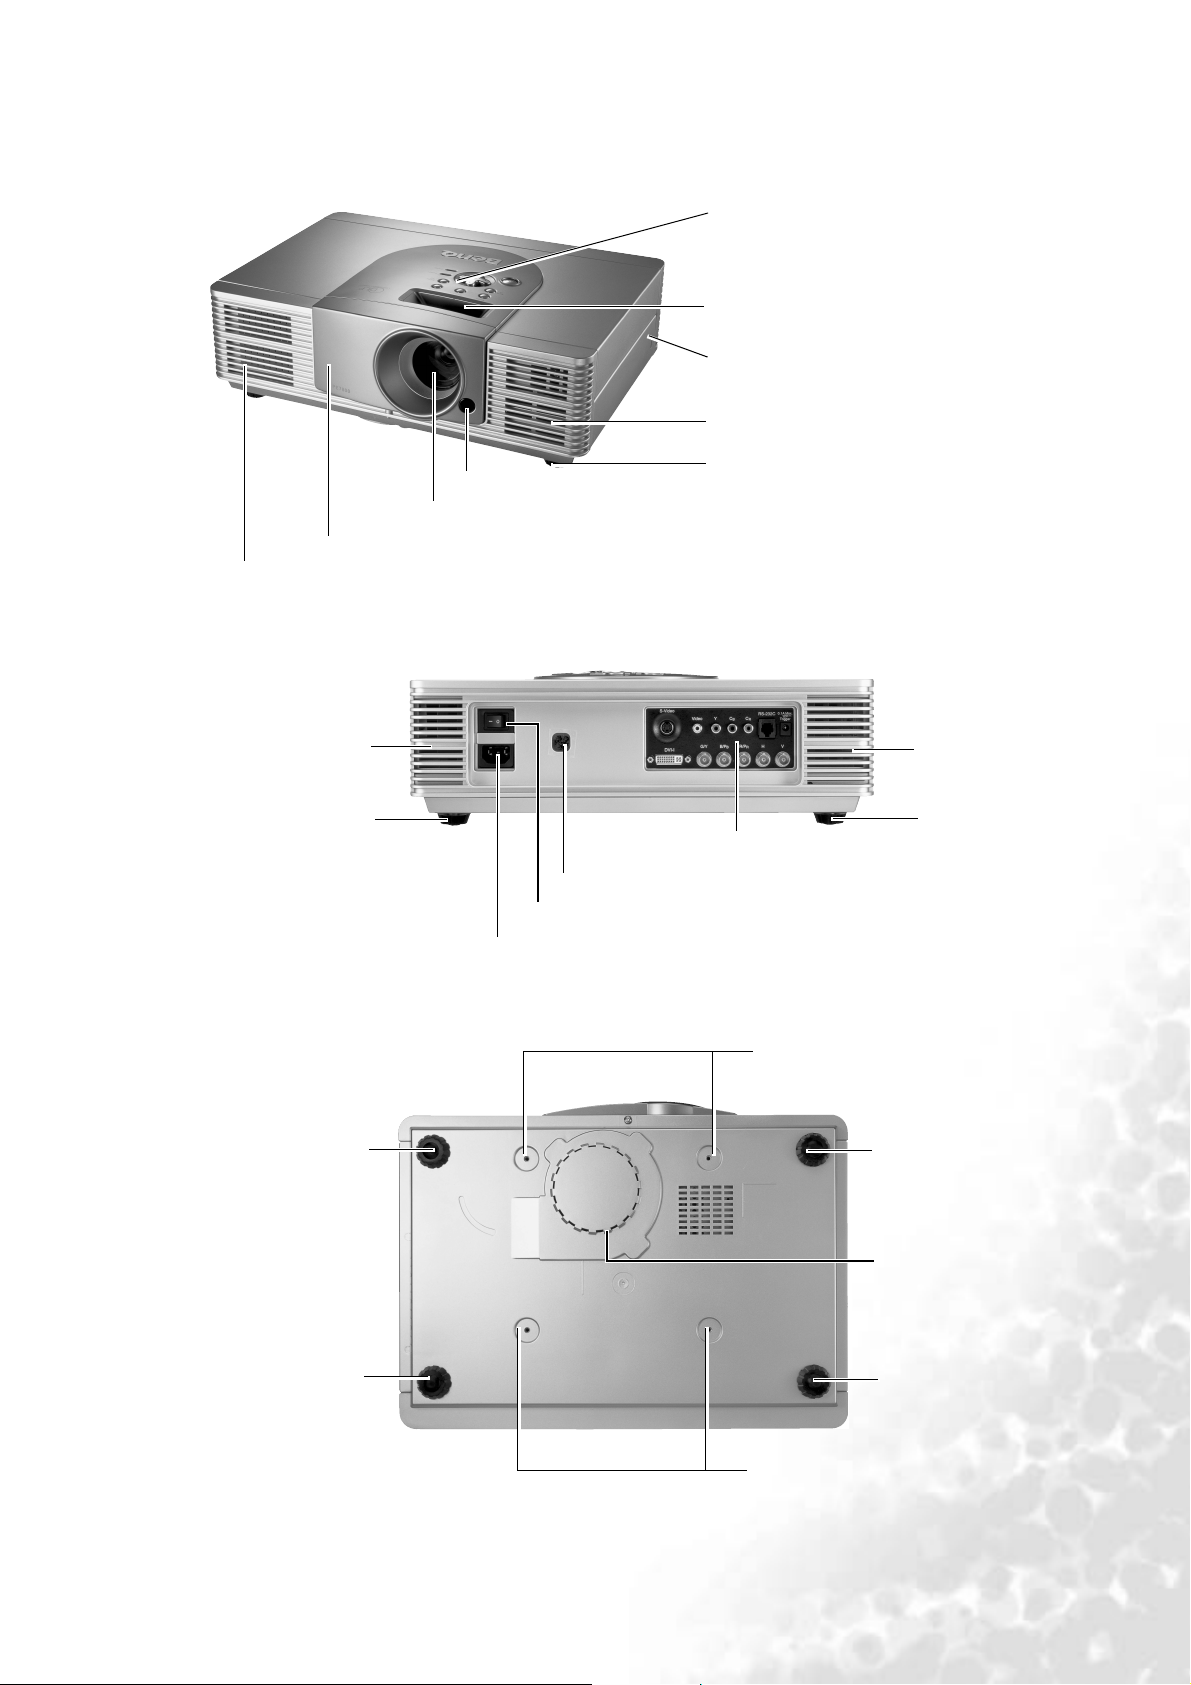
Projector Exterior View
Front / Upper Side
Control Panel
Show lamp status and whether the projector is on or
off. For more details, "Control Panel" on page 13.
Focus Ring and Zoom Ring
Adjusts the focus and zoom of the projection lens.
Kensington Lock
This lock can withstand 150 N of force.
Ventilation Holes (intake)
Front Lamp Cover: Remove this cover when replacing the lamp.
Ventilation Holes (exhaust)
Rear Side
Ventilation Holes
(exhaust)
Rear Adjuster
Bottom Side
Front IR Sensor
Projection Lens
AC Power IN Socket
Back IR Sensor
Main AC Power Switch
Front Adjuster button
Adjusts the height or projection angle.
Ventilation Holes
(exhaust)
Rear Adjuster
Connector Panel
For more details, see the description of
Connector Panel on the next page.
Front Adjuster
Adjusts the height or
projection angle.
Rear Adjuster
Adjusts the height or
projection angle.
Ceiling Mount Holes
For attaching the prjector to a ceiling mount
rack.
Front Adjuster
Adjusts the height or
projection angle.
Ventilation Holes
(intake)
Rear Adjuster
Adjusts the height or
projection angle.
Ceiling Mount Holes
For attaching the prjector to a ceiling
mount rack.
11 Overview
Page 12

Connector Panel
1. Video (RCA jack)
Composite video signal input.
2. S-Video (mini DIN 4-pin)
Y/C (S-video) signal input
3. Component (RCA jacks)
480i Component (Y/C
B/CR) video signal input
4. RGB/ HDTV (BNC)
DTV Y/P
B/PR or DTV RGB video signal input.
5. Computer (DVI-I)
RGB Computer and DVI signal input.
6. RS-232C (phone jack)
RS-232C control signal input.
7. 12V Trigger (mini jack)
+12V output, active when the projector is turned on.
12 Overview
Page 13

Controls and Functions
Control Panel
5
4
3
2
1
11
10
6
7
8
9
1. POWER (Refer to pages 19, 21 and 32 for more
information.)
Press this key for ONE second to turn the
projector on when it is in the standby mode. Or
press this key twice to turn the unit off.
2. ARROWS (c/e/d/f) (Refer to page 23 for
more information.)
Used to select the desired menu items and to
make adjustments.
3. EXIT
Exits and saves the menu settings.
4. MENU (Refer to page 22 for more information.)
Turns the on-screen display control menu on or
off.
5. MEMORY (Refer to page 20 and 26 for more
information.)
Sequentially recalls settings 1 ~ 3 saved to
memory.
8. POWER light
Indicates whether the unit is on or off
Q The orange light shows when the AC
power cord is plugged into the wall
outlet (standby mode). Once in the
standby mode, you can press the
POWER key on the projector or the ON
key on the remote control for ONE
second to turn the projector on.
Q The green light shows when the power
is turned on and the projector is
operating.
Q Flashes orange for the first 60 seconds
during powering up, indicating that the
lamp is warming up.
Q Flashes orange for two minutes after the
projector is turned off to indicate that
the lamp is cooling.
9. LAMP indicator light (Refer to page 32 for
more information.)
Indicates the status of lamp.
Shows a red light when the lamp has
developed a problem. Please contact your
BenQ dealer for assistance.
6. INPUT (Refer to page 19 and 24 for more
information.)
Switches input sources sequentially.
7. ENTER (Refer to page 23 for more information.)
Opens the selected item of the menu.
10. Zoom Ring (Refer to page 19 for more
information.)
Adjusts the size of the image
Q Rotate clockwise to enlarge the image or
rotate counter-clockwise to make the
image smaller.
11. Focus Ring (Refer to page 19 for more
information.)
Adjusts the focus of the projected image.
13 Overview
Page 14

Remote Control
POWER ON/OFF
Hold ON down for ONE second to
turn the projector on. Press OFF to
turn the projector off. (Refer to pages
19 and 21 for more information.)
Aspect buttons
Selects the image aspect ratio to suit
the input signal. (Refer to page 25 for
more information.)
Source buttons
Selects an input source to display on
the projector. (Refer to page 24 for
more information.)
Memory (1, 2, 3 and default) buttons
Restores settings saved in memory
locations 1, 2 and 3 or restores the
default settings for the current input
source. (Refer to page 26 for more
information.)
EXIT
Exits and saves any changes made
using the menu. (Refer to page 23 for
more information.)
SCREEN c / d: Control the screen
up or down directly. These functions
are only available for BENQ's
accessory screen.
ARROWS (c/e/d/f)
Used to select the desired menu or to
make adjustments.(Refer to page 23
for more information.)
ENTER
Opens the selected items of the
menu. (Refer to page 23 for more
information.)
MENU
Turns the on-screen display control
menu on or off. (Refer to page 23 for
more information.)
Picture quality adjustment buttons
(Refer to page 23 for more
information.)
LIGHT: Turns the remote control’s
backlight on.
Notes on Remote Control Operation
Q Make sure that there is nothing between the remote control and the IR sensor on the projector that
Q The effective range of the remote control is up to 8 meters from the front of the projector or 8 meters
14 Overview
might obstruct the infrared beam.
from the rear of the projector. The remote control must be held at an angle within 30 degrees of the
projector’s IR remote control sensor.
Page 15

Connecting
When connecting any signal source to the projector, be sure to:
1. Turn off all equipment before making any connections.
2. Use the correct signal cables for each source.
3. Ensure the cables are firmly inserted.
4. Connect all audio signals to external speakers. This projector is not equipped with speakers.
Connecting Video Inputs
Connecting to DVD players
DVD Player
CR(PR) CB(PB) Y
Composite video cable
Component video cable
If the selected video image is not displayed after the projector is turned on and the correct video source has been
selected, please check that the video source is turned on and operating correctly. Also check that the signal cables
have been connected correctly.
To audio output
terminals
S-Video cable
To audio input
terminals
Connecting Progressive Component (DTV Y/PB/PR)
DTV
To audio output
terminals
To Y P BPR terminals
Component video cable
To audio input
terminals
To Y P BPR terminals
15 Connecting
Page 16

Connecting RGBHV (DTV RGB)
DTV
To audio output
terminals
(not included in the
accessory kit)
To audio input
terminals
Connecting Video Equipment, a PC or another Computer using the DVI-I Connector
Video equipment or computer
with DVI-I terminal
To DVI-I terminals
DVI-DVI cable
To audio output
terminals
To audio input
terminals
To DVI-I terminals
16 Connecting
Page 17

Setting Up Your Projector
Preparations
1. Remove the lens cap.
2. Turn all of the connected quipment on.
3. Plug the supplied power cord into the AC inlet on the rear of
this unit.
4. Plug the power cord into a wall socket and turn the wall
switch on.
5. Turn on the main power switch at the rear of this unit (next to
the AC inlet). The POWER light will light up in orange. Press
POWER ON/OFF key on the remote control or POWER key
on the projector for ONE second to turn the projector on.
Adjust the Height
There are four adjustment screws on the bottom of the projector. These
adjustment screws change the image height and projection angle. They
can lift the projection angle by up to 15 degrees. To adjust the projector,
you can screw the height adjustments to fine-tune the projection angle.
If the screen and the projector are not perpendicular to each other, the
projected image becomes vertical trapezoidal. To correct this problem,
adjust the value of Keystone in the Installation menu. See page 27 for more
information.
17 Setting Up Your Projector
Page 18

Setting Up the Screen
Ceiling Installtion for 16 : 9 Screen
Projection Distance
Screen Size (Type)
Width
Offset
Height
Floor Installation for 16 : 9 Screen
Screen Size (Type)
Height
Width
Offset
Projector
Screen
Screen
Projector
Projection Distance
16 : 9 screen size (inch)
Screen Size Projection Distance Offset
Ty pe Heig ht Wi dth
45.9 22.5 40.0 65.2 79.6 4.8
68.9 33.8 60.0 97.8 119.4 7.2
91.8 45.0 80.0 130.4 159.2 9.6
103.3 50.6 90.0 146.7 179.1 10.8
114.8 56.3 100.0 163.0 199.0 12.0
126.2 61.9 110.0 179.3 218.9 13.2
137.7 67.5 120.0 195.6 238.8 14.4
149.2 73.1 130.0 211.9 258.7 15.6
160.7 78.8 140.0 228.2 278.6 16.8
183.6 90.9 160.0 260.8 318.4 19.2
206.6 101.3 180.0 293.4 358.2 21.6
229.5 112.5 200.0 326.0 398.0 24.0
The above numbers are approximate and may be slightly different from the actual measurements.
Min.
(W x 1.63)
Max.
(W x 1.99)
(W x 0.12)
18 Setting Up Your Projector
Page 19

Basic Operation
Turning the Power on
Follow the steps below.
1. Make sure the Power light is orange when power is applied
and the main AC power switch is turned on.
2. Press and hold the ON key on the remote control or the
POWER key on the projector for ONE second to turn the
projector on. The POWER light will flash orange while
warming up, then show a steady green.
3. " Searching…." will be displayed on the screen before the
projector identifies the input signal. This message will
remain on the screen until a valid signal is detected.
4. If the horizontal frequency of the input signal exceeds the
range of the projector (XGA), a message reading "
Unsupported timing " will be displayed on the screen. This
message will remain on-screen until you change the input
signal.
The ON key on the remote control and the POWER key on the projector may not work while the projector is cooling.
(The Power light blinks orange while the projector is cooling.)
Zoom / Focusing
Q Adjust the projected image to the size that
you need using the lens’ zoom ring. Then
focus the image by rotating the focus ring.
Zoom in Zoom out
Selecting Input Source
Q When the projector is turned on, it will search for the input source
you last selected.
Q You may directly select the input source by using the remote
control.
Focus
19 Basic Operation
Page 20

Selecting Aspect Ratio
Q Select an aspect ratio to suit the format of the video signal. There are five aspect
ratios available:
1. ANA (ANAMORPHIC): Scales an image so that it is displayed in the center of
the screen with a 16:9 aspect ratio.
2. Standard (4:3): Scales an image so that it is displayed in the center of the screen
with a 4:3 aspect ratio.
3. LB (LETTERBOX): Enlarges an image with letterbox format to display it in fullscreen format with a 16:9 aspect ratio. The upper and lower portions of the
image are cropped. Use this setting for Cinemascope and Vista video wide screen formats.
4. THRO (Through): One-to-one mapping is performed on the input signal without any scaling with the
image displayed at the center of the screen.
5. WIDE: A 4:3 aspect ratio image is enlarged NON-linearly in horizontal direction to accommodate 16:9
full-screen display.
Q Refer to page 25 for more information.
Selecting the Video Memory
Q Press the video memory key on the remote control to recall the settings directly.
Q There are four video settings : MEMORY 1, MEMORY 2 and MEMORY 3 and
DEFAULT. The DEFAULT key can be used to restore the default setting for the
current input source.
Q Refer to page 26 for more information.
Setting Menu
Q Press the MENU button to turn the on-screen display menu on or
off.
Q Use the ARROW buttons (c/e/d/f) to select items in the
menu or to make various adjustments.
Q Press the ENTER button to enter the setting for the current items
in the menu, or press EXIT to leave and save the settings for the
current items in the menu.
Q Refer to page 23 for more information.
20 Basic Operation
Page 21

PIP (Picture-In-Picture)/POP (Picture-On-Picture) functions
Q Press the PIP button to enable the PIP function.
1.For PIP purposes, there are two groups of inputs classfied according to their
display modes:
Video Group: Video, S-Video and Component Y/C
Graphic Group: HDTV input and Computer input.
2. The PIP function allows the projector to display one input from the Graphic
Group within one input from the Video Group, or display one input from Video
Group within one input from the Graphic Group.
3. Press the PIP button to switch to the main window or turn off the PIP function.
4. Select the input source for the main window by pressing the INPUT button.
Q Press the POP key to enable the POP function.
Q Press the ACTIVE button to switch to the active window. You can change the input signal setting in the active
window.
Q Press + or - to adjust the size of the PIP window.
Q Adjust the position of the PIP window with the ARROW keys (c/e/d/f).
Q SCREEN c / d: Control the screen up or down directly. These functions are only available for BENQ's
accessory screen.
B/CR inputs
Turning the Power Off
Follow the steps below.
1. Press the OFF key on the remote control or the POWER key
on the projector.
2. The POWER light flashes green and the fans run for two
minutes to cool the lamp. The projector will not respond to
any commands until the cooling process is complete.
3. Then, the POWER light is a steady orange once the cooling
process has finished. The fans will continue to run for about
two minutes after the light changes to orange.
4. The fans stop and the light is orange.
5. If the projector will not be used for an extended period, turn
the main power switch off and unplug the power cord from
the power outlet.
21 Basic Operation
Page 22

Menus
LAM
NOR
AL
USER 1
USER 2
WAR
Menu Structure
PICTURE...
DISPLAY...
ENVIRONMENT...
INSTALLATION...
PRO-PICTURE...
BRIGHTNESS -30..30
CONTRAST -32..31
COLOR -30..30
TINT -15..15
SHARPNESS -5..5
FILTERS 0..3
RED -15..15
GREEN -15..15
BLUE -15..15
YELLOW -15..15
SOURCE...
ASPECT...
PC & HDTV...
SAVE...
LOAD...
DEFAULT LOAD
LAMP TIMER RESET
AUTO OFF 10 MINNUTES
LAMP HOURS 10 HOURS 10 MINNUTES
LANGUAGE...
MIRROR...
KEYSTONE... -12..12
BACKGROUND COLOR...
OSD POSITION...
PATTERN...
COLOR TEMP...
SET USER COLOR TEMP...
GAMMA...
VIDEO
S-VIDEO
COMPONENT
COMP-HD
RGB-HD
DVI-I
ANAMORPHIC
STANDARD(4:3)
LETTERBOX
WIDE
THROUGH
AUTO YES?
FREQUENCY -15..15
PHASE 0..31
H. POS -30..30
V. POS -30..3
MEMORY 1
MEMORY 2
MEMORY 3
MEMORY 1
MEMORY 2
MEMORY
3
LOAD DEFAULT OF CURRENT SOURCE.
ARE YOU SURE?
PLEASE DO THIS ONLY WHEN YOU
CHANGE A NEW LAMP.ARE YOU SURE?
ENGLISH
FRENCH
SPANISH
GERMAN
ITALIAN
TRADITIONAL CHINESE
SIMPLIFIED CHINESE
KOREAN
FLOOR FRONT
CEILING FRONT
FLOOR REAR
CEILING REAR
LIGHT SEA GREEN
BLACK
WHIT
E
HORIZONTAL 0...100
VERTICAL 0...10
LAM
P
LOAD
R GAIN 0..512
G GAIN 0..512
B GAIN 0..512
R BIAS 0..90
G BIAS 0..90
B BIAS 0..90
SAVE TO: USER2
CINEMA
WAR
LAMP
M
NOR
WARM
MAL
COOL
NORMAL COOL
USER1
USER 1
NO YES
NO YES
USER 2
USE
R1
VIDEOPC
0
USE
R2
0
22 Menus
Page 23

Using the Menus
The projector is equipped with on-screen display (OSD) menus for making various adjustments and settings.
There are eight different menu languages. Refer to "INSTALLATION Menu" on page 27 for more details.
The following example describes the adjustment of the keystone.
1. Press the MENU
button to turn
the on-screen
menu on.
2. Use c or d to
select
INSTALLATION
and press ENTER.
3. Use c or d to
select KEYSTONE
and press ENTER.
4. Adjust keystone values by pressing e or
f.
5. Press the EXIT button to leave and save
the settings.
To leave the menu without saving, press
the MENU botton again.
PICTURE Menu
These settings can be stored in three separate video memories, in which each can have different parameters for
different input sources.
There are ten items in this menu: BRIGHTNESS — CONTRAST — COLOR — TINT — SHARPNESS —
FILTERS — RED — GREEN — BLUE — YELLOW.
1. BRIGHTNESS: Adjusts the picture brightness to values between 0 and 60. The higher the value, the brighter
the picture. And lower the setting, darker the picture.
2. CONTRAST: Adjusts the picture contrast to values between 0 and 30. The higher the value, the greater the
contrast.
23 Menus
Page 24

3. COLOR: Adjusts the color intensity to values between 0 and 60. The higher the value, the more vivid and
brighter the color.
4. TINT: Adjusts the color tones to values between 0 and 30. The higher the value, the more reddish the
picture becomes. The lower the value, the more greenish the picture becomes.
Applies to NTSC video signal, only.
5. SHARPNESS: Adjusts the picture sharpness to values between -10 and +10. The higher the value, the
sharper the picture.
6. FILTERS: Turn the video and data filters on or off. Filters can reduce noise in the picture to produce a
sharper image. There are four filters for video input (0 ~ 3) and two filters for graphic input (0 ~ 1). The
higher the setting, the less the noise.
7. RED: Adjusts red hues independently to values between 0 and 30. The higher the setting, the greater the
intensity of red color in the image.
8. GREEN: Adjusts green hues independently to values between 0 and 30. The higher the setting, the greater
the intensity of green color in the image.
9. BLUE: Adjusts blue hues independently to values between 0 and 30.The higher the setting, the greater the
intensity of blue color in the image.
10. YELLOW: Adjusts yellow hues independently to values between 0 and 30. The higher the setting, the greater
the intensity of yellow color in the image.
DISPLAY Menu
Use this menu to set the way that the projector displays the picture.
There are five items in this menu: SOURCE — ASPECT — PC & HDTV — SAVE — LOAD.
1. SOURCE: Selects the video source that will be displayed. .
■ VIDEO: Composite video signal.
■ S-VIDEO: S-Video video signal.
■ COMPONENT: Component Y/CB/CR input
■ COMP-HD: DTV Y/PB/PR input
■ RGB-HD: DTV RGBHV signal input
■ DVI-I: Conputer signal input. Selects DVI-A (Analog) or DVI-D (Digital) signal automatically.
24 Menus
Page 25

2. ASPECT: There are five aspect ratios that can be selected for different video signal:
■ ANAMORPHIC: Scales an image so that it is displayed in the center of the screen with a 16:9 aspect ratio.
BEFORE: 16:9 images (1080i,
720p)
■ Standard (4:3): Scales an image so that it is displayed in the center of the screen with a 4:3 aspect ratio.
BEFORE: Picture images
with a ratio of 4:3 (480i, 576i,
480p, 576p and PC)
■ LETTERBOX: Enlarges an image with letterbox format to display it in full-screen format with a 16:9
AFTER: Projects images on a full
16:9 screen
AFTER: Projects images at
a 4:3 ratio
aspect ratio. The upper and lower portions of the image are cropped. Use this setting for Cinemascope
and Vista video wide screen formats.
or
BEFORE: Cinemascope
and vista signals with a ratio
of 4:3
AFTER
AFTER
■ WIDE: Expands an image with a 4:3 aspect ration NON-linearly along the horizontal axis to provide full
screen display at a 16:9 aspect ratio.
BEFORE: Projects images
with a ratio of 4:3 (480i, 576i,
480p, 576p and PC)
■ THROUGH : One-to-one mapping is performed without any scaling of the image. The image is
AFTER: Expands projected
image in horizontal direction to fit
a full 16:9 screen
displayed at the center of the screen.
or
BEFORE: 16:9 images (1080i,
720p)
AFTER: Projected images are
reduced to a half. (1080i)
AFTER: Projected images are
compressed to a full screen size.
(720p)
25 Menus
Page 26

3. PC&HDTV: The following settings are only available with a PC or Digital Television RGB signal:
■ AUTO: Adjusts the phase, frequency and position automatically.
■ FREQ.: Adjusts the frequency of the sampling clock that captures the input signal.
■ PHASE: Adjusts the phase of the clock.
■ H. POS.: Adjusts the horizontal position of the image.
■ V. POS.: Adjusts the vertical position of the image.
The available adjustment range of the vertical position depends on the type of the input signal that is being
displayed. The vertical position cannot be changed with some types of signal.
4. SAVE: There are three video memories in which users can store
settings, including all items in the Picture and Pro-Picture menus
except for SET USER COLOR TEMP.
Input source Number of available memories
VIDEO
S-VIDEO
COMP-HD
DVI-ANALOG/ DIGITAL
■ To store the settings:
3
3
3
3
i.) Adjusts the items in the Picture and Pro-Picture menus to desired values.
ii.) Go to the Display menu and select SAVE, press Enter. The SAVE OSD will be shown as the picture
above.
iii.) Select MEMORY 1, MEMORY 2 or MEMORY 3 and press ENTER to sore the settings.
iv.) To leave the OSD, press MENU.
5. LOAD: Loads the settings from one of three video memories.
ENVIRONMENT Menu
In this menu, global settings for the projector can be made.
There are four items available: DEFAULT — LAMP TIMER — AUTO OFF — LAMP HOURS.
1. DEFAULT: Loads the default value of the current input source.
2. LAMP TIMER: Resets the lamp timer. This should only be done after the lamp has been replaced.
3. AUTO OFF: Sets the auto-shutdown timer. The timer can be set to a value between10 minutes and 3 hours.
4. LAMP HOURS: Please refer to page 30 for detailed information.
26 Menus
Page 27

INSTALLATION Menu
This menu contains items necessary for installation.
There are six items available: LANGUAGE, MIRROR, KEYSTONE, BACKGROUND COLOR, OSD POSITION
and PATTERN.
1. LANGUAGE: There are eight languages that can be selected for the menus: English, French, Spanish,
German, Italian, Traditional Chinese, Simplified Chinese and Korean.
2. MIRROR: The projector can be installed on a ceiling or behind a screen, or with one or more mirrors.
There are four settings for choice. But the settings are only working with the 1080i, 720p, 525p and 625p
input signals and the input signals from DVI terminal. Contact your dealer for the ceiling mount bracket if
you need to install the projector on a ceiling.
■ FLOOR FRONT: Select this setting with the projector set on the
floor and audience viewing the projected images from the front
side of the screen. This is the most common setting.
■CEILING FRONT: Select this setting with the projector
suspended from the ceiling and audience viewing the projected
images from the front side.
■ FLOOR REAR: Select this setting when the projector is placed
near the floor and behind the screen. A special rear projection
screen is required.
■CEILING REAR: Select this setting when the projector is
suspended from the ceiling and placed behind the screen. A
special rear projection screen is required.
3. KEYSTONE: Corrects for trapezoidal distortion resulting from the angle of projection. It can provide
correction of up to ± 12 degrees.
4. BACKGROUND COLOR: Allows the user to choose the color of the background screen that will be
displayed when there is no input signal. Choose LIGHT SEA GREEN, BLACK and WHITE.
27 Menus
Page 28

5. OSD POSITION: The position of the On Screen Display can be adjusted in both vertical and horizontal
directions.
The available adjustment range of the vertical position depends on the type of the input signal that is being
displayed. The vertical position cannot be changed with some types of signal.
6. PAT TE RN : It will be displayed with the aspect ratio setting made using the ASPECT function of the
DISPLAY menu. Use this pattern when installing the projector, even if there is no input signal. Use it to
adjust the image size and the focus.
Only some of the items above can be adjusted, when there is no input signal.
PRO-PICTURE Menu
Except for SET USER COLOR TEMP, the settings can be stored in three separate video memories. Each can have
different parameters for different types of video signal.
1. COLOR TEMP: Adjusts the white color. 5 options are available for COLOR TEMPERATURE: HI BRIGHT,
STANDARD, LOW, USER1 and USER 2.
■ HI BRIGHT: High color temperature. Makes white bluish. It is best suited to PCs and other computers.
■ STANDARD: Middle color temperature (6500°K). Maintains normal colorings for white. It is best suited
for viewing TV.
■ LOW: Low color temperature (5700°K). Makes white appear reddish. It is best suited for viewing movies.
■ USER 1 and USER 2 : Two different color temperatures can be customized and stored. See below for
details
2. SET USER COLOR TEMP: Adjusts and stores users’ preferable color temperature.
■ To store the settings:
i.) Open the PRO-PICTURE menu and select SET USER
COLOR TEMPERATURE, press ENTER. A menu like the one
pictured to the right will be displayed.
ii.) Choose a basic color temperature among LAMP, WARM,
NORMAL and COOL by pressing the c or d button and
press ENTER.
iii.) Press c or d to select the item to be changed. And adjust
the value with e or f button.
iv.) Store the settings as USER 1 or USER 2 by pressing the c
or d button.
v.) Press Enter to save the changes.
About color temperatures:
There are many different shades that are considered to be “white” for various purposes. One of the
common methods of representing white color is known as the “color temperature”. A white color with a
low color temperature appears to be reddish white. A white color with a high color temperature appears
to have more blue in it. The SET USER COLOR TEMP menu allows you to alter the color temperature
and the overall color balance of the image by adjusting the red, green and blue gains and biases.
28 Menus
To make the color temperature higher
Set the value of B GAIN (or B BIAS) greater, and the value of R GAIN (or R BIAS) smaller.
To make the color temperature lower
Page 29

Set the value of R GAIN (or R BIAS) greater, and the value of B GAIN ( or B BIAS) smaller.
3. GAMMA: Adjusts the color saturation of mid color tones within the image. Can be used to displayed fine
detail more clearly under some conditions.
■ CINEMA: Suitable for viewing movies in a dark room.
■ PC: Suitable for viewing images from a PC or other computer in a bright room.
■ VIDEO: Suitable for viewing video programs in a dark room.
29 Menus
Page 30

Additional Information
Warning Message
Q It is normal for illumination from the lamp to
dim somewhat when the projector has been
used for a period of time.
Q The message "Lamp life is expired ! Please
install new lamp. And reset the lamp timer."
will be displayed for 30 seconds on the screen
when the lamp has been in use for 1950 hours.
Q The message " Please replace the lamp! Lamp
will exceed its lifetime after (hours):" will be
displayed on the screen for 30 seconds each
time the projector is turned on after the lamp
has been in use for 1980 hours. The number of
hours will be updated.
Q The message "Please replace the lamp !" will be
displayed on the screen continuously and the
POWER LED will flash orange and green
sequentially if the lamp has been in use for
more than 2,000 hours.
Q The projector will turn off automatically after
10 minutes.
Lamp life is expired!
Please install new lamp
And reset the lamp timer
Please replace the lamp!
Lamp will exceed its
lifetime after (hours):
Please replace the lamp!
30 Additional Information
Page 31

Replacing the Lamp (Contact your BenQ dealer for assistance)
CAUTION: The lamp may be very hot. Allow the projector to cool down for 45 minutes before replacing the
lamp.
1. Loosen the screws
on the front lamp
cover.
2. Remove the front
lamp cover.
3. Loosen the three
screws on the
lamp shield.
4. Take off the lamp
shield.
5. Loosen the three
screws on the
lamp module.
6. Pull out the lamp
module
horizontally.
Pulling it too
quickly may cause
broken glass to scatter about if the bulb has broken.
Do not place the lamp in locations where water
might splash on it, children can reach it, or near
flammable materials.
7. Insert the new
lamp module
into the
projector
horizontally
until it is
securely in place.
8. Tighten the two
screws on the lamp module.
9. Put on the lamp
shield.
10. Tighten the three
screws on the
lamp shield.
11. Put on the front
lamp cover.
12. Tighten the
screws on front
lamp cover.
Loose screws
may cause a bad
connection, which
could result in malfunction.
Do not over tighten the screws.
13. Turn the power on and go into Environment
menu to reset the "Lamp Timer" item.
■ Power will not turn on while the lamp cover is
off.
Do not insert your hands into the box after the
lamp is removed. If you touch the optical component
inside, it could cause color unevenness and distortion
of the projected images.
Resetting the lamp counter
14. On the control panel, simultaneously press and hold the S, T, and POWER buttons for at least
3seconds.
■ Once the lamp life exceeds 1,500 hours, the lamp will not light, even after you replace it. The lamp
counter must be reset as soon as a new lamp is installed.
■ Do not reset the lamp life without replacing the lamp.
31 Additional Information
Page 32

Indicators
There are three indicators which show the status of the projector. Check the following for information about the
indicator lights. If there is anything wrong, turn the projector off and contact your dealer.
When the projector is in a normal state, ...
POWER
(Green)
Green Orange Red Initial the projector. Cannot accept any commands.
Off Orange
Off
Green Off Power on.
Flashing
Green
POWER
(Orange)
Flashing
Orange
Off Lamp is cooling down. Cannot turn the projector on.
LAMP STATE REMARK
Standby mode.
Lamp is warming up. Cannot turn the projector off.
Off
When the projector is in an abnormal state, ...
POWER
(Green)
Green
Flashing
Green
Green Orange
POWER
(Orange)
Off
Off
Off Red The projection is damaged. Contact your dealer.
Flashing
Orange
LAMP
(Red)
Flashing
red
three
times in
a row
Flashing
red two
times in
a row
Off
Flashing
Red
STATE REMARK
The internal temperature is too
high.
• The intake ventilation or the
exhaust ventilation is
blocked.
•The projector may be in a
poorly ventilated location.
• The ambient temperature
may be too high.
The fans are not working.
Almost time to to replace the
lamp. The lamp has been used for
2000 hours. (The power is on.)
The lamp is too hot to turn the
projector on.
Solution:
• Make sure that the
ventilation holes are not
blocked.
• Relocate the projector.
• Stop using the projector
until the ambient
temperature falls within the
specified range. The
maximum operating
temperature is specified as
35°C / 95°F.
Solution:
•Check if the power supply is
stable.
• Check if there is object stuck
in the fans.
•Contact your dealer.
Solution:
• Install a new lamp.
Solution:
•Wait for 3 minutes to cool
down the projector. You can
restart the projector when it
is back to standby mode.
32 Additional Information
Page 33

Troubleshooting
Problem Cause Remedy
There is no power from the power
cable.
The projector does
not turn on.
No picture.
Image is unstable.
Picture is blurred.
Remote control does
not work correctly
LAMP light flashes
red.
POWER indicator
light flashes orange
and green
sequentially.
The power switch is not in the on
position.
Attempting to turn the projector on
again during the cooling process.
The front lamp cover is not securely
attached.
The video source is not turned on or
connected correctly.
The projector is not correctly
connected to the input source
device.
The input signal has not been
correctly selected.
The input signal has not been
correctly selected in the "INPUT
SOURCE" item in the DISPLAY
menu.
POWER light or LAMP indicator
light flashing.
The connection cables are not
securely connected to the projector
or the signal source.
The projection lens is not correctly
focused.
The projector and the screen are not
aligned properly.
The lens cap is still attached to the
lens
The batteries are out of power. Replace both of the batteries with new ones.
The front lamp cover is not correctly
attached.
The cooling fan is not working
properly.
The temperature inside the projector
is extremely high.
The ambient temperature is too high
(above 35°C / 95°F).
The lamp has exceeded its specified
usage time.
The lamp has burned out. Replace the lamp with a new one.
Plug the power cord into the AC inlet on the
rear of the projector, and plug the power
cord into to the power outlet. If the power
outlet has a switch, make sure that it is
switched on.
Put the power switch in the on position.
Wait until the cooling down process has
completed.
Correctly attach the front lamp cover.
Turn the video source on and check that the
signal cable is connected correctly.
Check the connection.
Select the correct input signal with the
INPUT keys: Component 1, Component 2,
DVI-D, DVI-A, Video and S-Video on the
remote control.
Select the correct input signal.
Please contact your BenQ dealer for
assistance.
Correctly connect the cables to the
appropriate terminals.
Adjust the focus of the lens using the focus
ring.
Adjust the projection angle and direction as
well as the height of this unit if necessary.
Remove the lens cap.
Correctly attach the front lamp cover.
Please contact your BenQ dealer for
assistance.
Check that the ventilation holes are not
blocked.
Wait until the room cools down or move the
projector to a cooler loaction.
Replace the lamp with a new one.
33 Additional Information
Page 34

Specifications
All specifications are subject to change without notice.
Optical Characteristics
Projection system
DMD chip 0.64” DMD W_Pal (1024 x 576)
Contrast ratio 2000 : 1
Lens 1.2-times zoom ratio, F/# 2.67 ~ 3.24, efl 23.4 ~ 28.3
Focus distance 1.5m to 8m / 5.2ft to 26.2ft
Projection size 1.27m to 5.1m / 50 to 200 inches
Lamp 210W NSH
Single-chip DLP
TM
system.
Electrical Characteristics
Color system NTSC3.58 — NTSC 4.43 — SECAM / PAL-M / PAL-N
Resolution XGA, SVGA, VGA, 480p, 720p, 1080i
Max. number of display colors 16,770,000 colors (full color display)
Input/Output
Video, S-Video, Component (Y/ CB/ CR)
RS-232C (phone jack), DTV (Y/ PB/ PR), RGBHV, DVI, Trigger (mini-jack)
General Characteristics
Dimensions 400mm x 347mm x 116mm (L x W x H)
We ig h t 16.7 lbs / 7.6 kg
Power VAC 100 - 240 Full-range switch (50/60Hz), 3 Wire Grounded
Power consumption Max 300 W
Operating temperature 5°C to 35°C / 41°F to 95°F
Operating humidity 10% - 90%
Storage temperature -10°C- 60°C / 14°F to 140°F
Storage humidity 10% - 90%
Keystone + 12° - -12°
34 Additional Information
Page 35

Dimensions
Unit: mm
35 Additional Information
 Loading...