

Page 1

PE5120 Digital Projector
Home Entertainment Series
Quick Start Guide
Welcome
Page 2
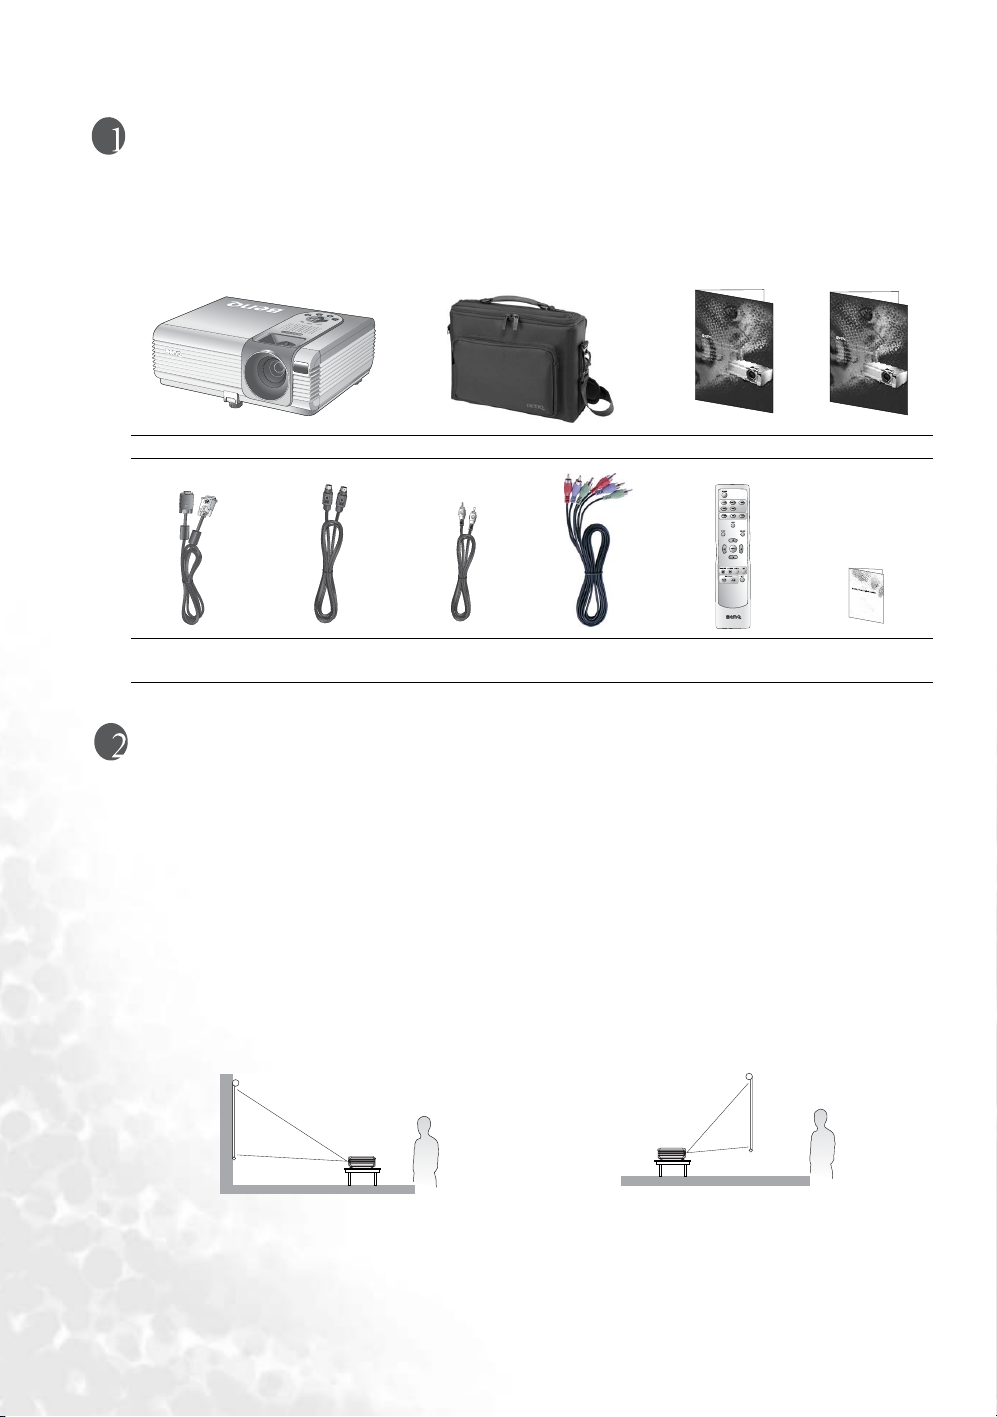
Shipping contents
Carefully unpack and verify that you have all of the items shown below. If any of these items are
missing, please contact your place of purchase. The standard accressories may vary from country to
country.
PE6800 Digital Projector
Home Theater
User’s Maunal
PE6800 Digital Projector
Home Theater
User’s Maunal
Projector Soft Carry Case User’s Manual Quick Start Guide
C
T
VGA-DVI Cable S-Video Cable Video Cable Component
Remote Control Warranty Booklet
Video Cable
Choosing a location
Your projector is designed to be installed in one of four possible installation configurations:
1. Floor in front of screen;
2. Ceiling in front of screen;
3. Floor at rear of screen; or
4. Ceiling at rear of screen.
For quick setup and portability, it is recommended to position your projector in either the Floor front
or Floor rear as shown below. For instructions to permanently mount the projector on the ceiling,
please refer to the user’s manual.
I. Floor front: The most common way to
position the projector.
2
Shipping contents
II. Floor rear: A special rear projection screen is
required.
Page 3

Connecting to video devices
Connecting video inputs
Connecting component-video devices
Component Video cable
Game player
AV equipment
From audio output
terminals
Component Video cable
Connecting S-video or video devices
S-Video or video device
Composite
Video
cable
From audio output
terminals
S-Video cable
To audio input
terminals
Connecting a computer
From audio output
terminals
VGA-DVI cable
To audio input
terminals
To audio input
terminals
Connecting to video devices
3
Page 4

Starting up
1. Turn all of the connected equipment on.
2. Remove the lens cap.
3. Plug the supplied power cord into the AC inlet
and the other end of the power cord into a
wall socket and turn the wall switch on (where
fitted).
4. Press and hold the Power button on the
projector or remote control to turn the
projector on.
5. The start up procedure takes about 30
seconds. Then, press Source on the
projector or one of the Source buttons
on the remote control to select your
desired input signal. A message shows
on the screen when the port is being
searched.
4
Starting up
Page 5

Adjusting the image
1. If you need to raise the image, tilt the
projector up at the front by extending the
adjuster legs. Push the quick release button to
speed the operation.
2. Adjust the rear legs to balance the projector
and have them sit flat without wobbling.
3. If the screen and the projector are not
perpendicular to each other, the projected
image becomes trapezoidal. Press the top
keystone button ( ) to reduce the upper
part of the image. Or press the bottom
Keystone button ( )to reduce the lower
part until the image is square.
4. Rotate the Zoom ring to reduce or
enlarge the image.
5. Rotate the Focus ring to sharpen the
image to a preferred quality.
Adjusting the image
5
Page 6

Optimizing the image
C
T
The following steps are optional. You may not need to follow every step.
1. Change the image ratio.
2. Pess Auto to re-adjust the values of frequency and phase to provide
the best image quality.
3. Select a preset mode.
4. Adjust brightness and contrast settings for a computer image in the
Picture menu. Or adjust brightness, contrast, tint, and color settings for
a video image.
For more advanced settings, refer to the user’s manual.
Turning the projector off
C
T
1. Press Power on the projector or remote control.
A confirmation message displays. Press Power a
second time to turn the projector off.
The Power indication light flashes orange and
the lamp shuts down, the fans will continue to
run approximately 110 seconds to cool down the
projector.
2. Disconnect the power cord from the wall socket
and the projetor..
For more information on storing and transporting the projector, refer to the user’s manual.
Need more help?
Refer to the user’s manual for more information. If the manual does not help you resolve your
problem, please call your place of purchase or visit our website at www.BenQ.com for further
assistance.
6
Optimizing the image
 Loading...