

Page 1

PLEASE READ
We are in no way responsible for the
contents of the manual. We do not guarantee
its accuracy and we do not make any claim
of copyright. The copyright remains the
property of their respective owners.
Visit the site to read the latest projector
news and reviews, read and comment on
projector specifications, download user
manuals and much more.
Page 2

PB6200/ PB6100
Digital Projector
User’s Manual
Welcome
Page 3

Copyright
Copyright 2003 by BENQ Corporation. All rights reserved. No part of this publication may be reproduced, transmitted, transcribed, stored in a retrieval system or translated into any language or computer language, in any form or by any means, electronic, mechanical, magnetic, optical, chemical,
manual or otherwise, without the prior written permission of this company.
Disclaimer
BENQ Corporation makes no representations or warranties, either expressed or implied, with respect
to the contents hereof and specifically disclaims any warranties, merchantability or fitness for any
particular purpose. Further, BENQ Corporation reserves the right to revise this publication and to
make changes from time to time in the contents hereof without obligation of this company to notify
any person of such revision or changes.
*Windows, Internet Explorer and Outlook Express are trademarks of Microsoft Corporation. Others
are copyrights of their respective companies or organizations.
Page 4

Table of Contents
Important Safety Instructions .................................1
Introduction .............................................................4
Projector Features .................................................................. 4
Shipping Contents ................................................................. 5
Alternative Accessories ........................................................................5
Optional Accessories ........................................................................... 5
Projector Description ............................................................ 6
Your Projector at a Glance .................................................................. 6
External Control Panel ........................................................................7
Adjuster ................................................................................................ 8
Remote Control Description ................................................ 9
Your Remote Control at a Glance ...................................................... 9
Remote Control Effective Range ........................................................ 9
Remote Control Functions ................................................................. 9
Installing or Replacing Batteries ........................... 10
Installation ................................................................11
Screen Size .............................................................................. 11
Connecting to Various Equipment ...................................... 13
HDTV Equipment ............................................................................... 13
Connecting to Various Equipment .................................................... 14
Operation .................................................................15
Start Up .................................................................................. 15
Digital Keystone Correction ................................................. 16
Auto Adjustment ................................................................... 16
Source Selection ..................................................................... 16
Blank ...................................................................................... 17
Menu System ......................................................................... 18
1. Display Menu ................................................................................. 19
2. Image Menu .................................................................................... 20
3. Source Menu ................................................................................... 21
4. Control Menu .................................................................................. 22
5. PIP Menu ......................................................................................... 23
Shutdown ............................................................................... 24
Table of Contents i
Page 5

Maintenance .............................................................25
Lamp Information .................................................................25
Use and Replacement of the Lamp .....................................................25
Lamp Replacement ..............................................................................25
Resetting Lamp Hours ......................................................................... 27
Temp Information ............................................................................... 27
LED Indicator Status & Illustration .................................................... 28
Service Information ...............................................................30
Accessories (included in the standard package) ................................30
Alternative Accessories (vary from country to country) ........ 30
Optional Accessories (not included in the standard package) ..........30
Ordering Parts or Getting Information .............................................. 30
Troubleshooting .......................................................31
Common Problems & Solutions ...........................................31
Status Messages ......................................................................32
Specifications ............................................................33
Projector Specifications .........................................................33
Technical Specifications ...................................................................... 33
Timing Chart .........................................................................34
Dimensions ...............................................................35
Warranty ...................................................................36
Limited Warranty ...................................................................36
Safety Regulations ....................................................37
FCC Statement .......................................................................37
EEC Statement .......................................................................37
MIC Statement .......................................................................37
Table of Contentsii
Page 6
Important Safety Instructions
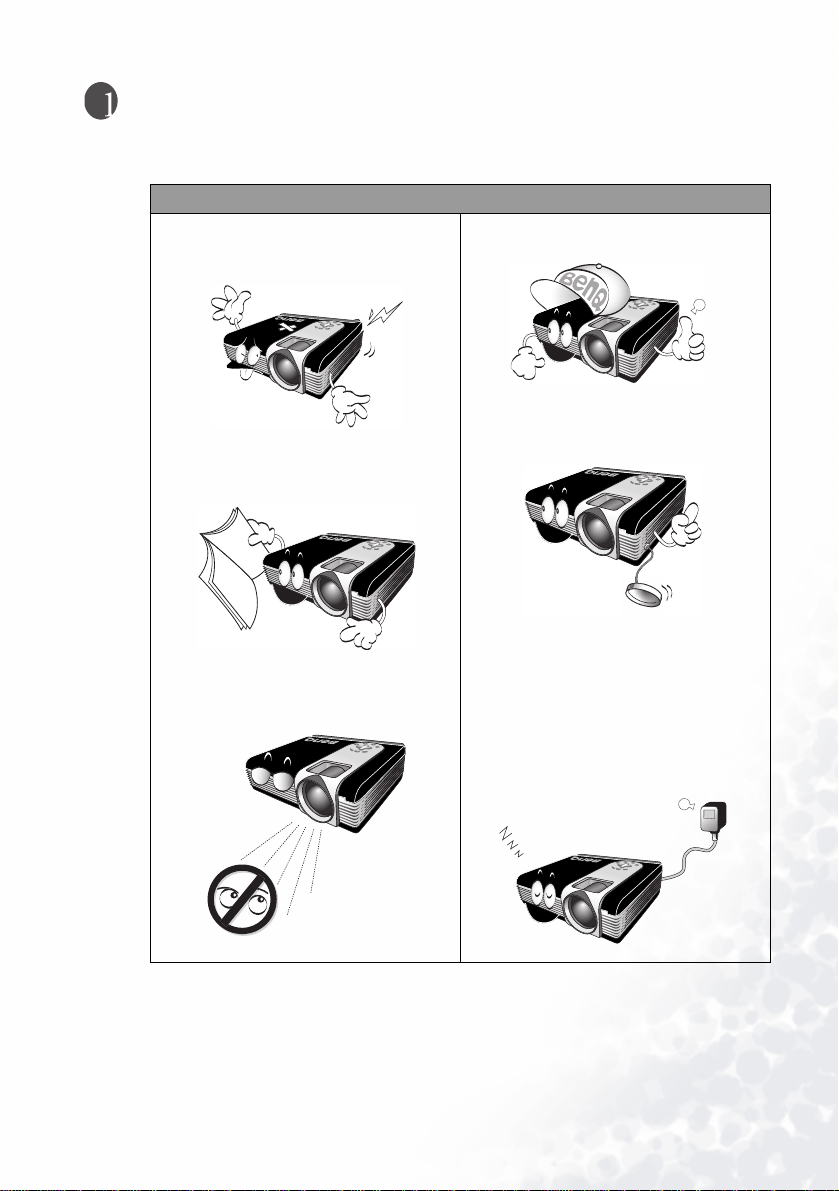
Caution
• To prevent shock, do not open the
cabinet. No user-serviceable parts
inside.
• Please read this user’s manual before
you operate your projector. Save this
user’s manual for future reference.
• Do not look straight at the projector
lens during operation. The intense
light beam may damage your eyes.
• Refer servicing to qualified service
personnel.
• Always open the lens shutter or
remove the lens cap when the
projector lamp is on.
•In some countries, the line voltage is
NOT stable. This projector is
designed to operate safely within a
bandwidth of 100 to 240 volts, but
could fail if power cuts or surges of
±10 volts occur. In these high-risk
areas, it is recommended to install a
power stabilizer unit.
Important Safety Instructions 1
Page 7
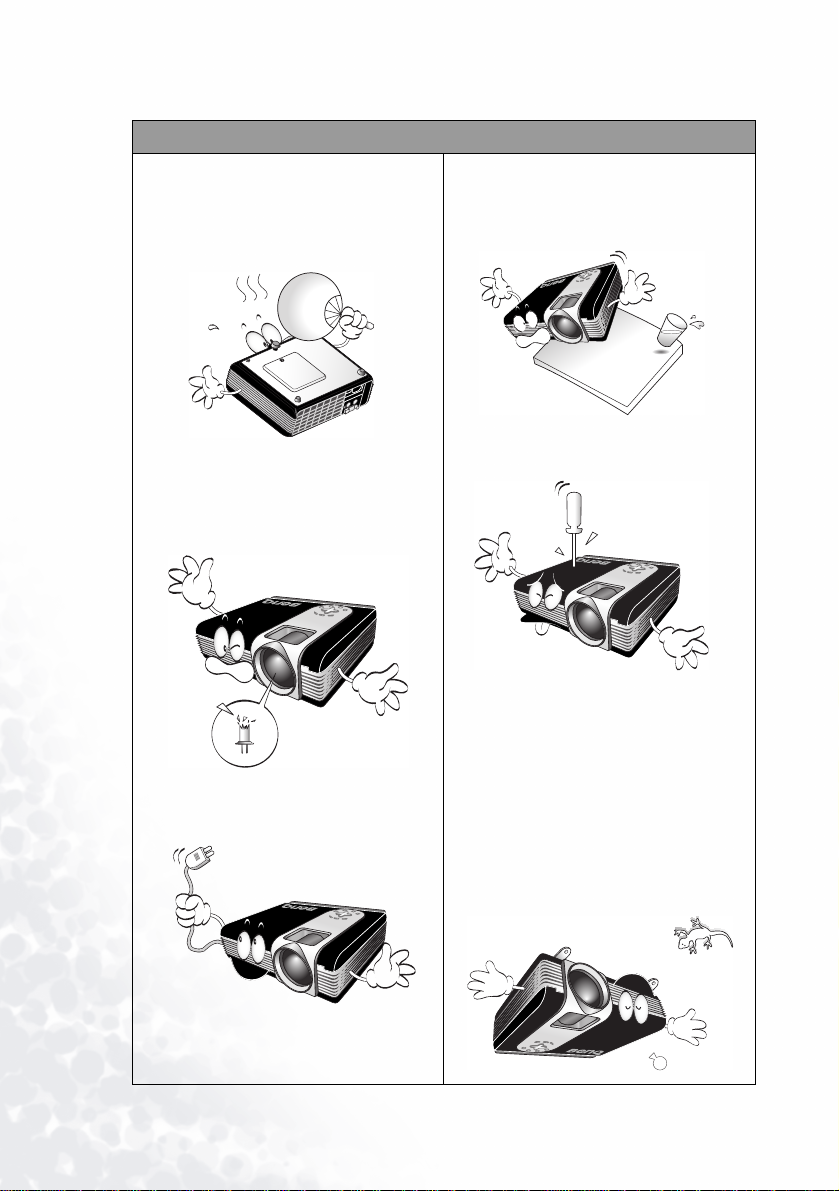
Safety Instructions
1. The lamp becomes extremely hot
during operation. Allow the projector to cool for approximately 45
minutes prior to removing the lamp
assembly for replacement.
4. Do not place this product on an
unstable cart, stand, or table. The
product may fall, sustaining serious
damage.
2. Do not operate lamps beyond the
rated lamp life. Excessive operation
of lamps beyond the rated life could
cause them to explode on rare occasions.
3. Never replace lamp assembly or any
electronic components unless the
projector is unplugged.
5. To reduce the risk of electric shock,
do not disassemble this appliance.
*Take it to a qualified technician when
service or repair is required. Incorrect
reassembly can cause electric shock
when the appliance is subsequently used.
6. This product is capable of displaying
inverted images for ceiling mount
installation. Please use BenQ’s Ceiling Mounting Kit for mounting the
unit and ensure it is securely
installed.
Important Safety Instructions2
Page 8
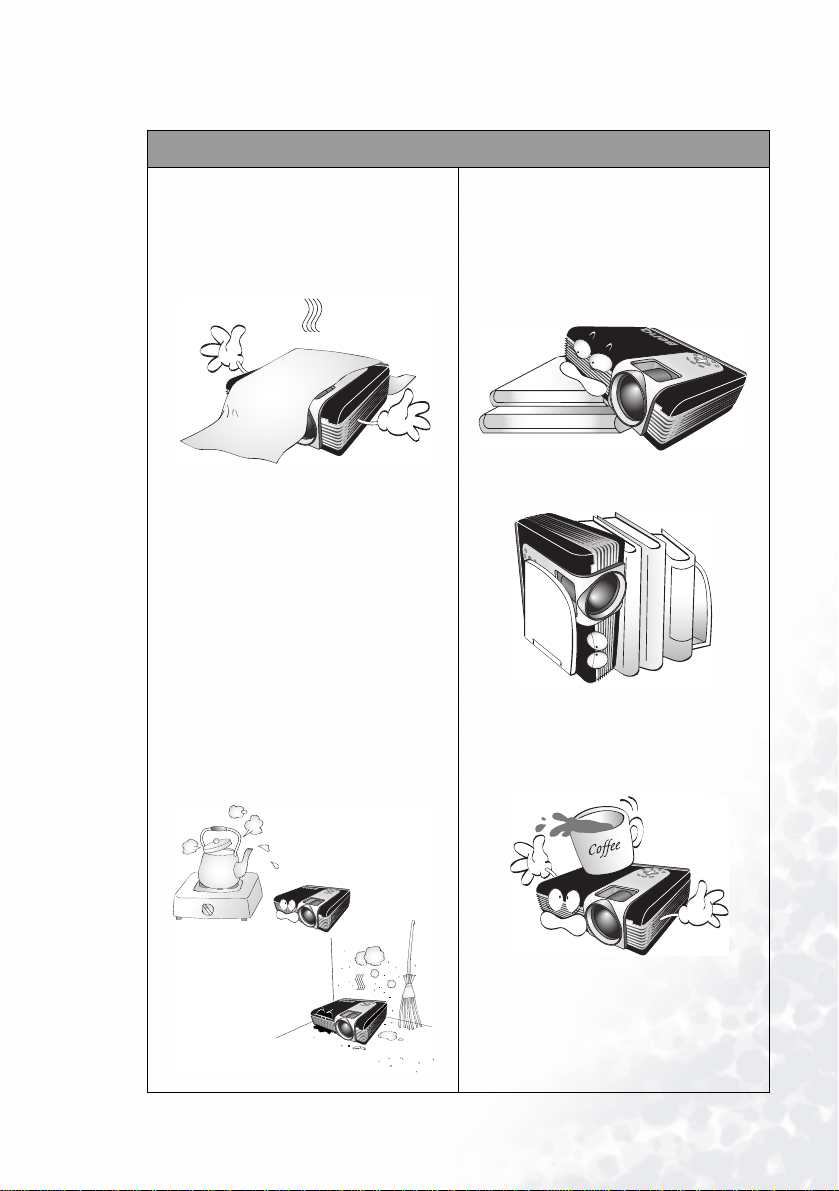
Safety Instructions (Continued)
7. Do not block the ventilation holes.
- Do not place this unit on a blanket or
other bedding.
- Do not cover this unit with a cloth.
- Do not place any inflammables near the
ventilation holes.
If the ventilation holes are seriously
obstructed, overheating inside the unit
may result in a fire.
8. Do not place this unit in any of the
following environments.
- Spece where is poorly ventilated or
confined. Allow at least 50 cm clearance
from walls.
- Locations where temperatures may
become excessively high, such as the
inside of a car with all windows rolled
up.
- Locations where excessive humidity,
dust, or cigarette smoke may
contaminate optical components,
shortening the projector’s lifespan and
darkening the screen.
- Locations near fire alarms
9. Always place the unit on a level, horizontal surface during operation.
- Do not use if tilted at an angle of more
than 10 degrees left to right, nor at angle
of more than 15 degrees front to back.
Using the unit when it is not fully
horizontal may cause a malfunction of,
or damage to, the lamp.
10. Do not stand the unit on end vertically.
Doing so may cause the unit to fall over,
causing injury or resulting in damage to
the unit.
11. Do not step on this unit or place any
objects upon it.
Besides probable physical damage to the
unit, doing so may result in accidents
and possible injury.
Important Safety Instructions 3
Page 9

Introduction
Projector Features
The projector integrates high-performance optical engine projection and a user-friendly
design to deliver high reliability and ease of use.
The projector offers the following features:
• Small and light for portability
• High quality manual zoom lens
• One-key auto-adjustment to display the best picture quality
• Digital keystone correction to correct distorted images
• Adjustable color balance control for data/video display
• Ultra-high brightness projection lamp
• Ability to display 16.7 million colors
• On-screen menus in 8 languages: English, French, German, Italian, Spanish, Korean,
Traditional Chinese and Simplified Chinese.
• 4 preset modes for each signal input allow the projected images optimized.
• Switchable Economic mode to adjust the power consumption
• Powerful AV function to provide high quality AV picture
• HDTV compatibility (YP
Note: The brightness of the projected image will vary depending on the ambient lighting conditions and contrast / brightness settings.
bPr)
Introduction4
Page 10
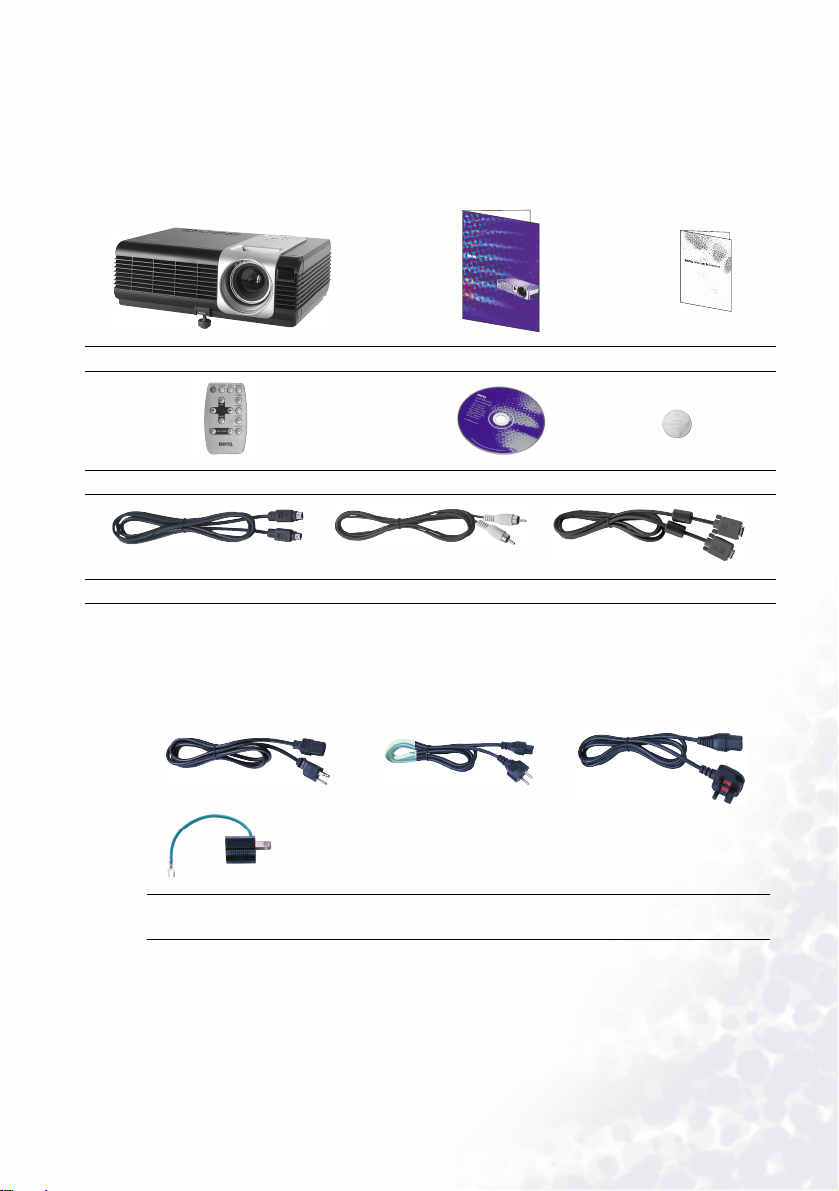
Shipping Contents
The projector is shipped with the cables required for connection to standard PC or laptop
computers. Carefully unpack and verify that you have all the items shown below. If any of
these items are missing, please contact personnel at the place of purchase.
PB2220/PB2120
DigitalProjector
User'sMaunal
Projector User’s Manual
Remote Control User’s Manual CD Batteries
S-Video Cable Video Cable VGA Cable
Alternative Accessories
1. Power Cord: 110V for the US, 240V for UK and 220V for European countries
2. 3-2 converter: For the US
US
Power cord 110V and
3-2 converter
EU
Power cord 220V Power cord 240V
UK
Warranty Booklet
Optional Accessories
1. Macintosh adapter
2. 200W lamp module
3. Ceiling mount kit
4. HDTV cable
5. Soft carry case
Introduction 5
Page 11
Projector Description
S-VIDEOVIDEOPC/HDTV
V
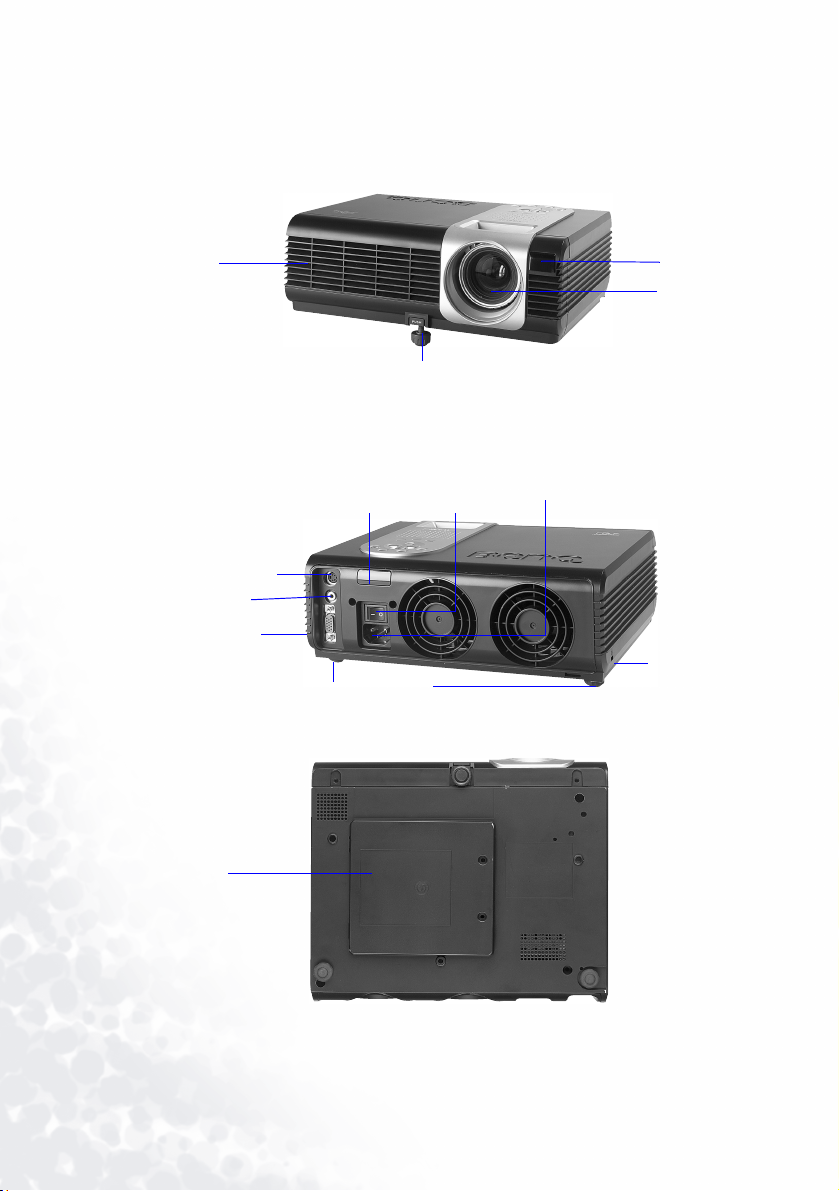
Your Projector at a Glance
Ventilation
grill
S-Video Mini DIM
ideo RCA jack
RGB signal input
(PC/ YPbPr/ YCbCr)
IR remote
sensor
ACINLET
Rear adjusters
Front
adjuster
Main power
switch
IR remote
sensor
Projection
lens
AC inlet
Kensing ton
lock slot
Lamp door
Introduction6
Page 12
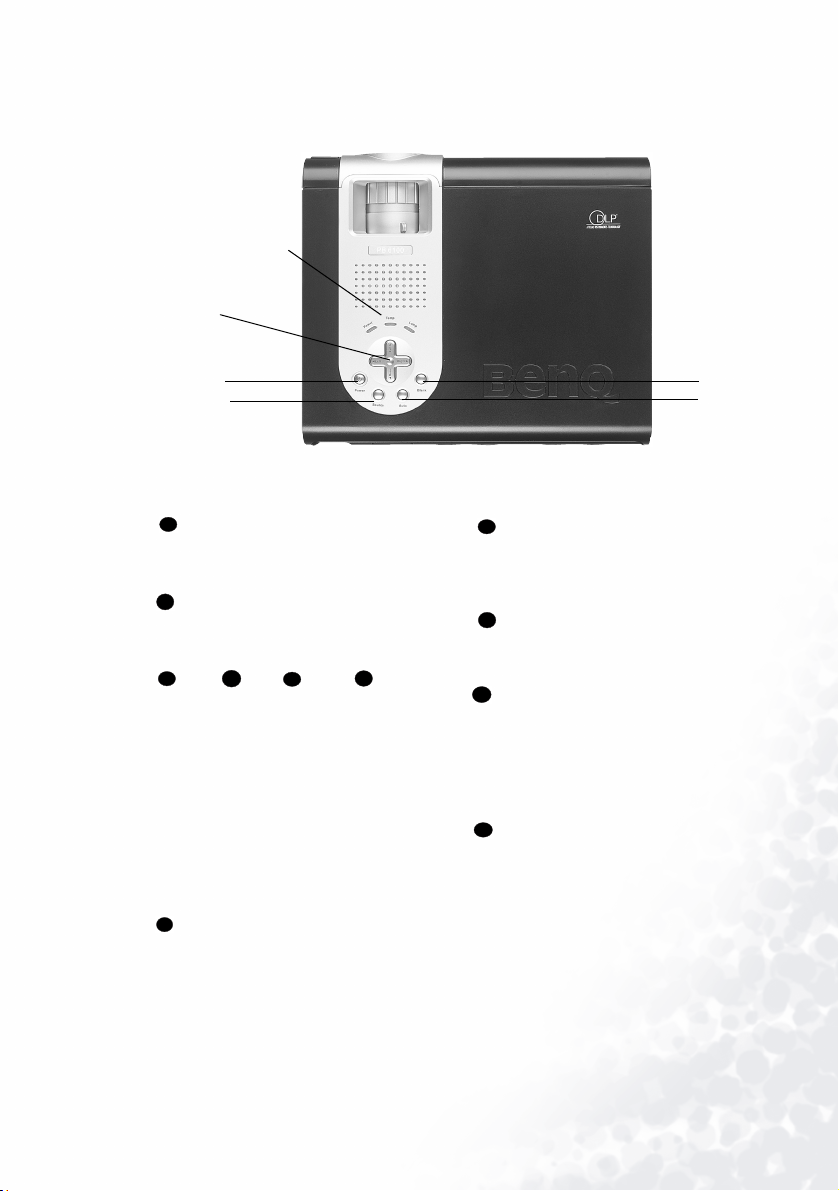
External Control Panel
11. Lamp indicator
10. Temp indicator
9. Power indicator
3. Left
4. Exit
5. Right
6. Menu
1. Power
2. Source
1
Power
Presses the Power key to turn the projector
on or off.
2
Source
Selects signal sources from among PC,
bPr, S-Video and Video.
YP
3
4
Left Exit Right Menu
5
6
Menu will display the menu system on
screen. Press Menu again to access the submenus. Left and Right help you navigate
among choices and settings in the menus
and sub-menus. However, when the onscreen menu is not activated, the Left and
Right buttons will function as Keystone -/+
hot keys.
Press the Exit button to go back to the main
menu. Press Exit again to leave the menu
system.
7
Aut o
Automatically determines the best picture
settings for current received signals.
8. Blank
7. Auto
8
Blank
Uses Blank to hide the screen image. To
unseal the image, press Blank again to turn
on the image immediately.
9
Power indicator
It will light up or flash when the projector is
under operation.
10
Temp in di ca to r
The Temp indicator will flash when the system temperature is too high, which may
occur if the projector is operated improperly.
See "Temp Information" on page 27 for
more detailed information.
11
Lamp indicator
The Lamp Indicator will light up when the
lamp needs service or replacement. See
“Lamp Information” on page 25 for more
detailed information.
Introduction 7
Page 13
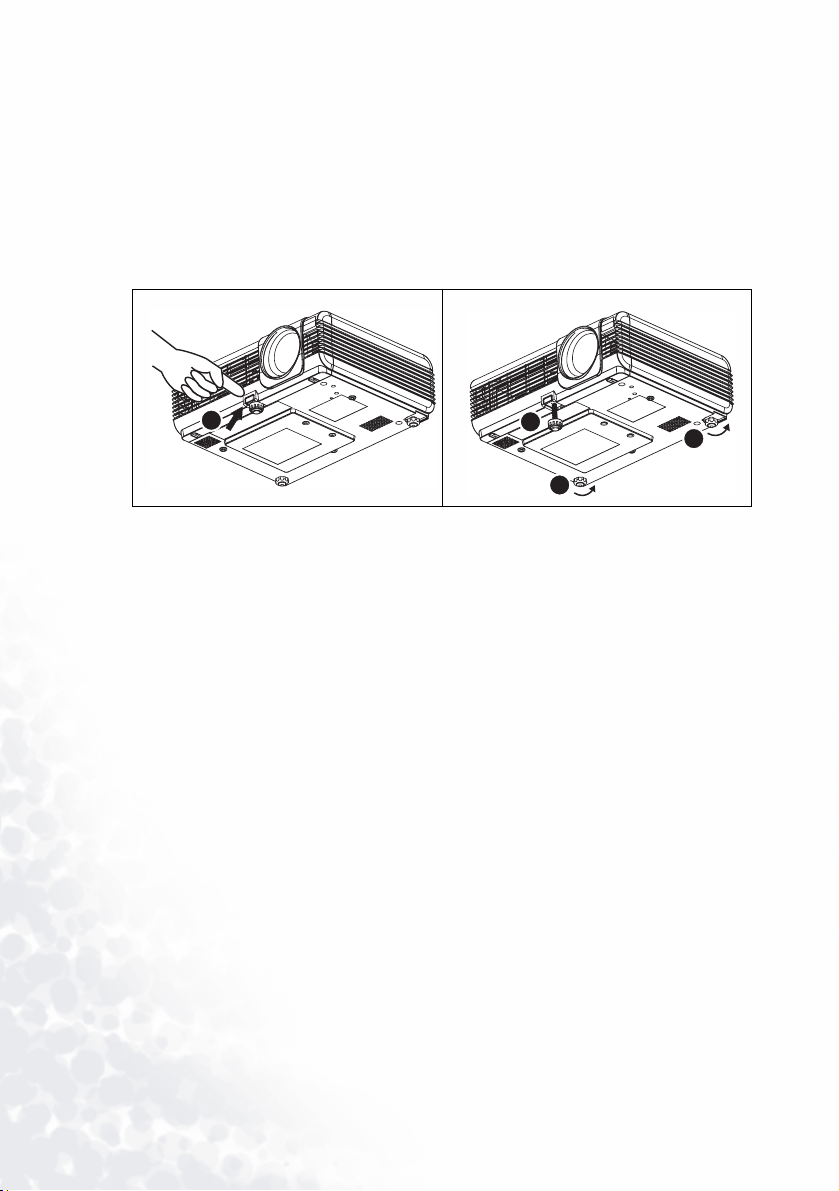
Adjuster
The projector is equipped with 1 quick-release adjuster foot. Push the button to adjust its tilt
angle.
1. Lift the projector up and press the adjuster button to release the front adjuster.
2. The adjuster will drop into position and be locked
3. If the projected image is higher than the screen, you can screw the 2 rear adjusters to
decrease the offset.
1
2
3
3
Introduction8
Page 14

Remote Control Description
Your Remote Control at a Glance
POWER
SOURCE
AUT O
BLANK
EXIT
Left / Right
MENU / Down
KEYSTONE
FREEZE
PRESET
PIP SOURCE
PIP POSITION
Remote Control Effective Range
The remote sensors are located on the front and the back of the projector. It can function in
a range of 30 degrees horizontally and 30 degrees vertically relative to a line that is a right
angle to the remote sensors. The distance between the remote control and the remote
sensors must be shorter than 6 meters (19.5 feet).
Remote Control Functions
1. POWER, SOURCE, AUTO, BLANK, 3,4, EXIT, MENU
The functions of these buttons are the same as those on the external control panel. Please
refer to "External Control Panel" on page 7 for more information.
2. KEYSTONE
If the image is trapezoid after adjusting the projection offset, press KEYSTONE + OR
KEYSTONE - to correct distorted image.
3. FREEZE
The image can be frozen when FREEZE is pressed. An icon will appear in the lower
right corner of the screen. To release the freeze function, press the FREEZE button again.
Introduction 9
Page 15

4. PRESET
Users can switch 4 kinds of preset modes. The preset mode changes each time when you
press PRESET button
•PC Signal:
Presentation Mode (Default) --> Vivid Mode --> Video Mode --> Economic Mode
• YPbPr/ S-Video/ Video Signal:
Gaming Mode (Default) --> Video Mode --> Cinema Mode --> Economic Mode
5. PIP SOURCE
User can activate PIP and select the source between S-Video and Video while the input
source is PC. The PIP source changes in the order of S-Video, Video, and off.
6. PIP POSITION
While PIP is activated, you can select one of the nine positions.
Installing or Replacing Batteries
1. Use a pointy-sided
stick to release the
barttery tray. Pull
the tray off.
2. Install or replace a battery.
3. Snap the battery tray back into
place.
Avoid excessive heat and humidity. There may be danger of an explosion if batteries are incorrectly replaced. Replace only with the same or equivalent type recommended by the manufacturer. Dispose of used batteries according to the manufacturer’s instructions.
Introduction10
Page 16

Installation
Screen Size
Place the projector at the required distance from the screen according to the desired picture
size (see the table below).
Projection Distance
PB6200 (XGA) screen size chart (4:3 aspect ratio)
Distance
from screen
feet inches feet inches feet inches meters cm meters cm meters cm
4 48 2.49 29.9 3.05 36.6 1 100 0.62 62.2 0.76 76.2
6 72 3.73 44.8 4.57 54.9 1.5 150 0.93 93.3 1.14 114.3
8 96 4.98 59.7 6.10 73.2 2 200 1.24 124.5 1.52 152.4
10 120 6.22 74.7 7.62 91.4 2.5 250 1.56 155.6 1.91 190.5
12 144 7.47 89.6 9.14 109.7 3 300 1.87 186.7 2.29 228.6
14 168 8.71 104.5 10.67 128.0 3.5 350 2.18 217.8 2.67 266.7
16 192 9.96 119.5 12.19 146.3 4 400 2.49 248.9 3.05 304.8
18 216 11.20 134.4 13.72 164.6 4.5 450 2.80 280.0 3.43 342.9
20 240 12.45 149.4 15.24 182.9 5 500 3.11 311.2 3.81 381.0
22 264 13.69 164.3 16.76 201.2 5.5 550 3.42 342.3 4.19 419.1
24 288 14.94 179.2 18.29 219.5 6 600 3.73 373.4 4.57 457.2
26 312 16.18 194.2 19.81 237.7 6.5 650 4.04 404.5 4.95 495.3
28 336 17.42 209.1 21.34 256.0 7 700 4.36 435.6 5.33 533.4
30 360 18.67 224.0 22.86 274.3 7.5 750 4.67 466.7 5.72 571.5
32 384 19.91 239.0 24.38 292.6 8 800 4.98 497.8 6.10 609.6
Diagonal measurement
Minimum
zoom
Maximum
zoom
Distance from
screen
Diagonal measurement
Minimum
zoom
Maximum
zoom
Installation 11
Page 17

PB6200 (XGA) screen size chart (16:9 aspect ratio)
Distance
from screen
feet inches feet inches feet inches meters cm meters cm meters cm
4 48 2.29 27.5 2.80 33.6 1 100 0.57 57.4 0.70 70.0
6 72 3.44 41.3 4.20 50.4 1.5 150 0.86 86.0 1.05 105.0
8 96 4.59 55.1 5.60 67.2 2 200 1.15 114.7 1.40 140.0
10 120 5.74 68.8 7.00 84.0 2.5 250 1.43 143.4 1.75 179.4
12 144 6.88 82.6 8.40 100.8 3 300 1.72 172.1 2.10 209.9
14 168 8.03 96.4 9.80 117.6 3.5 350 2.01 200.8 2.45 244.9
16 192 9.18 110.1 11.20 134.4 4 400 2.29 229.4 2.80 279.9
18 216 10.32 123.9 12.60 151.2 4.5 450 2.58 258.1 3.15 314.9
20 240 11.47 137.7 14.00 167.9 5 500 2.87 286.8 3.50 349.9
22 264 12.62 151.4 15.39 184.7 5.5 550 3.15 315.5 3.85 384.9
24 288 13.77 165.2 16.79 201.5 6 600 3.44 344.1 4.20 419.9
26 312 14.91 179.0 18.19 218.3 6.5 650 3.37 372.8 4.55 454.9
28 336 16.06 192.7 19.59 235.1 7 700 4.02 401.5 4.90 489.8
30 360 17.21 206.5 20.99 251.9 7.5 750 4.30 430.2 5.25 524.8
32 384 18.35 220.3 22.39 268.7 8 800 4.59 458.9 5.60 559.8
Diagonal measurement
Minimum
zoom
Maximum
zoom
Distance from
screen
Diagonal measurement
Minimum
zoom
Maximum
zoom
PB6100 (SVGA) screen size chart (4:3 aspect ratio)
Distance
from screen
feet inches feet inches feet inches meters cm meters cm meters cm
4 48 1.96 23.5 2.40 28.7 1 100 0.49 48.9 0.60 59.9
6 72 2.93 35.2 3.59 43.1 1.5 150 0.73 73.4 0.90 89.8
8 96 3.91 47.0 4.79 57.5 2 200 0.98 97.8 1.20 119.8
10 120 4.89 58.7 5.99 71.9 2.5 250 1.22 122.3 1.50 149.7
12 144 5.87 70.4 7.19 86.2 3 300 1.47 146.7 1.80 179.7
14 168 6.85 82.2 8.39 100.6 3.5 350 1.71 171.2 2.10 209.6
16 192 7.83 93.9 9.58 115.0 4 400 1.96 195.7 2.40 239.6
18 216 8.80 105.7 10.78 129.4 4.5 450 2.20 220.1 2.70 269.5
20 240 9.78 117.4 11.98 143.7 5 500 2.45 244.6 2.99 299.5
22 264 10.76 129.1 13.18 158.1 5.5 550 2.69 269.0 3.29 329.4
24 288 11.74 140.9 14.37 172.5 6 600 2.93 293.5 3.59 359.4
26 312 12.72 152.6 15.57 186.9 6.5 650 3.18 317.9 3.89 389.3
28 336 13.70 164.3 16.77 201.2 7 700 3.42 342.4 4.19 419.3
30 360 14.67 176.1 17.97 215.6 7.5 750 3.67 366.8 4.49 449.2
32 384 15.65 187.8 19.17 230.0 8 800 3.91 391.3 4.79 479.1
Diagonal measurement
Minimum
zoom
Maximum
zoom
Distance from
screen
Diagonal measurement
Minimum
zoom
Maximum
zoom
Installation12
Page 18

PB6100 (SVGA) screen size chart (16:9 aspect ratio)
Distance
from screen
feet inches feet inches feet inches meters cm meters cm meters cm
4 48 1.80 21.6 2.20 26.4 1 100 0.45 45.1 0.55 55.0
6 72 2.70 32.4 4.20 50.4 1.5 150 0.68 67.6 0.82 82.5
8 96 3.61 433 5.60 67.2 2 200 0.90 90.1 1.10 110.0
10 120 4.51 54.1 7.00 84.0 2.5 250 1.13 112.7 1.37 137.5
12 144 5.41 64.9 8.40 100.8 3 300 1.35 135.2 1.65 164.9
14 168 6.31 75.7 9.80 117.6 3.5 350 1.58 157.7 1.92 192.4
16 192 7.21 86.5 11.20 134.4 4 400 1.80 180.3 2.20 219.9
18 216 8.11 97.3 12.60 151.2 4.5 450 2.03 202.8 2.47 247.4
20 240 9.01 108.2 14.00 167.9 5 500 2.25 225.3 2.75 274.9
22 264 9.91 119.0 15.39 184.7 5.5 550 2.48 247.9 3.02 302.4
24 288 10.82 129.8 16.79 201.5 6 600 2.70 270.4 3.30 329.9
26 312 11.72 140.6 18.19 218.3 6.5 650 2.93 292.9 3.57 357.4
28 336 12.62 151.4 19.59 235.1 7 700 3.15 315.5 3.85 384.9
30 360 13.52 162.2 20.99 251.9 7.5 750 3.38 338.0 4.12 412.4
32 384 14.42 173.1 22.39 268.7 8 800 3.61 360.5 4.40 439.8
There is 3% ~ 5% tolerance among these numbers due to optical component limits.
* 1m = 3.28 feet, 1 feet = 0.305m, 1m = 100cm, 1 feet = 12 inches
Diagonal measurement
Minimum
zoom
Maximum
zoom
Distance from
screen
Diagonal measurement
Minimum
zoom
Connecting to Various Equipment
Maximum
zoom
HDTV Equipment
The projector is capable of displaying various High Definition TV display modes. Some of
these sources are:
• Digital-VHS (D-VHS) player • DVD player
•Satellite Dish HDTV receiver •DTV tuners
Most of these sources will provide an analog component video output, a standard VGA
output, or a YP
The projector is capable of accepting HDTV data through a D-Sub connector. Use a HDTV
cable that is an optional accessory to display HDTV images.
The following standards are supported in the HDTV function:
• 480i • 480p
• 576i • 576p
• 720p • 1080i
Please refer to "Menu System" on page 18 for information on the HDTV OSD selections.
bPr (default) format.
Installation 13
Page 19

Connecting to Various Equipment
AC
INL
ET
S-VIDEOVIDEOPC/HDT
V
It only takes a few seconds to connect your projector to your desktop or notebook computer,
VCR, or other systems. However, a Mac adapter (an optional accessory) is needed for
connection to Macintosh computers.
S- Vide o/ Vi deo
PC/ HDTV
S-Video
Video
Installation14
Page 20

Operation
ACINLET
S-VIDEOVIDEOPC/HDTV
Start Up
1. Plug the power cord into the projector and into a wall socket.
2. Turn on the main power switch.
3. Press and hold POWER for 1 second to start the projector. The back-lit POWER key
flashes green and stays green when the power is turned on.
(When the power is turned off, there is a 90-second cooling period before the projector can
be re-started.)
4. Switch on all connected equipment.
Operation 15
Page 21

Digital Keystone Correction
Keystoning refers to the situation
where the projected image is
noticeably wider at either the top or
bottom. To correct this, press 3
Left/ Right 4 (hot key) on the
control panel of the projector or
KEYSTONE 3/4 on the remote
control, and then adjust the sliding
bar labeled Keystone, as needed.
Press + to correct keystoning at the
top of the image. Press - to correct
keystoning at the bottom of the
image.
Auto Adjustment
In some cases, you may need to optimize the
picture quality. To do this, press the AUTO key
on the control panel of the projector or on the
remote control. Within 3 seconds, the built-in
Intelligent Auto Adjustment function will readjust settings to provide the best picture
quality.
Source Selection
When several input sources are available,
press the SOURCE key to make a selection
from the control panel of the projector or
the remote control.
Operation16
Page 22

Blank
Uses Blank to hide the screen image. You can
unseal the image gradually by using the
mouse of the remote control, or simply press
Blank to turn on the image immediately.
Operation 17
Page 23

Menu System
Press Menu for the main menu, and then press 3or 4 to select a sub-menu. Press Menu
again to select items in the sub-menu.
Functions available when connecting to different equipment...
Sub-Menu PC Y/Pb/Pr S-Video / Video
Display
Image
Source
Control
PIP
Keystone
Brightness
Contrast
Phase
H Size
Aspect Ratio
H Position
V Position
Color Temp
Information
Mirror
Source
Source Scan
Blank Time
Auto Off
Language
OSD Pos.
OSD Time
Preset Mode
Reset
Lamp Hour
Main Page:
PIP Source
PIP Size
PIP Pos.
H Position
V Position
More Options
Aspect Ratio
Color
Tint
Color Temp
Sub Page:
Brightness
Contrast
Color
Tint
Sharpness
Keystone
Brightness
Contrast
Color
Tint
Aspect Ratio
System
Sharpness
Color Temp
Information
Operation18
Page 24

1. Display Menu
FUNCTION DESCRIPTION
Keystone
Corrects any keystoning of the image.
+-
Brightness
Contrast
Phase
H Size
Color
Tint
Adjusts the brightness of the image.
Adjusts the degree of difference between dark and light in the image.
Adjusts to avoid the occurrence of flicker.
This function is not available when the input mode is Video or S-
Video.
Adjusts to fit in the desired image size.
This function is not available when the input mode is Video or SVideo.
Increases or decreases the color range (R, G, B) of the image.
This function is not available when the input mode is PC.
Adjusts the image to make it appear more red or blue.
This function is not available when the input mode is PC.
Operation 19
Page 25

2. Image Menu
FUNCTION DESCRIPTION
Aspect Ratio
H Position
V Position
Makes the best fit of the image to the screen,
1. 4 : 3 2. 16 : 9 3. Native
“Native” is available only when the input mode is PC .
Adjusts the horizontal position of the projected image.
This function is available only when the input mode is PC.
Adjusts the vertical positon of the projected image.
Color Temp
Information
System
Sharpness
Color
Tint
Operation20
This function is available only when the input mode is PC.
Adjusts the color temperature to fit your preference.
Shows the current resolution and preset mode.
System information will be shown:
1.NTSC 2. PAL 3.SECAM 4. YUV
Adjusts the image to make it look sharper or softer.
This function is not available when the input mode is PC or YPbPr.
Increases or decreases the color range (R, G, B) of the image.
This function is not available when the input mode is PC.
Adjusts the image to make it appear more red or blue.
This function is available only when the selected System is NTSC.
Page 26

3. Source Menu
FUNCTION DESCRIPTION
Mirror
Source
Source Scan
Blank Time
Auto Off
1. Default
3. Rear screen projection
Shows the selected input source among PC, YPbPr, S-Video and Video
when they are available.
If selecting ON, the function is activated and the projector starts to scan in
order of PC, YPbPr, S-Video and Video when there is no signal detected. If
selection OFF, the projector only detects the last input source.
Determines the length of time before the projector is shut off when Blank
is activated.
Sets the length of time before the system is shut off when no input is
detected.
2. Ceiling mounted projection
4. Ceiling mounted and rearscreen projection
Operation 21
Page 27

4. Control Menu
FUNCTION DESCRIPTION
Language
OSD Pos.
OSD Time
Preset Mode
Reset
Lamp Hour
Language sets the language for the OSD control menus.
Use the 3 / 4 key to select the desired language from among English,
French, German, Italian, Spanish, Korean, Traditional Chinese and
Simplified Chinese.
Selects a desired OSD position.
Sets the length of time the OSD will remain active after the last time you
pressed the button. The range is from 5 to 60 seconds in 5-second
increments.
To optimize the projected images, you are free to choose one of the preset
modes in accordance to the purpose of projection.
PC Signal
1. Presentation Mode: It is designed for presentations. The brightness
is emphasized in this mode.
2. Vivid Mode: It is perfect for gaming. The color saturation and
brightness are well-balanced.
3. Video Mode: It is suitable for cinematic enjoyment in their natural
color.
4. Economic Mode: With lower system noise, the lamp can save 20%
power to extend its life.
YPbPr/ S-Video/ Video Signal
1. Gaming Mode: It is suitable for playing video games in a bright living room.
2. Video Mode: With a higher color temperature, it is suitable for
enjoying movies.
3. Cinema Mode: With a lower color temperature, it is suitable for
enjoying movies.
4. Economic Mode: With lower system noise, the lamp can save 20%
power to extend its life.
Returns all settings to their factory preset values.
Shows lamp usage time.
Operation22
Page 28

5. PIP Menu
These functions are available only when the input mode is PC and the PIP source is Video or
S-Video.
FUNCTION DESCRIPTION
PIP Source
Selects the source for the PIP.
PIP Size
PIP Position
H Position
V Position
More Options
Brightness
Contrast
Color
Tint
Sharpness
Enables use of the 3 / 4 key to scroll through the four alternatives: Off,
Small, Medium, Large.
Selects a desired position for the PIP.
Adjusts the horizontal position of the PIP image.
Adjusts the vertical position of the PIP image.
Enables use of the 3 / 4 key to select more PIP functions including
Brightness, Contrast, Color, Tint, Sharpness and System.
Adjusts the brightness of the PIP image.
Adjusts the degree of difference between dark and light for the PIP image.
Increases or decreases the color range (R, G, B) of the image.
Adjusts the image to make it appear more red or blue.
Adjusts the image to make it appear sharper or softer
Operation 23
Page 29

Shutdown
ACINLET
S-VIDEOVIDEOPC/HDTV
1. Press and hold POWER and a warning message will appear. To turn off the projector,
press and hold POWER again.
2. The fan will continue to run for approximately 90 seconds.
3. Turn off the main power switch.
4. Disconnect the power cord from the wall socket.
Do not unplug the power cord before POWER is shut down or during the 90-second cooling
process.
If the projector is not properly shut down, to protect the lamp, the system will detect this and
cool the lamp for 90 seconds automatically before turning on again.
Operation24
Page 30

Maintenance
Lamp Information
Use and Replacement of the Lamp
When the Lamp Indicator lights up red or a message appears suggesting the time of lamp
replacement, please install a new lamp or consult your dealer. An old lamp could cause a
malfunction in the projector and in rare instances may even break.
For more detailed information, please refer to "LED Indicator Status & Illustration" on page
28.
The Lamp and Temp indicators will light up if the lamp becomes too hot. Turn off the power
and let the projector cool for 45 minutes. If the Lamp or Temp indicator still lights up when
turning the power on, please contact your dealer.
Lamp Replacement
To reduce the risk of electrical shock, always turn off the projector and disconnect the power
cord before changing the lamp.
To reduce the risk of severe burns, allow the projector to cool for at least 45 minutes before
replacing the lamp.
To reduce the risk of injuries to fingers and damage to internal components, use caution when
removing lamp glass that has shattered into sharp pieces.
To reduce the risk of injuries to fingers and/or compromising image quality by touching the
lens, do not touch the empty lamp compartment when the lamp is removed.
This lamp contains mercury. Consult your local hazardous waste regulations to dispose of
this lamp in a proper manner.
Maintenance 25
Page 31

Step 1. Turn off the projector. Discon-
nect the power cord from the
outlet and the projector.
Step 2. Loosen the screw and remove the
lamp cover. (It is strongly recommended that you use a magnetic-head screwdriver.) If the
lamp is hot, avoid burns by waiting 45 minutes until the lamp
has cooled.
Step 3. Loosen the 3 screws. Pull the han-
dle to remove the lamp housing.
If the screws are not loosened
completely, they could injure
your fingers. Do not insert your
hand into the box after the lamp
is removed. If you touch the
optical components inside, this
could cause color unevenness in
projected images.
Step 4. Replace the lamp with a new one.
Insert it into the projector, and
tighten the screws firmly. Loose
screws may cause a bad connection, which may result in malfunction.
Step 5. Re-install the lamp cover and
tighten the screw. Do not turn
on the power with the lamp
cover removed. Whenever the
lamp is replaced, reset the total
lamp operation time. Do not
reset if the lamp is not replaced
as this could cause damage.
Maintenance26
Page 32

Resetting Lamp Hours
If you replace the lamp with a new one, please follow the instructions below to reset the
lamp hour.
OSD INSTRUCTIONS
Press and hold the Exit button on the projector for 3
seconds to display the total used lamp time. With the
OSD on, press MENU to activate RESET function or
press EXIT to leave.
Press W or X to reset the lamp hour to zero or or press
EXIT to leave.
This message displays when the lamp hour is reset to
zero. You can press EXIT to leave.
Te m p I n f o r m a tion
When the LED lights up, it is warning you of the following possible problems:
1. The internal temperature is too high.
2. The fans are not working.
Turn off the projector and contact qualified service personnel for further help.
For more detailed information, please refer to "LED Indicator Status & Illustration" on page
28.
Maintenance 27
Page 33

LED Indicator Status & Illustration
llustration
1. - : LED OFF
2. : LED blinking
3. : LED solid ON
4.
O : LED lights up orange.
R : LED lights up red.
5.
G : LED lights up green.
6.
LED Status & Description
Power Temp Lamp
Power switch on
O O O
Power-up cooling. Projector cooling system will auto-cool for
O
O
--
--
90 seconds when power was abnormal shutdown without
cooling and power on again within hours.
Stand-by
Power events
G
O
--
--
Maintenance28
G
Lamp LED is blinking during powering up.
--
Power-down cooling for 90 seconds after power has been
--
--
turned off.
Normal operation
Lamp spoil, it is warning you that lamp usage has exceeded
3000 hours. Replace the projection lamp with a new one
R
immediately.
Lamp error, the lamp is not properly attached or lamp
damaged. Please contact your dealer.
R
Lamp events
Page 34

Fan 1 error, projector will auto shutdown. If you return on the
power, and projector shutdown again. Please contact your
R
R
R
G
G
G
--
-
R
R
R
R
R
R
R
R
-
dealer.
Fan 2 error, projector will auto shutdown. If you return on the
power, and projector shutdown again. Please contact your
G
dealer.
Fan 3 error, projector will auto shutdown. If you return on the
power, and projector shutdown again. Please contact your
G
dealer.
Thermal sensor 1 over-temperature, projector will auto
shutdown. If you return on the power, and projector
-
shutdown again. Please contact your dealer.
Thermal sensor 2 over-temperature, projector will auto
shutdown. If you return on the power, and projector
G
shutdown again. Please contact your dealer.
Thermal sensor 3 over-temperature, projector will auto
shutdown. If you return on the power, and projector
G
shutdown again. Please contact your dealer.
Thermal sensor 1 doesn’t work, projector will auto shutdown.
If you return on the power, and projector shutdown again.
Please contact your dealer.
Thermal sensor 2 doesn’t work, projector will auto shutdown.
If you return on the power, and projector shutdown again.
G
Please contact your dealer.
Thermal events
Thermal sensor 3 doesn’t work, projector will auto shutdown.
-
R
If you return on the power, and projector shutdown again.
G
Please contact your dealer.
Maintenance 29
Page 35

Service Information
Accessories (included in the standard package)
Description of parts . . . . . . . . . . . . . . . . . . . . . . . . . . . . . . . . . . . . . . . . . Part Number
VGA cable. . . . . . . . . . . . . . . . . . . . . . . . . . . . . . . . . . . . . . . . . . . . . . . . . . . 50.J0508.503
Video cable. . . . . . . . . . . . . . . . . . . . . . . . . . . . . . . . . . . . . . . . . . . . . . . . . . 50.J1303.501
S-Video cable . . . . . . . . . . . . . . . . . . . . . . . . . . . . . . . . . . . . . . . . . . . . . . . 50.72920.011
Remote control . . . . . . . . . . . . . . . . . . . . . . . . . . . . . . . . . . . . . . . . . . . . . . 56.26J86.001
Alternative Accessories (vary from country to country)
Description of parts . . . . . . . . . . . . . . . . . . . . . . . . . . . . . . . . . . . . . . . . . Part Number
Power cord (US) . . . . . . . . . . . . . . . . . . . . . . . . . . . . . . . . . . . . . . . . . . . . .27.01818.000
3-2 converter (US). . . . . . . . . . . . . . . . . . . . . . . . . . . . . . . . . . . . . . . . . . . 22.91007.001
Power cord (EU) . . . . . . . . . . . . . . . . . . . . . . . . . . . . . . . . . . . . . . . . . . . . .27.82718.281
Power cord (UK) . . . . . . . . . . . . . . . . . . . . . . . . . . . . . . . . . . . . . . . . . . . . 27.01018.000
Optional Accessories (not included in the standard package)
Description of parts . . . . . . . . . . . . . . . . . . . . . . . . . . . . . . . . . . . . . . . . . Part number
Mac adapter (switchable) . . . . . . . . . . . . . . . . . . . . . . . . . . . . . . . . . . . . . 20.20118.A15
200W lamp module . . . . . . . . . . . . . . . . . . . . . . . . . . . . . . . . . . . . . . . . 60.J8618.CG1
Ceiling mount kit. . . . . . . . . . . . . . . . . . . . . . . . . . . . . . . . . . . . . . . . . . . . 60.J7615.001
Soft carry case. . . . . . . . . . . . . . . . . . . . . . . . . . . . . . . . . . . . . . . . . . . . . . . .98.J7601.001
HDTV cable . . . . . . . . . . . . . . . . . . . . . . . . . . . . . . . . . . . . . . . . . . . . . . . . .50.J2401.001
Ordering Parts or Getting Information
For product information, product assistance, service information, or to order accessories,
please visit the BENQ Corporation website at http://www.BenQ.com
Maintenance30
.
Page 36

Troubleshooting
Common Problems & Solutions
NO POWER
Try these solutions:
• Make sure the power cord is inserted snuged into the AC adapter socket.
• Make sure the power cord is inserted snuged into the power outlet.
• Toggle the power switch to the position “1”.
• Wait 90 seconds after the projector is turned off before turning the projector back on.
NO PICTURE
Try these solutions:
• Check for the proper input source.
• Ensure all cables are connected properly.
• Adjust the brightness and contrast.
• Remove the lens cap.
TRAPEZOID IMAGE ON THE SCREEN
Try these solutions:
• Reposition the unit to improve its angle on the screen.
•Use the Keystone correction key on the control panel of the projector or the remote
control unit.
POOR COLOR
Try these solutions:
• Select the correct video system.
• Adjust brightness, contrast, or saturation.
BLURRED IMAGE
Try these solutions:
• Press Auto on the control panel of the projector or the remote control unit to get better
picture quality.
•Adjust the focus.
• Reposition the unit to improve its projection angle.
• Ensure the distance between the unit and screen is within the adjustment range of the
lens.
REMOTE CONTROL DOES NOT WORK
Try these solutions:
• Replace the batteries with new ones.
• Make sure there is no obstacle between the remote control and the projector.
• Stand within 6 meters (19.5 feet) of the projector.
• Make sure nothing is blocking the front and rear receivers.
Troubleshooting 31
Page 37

Status Messages
On-Screen Messages Description
SEARCHING
ACQUIRING SIGNAL
OUT OF RANGE
Lamp Warning - Change
Lamp If Brightness Is Low.
Out Of Lamp Usage Time Change The Lamp! The
Power Will Turn Off After
3000 Hours.
Out Of Lamp Usage Time -
Change The Lamp! Press
<MENU> to enable
<RESET>
Projector is searching for input.
Projector has identified the input signal and is
running the auto image adjustment function.
Input signal frequency exceeds the projector’s range.
The lamp has been in operation for over 1980 hours.
Install a new lamp for optimal performance. This
message will display for 10 seconds after starting up
the projector.
The lamp has been in operation for over 2980 hours,
and the power will turn off after 3000 hours. This
message will display for 30 seconds after starting up
the projector.
The lamp has been in operation for over 3000 hours.
The warning message will display for 40 seconds and
then shut down automatically. If you have installed a
new lamp, press <MENU> during the OSD on to
enter for resetting the lamp hour to zero.
Troubleshooting32
Page 38

Specifications
Projector Specifications
Technical Specifications
All specifications are subject to change without notice.
General
Product name Digital Projector
Model name PB6200 1024X768 XGA
PB6100 800X600 SVGA
Optical
Display system 1-CHIP DMD
Lens F/Number F = 2.4 to 2.6, f = 24.3 ~ 29.2 mm
Lamp 200W lamp
Electrical
Power supply AC100 ~ 240V, 3.2A, 50/60 Hz (Automatic)
Power consumption 285W (Max)
Mechanical
Dimensions 262 mm (W) x 98.4 mm (H) x 215.5 mm (D)
Operating temperature
range
Weight 5.8 lbs (2.6 Kg)
Input terminal
Computer input
RGB input D-sub 15-pin (female)
Video signal input
S-VIDEO Mini DIN 4-pin port x1
VIDEO RCA jack x1
0°C ~ 40°C
Specifications 33
Page 39

Timing Chart
Resolution H Sync (kHz) V Sync (Hz) Remark
640x350 31.5 70.1
640x400 37.9 85.1 VESA
720x400 31.5 70.0
720x400 37.9 85.1 VESA
640x480 31.5 60.0 VESA
640x480 37.9 72.8 VESA
640x480 35 66.7 Macintosh
640x480 43.3 85.0 VESA
800x600 35.2 56.3 VESA
800x600 37.9 60.3 VESA
800x600 46.9 75.0 VESA
800x600 48.1 72.2 VESA
800x600 53.7 85.1 VESA
832x624 49.7 74.5 Macintosh
1024x768 48.4 60.0 VESA
1024x768 56.5 70.1 VESA
1024x768 60.0 75.0 VESA
1024x768 68.7 85.0 VESA
1280x1024 64.0 60.0 VESA
Specifications34
Page 40

Dimensions
262
215.5
98.4
Unit: mm
Dimensions 35
Page 41

Warranty
Limited Warranty
BENQ warrants this product against any defects in material and workmanship, under normal usage and storage.
Exclusion to Warranty: The lamps are considered a consumable item and are warranted for
90 days or 1000 hours, whichever occurs first. Proof of purchase date will be required with
any warranty claim. In the event this product is found to be defective within the warranty
period, BENQ’s only obligation and your exclusive remedy shall be replacement of any
defective parts (labor included). To obtain warranty service, immediately notify the dealer
from which you purchased the product of any defects.
Important: The above warranty shall be void if the customer fails to operate the product in
accordance with BENQ’s written instructions. This warranty gives you specific legal rights,
and you may have other rights which vary from country to country.
For other information, please refer to BenQ Warranty Information Book.
Warranty36
Page 42

Safety Regulations
FCC Statement
CLASS A: This equipment generates, uses and can radiate radio frequency energy, and if not
installed and used in accordance with the instruction manual, may cause interference to
radio communications. It has been tested and found to comply with the limits for a Class “A”
computing device pursuant to Subpart B of Part 15 of the FCC Rules, which are designed to
provide reasonable protection against such interference when operated in a commercial
environment. Operation of this equipment in a residential area is likely to cause interference,
in which case the user at his/her own expense will be required to take whatever measures
may be required to correct the interference.
CLASS B: This equipment generates, uses and can radiate radio frequency energy and, if not
installed and used in accordance with the instructions, may cause harmful interference to
radio communications. However, there is no guarantee that interference will not occur in a
particular installation. If this equipment does cause harmful interference to radio or television reception, which can be determined by turning the equipment off and on, the user is
encouraged to try to correct the interference by one or more of the following measures:
— Reorient or relocate the receiving antenna.
— Increase the distance between the equipment and receiver.
— Connect the equipment into an outlet on a circuit different from that to which
the receiver is connected.
— Consult the dealer or an experienced radio/TV technician for help.
EEC Statement
This machine was tested against the 89/336/EEC (European Economic Community) for
EMC (Electro Magnetic Compatibility) and fulfills these requirements.
MIC Statement
A class equipment (Business purpose info/telecommunications equipment)
As this equipment has undergone EMC registration for business purpose, the seller and/or
the buyer is asked to beware of this point and in case a wrongful sale or purchase has been
made, it is asked that a change to household use be made.
B class equipment (Household purpose info/telecommunications equipment)
As this equipment has undergone EMC registration for household purpose, this product can
be used in any area including residential area.
Safety Regulations 37
Page 43

PLEASE READ
We are in no way responsible for the
contents of the manual. We do not guarantee
its accuracy and we do not make any claim
of copyright. The copyright remains the
property of their respective owners.
Visit the site to read the latest projector
news and reviews, read and comment on
projector specifications, download user
manuals and much more.
 Loading...