

Page 1
Professional Desktop Scanner
User’s Manual
(PC version)
English
Page 2

Page 3
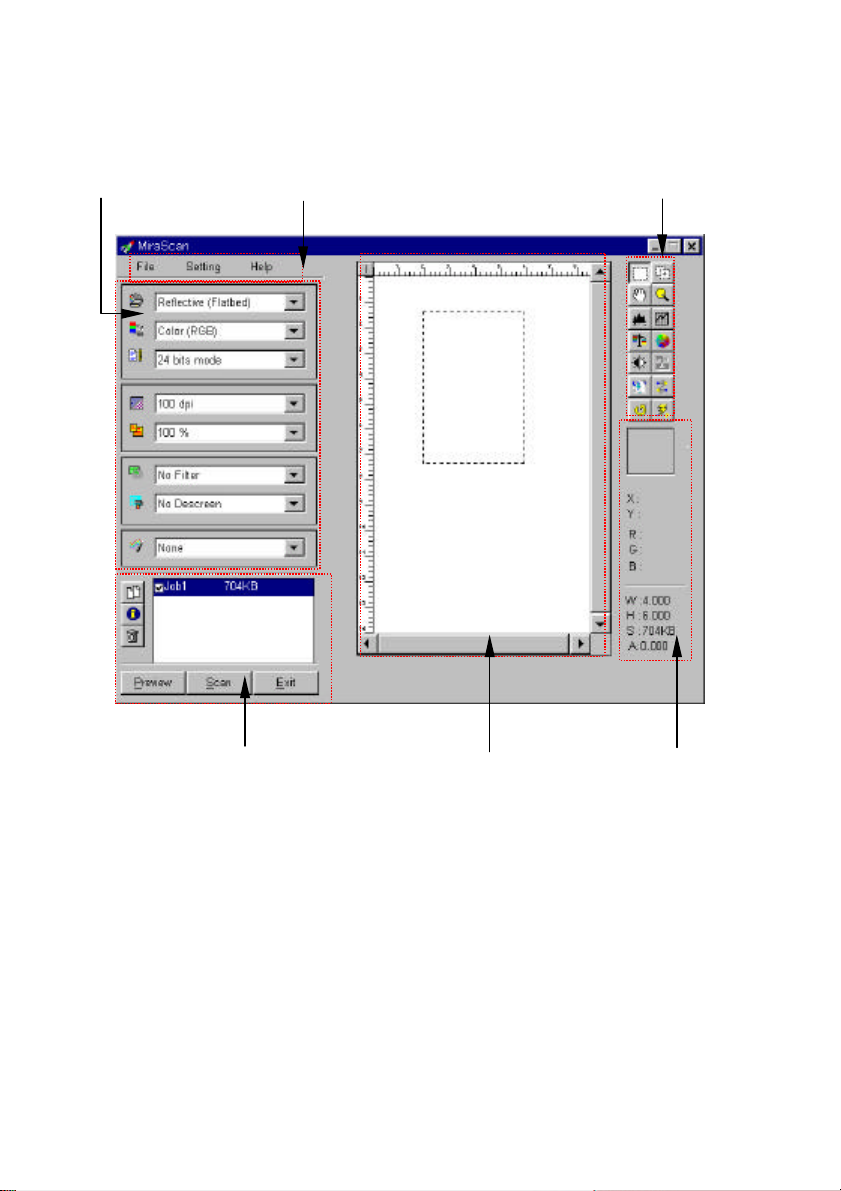
MiraScan main screen
Menu Bar
Combo Boxes
Tool Bar
Job List and Command Buttons
Preview Area
Status Area
(page 13)
(page 9)
(page 24)
(page 22)
(page 24)
(page 39)
Page 4

Copyright
Copyright © 1999 by this company. All rights reserved. No part of this publication
may be reproduced, transmitted, transcribed, stored in a retrieval system or
translated into any language or computer language, in any form or by any means,
electronic, mechanical, magnetic, optical, chemical, manual or otherwise, without
the prior written permission of this company.
Disclaimer
This company makes no representations or warranties, either expressed or implied,
with respect to the contents hereof and specifically disclaims any warranties,
merchantability or fitness for any particular purpose. Further, this company
reserves the right to revise this publication and to make changes from time to time
in the contents hereof without obligation of this company to notify any person of
such revision or changes.
Brands and product names are trademarks or registered trademarks of their respective
companies.
IMPORTANT SAFETY INSTRUCTIONS
1. Read these instructions carefully. Save these instructions for future reference.
2. Follow all warnings and instructions marked on the product.
3. Unplug this product from the wall outlet before cleaning. Do not use liquid
cleaners or aerosol cleaners. Use a damp cloth for cleaning.
4. Do not use this product near water.
5. Do not place this product on an unstable cart, stand, or table. The product
may fall, causing serious damage to the product.
6. Openings in the cabinet and the bottom are provided for ventilation; to
ensure reliable operation of the product and to protect it from overheating,
these openings must not be blocked or covered. The openings should never
be blocked by placing the product on a bed, sofa, rug, or other similar
surface. This product should never be placed near or over a radiator or heat
register, or in a built-in installation unless proper ventilation is provided.
7. This product should be operated from the type of power indicated on the
marking label. If you are not sure of the type of power available, consult your
dealer or local power company.
Page 5

8. Do not allow anything to rest on the power cord. Do not locate this product
where persons will walk on the cord.
9. If an extension cord is used with this product, make sure that the total
ampere rating of the equipment plugged into the extension cord does not
exceed the extension cord ampere rating. Also, make sure that the total rating
of all products plugged into the wall outlet does not exceed the fuse rating.
10. Never push objects of any kind into this product through cabinet openings as
they may touch dangerous voltage points or short out parts that could result
in a fire or electric shock. Never spill liquid of any kind on the product.
11. Do not attempt to service this product yourself, as opening or removing
covers may expose you to dangerous voltage points or other risks. Refer all
servicing to qualified service personnel.
12. Unplug this product from the wall outlet and refer servicing to qualified
service personnel under the following conditions:
a. When the power cord or plug is damaged or frayed
b. If liquid has been spilled into the product
c. If the product has been exposed to rain or water
d. If the product does not operate normally when the operating
instructions are followed. Adjust only those controls that are covered by
the operating instructions since improper adjustment of other controls
may result in damage and will often require extensive work by a
qualified technician to restore the product to normal condition.
e. If the product has been dropped or the cabinet has been damaged
f. If the product exhibits a distinct change in performance, indicating a
need for service.
13. Use only the power cord which is of the same type as the one originally
included with the scanner.
Page 6

FCC INFORMATION
The Federal Communication Commission Radio Frequency Interference Statement
includes the following paragraph:
This equipment has been tested and found to comply with the limits for a Class B
Digital Device, pursuant to Part 15 of the FCC Rules. These limits are designed to
provide reasonable protection against harmful interference in a residential
installation. This equipment generates, uses and can radiate radio frequency
energy and, if not installed and used in accordance with the instruction, may cause
harmful interference to radio communication. However, there is no guarantee that
interference will not occur in a particular installation. If this equipment dose cause
harmful interference to radio or television reception, which can be determined by
turning the equipment off and on, the user is encouraged to try to correct the
interference by one or more of the following measures:
1. Reorient or relocate the receiving antenna.
2. Increase the separation between the equipment and receiver.
3. Connect the equipment into an outlet on a circuit different from that to which
the receiver is connected.
4. Consult the dealer or an experienced radio/TV technician for help.
The user should not modify or change this equipment without written approval
from this company. Modification could void authority to use this equipment.
Page 7

English
Table of Contents
CHAPTER 1. MIRASCAN............................................................................1
PREFACE: INTRODUCTION TO MIRASCAN ..............................................................1
SCANNING REFLECTIVE AND TRANSPARENT ORIGINALS...............................................4
Scanning reflective originals....................................................................4
Scanning transparent originals.................................................................6
UNDERSTANDING MIRASCAN FUNCTIONS ..............................................................9
Menu Bar .............................................................................................9
File submenu..................................................................................... 9
Load Config… ................................................................................. 9
Save Config… .................................................................................9
Save Config As….............................................................................9
Reset Config...................................................................................9
Auto Save Config.............................................................................9
Settings submenu............................................................................. 10
Scan Size…................................................................................... 10
Monitor Gamma ............................................................................ 11
Film Type..................................................................................... 12
Auto Preview................................................................................ 12
Help submenu.................................................................................. 12
Contents...................................................................................... 12
Scanner Info….............................................................................. 12
About MiraScan….......................................................................... 12
Combo Boxes...................................................................................... 13
Original box..................................................................................... 13
Reflective (Flatbed) ....................................................................... 13
Transparent.................................................................................. 13
Negative Film ............................................................................... 13
Image Type box............................................................................... 14
Color (RGB).................................................................................. 14
Gray............................................................................................ 14
Line Art........................................................................................ 14
Scan Mode box ................................................................................ 15
24 bits mode ................................................................................ 15
36 bits mode ................................................................................ 15
Resolution box................................................................................. 15
Scenarios for using a high resolution scan............................................ 16
Scaling box...................................................................................... 17
Filter box ........................................................................................ 17
Descreen box................................................................................... 19
Color Wizard box.............................................................................. 20
Auto Density................................................................................. 20
Photo Magic ................................................................................. 20
Film Wizard.................................................................................. 20
Color Matching.............................................................................. 21
i
Page 8

English
Job List and Command Buttons.............................................................. 22
Job List........................................................................................... 22
Duplicate button............................................................................... 23
Info button...................................................................................... 23
Delete button................................................................................... 23
Preview button................................................................................. 23
Scan button..................................................................................... 23
Exit button...................................................................................... 23
Preview Area ...................................................................................... 24
Tool Bar............................................................................................. 24
Selection button............................................................................... 24
New Frame button............................................................................ 25
Hand button.................................................................................... 25
Zoom button.................................................................................... 25
Level button.................................................................................... 26
Color Channel box......................................................................... 26
Histogram.................................................................................... 26
Input Level box............................................................................. 29
Output Level box........................................................................... 29
Curve button ................................................................................... 30
Color Channel box......................................................................... 30
Tonal Map.................................................................................... 30
Input/Output Status Area............................................................... 31
Color Balance button......................................................................... 32
Channel....................................................................................... 32
Adjustment Area........................................................................... 32
Color Adjustment button.................................................................... 33
Color Wheel.................................................................................. 33
Lightness Bar................................................................................ 33
Entry Box..................................................................................... 33
Brightness/Contrast button................................................................ 34
Brightness control ......................................................................... 34
Contrast control............................................................................ 34
Threshold button.............................................................................. 35
Invert button................................................................................... 36
Mirror button................................................................................... 36
Rotate button.................................................................................. 37
Auto button..................................................................................... 38
Status Area......................................................................................... 39
Pixel Display Box........................................................................... 39
Pixel Information Area ................................................................... 39
Image Information Area................................................................. 39
CHAPTER 2. PHOTO EXPRESS.................................................................41
INTRODUCTION.......................................................................................... 41
GETTING STARTED...................................................................................... 42
ii
Page 9

English
GETTING IMAGES........................................................................................ 44
Working with Album............................................................................. 44
WORKING ON IMAGES .................................................................................. 46
Adjusting Images ................................................................................ 46
SHARING IMAGES........................................................................................ 48
Printing Images................................................................................... 48
Saving Images.................................................................................... 49
EXPRESS YOUR IMAGES................................................................................. 50
Create Calendars................................................................................. 50
Morphing Photos ................................................................................. 51
WORKING IN PROJECT MODE .......................................................................... 52
To Begin a New Project........................................................................ 52
Working with Templates....................................................................... 53
Adding Decoration............................................................................... 54
Printing Templates............................................................................... 55
Sharing Templates............................................................................... 56
CHAPTER 3. TEXTBRIDGE CLASSIC ........................................................57
TEXTBRIDGE CLASSIC .................................................................................. 57
Main Screen........................................................................................ 57
Select Scanner .................................................................................... 58
BEGIN OCR IN AUTOMATIC MODE.................................................................... 59
CHAPTER 4. COPIER...............................................................................61
Adjust Copier Settings.......................................................................... 61
Copier Parameters............................................................................ 62
How to Use Copier............................................................................... 65
CHAPTER 5. TROUBLESHOOTING AND FAQ............................................67
FAQ...................................................................................................... 67
TROUBLESHOOTING..................................................................................... 67
CHAPTER 6. SERVICE INFORMATION.....................................................69
APPENDIX. MIRASCAN MAIN SCREEN GUIDE MAP ................................71
iii
Page 10

English
<Memo>
iv
Page 11

English
Chapter 1. MiraScan
Preface: Introduction to MiraScan
MiraScan is the driver program for your scanner. It is TWAIN compliant and
designed to be user-friendly. With its iconlized user-interface and fully logical taskflow design, you can complete a satisfactory scanning job with only a few mouse
clicks. You can perform all of the following tasks using MiraScan:
1. Preview, scan and import the reflective originals or transparencies into your
image editing software.
2. Adjust the quality of your scanned image before you actually start editing the
image in your image editing software.
3. Apply batch scan functionality, allowing you to specify and switch among
multiple scanning sessions in an image.
4. Create special effects to the scanned image by applying Invert and Mirror
functions.
5. Use the Color Wizard to adjust the image easily and quickly.
1
Page 12
English
MiraScan Main Screen
Menu Bar
Combo Boxes
Tool Bar
Job List and Command Buttons
Preview Area
Status Area
You can invoke the MiraScan driver using your image editing or OCR (optical
character recognition) software. Depending on the software you use, you may need
to select the scanner (image source) before you can use the scanner and MiraScan
to scan and import image. For details, please refer to the instructions that come
with your particular software package.
When MiraScan is evoked successfully, the following main screen will appear:
2
Page 13
English
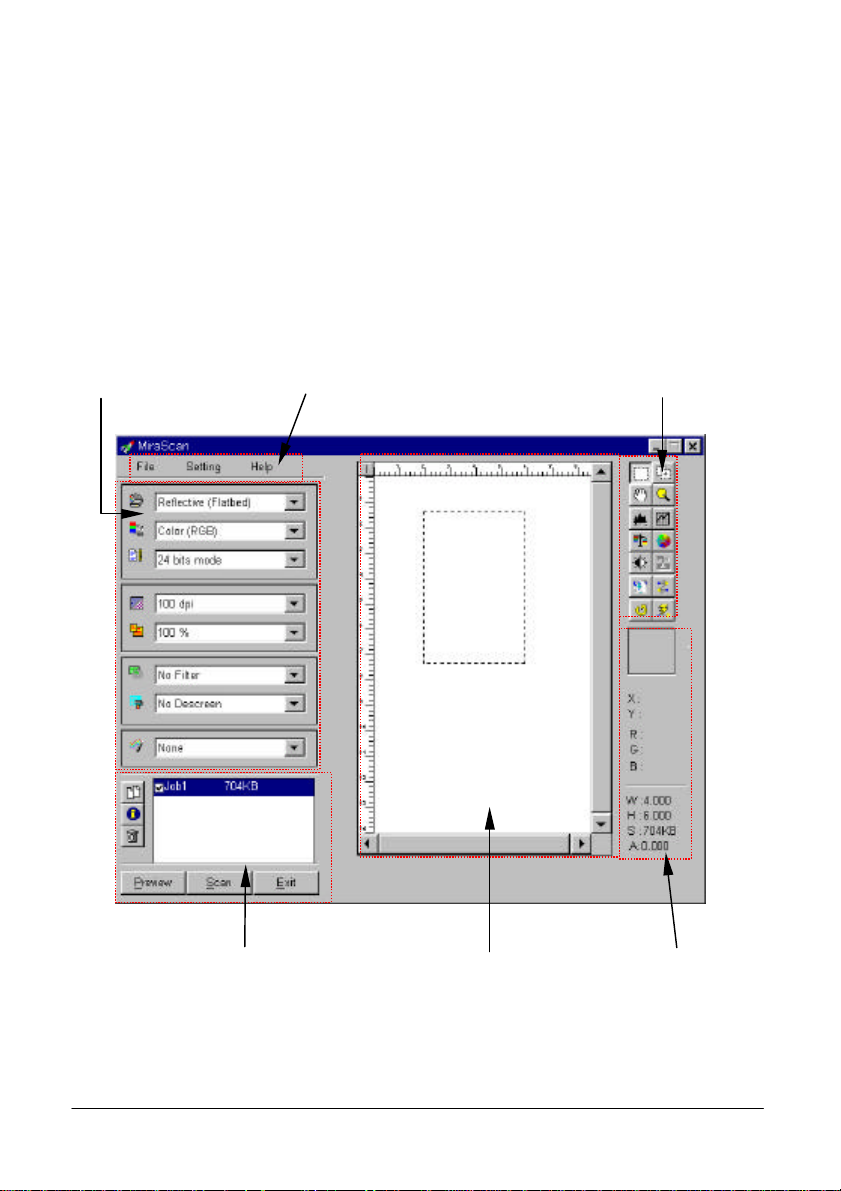
Main Screen Feature Used to…
Menu Bar Adjust MiraScan settings and display driver
Combo Boxes Specify different scan settings and apply to the
Preview Area Preview the original image in order to obtain a general
Tool Bar Access several advanced tools in order to adjust the
Status Area Display information of current image.
information.
scanned image, according to the original you want to
scan.
understanding of what the image will look like and
adjust the scan area.
scanned image more precisely.
Command Button
and Job List
Manage scan jobs and control scan actions.
3
Page 14
English
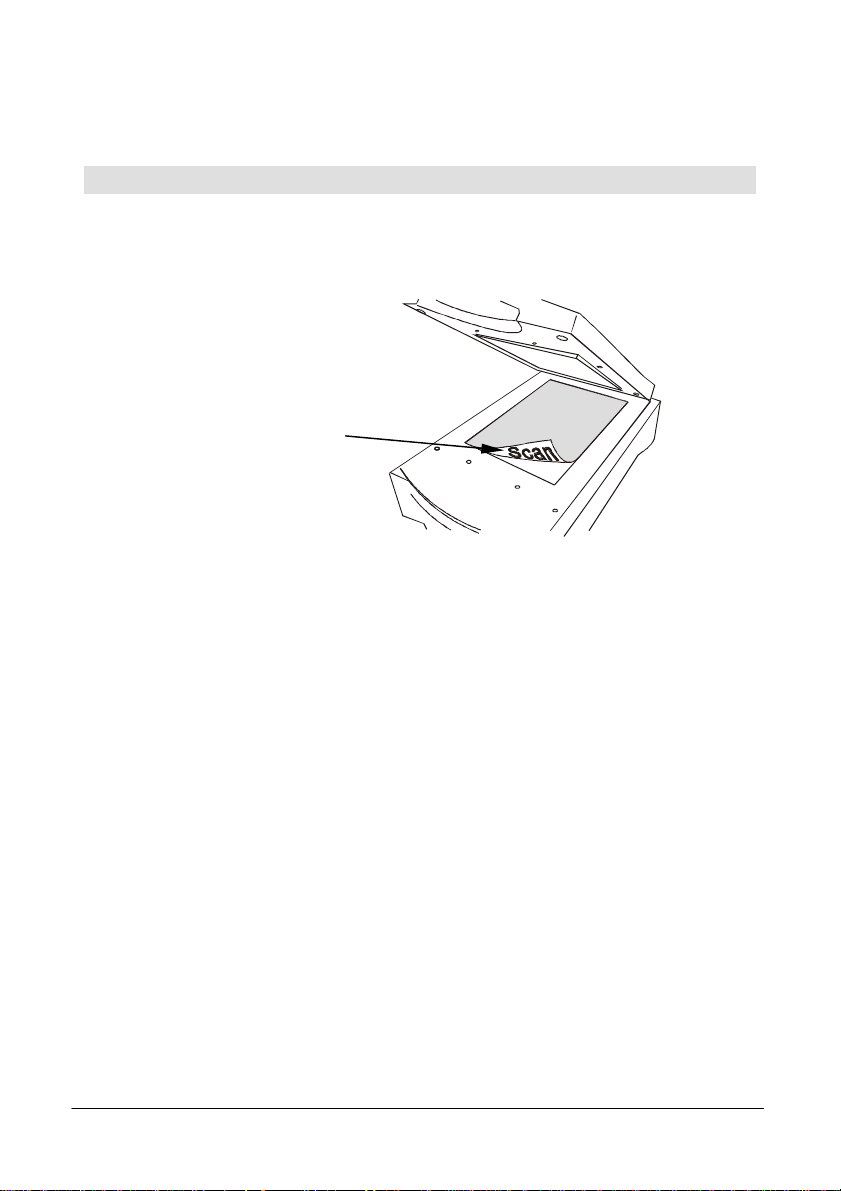
Scanning Reflective and Transparent Originals
Note the direction
This chapter will guide you step by step toward a successful scan:
Scanning reflective originals
Step 1. Place the original face down on the scanner glass plate. Note the
direction of the original so that you will not scan the image in the wrong
direction. Close the scanner lid.
Step 2. Open your application software.
Step 3. If this is your first time to scan, you may have to select the TWAIN
source by choosing Select source in the File menu and then selecting
MiraScan in your application software (You only need to do this once,
unless you re-install your application software). Please note that the
way to select the TWAIN source may differ according to the software
you use. For details, please refer to the documents that come with your
application software.
Step 4. Choose Acquire from your application software to bring up MiraScan
Step 5. From the MiraScan main screen, select Reflective in the Original
Step 6. Adjust the scan area in the Preview Area.
Step 7. Use the options in the Combo Boxes to specify the Resolution, Scale…,
Step 8. Use the options in the Tool Bar to adjust the image.
(this may also differ according to the application you use).
combo box, then click Preview. A preview image will appear in the
Preview Area.
etc. that will apply to the scanned image.
4
Page 15
English
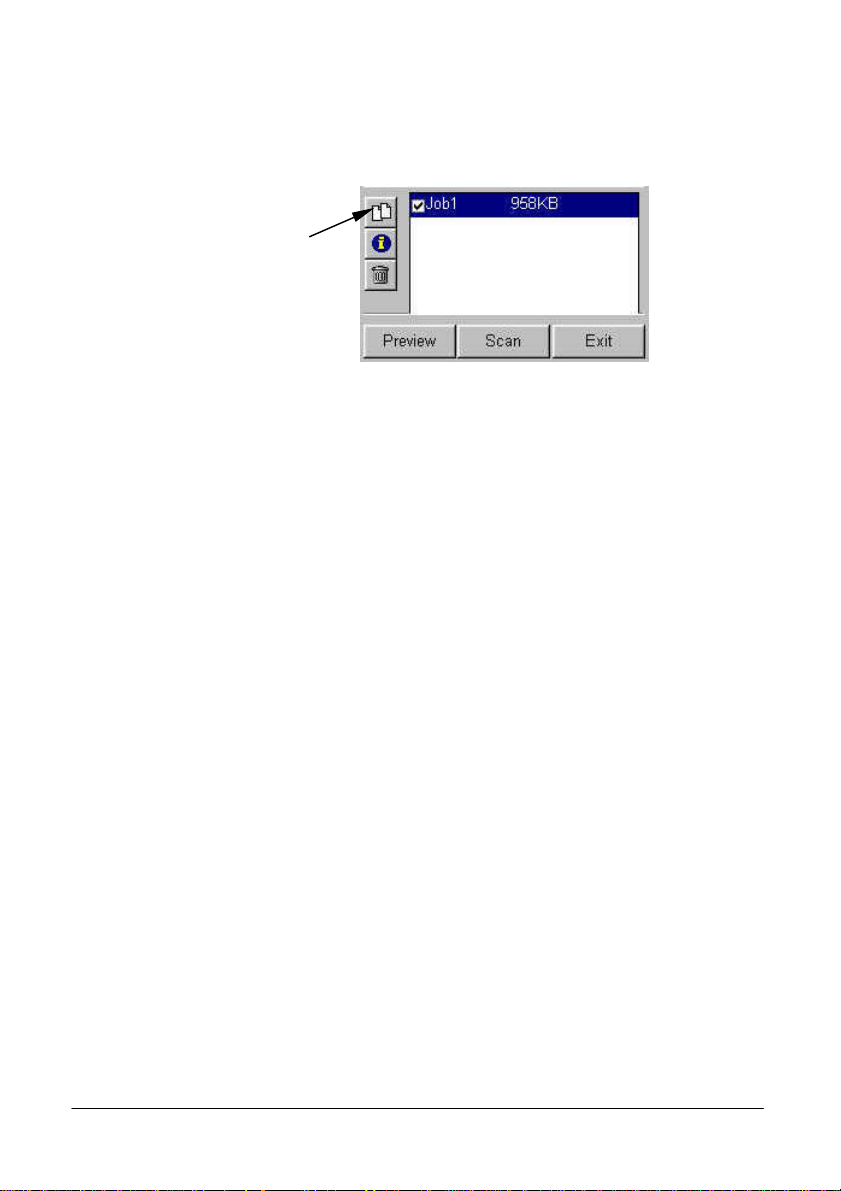
Click this button to
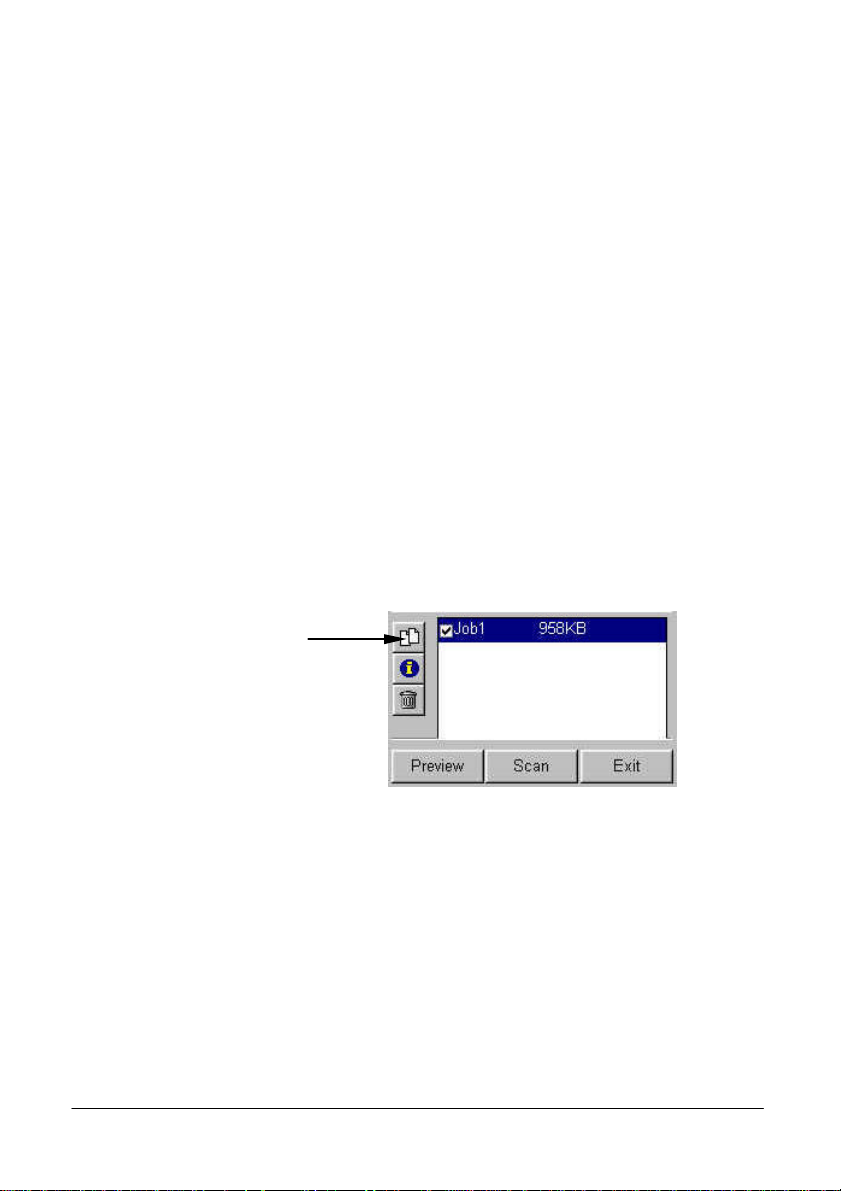
Step 9. If you need to add another scan area (scan job) to the original, push
the Duplicate button in the Job List to add a new job. Then repeat
Step 6 and 7 to do the settings for that scan job.
add a new job.
Step 10. After you have finished with the settings for each scan job, press the
Scan button to scan.
Step 11. A few seconds later, the scanned image(s) will be imported into your
application software. You can start to edit the image(s).
5
Page 16
English
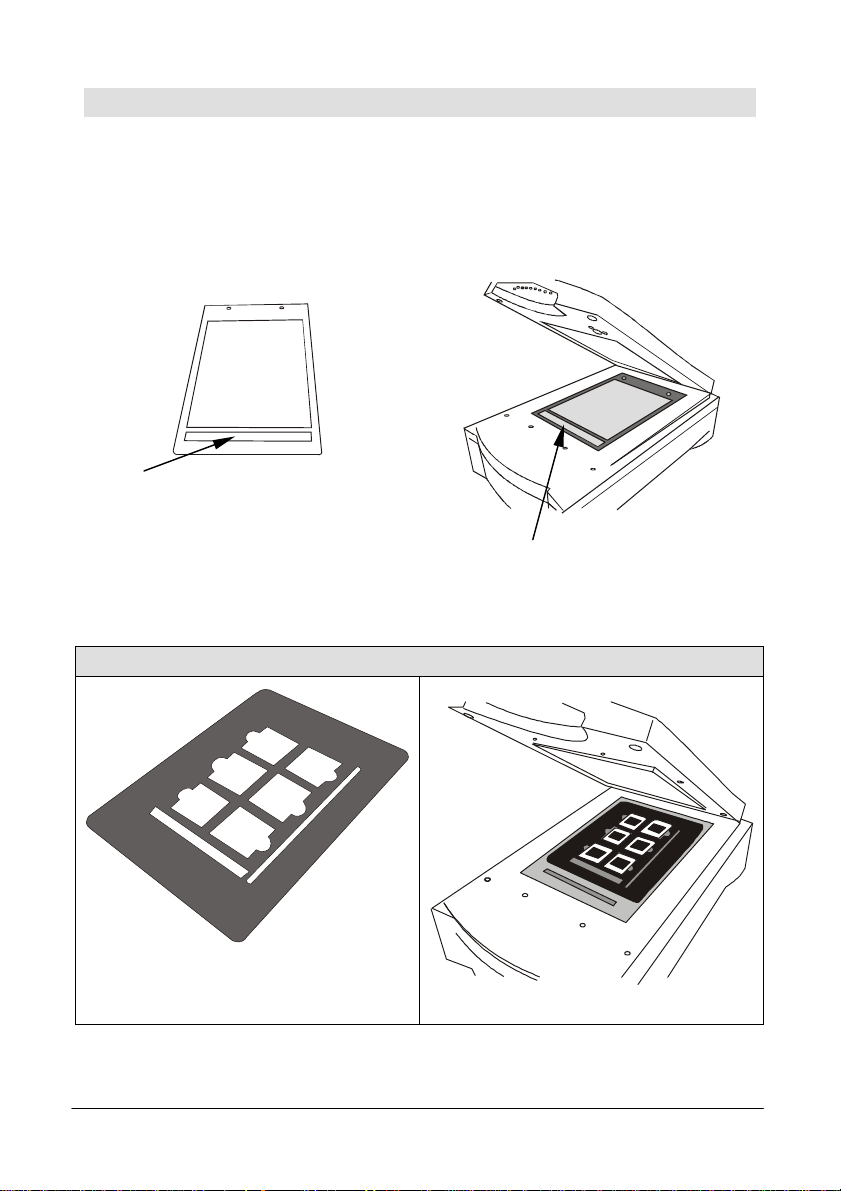
Calibration area
Scanning transparent originals
Step 1. Place your film in an appropriate film frame, then place on the glass
plate of scanner. When doing so, make sure that the calibration area is
facing the right direction (Towards the front panel of the scanner). Do
not block the calibration area, or the scanner will fail to function
correctly.
Transparency positioning frame
Scan Mounted Slides
Slide holder
Note the direction of the calibration
area
6
Page 17
English
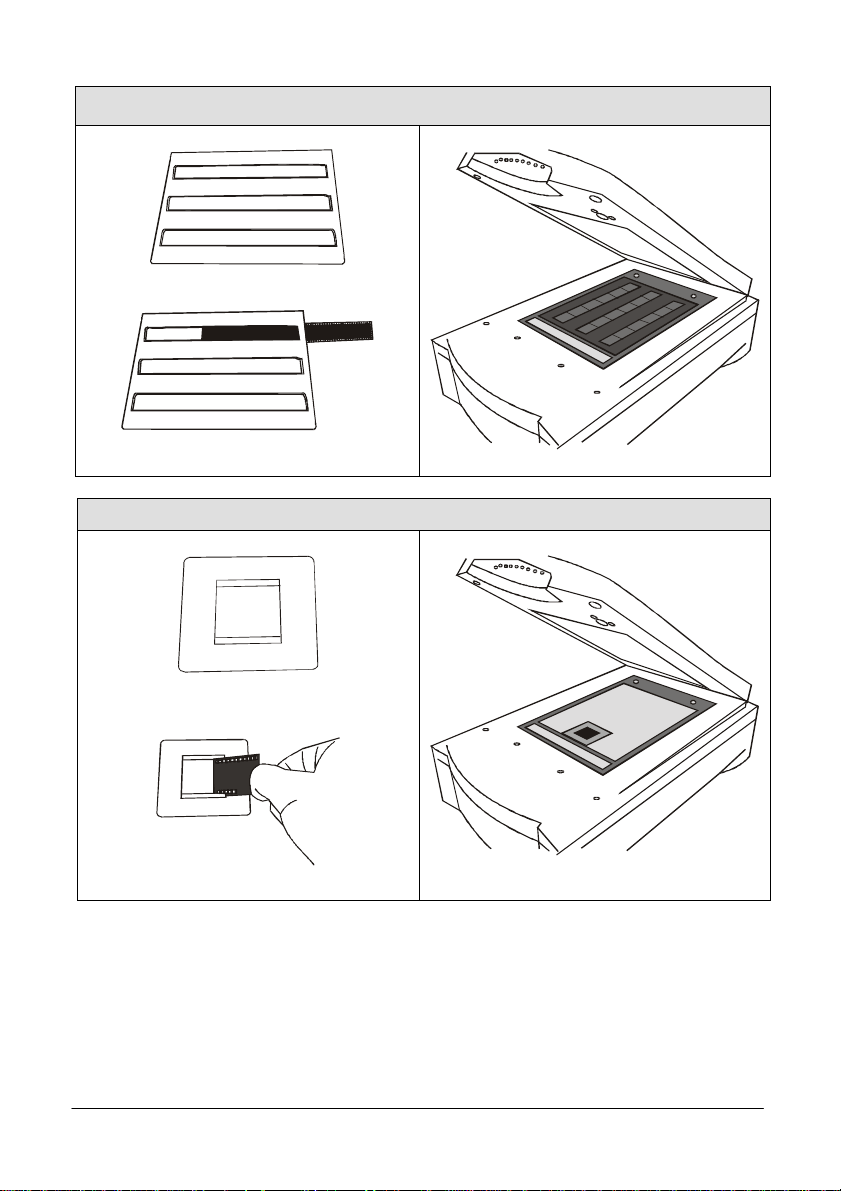
Scan Filmstrip
Filmstrip holder
Insert the filmstrip into the holder
Scan Positive Films
positive film holder
Place the positive film in the holder
Step 2. Open your application software.
Step 3. If this is your first time to scan, you may have to select the TWAIN
source by choosing Select source in the File menu, then selecting
MiraScan in your application software (you only need to do this once,
unless you re-install your application software). Please note that the
way to select the TWAIN source may differ according to the software
7
Page 18
English
Click this button to
you use. For details, please refer to the documents that come with your
application software.
Step 4. Choose Acquire from your application software. This will bring up the
MiraScan main screen.
Step 5. From the MiraScan main screen, select Transparent (if you are
scanning a positive film) or Negative Film (if you are scanning a
negative film) in the Original combo box. When the Film Type dialog
box appears, select the type of film you use from the list and click OK.
Step 6. Click Preview. The preview image will appear in the Preview Area.
Step 7. Adjust the scan area in the Preview Area.
Step 8. Use the options in the Combo Boxes to specify the Resolution,
Scale…, etc. that will apply to the scanned image.
Step 9. Use the options in the Tool Bar to adjust the image.
Step 10. If you need to add another scan area (scan job) to the original, click on
the Duplicate button in the Job List to add a new job. Then repeat
Steps 7 through 9 to adjust the settings for that scan job.
add a new scan job.
Step 11. After you have finished with the settings for each scan job, click on the
Step 12. A few seconds later, the scanned image(s) will be imported into your
Scan button to scan.
application software. You can start to edit the image(s).
8
Page 19
English
Understanding MiraScan Functions
This section describes all the features provided by MiraScan. By fully utilizing these
features, you can scan images more efficiently and quickly.
Menu Bar
There are three selectable menu items in the Menu
Bar. Each menu item contains several options in its
submenu:
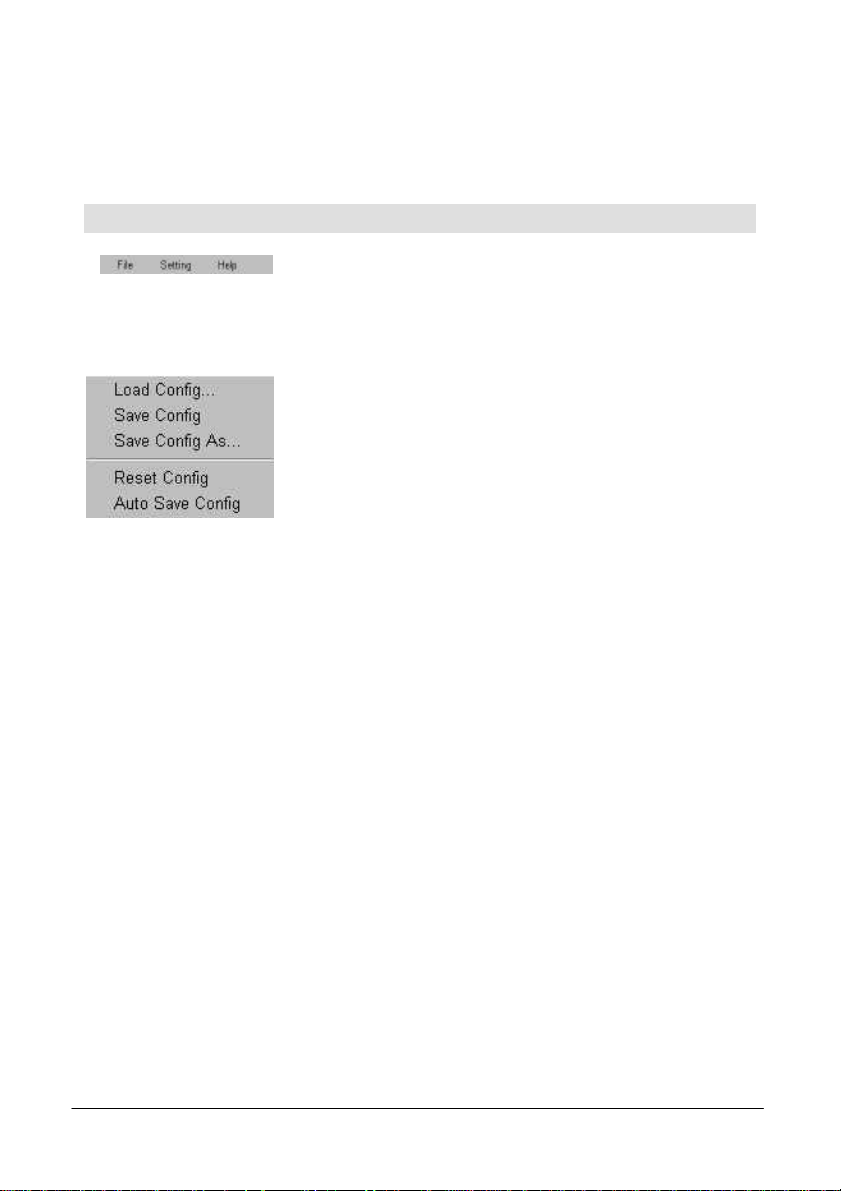
File submenu
MiraScan can record the settings you make for each
scan session in a configuration file. With this feature,
you can specify different settings for each scan job in
each configuration file. Load the configuration file when
you want to apply the settings. For example, you can
save the settings you make for scanning magazine
pictures in a configuration file and name it “Magazine”.
The next time you want to scan a magazine picture, you
can load the “Magazine” configuration file and MiraScan
will apply the settings recorded in it.
Load Config…
Load the configuration file you created. When the configuration file is loaded
successfully, MiraScan will apply the settings recorded in the configuration file
automatically.
Save Config…
Save current MiraScan settings into the configuration file.
Save Config As…
Save current MiraScan Settings as another new configuration file. Usually you can
create a new configuration file in this way. You can designate different file names
for each configuration file.
Reset Config
When you select this item, the settings you make in MiraScan will be reset to its
default value.
Auto Save Config
When you select this item, the settings will be saved in a configuration file
automatically as you exit MiraScan.
9
Page 20

English
Settings submenu
You can adjust several general scan settings in this
submenu.
Scan Size…
When you choose this item, the following dialog box will appear:
In this dialog box, you can set the sizes of the
areas to be scanned. First, choose the job
number (the numbers of the scan areas listed in
the Job List) from the job number list box, then
set the size of the scan area. Click in the Scan
Size list box:
If you have set the original as Reflective (Flatbed) in the Combo Boxes, you
can choose the scan area size from the list. Four frequently used formats are listed:
A4, A5, B5 and Letter. You can also customize the scan sizes by choosing
Custom in the list box and then enter the desired width and height into the Width
and Height text boxes. The default unit is inch. To change the unit, press in the
list box with your mouse, and choose the desired unit from the list by clicking it.
If you have set the original as Transparent or Negative Film, the list box will
contain only two items: Max. Area and Custom. Choosing Max. Area , the full
range of the image will be scanned. If you choose Custom, you can enter the sizes
you want into the Width (max.: 8 inches) and Height (max.: 10 inches) text
boxes.
After you complete your settings, click on the OK button to confirm your settings
and close the dialog box. You can then press the Cancel button to close the dialog
box without saving your settings; or you can press the Apply button to apply your
settings to the image without closing the dialog box.
10
Page 21
English
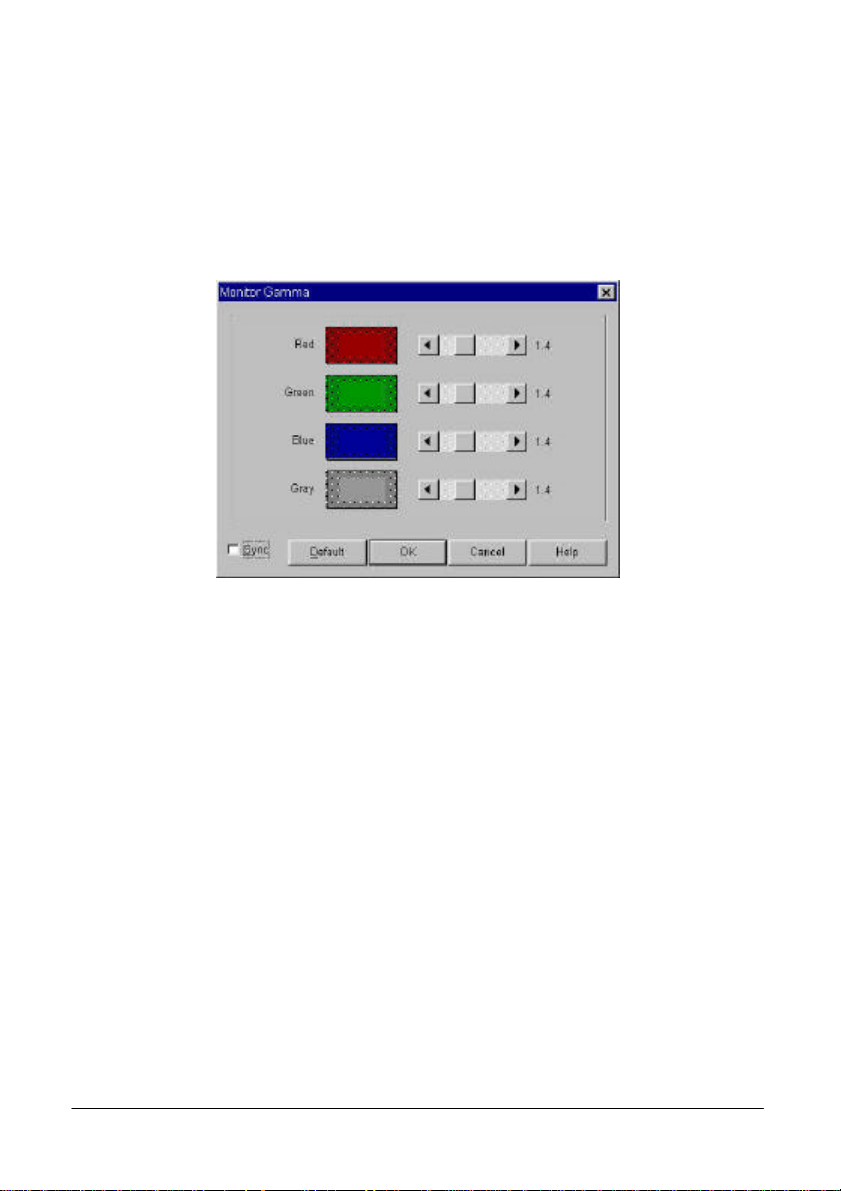
Monitor Gamma
Generally, a monitor cannot display the real colors of an image in the real world. In
order to have the monitor approximate the colors as possible, usually, you need to
adjust the monitor gamma.
Adjustment of the monitor gamma can make the monitor approximate the colors of
the original image more closely. Choose this item, and the following dialog box will
appear:
From this dialog box, you can adjust the brightness in the midtone of display so
that it can approximate the color details of the original images. Drag the scroll bars
to adjust the gamma values of red, green, blue and gray until the monitor displays
the original colors more accurately. If the Syn box is checked, you can adjust all
the four gamma values simultaneously by dragging any scroll bar.
When the adjustment is done, press the OK button to confirm your settings and
close the dialog box; otherwise, press the Cancel button to cancel your settings
and close this dialog box. If you use the default value, click on the Default button
and MiraScan will set the gamma value to 1.4.
11
Page 22
English
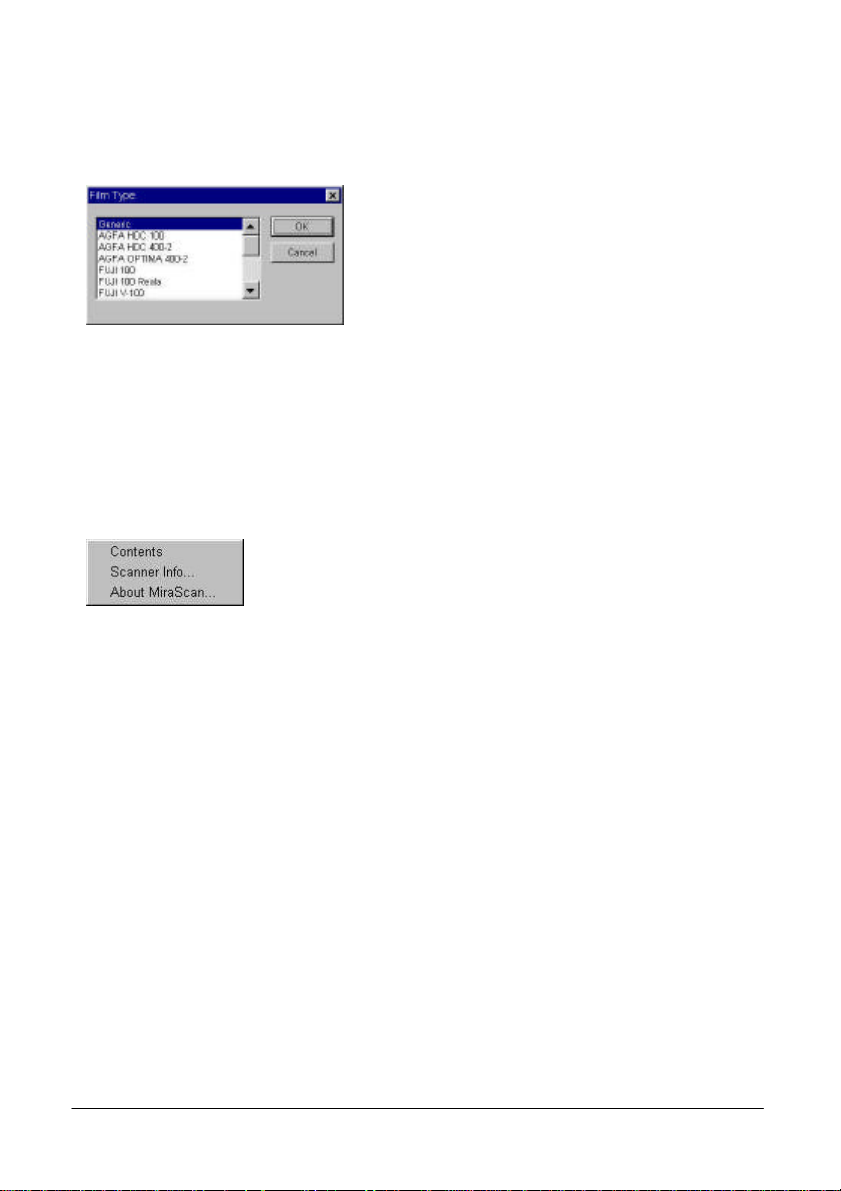
Film Type
This item is applicable only if you are scanning negative films and your scanner is
equipped with TPO. Choosing this item, the following dialog box will appear:
When you want to scan a negative film,
choose the type of your film here in advance.
MiraScan will optimize the scanning result for
the film type you selected. If you do not know
the type of your film or your film type is not
listed, choose Generic from the list.
When the selection is done, click OK to confirm or Cancel to abort.
Auto Preview
To perform the preview operation automatically each time you invoke MiraScan,
check the Auto Preview checkbox.
Help submenu
Click on the Help submenu, if you are either not clear
about certain MiraScan functions, or if you want
information about MiraScan or your scanner.
Contents
Click this item to bring up the on-line help system for your MiraScan. Before you
can use the on-line help system, you will need to have an Internet browser (such
as Netscape Navigator or Microsoft Internet Explorer) installed in your computer.
Scanner Info…
Select this item and a dialog box showing the scanner and driver information will
appear. This information, especially the driver version, is useful when you call for
technical support or if you plan to update your MiraScan scanner driver.
About MiraScan…
Choose this item to display the MiraScan copyright information. Click on the image
to close it.
12
Page 23
English
Combo Boxes
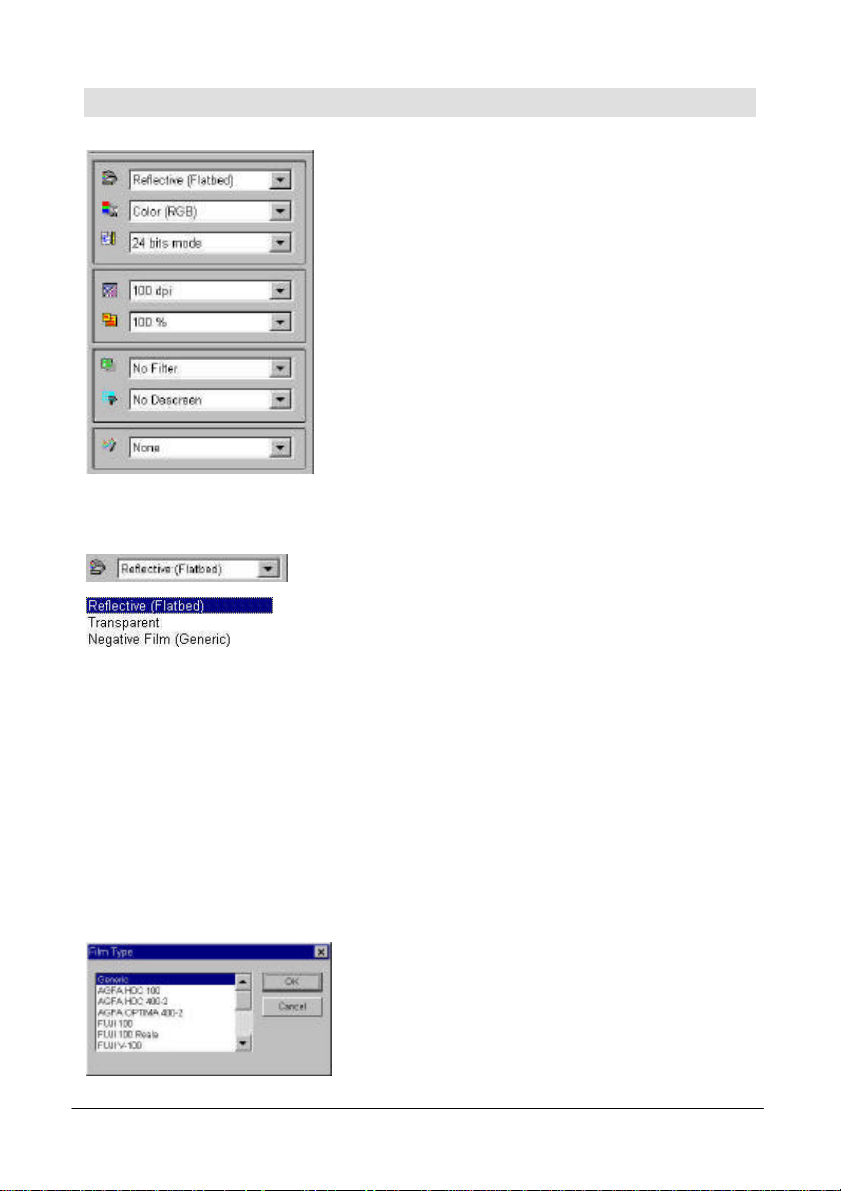
Original box
Combo Boxes provide several options to adjust the
scan settings before you scan an image. In order
to achieve the best scan result, you may need to
adjust the settings according to the purpose of the
scanned image and the type of original you use to
scan.
According to the type of original you use to scan, you
can select the original type from this box. There are
three items available on the list:
Reflective (Flatbed)
Select Reflective (Flatbed) if you are scanning images on hard copies, such as
magazine pictures, photographs or paper documents.
Transparent
Select Transparent if you are scanning positive films or slides. Please note that this
function is only applicable if your scanner is equipped with a TPO.
Negative Film
Select Negative Film if you are scanning negative films (such as the 35mm film
used for cameras). The following dialog box will appear to select the appropriate
film type.
Choose the film type according to the film you
use to scan. If you do not know the film type or
if the film type is not on the list, please select
Generic.
13
Page 24
English
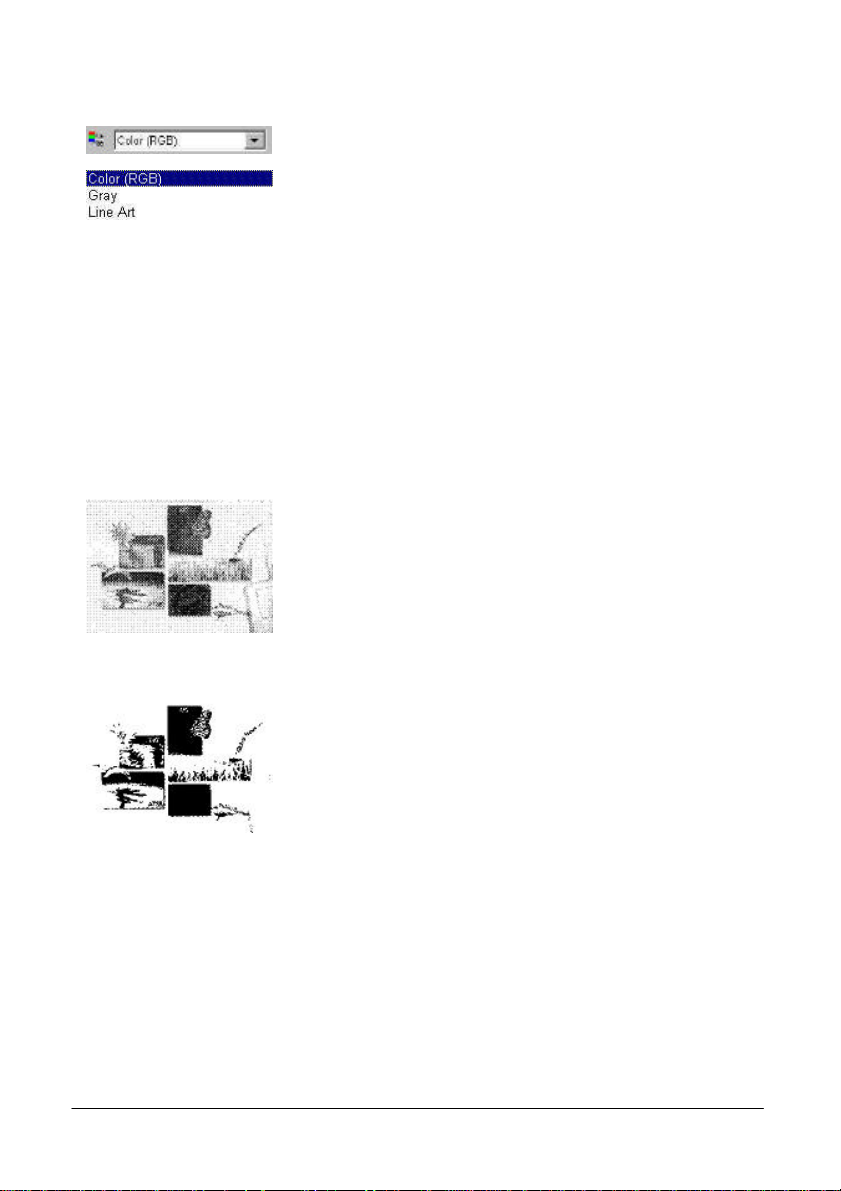
Image Type box
The Image Type box is used to select a particular data
type for your scanning. You will need to select a correct
image type according to the original and the purpose of
the scanned image. For example, if you are scanning a
text document, choose Line Art instead of Color to fit
the original type save the file size. The effect of each
item is described below.
Color (RGB)
Each pixel of a color image occupies 24 or 36 bits (according to your selection in
the Scan Mode box).
The Color mode is used for scanning images with continuous tones of gray shades
or colors that must be kept (such as a photograph). It contains more information
than other image types and may require excessive system memory.
Note: if you select Color (RGB) as the image type, the “Threshold” function in Tool
Buttons will be disabled automatically.
Gray
Each pixel of a gray image occupies 8 bits. A total of
256 gray levels may be represented. The Gray mode is
used mainly for scanning grayscale images.
Note: if you select Gray as the image type, the “Color
Balance”, “Color Adjustment”, Threshold” and “Rotate”
functions in Tool Buttons will be disabled automatically.
Line Art
Each pixel of a Line Art image occupies 1 bit. A total of
2 gray levels, i.e., black and white, may be represented.
The Line Art mode is used for scanning documents or
graphics containing lines, text and detailed drawings.
Select this item if you are scanning for an OCR (Optical
Character Recognition) process, and keep the resolution
at or above 300 dpi.
Note: if you select Line Art as the image type, the
following functions will be disabled automatically:
“Descreen”, “Filter” and “Color Wizard” in Combo
Boxes.
“Level”, “Curve”, Color Balance”, Color Adjustment”,
“Brightness/Contrast” and “Rotate” in Tool Buttons.
14
Page 25
English
Image scanned at 150 dpi
Image scanned at 300 dpi
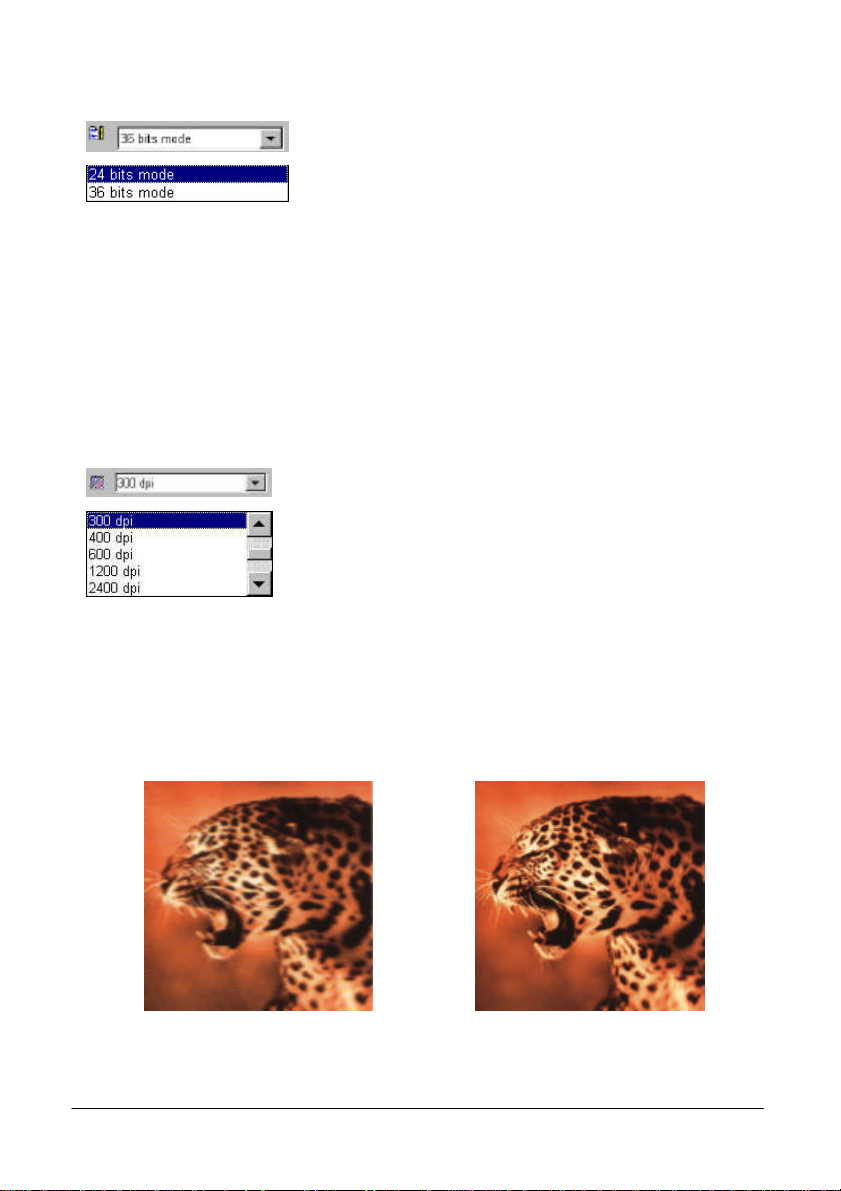
Scan Mode box
The Scan Mode box provides two scan modes: 24 bits
mode and 36 bits mode. The more bits used to
reproduce the image color, the more accurate the
scanner captures the colors of the original.
24 bits mode
In 24 bits mode, MiraScan uses 8 bits for Red, 8 bits for Green and 8 bits for Blue
to capture the colors of the original.
36 bits mode
In 24 bits mode, MiraScan uses 12 bits for Red, 12 bits for Green and 12 bits for
Blue to capture the colors of the original.
Resolution box
Resolution is used to decide how delicate the scanner
captures the original image.
When the original is scanned and turned into a digital
image, the scanner captures and records the image in
terms of pixels. The more pixels used to record an
image, the more delicate it seems. In this way, details
in the image may be represented more clearly.
Resolution is the density of pixels in a digital image and is usually measured by a
unit called dpi (dot per inch). If you use higher resolution to scan an image, the
scanner will record the image with more pixels and the quality of the scanned
image improved. Below are two examples of one image scanned at different
resolutions:
15
Page 26
English
The best way to select the scan resolution is to match the purpose of your scan
job. This is because the higher resolution you use for scanning, the larger the
scanned image file size will become. When resolution is elevated cross a certain
value, it will only enlarge the file size of the scanned image without improving the
image quality.
If you are scanning images for displaying on screens, such as web page images, a
resolution of 75dpi is sufficient.
If you are scanning images for printer output, we recommend that you use a
resolution of no more than 300dpi.
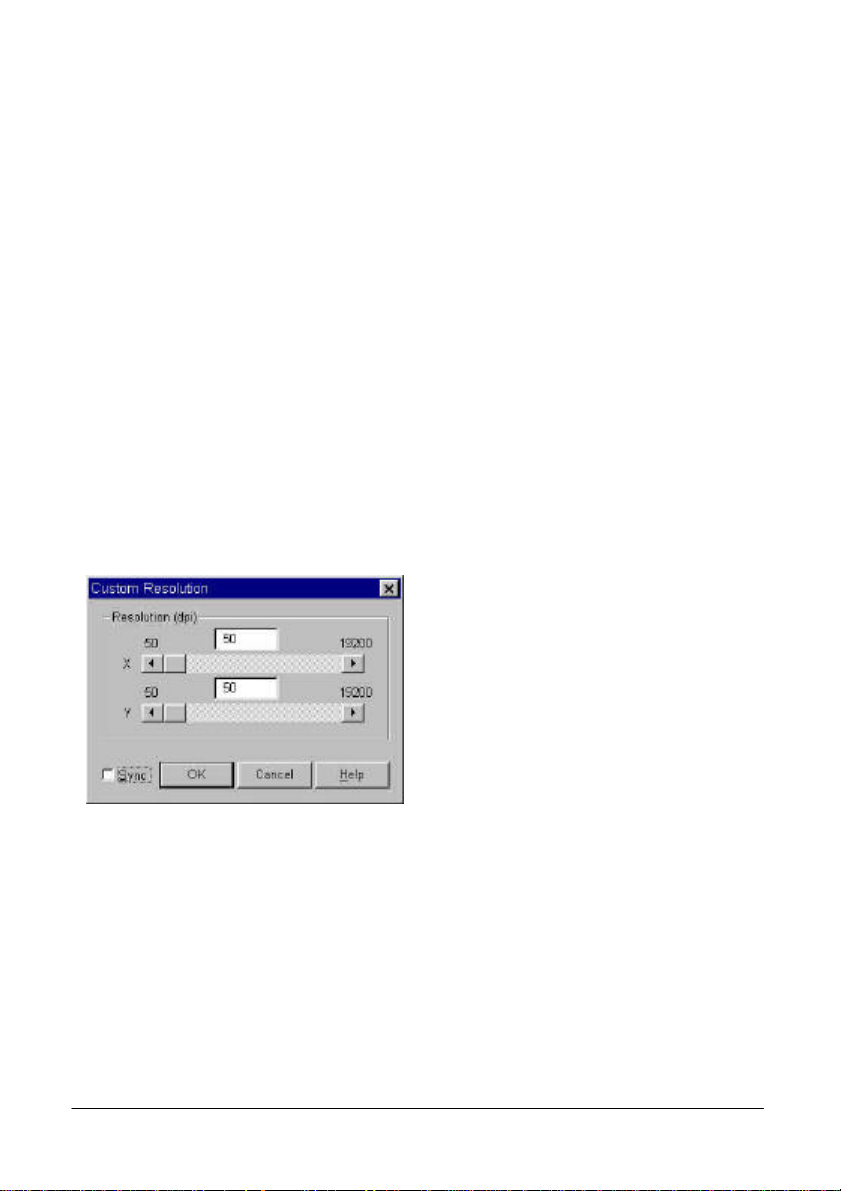
Scenarios for using a high resolution scan
High resolution scans are not normally used for our ordinary purposes. However,
they may be of use when professionals need to retain the sharpness and overall
quality of images.
Select a resolution (ranging from 75dpi to 19200dpi) from the Resolution box.
Alternatively, you may select Custom… to customize resolution. Once you select
Custom…, the following dialog box will appear:
From this dialog box, drag the scroll
bars to adjust the resolution of the X
(Horizontal) and Y (Vertical) axis
independently. This may however,
cause the resolution of the X-axis to be
different from that of the Y-axis.
Consequently, the shape of the original
image will be altered. To avoid this,
you may check the Sync check box to
adjust the resolutions of the X- and Yaxes simultaneously. This will
constrain the proportions of the original
image.
When you get the desired effect, click on the OK button to confirm your settings
and close the dialog box. If you are not satisfied with the adjustment, click on the
Cancel button to cancel your settings and close the dialog box.
16
Page 27

English
Scaling box
The scaling combo box allows you to specify the
horizontal and vertical scale of the image to be scanned.
Note that the maximum and minimum scaling is
determined by the resolution.
The scaling unit is a percentage (%). You may select a scaling percentage from the
list. The value selected applies to the horizontal and vertical coordinates. To
customize the scale, you may select the Custom... item to invoke the Custom
Scaling dialog box shown below:
From this dialog box, you can adjust
the scales of the X (Horizontal) and Y
(Vertical) axis independently by
dragging the scroll bars. This may
cause the scale of the X-axis to be
different from that of the Y-axis.
Consequently, the shape of the original
image will be altered. To avoid this,
you can check the Sync check box to
adjust the scales of the X- and Y-axis
simultaneously. This will retain the
original shape of the image.
When you get the desired effect, click on the OK button to confirm your settings
and close the dialog box. If you are not satisfied with the adjustment, click on the
Cancel button to cancel your settings and close the dialog box.
Filter box
The Filter combo box allows you to sharpen or blur an
image. You can choose from the list: No filter,
Sharpen, Sharpen more, Blur, Blur more and
Unsharp Mask….
If you want the edge of the image to be sharper, i.e., in a higher contrast against
the background, select sharpen or sharpen more. If you select Blur or Blur more ,
the edge of the image will be blurred. If you want to adjust the sharpness more
accurately, select Unsharp Mask… and the Unsharp Mask dialog box will
appear:
17
Page 28

English
From this dialog box, you can adjust the
sharpness accurately. Dragging the scroll
bar to the left will blur the image, and
dragging the scroll bar to right will sharpen
the image. You can also directly enter the
desired value into the Amount entry box
to change the sharpness.
When you get the desired effect, click on the OK button to confirm your settings
and close the dialog box. If you are not satisfied with the adjustment, click on the
Cancel button to cancel your settings and close the dialog box.
No filter Blur Blur more
Sharpen
Sharpen more
18
Page 29

English
Descreen box
If you are scanning images from magazines,
newspapers or other printed materials, you will find
that the scanned image appears to be covered by tiny
screen patterns. To eliminate this screen pattern, you
can use the options in the Descreen box.
According to the original you scan, you can select from the Newspaper,
Magazine or the Art Magazine form to match your need. You can also select
Custom… to custom the descreen setting. When Custom… is selected, the
following dialog box will appear:
In this dialog box, you can adjust the
descreen value manually between 50
and 200 by dragging the scroll bar to
right or left, you can also directly
enter the desired value in the
Descreen entry box to set the
descreen value. When you get the
desired effect, click on the OK button
to confirm your settings and close the
dialog box. If you are not satisfied
with the adjustment, click on the
Cancel button to cancel your settings
and close the dialog box.
Original scanned image Apply Descreen at 133lpi
19
Page 30
English
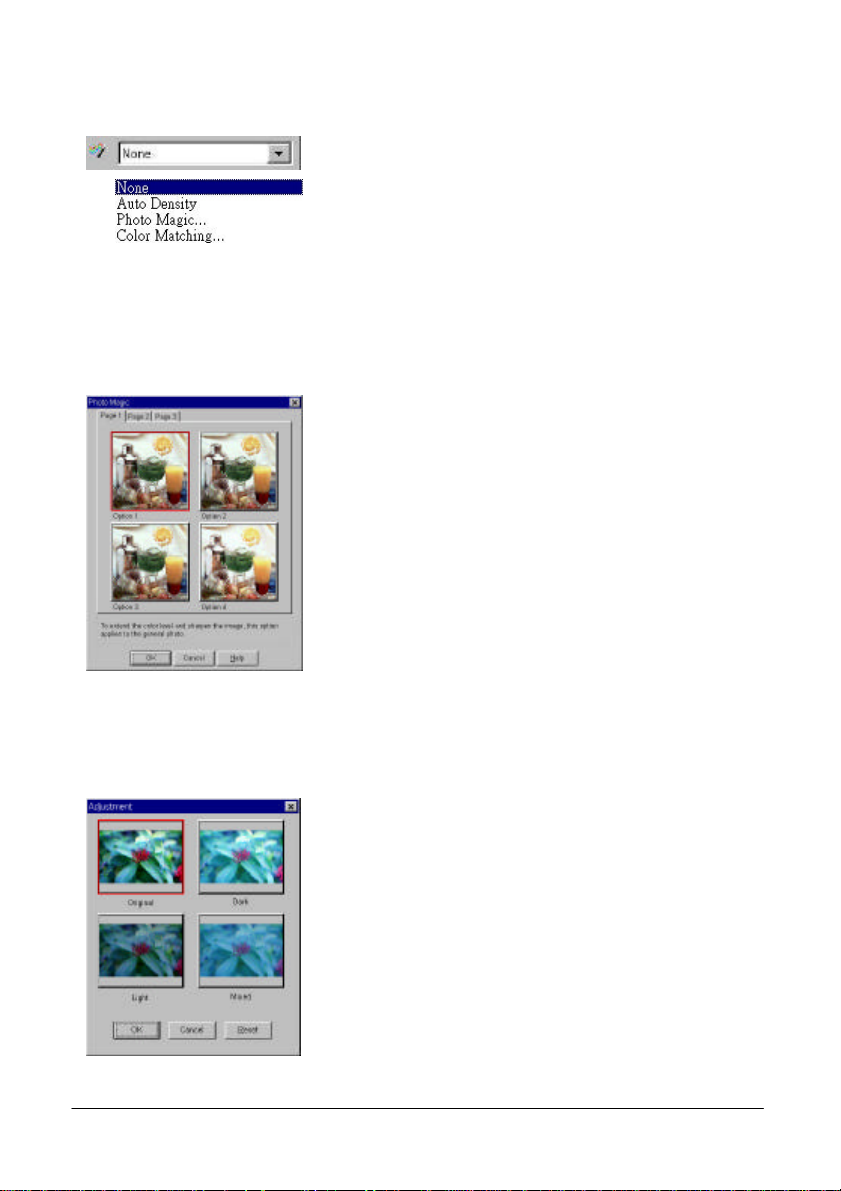
Color Wizard box
The Color Wizard box offers two quick and
convenient tools for you to adjust the overall quality
of the scanned image:
Auto Density
Select Auto Density to optimize the density of the image automatically.
Photo Magic
If you select Photo Magic, the following dialog box will appear:
There are three tabs in this dialog box. Each tab
contains certain image enhancement options in
thumbnails. You can click to select each thumbnail,
and a red frame will appear around it. Meanwhile, a
related description on the modification applied will
appear in the lower part of the dialog box.
If you find a satisfactory effect to use, click OK to
exit the dialog box and apply the effect while
scanning. Otherwise, click Cancel to exit the dialog
box without applying the effect.
Film Wizard
Film wizard is a convenient tool for you to correct the color deviation that may
occur when you scan negative films. The following dialogue box will appear after
you choose this item:
You can choose among the thumbnails for a best
result to use. Click OK to apply and exit. Otherwise,
click Reset to maintain the default state of the
image or Cancel to abort and exit.
Note: this function item appears only if you
choose “Negative Film” in the Original box.
20
Page 31

English
Color Matching
The color matching function allows you to
maintain the consistency of color reproduction
between the scanner and other output devices.
Note:
1. This function item only appears when
you choose “Reflective” in the Original
box.
2. This function does not support
Windows 95.
Input Device
The name of the input device (your
current scanner) is shown here.
Output Device
You can choose an output device to use by
clicking each radio button. The related
information will be displayed in the Output
Device Profile Info box.
I you choose current printer or other devices
as the output device, you need to select a
color profile to use.
A color profile is a file that tells a device how to manage colors so it can reproduce
colors more accurately and close to the origin. These profiles are usually provided
by the device manufactures or you can use certain color management software to
create them.
Output Intent
According to the output purpose, you can select from 4 color matching methods in
this drop-down list box. The table below the output intent and their meanings:
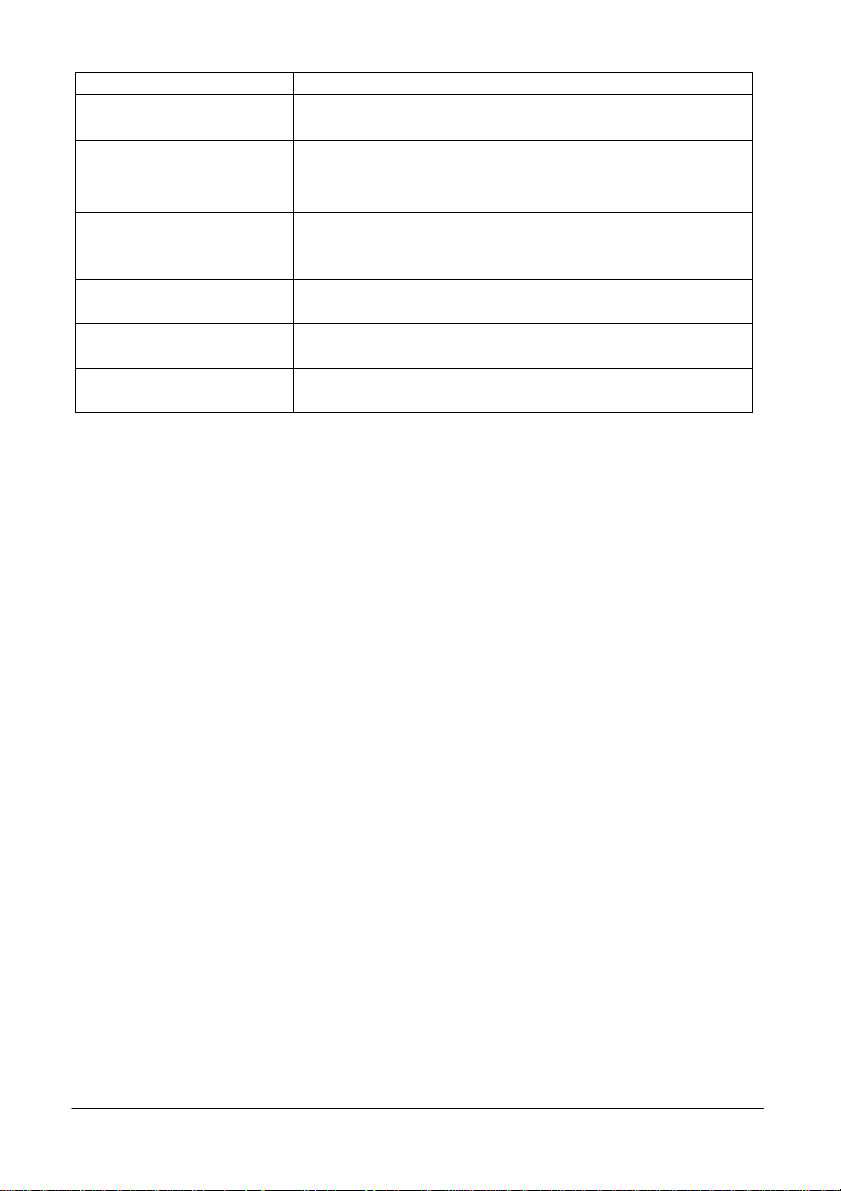
Intent Meaning
Absolute
Colormetric
Saturation Maintain saturation. Used for business charts and other situations
Relative
Colormetric
Perceptual Maintain contrast. Used for photographs and natural images.
Maintain the white point. Match the colors in their nearest color in
the destination gamut.
in which undithered colors are required.
Maintain colormetric match. Used for graphic designs and named
colors.
21
Page 32

English
Job List and Command Buttons
The Job List and Command Buttons are used to
control the scan job flow while you scan images.
Job List
The Job List provides information on all scan jobs in process. The file size is also
displayed in the list.
The file size will vary according to the resolution, image
type and scan size you specify. Please refer to the table
below to get a general concept of file size:
75dpi 150dpi 300dpi 600dpi 1,200dpi 2,400dpi
3”x5” 11 44 170 670 2,659 10,592
Line Art
Gray
Color (24-bit)
For example, if you are scanning a 3”x5” photo in Color mode at 300dpi, the file
size of the scanned image will be 3,959KB, or 3.959MB.
4”x6” 18 69 270 1,068 4,245 16,929
5”x7” 26 100 392 1,553 6,184 24,672
A4 (210x297mm) 71 278 1,101 4,379 17,466 69,757
Legal (8.5”x14”) 85 334 1,323 5,261 20,981 83,799
Letter (8.5”x11”) 67 263 1,039 4,133 16,485 65,842
35mm film/slide 1 4 16 61 237 938
3”x5” 83 331 1,332 5,282 21,111 84,410
4”x6” 133 529 2,114 8,448 33,771 135,042
5”x7” 193 772 3,082 12,316 49,243 196,924
A4 548 2,181 8,716 34,846 139,344 557,294
Legal (8.5”x14”) 656 2,620 10,471 41,860 167,392 669,437
Letter (8.5”x11”) 516 2,059 8,227 32,890 131,523 526,014
35mm film/slide 7 29 116 465 1,855 7,412
3”x5” 248 990 3,959 15,829 63,298 25,316
4”x6” 396 1,584 6,333 25,323 101,271 405,042
5”x7” 578 2,310 9,234 36,926 147,680 590,674
A4 1,641 6,534 26,129 104,497 417,950 1632,256
Legal (8.5”x14”) 1,964 7,850 31,389 125,532 502,080 1961,000
Letter (8.5”x11”) 1,543 6,168 24,662 98,632 394,491 1540,096
35mm film/slide 21 87 348 1,390 5,556 22,217
Unit:KB
22
Page 33

English
When you have created multiple scan jobs (see below for how to create a new scan
job) in the list, you can check or uncheck the box in front of the job name to
decide whether to proceed scanning that specific job(s). By selecting each scan job
in the list, you can adjust different scanning settings for each scan job respectively.
Duplicate button
Click this button to add a new scan job. This is useful when you want
to scan multiple images in one original. After you click this button, a
new scan area will appear in the preview area, and the new job will
appear in the Job List. You can add up to 10 scan jobs in one scan
session.
Info button
The Info button is used to display the detailed information of selected
scan job. You can first click to select the job in the Job List and then
click this button to display its detailed information:
You can either click OK to close this
information window or click Save to save the
information as a text file for your future
reference.
Delete button
Use the Delete button to delete a scan job. First click to choose a
scan job in the Job List, then click this button to delete that job.
Preview button
Use the Preview button to start previewing the image. Preview
proceeds in color or in monochrome depending on the setting in the
Image Type combo box.
Scan button
Use the Scan button to start scanning the image.
Exit button
Click on the Exit button to exit MiraScan.
23
Page 34

English
Preview Area
Unit button
Tool Bar
The Preview Area is where you can see your
image in rough quality and point to a pixel to
read its value. You can also set the scanning
area and view an instant preview of the effects
caused by parameter changes from the Image
functions. There are two rulers to help you set
the scanning area.
To the left and top of this area, rulers are
shown to give you a reference for the
dimension of the image. You can change the
rule unit by pressing the Unit button. "P"
represents pixel; "I" represents inch, and "M"
represents millimeter.
The Preview Area displays the preview image
that is acquired after the Preview button is
selected. Also, any parameter change made to
the image is instantly displayed in it.
The Tool Bar consists of a series of useful tools that you can use to
adjust the image more precisely.
Selection button
You can first click the Selection button and then adjust the selection
area in the Preview Area.
The selection area is a dotted rectangle in the Preview Area, and
each selection area in an image represents a scan job. Only the part
of image enclosed in the selection area will be scanned and
24
Page 35

English
transferred into the image editing software. In order to minimize the
size of the scanned image file, it is better to select and scan only the
necessary part of the image with selection area.
To adjust the selection area:
1. Move the selection area by pointing the mouse cursor to the
selection area. When the cursor turns into a crossed arrow, click
and drag your mouse to move the selection area in the Preview
Area.
2. Adjust the size of selection area by moving the cursor over the
edge of selection area. When the cursor turns into a double-sided
arrow, click and drag your mouse to expand or shrink the
selection area.
New Frame button
Use the New Frame button to add a new selection area to the
Preview Area. (To do so, you can also use the Duplicate button in
Job List). First click this button, then move the mouse cursor into the
Preview Area. When the cursor becomes a cross, click and drag
your mouse to create a new selection area. The new selection area
(scan job) you just created will also be listed in the Job List. You can
use the buttons in the Job List to delete or view detailed information
of that job.
Hand button
The Hand button is used to move the preview image within the
Preview Area. If the preview image is larger than the Preview Area,
you can first click this button, move the cursor onto the preview
image, then click and drag your mouse to move.
Zoom button
Use the Zoom button to get a closer look at the preview image. Click
on the Zoom button to enlarge the preview image. When the cursor
turns into a magnifier, move it over the preview image, and then click
on it. You can zoom out from the image by first pressing and holding
“Alt” key on your keyboard and then clicking on the preview image.
25
Page 36

English
Level button
By clicking on the Level button, the Level dialog box will appear.
The Level dialog box includes several
useful tools for you to check the color
level information of the image and
adjust the image quality. A
description of each component in the
dialog box and how they work to
affect the image follows.
Color Channel box
Use the Color Channel box to select a color channel to adjust. This
will allow you to adjust the histogram property of each color
channel respectively.
Histogram
A Histogram displays the distributing status of
dark and bright pixels in an image. The x-axis is
divided into 256 equal portions, representing the
brightness level of 0 to 255. The y-axis is used to
represent the quantity of pixel in each brightness
level. A comparison of two images and their
histograms follows:
26
Page 37

English
Brighter images have brighter
pixels, therefore the bars in the
right are higher than that in the
left.
Darker images have darker
pixels, therefore the bars in the
left are higher than that in the
right.
In addition, if we take a look at the two images below:
Image 1
Image 2
We can see that in Image 1, there is a higher contrast between the brighter and
darker part of the image. Bright and dark pixels occupy a larger portion of the total
image. Therefore, in the histogram there are higher bars in the left (darker side)
and right (brighter side), and in the center the bars are relatively much lower,
which means that there are only a few midtone pixels in the image.
In image 2, pixels in objects possess greater levels of brightness and darkness.
The distribution is more even than that in Image 1 as well. Therefore, the brighter,
midtone and darker pixels share evenly the total pixels in the image. This will result
in making the histogram for Image 2 appear smoother.
27
Page 38

English
Shadow
Highlight
Midtone
Now that we can understand the information in the histogram, the next step will be
to adjust the image with histogram tools. Below the Histogram, there are three
tiny triangles:
Threshold
Threshold
By dragging these triangles, you can adjust the brightness and contrast of an
image precisely. For example, if you drag the Shadow Threshold triangle to the
right, the pixels with lower brightness level than the Shadow Threshold will be
cut into black. This makes the image look darker. If you drag the Highlight
Threshold triangle to the left, the pixels with higher brightness level than the
Highlight Threshold will be turned into white. This makes the image look
brighter.
The Midtone triangle is used to control the brightness level of midtone pixels.
Dragging the Midtone triangle to the left will increase the brightness level of
midtone pixels and make the midtone area of image look brighter. Dragging the
triangle to the right will decrease the brightness level of midtone pixels and make
the midtone area of image look darker.
Below is an example of using the histogram tools to enhance the image and add
detail:
Before adjustment
After adjustment
28
Page 39

English
Input Level box
The Input Level box displays the value of Shadow
Threshold, Midtone and Highlight Threshold
respectively. You can also input each value here
directly.
Output Level box
The Output Level box is used to expand the output
level of the image color. You can either drag the
triangles below the bar or enter the value directly to
adjust.
If the Input Level is set as 20 to 230, then 210 (230 minus 20) color levels can be
represented in the image. If you set the Output Level as 10 to 250, then the
original 210 levels of color can be “expanded” to 240 levels (250 minus 10), which
can enrich the color and display more details in the image.
You can also click on the Auto button in the dialog box to adjust the histogram
properties automatically. When you have finished with adjustments, you can click
OK to apply, or click Reset to restore the default settings. To abort and exit the
dialog box, click Cancel.
29
Page 40

English
Curve button
The Curve tool is used to adjust the brightness properties of midtone
pixels in an image. Once you click on the Curve button, the following
dialog box will appear:
An introduction to each component in the
dialog box and a description of how to use
the Curve tool to adjust an image follows.
Color Channel box
Use the Color Channel box to select the color channel to be
adjusted. This allows you to adjust the curve property of each color
channel respectively.
Tonal Map
The x-axis in the Tonal Map represents the input
brightness level of the pixels in an image. The y-axis
represents the output brightness level of the image. By
clicking and dragging the curve to change its shape, you
can adjust the difference between input and output
brightness level of an image without making too much
modification to the dark and bright areas. If we compare
the following images and their Tonal Maps:
30
Page 41

English
area of the image
Click to add a new point.
The original image and its
Tonal Map. The curve is
straight and diagonal.
Drag the curve to the left,
and the mid-tone area of
the image becomes
brighter.
Drag the curve to the
right, and the mid-tone
becomes darker.
You can also click the curve to add new points and further change the shape of the
curve:
Input/Output Status Area
You can read the precise input/output value here.
When you have finished with adjustments, you can click OK to apply, or click
Reset to restore the default settings. To abort and exit the dialog box, click
Cancel.
31
Page 42

English
Color Balance button
Click the Color Balance button to evoke the Color Balance dialog box:
In this dialog box, you can change the
mixture of colors of an image and
emphasize or diminish certain colors.
A description of Color Balance components
follows.
Channel
This is where you can select the channel to
be adjusted.
Adjustment Area
You can drag the triangles or enter the value
(from 0 to 100) in the box directly to adjust.
To adjust the color balance, first, you can select the channel you want to adjust,
then drag the triangles under the three color bars. In addition, you can also enter
the desired values directly into the three entry boxes to the right of the color bars
to adjust the color balance.
As an example, if the color of the brighter area in the original you scan appears to
be bluish, you can first choose Highlight as the channel, and then drag the
triangle below Cyan-Red bar to the right, or drag the triangle below the Yellow-Blue
bar to the left to eliminate the bluish effect.
When you get the desired effect, click the OK button to confirm your settings and
close the dialog box. If you are not satisfied with the adjustment, you can click on
the Reset button and the settings will return to the default values. Alternatively,
you can click the Cancel button to cancel your settings and close the dialog box.
32
Page 43

English
Color Adjustment button
Click the Color Adjustment button, and the Color Adjustment dialog
box will appear:
Color Adjustment is another
convenient tool that you can use to
adjust and calibrate the colors in an
image. This function works much like
the Color Balance tool, but it provides
another way to control the property of
image colors.
The Color Adjustment tool uses three
control items: Hue, Saturation and
Lightness. Hue is a characteristic that
distinguishes one color from another,
while Saturation decides the intensity
of a color. Lightness is used to
measure the amount of brightness in a
color. The lighter a color is, the higher
lightness it has.
Color Wheel
Color Wheel is used to specify the hue and saturation of
the color you want to use. Move your mouse cursor on the
Color Wheel and then click on it. Drag within the Color
Wheel to select the hue of the color you want to use. The
distance from the center of the wheel decides the
saturation of the color: the farther you drag your mouse
cursor from the center of the Color Wheel, the higher the
saturation.
Lightness Bar
You can drag the triangle below the Lightness Bar to adjust
the lightness of the color you choose. To increase the
lightness, drag the triangle to the right. Otherwise, drag the
triangle to the left to reduce the lightness.
Entry Box
While you drag within the Color Wheel to choose the hue
and saturation of color or drag the triangle below the
Lightness Bar to specify the lightness of color, the related
information will also be shown in the Entry Boxes. You can
also enter the values here directly.
33
Page 44
English
When you have finished with adjustments, click the OK button to confirm your
settings and close the dialog box. If you are not satisfied with the adjustments, you
can click the Reset button and the settings will return to the default. Alternatively,
you can click the Cancel button to cancel and close the dialog box.
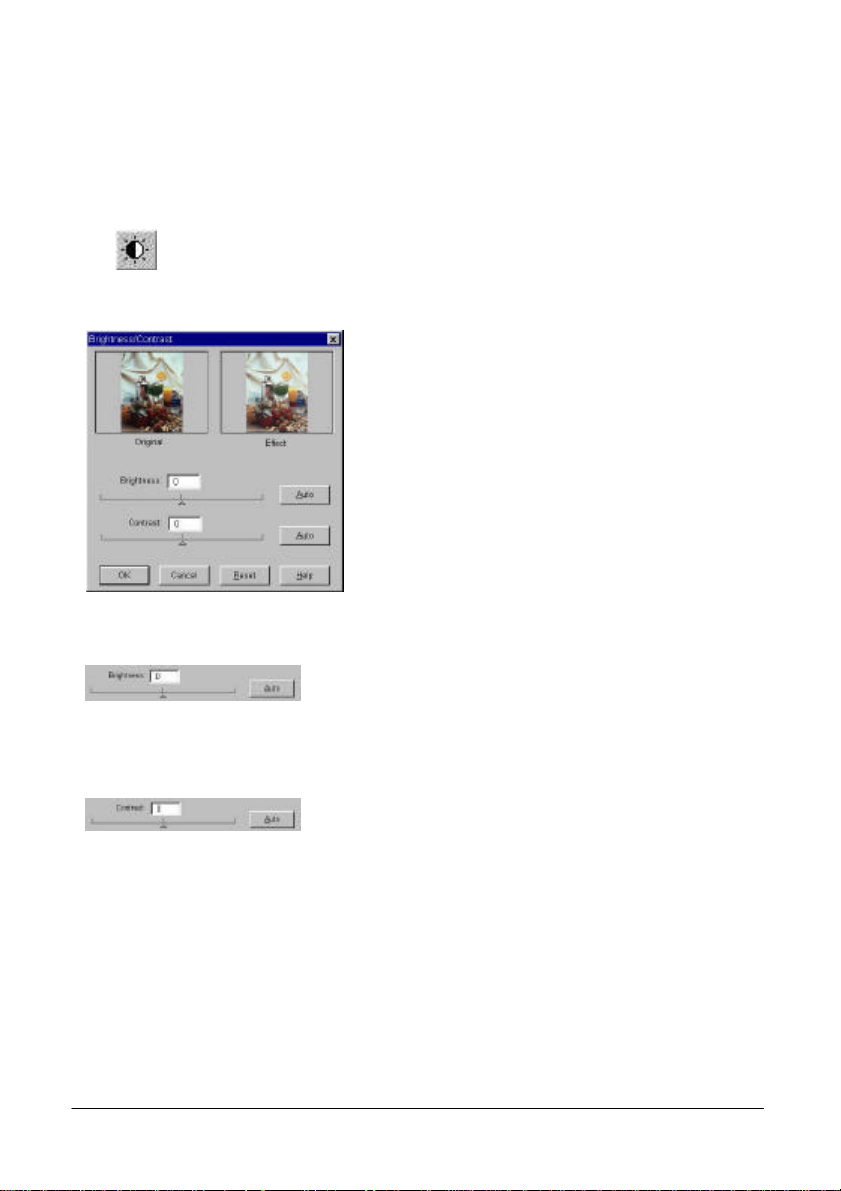
Brightness/Contrast button
Click the Brightness/Contrast button and the Brightness/Contrast
dialog box will appear:
You can adjust the overall brightness and
contrast of the image manually or
automatically in this dialog box. To adjust the
brightness and contrast more precisely, you
can use the Curve and Level function.
Brightness control
You can drag the triangle below the bar to
increase/decrease the overall brightness of the image,
or click Auto button to adjust the brightness
automatically.
Contrast control
You can drag the triangle below the bar to
increase/decrease the overall contrast of the image,
or click Auto button to adjust the contrast
automatically.
When you have finished with adjustments, click the OK button to confirm your
settings and close the dialog box. If you are not satisfied with the adjustments, you
can click the Reset button and the settings will return to the default. Alternatively,
you can click the Cancel button to cancel and close the dialog box.
34
Page 45

English
Threshold button
Threshold function is very useful when you scan line art images or
scan documents for OCR (optical character recognition) use. You may
use this function to adjust the quality of line art images or eliminate
unwanted dots in the document to improve the accuracy of
recognition.
Note: this function is only applicable when you select LineArt as the
Image Type.
Select the Threshold button, and the Threshold dialog box will appear:
The x-axis in the histogram represents the
brightness level of the pixels in the image (from
0 to 255, from left to right). The y-axis
represents the quantity of pixels.
To adjust the threshold value, drag the triangle
below the histogram or enter the threshold
value in the Threshold entry box directly. For
example:
Image 1 Image 2
35
Page 46

English
Image 1 is the original scanned image, while in Image 2 the threshold value is
changed into 56. This means that pixels in the image with brightness level below
56 will all be cut into black, and those with brightness level above 56 are all turned
into white. Therefore, you will find that by setting a lower threshold value, some
details are lost in the new image. However, if there are many unwanted dots in an
image, you can eliminate them.
When you have finished with the threshold adjustment, you can click OK to
confirm, or click Cancel to abort and exit the dialog box. Otherwise, you can click
Reset button and the settings will return to the default 128.
Invert button
You can click the Invert button to get an inverted image:
Original image
Image after Invert is
applied
Mirror button
You can click the Mirror button to get a mirror reflection effect on the
original as if you were viewing the image in a mirror:
Original image
36
Image after Mirror is
applied
Page 47

English
Rotate button
You can rotate the selection area easily with this button. Besides, if the
original in not aligned well, you can use this function to correct the tilt.
For example, if you are scanning a photo that is not aligned well:
After you preview the photo, adjust the selection area to approximately encompass
the photo. Then click this button to display the Rotate dialogue box:
You can drag the slider to rotate the image
manually or click the Auto button to let
MiraScan align the image automatically.
You can also enter the rotation angle in the
Angle entry box directly.
Original image
Image aligned by clicking
Auto
When you have finished with the rotation, you can click OK to apply, or click
Cancel to abort and exit the dialog box. Otherwise, you can click Reset button to
reset the angle.
Note:
1. The Auto function applies only to reflective originals with rectangular
edges (e.g., photographs).
2. The rotation angle can be limited by the size of the selection area.
37
Page 48

English
Auto button
After you preview an image, you can press this button to open the
Auto dialogue box:
Auto Crop
Click this button and MiraScan will crop
the scan area automatically and leave
only the necessary size for scanning.
Auto Descreen
Click this button and MiraScan will detect
and apply an appropriate descreen value
for scanning.
Auto Type
Click this button to let MiraScan detect
the image and choose an appropriate
image type automatically.
When selection is done, you can click OK to confirm or Cancel to abort and exit.
38
Page 49

English
Status Area
Status Area provides information of the image you are working
on:
Pixel Display Box
This box displays the color of the pixel to
which the mouse cursor is pointing.
Pixel Information Area
The location of the pixel expressed in X, Y
coordinates and the RGB values of the pixel
is displayed here.
Image Information Area
The image information is displayed here (W
= width, H = height, S = image size, A =
rotation angle).
39
Page 50

English
<Memo>
40
Page 51

English
Organize and manage all your digitized
Repair cherished pictures with
Realistic paint tools turn
any scene into a work
of art.
Chapter 2. Photo Express
In this chapter you will be introduced to the fantastic world of Photo Express. Learn
more about this bundled software and make your everyday life more interesting
and colorful!
Note: refer to Photo Express electronic User’s Manual in the software disc
for more details on how to use its different features and functions.
Introduction
Welcome to Photo Express, the new cool tool for expressing your creativity with
pictures of your family and friends! Photo Express is the ultimate tool for adding
that extra spark of life to your photos - it gives you the power to take ordinary,
everyday pictures and turn them into high-quality works of art. With its guided
workflow and intuitive interface, you’ll be printing out personalized birthday cards,
calendars, and posters in no time at all!
Photo Express brings a whole new attitude to photo editing. With its professionalquality templates and easy-to-use editing and management tools added to an all
new interface, photo editing has never been easier or this much fun. High-end
tools in a home environment put the power of a photo studio right at your
fingertips.
powerful touch-up and clone tools.
Use templates to create outstanding calendars, birthday cards, greeting cards,
invitations, and much, much more!
photographs with Album. Keeping track of
your loved ones has never been easier.
41
Page 52

English
Getting Started
To run Photo Express, double click the Photo Express icon on your Windows
desktop or open from Windows Start Menu. When you run Photo Express, make
sure that the monitor display is at a resolution of 800×600 or 1024×768 and Hi
Color (15/16 bit) or True Color (24 bit) mode. The following screen will appear. It’s
better to familiarize yourself with the components in the interface before you
actually start:
Tool Bar
Workspace
Options Panel
Mode Tabs
Shortcut Ba
Command Panel Global Viewer & Thumbnail Scroll
42
r
Page 53

English
Mode Tab: The Mode tabs switch Photo Express
between Photo mode and Project mode. Photo mode is where the majority of your
work is done, while the Project mode lets you make greeting cards, name cards,
and other fun things based on templates.
Command Panel: The Command panel lists all of the available
categories in Photo Express necessary for getting the most out
of your creativity when working on photos. Each category
contains a specific set of tools.
Options Panel: The Options panel shows you
all the different options available for any given
tool.
Tool Bar: The Toolbar contains all of the
tools you need to edit your photos. Each
group of tools is divided into categories when you select a new category, the tools on the Toolbar change accordingly.
Categories can be selected from the Command panel.
Shortcut Bar: The Shortcut bar
makes available to you all the most
commonly used menu commands. These commands vary depending on the
Command panel category you are currently in. Click the green arrow to hide the
Shortcut bar.
Thumbnail scroll: The Thumbnail scroll opens from the
Global Viewer and lists all the images you currently have
open with the topmost image displayed in the window below
the Command panel.
Workspace: The Workspace is where your photo is placed as you work on it.
43
Page 54

English
Getting Images
The first thing you want to do when you start Photo Express is to get the photos
you want to work with into the actual program. The place you start is with Album.
From here, you can do almost anything in Photo Express. All other ways of getting
photos can work independently of Album, but they are also set up to let you
capture or open images directly to it.
Note: The Project tab only allows you to open Project Template files
(*.tpx and *.tpl). For information on adding photos and other images to
the template, please see Working with Templates.
Working with Album
Album lets you organize the photos in your computer
into convenient “books” similar to real-world photo
albums. These books contain thumbnails of all the
images you select to put in them, as well as links to
said images, information, and annotations. This way,
you have instant access to all your photos from directly
within Photo Express. Organize photos by author,
subject, title and catalog.
To create a new Album:
1. Click the Get category button on the Command
Panel.
2. Select Album from the Toolbar.
3. Click the New button in the Options panel. The New Photo Album dialog box
opens and you can set up the new album file.
44
Page 55

English
To add new images to an album:
1. Select an album.
2. Click the File icon and browse for the folder where the images are stored.
3. When they appear in the Options panel, click the Select All button (or select
images individually by holding down the Ctrl key as you click them).
4. Next, select the Save to album option and click the Insert button. The files
are added to the last album you had open.
To relink “lost” images, right-click over the album in the Options
panel and select either Relink or Refresh.
Printing album thumbnails:
1. Click the Album icon on the Get toolbar and then choose an album from the
Options panel.
2. Press the Ctrl key, and in the workspace, click the thumbnails you want to use.
The selected thumbnails are highlighted in green.
3. Click the Print button on the Command panel and select a print method.
You can jump immediately to the Print option you want to use by
hovering your pointer over the Print button on the Command
panel. When the submenu appears, click the Print icon you want.
45
Page 56

English
Working on Images
Adjusting Images
After you have acquired an image from a scanner or digital camera, it may need
some adjustments. Photo Express provides you with the perfect tool for adjusting
your photos: the Transform tool.
To re-align a photo:
1. After scanning the photo, open it from either
Album or from File directly into the workspace if
you haven’t already scanned it directly there.
2. Put your mouse over the Edit category
button and select Adjust from the pop-up
submenu. The Adjust tools appear on the
Toolbar.
3. Click the Transform button on the Adjust
toolbar. The Transform options appear in the
Options panel.
.To freely rotate a photo, select the spin wheel in the upper right or lower left
corner of the photo and rotate into position.
.To position it more accurately, enter an order of degrees in the Options panel
and then click either Rotate Left or Rotate Right to implement it.
.To flip the photo, click either Flip Horizontally or Flip Vertically.
You can re-size an image during transformation by clicking and
dragging the handles on the upper left or lower right corners. You
can also move the image in the workspace by dragging it with your
mouse cursor.
46
Page 57

English
To trim your photo:
To re-size your photo:
1. Click the Trim button in the Edit: Adjust
category. The Trim options will open in the
Options panel.
2. Select a Trim shape and then set the
amount of Soft edge you want to soften the
edges of the trimmed photo with.
3. Click Apply to trim the photo.
Note: You can open the trimmed region
in a new editing workspace by selecting
the Create New Image option.
1. Click the Size button in the Edit:Adjust
category. This opens the Size options in the
Options panel.
2. Select either a predefined size from the
Standard drop-down menu, or enter custom
dimensions for the image in the User defined
option.
3. Select the Keep aspect ratio button to
maintain continuity between height and width
as you resize. This keeps the image from
getting stretched unnaturally.
4. Finally, you can define the image’s
Resolution. This determines how the image
prints on paper - the lower the resolution, the
less pixels used to generate the image, while a
higher resolution uses more pixels to create an
image with larger pixels.
5. Click Apply to resize the photo.
47
Page 58
English
Sharing Images
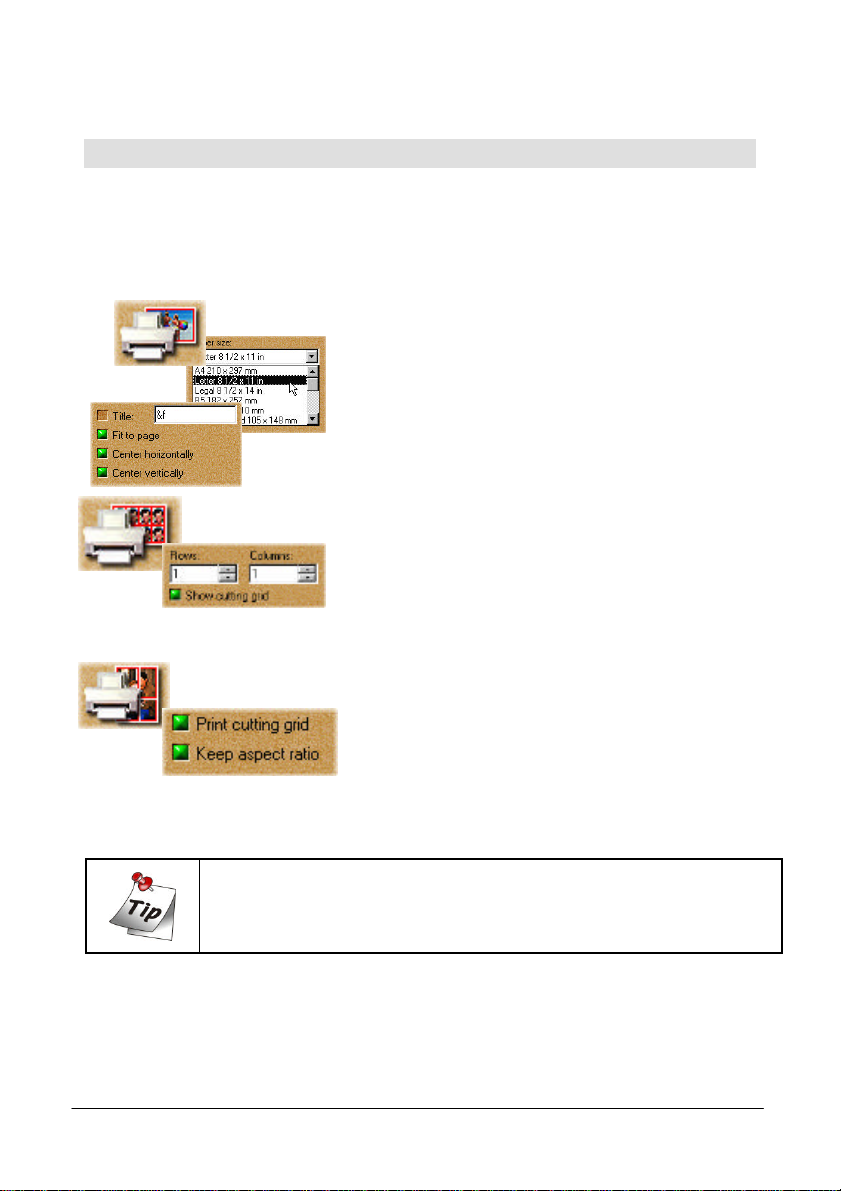
Printing Images
Once you have put the finishing touches onto your photos, it is time to print them
out. Photo Express contains numerous printing options, letting you output posters
and name cards in addition to its regular printing duties.
To print an image:
1. Select the image you wish to print from
the Thumbnail scroll, or select an image or
images from an available album.
2. Click the Print button on the Command
panel. The print tools appear on the Toolbar.
3. Select a print tool to use.
o Normal lets you print images normally on
various different types of paper (from Letter
to A4 to envelopes).
o Tile resamples the image down to tile it
multiple times on the page, creating custom
“picture cards” or postcards.
o Poster resamples the picture up, allowing
you to print portions of it on separate pieces
of paper effectively creating posters and
banners.
4. Click Print.
You can also print album thumbnails. For more on this, see Working
with Album - Printing album thumbnails.
48
Page 59

English
Saving Images
After work on your photo is complete, you may want to save it. In Photo Express,
you can save a photo in a variety of different image file formats. Each file format
has its own unique properties and characteristics. Some formats, however, are
better than others for specific situations, such as saving for the Web are.
To save a photo:
1. Click the Share button on the Command
panel. The Toolbar displays the different Share
tools.
2. Click the Save button on the Toolbar. The
Save options appear in the Options panel.
3. Enter the location, name, file type, and
data type.
4. Select an album from the Save to album
drop-down menu.
5. Click Save.
o Data type describes how much color information the image is saved
with. The more color information included in the file, the larger the
file tends to be. The highest color data type is True Color and files
saved with this data type can be very large. Indexed-256 and
Grayscale each contain up to a maximum of 256 distinct colors and
generally are quite small.
o Some file types you can use are: BMP for saving your photos at the
highest level of quality with no compression; JPEG for photos you
want to use on the web or send via e-mail - it compresses photos
down while retaining its overall quality; UPX for saving photos with
unmerged, free-floating objects. These objects can be used again
when the file is re-opened.
49
Page 60

English
Express Your Images
Create Calendars
One of the easiest tasks to accomplish in Photo Express is making calendars, either
for your Windows desktop or for your real desktop. They are great for keeping your
loved ones close, in addition to being a convenient way to keep track of important
dates in style.
To create calendars:
1. Get the image you want to use as the
calendar image.
2. Click the Express button on the Cmmand
panel and then select the Calendar icon from
the Toolbar.
3. Choose a type of calendar from the
samples and modify it to fit your needs.
4. Click and drag the photo or date object to
move it. Or, resize it using the control handles
on the image’s border. Edit text and dates by
selecting the object that contains it, then click
the Planner button on the Shortcut bar to add
notes or holidays to individual dates as well as
add props from the Clipart box.
5. When your calendar is ready, set it as
Windows wallpaper by clicking the Wallpaper
icon in the Options panel, or send it to the
Windows clipboard (to paste it into other
applications) by clicking the Clipboard icon.
Finally, print the calendar by clicking the Print
button.
On the Shortcut bar, click the Command Menu icon to open the
Calendar Command Menu. This is where you define the properties
of the calendar, such as font, colors, and text style, among other
things.
50
Page 61

English
Morphing Photos
One of Photo Express’ more novel effects extras is that of image morphing.
Morphing transforms an image over time to create interesting and unique “warps”
of the original photo. Image morphs are output as either image sequences or
animated GIF files.
To morph an image:
1. Get the photo you want to morph from an
album or from your hard disk.
2. Click the Express button on the Command
panel. The Express extras appear on the
Toolbar.
3. Select the Morph icon from the Toolbar.
4. Choose a transformation from Type. To use
the transformation, move your mouse cursor into
the workspace and start “painting”.
5. On the Shortcut bar, click the Add Item to
Storyboard button. This adds the current image
to the Storyboard.
You can remove the effects of
a transformation and return the
image to its original state by
clicking the Restore button on
the Shortcut bar. Also, click the
Play button to view an on-thefly rendering of the animation.
6. When your Storyboard is complete, save
the file to disk by clicking the Save icon on the
Shortcut bar.
Note: You can output image morphs as either an image sequence or GIF
animations. GIF animations are useful for putting your images on the
Web while image sequences are best for searching through the individual
frames to find the one that really stands out.
51
Page 62

English
Working in Project Mode
The Project mode gives you a focused environment in which to create custom
greeting cards, calendars, invitations, birthday and anniversary cards, name cards,
and planners. The Project mode is useful for getting through a “project” as quickly
and efficiently as possible. It is where Photo Express lives up to its name, speeding
you through all the necessary tasks while keeping all the unnecessary or
extraneous components secure in the background. While in Project mode, you can
only open template files, but you can add photo files of any image type to your
templates in the process of customizing them.
To Begin a New Project
1. Click the Project tab when you start Photo
Express. Photo Express then switches over to Project
mode, which contains slightly different options and
commands than Photo mode.
2. Click the album icon on the Toolbar and then select
an album from the Options panel. Albums are
categorized by type, such as Flyers, Greeting Cards,
and Invitations to name a few.
3. Choose a template from the album and click the
Edit button on the Command panel. The template
opens into the workspace.
You can create your own, custom
templates in Photo mode. All you need
to do is set your template up (i.e. add
text objects and artwork) and then save
it as a *.tpx file. This file can then be
opened in Project mode and saved to
one of the many Project albums or
added to a custom album.
52
Page 63

English
Working with Templates
Photo Express’ unique templates can be edited and customized to suit your own
needs. Templates consist of multiple components, usually a combination of text
and photos with a decoration or two perhaps thrown in. To change any one of
these components, simply select it and choose the appropriate tools from the
Toolbar.
To replace images in a template:
1. Click the Edit button on the Command panel. When
the submenu opens, click Place. The Place tools appear
on the Toolbar.
2. Click the Album icon.
3. In the Options panel, select the image you want to
insert from an available album.
4. Click Replace.
You can also insert images that are
already open in the workspace. Simply
click the Workspace icon on the Place
toolbar and select the image you want to
add to the template.
To move one object over another:
1. Select the object you want to move up.
2. Click the Move Object Up button on
the Shortcut bar. This moves the object up
one level, placing it above and over objects
lower than it in the hierarchy.
Use the Move Object
Down button to place the
object below other
objects.
53
Page 64

English
Adding Decoration
One category of tools on the Edit menu in Project mode is unique to that tab:
Decoration. These are special, object-based effects such as Frames, Edges and
Props you can use to enhance photo objects in a project.
To add special edge effects to a photo object:
1. Select a photo object.
2. Click the Decoration button on the Edit
submenu of the Command panel.
3. Click the Edges icon on the Toolbar.
4. From the Edges drawer, click the Magic icon.
This opens the Magic Edges options in the Options
panel.
5. Select a Magic Edges preset and click Apply.
You can create unique Magic Edges
by clicking the Custom tab in the
Magic Edges Options panel.
To add frame to a photo object:
1. Select a photo object.
2. Click the Frames icon on the Toolbar.
3. Select a frame from the Options panel.
4. Click Apply.
Note: You cannot apply frames to a
background image.
54
Page 65
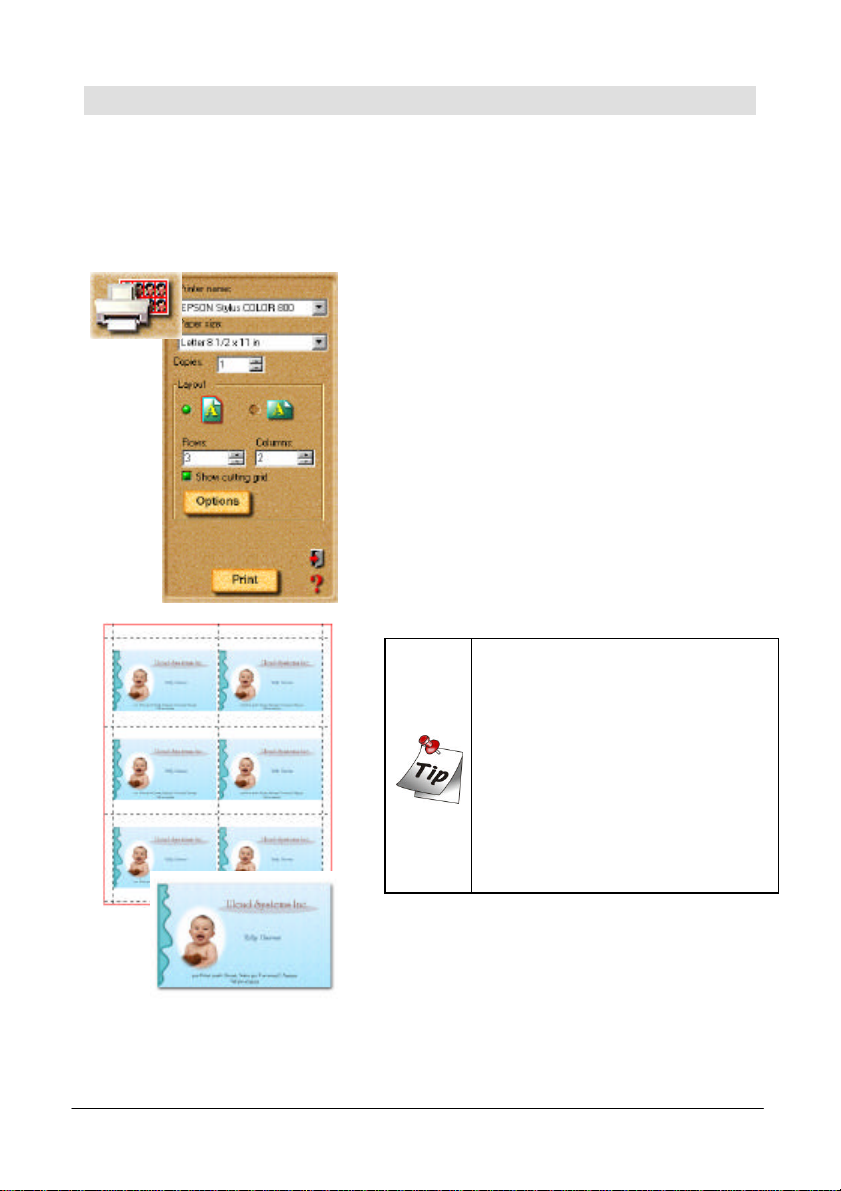
English
Printing Templates
As with Photo mode, Project mode lets you print your work when you’re finished
with it. The same options available in Photo mode apply in Project mode as well.
For more on printing, see 4-8 Printing Images and the online help.
To print a template as name cards:
1. Click the Print button on the Command
panel.
2. Select the Tile icon from the Toolbar. The
Tile options appear in the Options panel.
3. Enter the number of rows and columns. This
establishes how many name cards are printed
per page.
4. Select your printer from the Printer name
drop-down menu.
5. Select the paper size you want to use from
Paper size drop-down menu.
6. Click Print.
55
o To further define the layout of
the name cards on the page, click
the Options button. This opens
the Layout options dialog box,
giving you control over such things
as X- and Y- offset, spacing, and
image size, among others.
o To setup your printer options,
click the Printer Properties icon
on the Shortcut bar.
Page 66

English
Sharing Templates
Sharing templates works exactly the same way as sharing photos in Photo mode.
You can print, e-mail, fax, or output them to web pages. For more on these tools,
see the online help and related documents.
To e-mail a template:
1. Click the Share: E-mail button on the
Command panel.
2. Click Send.
Select your default e-mail client
from the Mail client drop-down list
for help on how to set it to work
properly.
To fax a template:
1. Click the Share: Fax button on the Command
panel.
2. Set the desired Layout options.
3. Click Send.
Microsoft Fax must be installed first
before you can use this feature.
To output a template as a Web page:
1. Click the Share: Web Page button on
the Command panel.
2. Setup the web page’s parameters (i.e.
number of rows and columns of the images
to display per web page).
3. Select To Mail from the Destination
drop-down menu.
4. Click Apply.
56
Page 67

English
Menu Bar
Process Bar
View Area
Status Bar
Main Tool Bar
Chapter 3. TextBridge Classic
TextBridge is a powerful OCR software that can turn text images into editable
electronic text files. In this chapter you will be shown the way to use its basic
function and some tips to OCR.
Note: refer to TextBridge Classic electronic User’s Manual for more
details on how to use its features and functions.
TextBridge Classic
Main Screen
You can open TextBridge in two ways: you can open it directly from Windows
taskbar, or open it from your word editing software. Refer to the steps below to
open TextBridge directly from Windows taskbar. To open TextBridge from your
word editing software, please refer to the electronic manual that comes with
TextBridge Classic.
To open TextBridge Classic from Windows Taskbar:
1. On Windows taskbar, click Start.
2. Move the mouse cursor to Programs, then TextBridge Classic.
3. Click the TextBridge Classic icon. TextBridge Classic opens and the main
screen will appear as shown below:
57
Page 68

English
Select Scanner
Before you start OCR with your scanner, please follow the steps below to select
scanner for TextBridge Classics:
1. Click File in the Menu Bar. Choose Select Scanner in the drop-down
submenu that appears.
2. Select Scanner dialogue box will pop up. Choose MiraScan Vx.xx.xx and
then click OK.
58
Page 69

English
Begin OCR in Automatic Mode
Automatic Mode allows you to complete OCR through a few mouse clicks. Here is
how to use the OCR function in Automatic Mode.
1. Place the document original facing down on the glass plate of the scanner and
then close the scanner lid. Click Auto Process button. Start
dialogue box will show up.
2. Choose an appropriate Page Type and select Page Source. Select Scanner
as page source, then click OK.
3. MiraScan window will pop up automatically. Set the Image Type to Line-Art
and Resolution to 300dpi or higher.
59
Page 70

English
4. Preview the document image in the MiraScan Preview Area, and select the
scanning area. When done, click Scan.
5. MiraScan window will disappear and TextBridge Classic will start to recognize
the scanned image. The following dialogue box will pop up when TextBridge
has finished recognizing the image. To continue with another document, click
More Pages. To recognize the other side of the document, click Other Side.
If you want to end the OCR process, click No More to save the recognized text.
6. The following dialogue box will appear at the end of your OCR process. Select
the file format for the scanned text file and click Save to save. You can open
the text file later with your word editing software for further editing.
The quality of your document original and the setting you apply
when scanning can affect the accuracy of recognition significantly.
Below are some tips to improve the accuracy of OCR:
o Use clean, crisp document original.
o Avoid notes, scribbles and smears in your original. You can use
image editing software to remove them before you actually start
to recognize the scanned image.
o Avoid using fancy documents.
o Align the document image if it is not aligned perfectly.
o Keep the glass plate of your scanner clean.
60
Page 71
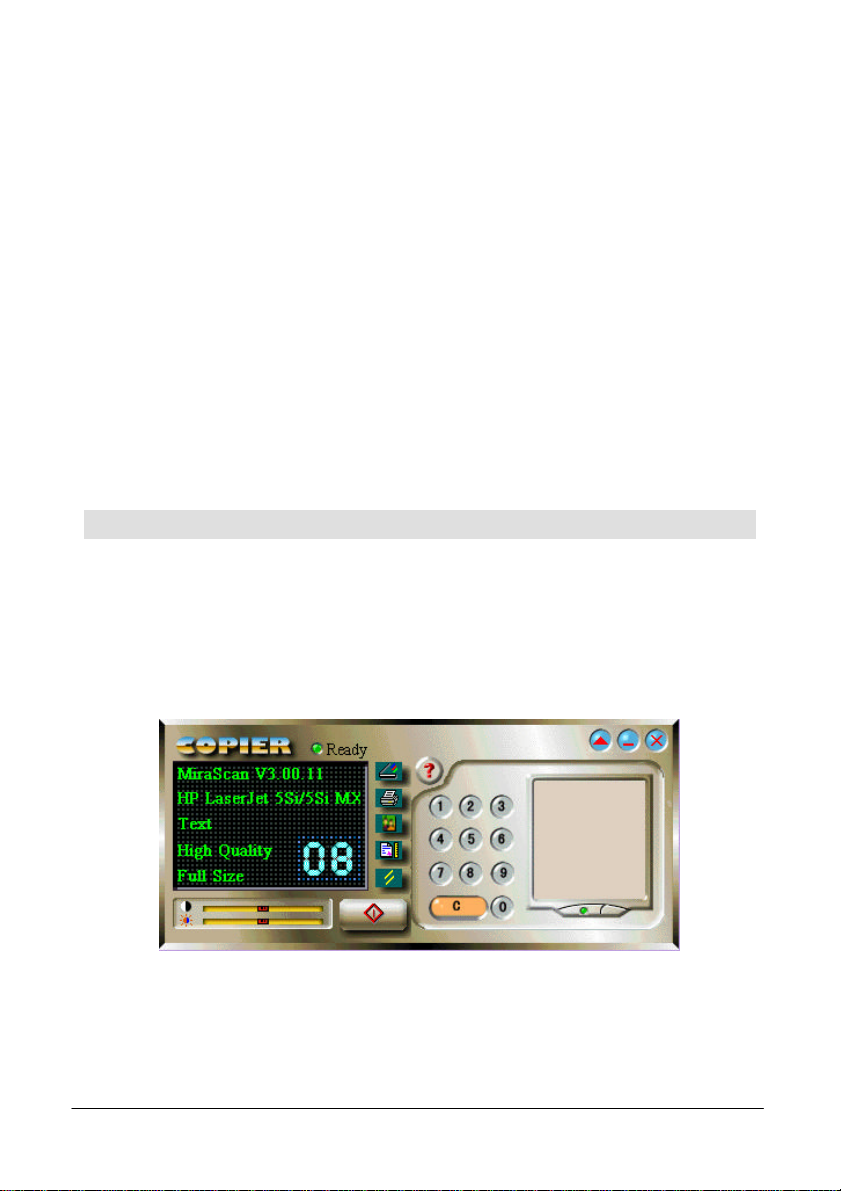
English
Chapter 4. Copier
Copier is an application software that can combine your existing scanner and
printer into a copy machine and make it easier to copy images and documents. In
this chapter you will be shown the way to use this convenient tool.
You can use Copier to:
l Scale up and down
The scanned image can be diminished or enlarged within the size of the paper.
l Partial copy
You can specify any area in the scan preview window for copying.
l Save as file
The scanned image can be saved as a file.
Note: refer to the Copier online help for more details on how to use
Copier.
Adjust Copier Settings
In order to make better copies, it’s important to know how to adjust the settings in
the Copier.
To open Copier, click Start on Windows taskbar, move the mouse cursor over
Programs, Copier and then the Copier icon. Click on it and the Copier panel will
appear as shown below:
61
Page 72

English
Copier Parameters
The table below is a list of Copier parameters. Before you start to copy, adjust
parameters properly to fit your purpose.
Icons
Icon Parameter Description
Scanner
driver
Printer
Image Type
Copy
quality
Selects the scanner driver. To select scanner driver,
click this icon until your scanner driver appears in the
Information Window.
Allows you to select the printer type or save the copy
output as a file for future use. When you click on this
icon, the dialog box appears.
Select the printer and paper size you want, or click on
Setup to configure your printer. To save the output as
a file, select .
Sets the image type as Text, Color Picture and Gray
Picture. To set image type, click this icon until the right
image type appears in the Information Window.
Default setting is Text.
Sets the copying quality as High Quality or High Speed.
To copy an image quickly, choose High Speed".
Otherwise, choose High Quality for better results
especially if you are copying color pictures. Default
setting High Quality.
Reset all
settings
Resets all of the above parameters to their original
settings.
62
Page 73

English
Brightness
Contrast
Sliders
Digit keys
Clear key
Information Window
The Information Window shows the current
settings for the Scanner Driver, Printer,
Image Type, Copy Quality and number of
copies.
Brightness and Contrast
The sliders are used to adjust the image
contrast and brightness.
Drag the slider with your mouse or press
the right and left arrow keys to adjust the
contrast or brightness.
The sliders appear in red when they are in
the middle or gray elsewhere.
Number of Copies
The digit keys are used to set the copy
number. Valid copy number for output to
printer is from 1 to 99. Press the digit keys
to set the copy number and the number you
set will be shown in the information box.
Note: If you save the output as a file, the
copy number can only be set to 1. The digit
keys are ineffective.
The Clear button clears the copy number
and resets it to 1.
63
Page 74

English
Buttons
Start Copying button. Press this button to start copying the image
to printer or file. The button changes to while the scanner is
copying and you can press it to stop copying.
Minimize button. Press this button to minimize the Copier panel.
Exit button. Press this button to exit Copier.
Preview button. Press this button to open the preview windows.
This button changes to when you are in the Preview Menu. Click
this button to exit Preview.
Copier has two preview windows - scan preview and print preview.
Press to scan the preview image.
When copying, the button changes to and you can press this
button to terminate scanning. See the online help for more details
of the Preview functions.
Ready lamp. If the indicator lamp is green, this means that the
scanner is ready and you can scan the next document or image. A
blinking lamp means that the scanner is busy.
Help button. Press this button to open the Copier online help.
64
Page 75

English
How to Use Copier
Follow these steps to copy a document:
1. Open Copier.
2. Place the document you want to copy facing down on the scanner glass plate.
Set the Copier parameters properly.
3. Click on the button to start copying. Note that when copying in under
progress, this button changes to and you can click on this button to
cancel copying anytime.
65
Page 76

English
<Memo>
66
Page 77

English
Chapter 5. Troubleshooting and FAQ
FAQ
5.1.1 Why does MiraScan display the message “Scanner is warming up”
whenever I scan or preview after I change the Original type or
Scan Mode setting?
Answer: when you change the Original type or Scan Mode, the scanner needs to
switch the lamp used for scanning and warming up is needed.
5.1.2 When I preview transparent originals, why does the color of the
preview image change as I move or adjust the size of the selection
rectangle in the Preview Area?
Answer: when processing the image data of transparent originals, MiraScan will
dynamically optimize the color according to the image enclosed in the
selection rectangle. Therefore, when you move the selection rectangle or
change its size, a slight color change will occur to the preview image.
5.1.3 When I scan films, why does the color sometimes deviate from that
of the original?
Answer: because the image data of the film is not enough for MiraScan to
calibrate image color accurately. Try to use another film for scanning.
Troubleshooting
5.2.1 The scanner can not work and the screen shows “Scanner not
found” instead.
Make sure that the SCSI cable is connected properly to your PC and your scanner is
turned on. Otherwise, turn on the scanner, then enter Windows Control Panel
and click Refresh in Device Manager tab of System.
5.2.2 The Auto Crop function sometimes fails.
MiraScan performs the Auto Crop function by first judging the outline of the image.
If the outline of the image can not be recognized properly, MiraScan will not be
able to decide the correct shape to crop. This is usually caused by image data noise
and dirty glass plate.
If this happens, clean the scanner glass plate with a lint-free cloth and press the
TPO unit gently while scanning.
5.2.3 The TPO lamp goes out when I lift the TPO unit.
Check to see if the TPO unit cable is connected firmly to the scanner.
67
Page 78

English
5.2.4 Calibration fail occurs when I scan transparent originals.
Check to see if:
The slide/film frame is positioned correctly.
The TPO unit is working properly.
The TPO unit cable is firmly connected to the scanner.
5.2.5 TextBridge can’t work.
First of all, please make sure you have chosen the right data source for TextBridge
Calssic. If not, please choose the right scanner in TextBridge.
Secondly, set the scanning image type to Line Art. For better recognition
performance, set the driver threshold value to 128.
5.2.6 The driver sometimes show the message “SCSI card not found”,
and a few minutes later, it works properly.
To prevent damaging the scanner due to unstable power supply or short condition,
the fuse on the SCSI card could be open for a while. During this period, the SCSI
card does not function but after a few minutes, the fuse temperature cools down
and the fuse recovers. You can solve this question by turning the scanner power off
and turn it back on for a few minutes.
68
Page 79

English
Chapter 6. Service Information
If problems persist after you check this manual, you can contact your dealer or
consult the technical service below:
For driver and hardware questions, please send an e-mail (Containing detailed
descriptions of the problem you come upon, the hardware and software
environment of your system) to the following address:
Taiwan: FAEIMG@acerperipherals.com.tw
USA: APAWeb@apa.acer.com
Europe: SCANNER.FAE@acerperipherals.nl
For free driver updates, product information and news release, please visit the
following web addresses:
http://www.acerperipherals.com.tw (Taiwan)
http://www.acerperipherals.com (USA)
http://www.acerperipherals.nl (Europe)
For questions on using the bundled application, please consult the following web
addresses:
http://www.ulead.com (Photo Express)
http://www.xerox.com (TextBridge)
Re-packing Directions
To avoid unpredictable damages during transportation, please follow these
guidelines when repacking your scanner:
1. Lock the scanner: you can find the lock on the bottom of the scanner.
2. Use the original shipping container and packing materials for repacking.
3. Send only the scanner and other hardware required to complete the repair.
4. Enclose a document describing the problems you encountered.
69
Page 80

English
<Memo>
70
Page 81

English
Appendix. MiraScan main screen guide map
71
Page 82

English
MiraScan main screen guide map (continued)
72
 Loading...