

Page 1
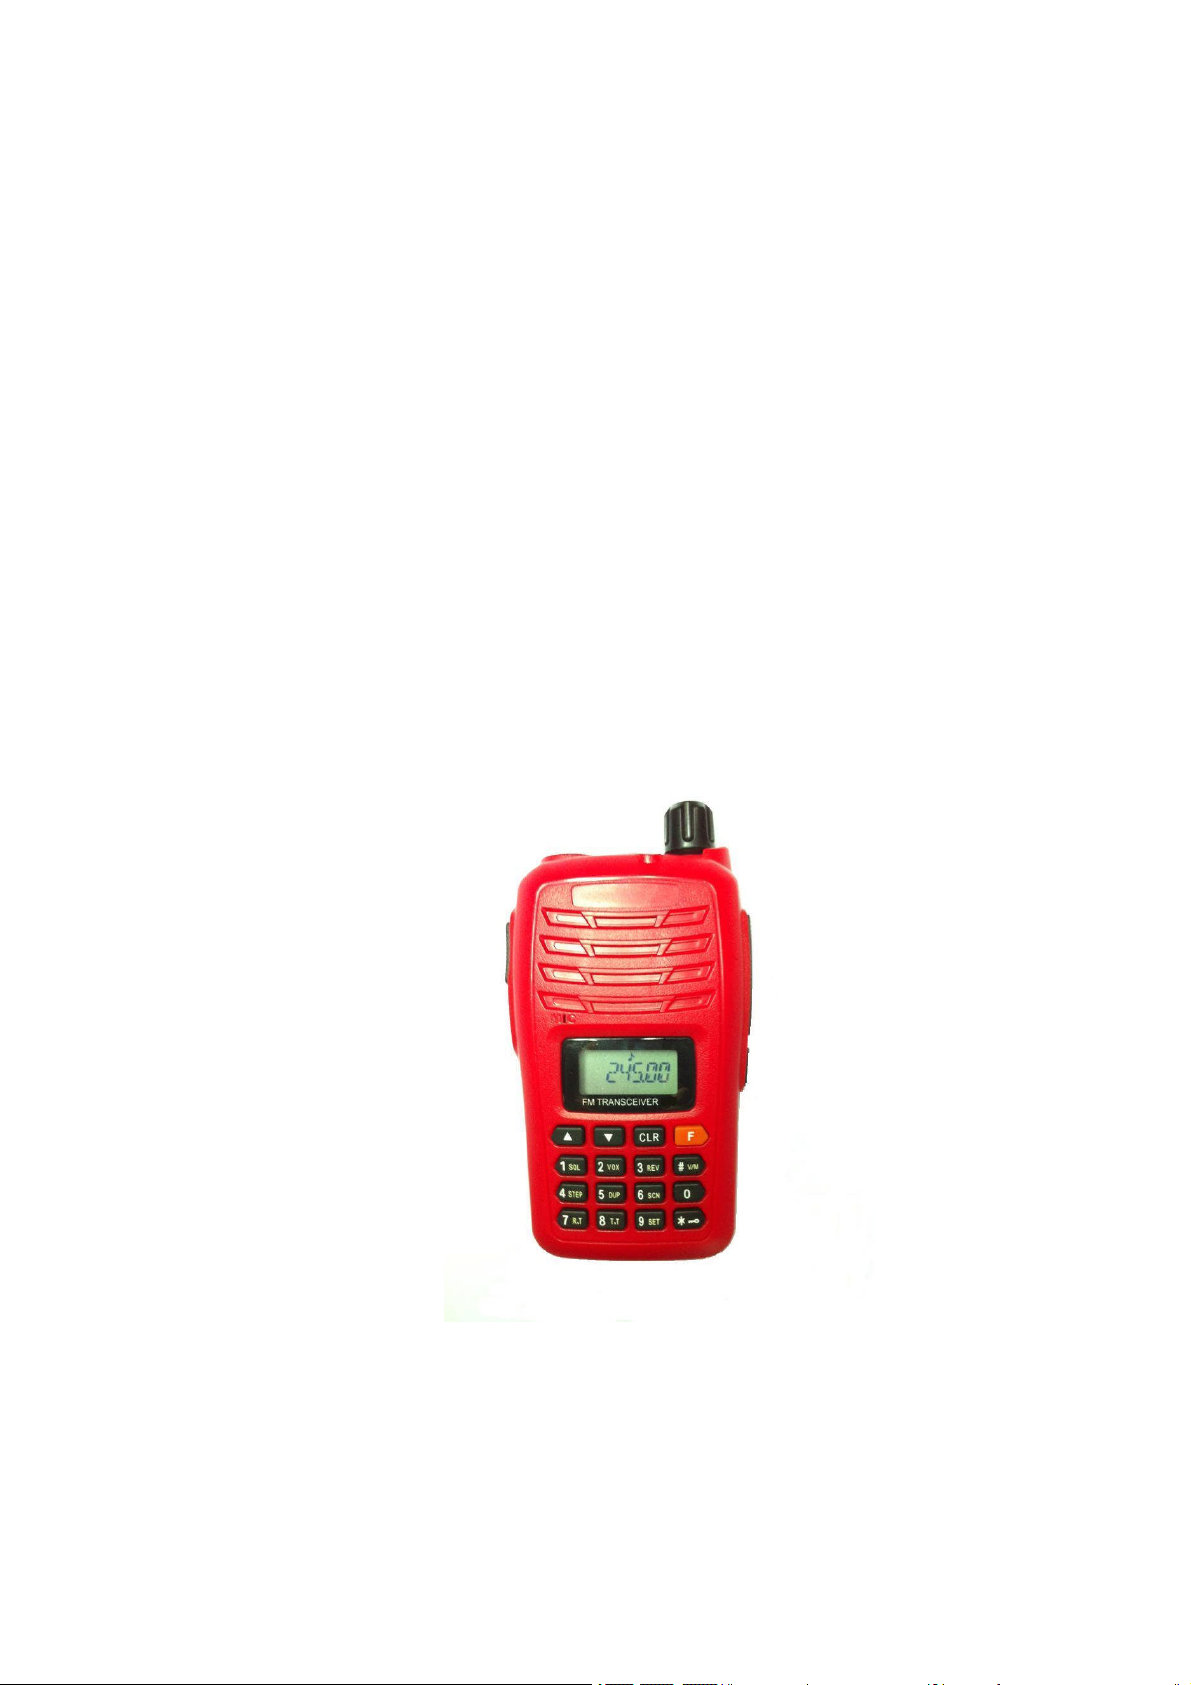
A86 Model Professional FM Handheld Transceiver
(VHF: 245-245.9875MHZ)
USER'S MANUAL
Please read carefully before using
Page 2
Thank You!
We are grateful you have chosen A86 model FM VHF portable transceiver. This 2-way radio represents novel
design and stable performance. It is developed to meet the demands of portability, easy-operating and multifunction.
The small size and reasonable price will satisfy you.
MODELS COVERED BY THIS MANUAL:
A86 MODEL VHF:245-245.9875MHZ FM TRANSCEIVER
Safety Information
1, Please DO NOT try to open the transceiver, as it may do damage to the transceiver.
2, Please use the matched antenna in case it shortens communication distance. Please DO NOT transmit before
antenna is installed. Please also use battery pack and charger we've offered in case of any damage.
3, Please DO NOT expose the transceiver to direct sunlight for a long time; DO NOT place the transceiver near any
heating, damp and dusty environments; DO NOT wash the transceiver with detergent with harsh chemicals.
4, Please turn off the power immediately and remove the rechargeable battery pack from the transceiver if any
abnormal odor or smoke is detected, and then contact the dealer.
Checking Equipment
Thank you for using FB-136 FM transceiver. Before using, we recommend you:
Please check whether the package is broken.
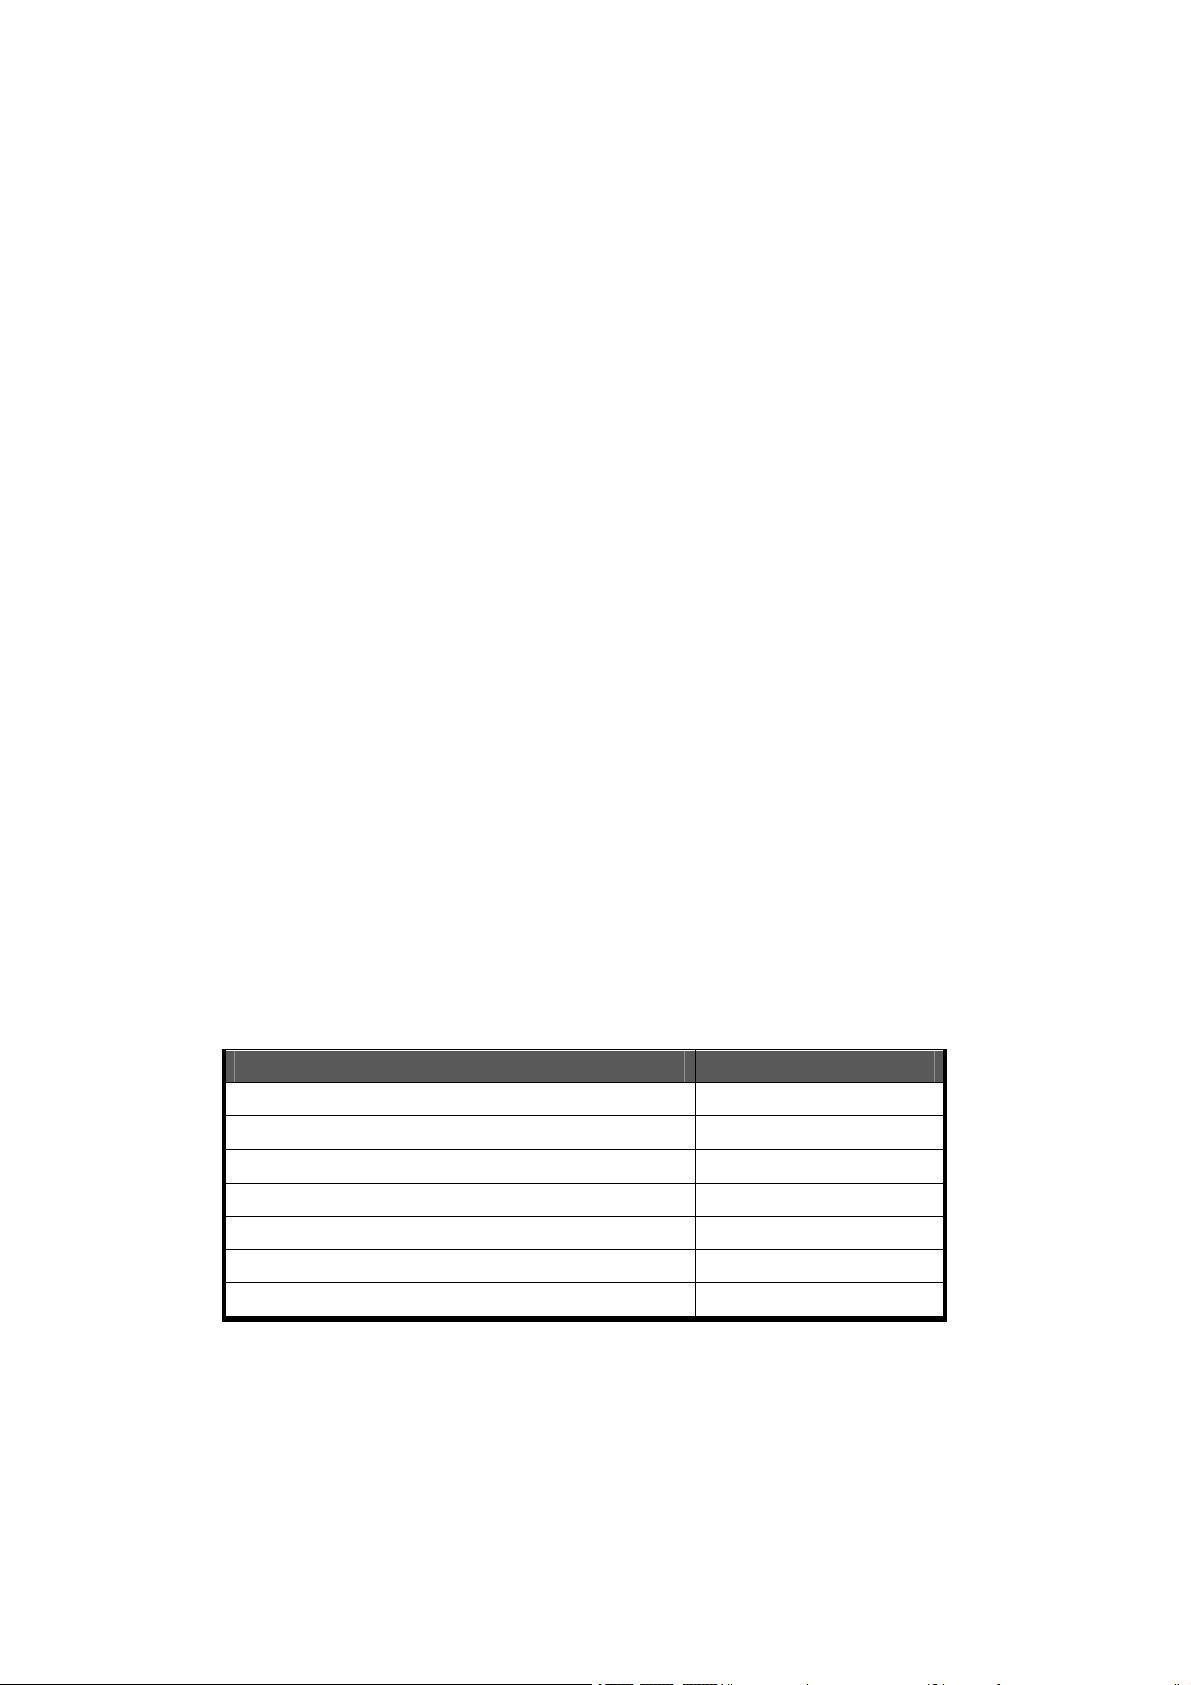
Unpack the transceiver carefully: Identify the items listed in the following table.
If any damage or miss has occurred during shipment, contact with dealer immediately.
SUPPLIEDACCESSORIES
ITEM QUANTITY
A86 Transceiver 1
RubberAntenna
7.4V Li-ion Battery
String
Desk Charger
Belt Clip
User's Manual
1
1
1
1
1
1
Page 3

Content
一、Main Function … … … … … … … … … … … … … … … … … … … … …
二、Get Acquainted ………………………………………………………
Charge Battery Pack … … … … … … … … … … … … … … … … … … … … … … …
Install/Remove Battery Pack … … … … … … … … … … … … … … … … … … … … …
Install Belt Clip … … … … … … … … … … … … … … … … … … … … … … … … …
Install Optional Speaker/MIC Earphone、… … … … … … … … … … … … … … … …
Keypad …… … … … … … … … … … … … … … … … … … … … … … … … … … … …
LCD Screen … … … … … … … … … … … … … … … … … … … … … … … … … … … …
三、Working Mode …………………………………………………………
FR Model (Frequency Mode) ………………………………………………………
CH Mode(Channel Mode) ………………………………………………………
MENU Mode …………………………………………………………………………
四、Basic Operation …………………………………………………………
Switch Power ON/Off、Adjust Volume ………………………………………………………………
Select frequency ………………………………………………………………………………
PTT Transmit、VOX Transmit ………………………………………………………………
MONI ……………………………………………………………………………………
Alarm Function ……………………………………………………………………………
Call Function ………………………………………………………………………………
Key lock On/Off ………………………………………………………………………………
五、FM Radio Function …………………………………………………………
Turn On/Off FM Radio … … … … … … … … … … … … … … … … … … … … … … … … … … … … … … … … … ..
Select FR/CH Mode …… … … … … … … … … … … … … … … … … … … … … … … … … … .
Search Broadcast Channel …… … … … … … … … … … … … … … … … … … … … … … … … … … … … … … … … … … ..
Set MONI Mode …… … … … … … … … … … … … … … … … … … … … … … … … … … … … … … … ..
Set SQL Level … … … … … … … … … … … … … … … … … … … … … … … … … … … … … … … … … …
StoreChannel Data … … … … … … … … … … … … … … … … … … … … … … … … … … … … … … … … … .....
Delete Channel Data …… … … … … … … … … … … … … … … … … … … … … … … … … … … … … … … … … … .
六、Shortcut Operation ……………………………………………………………
Set SQL Level ………………………………………………………………………………
ON/OFF VOX Function …………………………………………………………………………
ON/OFF Reverse Frequency Function ……………………………………………………………
Select step frequency …………………………………………………………………
Select different frequency …………………………………………………………………
Scan …………………………………………………………………………………………
Set Transmit/Receive Signal ……………………………………………………………………………
Page 4

Set Transmit Signal ……………………………………………………………………………………
Menu Option ……………………………………………………………………………………
Select Working Group …………………………………………………………………………………
Store new channel ………………………………………………………………………………………
Set High/Low Power ………………………………………………………………………………………
七、Menu Operation ……………………………………………………………
八、Cancel channel …………………………………………………
九、Set self channel programming ……………………………………………
十、Special Function ……………………………………………………………
Clear All Channels Away ………………………………………………………………………
PC Program Function …………………………………………………………………………………
Wired Copy Function……………………………………………………………………………………..
十一、Specification … … … … … … … … … … … … … … … … … … … … … … … …
十二、 Common Error and Solution … … … … … … … … … … … … … … … …
Main Function
VHF Frequency Range:(245-245.9875MHZ)
199 Stored Channels
CTCSS/DCS
VOX Function
Multiple Scan Function
Calling Function
PC Programmable
Wired Copy Function
Alarm Function
Group Programmable
High/Low Power Selection
FM Radio Function
Page 5
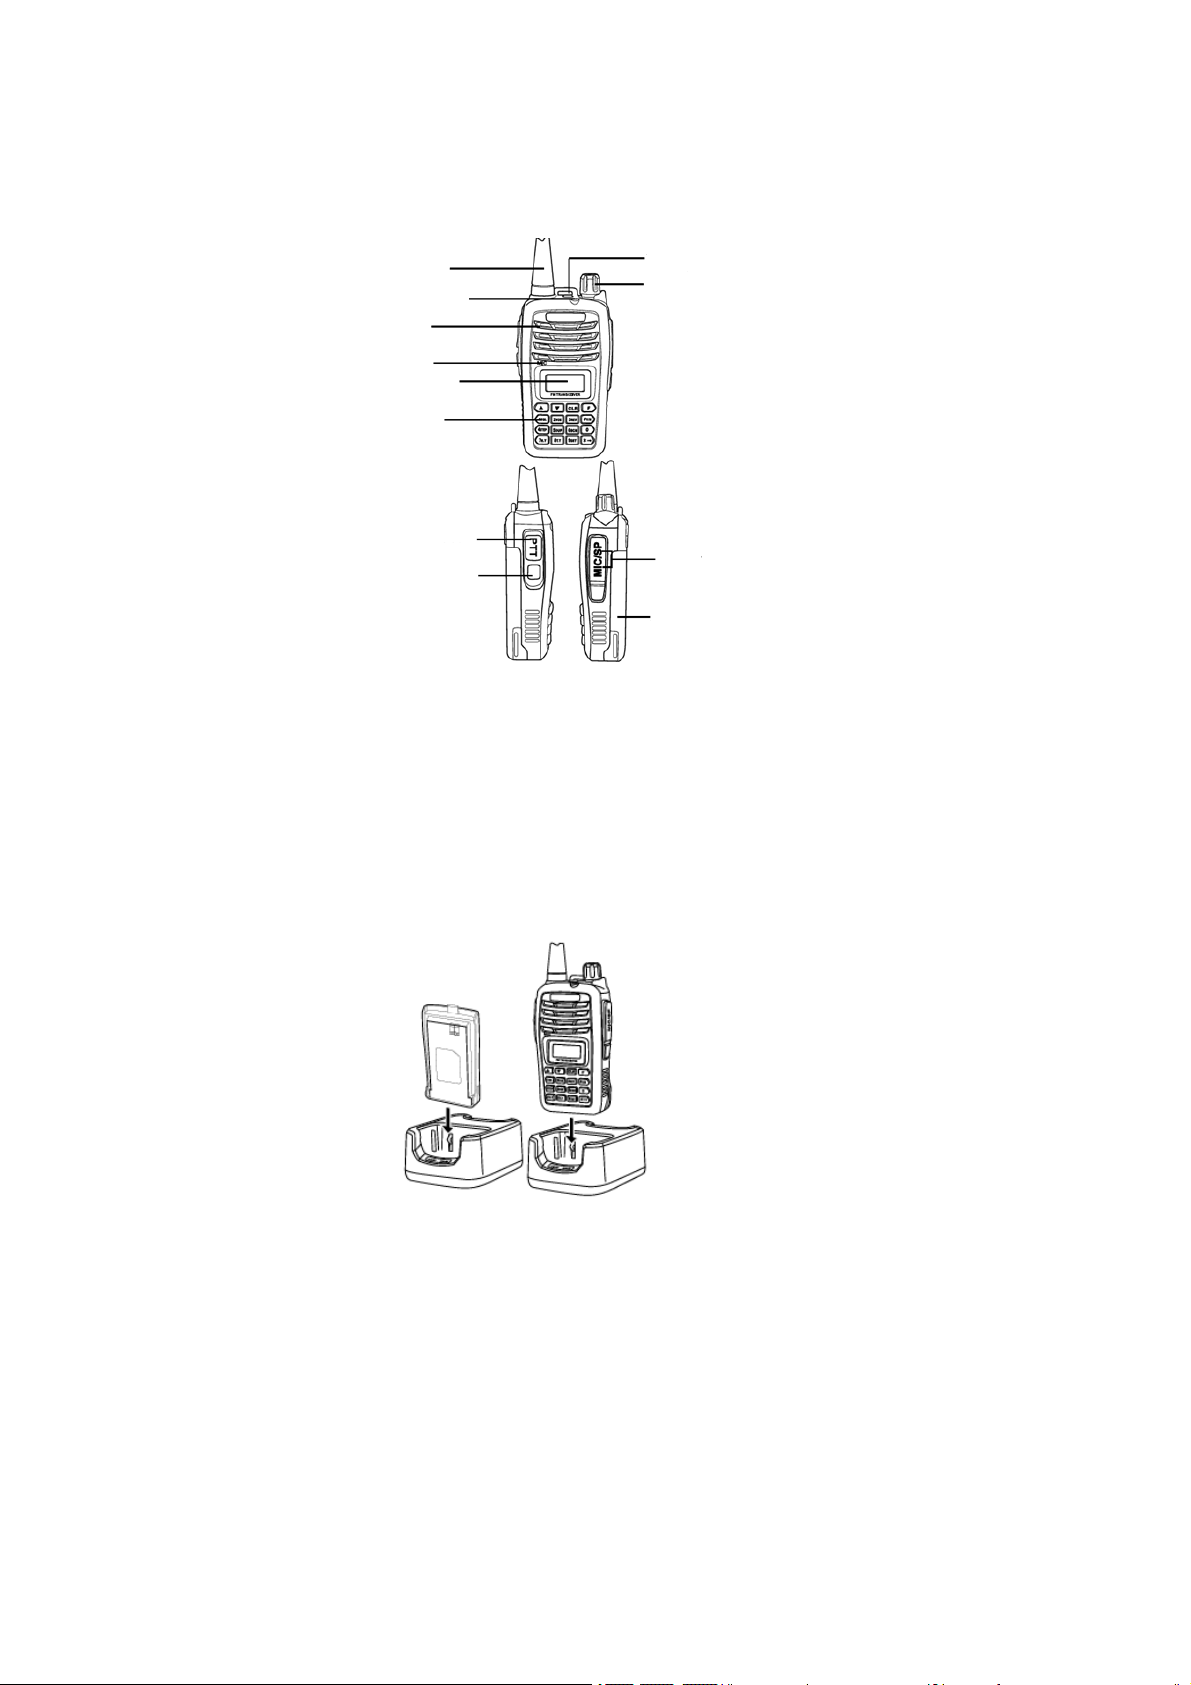
一、Get Acquainted
Antenna Alarm button
Indicator power/volume knob
MIC
LCD screen
Keypad
PTT
MONI earphone slot
Battery pack
Charge Battery Pack
The battery is not charged in the factory, and please charges it before using. The first charging can’t reach full
capability after buying or storing for a long time (more than two months). Please charge and discharge it for two or
three times to really reach full capability.
Plug the uncharged battery or transceiver with battery into charger, and make sure the battery contact with charging
terminal. Red light means charging on, while green light means off.
Notice:
Please do not charge the battery again if it is charged fully, otherwise, the life of the battery will be shorted or
it will be damaged.
Please turn off the transceiver before charging. It may disturb charging if you use the transceiver when
charging.
It comes to the limit of the battery life if the use time of transceiver shortens obviously even charging is
correct. Please change new battery pack.
Page 6
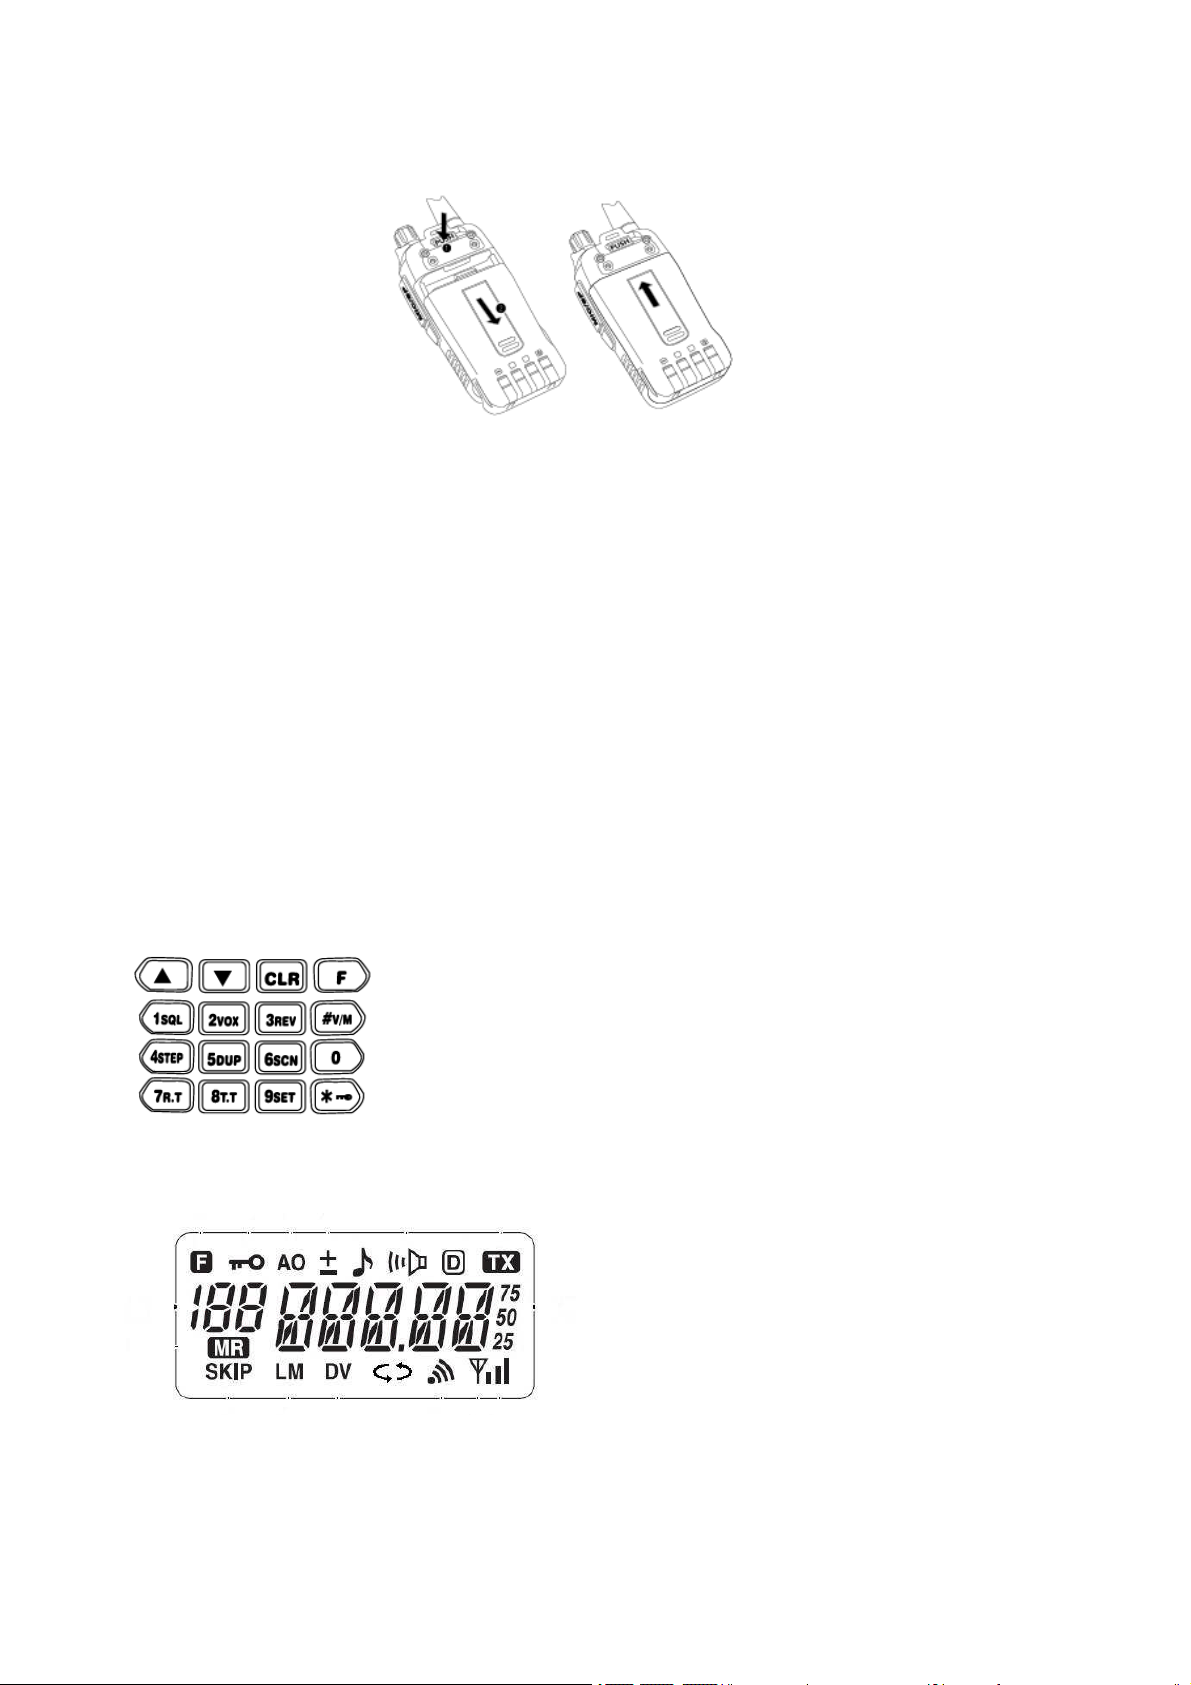
Install/Remove Battery Pack
Match battery pack with button at the back of transceiver, then slide battery pack upon until hearing a clatter.
Please turn off the transceiver first before removing battery pack. Push battery latch on the top of the
transceiver to release the upside of battery pack, and then pull it away from the transceiver.
Install Belt Clip
Fix belt clip with two matched screws to make it convenient to take if necessary.
Install Optional Speaker/MIC Earphone
Used for earphone and wired copy between two radios, and also operate with PC software. (Please contact the
dealer about data wire and PC software.)
Keypad
Input Frequency and operate function.
LCD Screen
You can find kinds of indicators on the screen showing selected content. Sometimes you may forget what
these indicators represent or how to set them. And then the following table can be useful.
Page 7
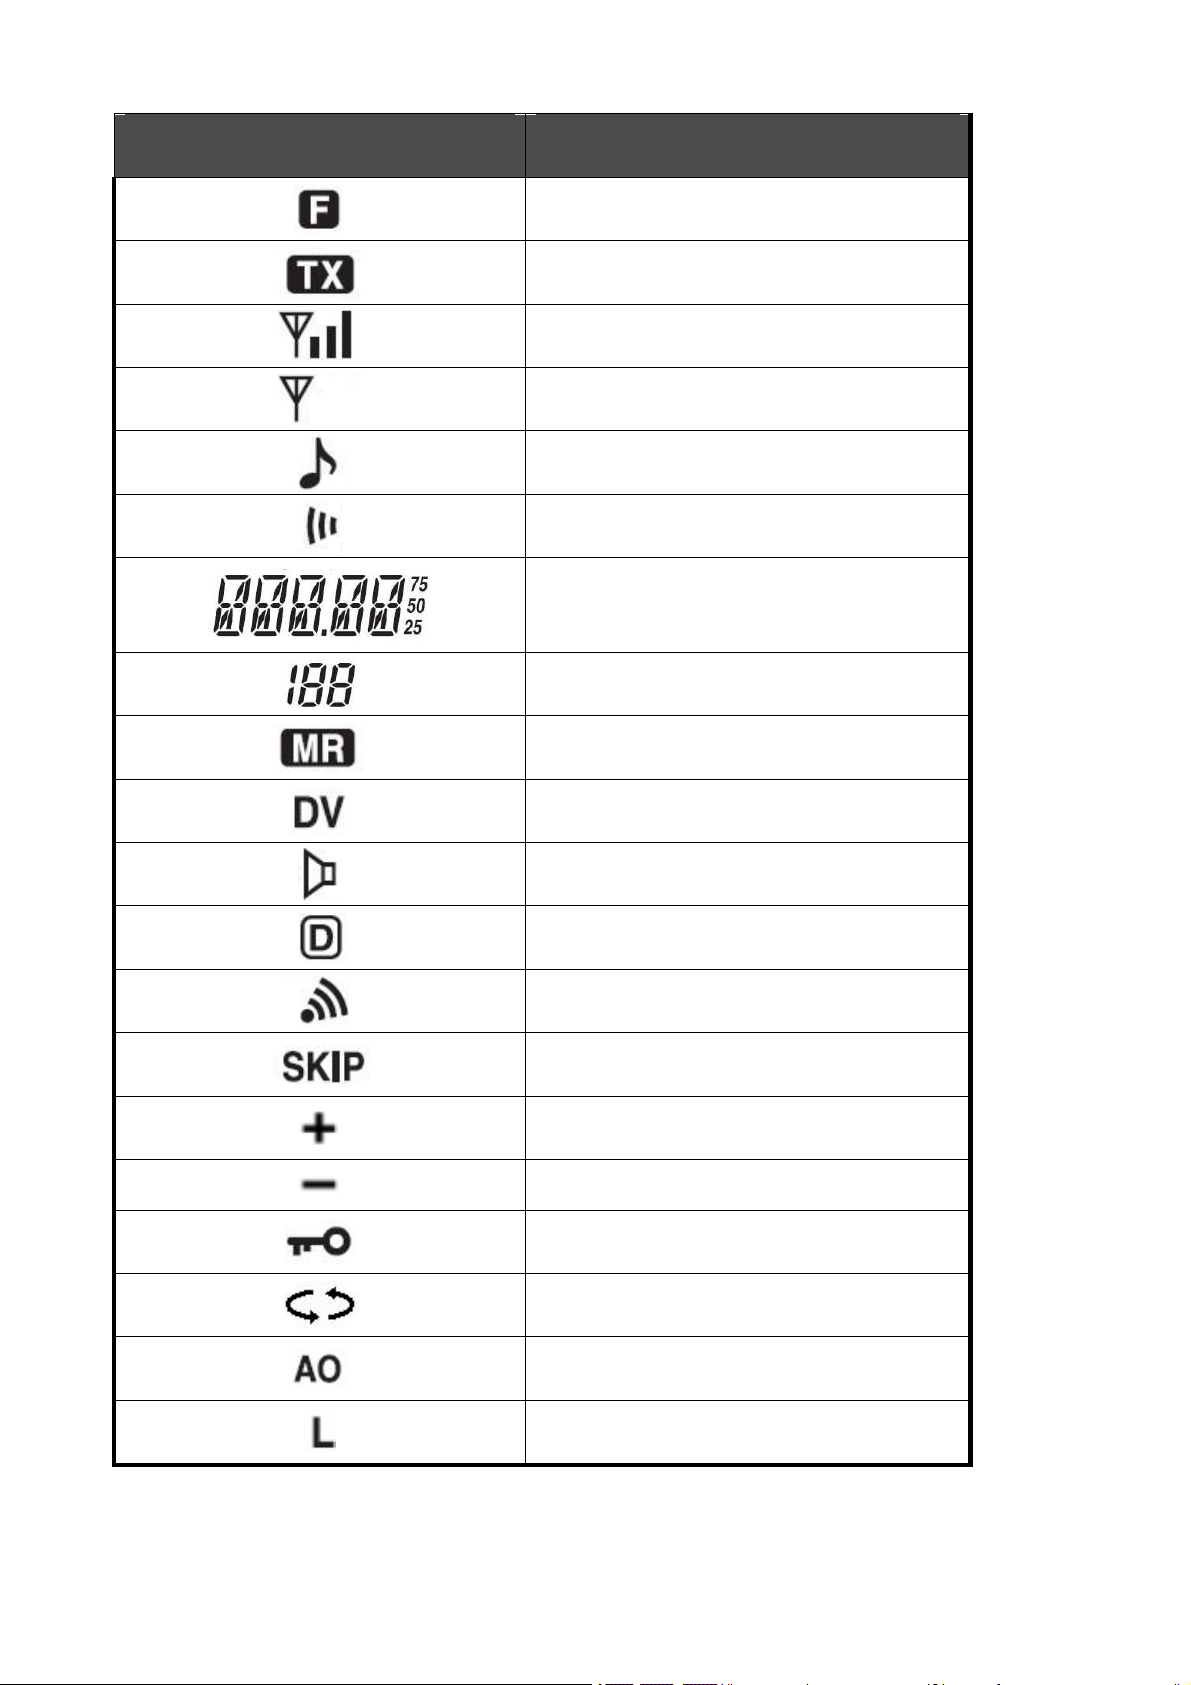
Signal Function Description
Appear when pressing【F】 and enter function
operation。
Appear when transmitting
Appear when receiving
SQL on
Key-press tone on
Appear when calling
Display frequency in use or menu function
Memory channel
Display stored channel
Appear when reverse frequency is on
Appear when CTCSS is on
Appear when DCS is on
Appear when VOX is on
Add scanned channel
Increase frequency
Decrease frequency
Appear when keypad is locked
Appear when group is on
Appear when FM radio is on
Low power transmitting
Page 8
#F#
三、Working Mode
■FR Model (Frequency model )
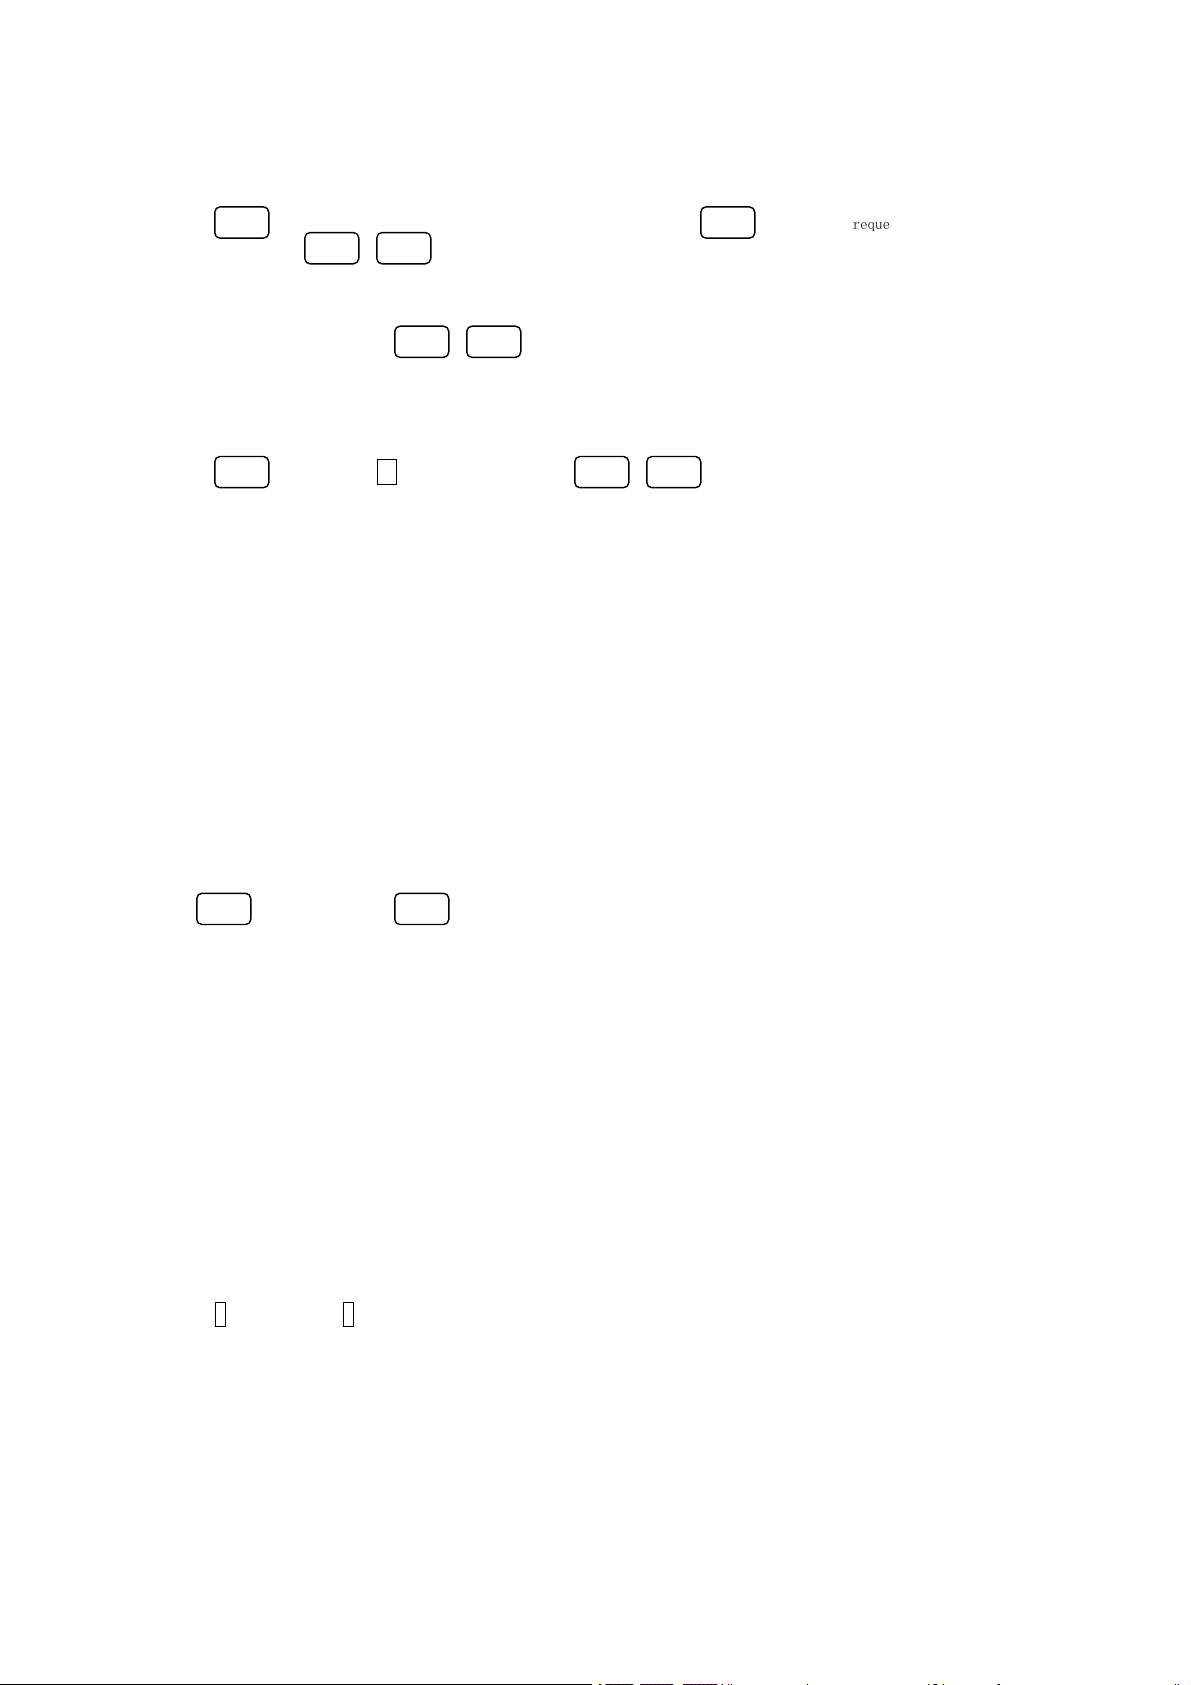
Press to turn on,can select to FR model 。Under this model press show “Full frequency frequency “or “CH+FR
Model “ 。You can select to select full frequency or channel number .or can direct use keypad to input
the full frequency or channel number you need.
■CH Mode(Channel Mode)
Under CH mode,You can press to change channel number, or directly input your needed number.
■Menu Mode
▲ ▼
▲ ▼
Press then press 9 to enter menu.Then press to s elect. You can enter menu to
operate, and operation details please refer to "Menu Operation."
▲ ▼
四、Basic Operation
■Switch Power On/Off
Turn the Power/Volume knob clockwise to switch on the transceiver; turn the Power/Volume knob counterclockwise
to switch the transceiver off.
■Adjust Volume
Turn the Power/Volume knob clockwise to increase volume; turn it counterclockwise to decrease volume。
■Select Frequency
Press to increase frequency;press 按 to decrease frequency.
▲ ▼
If you can not select specific multiple,you will change the frequency spacing .detail information see :select
step frequency”.
You can use keypad to direct input the frequency you need ,Please see the “Keypad input”。
■PTT Transmit
1. Press and hold "PTT" and speak normally. (Red light flashes while transmitting.)
2. Release "PTT" to turn to receiving state.
■VOX Transmit
1. You can set VOX plus and VOX stop to delay transmit time in menu function.(VOX plus:1 is the highest level,
you need to speak loud to powerfully transmit; 9 is the lowest level.)
2. Press F, then press 2to turn VOX function on.
3. Insert the MIC earphone.
4. Speak to MIC, and it can transmit when you speak loud enough.
■MONI
1. Press MONI to enter MONi mode. (SQL on)
2. Hold "MONI" for 4 seconds to enter another Moni mode(SQL on), then release "MONI", the transceiver is still
in MONI mode; then press "MONI" to exit Moni mode.
Page 9

ALM
ALM
*
■Alarm Function
1. Hold for 10 seconds to enter Alarm function.
2. Turn the Volume knob to change alarming volume.
3. If there is frequency in stored channel, the transceiver will auto transmit.
4. Under Alarm function, the transceiver rings and transmits for 20 seconds, and there are 10 seconds between
the first and second ringing. After recycling for 3 times, it exits, then back to normal state.
5. While alarming during 10 seconds, the transceiver exits when receiving signal, then back to normal state.
6. While alarming, you can also press "PTT" to exit.
■Calling Function
1. Press then release it shortly,transceiver enters calling state; A calling signal is transmitted,
and it lasts for 4 seconds。
2. Under calling state, you can press PTT to stop calling, back to standby state.
3. When calling is received, the transceiver rings, and matched icon flickers in the screen.
■Key lock On/Off
1Under standby mode hold , for one second to switch key lock on/off.
五、FM Radio Function
1、 Turn On/Off FM Radio
Under standby mode,press F to enter FM Radio function,then press "MONI" to switch FM Radio on/off. When radio is on,
LCD screen displays“AO”。Under Full Frequency mode,you can input 4-5 digital numbers, or you can press ▲、▼to change the
radio frequency; frequency step is 50K;Under CH mode,you can press▲、▼ or input 2 digital numbers(01~25)to change current
channel.
2、 Select Frequency/CH Mode
Under FM Radio mode, press # to switch FM radio's Frequency/CH mode。(You can't switch when FM Radio is off.)
3、 Search Broadcast Channel
Under FM Radio mode, you can use this function to quickly get your needed channel.
Under FM radio frequency mode,press F to enter this function,then press 6to search broadcast channel.
LCD displays“RS UP/d N”. You can press ▲、▼to change searching direction. Press any other key to exit searching.
When certain channel is searched, FM radio stops at the searched frequency and then exits.
While searching, press PTT, and it will auto exit.
4、 Set MONI Mode
Setting Way:Under FM Radio mode,press F to enter function option,then press 9to enter this function;Select DW,then press
F to enter; press ▲、▼to select,finally press F to confirm。
NOTE:When DW is ON,you can MONI signal under FM radio mode; while receiving signal, it will exit FM radio mode to enter
receiving mode. After speaking, it will auto return to FM radio mode.
When D Wis OFF, it will stay in FM radio mode.
5、 Set SQL Level
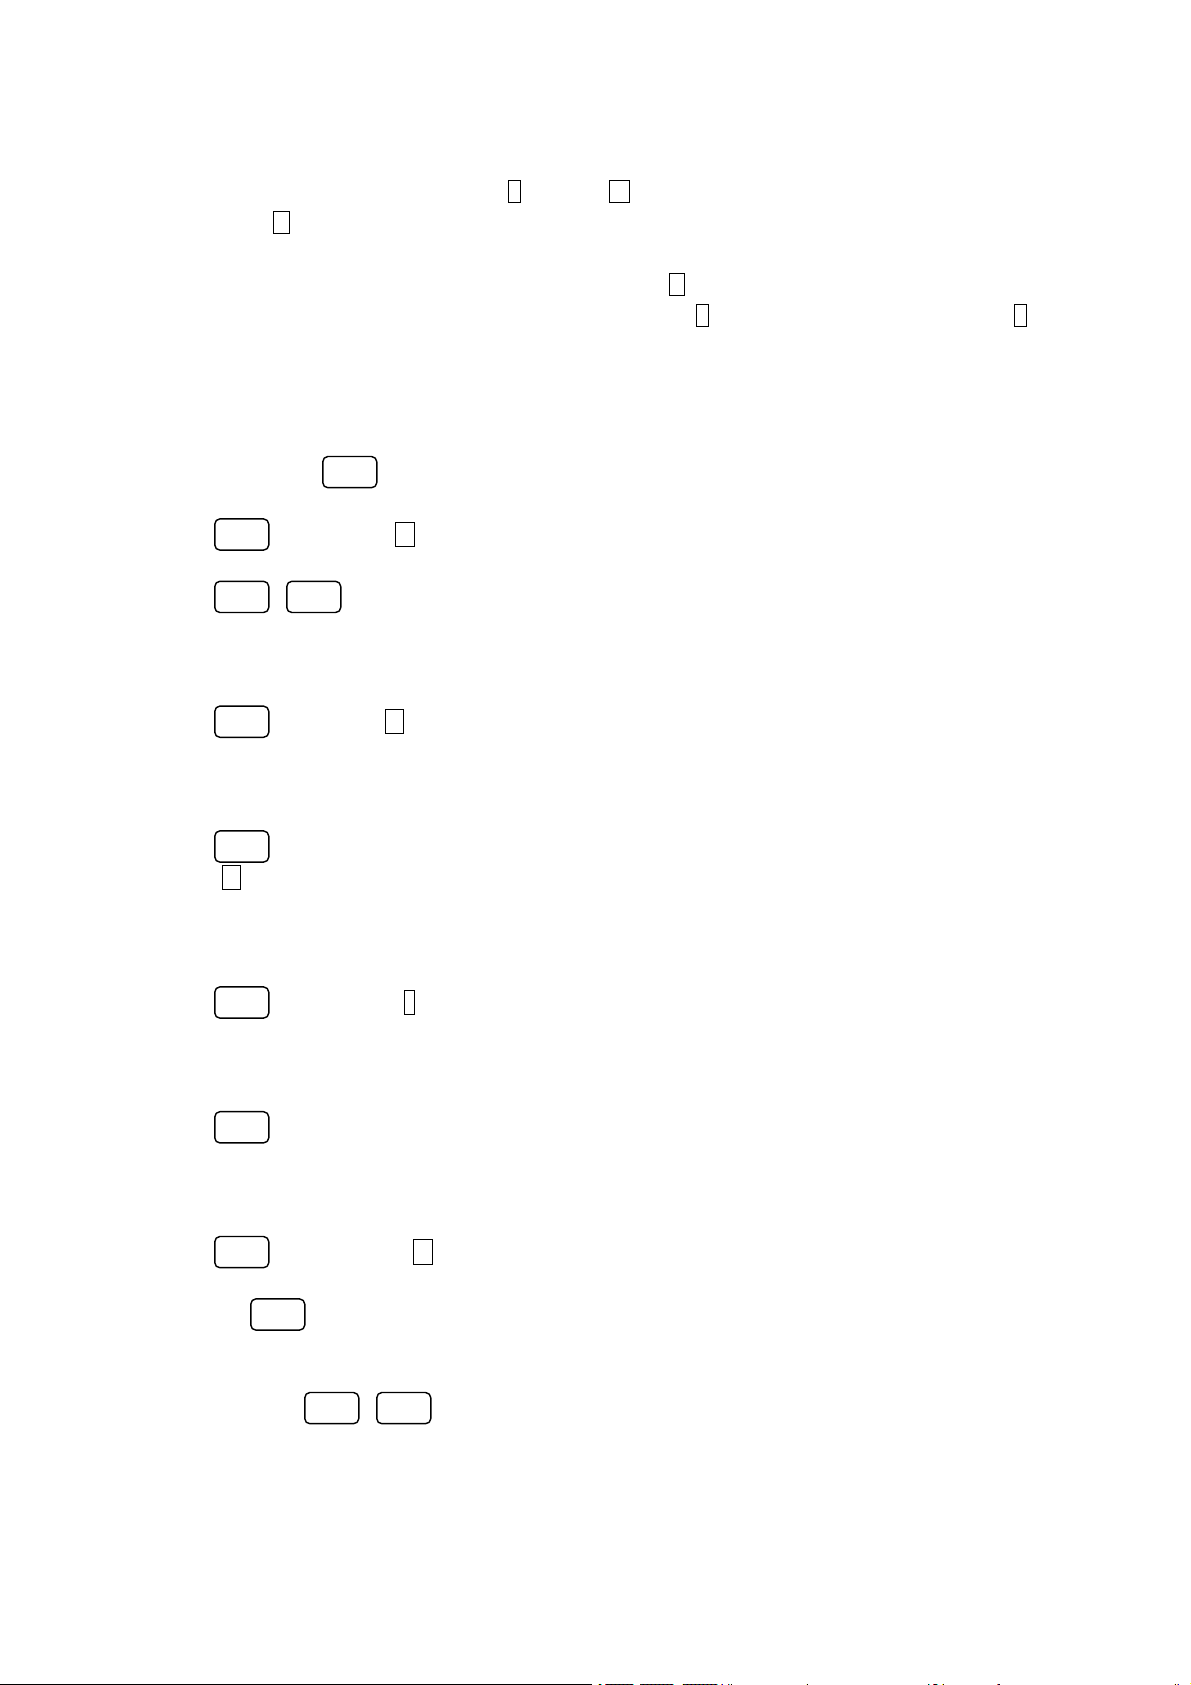
Under FM Radio mode,press F to function option,then press 1 to set SQL level. You can press ▲、▼ to select level 0~9. Then
Page 10
FFFFFFF
F
press any key to exit.
6、 StoreChannel Data
Under FM Radio mode,input radio frequency, press F,then press * to store channel data; press▲、▼to select the channel you want
to store,then press F to store data.
7、 Delete Channel Data
Set FM Radio mode and CH mode,,then switch the power off. Hold * and switch the power on to delete FM radio channel data.
Now LCD displays“xx DEL”. Press▲、▼ to select channel,then press F,LCD displays“xx YES”. Finally press F to delete.
After deleting, LCD displays“xx DEL”. You can go to delete next channel. Turn off the power and turn on again .
六:Shortcut Operation
For A86 Model , press , then press 0~9,#、* to operate, and you can edit the function easier.
■Set SQL Level
1.Press ,hen press 1 to set SQL level. There are levels 0-9.
2. Press to select SQL level,confirm and store, then press any other key to exit.
■ON/OFF VOX Function
.press ,then press 2 to switch VOX function on/off. While VOX Function is on, the icon will show on
the screen.
■ON/OFF Reverse Frequency Function
. Press ,
then press 3 to switch Reverse Frequency function on/off. While this function is on, the icon will show on the
screen.
When this channel is without transmit frequency, you can't enter Reverse Frequency function.
■Select step frequency
1. Press ,Then press 4 ,to select step frequency 。It is totally :12.5K、25K。
Note::This function just use in FR Model .
■Select different frequency
. Press ,Then press number 5,to select different frequency 。When increase frequency ,the LCD show
“+”,decrease frequency ,The LCD show “—”。
▲ ▼
■Scan
1. Press ,then press 6 to begin scanning.
1. Press while scanning, the radio will save currently scanned frequency/channel, then exit scanning.
If you press any other key, the radio won't save any frequency/channel and directly exit.
1. 2.While scanning,press to change scanning direction.
2. VFO Mode:radio will scan all frequency ranges.
3. CH Mode:while out of group mode, radio will scan the stored channel(you can store 199 channels in total);
under group mode, radio will scan the stored channel in the group(you can store no more than 20 channel each
group).
▲ ▼
Page 11
F#*FF#*FFF*
F
4. If there are less than 2 stored channels, and they aren't added, radio can't scan.
■Set Transmit/Receive Signal
1. Press ,then press 7,to set Transmit/Receive sign.
2. Press to switch signal type,see as below::
OFF CTCSS DCS N
3.Press to adjust DCS,see as below::
DCS N DCS I
4.Press to select your needed group.
▲ ▼
5. Press to store and exit. Other keys are no use to exit。
■Set Transmit Signal
1. Press ,then press 8 to set transmit signal.
2. Press to switch the signal type,see as below:
OFF CTCSS DCS N OFF
3. Press to adjust DCS,see as below:
DCS N DCS I
4. Press to select your needed group.
▲ ▼
5. Press to store and exit. Other keys are no use to exit.
■Menu Option
Press ,then press 9 to enter menu option. Details please refer to below operations.
■Select Working Group
1. Press ,then press 0 to select working group.
2. Press , to select your needed group. There are 10 groups A~J to select. Only the group with
▲ ▼
stored channel(s) can be selected.
3. Press any other key to exit, back to standby mode.
NOTE:With the radio under CH mode,and Group Function is on,your operation is available.
■ Store New Channel
1. The radio must in the full frequency model can store channel 。
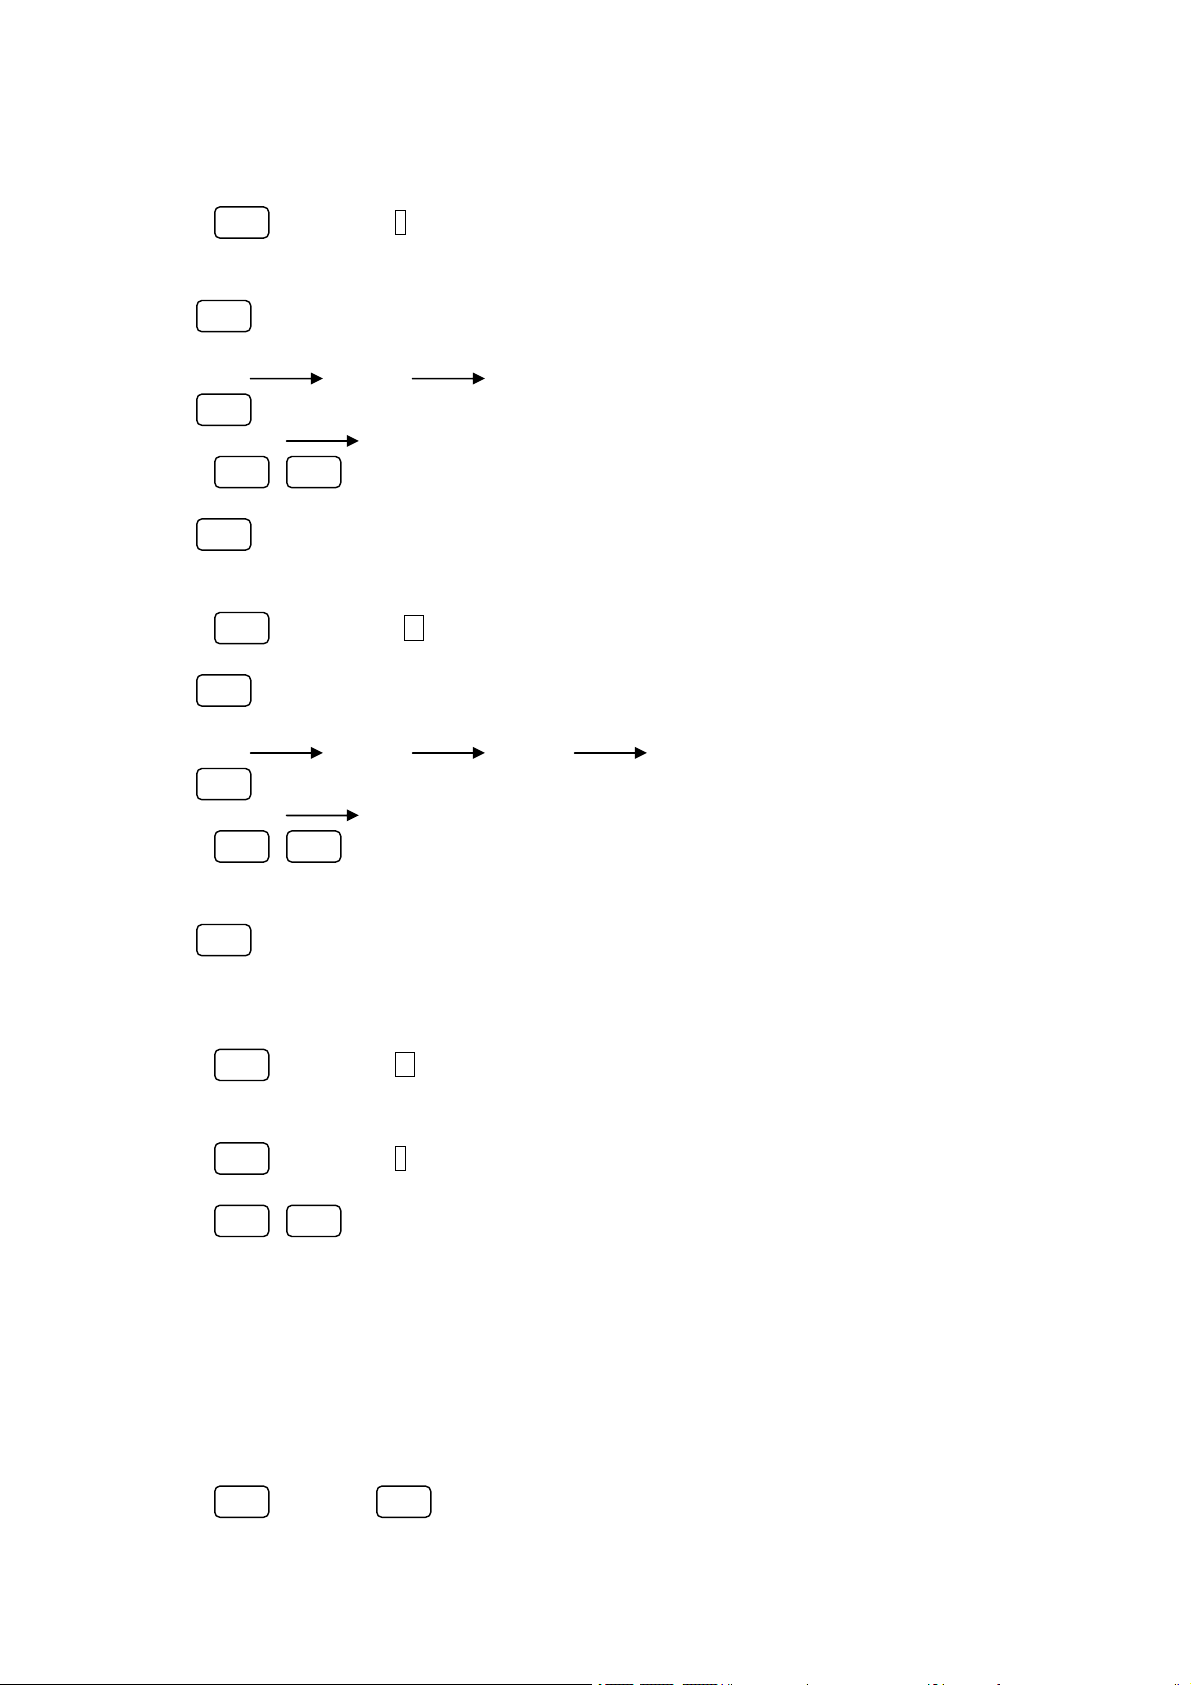
2. Press .then press ,to store channel operation ,small channel number and F sign flicker。
Page 12
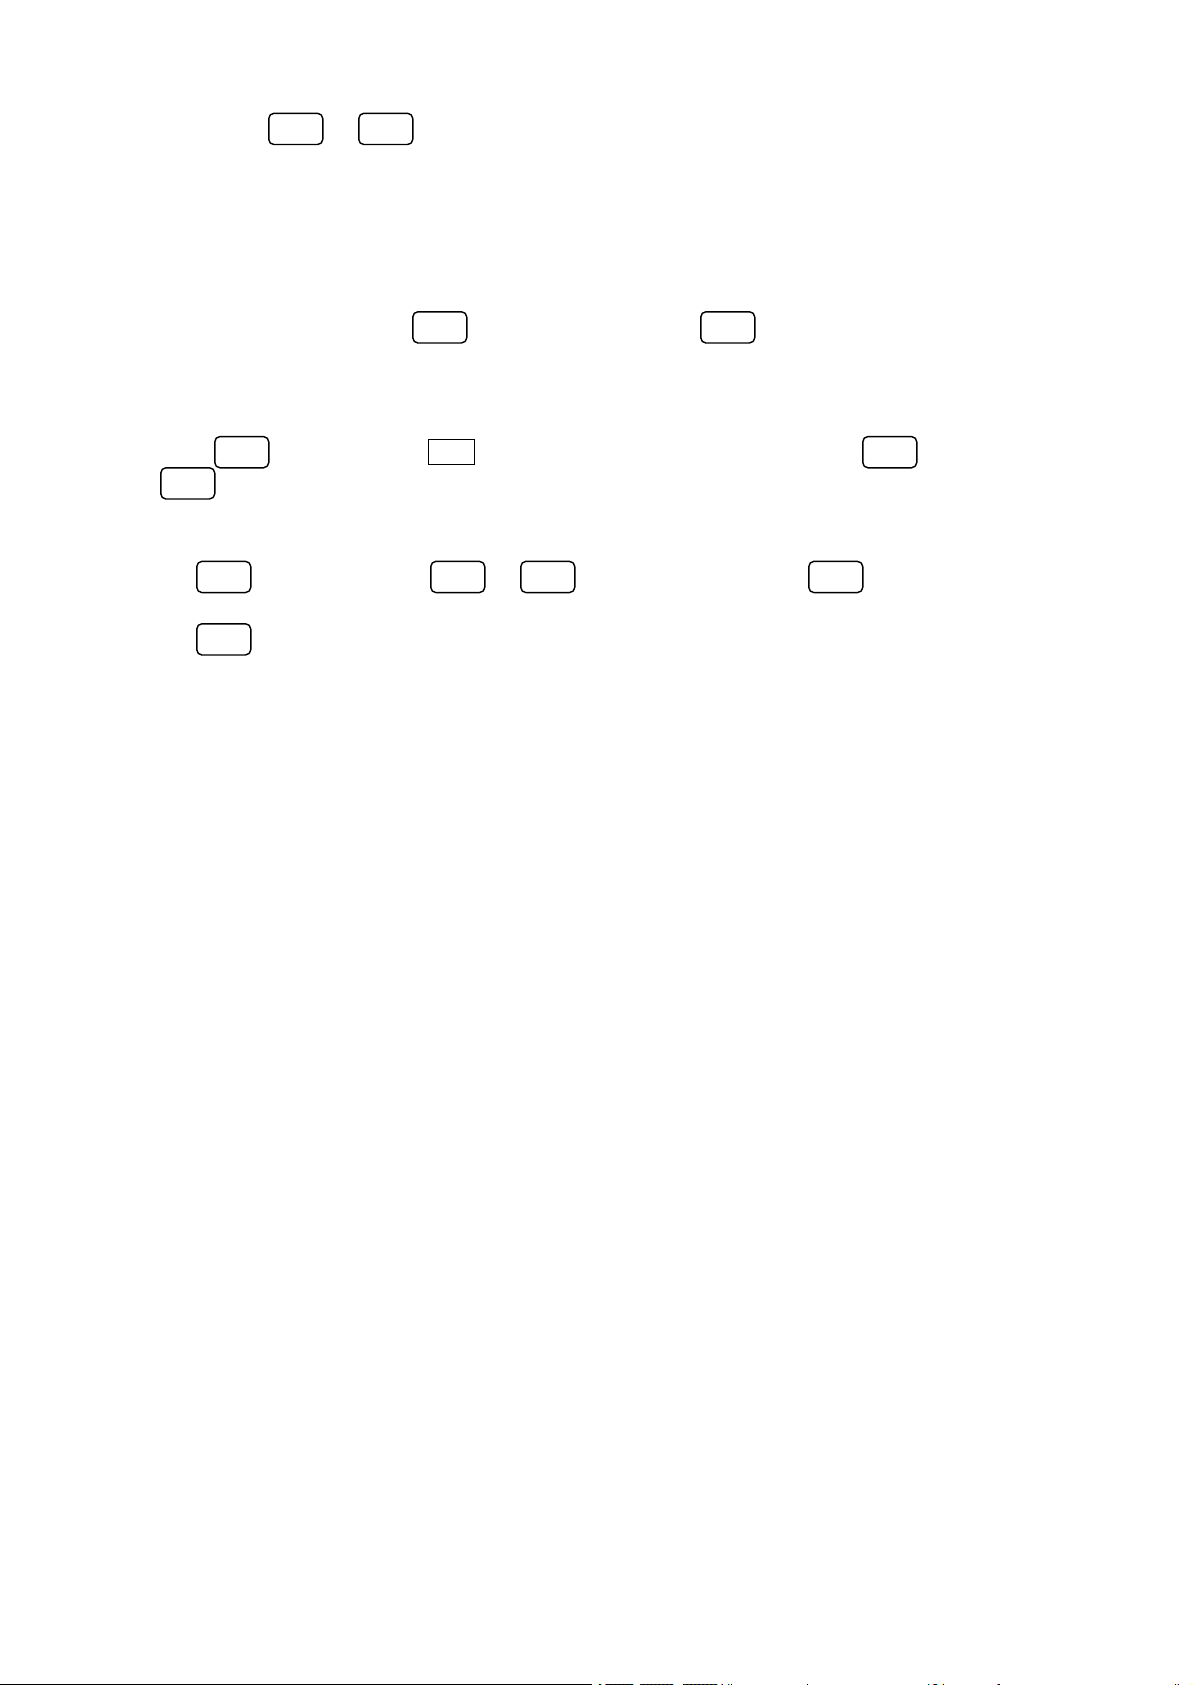
FFF
CLRF#
3. press 或 or 键 to select store channel number;or direct input the number to store channel
4. press to store and confirm to exit .the other operation can not to exit .
▲ ▼
Note::when you use keypad to Channel programming setting,from 1 channel to 80 channel are not revised or cannel .store
channel can select programming from 81 channel to 199 channels.
■Set High/Low Power
1。Under standby mode,press to enter function option,then press to switch high/low power.
2. When it's low power, LCD screen show“L”。
七、Menu Operation
Press then press 9 radio enter menu function. Press
or to select menu options;
▼
Press to enter, then press 或 to adjust,finally press to confirm and back to last
option.
▲ ▼
▲
press to exit,back to last option.
Menu Details As Below:
1、
1、Set Ringing
Off:turn off ringing
On:turn on ringing
2、Set Background Light
On:background light keep on
Off:background light keep off
Auto:background light on when you press any key; it's off without any operation within 10 seconds.
3、Set Timeout
You can select:OFF、30、60、90、120、150、180、210、240、270(s).
4、Set Different Frequency
You can directly input 5 digital numbers of different frequency:(00.000M~99.995M)(It can only be set
under full frequency mode).
5、Turn On/Off Group
On:turn on group
Off:turn off group
There are total 199 channel in this radio, divided in 10 groups. There are respectively 20 channels
in first 9 groups, while 19 channels for lsat group.
The channels 1-20 are in group A, channels 21-40 are in group B, followings are according, and channels
181-199 are in group J.(It is available only under CH mode.)
6、Show Current Battery Voltage
Show current battery voltage when switching the power on, back to standby mode after 10 seconds.
7、Set VOX Level
Set VOX from leves1~9
Page 13

*#F
8、Set VOX Timeout
You can select:0.3S、0.5S、1.0S、1.5S、2.0S、3.0S
9、Save Time
On:turn on save power function
Off:turn off save power function
10、Set Scan Mode
CO:carrier wave scan
TO:time scan
SE:single time scan; it stops when any signal is scanned
11、Set Scan Add/Delete
ADD:add
DEL:delete
12、Set Key lock Mode
Menu:lock keypad by hand
Auto:auto lock keypad
13、Set Boot-strap Display
OFF:not show any content
DC:show current voltage
MSG:show greeting words
14、Set Boot-strap Information
You can set information with 5 letters. press 或 to select letters,press to switch to
▲
▼
next letter,press to cancel front letter ,press to confirm and exit.
15、Set Channel Name
On:show channel name under CH mode
Off:no show channel name under CH mode
16、Set MONI Mode under CH mode
When DW is ON,you can MONI signal under FM radio mode; while receiving signal, it will exit FM radio mode to enter
receiving mode. After speaking, it will auto return to FM radio mode.
When DW is OFF, it will stay in FM radio mode.
■Keypad Input
Under CH mode,input 1-3 digital numbers to switch current frequency. After inputting, radio will switch
to your input channel if it has stored frequency, unless it returns to original channel.
Eg: CH 1:(input 001) CH 98:(input 098 or 98) CH 123:(input 123)
2. In FR model (full frequency ),standby ,put the number to change the frequency ar present 。After input
6 digits,if the input frequency can be used ,the radio can swith to the frequency you input .If out of
range ,it is come back to frequency of working 。
Page 14
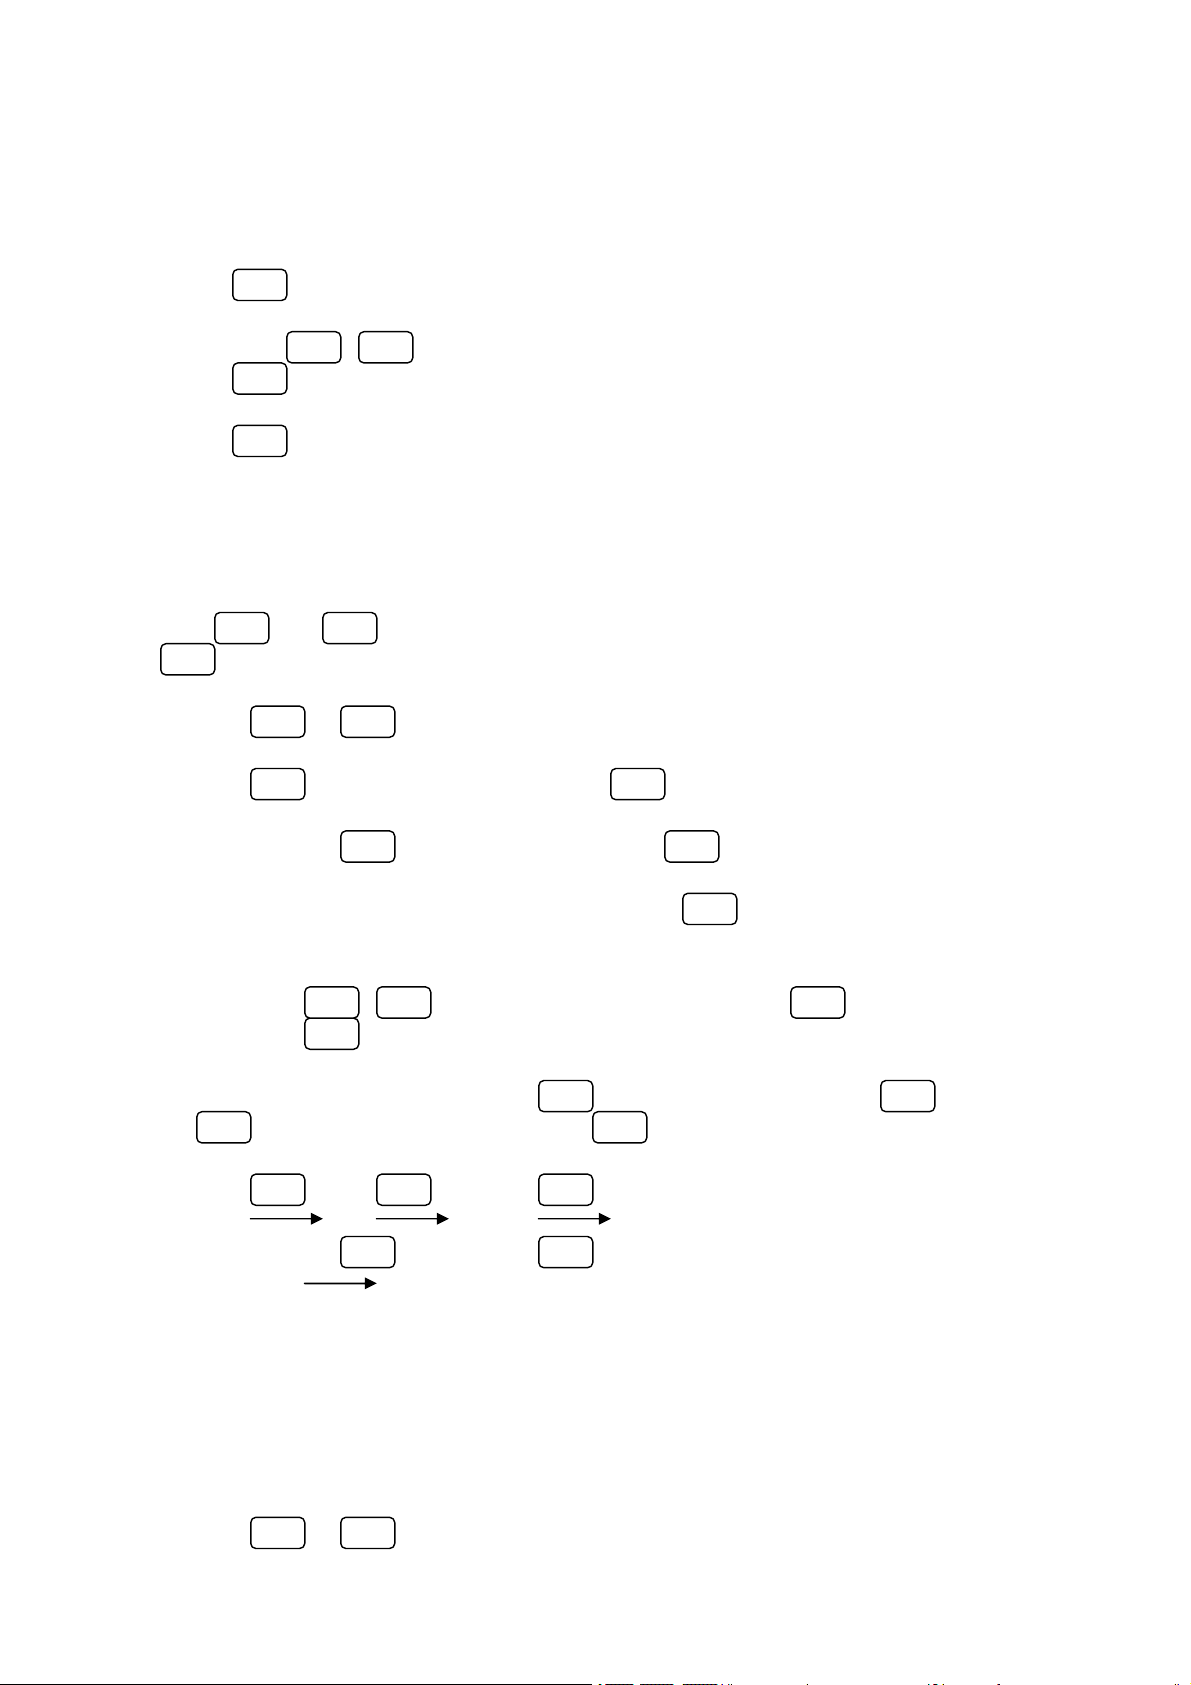
FF*F#****
MONIF*FF##*F
F
八、Delete Channel
1. Your radio must be under "Channel + Frequency" mode.
2.Press to switch power on. Now LCD screen shows“DEL“,and channel number flickers。
3.You can press to select your needed channel,or directly input your needed channel number
then press now LCD screen shows“YES".
4.Finally press to confirm. After deleting first channel, radio switches to next channel stored with
frequency, ready for next deleting.
Note :only cancel the new added channel ,1-80 channel can not canceled.
▲ ▼
九、set self channel programming
■set memory channel
Press and and turn on to enter self programming model 。The LCD show “SELF”。And press
The LCD show “CH-1”。
1. Select channel number
You can press or to select the channel number ,the range from 81-199 channel .
2. Set RX frequency
▲ ▼
Press to set RX frequency 。You can press to select whether set self channel’RX frequency .If you
want to cancel self channel .
You can press then the LCD show “------“,then press to confirm ,then this channel information can be
canceled 。The radio can enter the operation next channel 。
You can select keypad ,input 6 digits to input the frequency you need ,then press to confirm and enter RX programming
operation 。
▲
You can press to increase or decrease step to select frequency at present ,press 。 To select the step (12.5K、
25K、)。 press to confirm and enter RX programming operation .
3. Set RX signaling
When you enter this model ,the LCD show(3 OFF)。press to select kind of the signaling 。Then press 或 or
To select group of what to want to RX,then press to confirmed
▼
OFF 67.0 d 023N OFF
When select is DQT,you can press to change direction .
DCS N DCS I
4. Set TX frequency
The set method of setting is the same to “Set RX frequency”
5. SET TX SIGNALING
The set method of setting is the same to “Set RX Signaling ”
6. Set busy lock
Press or to select OFF or (WAVE )or( CALL), after selecting to press
▲ ▼
▲
▲ ▼
Page 15
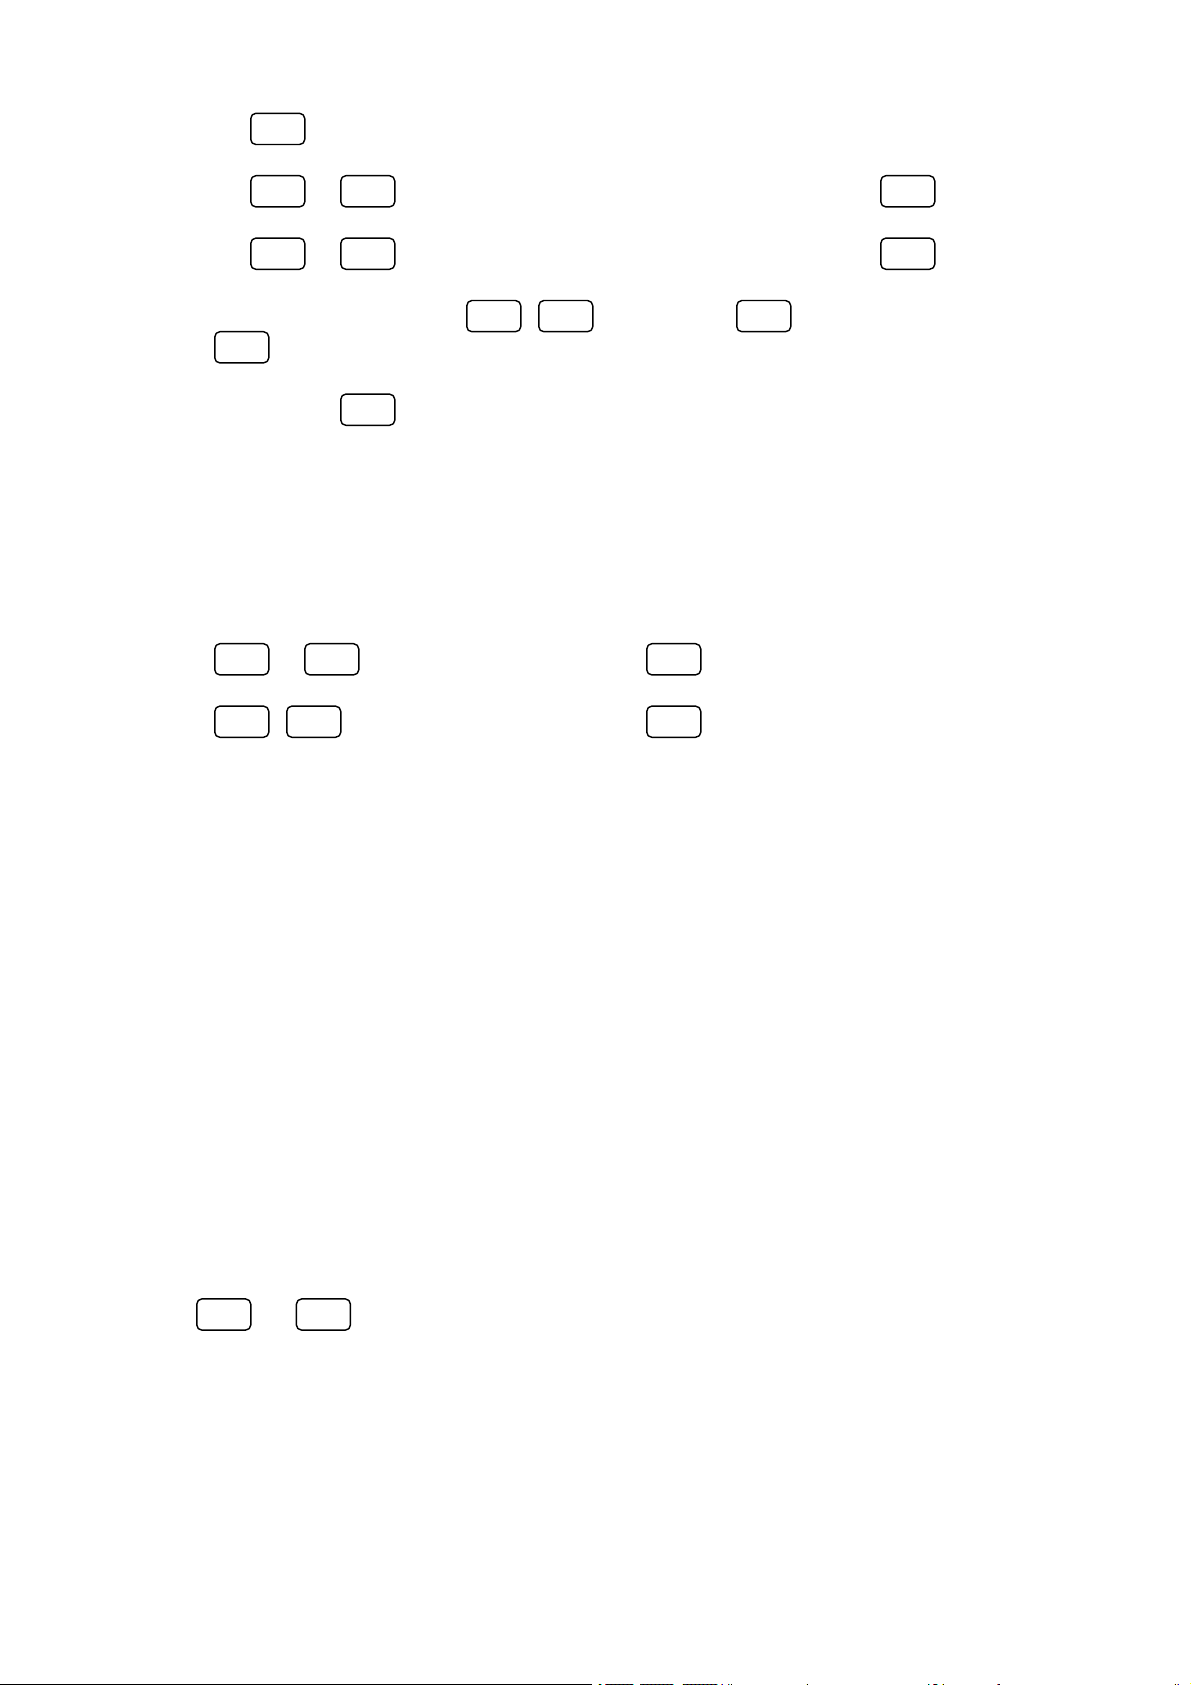
F*#FFFMONIFFFMONI
To confirm 。
7. Set add scan /cancel scan function。
Press or to select Add ) or( Del),after selecting press to confirm.
8. Set low/high power
Press or select High or Low function ,after selecting press to confirm.
9. Set channel name
You can set 5 character name of channel。press 按 or to select character press to swith next character ,press 按
programming next channel .
▲ ▼
▲ ▼
▲ ▼
Cancel front character ,press
To confirm. This self programming is finis h ,the radio operation enter next
十 、Special Function
Clear All Channels Away
press and to switch power on,LCD screen shows“CLEAR ,then press , and it shows “VFO” ,
press to set “VFO”or“FULL”。Finally press to cancel letter 。
▲ ▼
After clearing away, radio is back to standby mode
When set “VFO”,clear full frequency information ,and all the information will save.
When set “FULL”,clear full frequency information and added information (1-80 channels can not canceled)
After clearing function ,the radio machine setting and full frequency is enclosed :
Frequency deviation:10。000M different frequency:OFF step :5KHz
signaling:no Operation mode :VFO frequency power save:on
tone :on scan model :time scan Time timer :180second
VOX:off SQL level :3 backlight :auto Reverse frequency :off
key lock :manual group operation:off VOX gain :4 level VOX delay time :0.3second
■PC Program Function:
1、 Connect the radio's SP/MIC jack and computer COM(communication port) with the program cable,then switch
power on.
2、 Turn on the computer,and launch the program software. Read the parameters of the radio, then select your
needed frequency and other function parameters. Afterwards, click related button to write to radio, or directly
press the relative signal on the toolbar to start writing. After the progress is finished, LCD screen displays
"Succeed". Now all parameters are written in the radio.
■Wired Copy Function
Press and to switch power on to enter wired copy state, LCD screen displays“CLonE”,then press MONI to
begin copying. While copying,the copied radio will show“CL OU”,copying radio show“CL IN”.When successfully copied,
the copied radio shows“End”, then auto back to the original state of wired copy state;when copy failed, the copied radio shows
“Err”, then auto back to the original state of wired copy. It takes about 15 seconds to finish copying.
▼
Page 16
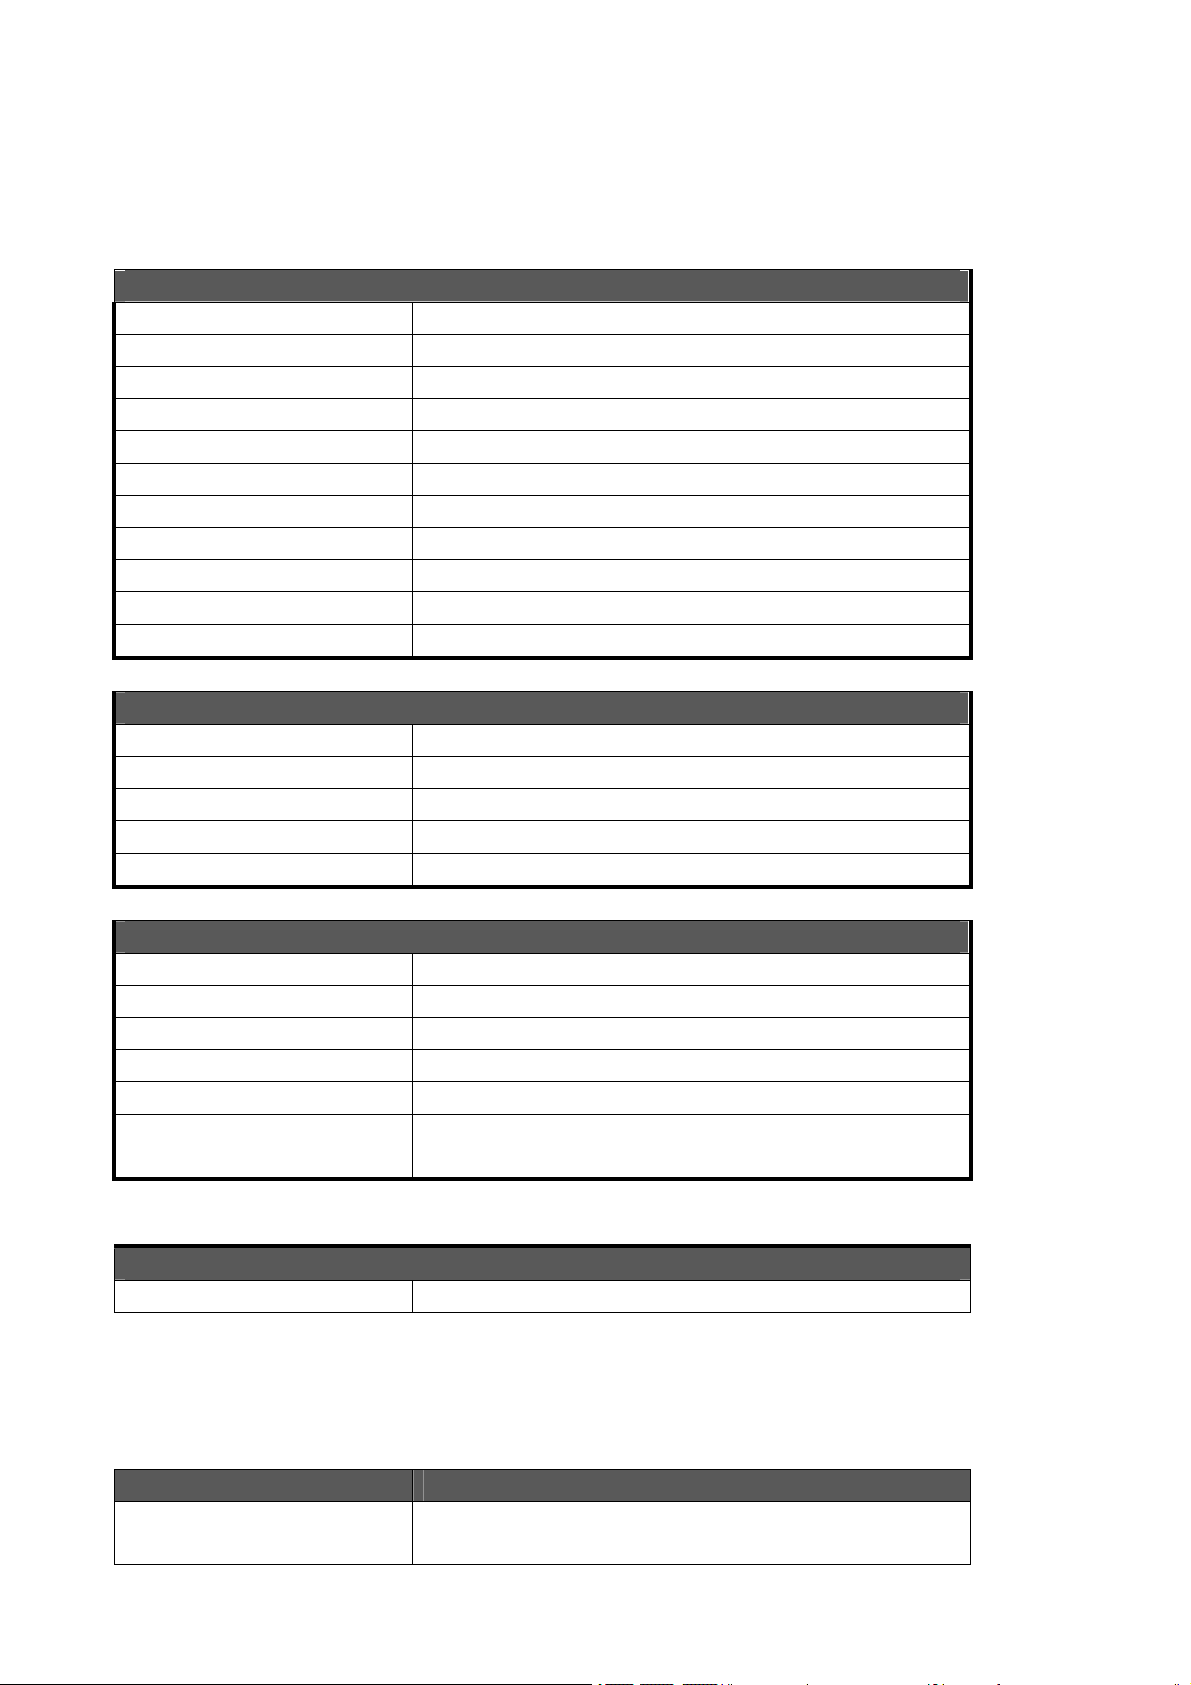
十一、Specification
General Part
Frequency Range
Operating Temperature
Frequency Combination Phase lock frequency synthesize
Frequency Stability
Memory Channel 199 channels
Rated Voltage DC7.4V Li-ion battery
Antenna Rubber antenna
Antenna Impedance
Operation Mode Simplex of co-frequency or alien frequency
Dimension
Weight About 220g(including battery pack)
102mm ×62mm ×35mm(without antenna )
Transmitter
Output Power
Modulate Mode Frequency Modulate
Maximum Frequency Deviation
Spurious Radiation <-60dB
Transmit Current
High Power:5W Low Power:1W
High Power≤1600mA Low Power≤800mA
VHF:245-245.9875MHz
-10℃to +60℃
±2.5ppm
50Ω
≤2.5KHz
Receiver
Sensitivity <0.20uV(12dB SINAD)
Squelch Sensitivity <0.20uV
IntermodulationAntijamming 50dB
Audio Power
Receive Current
Squelch System Standby
Current
≥400mW
≤120mA
15mA
FM Radio
Frequency Range FM:76 MHz ~107.95MHz
Common Error and Solution
Error Solution
Could not turn on the power
Battery power is too low, please recharge the battery.
Bad connect of battery, remove the battery and installing it one time.
Page 17
The power of battery easily get lost. The battery life is ended, please use new battery.
Could not talk with other member
in the same team
Appears voices from other
non-member
No FM Radio Function
Distant is out of the effect communicate range.
Apply with different frequency/ DCS/ CTCSS, please reset these
parameter.
Please change your CTCSS signal, or change all the transceivers
signal in your team.
Check whether in the Radio Mode, if not please shift setting in the
Radio Mode.
Check your local Radio station signal, or signal problem.
We endeavor to achieve the manual's accuracy and completeness, but sorry that not liable for
any possible emission and printing errors.
Specifications are subject to change without notice.
 Loading...