

Page 1
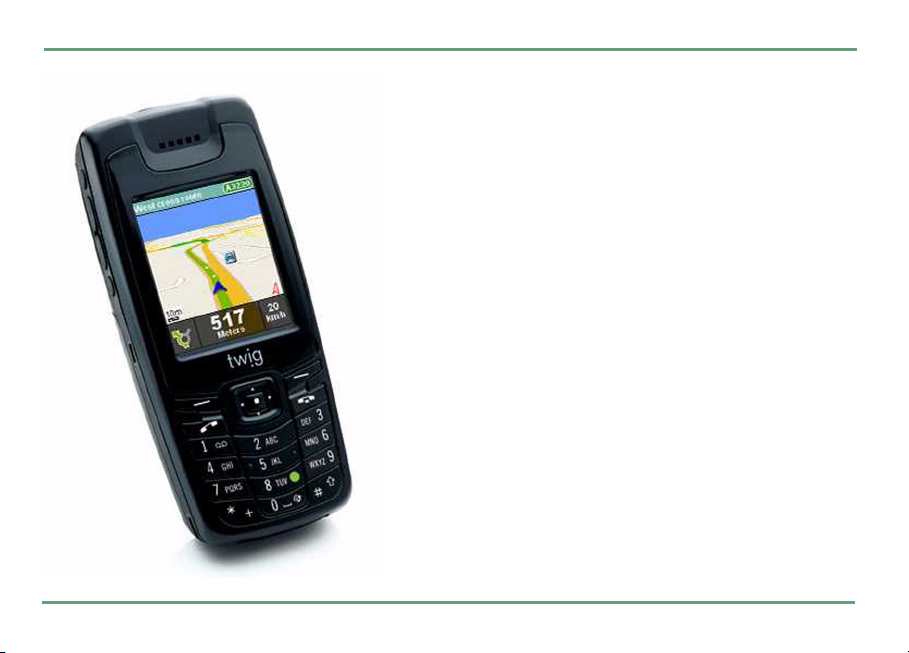
WIG NAVIGATION
User’s Manual
Publication number YZ3001-01
All rights reseved. © Benefon Oyj, 2006
Page 2
• The device is designed for use on the E-GSM900/ DCS 1800/ PCS 1900 MHZ Tri Band networks. You can use the
• The device also includes integrated high-performance 12-channel GPS receiver. The unique combination of GPS and
• Information in this User´s manual is subject to change without notice. BENEFON reserves the right to change or
• For more information, details and descriptions, including phone configuration and assortment of chargers and
• BENEFON warrants its products to be free of defects in material or workmanship when leaving the factory. A war-
• Hereby, Benefon Oyj declares that this mobile phone, type TGP80EG, is in compliance with the essential require-
• Benefon and Twig are registered trademarks of Benefon Oyj.
• Bluetooth is a registered trademark of Bluetooth SIG, Inc.
•eZiText
device in all countries where the GSM network operators have a roaming contract with your network operator.
GSM equipment in this device enables innovative new features, such as personal navigation, route planning, as well
as support and user interface for secondary emergency aid feature. In order to function properly, some of these
features may require third-party services. BENEFON is not responsible for such services, their existence, functionality or compatibility with BENEFON products.
improve their products and to make changes in the content without obligation to notify any person or organization of
such changes or improvements. BENEFON is not responsible for any loss of data, income or any consequential
damage whatsoever caused. Some of the features described in this guide may be optional and intended to be purchased separately. For details, please contact your dealer.
accessories, please visit the web site: www.benefon.com, or contact your BENEFON dealer.
ranty certificate with the date of purchase is enclosed in the delivery. For details, see the warranty certificate.
ments and other relevant provisions of Directive 1999/5/EC.
®
is a registered trademark of ZI Corporation.
Manufacturer: Benefon Oyj.
P.O.Box 84, 24101, Salo, Finland
website: www.benefon.com
Copyright
©
2006. All rights reserved.
0700
Correct disposal of this product: The
mobile phone should not be disposed
with household or other commercial
wastes. Remove the battery from the
phone and dispose it according to local
battery recycling laws.
2
Page 3

CONTENTS
STARTING TWIG NAVIGATION . . . . . . . . . . . . . . .5
NAVIGATION DISPLAY . . . . . . . . . . . . . . . . . . . . . .6
2D, 3D and Road Safety . . . . . . . . . . . . . . . . . .6
Map Interfaces . . . . . . . . . . . . . . . . . . . . . . . . .7
ROUTING INTERFACE . . . . . . . . . . . . . . . . . 7
CURRENT POSITION INTERFACE . . . . . . . 7
Map Symbols. . . . . . . . . . . . . . . . . . . . . . . . . . .8
TWIG KEY . . . . . . . . . . . . . . . . . . . . . . . . . . . . . . . .9
Route to base point . . . . . . . . . . . . . . . . . . . . .9
Set base point . . . . . . . . . . . . . . . . . . . . . . . . . .9
Route to home. . . . . . . . . . . . . . . . . . . . . . . . 10
TWIG NAVIGATION . . . . . . . . . . . . . . . . . . . . . . . 11
Twig Finder . . . . . . . . . . . . . . . . . . . . . . . . . . 11
SENDING FINDER REQUEST . . . . . . . . . . 12
FINDER RESPONSE. . . . . . . . . . . . . . . . . . 12
RECEIVING FINDER REQUEST . . . . . . . . . 13
CONTENTS
Route To . . . . . . . . . . . . . . . . . . . . . . . . . . . . . 13
ENTERING AN ADDRESS . . . . . . . . . . . . . 14
SELECTING A POI . . . . . . . . . . . . . . . . . . . 15
HISTORY LIST. . . . . . . . . . . . . . . . . . . . . . . 15
FAVOURITES . . . . . . . . . . . . . . . . . . . . . . . 15
Route Plan . . . . . . . . . . . . . . . . . . . . . . . . . . . 15
Favourites . . . . . . . . . . . . . . . . . . . . . . . . . . . 17
Find Nearest . . . . . . . . . . . . . . . . . . . . . . . . . 18
Browse Map . . . . . . . . . . . . . . . . . . . . . . . . . . 18
ROAD INFORMATION . . . . . . . . . . . . . . . . 19
POI INFORMATION . . . . . . . . . . . . . . . . . . 19
Change View . . . . . . . . . . . . . . . . . . . . . . . . . 20
Directions. . . . . . . . . . . . . . . . . . . . . . . . . . . . 20
Send Map . . . . . . . . . . . . . . . . . . . . . . . . . . . . 21
MMS . . . . . . . . . . . . . . . . . . . . . . . . . . . . . . 21
E-MAIL . . . . . . . . . . . . . . . . . . . . . . . . . . . . 21
Map colours . . . . . . . . . . . . . . . . . . . . . . . . . . 21
Settings . . . . . . . . . . . . . . . . . . . . . . . . . . . . . 21
ROUTING . . . . . . . . . . . . . . . . . . . . . . . . . . 21
VOICE GUIDANCE . . . . . . . . . . . . . . . . . . . 22
3
Page 4

CONTENTS
DISPLAY . . . . . . . . . . . . . . . . . . . . . . . . . . . 23
Backlight. . . . . . . . . . . . . . . . . . . . . . 23
Soft key area . . . . . . . . . . . . . . . . . . 23
Colour scheme. . . . . . . . . . . . . . . . . 24
ROUTE QUICK KEYS . . . . . . . . . . . . . . . . . 24
POI DISPLAY . . . . . . . . . . . . . . . . . . . . . . . 24
AUTO ZOOM . . . . . . . . . . . . . . . . . . . . . . . . 25
DEFAULT VIEW . . . . . . . . . . . . . . . . . . . . . 25
DEFAULT COUNTRY . . . . . . . . . . . . . . . . . 25
CALCULATION DISPLAY. . . . . . . . . . . . . . 25
GPS MONITOR . . . . . . . . . . . . . . . . . . . . . . 26
DEMO MODE . . . . . . . . . . . . . . . . . . . . . . . 26
HOME . . . . . . . . . . . . . . . . . . . . . . . . . . . . . 26
VERSION. . . . . . . . . . . . . . . . . . . . . . . . . . . 26
Clear Route. . . . . . . . . . . . . . . . . . . . . . . . . . . 26
4
Page 5

STARTING TWIG NAVIGATION
You can start Twig Navigation application by using the Twig Key
down the key until Twig Navigation starts. You
can also start the application by entering the
main menu from the home screen by pressing
and selecting the Twig Navigation icon.
Twig Navigation is also assigned as a default
shortcut for the right function key
modify shortcut keys in the phone settings.
Once you have started Twig Navigation you will
be placed into your preferred map view, centered
on your current position. By default this is a 2D
map display the first time you start Twig Navigation.
When Twig Navigation is started, you will see two
bars at the top of the screen. The bar at the very
top is the GPS bar, indicating the status of your
GPS connection. As sattelites are found, several
dots will appear on the right hand side of the GPS
bar. This indicates the quality of the signal from
the sattelites.
There is also a bar beneith this which displays the
name of the road you are currently on. Both of
8. Simply press and hold
"
-. You can
STARTING TWIG NAVIGATION
these bars are always displayed in 2D and 3D map
modes.
For phone keys and other outer parts, as well as
display areas, see
manual page 10
phone settings,
manual page 49
introducing the phone on twig user
. For information about general
see settings on twig discovery user’s
.
5
Page 6

NAVIGATION DISPLAY
NAVIGATION DISPLAY
2D, 3D and Road Safety
There are three types of navigation views in Twig
Navigation, a 2D, a 3D and Road Safety display.
To change between these views simply use the
left and right arrow keys
through the different display types.
The 2D and the 3D views are map displays, showing you information as a 2- or 3- dimensional
map. The displayed information depends on
whether the Twig Navigation is currently routing
to a destination or not. See
.
page 7
It’s possible to zoom in and out of the 2D and 3D
maps to see more or less details. Use the up and
down arrow keys
zoom level can be seen at the bottom left of the
view. The available levels are 20km, 10km, 3km,
800m, 400m, 100m, 50m, 20m, 10m and 5m.
You can choose between the 2D or the 3D view as
your default display in
.
page 21
6
n. This will scroll you
map interfaces on
n for zooming. The current
Settings
. See
settings on
The third view is the Road Safety display. This
shows a large icon displaying your next direction,
a textural instruction and a distance to the next
turn. As you make the correct turns in your
route, the Road Safety view changes to show you
your next instruction. This view can only be seen
when you have a route planned.
You can use the function keys while in any of the
views. Pressing the left function key
will show you routing options. From here you can
quickly input or select a destination where you
would like to be routed to. See
Press the middle key
menu. From here you can create routing plans,
access your favourite destinations, change settings, etc. See
You can also access your predefined quick routing
keys. To use a quick route hold down the appropriate alphanumeric key (
.
Press
Exit
" to access Twig Navigation
twig navigation on page 11
0 to 7 and 9).
to exit Twig Navigation.
.
Route To
route to on page 13
.
.
Page 7

Map Interfaces
There are two different types of interface within
2D and 3D displays in Twig Navigation. The first
is when a destination has been defined and you
are being routed; the second is when no destination is defined and your current position is simply
being updated.
ROUTING INTERFACE
Current road name
Map area
Current road number
Point of
interest
icon
NAVIGATION DISPLAY
CURRENT POSITION INTERFACE
Current road name
Symbol
showing if
your own
position is
not valid
Point of interest icon
Current road number
Pointer to
north
Zoom level
Next turn
icon
Distance to next turn
Pointer to
north
ETA/ Current speed
Your current position
Zoom level
Map area
ETA/ Current speed
Your current position
7
Page 8
NAVIGATION DISPLAY
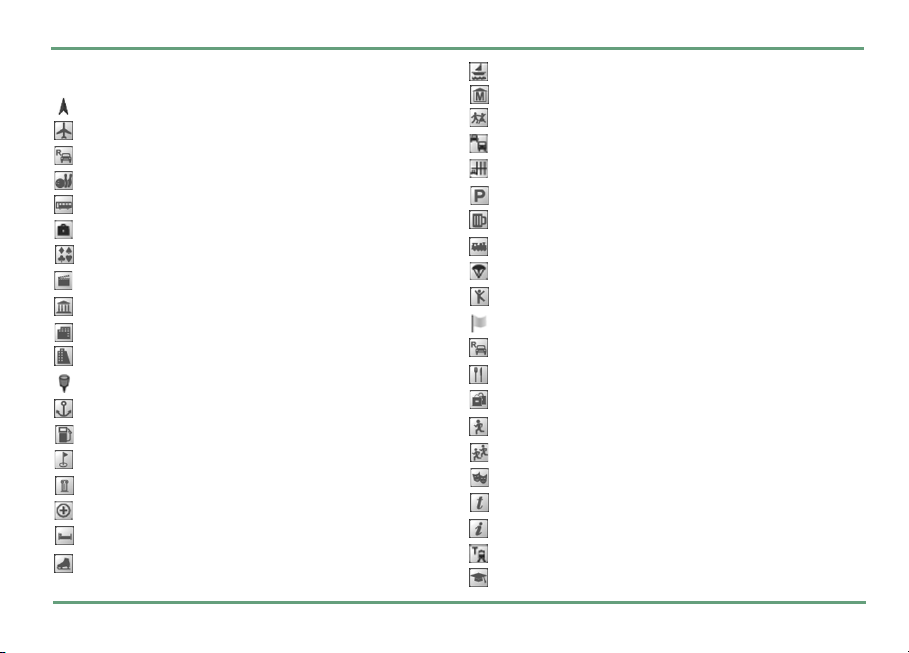
Map Symbols
Current position symbol.
Airport symbol.
Car dealer symbol.
Bowling symbol.
Bus station symbol.
Business symbol.
Casino symbol.
Cinema symbol.
City hall symbol.
Community centre symbol.
Conference centre symbol.
Favourite position symbol.
Ferry terminal symbol.
Fuel station symbol.
Golf course symbol.
Historic monument symbol.
Hospital symbol.
Hotel symbol.
Ice skating symbol.
8
Marina symbol
Museum symbol.
Nightlife symbol.
Park & Ride symbol.
Parking lot symbol.
Car parking symbol.
Public house wine bar symbol.
Train station symbol.
Sport airport symbol.
Recreation symbol.
Route start flag symbol.
Car rental symbol.
Restaurant symbol.
Shopping centre symbol.
Sports centre symbol.
Sports complex symbol.
Theatre symbol.
Tourist attraction symbol.
Tourist information symbol.
Transit station symbol
University symbol.
Page 9

TWI G KEY
The Twig Key 8 is a special key within Twig
Navigation which has two functions. You can not
assign a quick route to the Twig Key as you can
with the other alphanumeric keys.
The first function of the Twig Key allows you to
quickly store your current position. Hold down the
Twig Key
and your current position will be stored for retrieval later. This is especially useful when parking your car in an unknown town. You can quickly
store the position of your car for retrieval when
you need to get back.
The second function of the Twig Key allows you to
quickly route back to a previously stored position
or to your defined home location. You can also set
a new base point for routing. To access these options simply press the Twig Key
8 for a second whilst in the 2D display
8 once.
Route to base point
With the
late a route to a previously stored base point. Select the option from the Twig Key options list and
press
Route to base point
".
option you can calcu-
TWIG KEY
Once the routing is started, you will be taken back
to the map display using the view you had currenctly selected. A progress bar is displayed
showing the status of the calculation and the
route will be displayed on the map after the calculation is finished.
Set base point
If you have not defined a base point, you can do
it by selecting
tions list and pressing
store your current position as a base point (as
when you held the Twig Key down).
If you are currently routing to a previously set
base point, the application will prompt you for
whether the ongoing routing should be cancelled
and the current location stored as a new base
point. If you select
your previously selected map view with the current route cleared and current location saved as
a base point. You need to select
to restart route calculation.
Selecting
lected map view without clearing the current
route. No new base point is set.
Set base point
from the Twig Key op-
". Selecting the option will
Yes
, you will be directed to
Route to base point
No
returns back to your previously se-
9
Page 10

TWIG KEY
Route to home
To calculate your route home, select
option
from the Twig Key options list by highlighting the option and pressing
defined a home location for this calculation, see
home on page 26
After selecting the option you will be directed to
the map view you had previously selected. A
progress bar is displayed showing the status of
the calculation. The route will be displayed on the
map after the calculation is finished.
If a route was defined previously and you are currently being routed, the application will prompt
you for whether you wish to cancel the current
routing and calculate a new one. Select
proceed with the new calculation or
with the currently ongoing one.
10
.
". You need to have
Route to home
Yes
No
to
to keep
Page 11

TWIG NAVIGATION
The Twig Navigation system allows you to define
or select destinations as well as manage favourite
locations and modify settings. Press
any of the diplay views to enter the Twig Navigation menu list.
•
Twig Finder
•
Route To
tion.
•
Route Plan
destinations.
•
Favourites
locations.
•
Find Nearest
Interest.
•
Browse Map
• Change View...
map display.
•
Directions
your planned destination
•Send Map...
display to one of your friends via MMS.
• Map colours
: You can send location requests.
: You can define or select a destina-
: You can plan a route to multiple
: You can manage your favourite
: You can find the nearest Point of
: You can browse the map.
: You can change your current
: You can view a list of directions to
: You can send your current map
: You can change the colour of your
" while in
TWIG NAVIGATION
current map display.
•
Settings
: You can modify Twig Navigation set-
tings.
•
Clear Route
you have entered a destination.
Use up and down arrow keys n to highlight the
desired option and choose it by pressing the middle key
: You can clear the current route, if
".
Twig Finder
Twig Finder allows you to find the location of a
contact such as your friends or family, display
their position on the 2D map display and optionally route to their current position. Twig Finder
also allows you to send your curent position to
another twig and send your current position as an
address in an SMS message.
The Twig Finder application works using request
and response messages. You first request the position of a contact and, if they allow you to see
where they are, they send a response back.
11
Page 12

TWIG NAVIGATION
SENDING FINDER REQUEST
After selecting
the the following list:
•
Find contact
to a specific contact in your address book.
•
Send my position
a specific contact in your address book.
•
Send my address
position as an address in an SMS message to
a contact in your address book.
•
History
responses you have received from your
friends and family in the past.
After selecting Find Contact, Send my position or
Send my address you can enter the phone number of the contact you would like to find or send
your position to. Alternativly you can press
Add
to select a contact from your address book.
After selecting
that are stored in your phone with at least one
mobile phone number are displayed.
Using the up and down arrow keys
lect the contact. After selecting the contact, press
the middle button
their current position. Note that if there are sev-
12
Twig Finder
: You can send a location request
: You can send your position to
: You can manage the location
you will be presented
: You can send your current
.
.
Add
a selection list of contacts
n you can se-
" to send a request to them for
eral numbers stored for a contact, you need to select also a number before sending your request.
After the request is sent you will be returned to
the view from where you entered the Twig Navigation menu. To send other position requests, return back Twig Navigation menu by pressing
and selecting
Twig Finder
.
"
FINDER RESPONSE
Should the contact you selected respond to your
Twig Finder request, then your Twig will prompt
you that the a location update is received and ask
you whether you would like to see the location on
map.
Pressing the right function key
the response and remove it from the phone’s
memory. You will be taken back to your previous
view. Pressing the left function key
take you to the 2D map display, centered on the
contacts position and add the contacts position to
your Twig Finder history.
You can zoom the view in and out by using the up
and down arrow keys
contact’s position by selecting
confirming it by pressing
tions, see
route to on page 13
-
No
will dismiss
.
Yes
will
n. Start to route to the
.
Route
.
Yes
. For routing op-
.
and
Page 13

If you want to see details for the Twig Finder response, enter Twig Finder option by pressing
and select
clude:
Speed/ Heading/ Battery level
turn back to the map view.
Name of the street the
contact is currently on
Symbol
showing if
your own position is not
valid
Actual position of the
contact
Zoom
level
Details
. The available information in-
Name/ Time stamp/ Coordinates/ Accuracy
. Press .
Number of the
street the contact
is currently on
Map area
The road the contact is currently on
Date and time of the current location
Ok
to re-
Current
speed of
the contact
Current
heading of
the contact
"
TWIG NAVIGATION
RECEIVING FINDER REQUEST
When you are receiving a Twig Finder request
your Twig will prompt you for approval with the
/
following:
<contact name>: Send location update?
.
By pressing the left function key
current position will be sent to the contact. By
pressing the right function key
will ignore the request and removes it from the
phone’s memory.
Note that you can receive and approve location
requests also when the Twig Navigation application is not running.
-
Yes
No
, your Twig
Route To
After selecting
tem will require you to enter or select a destination. The destination can be from one of the
following options:
•
Address
destination.
•
History
destinations to be routed to.
Route To
: You can enter the address of your
: You can select one of your previous 20
, the Twig Navigation sys-
your
13
Page 14

TWIG NAVIGATION
•
Favourites
rites as your destination.
• Contacts:
: You can select one of your favou-
You can select one of your contacts
addresses as your destination
•
POI
: You can search for and select a Point of
Interest (such as a hotel or fuel station) as
your destination.
•
Home
: You can select your defined home
address as your destination.
Use up and down arrow keys n to highlight the
desired option and choose it by pressing the middle button
your previously selected view.
If you are already being routed to a previously
defined destination, selecting
the application to ask you whether you wish to
cancel the ongoing routing and proceed with routing to the new destination. Select
start routing to the new destination or
continue with the ongoing one.
". Or choose - to return back to
Route To
will cause
.
Yes
-
No
to
to
ENTERING AN ADDRESS
Entering an address into the Twig Navigation system is very simple. First you must select the
14
country where you would like to be navigated to
(if you only have one country installed, then you
wont be able to change this option). If you want
to be navigated to the center of a city, then simply enter the city name, if you know the name of
the road you want to navigate to, then enter the
city and road name or, if you know the full address of where you want to navigate to, then enter the city, road name and house number. You
can also bypass the city, road name and house
number entry boxes and simply enter a postcode
if you have it.
After entering the above details press the left
function key
you entered be incorrect you will be alerted. If
this happens simply press the left function key
.
screen.
if the house number is not found, you can select
to calculate your route to the start of the road by
pressing
for it.
Once you have selected the correct city and road
name you will be taken to your preferred map display and routing will begin.
.
Route
. Should any of the details
Ok
again to return to the address input
.
Yes
when the application prompts
Page 15

SELECTING A POI
The Twig Navigation system comes loaded with
thousands of Points of Interest (POI). These
range from Hotels to Fuel Stations to Airports.
When selecting a POI, you must first select the
country and the type of POI you would like.
You will first be presented with two options when
you can select the country the POI is in and a POI
type. You can scroll through this list by using
left/right and select the required type of POI by
pressing
After selecting the required POI type you will be
presented with a list of POI’s within your selected
POI type. You can now type the specific name of
the POI you would like to find. As you type the
POI list will get shorter and you will be able to select the POI want by using
select.
Scroll the POI list with up and down arrow keys
.
Route
.
n up/down and " to
n to highlight the POI you wish to route to.
Press
.
Route
to your preferred map display and routing will begin.
to start routing. You will be taken
n
TWIG NAVIGATION
HISTORY LIST
History list is a list of previous 20 destinations
you have selected or defined. Scroll the history
list with the up and down arrow keys
desired destination is highlighted, press
Route
to start routing. You will be directed to your
previously selected view.
n. Once the
.
FAVOURITES
Favourites list is a list of all your stored favourite
destinations. Scroll the favourites list with up and
down arrow keys
wish to route to. Once the desired destination is
highlighted, press
n to select the destination you
.
Route
to start routing.
Route Plan
A
Route Plan
multiple destinations rather than routing to a single destination as in
Route Plan
Selecting this option by using the middle soft key
" will take you to the same screen as defined in
Route To
tion.
allows you to specify and route to
you will have one option
Route To
where you can select your first destina-
. When entering
Add Destination
15
.
Page 16

TWIG NAVIGATION
•
Address
: You can enter the address of your
destination. Select the option by pressing
define the address as in
.
Add
to add it into the route plan.
•History
• Favourites
• Contacts: You can select one of your contacts
•
•
16
: You can select your destination from
one of your previous 10 destinations. Press
to select the option and scroll the history list
as in
Route To.
destination to the route plan.
rites as your destination. Press " to select the
option
and scroll the favourites list as in
. Press
To
route plan.
addresses from your address book as your
destination. Press
would like to be routed to.
POI
: You can search for and select a Point of
Interest (such as a hotel or fuel station) as
your destination. Press
and scroll the list of POI’s as in
"
Select
plan.
Home
: Press "
address as your destination.
Press
: You can select one of your favou-
" Select
to add the destination to the
" to select the contact you
to add the desired POI to the route
to select your defined home
Route To
" Select
and press
to add the desired
" to select the option
Route To.
",
"
Route
Press
After selecting a destination you will be returned
to the route plan screen where you will see
Destination
can now keep repeating this process by selecting
Add Destination
tinations you would like to visit in your route plan.
Once you have entered all the destinations in
your route plan, you can press the left function
key
to your previously used view and routing will begin.
The Twig Navigation system will route you to the
destinations you entered in the order you entered
them (from the top of the route plan list to the
bottom). However, whilst on the route plan list it
is possible for you to modify the order of the destinations as well as remove them from the route
plan. To do this use the arrow keys
the destination you would like to move or delete
and press the middle button
menu with the following options:
•
•
and the destination you selected. You
until you have built up a list of des-
.
Route
to begin routing. This will take you
". This will display a
Move Up
the list.
Move Down
down in the list.
: Move the selected destination up in
: Move the selected destination
n to select
Add
Page 17

•
Edit
: Modify the destination information.
•
Delete
: Remove the destination from the route
plan.
Again, use the middle button " to select the op-
tion you would like or use the right function key
-
Back
to go back to the route plan list.
Favourites
A favourite location is somewhere you visit often
like your office or a friend’s house. By creating a
list of favourite locations you can quickly and easily select a destination.
The first time you enter
only one option
by using the middle button
taken to a list of options including
ry
/
POI/ Home/ Current position
enter an address, select a POI, select an item
from your history or select your current position
to set as your new favourite. The options are sim-
Route to
ilar to
If you are entering an address you will be taken
to the new favourite screen, where you can enter
the name of your favourite and the address. However, if you select a POI or an item from your his-
New Favourite
, see
Favourites
route to on page 13
you will see
. Select this option
". You will now be
Address/ Histo-
. From here you can
.
TWIG NAVIGATION
tory then after you select it you will be taken to
the new favourite screen with the address of the
POI or history item automatically filled in. In this
instance, all you need to do is enter a name for
you new favourite item.
Once the details of your new favourite have been
entered, press the left function key
save the favourite. If the name you entered is the
same as a favourite that already exists then you
will be shown an error and returned back to the
new favourite screen with the name field highlighted. The application will also notify you if the
entered address cannot be found.
After you have successfully saved your favourite
you will be returned to the Favourites list and
your new favourite will be added to the list. You
can again add another favourite by selecting
Favourite
Using the arrow keys
rite items in the list. Pressing the middle button
.
n you can select the favou-
" will display a list of options, including
it
/
Route/ Delete
these items simply use the arrow keys
lect the option you would like and press the middle button
a favourite item. To select one of
".
.
Open/ Ed-
n to se-
Save
to
New
17
Page 18

TWIG NAVIGATION
Find Nearest
When selecting
select the country you would like to find the POI
in and the type of POI you would like to find. You
can scroll through these lists by using
right and select the required type of POI by press-
.
ing
After selecting the required POI type the application will display a list of POIs of your selected type
with the nearest POI to your current position being at the top and any further POIs listed benieth.
To view the POI simply use
lect the POI using the middle button
lecting the POI, you will be placed into Browse
map mode with the cursor placed over the selected POIs location.
Find
Find Nearest
.
you will first need to
n left/
n up/down and se-
". After se-
Browse Map
After selecting
the map display in 2D mode. The Browse Map feature of the Twig Navigation system is only available in the 2D map display.
When you enter the map display you will see a red
cursor in the centre of the screen. You can move
the cursor around using the arrow keys
18
Browse Map
you will be placed into
n. Press
the star key
to zoom out a location.
If the cursor is not over a road, POI or asset, then
general Browse map options will be available, including zooming in/out and jumping to location.
Press
desired option by highlighting it and pressing
•
Zoom in
•
Zoom out
•
Jump to..
define a location where you would like the 2D
map display to center on. Select
enter the city and road name for the desired
address. You can optionally enter also house
number and postal code.
To jump to the desired location by it’s longitude and latitude, select
you have entered the required information
press
map display with your entered location in the
center of the screen.
•
Add to favourites
the Twig Navigation system will add the
selected position to your favourites list. The
name of the favourite will default to the name
of the road you selected. You will be able to
+ to zoom in and the hash key §
" to enter the options list and select the
".
: Select to zoom one level in.
: Select to zoom one level out.
: Jump To allows you to select or
Address
to
.
Coordinates
Jump
. You will be taken to the 2D
: By selecting
Add to favourites
. When
Page 19

edit this name by entering the Favourites
menu item. See
favourites on page 17
.
ROAD INFORMATION
If the cursor is over a road, you can press " to
select it and get detailed road information. After
selecting a particular road you will be presented
road information options. In addition to the gen-
Browse Map
eral
following:
•
Route here
Navigation system will calculate a route to the
selected point on the road. You will be taken
to the 2D map display and a progress bar will
be displayed during the calculation. If you are
currently being routed, the application will ask
you whether you wish to cancel the routing
and continue to route to the new destination.
•
Road info
sented with detailed road information about
the selected road, including street name and
number, number of lanes, speed limit, possi
ble one-way driving direction and road tolls. If
any of this information is not available the
corresponding field is not shown in the street
info list.
options, these options include the
: By selecting
: By selecting this option you will pre-
Route here
the Twig
TWIG NAVIGATION
•
Add to favourites
the Twig Navigation system will add the
selected position to your favourites list. The
name of the favourite will default to the name
of the road you selected. You will be able to
edit this name by entering the Favourites
menu item. See
: By selecting
favourites on page 17
Add to favourites
.
POI INFORMATION
If the cursor is over a POI symbol, you can press
" to select it and get detailed information. After
selecting a POI you will be presented POI information options. In addition to the general
Map
options, these options include the following:
•
Route here
Navigation system will calculate a route to the
selected POI.
•
POI Information
will be presented with all the available infor
mation that is associated with the POI, including for example POI name and address, phone
-
and fax numbers and website address. You
can highlight name, street, city or postcode
fields and press
culation. You can also select
options list by using the middle key
: By selecting
: By selecting this option you
.
Route here
Route
to start route cal-
Route
the Twig
from the
".
Browse
-
19
Page 20

TWIG NAVIGATION
If you are currently being routed, the application will ask you whether you wish to cancel
the routing and continue to route to the new
destination.
If a telephone number is available, highlight
the field and press
also start a call by pressing the middle key
and selecting
there is only one phone number available, the
call will start immediately. If there are several
phone numbers stored for the contact, you
need to select one of them to start calling.
If there is an available website address, high-
light the field and select .
your phone’s web browser and direct it to the
POI’s website. The other way to open the
website is to press the middle key
Go to
select
•
Add to favourites
the Twig Navigation system will add the
selected POI to your favourites list. The name
of the favourite will default to the name of the
POI you selected. You will be able to edit this
name by entering the Favourites menu item.
See
20
from the options list.
favourites on page 17
.
Call
to call it. You can
Call
from the options list. If
Go to
: By selecting
Add to favourites
.
to open
" and
Change View
Change View allows you to change your current
view. It does exactly the same as using the left
and right arrow keys
views. See
this option using the middle button
"
have the option to select 2D or 3D. If you are
currently being routed to a destination, you will
also have a 3rd view called ‘Road Safety’.
To select your preferred view simply use the up
and down arrows
using the middle button
navigation display on page 6
n whilst in some of the
. By selecting
" you will
n and select your the view by
".
Directions
Open
Directions
you to your planned destination. You can see an
icon indicating direction, a description of the direction and distance to the next turn. The next
turn to follow is always on top of the list.
If there is no destination defined, the directions
list is empty.
to see a list of directions guiding
Page 21

Send Map
Send map allows you to send an image of the map
containing your current position to a contact. By
selecting
would like to send the map, by MMS or by E-mail.
Use the up and down arrow keys
you would like to send it and press the middle
button
to the Navigation menu.
MMS
By selecting MMS you will be taken to the new
MMS screen. The MMS will automatically have an
image of a 2D map containing your current position on it. From here you can fill in any other information about the MMS such as the contact you
would like to send it to, a subject, etc. See
ing and sending an mms on twig discovery user’s manual
page 33
By selecting E-mail you will be taken to the new
E-mail screen. The E-mail will automatically have
an image of a 2D map containing your current position added as an attachment. From here you can
fill in any other information about the E-mail such
Send Map
you must next choose how you
n to select how
" to select the option. Press - to return
creat-
.
TWIG NAVIGATION
as the recipient, subject, body text, etc. See
ating and sending an e-mail on twig discovery user’s
manual page 34
.
cre-
Map colours
You can change the colour of your map display.
Choose the desired colour from the options list by
using the up and down arrow keys
colour will appear on both the 2D and 3D map displays.
n. The chosen
Settings
In
Settings
the Twig Navigation. Select the desired option
from the settings option list:
ance
zoom/ Default view/ Default country/ Calculation display/ GPS monitor/ Demo mode/ Home.../ Version
ROUTING
Routing settings allow you to change the way the
Twig Navigation system calculates routes to your
entered or selected destinations. After you have
finished modifying the settings you can press the
right function key to go back to the map display.
you can define and modify settings for
Routing/ Voice guid-
/
Display/ Route quick keys/ POI display/ Auto
.
21
Page 22

TWIG NAVIGATION
You can modify the following four options:
•
Auto Re-routing
the Twig Navigation system will automatically
re-route you if you go off course when being
routed to a destination. Use the left and right
arrow keys
On
(default) and
•
Travel Mode
eling. The options here are
Walking
calculating a route, road rules such as one
way streets are ignored and highways are
avoided. In driving mode all the road rules are
always observed when calculating a route. In
cycling mode, road rules are observed and
highways are avoided. Use the left and right
arrow keys
•
Route Type
Navigation system always uses the fastest
route (default) or the shortest route. Calculat
ing using the fastest route will cause the Twig
Navigation system to prefer highways and
higher speed roads. Shortest route will cause
the Twig Navigation system to calculate routes
based on the shortest distance, but this may
include low speed roads. Use the left and right
arrow keys
22
: You can select whether or not
n to change this option between
Off
.
: You can select how you are trav-
and
Cycling
. In walking mode, when
Driving
(default),
n to change this option.
: You can select whether the Twig
n to change this option.
•
Avoid Toll Roads
the Twig Navigation system avoids toll roads
when calculating routes. Use the left and right
arrow keys
Yes
and No (default).
•
Route after destination
or not the Twig Navigation system will con
tinue to route you after you have reached
your destination. Setting this option to yes
will mean twig will reroute you back to your
destination if you pass it, set it to no and twig
will clear the route as soon as you arrive at
your destination. Use the left and right arrow
n to switch this option between
keys
No
(default).
•
Show instruction
the Twig Navigation system will show the next
instruction or use continue instructions. Use
the left and right arrow keys
option between
(default).
: You can select whether or not
n to switch this option between
: You can select whether
: You can select whether or not
n to switch this
Show next
and
Show current
VOICE GUIDANCE
In
Voice Guidance
Twig Navigation system to direct you using voice
prompts. In the settings list you can define
ance
/
Volume level/ Voices
you can define settings for the
.
Yes
-
and
Guid-
Page 23

In
Guidance
use the voice guidance or not. You can switch this
option between on and off using the left and right
arrow keys
Volume level
In
from 1 to 5 bars, which is the loudest level. Use
you can select whether you want to
n.
you can adjust volume from level
n left/right to adjust the volume level.
Voices
settings allow you to select the voice you
would like to use in voice prompts. Initially there
are two voices on your phone, a male and female.
Use the left and right arrow keys
one or the other. To listen a short sample of a
voice, highlight the voice name, press the middle
" and select .
key
To use a particular voice, highlight it and press
the middle key
lowing options:
•
Use
: Selecting this option will use the selected
voice for all voice prompts when you are being
routed to a destination.
•
Play
: Selecting this option will play a sample
of the voice.
Play
". You will then be given the fol-
n to select the
.
TWIG NAVIGATION
DISPLAY
Display settings allow you to adjust your phone
display. The following fields are available in the
settings list:
scheme
.
Backlight/ Soft key area/ Colour
Backlight
Backlight settings allow you to set when you
would like the backlight to come on. Using the left
and right arrow keys
following options:
•
Always On
when using the Twig Navigation system.
•
Automatic
is a command such as an upcoming turn. The
backlight will turn off a few seconds after the
command is given.
: The backlight stays on permanently
: The backlight comes on when there
n you can select one of the
Soft key area
You can define whether you want to see the soft
key area while in 2D, 3D or Directions list view.
Show
or
Hidden
Select
highlighting the option and pressing the middle
".
key
from the selection list by
23
Page 24

TWIG NAVIGATION
Colour scheme
You can select the colour scheme you would like
to use on the map display.
ROUTE QUICK KEYS
Route Quick Keys
tion against the alphanumeric keys (except the
Twig Key
quick key whilst in map display will calculate a
route to the location associated with the key and
begin routing you there.
To set a destination to a key simply use the up
and down arrows
like to assign a location to and press
Then set the desired destination for that key. The
destination assignment options include:
•
Address
location. Key in the address information and
press
•
History
your previous 10 destinations. Press the mid
dle key " to select the desired destination.
•
Favourites
rites as the location. Press the middle key "
to select the desired location.
24
settings allow you to set a loca-
8). Pressing and holding a route
n to select the key you would
.
Assign
: You can enter the address of the
.
Assign
to confirm the assignment.
: You can select a location from one of
: You can select one of your favou-
•
Contacts
your contacts as the location. Press the mid
dle key " to select the desired location.
•
POI
Interest (such as a hotel or fuel station) as
the location. Press the middle key
the POI.
•
Home
address as the location. Press the middle key
: You can select the address of one of
: You can search for and select a Point of
" to select
: You can select your defined home
" to confirm the assignment.
You can browse the quick destination list by using
the up and down arrows
destination assigned to a highlighted key, you can
enter quick destination options by pressing
.
These options include:
•
Assign
: Select to enter the destination assign-
ment introduced above.
•
Remove
: Select to remove the quick destina-
tion.
POI DISPLAY
-
Having all the POI icons displayed on the map at
once can be very confusing and uses up a lot of
space on the map. Because of this from within
this option you can choose the POI icons you
n. If there is already a
-
".
Page 25

would like to see on the map. Simply select the
POI type you would like to show or hide using the
up and down arrows
ton
" to switch the icon on and off.
n and use the middle but-
AUTO ZOOM
The faster you travel the more of the road ahead
you need to see. When in 2D or 3D map mode,
auto zoom will automatically zoom out when you
go over certain speeds so you can see more of
whats ahead. You can switch auto zoom on and
off from within this setting.
DEFAULT VIEW
Default view settings allow you to change your
default map view. The default view is the view
that is displayed when you start the Twig Navigation system. Using the left and right arrow keys
n you can change between 2D and 3D map dis-
play. Press
" to select the desired view.
DEFAULT COUNTRY
If you have several countries installed on your
twig, you will need to select a country each time
you want to plan a route, find a POI, etc. The De-
TWIG NAVIGATION
fault Country setting allows you to define the
country that is automatically selected every time
you go into Route To, Find POI, etc. From within
the Default country setting, use the up and down
arrows
n to select the county you would like to
use as your default and use the middle button
to select it.
"
CALCULATION DISPLAY
From within the calculation display settings you
can select the calculations you would like to see
when you are being routed to a destination. You
can select from the following calculations:
•
ETA
: Display the estimated time you will
arrive at your destination.
•
Distance
tion.
•
Time
get to your destination
•
Speed
Use the up and down arrows n to select the cal-
culations you would like to display and use the
middle button
: Display the distance to your destina-
: Display the estimated time it will take to
: Display your current speed
" to display or hide them.
25
Page 26

TWIG NAVIGATION
GPS MONITOR
Selecting this menu item starts the GPS Monitor
application. From within here you can see the
status of the sattelite fixes you have and the relative strength in signal.
DEMO MODE
In Demo mode you can define an origin and destination, perform a route calculation and see a
demo of the route before actually taking the route
for yourself. Select the origin and destination options to input your start and end points and then
.
Route
select
default map view where you can see the route
demoed to you.
. You will then be taken to your
HOME
Home settings allow you to set the address of
your home location. This will allow you to quickly
select and navigate back to your defined home location from the Twig Key
See
twig key on page 9
You can select
pressing the middle key
26
Set Home
8 and
and
route to on page 13
from the options list by
Route to
". Define your home lo-
menu.
.
cation by keying in your city, road name, house
number and postcode. Press
your settings.
To delete your home settings select
the home options list. Confirm the deletion by
pressing
.
Yes
.
.
Save
Clear
to save
from
VERSION
Selecting
version of the Twig Navigation system that you
are currently using.
Version
displays you information of the
Clear Route
If you are currently being routed, selecting
route
will remove the current route information
and cancel the routing.
Clear
 Loading...