

Page 1

Gas & Wood Fired Outdoor Pizza Oven
16
Page 2
•
he parts which have been sealed by the manufa
Page 3
•
The parts which have been sealed by the manufacturer should not be adjusted by the user
•
When the appliance is using LPG & LPG cylinder should be used
•
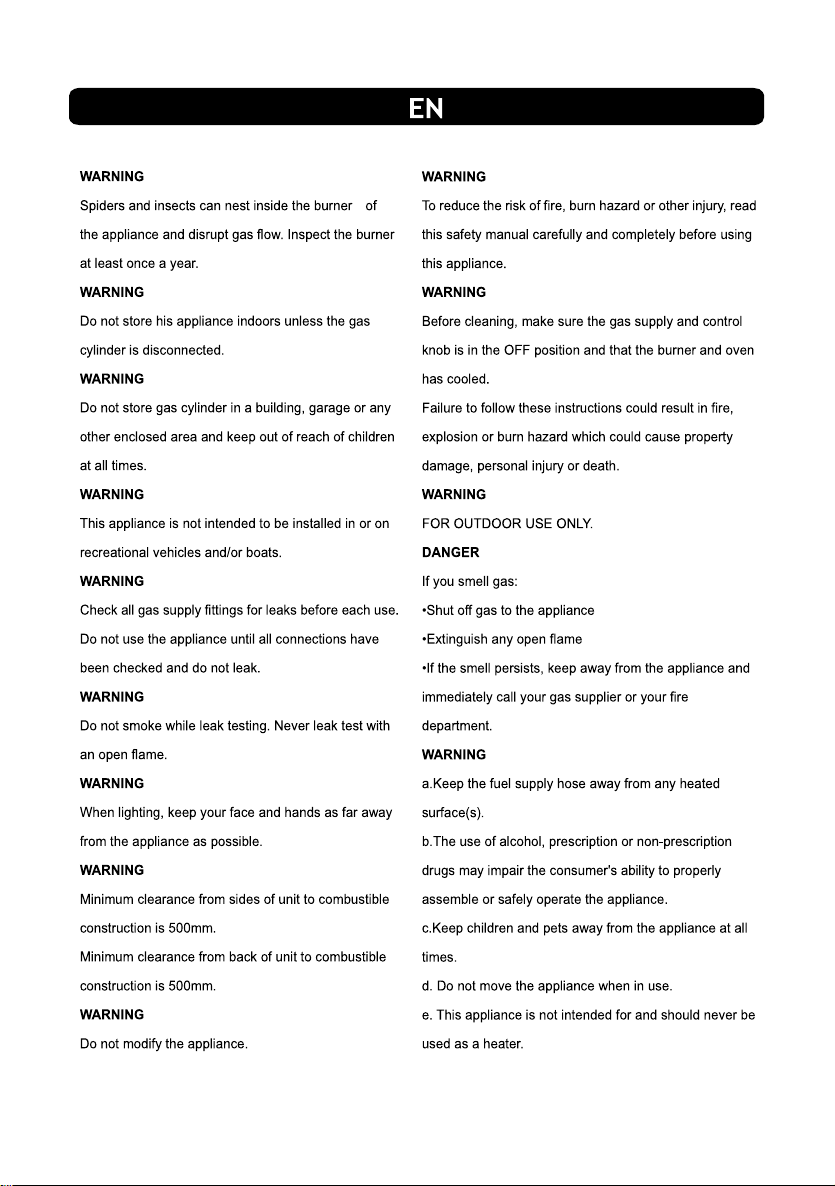
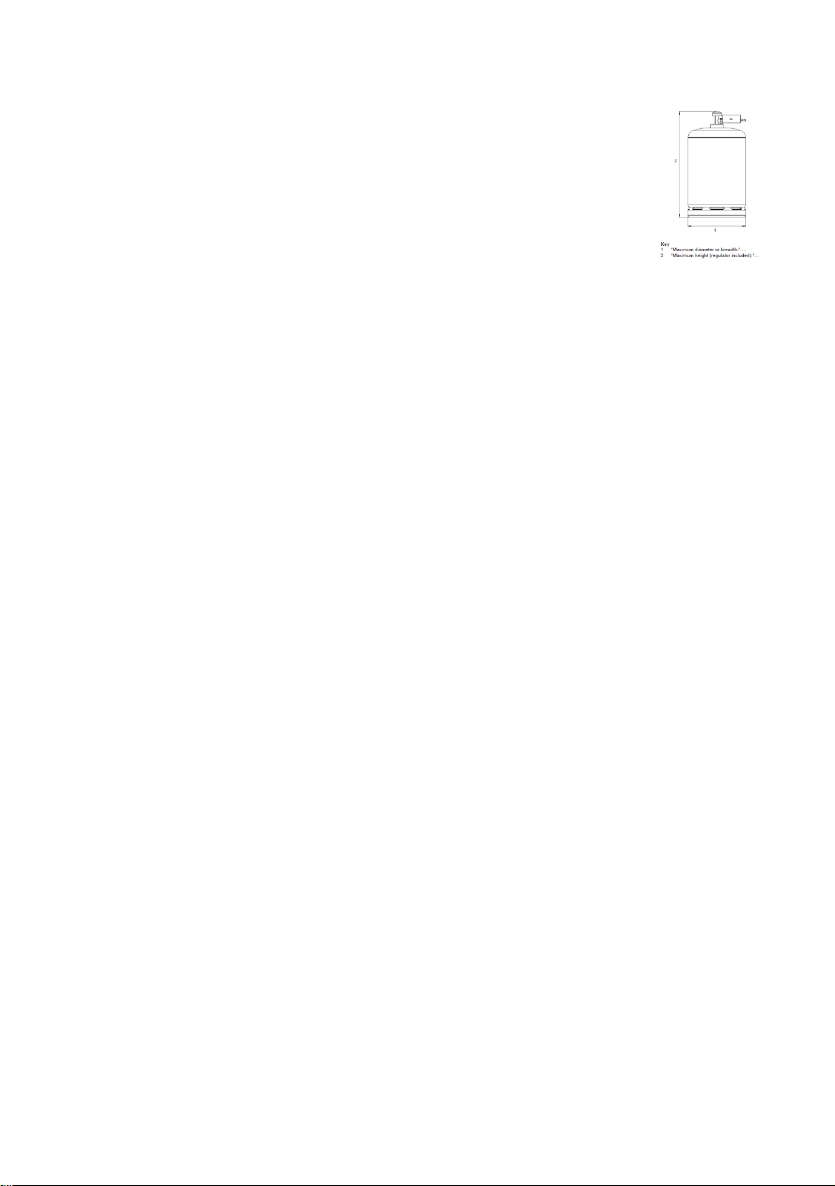
The LPG cylinder size: max diameter-390mm, max height-455mm.
•
The minimum distances between the appliance and adjacent walls is 0.5m
•
The hose for the appliance should not exceed 1.5m
•
The gas supply tubing or hose shall comply with the national requirements in
•
Force and shall be periodically examined and replaced as
•
The hose should comply with the standard EN16436. The regulator should comply with the standard
EN16129.
•
The necessity of changing the flexible tube when the national conditions require it, and depending on its
validity.
•
Check and suitably clean the inside of the oven before it is lit in order to avoid the emission of fire from the oils
that have accumulated
•
The burner outlets should be checked for obstruction during previous cooking.
•
The burner outlets should be checked for obstruction and cleaned regularly with a soft wire brush.
•
It is necessary to avoid obstruction and to allow for a good combustion.
•
The position of the connection flexible tube so as to ensure that it is not subjected to twisting.
during previous cooking.
necessary.
SAFETY PRACTICES TO AVOID INJURY
When properly cared for, your oven will provide safe, reliable service for many years. However, extreme care must
be used as the oven
When using this oven basic practices must be followed, including but not limited to following:
•
Do not repair or replace any part of the oven unless specifically recommended in this manual. All other service
should be referred to a
•
Children should not be left alone or unattended in an area where the oven is being used. Do not allow
children to sit, stand or play
•
Never let clothing or other flammables come in contact with or too close to any burner or hot
surface until it has cooled. The fabric
•
For personal safety, wear proper apparel. Loose fittings garments or sleeves should never be worn
while using the oven. Some
cooking.
•
Do not heat unopened food containers as a buildup of pressure may cause the containers to burst. When
lighting the burner, always
•
When using the oven, do not touch the outer shell, stone baking board or immediate surroundings as these
produces intense heat that can increase the risk of accidents.
qualified technician.
around the oven at any time.
could ignite, causing serious personal injury.
synthetic fabrics are highly flammable and should not be worn while
pay close attention to what you are doing.
Page 4
areas become extremely
•
Do not use the oven to cook extremely fatty meats or other products which increase flare-up.
•
Keep the area around the oven free of combustibles, including liquids, garbage, and steam, such as gasoline
or charcoal lighter fluid.
•
Never use the oven in extremely windy conditions.
•
The temperature under the oven is high. Do not place the oven on a table with flammable table cloths,
plastic or any other
•
The recommendation of the use of protective gloves when handling particularly hot
components.
hot and could cause burns.
Do not obstruct the flow of combustion and ventilation air.
inflammable materials.
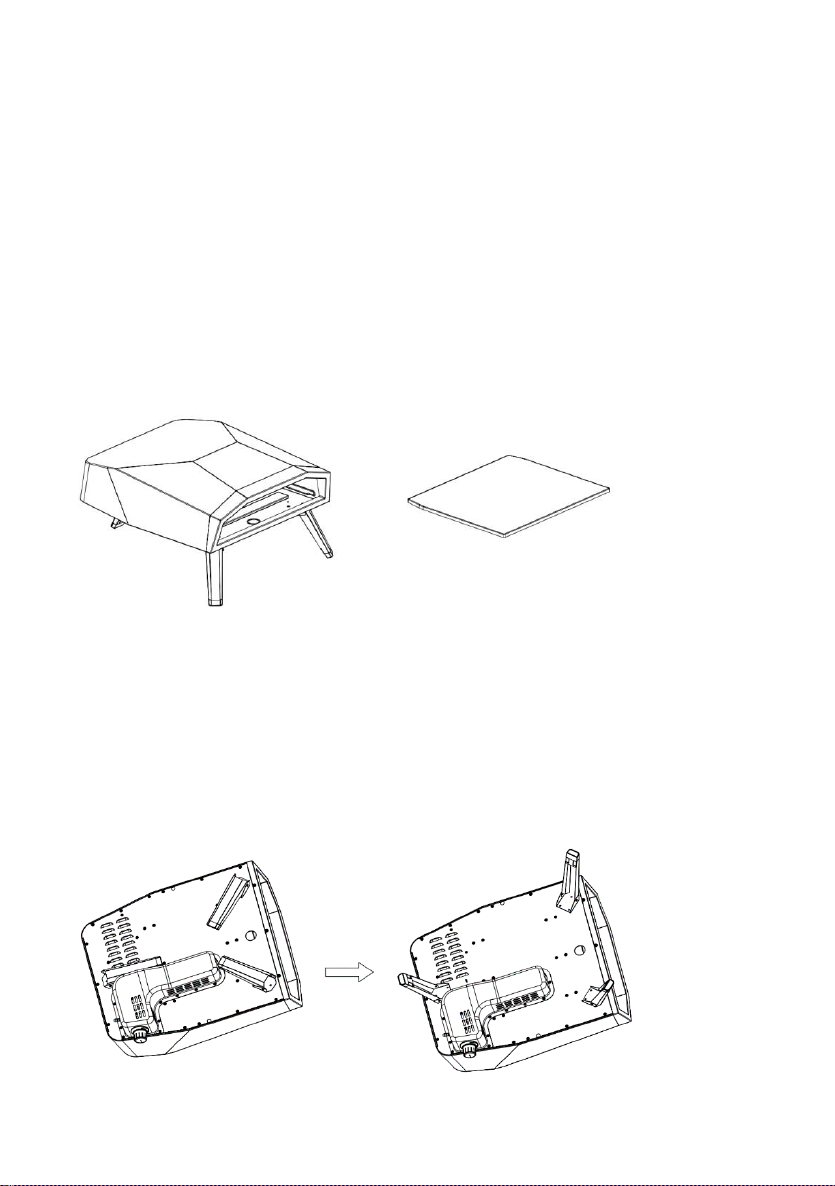
DEVICE OVERVIEW AND INDIVIDUAL PARTS
1. PIZZA OVEN
2. PIZZA STONE
ASSEMBLY
Before assembly, make sure all parts are present. If any part is missing or damaged, do not attempt to assemble the appliance.
Contact
customer service for replacement parts.
1.
Unfold legs
Install Rotary handle
Page 5
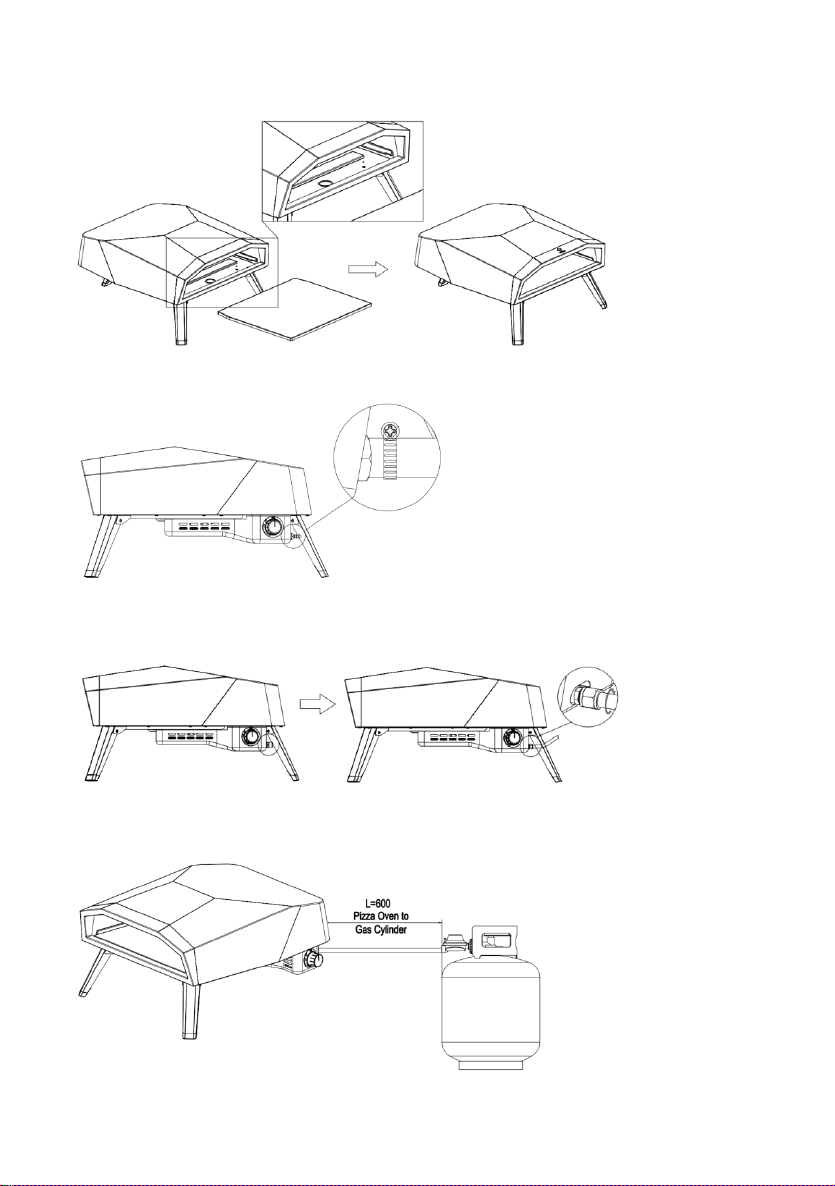
2. Insert the round pizza stone on the rotating plate in the oven.
3.Connect the gas hose to the P160
OR
4. The minimum distance between the equipment and the cylinder is 0.6 m
Page 6
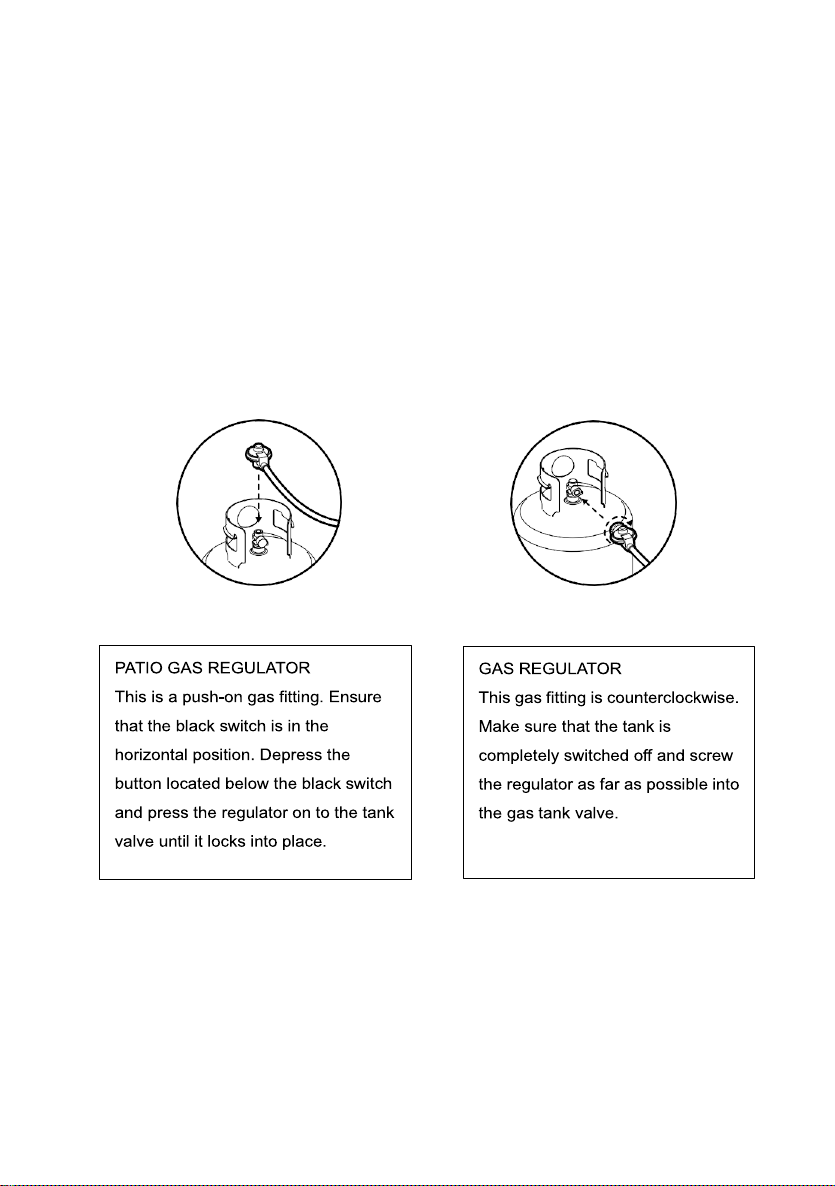
WARNING
•Please always keep the gas bottle in upright position.
•The size for 20 lbs LP gas cylinder is 390mm in diameter and 455mm tall
•If the appliance is not in use, the gas must be turned off at the supply cylinder.
•The cylinder used must include a collar to protect the cylinder valve.
•The minimum distance for the appliance and the 20lb gas tank is 600mm apart.
•when changing the gas cylinder which shall be carried out away from any source of ignition
•The absolute necessity of not obstructing the ventilation openings of the cylinder compartment
Page 7

CONNECTING THE LIQUID PROPANE GAS CYLINDER
1.To connect the liquid propane gas cylinder:
2.The cylinder valve should be in OFF position.
3.Make sure the burner valve is in OFF position.
4.Inspect the valve connections, port and regulator assembly. Remove debris and inspect the
hose for damage.
5.When connecting the regulator assembly to the valve, use your hand to tighten the nut
clockwise until it stops. Use of a wrench could damage the quick coupling nut and result in a
hazardous situation.
6.Open the cylinder valve fully by turning the valve counterclockwise.
7.Before lighting the oven, use a soap and water solution to check all connections for leaks.
8.If a leak is found, turn the cylinder valve OF, and do not use the oven until local liquid propane
dealer can make repairs.
DISCONNECTING THE LIQUID PROPANE GAS CYLINDER
1.Turn the oven burner valve OFF and make sure the oven is cool.
2.Turn the liquid propane cylinder valve OFF by turning clockwise until it stops.
3.Detach the regulator assembly from the cylinder valve by turning the quick coupling nut
counterclockwise.
4.Place dust cap for cylinder valve outlet whenever the cylinder is not in use.
LEAK TESTING
GENERAL
Although the gas connections of the appliance are leak tested prior packing and shipment, a complete test must be performed at
the
installation site.
Before each use, check all the gas connections for leak testing using the procedure listed below. If the smell of gas is detected at any
time,
you should immediately stop using and check the entire system for leaks.
Page 8
BEFORE TESTING
Make sure all packing material has been removed from the appliance.
Make a solution of one part liquid detergent and one part water. You will need a spray bottle, brush or rag to apply the
solution to the
fittings.
TO TEST
1.
2.
3.
4.
5.
6.
Turn the burner valve
Turn the liquid propane cylinder valve on counterclockwise to open the valve.
OFF
Apply the soap solution to all gas fittings. Soap bubbles would appear where a leak is present.
If a leak is present, immediately turn the gas supply
Turn the gas back
ON
and recheck.
Should the gas continue to leak from any of the fittings, turn the gas supply
service.
OFF
and tighten leaky fittings.
OFF
and contact customer
OPERATING INSTRUCTIONS
USING THE OVEN
Each burner is rated at 7.5KW. To begin:
1.Make sure the oven has been leak tested and properly placed.
2.Remove any remaining packing material.
3.Light the burner using the LIGHTING INSTRUCTIONS below
LIGHTING INSTRUCTION TO LIGHT THE BURNER
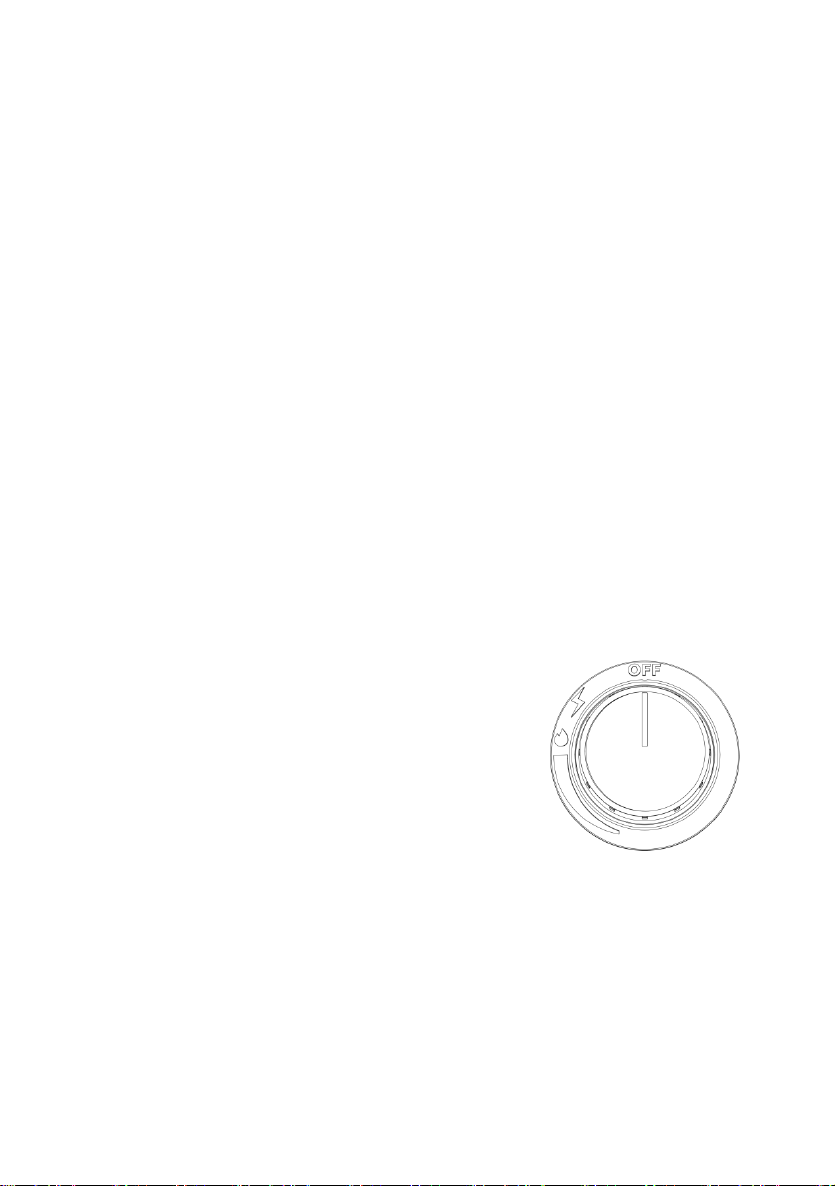
1.Make sure the control knob is in OFF position, and then turn the liquid propane cylinder valve
ON by slowly turning counterclockwise.
2.Push in and slowly turn the control knob anticlockwise until you hear a click and the burner
ignites.
3.If burner doesn't light, turn the knob OFF, wait 5 minutes and repeat the lighting.
Page 9
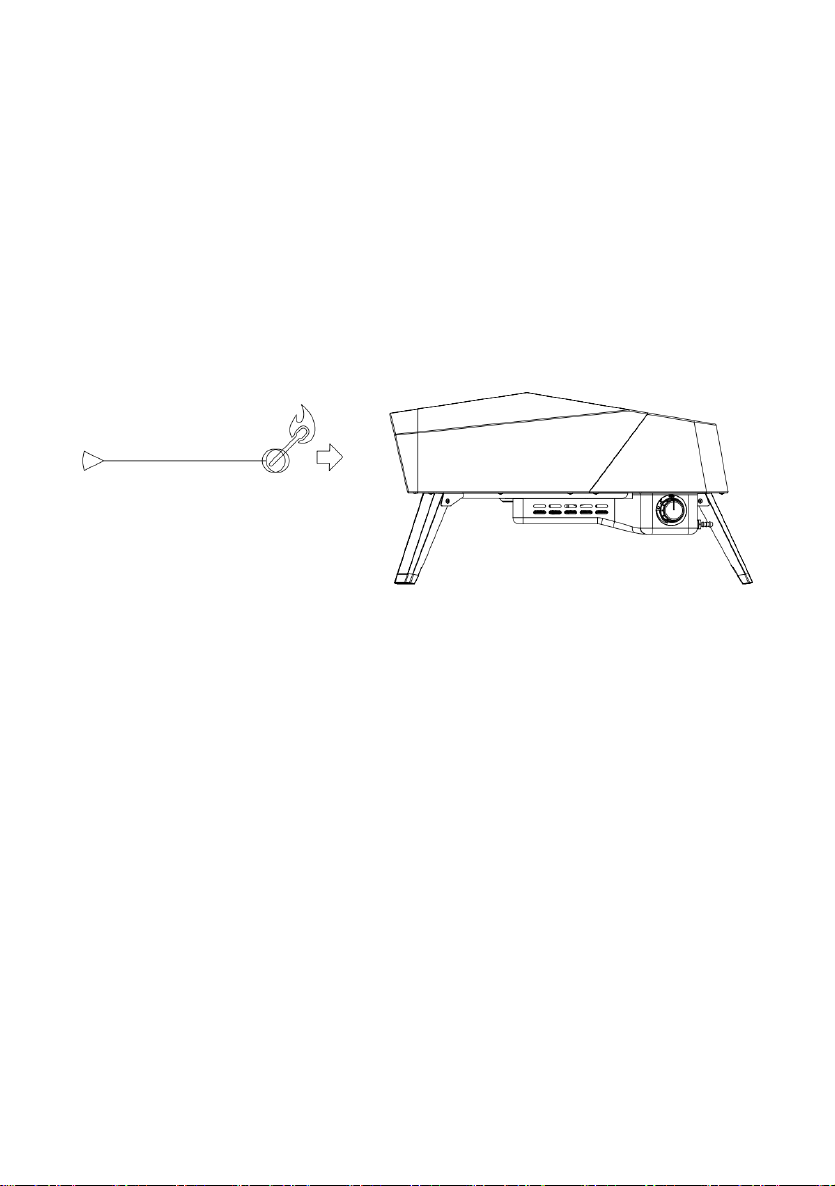
TO LIGHT WITH A MATCH
1.If burner will not light after several attempts using the control knob, he burner may be lit with a
match.
2.If you have already attempted to light the burner using the control knob, wait 5 minutes for any
gas to dissipate.
3 Insert a match into the matchstick holder, ignite the match and insert through the oven opening
to the burner.
4.Push and turn the control knob to HI slowly, the burner should ignite immediately.
5.If the burner does not light within seconds, turn the control knob OFF and wait 5 minutes and try
again.
CARE AND MAINTENANCE
Store P160F out of direct sunlight and indoors where possible and when storing for extended
periods of time. P160F should not be exposed to harsh weather conditions such as snow, heavy
rain and strong winds.
Wait for P160F to cool completely before moving
The outer shell of P160F may fade over time and through use. This will not affect performance.
STONE BAKING BOARD
1.DO NOT use the stone over an open flame
2.Avoid extreme temperature change to the stone. DO NOT place frozen foods on a hot stone
3.The stone is fragile and can break if bumped or dropped
4.The stone is very hot during use and stays hot for a long time after use.
5.DO NOT cool the stone with water when the stone is hot
6.After cleaning the stone with water, please dry the stone before use. This can be done in a
conventional oven at 60°C (140°F) for 2 hours.
Page 10
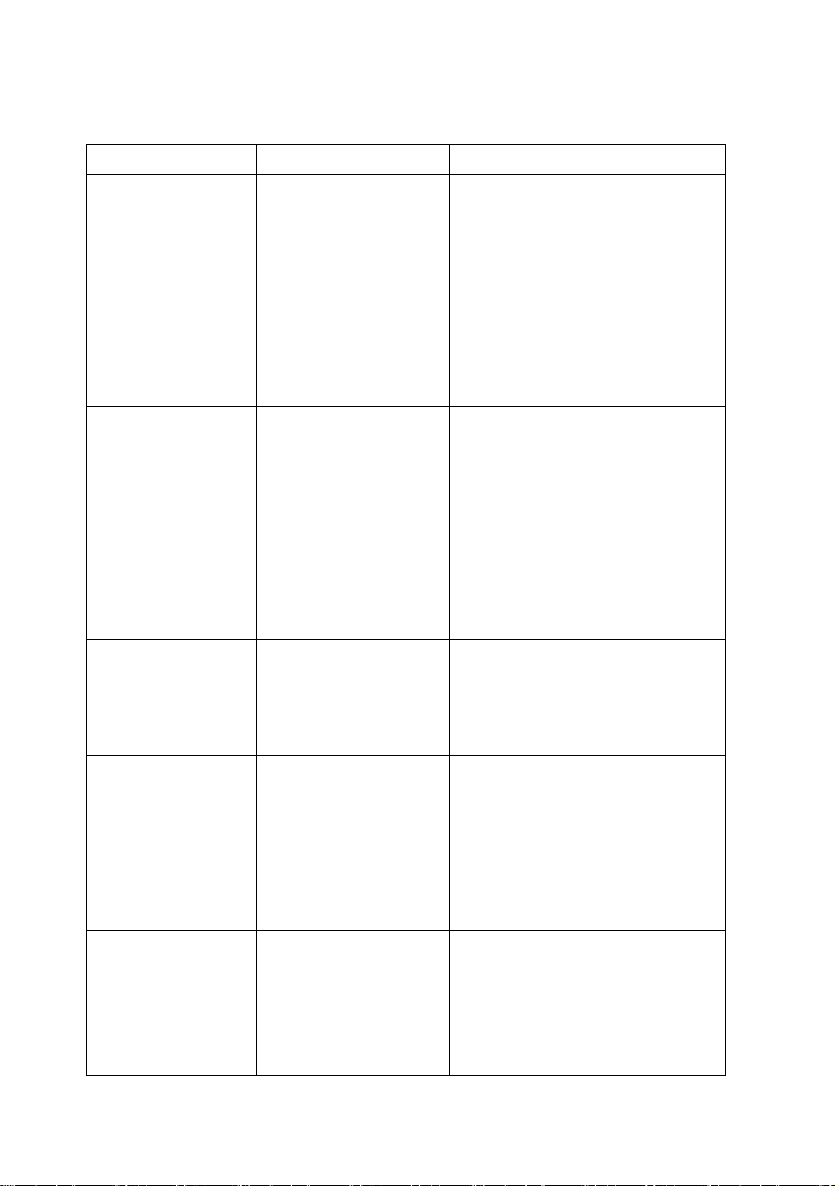
Problem
Possible Cause
Prevention/Solution
Burner will not light
1. No gas flow
2. Coupling nut and
regulator not fully
connected
3. Obstruction of gas flow
4. Disengagement of
burner to valve
5. Incorrect assembly
1. Check to see if propane tank is empty
2. Turn the coupling nut about one-half
to three quarters additional turn until
solid stop. Tighten by hand only – do
not use tools
3. Clear burner tube
4. Reengage burner and valve
5. Check steps in assembly instructions
Sudden drop in gas
flow or low flame
1. Out of gas
1. Check for gas in propane tank
2. Turn off gas control knob, wait 30
seconds and light oven. If flames are
still low, turn off gas control knob
and propane tank valve. Disconnect
regulator. Reconnect regulator and
leak test. Turn on propane tank valve,
wait 30 seconds and then light oven.
Flames blow out
1. High or gusting winds
2. Low on propane gas
1. Turn front of oven away from wind
2. Refill propane tank
3. Refer to Sudden drop in gas flow
above
Flare-up
1. Grease buildup
2. Excessive fat in meat
3. Excessive cooking
temperature
4. Excess flour on the
cooking surface
1. Clean oven
2. Trim fats from meat before cooking
3. Adjust (lower) temperature accordingly
4. Brush remnant flour from cooking
surface
5. Flip stone
Flashback (fire in
burner tube, roaring
sound from burner)
1. Burner and/or burner
tubes are
blocked
2. Pressure drops during
ignition
1. Turn gas control knob off. Clean
burner
and/or burner tubes.
2. Turn off oven, ensure the tank valve is
fully open (if applicable) and relight.
TROUBLESHOOTING
Page 11

 Loading...