

Page 1
Operations Manual
Items: H3760-H, H3760-S,
And H3760-HS
Introduction:
Thank you for choosing Benchmark Scient ific as your
source for laboratory equipment.
This manual covers the Benchmark Scient ific line of
digital Hotplates, St irrers, and Hotplate/St irrers (Series
H3760). In order to ensure the safe operat ion of the
equipment enclosed, please read this manual in its
entirety before use.
Specifications
Speed:
200-1500 rpm*
Temperature:
Ambient +5°C – 380°C*
Platform Dimensions:
6.5” x 6.5”
Electrical:
Power Consumption:
115V/60Hz or 230V/60Hz
Max: 500W
Warranty:
2 Years
*Speed and Temperature control may not be available
on all models
Installation:
Prior to installation, please ensure all components are included
within the carton and have arrived as expected. Please contact the
supplier as soon as possible should there be any discrepancy.
Place your new Hotplate/Stirrer on a flat, level service with at least 4
inches (10cm) clearance on all sides. If desired, attach the optional
support rod to the rear of the uni t by screwing threaded end into
designated hole. Attach proper power cord to the rear of unit and
plug into a grounded outlet of appropriate voltage.
Voltage of outlet must match voltage listed on the
label on rear of instrument. Failure to supply
appropriate power may damage instrument and void
warranty!
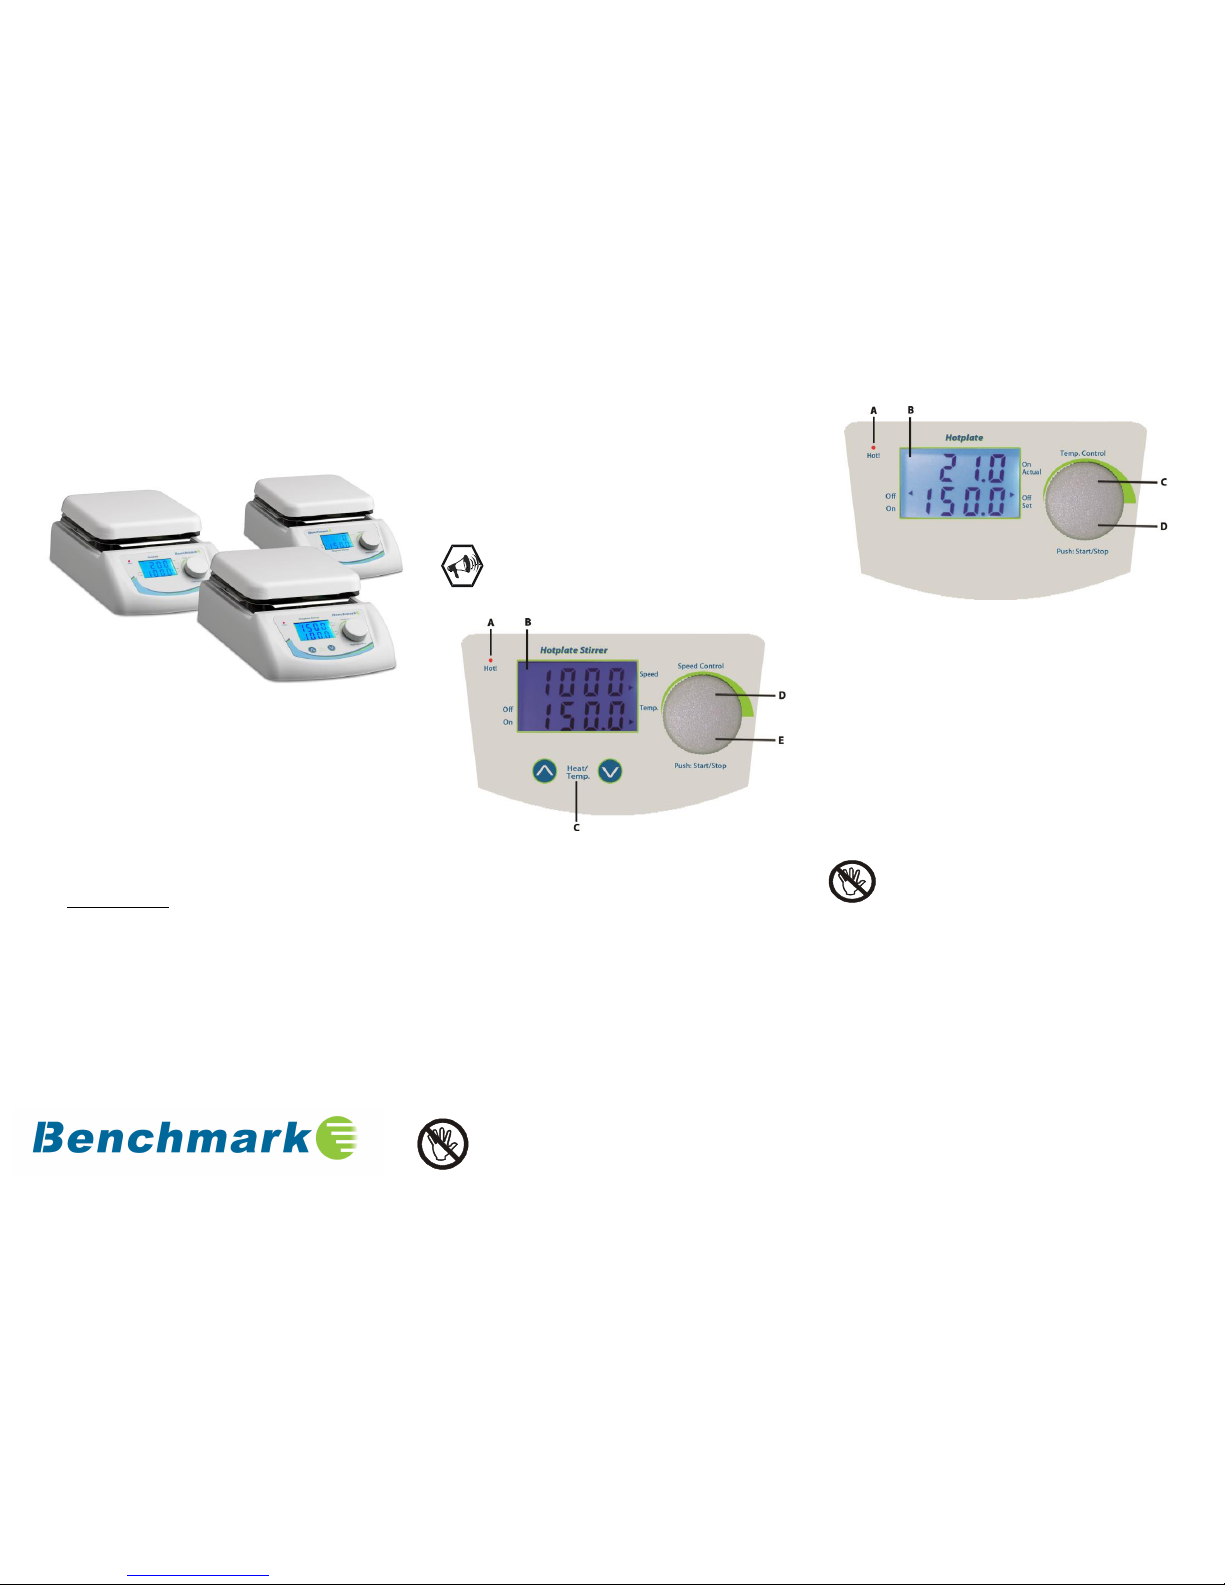
Control Panel - Hotplate/Stirrer Combination:
A) Hot surface indicator light – Safety Warning
B) Digital Display
C) Temp. selection keys
D) Speed control dial
E) Start/Stop
Operation (Hotplate/Stirrer Combination):
- Turn power switch (rear of instrument) to on position (“I”).
- Set stir speed by turning the dial. The set stir speed will
appear on the top of the display. To operate without
stirring, set stir speed to zero.
- Set temperature by using the up & down keys beneath the
display. The set temperature will appear on the bottom of the
display. To operate without heating, set temperature to
zero.
- Once desired stir speed and temperature are set, press the
selection knob to begin stirring and heating. The actual stir
speed and temperature will begin to rise to the set
parameters. Hot surface indicator lights at 50°C.
Caution: Hot surface! Once selection knob has been pressed,
the surface of the instrument will begin to heat. Avoid bodily
contact or personal injury may occur.
Control Panel - Hotplate and Stirrer:
A) Hot surface indicator (Hotplate only)
B) Digital Display
C) Temp. control dial (Speed control in stirrer
model)
D) Start/Stop
Operation (Hot Plate):
- Turn power switch (rear of instrument) to on p osition
(“I”).
- Set temperature by turning the dial on the right.
- Set temperature will appear on bottom of display, with
actual surface temp. appearing on top of display.
- Once desired temperature is set, press selection knob to
begin heating. The actual temperature (top of display)
will rise to match the temperature set on the bottom.
Hot surface indicator lights at 50°C.
Caution: Hot surface! Once selection knob has been
pressed, the surface of the instrument will begin to heat.
Avoid bodily contact or personal injury may occur.
Operation (Stirrer):
- Turn power switch (rear of instrument) to on p osition
(“I”).
- Set stir speed by turning the dial on the right.
- Set stir speed will appear on bottom of display, with
actual stir speed appearing on top of display.
- Once desired stir speed is set, press selection knob to
begin stirring. The actual stir speed (top of display) will
rise to the selected stirring speed.
Maintenance:
- To ensure performance and longevity of the instrument,
keep outer body and surface plate clean. Disconnect
instrument from power source and use a lint free rag to
wipe down all surfaces when cool. Do not immerse in
water or spray cleaner directly on the instrument.
- The instrument is covered by a 2 year warranty. In the
event of failure or defect, disconnect the unit from the
Page 2

power source and contact the manufacturer as so on as
possible.
Troubleshooting:
Check
Trouble Shooting
Not heating Or
Not stirring
Check power Supply Cord
Plug firmly into socket
Check Fuse
Replace Fuse
 Loading...