

Benchcrafted Crisscross Retro, Crisscross Solo, Glide M, Glide C Assembly And Installation Instructions Manual

AAsssseemmbbllyy && IInnssttaallllaattiioonn IInnssttrruuccttiioonnss FFoorr::
BBeenncchhccrraafftteedd CCrriissssccrroossss SSoolloo && RReettrroo
Install a Crisscross with any leg vise hardware, begin here
BBeenncchhccrraafftteedd GGlliiddee MM && GGlliiddee CC
Install a Glide M or Glide C, begin on page 12
Copyright, Benchcrafted 2017 Version: March 2017
Crisscross Contents:
Pictured items in bold
Quantity Description
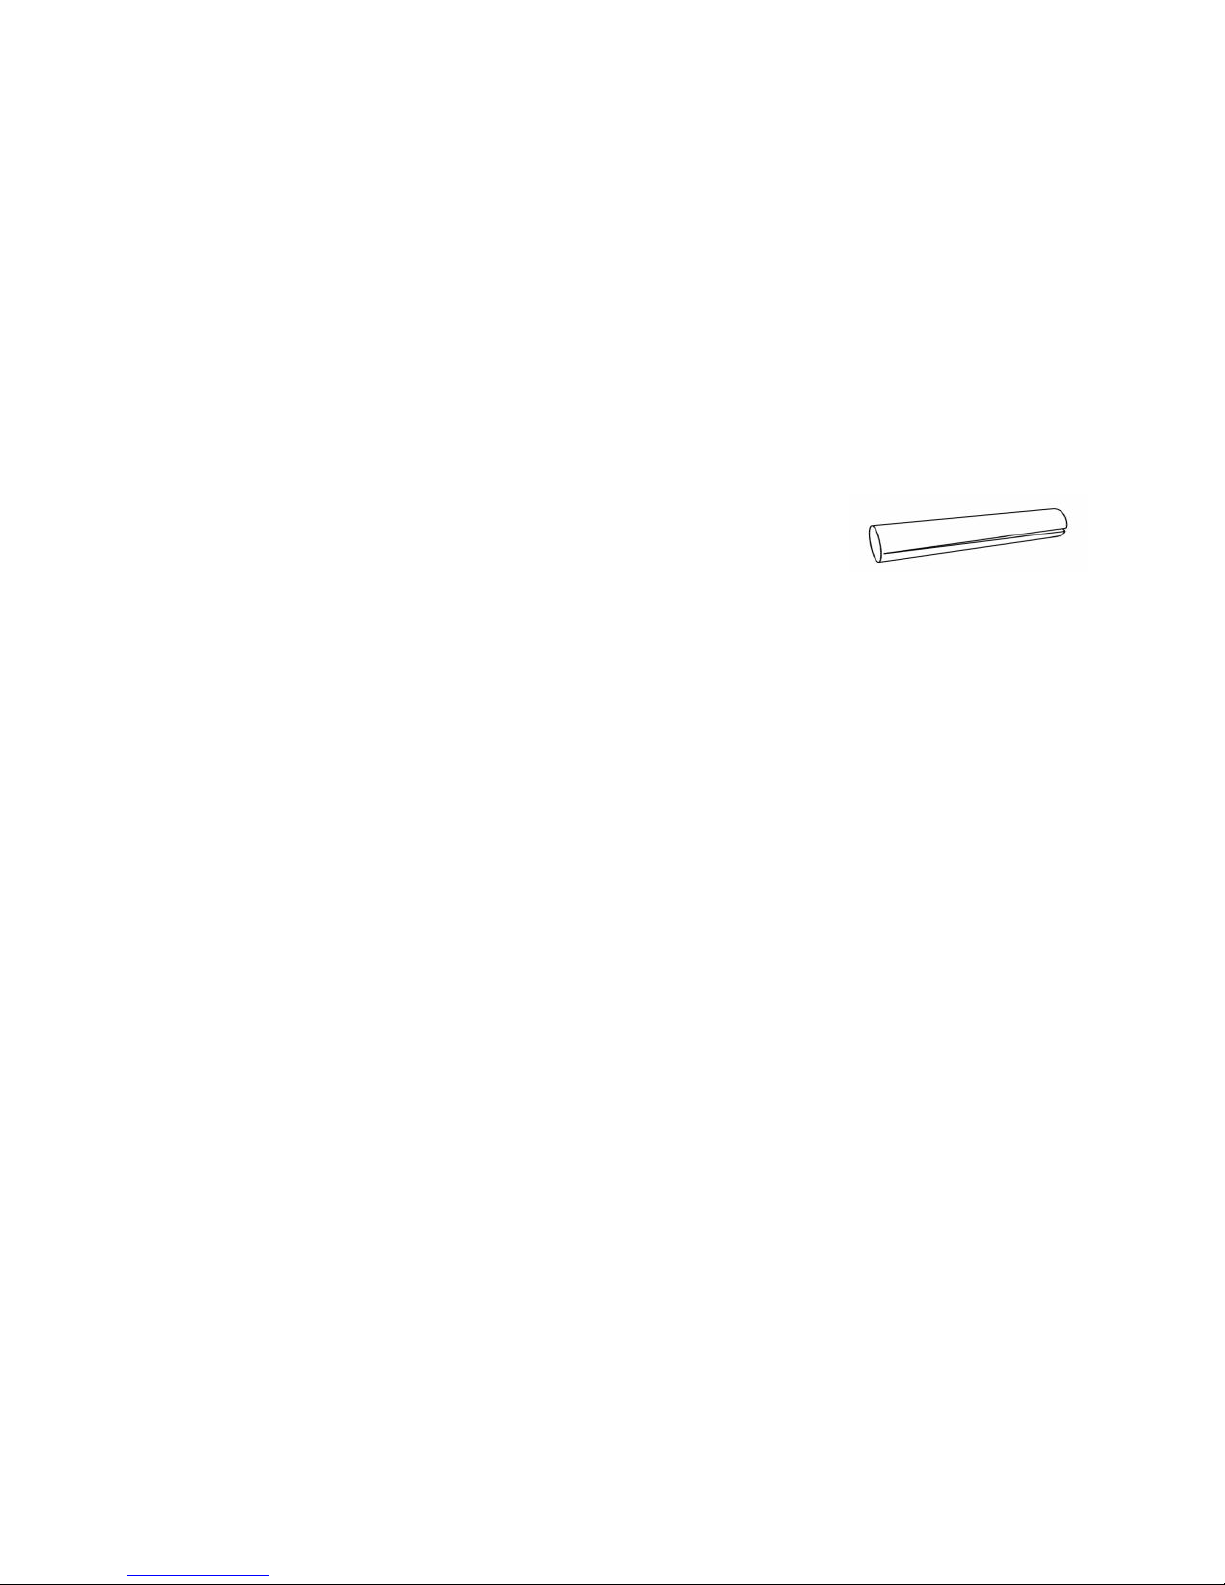
2 Crisscross arms
1 pivot pin
3 snap rings (one extra)
2 8” mounting pins (Solo only)
2 2-1/2” mounting pins (Retro only)
2 iron mounting brackets (Retro only)
4 5/16” x 1-1/4” cap screws (Retro only)
2 1-3/4” steel bearing plates
2 #8 wood screws
oo rr
CC rriissssccrr oossss
SSoo ll oo
CC rriissssccrr oossss
RRee ttrroo
Some parts are heavy. Be careful as you unpack and handle them. Also be aware that although we make
every effort to ease all edges, being cast and machined parts you may encounter a sharp egde or burr. If
you do, ease it with some fine abrasive paper or a fine file. Some components may have a rust prevent
tive oil applied. You may want to remove this oil before installing the vise. Wipe it off with a paper towel.
This will leave a light film of oil on the parts that will help prevent rust and keep the parts moving smoothly.
Read and understand these instructions COMPLETELY AND THOROUGHLY
before starting the installation or cutting into your bench. This includes instal-
lation of both Crisscross Solo and Retro, and the Troubleshooting sections.
We highly recommend that you NOT begin installation without the Crisscross
and all vise hardware in your possession.
Unpacking your Crisscross:
ATTENTION!
1

Origins of the Benchcrafted Crisscross
A popular mechanism for maintaining parallelism in vise jaws began to surface in the American patent
record in the mid 19th century. There are also documented sources of this mechanism in the La Forge
Royale catalog, Paris, late 19th to early 20th c. This device is basically two pieces or "arms" of metal or
wood, equal in length, joined in the middle to create a pivot. The upper ends of the arms (also on pivots)
are joined to the bench’s leg and the chop. The resulting mechanism not only maintains a parallel opening, but also supports the weight of itself, the vise components, and the chop. The beauty of the mechanism is its simplicity. In modern times this mechanism has become known as the "St. Peter’s Cross",
taken from an early 20th c. publication describing it as such. To our knowledge, this is the only reference
to this device by name. There has been some discussion about the history of this moniker, and the possible misnomer, since it was the Apostle Andrew that was crucified on an "X"-shaped cross, St. Peter
being crucified on a "T"-shaped cross, albeit upside down. We eventually acquired a 19th century version
of the St. Peter’s Cross, and used it to prototype our version, the Benchcrafted Crisscross.
The Crisscross is built with a small amount of toe-in. In other words, the chop will contact the bench top at
the upper end of the vise slightly before it contacts the bottom. This helps hold thin or irregular stock. You
will need to follow the specific installation sequence in order to install the Crisscross to best effect.
About these instructions
We don’t like to be wordy, and we don’t like complexity. The length of these instructions is such as to
convey the information you need to install the Crisscross intelligently. If it’s superfluous, we won’t include it,
if its useful for the installation, you bet we’re going to include it. We know you don’t want any surprises,
and we know the Crisscross is going into some beautiful benches. This is the info you need to get it right
straightway. It’s an easy install, but you can screw it up if you dive in without reading this.
1. Retrofitting to an existing leg vise - getting your chop vertically centered
skip to section 2 if you’re installing a Crisscross and leg vise into a new bench
If you’re retrofitting a Crisscross Retro to an existing leg vise, first study the drawings to make sure you
have enough space, and your screw’s position is compatible. If your chop isn’t thick enough, or long
enough, make a new one or laminate material onto the inside face to house the Crisscross mortise. If
your existing chop has a mortise for a parallel guide, you may want to patch that just for looks. You may
want to patch the hole in the leg as well, but chances are it will fall under the bearing plate. You probably
don’t need to patch it for strength. If the mounting hole in the plate lands on the void, you can install it
upside down.
Normally when installing a Crisscross, the vise hardware itself is installed last. It’s easier to get the hardware aligned with the Crisscross travel than vise versa. But since you’re retrofitting a Crisscross, you’ll
need to find the vertical center of your existing chop, screw and nut, then layout the location of the Crisscross based on this location. Once the Crisscross is installed, the vise screw needs to be travelling
parallel to the movement of the Crisscross. If your screw is off a few degrees (tilted up or down in its nut)
your vise may at worst bind, or at least not work smoothly. The Crisscross completely supports the weight
of the vise and chop, so to take advantage of this smooth movement, you also want the screw to turn
freely in its nut, and travel in a straight line, parallel to the in-out travel of the Crisscross. Again, if you’re
installing a new vise, install the Crisscross first, to establish the movement of the chop, then install the
vise screw. If a new chop is required for your retrofit, you could treat your install as new, and skip ahead to
section 2. Make sure you layout the hole in the new chop for the screw based on the location of the existing hole and nut in your bench leg.
2

Finding Vertical center in an existing chop
So now that you know that the screw travel and Crisscross travel need to be parallel, here’s how to find
the vertical center of your existing leg vise hardware in its chop. Close the vise almost all the way by
turning the screw clockwise, leaving it open just enough so the chop isn’t tight. Mark the back of the chop
and the side of the leg with a short, horizontal line--mark both the chop and the leg at the same spot. It
doesn’t matter where vertically, somewhere close to the top is fine for convenience. The weight of the
chop should be pulling down on the screw. This represents the lower position. (if your vise has a parallel
guide, make sure you remove it from the chop before this procedure.) Now, pull up on the screw’s handle
and watch the mark you made on the chop--it should move up from the corresponding mark on the leg.
Transfer this upper position to the leg by drawing a short line. It should fall just above the lower line on the
leg. The leg should now have two marks on it. Now tighten the vise slightly so it will hold its position as
you make the third mark. Depending on where the chop tightened up, adjust the vertical position of the
chop (tap down or lift up) until the mark on the back of the chop is centered between the two marks on the
leg. The screw is now vertically centered in the nut. It’s important that during this process the screw does
not contact wood as it passes through the clearance hole in the leg. If it does, enlarge the hole in the leg,
so with the vise vertically centered the screw does not contact any wood. You DO NOT want the screw to
rub on the inside of the hole.
With the chop still tight, draw a single horizontal line across the side of both the chop and leg. Open the
vise, then continue this line across the inside face of both the chop and leg. This is your datum, or reference line. When marking out the position of the Crisscross mortise, always measure and mark from this
line equally on the chop and leg. This will ensure your Crisscross is perfectly aligned with your vise screw.
Do not measure or reference off the ends of the chop or leg. And equally important, DO NOT change the
position of the nut on the back of the leg. If you do, you’ll have to find vertical center again.
Continue on in section 3, next page.
3

2. Note on New Installations
~
Installing a Crisscross Retro or Crisscross Solo in a new bench
In new installations (Retro or Solo) simply layout your main screw and Crisscross locations carefully,
keeping everything properly aligned using the drawings at the end of the instructions as a guide. You do
not need to find vertical center (section 1.) Your accurate layout and milling will all but guarantee your
screw running in line with the Crisscross. However, DO NOT fasten the main screw’s nut to the back of
the leg until the Crisscross and vise is mounted.
3. Mortise Layout - All Installations
The Crisscross occupies 19-1/2” of vertical space in your bench leg and chop. You can position the
Crisscross anywhere you like vertically (it should be centered left-to-right in the leg and chop, directly
below the vise screw) with a minimum of 1” of material left below the Crisscross mortise in the leg (you
can run the mortise clear through to the bottom of the leg if you absolutely have to.) The Crisscross will
open to a maximum of about 16”, but this is governed by the length of the vise screw. You should not
mount the Crisscross Solo in a bench leg that’s narrower than 3”, or the Retro in a leg narrower than 4”.
Bench leg and chop each need to be at least 2-1/2” thick (you could go thinner, at your own risk.) You
don’t need thick stock, you can laminate 8/4 stock onto 4/4 stock to achieve that thickness. Position the
glue lines towards the inside face so the mortise floor falls within solid stock (not on a glue line.) The chop
can be as narrow as 5”, but you’ll get better holding if you make it around 8” wide at the top. You can cut
any design you like onto the sides of the chop--tombstone shape, coves and curves-whatever. Just save
that step for the very end.
To layout the Crisscross mortises, refer to the measured drawings at the end of these instructions. It is not
necessary for the Crisscross to be a specific distance below the vise screw (but remember to allow
enough for the acetal bushing if you’re using one of our Benchcrafted leg vises.) The location on the
drawing is simply a lowest position of both the Crisscross and vise screw together in a given bench
height. You can shift both the Crisscross and your vise screw locations up or down to suit your bench
(Dimension “X”) Layout everything in full size before you cut anything.
Four points to consider when determining where to
vertically position your Crisscross:
1.
The space below the Crisscross mortise
of the leg. Best to keep some material here. 1" minimum. Although if you have a wide and thick leg (5" or
more) an open mortise won’t pose any problems. Make sure you chamfer the end of the mortise so you
don’t blow out material if you drag your bench across the floor.
2.
The distance between the top of the Crisscross mortise and the vise screw
between the screw and the mortise for strength. You can get a bit closer with the Solo. If you’re installing a
Glide Leg Vise, the drawings show the ideal distance below the acetal bushing.
3.
Height of the bench:
little. The drawings show, again, lowest possible position. This makes for a lot of room above the screw,
but you might want to reduce this so you’re not bending over too much to grab the vise handle.
If you have a tallish bench of 36" or so, you might want to move everything up a
: ideally, you don’t want the mortise to be open at the bottom
: Leave a little material
4

4. Possible interference with an upper rail and/or the benchtop (see ilus. below) If you position your vise
and Crisscross without regard to upper rails running between your front and rear legs, or the benchtop
itself, you might find either part ending up where the vise’s nut needs to be, especially if your nut has a
large flange, or you’re using a thick wooden nut. This especially important in very short benches. If you are
retrofitting a Crisscross and have less than about 20” below the screw, you may need to move the entire
vise up to accomodate the Crisscross. Again, layout in full size before cutting or drilling.If you’re installing
a Crisscross Retro, skip ahead to section 5.
4. Crisscross Solo Installation
for installation in new, unassembled benches only
(skip to section 5 if you’re installing a Crisscross Retro)
NOTE: DO NOT install your leg vise hardware before installing the Crisscross Solo. But DO layout for
it. Accomplish all vise and Crisscross installation work on the chop and leg with the leg itself not yet
permanently joined to the bench. You can layout and cut bench joinery, but its easiest to install your
vise before final bench assembly.
Refer to the drawings at the end for the Crisscross Solo installation. Make sure you leave your chop a
little long at the top, you’ll cut it flush with the top surface of the bench after the Crisscross is completely
mounted and functioning smoothly.
Drill the holes for the mounting pins on a drill press. This is where the Solo is best used. If you don’t have
a drill press, or aren’t confident in drilling deep, straight holes, you should use the Crisscross Retro.
Tip: when drilling deep holes use a sharp, high quality bit and back the bit out frequently (every 3/4” at
most) to clear chips. You should drill clear through the leg and chop to make installation easier should you
need to tap the pins out from the opposite side.
5

Once the holes are drilled, cut the mortises with your method of choice. You’re just getting wood out of the
way here, the mortises don’t have to be perfect, although the bottom portions do need to be flat for the
bearing plates to seat flatly. We like to hog out most of the waste on the drill press with a large Forstner
bit, followed by a fence-equipped router.
After the mortises are cut, install the two bearing plates with the included screws at the bottom of each
mortise.These bear the force of the bottom of each Crisscross arms.
Next, assemble the Crisscross arms, with the flat backs together and the ends with holes on the same
end (up). Align the center hole and insert the pivot pin with ONLY ONE snap ring installed. Leaving one
snap ring off lets you test fit and disassemble easily during the installation process. The pin might shift
around a little during the install, but that won’t affect anything. Once your leg vise and Crisscross are
completely finished, you can snap the other ring into place. To get a ring off, pry it open slightly with a
small, flat head screwdriver placed in one of the small openings in the perimeter of the snap ring.
Now drive the mounting pins into the holes in the chop and leg until they just come into the mortise. Place
one half of the assembled Crisscross into the leg mortise and slip the arm onto the end of the pin. Tap the
pin until it passes into the opposite hole in the leg. Now get the chop and repeat the same process for the
other half of the Crisscross. Make sure the Crisscross isn’t rubbing on the sides of the mortise. If it is,
shift it left or right. Once its in position, it will find its own center and generally stay there. The chop should
now “float” in and out quite easily as the Crisscross supports the weight of the chop.
Now check the vise for proper toe-in, see section 6.
To remove a mounting pin during installation, use a smaller pin (we use a hex ball driver with screwdriver
handle) to drive it out. The smaller pin will catch the hole in the Crisscross and keep the arm engaged
with the chop/leg. You can now pull the smaller pin out easily since it’s loose in the hole and safely remove
the Crisscross arm from the mortise. Now you can cut the mounting pins to final length and polish the
ends for a finished look.
Next, drill the necessary holes in the chop and leg for your leg vise hardware and install the screw only.
Here’s a critical step: You need to position the vise’s nut and fasten it to the bench leg so its in
line with the movement of the Crisscross.
Here’s how you do it:
6

With the chop completely closed and the screw ‘s flange/handle (T-casting, Glide handwheel, wooden
screw hub, etc.) mounted to the chop, and with the Crisscross mounted, thread the nut onto the screw
until it gets close to the back of the leg. Make sure the chop is centered left-to-right on the leg. Now with
one hand, press hard on the vise’s handle directly in line with the screw. This will push the chop closed,
forcing the inner surface of the vise handle to seat flat on the outside of the chop, flange or casting, positioning the screw into a closely parallel orientation with the Crisscross (assuming of course that you’ve
made the faces of your chop flat and parallel) As you’re pushing in, you can observe the end of the screw
raising up and finding its center within the leg’s clearance hole. It
or the leg. While still pushing in, tighten the nut against the back of the leg until snug. If your vise chop has
a lot of toe-in (see section 6) your screw will point more towards the floor. Keep this in mind during the
next step. Crouch down and while holding the nut in position with one hand, slowly operate the vise. Try
not to move the nut. If the vise operates smoothly, close the vise carefully until the nut is again snug
against the back of the leg. If it doesn’t operate smoothly, try shifting the nut around to find a spot where
the vise does operate smoothly. What you’re doing here is finding the sweet spot where the screw is
resting gently inside the nut. This will allow the vise to operate at its peak.
When you’re satisfied, mark the leg through the nut mounting holes for the mounting screws (snug the vise
enough that the weight of the screw does not drop down and spoil the location of the nut.) Mark the nut
itself so when you install it, its in the same orientation as before. Now remove the nut, drill the pilot holes
for the screws, and attach the nut. Thread the screw back through the nut and test the action. The vise
should now work sweetly. Your Crisscross Solo install is complete. You can now cut the chop to final
length, do any shaping, and if you like, glue some suede onto the inside of the chop and top and apply
any finish.
must not touch any wood
in the chop
5. Retro Installation
for retrofitting an assembled bench
&
for new installations in unassembled benches
Note for retrofitting a Benchcrafted Split Top Roubo, or other assembled benches:
are retrofitting into our Split Top Roubo, or installing into a new Split Top Roubo, or are retrofitting into
similar benches, the Crisscross mortise in the leg requires some different joinery between the leg and
front rail. In the Split Top Roubo, the typical placement of the mortise and tenon of the front rail, and the
bolt and barrel nut falls within the Crisscross mortise. To solve this issue, a thicker front rail (and tenon) is
made to allow the bolt and barrel nut to be installed
end of these instructions.
behind
the Crisscross mortise. See drawings at the
Note for new installations only: DO NOT install your leg vise hardware before installing the Crisscross Retro. But DO layout for it. Accomplish all vise and Crisscross installation work on the chop and
leg with the leg itself not yet permanently joined to the bench. You can layout and cut bench joinery,
but its easiest to install your vise before final bench assembly.
For those who
Refer to the drawings for the Crisscross Retro installation. Make sure you leave your chop a little long at
the top, you’ll cut it flush with the top surface of the bench after the Crisscross is completely mounted and
functioning smoothly.
7

If you haven’t already, review section
1. “Retrofitting to an existing leg vise”
to make sure you’ve
vertically centered the chop. If you’re retrofitting to an existing bench, but building a new chop, you should
still do this step since the nut is already attached to your bench leg and may be difficult to relocate. That
means you’ll need to mount the vise hardware to the new chop first, using the existing location of the
clearance hole and nut position in the leg as a guide, then find vertical center, then proceed with installing
the Crisscross.
After accomplishing your layout, cut the stepped mortises for the mounting brackets and arms. At the
upper end of each mortise where the two machined surfaces of the mounting bracket bear against the
wood, be diligent to chop the end grain of the mortise so it’s square to floor of the mortise. The bracket
needs to seat firmly and squarely here. See illustration below.
Next, place a bracket in the mortise and press it tight to the upper end of the mortise (where it butts into
end grain) and while holding it tight, use a transfer punch to mark for the two mounting screws. Try to bias
the location slightly towards the upper end of the mortise, so as you install the screws the bracket will be
drawn tight to the upper end of the mortise. You can see why its important to layout your mortise carefully,
since the end of the mortise here, where you chopped it square, determines the vertical position of the
Crisscross and the alignment of the arms to each other. Be diligent to get everything correct here. Take
your time and work with care and attention.
Drill and tap for the 5/16” mounting screws. (See the addendum at the end for info on tapping wood for
machine screws) Then test mount both brackets in the leg and chop. After you’ve determined that they fit
properly you’ll need to remove them to install the arms.
8

New installs only:
Drill the necessary holes in the
chop and leg for the vise hardware. DO NOT
MOUNT THE NUT.
Install the two bearing plates at the very bottom of
each mortise with the included wood screws.
These bear the force of the bottom of each Crisscross arm.
To mount the Crisscross Retro, first join each arm
to the brackets with the 2-1/2” mounting pins. See
the illustration at left to get the orientation correct.
The pins just slip in place and fit loosely and rotate
with no resistance. These are held in place by the
walls of the mortise, and once the bracket is installed, they are trapped in place. Now place the
bracket in the mortise and drive the two mounting
screws. You’ll need to swing the arm up and out of
the way to access the mounting holes. Mount both
assemblies to the leg and the chop. (You will find it
easier to work on the assembled vise with the leg
clamped to a bench or the like.)
Get ready to test the action of the assembled
Crisscross. If you’re building new, clamp the leg in
a vise or against a bench so you can test the
Crisscross action in the proper position. Place the
pivot pin in one of the arms with only one snap ring
installed (leaving one snap ring off lets you test fit
and disassemble easily during the installation
process. The pin might shift around a little during
the installation, but that won’t affect anything. Once
your leg vise and Crisscross are completely finished, you can snap the other ring into place. To
get a ring off, pry it open slightly with a small, flat
head screwdriver placed in one of the small openings in the perimeter of the snap ring) Now swing
the arms together, flat back to flat back, until the
central pivot pin holes align. Push the pin into the
other arm.
Make sure the Crisscross isn’t rubbing on the
sides of the mortise. If it is, shift it left or right. Once
its in position, it will find its own center and generally stay there. The chop should now “float” in and
out quite easily as the Crisscross supports the
weight of the chop.
Now check the vise for proper toe-in, see section
6.
9

Retrofitting only:
With the Crisscross functioning properly, go ahead and remount the vise onto the chop
and thread the main screw into the nut to test the vise for smooth action. The vise should work sweetly.
Your Crisscross Retro install is complete. You can now cut the chop to final length, do any shaping, and if
you like, glue some suede onto the inside of the chop and top and apply any finish.
New installs:
Here’s a critical part. You’ll need to position the vise’s nut and fasten it to the bench leg so
its in line with the movement of the Crisscross. Here’s how you do it:
With the chop completely closed and the screw ‘s flange/handle (T-casting, Glide handwheel, wooden
screw hub, etc.) mounted to the chop, and with the Crisscross mounted, thread the nut onto the screw
until it gets close to the back of the leg. Make sure the chop is centered left-to-right on the leg. Now with
one hand, press hard on the vise’s handle directly in line with the screw. This will push the chop closed,
forcing the inner surface of the vise handle to seat flat on the outside of the chop, flange or casting, positioning the screw into a closely parallel orientation with the Crisscross (assuming of course that you’ve
made the faces of your chop flat and parallel) As you’re pushing in, you can observe the end of the screw
raising up and finding its center within the leg’s clearance hole. It
must not touch any wood
in the chop
or the leg. While still pushing in, tighten the nut against the back of the leg until snug. If your vise chop has
a lot of toe-in (see section 6) your screw will point more towards the floor. Keep this in mind during the
next step. Crouch down and while holding the nut in position with one hand, slowly operate the vise. Try
not to move the nut. If the vise operates smoothly, close the vise carefully until the nut is again snug
against the back of the leg. If it doesn’t operate smoothly, try shifting the nut up or down to find a spot
where the vise does operate smoothly. What you’re doing here is finding the sweet spot where the screw
is resting gently inside the nut. This will allow the vise to operate at its peak.
When you’re satisfied, mark the leg through the nut mounting holes for the mounting screws (snug the vise
enough that the weight of the screw does not drop down and spoil the location of the nut.) Mark the nut
itself so when you install it, its in the same orientation as before.
Now remove the nut, drill the pilot holes for the screws, and
attach the nut. Thread the screw back through the nut and test
the action. The vise should now work sweetly. Your Crisscross
Retro install is complete. You can now cut the chop to final
length, do any shaping, and if you like, glue some suede onto
the inside of the chop and top, and apply any finish.
6. Toe-in
The Crisscross is manufactured with a small amount of toe-in.
This ensures that the very top of the chop contacts the front of
your bench first. Normally you can acheive this by planing your
inside chop face to a taper. But since this feature is built into the
Crisscross, you can keep your chop faces parallel. The amount
of toe-in will vary depending on your Crisscross vertical placement, the length of your chop, and how well you installed the
Crisscross. With the top of the chop just touching the edge of the
bench, the gap at the bottom of the chop should be about 1/8”3/8”
10

If you would like a little more toe-in at the top, you can remove the bearing plate from the chop and place
a layer or two of thin cardboard or veneer beneath it. If you put too much however, you can cause the chop
to bind on the screw’s shaft, stiffening the action of the vise. A better solution to adding some toe-in would
be to simply remove the chop and plane a taper on the inside surface of the chop. Obviously you’ll want to
remove more from the lower end of the chop.
7. Troubleshooting
The main causes of potential trouble will be:
1. If the two mounting pins (Solo) or two brackets (Retro) are not mounted at the same height
If the arm mounted to the leg is lower than the one in the chop, this will increase toe-in, but if its extreme
enough, it may cause the mechanism to bind. Likewise, if the arm mounted to the chop is lower than the
one in the leg, this will decrease toe-in, but if its extreme enough, it may cause the mechanism to bind.
Thus, the mounting pin locations of each arm MUST BE equidistant from the screw. If you used the Solo,
you’ll need to redrill the mounting pin holes correctly in a new location higher or lower. You’ll have to adjust
the length of the mortise as well. You can’t plug the holes and redrill--your bit will want to follow the plug.
An easier fix may simply be to purchase a pair of Retro brackets and install those. If you mounted a Retro
and its off, you may need to adjust the mortise length to shift the bracket up. You may need to replace the
machine screws with longer ones and drill clear through the leg and attach the bracket with nuts, since
you won’t be able to tap a plugged hole. Try to make any adjustments in the leg half of the Crisscross so
you don’t have to work on the chop where fixes would be more visible.
2. If the screw is not running in line (parallel) with the in-out travel of the Crisscross.
The easiest way to correct an out of alignment screw is to reposition the nut. Repeat the process in the
paragraph under section 4. “With the chop completely closed...” You’ll need to rotate the nut so you can
drive the screws into fresh wood.
3. The mounting pins are not parallel with each other, either in the Solo or the Retro.
For the Retro, try adjusting the floor of the mortise so the brackets seat parallel to each other. If they are
out of parallel the other direction you’ll need to adjust the end grain of the mortise and possible redrill the
mounting holes. See instructions in troubleshooting #1. If you used a Solo, you’ll have to relocate the
holes, or mount Retro brackets. Again, see #1 for instructions.
8. Maintenance
The Crisscross arms and brackets are made of powder coated cast iron and require no maintenance
other than to keep the mechanism clean of dust and grime. The steel parts can rust of course, so take
necessary precautions to prevent such. A few small drops of oil on the pivot and mounting pins every few
months will help keep the mechanism operating smoothly. Note: early versions of the Crisscross arms
and brackets were unfinished cast iron. If you have one of these, you may want to coat the parts in a
drying oil (tung, boiled linseed) to help prevent rust.
11

BBeenncchhccrraafftteedd
GGlliiddee MM && GGlliiddee CC
Assembly and Installation Instructions
Note: Glide M and Glide C leg vises include
either a Crisscross Solo or Crisscross Retro.
However, Glide components and Crisscross
components are packaged separately. To see
the contents of the Crisscross package, see
page 1.
Glide M & Glide C Contents:
Quantity Description
1 Glide Mor Glide C handwheel
1 Double lead acme screw
1 Double lead acme nut
1 Flange
1 Groove pin for attaching handwheel to screw
1 Acetal bushing
6 #9 x 1-1/2” round head wood screw
2 5/16-18 x 1-1/2 flat head machine screw
3 “Rosewood” Dymondwood knob (Glide M)
3 Infused Beech knob (Glide C)
3 Shoulder bolt for mounting knob
3 Thick washer/spacer for mounting the knob
4 Nylon washer for knob attachment (one extra)
1 Crubber for lining inside of vise jaws
Chop and leg
shown with Solo
mounting holes
and Retro
brackets
for illustrative
purposes
Read and understand these instructions COMPLETELY AND THOROUGHLY before starting the
installation or cutting into your bench.
We highly recommend that you NOT begin installation without the Crisscross, Glide and all
other bench hardware in your possession.
ATTENTION!
12
Unpacking your vise:
Some parts, especially the handwheel, are heavy. Be careful as you unpack and handle them. Also be aware
that although we make every effort to ease all edges, being machined parts you may encounter a sharp egde or
burr. If you do, ease it with some fine abrasive paper or a fine file. Some components will have a rust preventative oil applied. You should remove this oil before installing the vise. Wipe it off with a clean paper towel. This
will leave a light film of oil on the parts that will help prevent rust and keep the parts moving smoothly.
Assembly Instructions for Benchcrafted Glide Leg Vises
The Benchcrafted Glide Leg Vise ships unassembled. You will need to install two parts onto
the acme screw’s shaft: the flange, and handwheel. It only takes about a minute.
Tools required:
Small hammer
smooth end
Pin punch or large nail set
fig. 1
1. Get the handwheel, flange, acme screw, and groove pin.
2. First, place a couple drops of light machine oil on the shaft end of the acme screw near the shoulder for
lubrication, then slide the flange onto the shaft.
IMPORTANT : Face the side with the two countersunk holes away from the screw. The countersinks
need to face OUT once the vise is mounted in the bench..
3. Slide the handwheel onto the shaft, lining up the cross hole in the handwheel’s hub with the cross hole
in the shaft. Peer down into the hole and position the handwheel until the two holes line up precisely. You’ll
notice two sets of holes on the shaft. Use the hole closer to the screw for the Glide. The other hole is for
our Classic Leg Vise.
4. Get the groove pin, punch and hammer. Examine the groove pin. One end is smoothly round, with
virtually no grooves. The grooves get wider as they reach the opposite end of the pin. See fig.1
6. Insert the SMOOTH END WITH NO GROOVES first into the cross hole in the hub and with finger
pressure insert the pin until you feel it engage the hole in the shaft. If you can’t insert it far enough with
finger pressure, use the hammer to lightly tap the pin to get it moving towards the shaft. Try to keep the
hub in line with the cross hole in the shaft as you tap the pin in. Keep tapping the pin in until you feel a little
resistance as the pin meets the hole in the shaft. Tap some more until you feel the pin engage the hole in
the shaft. Now take the pin punch and place it on the head of the pin and finish driving the pin through the
shaft and the opposite side of the hub. Use light taps. The fit is machined precisely, it doesn’t take much
force. Do not over drive the pin, stop when its centered in the hub’s diameter. The flange should spin
freely on the shaft and have a little bit of play in the fit. The pin itself may fit loosely. It you’d like to tighten it
up, its easy. Put the pin in a vise about half way, then tap the exposed end with a hammer a couple times
to put a slight bend in the pin. Easy now, just a slight bend. This will keep the pin in place when you assemble the handwheel. A drop or two of Loctite will aid in keeping the pin in place.
See the section “Final Steps” for info on installting the knobs, which you should do after the entire vise is
installed.
13

Because the majority of the installation of a Glide M or Glide C lies in the installtion of the Benchcrafted
Crisscross, first read the Crisscross installation instructions from beginning to end, then layout the locations of the Crisscross mortise and Glide screw locations on your leg and chop following the drawings at
the end of these instructions, and using the principles outlined in the Crisscross instructions.
When you come to the section on drilling the holes in the chop and leg (pages 6 for Solo, 9 for Retro)
follow the instructions below. Remember, its much easier to do all of these operations with your leg free
from the bench if you’re building new. Once the Glide is completely finished and installed (except cutting
the chop to final height, flush with the top surface of the bench) then you can join the leg vise leg to the
bench permanently.
Drilling the screw clearance holes
From the outside face of the chop, drill a 1-1/4” hole entirely through the chop. This should give you plenty
of room for the 1” screw. You do not want the screw to touch any wood once mounted, it will inhibit free
movement of the vise.
To prevent blowout on the inside face of the chop, drill almost all the way through- then flip the piece and
finish at the inside face.
Repeat the process for the hole in the bench leg.
Mounting the vise
To mount the handwheel assembly to the chop,
place the screw through the hole and center the
screw in the hole. You can use the horizontal line
for vertical positioning (center the line in the two
holes of the mounting flange). For horizontal
positioning shift the flange back and forth marking
each position, then center the flange between
these two marks.
You MUST be certain the screw is centered in
the hole and not touching the chop at all!
When its in position, mark the hole centers with a
transfer punch or awl. Remove the handwheel
assembly. Using a 1/4” bit, drill pilot holes for the
5/16-18 tap. (See the addendum for tapping
techniques in wood.) Tap the holes for the 5/16
flat head machine screws.
14

Once the holes are tapped, screw the flange in place and check to see that the screw spins freely.
The screw should not touch the walls of the hole at all, and the wheel should rotate freely.
Next, continue with the Crisscross installation (where you left off on pages 6 or 9) and follow the instructions for mounting the nut. You’ll use three #9 x 1-1/2” round head wood screws to mount the nut.
Installing the acetal bushing
A special bushing which stabilizes the lateral movement of the screw, but still allows free movement is
installed next. The bushing is made from acetal, a very durable material that is widely used in bearing
applications. The bushing is milled to be just a few thousandths larger than the screw’s width, helping
stabilize left-right movement while adjusting the vise.
Unthread the screw from the nut, then pull on the handwheel until the end of the screw clears the front of
the leg (you don’t need to separate the Crisscross arms.) Slip the bushing over the end of the screw with
the counterbores facing out. Then feed the screw back through the leg and engage it in the nut a few
turns.
Orient the bushing so the elongated central hole is vertical, since the bushing only provides horizontal
(left-right) stabilization.
With the bushing pressed against the face of
the leg, shift the chop back and forth so you
can observe the postion of the bushing. You
want to find the center of that left-right movement. Once you’ve got it, position the bushing
up/down so the elongated hole is positioned
equidistant from the screw on top and bottom--
-you want an equal gap top and bottom. Trace
the perimeter of the bushing onto the face of
the leg with a pencil. Remove the vise from the
leg and then prepare to excavate the mortise
for the bushing. The bushing itself is 2-1/2”
diameter, but you’ll want to make the mortise
larger than this, at least 2-5/8” diameter. This
allows for some adjustability. You can drill this
mortise with a Fortsner bit, circle-cutting jig
and router, or with a fly cutter, followed by
simply drilling or routing out the interior. The
perimeter doesn’t have to be perfect. You also
don’t want the bushing to be proud of the leg’s
surface, so make the mortise about 9/16”
deep.
Reassemble the vise and advance the screw a
few turns.
Move the chop back and forth (left and right)
until the bushing is centered in the mortise.
Use a transfer punch (or bradpoint bit) to mark
15

the bottom of the bushing’s mortise in all three hole locations, while keeping the chop still. Pre-drill, then
install the bushing with three round head wood screws. You may need to remove the chop to get your drill
in there. Don’t cinch them down yet.
Test the action of the vise with the bushing in place. The vise screw should turn freely and smoothly.
Tighten one of the bushing screws and test again. Now gradually tighten the remaining screws incrementally while turning the vise screw. If you feel the vise screw getting tighter as you turn, loosen the mounting
screw and start again. The bushing is there to provide stability, it should not hamper the rotation of the
vise’s screw.
It’s also very important that the bottom of the mortise be flat. If it’s not, the bushing will be distorted as you
tighten the screws, possibly binding the main screw. If you need to remove more material from the bottom
of the mortise to get it flat, do so. It doesn’t matter if the bushing is slightly recessed into the leg a bit.
Final Steps
Once the Glide is completely installed and functioning smoothly, mark and cut the chop to final length,
flush with the benchtop. You can bevel the top outside corner of the chop or round it over. This is also a
good time to glue on the Crubber. We use water-based contact cement, but any glue will work.The
Crubber is an important part of the Glide. It provides incredible holding power with little effort. We line all
of our vises with this material, including the faces of our bench dogs.
To install the knobs, place a shoulder bolt through the knob and slip on the thick washer/spacer on the
threaded end. Screw it in place. The knob is designed to spin freely on the bolt. If you’d rather have the
knob not rotate, place one of the nylon washers under the head of the shoulder bolt before inserting it in
the knob. This will allow the bolt to clamp down tight onto the knob preventing rotation. The Dymondwood
knobs (Glide M) are made of layers of acrylic infused dyed hardwood. They are extremely durable and
require no maintenance. The knobs for the Glide C are made of acrylic infused solid beech, and likewise
require no maintenance.
The final step is to reassemble everything and give the Glide Crisscross a test run. Grab some boards
and a hand plane and give it a go. The knobs are very handy for spinning the vise quickly for rapid and
gross adjustments. But for repetitive clamping and unclamping of similar thickness workpieces---edge
jointing panels or cutting numerous tenons for door frames for example--grasping one knob or the rim of
the handwheel and giving the vise about a 1/3 turn is all that’s necessary to open the jaw and regrip. With
knobs at each 120 degree location, you will always have a knob within easy reach at the top of the wheel,
anywhere between the 10 o’clock and 2 o’clock positions. Experiment with how much force is really
necessary to hold your workpiece securely. You’ll find it’s much less than you initially think, making
workholding even more effortless as you learn to use the Glide.
The steel and iron parts of the vise can rust. You can treat your Benchcrafted vise like any fine handplane.
Keep dust off the mechanism, and moisture from forming and you’ll be set.
If you have any questions about the installation, we’re glad to help. Contact us at info@benchcrafted.com.
Thank you for purchasing the Benchcrafted Glide Leg Vise. We hope you enjoy using the vise as much
as we do.
16

17

Addendum
Tapping Holes In Wood For Machine Screws
Aside from the typical woodworking tools required to build the wood components of the vise and
install it, you’ll need a machine screw tap to install the machine screws in the flange, and Retro brackets.
Many of you will already have this tap, and for those who don’t, you’ll be able to pick them up at any hardware store or home center. Mail order suppliers like Enco or McMaster will also have taps. Taps are
inexpensive.
To attach the flange to the leg and chop you’ll need a 5/16-18 bottoming tap. Standard plug taps
will work fine, but bottoming taps (they cut threads almost to the bottom of a hole) will require a shallower
hole. Not a huge issue for the flange holes, but for the Retro,especially in the chop, you’ll want to use a
bottoming tap, ideally. Pilot hole size for 5/16-18 is 1/4”, or a tad less like 15/64 if you have it.
The holding power of machine screws in wood is about the same as using a threaded insert, and
you don’t have to buy the inserts. It’s also a great technique for making jigs and knock-down joints.
Once you drill the pilot hole (use a drill press for accuracy if possible) chuck the tap in a small,
cordless, variable-speed driver with the torque set for driving screws(the slower setting). Hold the drill
perpendicular to the surface and without pushing on the drill (just support its weight while keeping it
square) press the trigger and let the tap feed itself into the hole slowly. It helps to cut a small countersink
in the pilot hole to help get the tap started. When you feel the tap tighten up a bit and you’ve reached the
depth of threads you’re after, release the trigger. Switch the drill into reverse and press the trigger without
pulling on the drill. Let the tap thread itself out of the hole slowly. It’s important to go slow and feel how the
tap is working. If you go too fast you risk binding the tap. At that point the tap becomes a drill bit and you
just end up making a larger hole. If you’re new to this, practice on some scrap first. You can also tap the
holes by hand, but once you get the hang of using the driver it makes tapping quick and easy.
18

Crisscross
Leg And Chop Layout
Scale:
not to scale
Copyright 2015 Benchcrafted
No unauthorized duplication without
permission.
Page:
Version:
Jan 2015
Chop
Benchtop
Leg
19 -1/2"
19 -1/2"
1-3/4"
1-3/4"
4"
2-1/2"
Extend mortise to dotted lines
if installing Crisscross Retro
(leg and chop)
1-3/4" min.
1"
3/4"
Benchcrafted acetal
bushing mortise
2-3/4" dia. x 1/2" deep
Benchcrafted Classic and
Glide main screw through
hole 1-1/4" dia.**
Benchcrafted
Classic and Glide
main screw
through hole
1-1/4" dia.**
Rail
Mortise locations from bottom of
leg and chop shown in lowest
ideal position. See instructions for more info.
X*
*Dimension X will vary
depending on your
bench height
Crisscross Mortise depth:
1-7/16"
in chop and leg
1-3/4" min.
Retro
mortise ill.
Solo
mortise ill.
** Others' bench hardware
may vary
Crisscross
Mortise
Crisscross
Mortise

Crisscross Solo
Mounting Pin Location
Scale:
nts
Copyright 2014 Benchcrafted
No unauthorized duplication without
persmission.
Page:
Version:
Aug '14
See detail
Detail
Leg
Chop
Crisscross
Mortise
Crisscross
Mortise
7/8"
7/8"
3/4"
3/4"
3/8" d.

Crisscross
Front Rail Mortise
Scale:
1:1
Copyright 2012 Benchcrafted
No unauthorized duplication without
persmission.
Page:
1:1
Version:
Rev 1
Front of Leg
Back of Leg
5-5/8"
5/8"
3"
1-3/4"
Leg Vise leg shown (w/ Crisscross mortise.)
Cut mirror-image rail mortise on
opposite front leg.
7/8" deep mortise
1-1/2"
7-1/8"
This template is taken from our Split Top Roubo
Bench plans and represents a suggested way of
joining a front rail to a leg in a Roubo-style bench to
accomodate the Crisscross and our Barrel Nut
hardware. Your bench configuration may be different.

Crisscross
Front Rail Tenon
Scale:
nts
Copyright 2012 Benchcrafted
No unauthorized duplication without
persmission.
Page:
1:1
Version:
Rev 1
3"
4 -1/4"
5/8"
5/8"
5/8"
5/8"
1"
CL
Cut on both ends of front rail.
tenon length: 3/4"
3/4"
1-1/2"
2-1/8"
1" dia.
1-5/8" deep
Barrel Nut location
This template is taken from our Split Top Roubo Bench
plans and represents a suggested way of joining a front
rail to a leg in a Roubo-style bench to accomodate the
Crisscross and our Barrel Nut hardware. Your bench
configuration may be different.

Crisscross
Vise Leg Joinery
Scale:
Copyright 2012 Benchcrafted
No unauthorized duplication without
persmission.
Page:
Version:
Front Rail
This illustration is taken from our Split Top Roubo
Bench plans and represents a suggested way of
joining a front rail to a leg in a Roubo-style bench to
accomodate the Crisscross and our Barrel Nut
hardware. Your bench configuration may be different.

Crisscross
Leg Joinery X-Section
Scale:
Copyright 2014 Benchcrafted
No unauthorized duplication without
persmission.
Page:
Version:
Bolt passes behind Crisscross
mortise to engage barrel nut
in front rail
This illustration is taken from our Split Top Roubo
Bench plans and represents a suggested way of
joining a front rail to a leg in a Roubo-style bench to
accomodate the Crisscross and our Barrel Nut
hardware. Your bench configuration may be different.
 Loading...