

Page 1
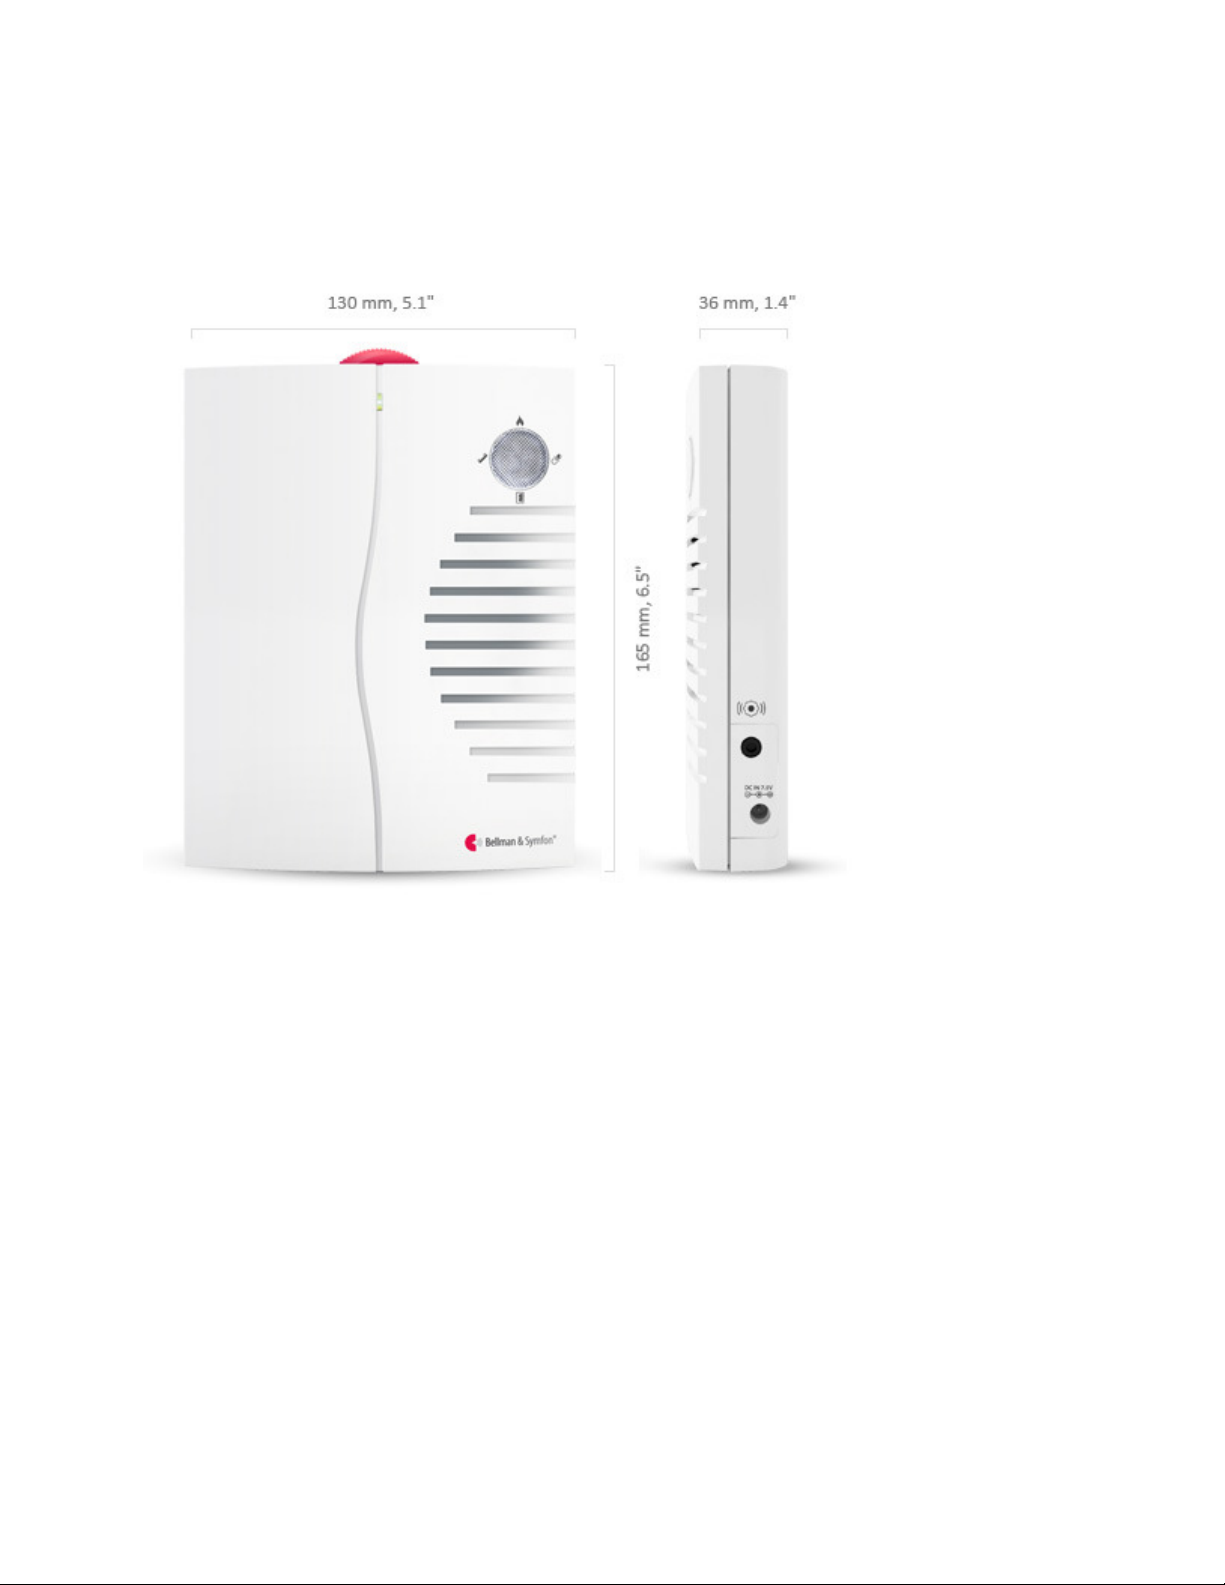
The Visit Portable Receiver
Art. no. BE1450
Introduction
The Visit system consists of a number of radio transmitters and receivers. The transmitters
detect different events in the surrounding area and transmit a radio signal to the receivers. The
receivers pick up this signal and provide indications using light, sound and/or vibration.
The transmitter determines what type of light, sound or vibration should be displayed so that the
reason for the indication is evident. Read through the entire user manual first and then start to
install the system.
Getting started
Unpacking, installing and testing the unit
1. Open the battery cover (10). Fit four LR14 alkaline type batteries and close the battery
cover. Press the Test Button (12). The Visit Portable Receiver will then emit sound and
Page 2
light signals and, if a BE1270 Bellman Bed-shaker (accessory) is connected, it will
vibrate.
2. A Visit Transmitter is required to test the radio reception. Press the Test Button on the
Visit Transmitter and the Portable Receiver will then emit sound and light signals and, if
a BE1270 Bellman Bed-shaker (accessory) is connected, it will vibrate.
3. Place the Visit Portable Receiver upright on a level surface or mount it on the wall using
the wall mount bracket supplied. The receiver should be placed where it can best be seen
and heard. It is also easy to take the Portable Receiver with you wherever you go.
Function
General
The BE1450 Visit Portable Receiver is a receiver within the Visit system for indoor use, which
attracts the attention of the user using sound, light and also vibration if a BE1270 Bellman Bedshaker (accessory) is connected.
It is activated via radio signals from any transmitter within the Visit System.
Radio key
On delivery all Visit units are tuned to the same Radio Key. If you have a neighbour with a
similar system, you can change to different Radio Keys so that you do not affect each other’s
systems.
The Radio Key on this receiver can be changed by holding down the Test Button (12) for about
five seconds until the LEDs (5) and (6) blink alternately. Then press the transmitter’s test button
so that the receiver’s LEDs (4-7) blink to confirm that the Radio Key has been changed. All units
in a Visit System must have the same Radio Key in order to operate as a group. Refer to the user
manual for the relevant unit.
Please note:
All Bellman Visit products within the same system must be tuned to the same Radio Key in
order to operate as a group.
Indicators and Signals
It is generally the transmitters in the Visit System that determine how the receivers will indicate
an alarm. See the description in the relevant transmitter user manual for further information.
The Portable Receiver has a function which allows you to easily check which alarm was the last
one detected. If you press the Test Button (12) once, the last alarm will be repeated.
Page 3

System indicators
The LED (2) blinks once when the Portable Receiver is activated by a transmitter sending a radio
signal to the Receiver.
The LEDs (4 - 7) that indicate which transmitter has activated the Portable Receiver normally
have the following meanings:
•
Orange LED (4) indicates a baby cry transmitter.
•
Green LED (5) indicates a door transmitter.
•
Yellow LED (6) indicates a telephone transmitter.
•
Red LED (7) indicates a fire alarm
If the green (5) and yellow (6) LEDs blink alternately, this indicates that the Portable Receiver is
in radio key selection mode. The Portable Receiver will then wait for a radio signal from a
transmitter in the Visit System which will adjust the receiver to the same radio key as the
transmitter is tuned to.
Sound
The Portable Receiver sounds an alarm. The sound volume can be adjusted between 0 and 93
dBA maximum at 1 metre by using the volume control (1). The main frequency range is 500 –
1000 Hz. Refer to the user manual for the relevant Visit transmitter for more information about
the types of sounds that can be emitted
Light
When the Visit Portable Receiver is activated, the LEDs (3) blink with a bright light.
Vibration
The Portable Receiver can power a BE1270 Bellman Bed-shaker (accessory) connected to the
socket (8). The bed shaker is placed under the pillow to wake the user up when the Portable
Receiver is activated. Refer to the user manual for the relevant transmitter for more information
about vibration patterns.
Power supply
When the LED (2) lights up green during activation, the unit is working correctly.
When the LED (2) lights up yellow during activation, the unit is working correctly, but the
batteries are flat and must be changed. Only use LR14 alkaline type batteries.
When the LED (2) is constantly green, the Portable Receiver is powered by an external power
supply (accessory) via the power supply unit connection socket (9).
Page 4

Troubleshooting in brief
The receiver signals when no transmitter
PROBLEM SOLUTION
Nothing happens.
The receiver is not emitting any sound
signals.
The receiver emits a sound but no light
signal.
The LED (2) lights up yellow when the
Receiver is activated.
The receiver is not activated, but works
when the test button is used.
•
Change the batteries. Only use LR14
alkaline type batteries.
•
Turn up the volume using the volume
control (1).
•
Check that on/off light signal switch (11) is
set to the ON position.
•
Change the batteries. Only use LR14
alkaline type batteries.
•
Check the battery in the transmitters.
•
Check that the receiver is not placed too far
away from the transmitters by moving it
closer to the transmitters.
•
Check that the receiver is set to the correct
radio key. For further information see
Function/Radio key.
•
Change the Radio Key on all units in the
system. For further information see
is activated.
Function/Radio key.
Page 5
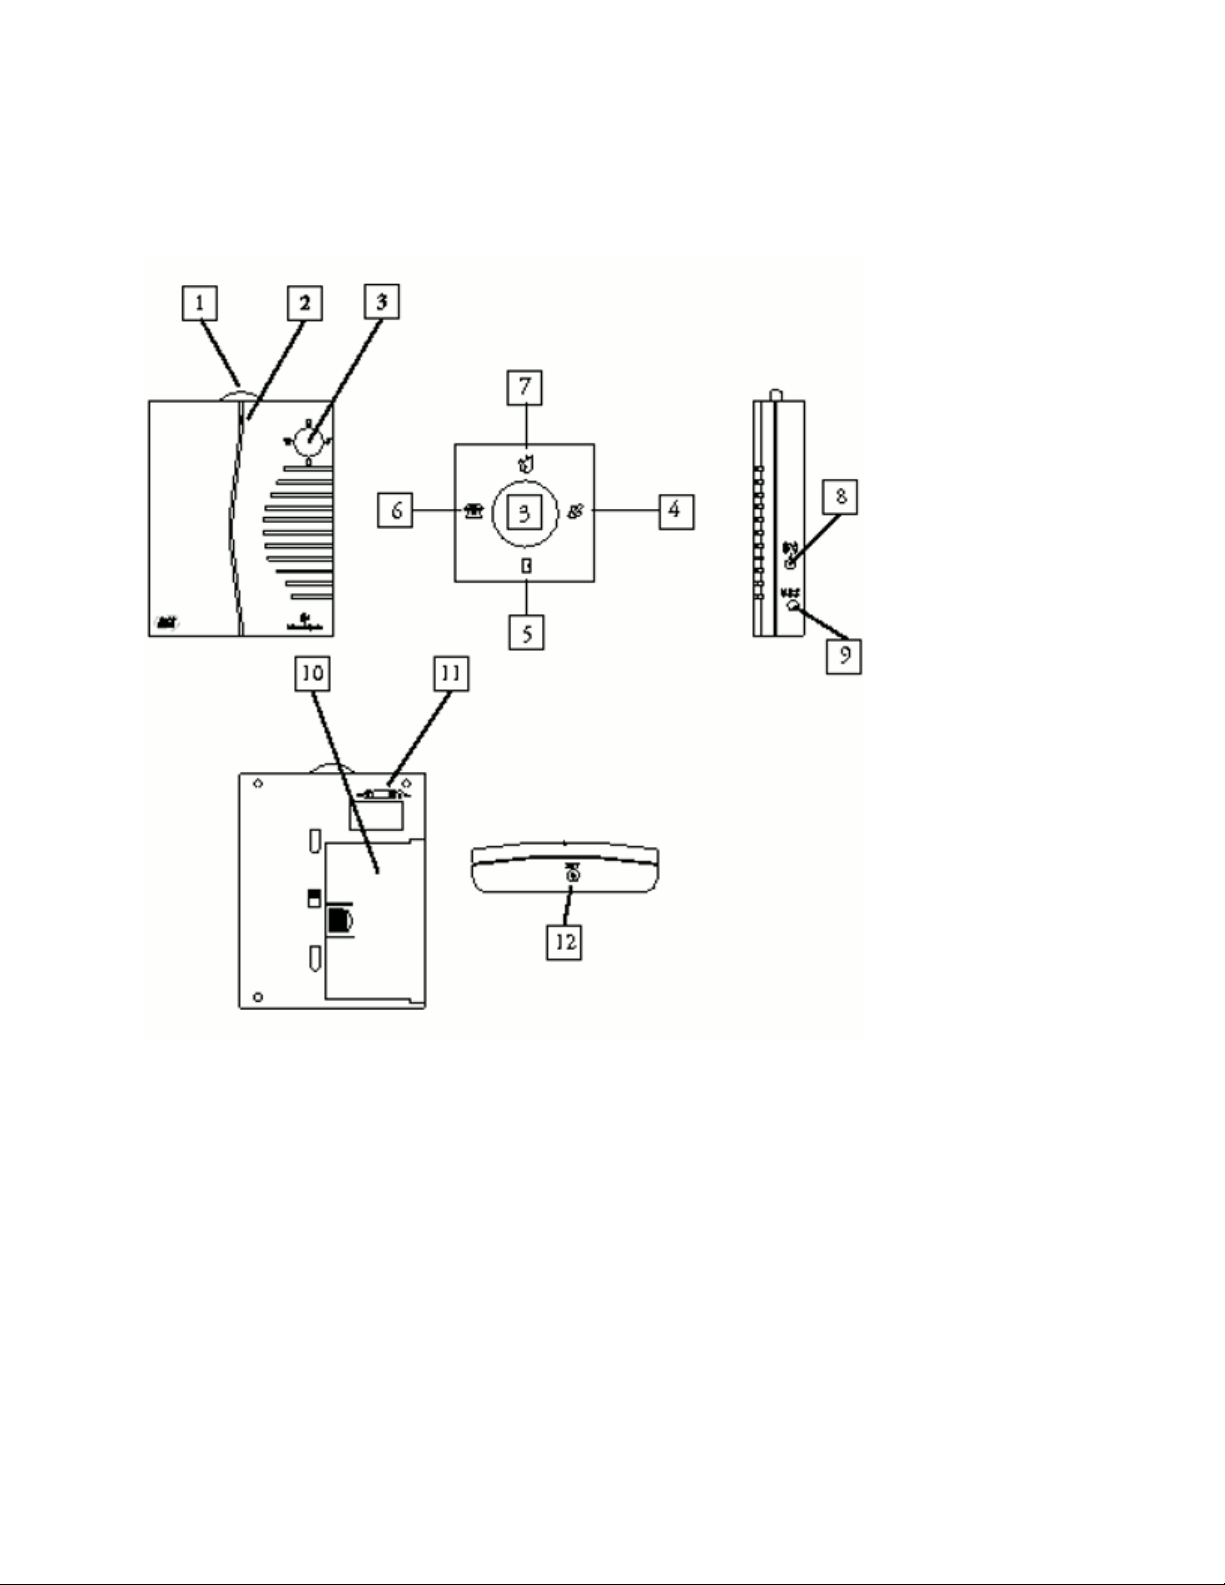
Technical illustration
1. Volume control
2. LED reception, battery and power supply indicator
3. White LEDs
4. Orange LED
5. Green LED
6. Yellow LED
7. Red LED
8. Vibrator output
9. Connection for power supply unit
10. Battery cover
11. Light signal switch
12. Test button
 Loading...