


BDI904SFBG-F
Bellini BDI904SFBG-F, BDI904SFBG, BDI604SG, BDI604SG-F, BI604TG Installation And User Manual
...
啊哈
Installation and User manual
Content
Safety instructions---------------------------------- 2
Product description--------------------------------- 4
Installation---------------------------------------------5
Start using your appliance--------------------------8
Maintenance and troubleshooting----------------16
Warranty------------------------------------------------ 18
90cm Built In Induction
Cooktop
BDI904SFBG
For warranty service call 1300 373 199(Australia)
or 0508 123108(New Zealand) to connect you to
the nearest authorised service centre
20140414 issue 2
BDI904SFBG-F

2
Safety instructions
This manual explains the proper installation and use of your appliance, please read it
carefully before using even if you are familiar with the product. The manual should be kept
in a safe place for future reference. In case of failure, only the Authorized Technical
Service may repair this hob. Otherwise the guarantee will be null and void.
Warning
General safety
z The appliance may only be installed and connected
by trained, registered service engineers.
z Built-in appliances may only be used after they have
built in to suitable built-in units and work surfaces
that meet standards.
z In the event of faults with the appliance or damage
to the glass ceramic(cracks, scratches or splits), the
appliance must be switched off and disconnected
from the electrical supply, to prevent the possibility
of an electric shock.
z Repairs to the appliance must only be carried out by
trained registered service engineers.
z The technical and identification data for the hob
figure on the reference plate fixed to the appliance.
z This reference plate must be consulted before
making the electrical connections.
z The electrical connections must be made by
specialist aware to the legal and regulatory,
requirements in each country.
z If the cable is damaged in any way it must be
replaced by the manufacturer or after sale service
or by authorized technical staff, to avoid hazard.
z Power line connection: The power cord should be
connected in compliance with the relevant standard,
to a 3×20A omni-polar circuit breaker.
z If the appliance is being connected directly to the
mains an Omni-polar circuit-breaker must be
installed with a minimum opening of 3mm between
contacts.
Correct use
z People (including children) who, because of their
physical, sensory or mental capabilities or their
inexperience or ignorance are not able to use the
device safely, should not use this device without
supervision or instruction by a responsible person.
z The appliance is not intended to be operated
by means of an external timer or separate
remote-control system.
z This appliance should be used only for normal
domestic cooking and frying of food.
z The appliance must not be used as a work
surface or as a storage surface.
z Additions or modifications to the appliance
are not permitted.
z Do not place or store flammable liquids,
highly inflammable materials or fusible
objects (e.g. plastic film, plastic, aluminum) on
or near the appliance.
z After being used for a long time, the
corresponding heating zone of the induction
hotplate is still hot. Never touch the ceramic
surface to avoid burning.
z Do not heat an empty pan on the appliance.
Children’s safety
z This appliance can be used by children aged
from 8 years and above and persons with
reduced physical, sensory or mental
capabilities or lack of experience and
knowledge if they have been given
supervision or instruction concerning use of
the appliance in a safe way and understand
the hazards involved. Children shall not play
with the appliance. Cleaning and user
maintenance shall not be made by children
without supervision.
z The cooking zones will become hot when you
cook. Therefore, always keep small children
away from the appliance.
z The appliance is not intended for use by
young children or infirm persons without
supervision.
3
z Young children should be supervised to ensure that
they do not play with the appliance.
z To avoid small children and pets unintentionally
switching the appliance on, we recommend
activation of the child safety device.
Safety during use
z Remove stickers and film from the glass ceramic.
z There is the risk of burns from the appliance if used
carelessly.
z Cables from electrical appliances must not touch
the hot surface of the appliance or hot cookware.
z Overheated fats and oils can ignite very quickly.
Warning! Fire hazard!
z Switch the cooking zones off after each use.
z Users with implanted pacemakers should keep their
upper body at least 30 cm from induction cooking
zones that are switched on.
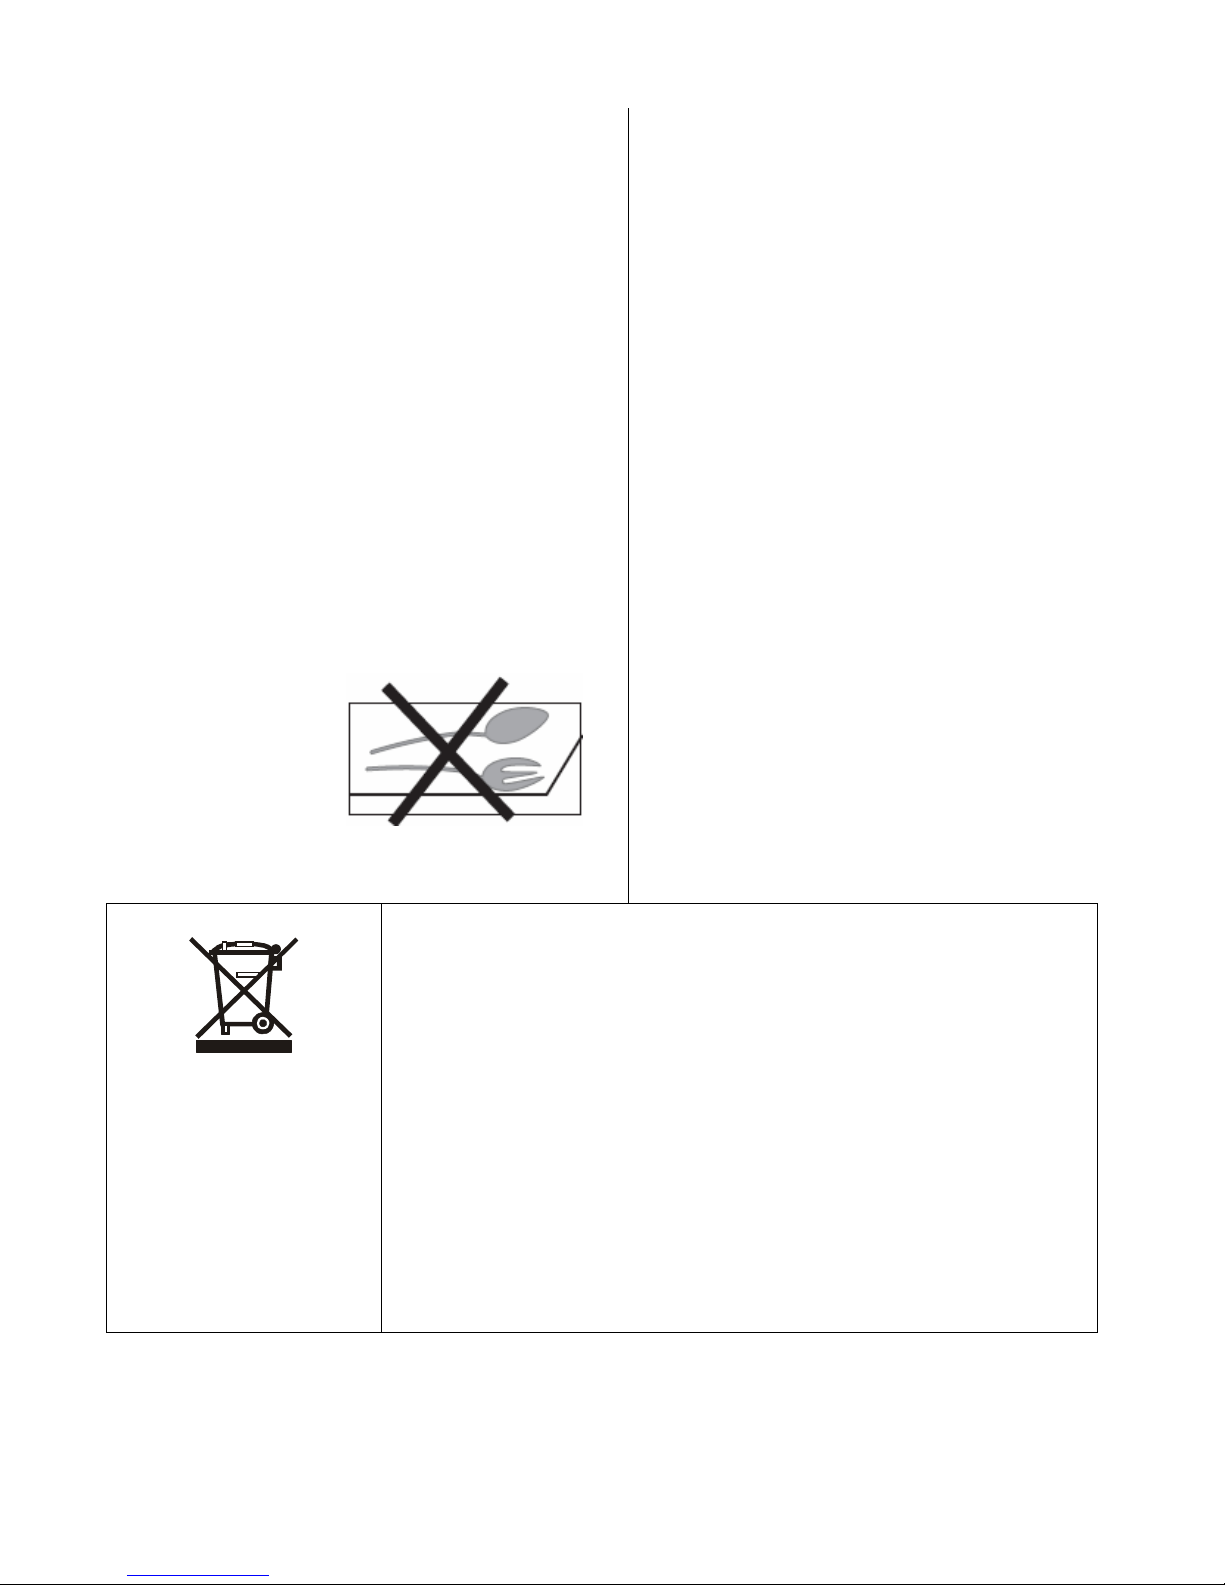
z Risk of burns! Do not place objects made of metal,
such as knives,
forks, spoons and
saucepan lids on
the cooking surface,
as they can get hot.
Safety when cleaning
z For cleaning, the appliance must be switched
off and cooled down.
z For safety reasons, the cleaning of the
appliance with steam jet or high pressure
cleaning equipment is not permitted.
How to avoid damage to the appliance
z The glass ceramic can be damaged by
objects falling onto it.
z The edge of the glass ceramic can be
damaged by being knocked by the cookware.
z Cookware made of cast iron, cast aluminum
or with damaged bottoms can scratch the
glass ceramic if pushed across the surface.
z Objects that melt and things that boil over can
burn onto the glass ceramic and should be
removed straightaway.
z Do not use the cooking zones with empty
cookware or without cookware.
z To avoid damaging cookware and glass
ceramics, do not allow saucepans or frying
pans to boil dry.
z The ventilation gap of 5mm between the
worktop and front of the unit underneath it
must not be covered.
DISPOSAL: Do not
dispose this product
as unsorted municipal
waste. Collection of
such waste separately
for special treatment is
necessary.
By ensuring that this appliance is disposed of correctly, you will help prevent any
possible damage to the environment and to human health, which might
otherwise be caused if it were disposed of in the wrong way.
The symbol indicates that it may not be treated as normal household waste. It
should be taken to a collection point for the recycling of electrical and electronic
goods.
This appliance requires specialist waste disposal. For further information
regarding the treatment, recover and recycling of this product please contact
your local council, your household waste disposal service, or the shop where
you purchased it.
For more detailed information about treatment, recovery and recycling of this
product, please contact your local city office, your household waste disposal
service or the shop where you purchased the product.
4
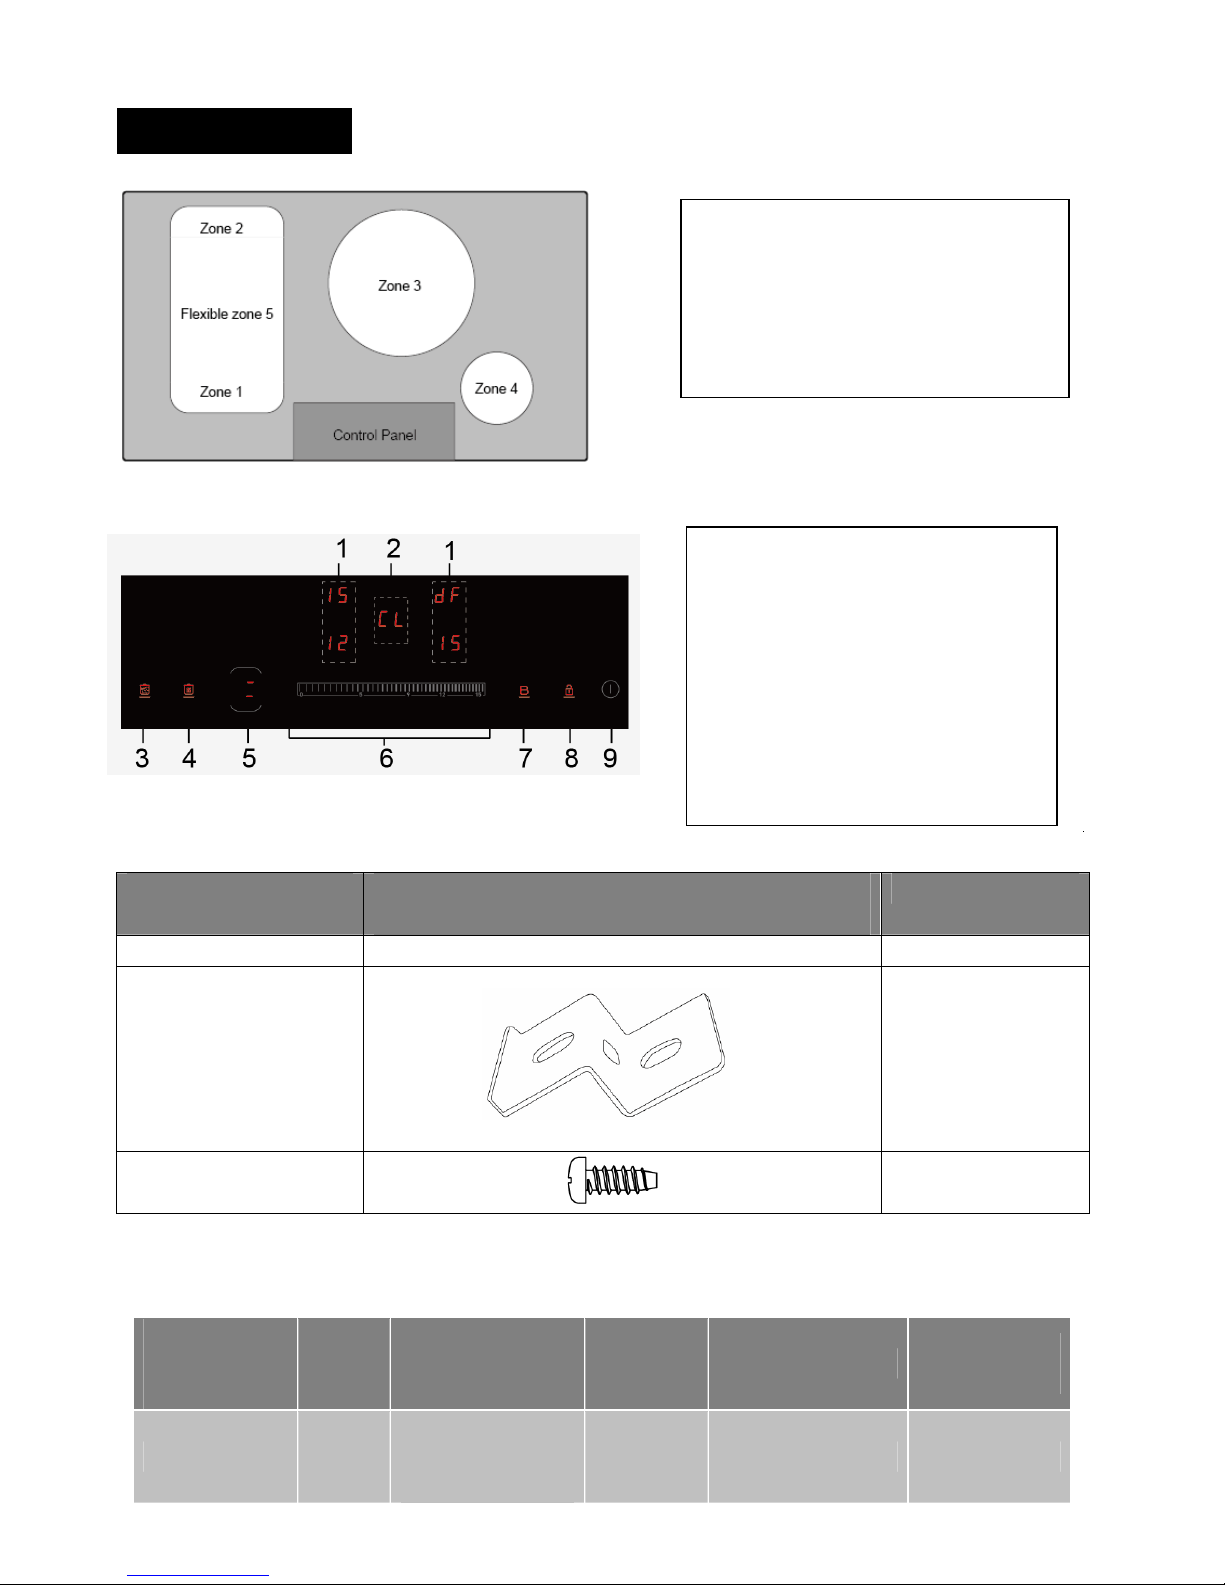
Product description
Accessory Name Picture
( for reference only, physical unit maybe different)
Quantity
User Manual 1
Fixing Bracket
4
Screw ST 3.5x10
4
Technical Specifications
Product
Dimensions
(h x w x d) mm
Approx.
Net
Weight
Electrical
Connection
Rated Input
Power
Power Level
Max Timer
Duration(min)
60x900x520 14.0Kg
220-240V~
400V 3N~
50/60Hz
15 99
Zone 1. max. 1800/3000 W 220x400mm
Zone 2. max. 1800/3000 W 220x400mm
Zone 3. max. 3000/4000 W 280mm
Zone 4. max. 1400/2000 W 140mm
Zone 5. max. 3000/4000 W 220x400mm
1. Heating zone selection controls
2.Timer control
3.Boiling cue control
4. keep warm control
5.Flexible zone control
6. Power / Timer slider touch control
7. Boost control
8. keylock control
9. ON/OFF control
7400W
5
Installation
Before you install the hob, make sure that
z the work surface is square and level, and no structural members interfere with space requirements
z the work surface is made of a heat-resistant material and at least 30mm thick.
z if the hob is installed above an oven, the oven has a built-in cooling fan
z the installation will comply with all clearance requirements and applicable standards and regulations
z a suitable isolating switch providing full disconnection from the mains power supply is incorporated in the
permanent wiring, mounted and positioned to comply with the local wiring rules and reg ulations. The
isolating switch must be of an approved type and provide a 3 mm air gap contact separation in all poles (or
in all active [phase] conductors if the local wiring rules allow for this variation of the requirements)
z the isolating switch will be easily accessible to the customer with the hob installed
z you consult local building authorities and by-laws if in doubt regarding installation
z you use heat-resistant and easy-to-clean finishes (such as ceramic tiles) for the wall surfaces surrounding
the hob.
When you have installed the hob, make sure that
z the power supply cable is not accessible through cupboard doors or drawers
z there is adequate flow of fresh air from outside the cabinetry to the base of the hob
z if the hob is installed above a drawer or cupboard space, a thermal protection barrier is installed belo w the
base of the hob
z the isolating switch is easily accessible by the customer
Before locating the fixing brackets
The unit should be placed on a stable, smooth surface (use the packaging). Do not apply force onto the controls
protruding from the hob.
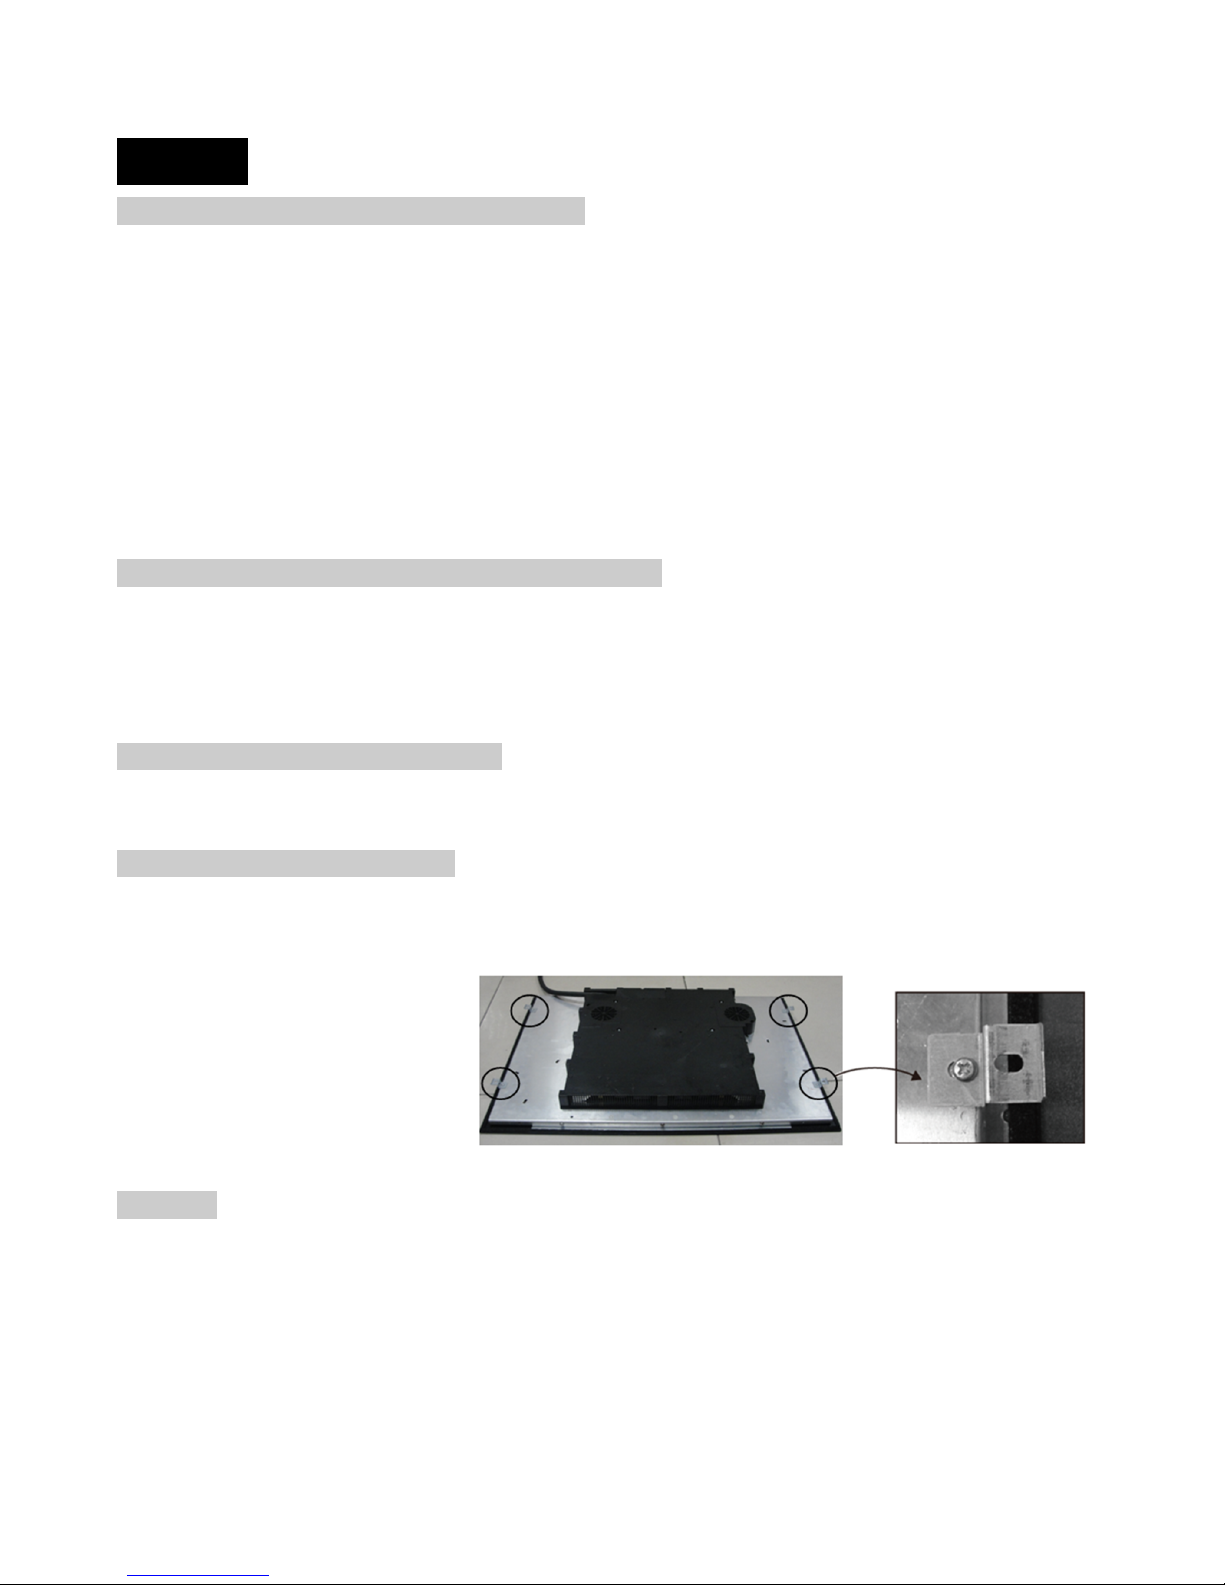
Adjusting the bracket position
Fix the hob on the work surface by screw 2 brackets
on the bottom of hob(see picture) after installation.
Adjust the bracket position to suit for different table
top thickness.
Cautions
z The induction hotplate must be installed by qualified personnel or technicians. We have professionals at
your service. Please never conduct the operation by yourself.
z The hob will not be installed directly above a dishwasher, fridge, freezer, washing ma chine or clothes dryer,
as the humidity may damage the hob electronics
z The induction hotplate shall be installed such that better heat radiation can be ensured to enhance its
reliability.
z The wall and induced heating zone above the table surface shall withstand heat.
z To avoid any damage, the sandwich layer and adhesive must be resistant to heat.
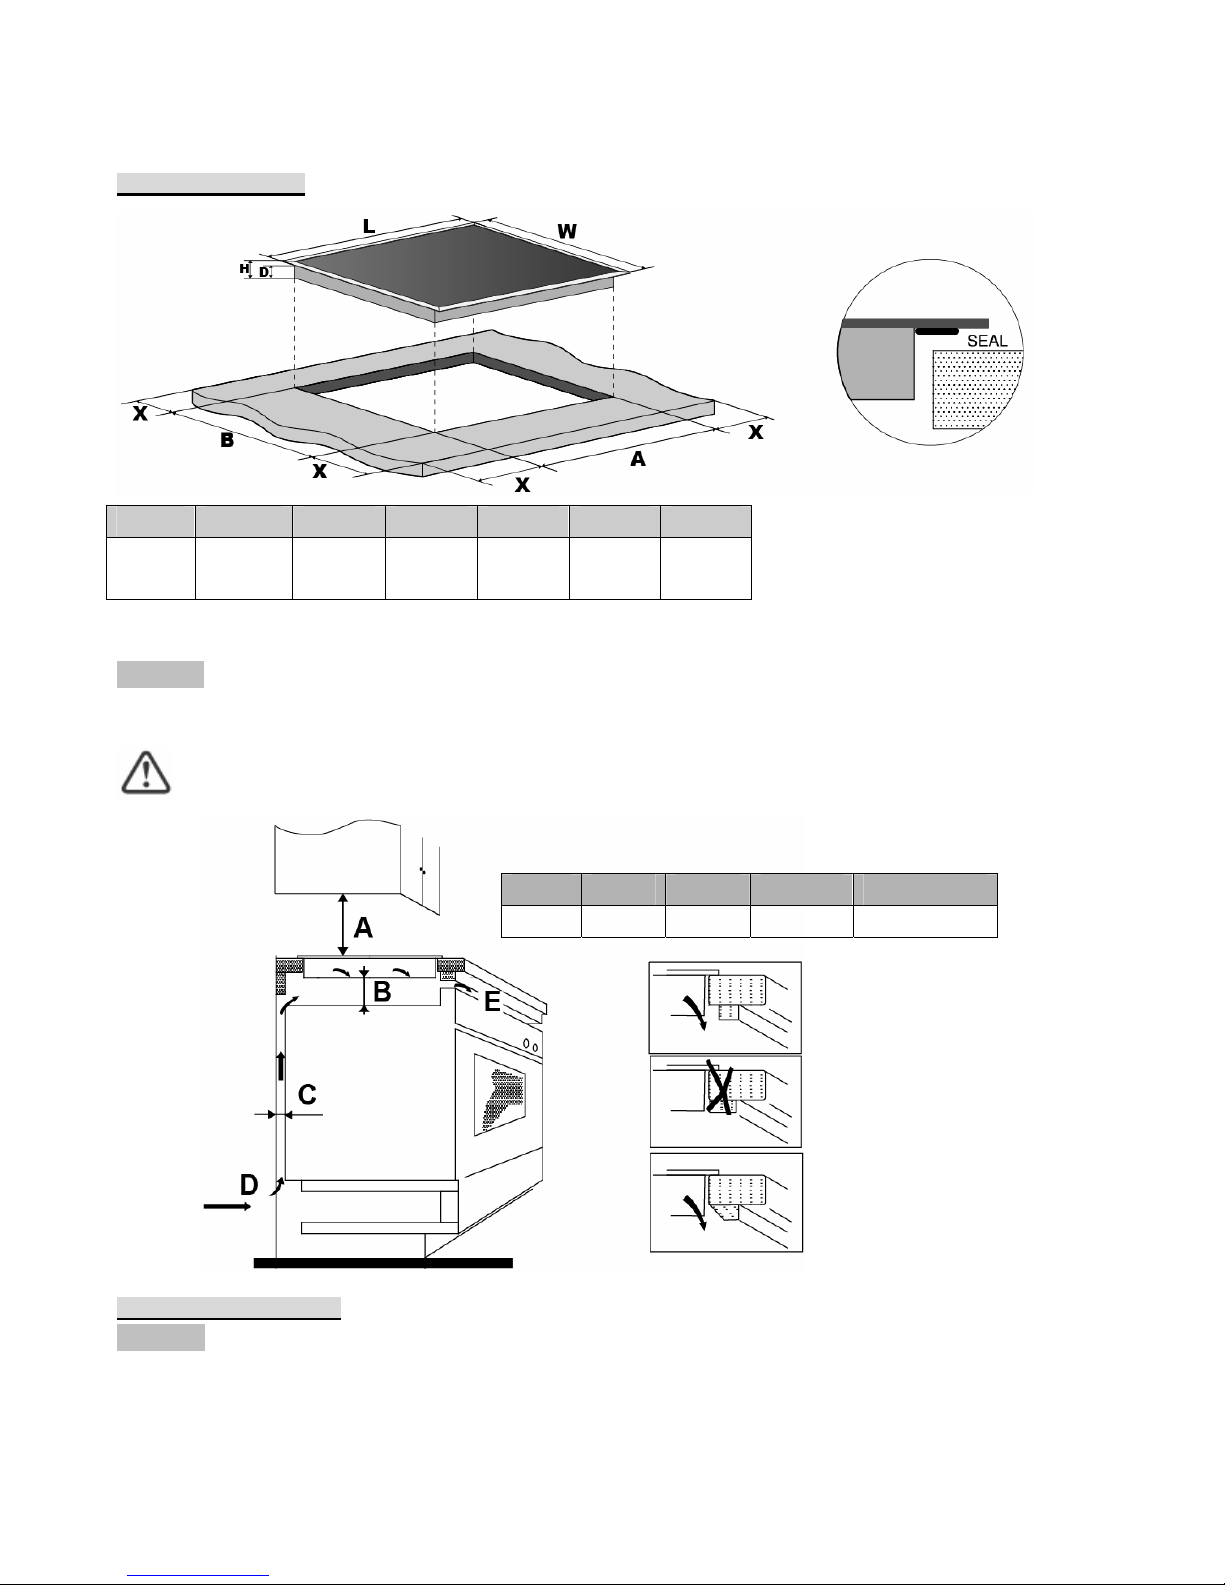
6
1. Cupboard Cutting
L(mm) W(mm) H(mm) D(mm) A(mm) B(mm) X(mm)
900 520
50 mini
Important
Under any circumstances, make sure the Induction cooker hob is well ventilated and the air inlet and outlet are
not blocked. Ensure the Induction cooker hob is in good work state. As shown below
Note: The safety distance between the hotplate and the cupboard above the hotplate should be at least
760mm.
2. Electrical connection.
Important:
z the domestic wiring system is suitable for the power drawn by the hob.
z the voltage corresponds to the value given in the rating plate
z the power supply cable sections can withstand the load specified on the rating plate.
z To connect the hob to the mains power supply, do not use adapters, reducers, or branching devices, as th ey
can cause overheating and fire.
A(mm) B(mm) C(mm) D E
760 50 mini 20 mini Air intake Air exit 5mm
60 56 495
750
 Loading...