

Page 1
INSTRUCTION MANUAL
WARNING
P2001739
REVISION B
Series e-90 & e-1535
Replacement Seal
Instructions
• Make sure that the pump is isolated from the
system and that pressure is relieved before
you disassemble the pump, remove plugs,
open vent or drain valves, or disconnect
the piping.
• Always disconnect and lock out power to the
driver before you perform any installation or
maintenance tasks.
• Never apply heat to impellers.
Failure to follow these directions will result in
serious physical injury.
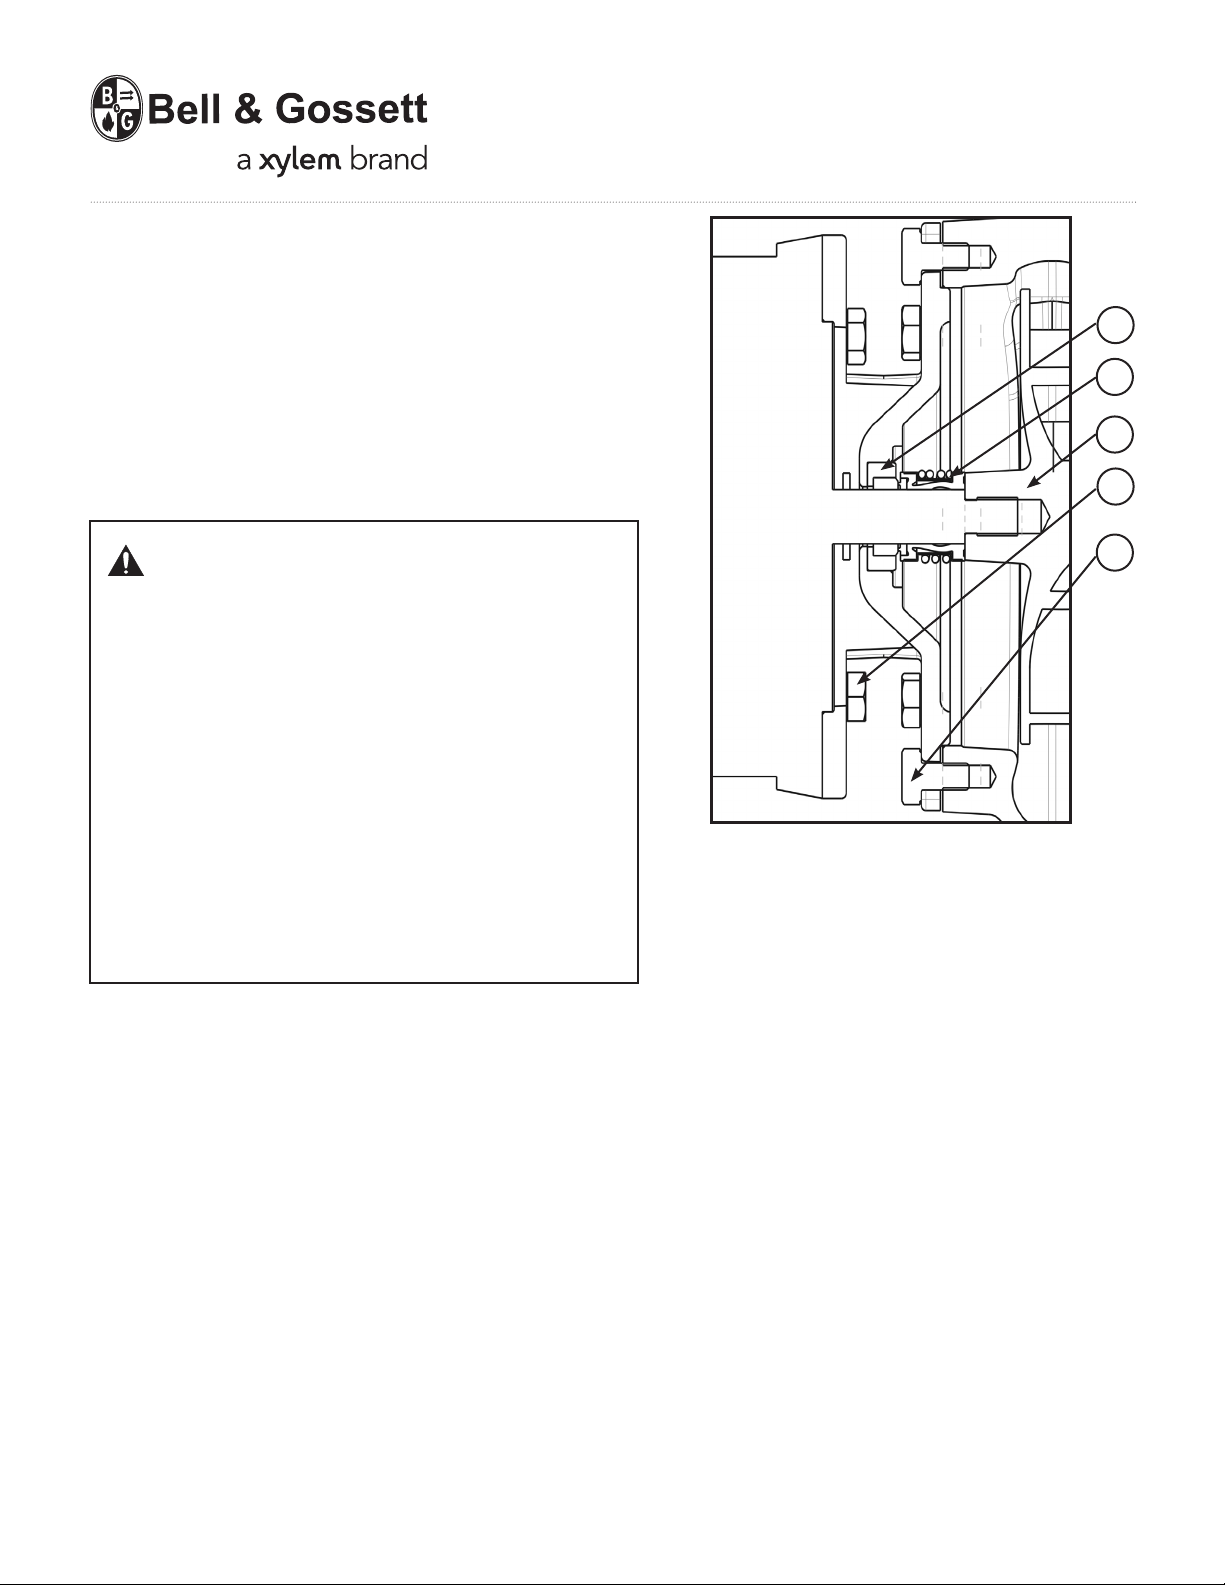
1
2
3
4
5
1. Seal Seat
2. Seal Head
3. Impeller
4. Motor Capscrew
5. Volute Capscrew
Close the isolation valves on the suction and discharge sides of the pump.
You must drain the system if no valves are installed. Open the drain valve or plug.
Do not proceed until liquid stops coming out of the drain. If liquid continues to ow from the drain,
the isolation valves are not sealing properly and you must repair them before you proceed.
Leave the drain open. Do not close the drain until the reassembly is complete.
Loosen the volute capscrews but do not remove them.
Shift the pump position slightly in order to allow any pressurized liquid to escape.
Remove the volute capscrews and remove the pump assembly from the volute.
Remove the plug or cover from the motor rear end plate. This will allow access to the end of the motor
shaft. A slot or wrench ats are provided on the end of the shaft to retain the shaft during disassembly
and assembly.
Page 2

Using a large screwdriver or an end wrench and a strap wrench on the impeller OD turn the
impeller counterclockwise to unscrew it from the motor shaft. The impeller is held in place with
Loctite and torque. Do not insert anything between the impeller vanes or motor fan blades as
damage may occur.
Grab the OD of the seal head assembly and remove. Remove the four capscrews that hold the
bracket to the motor and remove the bracket. Push the cup mounted seal seat out of the bracket
with a small screwdriver.
Clean the motor shaft and bracket recess with a clean lint free cloth.
Lubricate the OD of the cup mounted seal seat with soapy water or P80 Rubber Lubricant and push
into the bracket. Install the bracket onto the motor.
Check that the seal faces are clean, if not, gently wipe with a lint free cloth to prevent scratching.
The seal head assembly is a unitized design and should not be disassembled.
Lubricate the ID of the seal head assembly with soapy water or P80 and push onto the motor shaft.
Clean the motor and impeller threads. Apply Loctite 7471 Primer to the threads of the motor
and impeller. Allow to dry. Apply a small amount of Loctite Retaining Compound 609 or 680
to the threads.
Care must be used when applying Loctite so that it does not get on surrounding areas.
Screw the impeller onto the motor shaft. Using a large screwdriver or an end wrench and a strap
wrench on the impeller OD tighten the impeller to the motor shaft. Do not insert anything between
the impeller vanes or motor fan blades as damage may occur.
Torque the impeller to 20-25 ft-lbs. 25 ft-lbs can be approximated by turning the impeller until the
impeller hub is rmly against the motor shaft shoulder and then turning an additional 15 degrees.
Note: On three phase motors it is very important to follow these instructions. Failure to comply to
these instructions could allow the impeller to come loose during the motor rotation check if the
motor starts in reverse rotation.
Clean the bracket and volute gasket surfaces. Install a new gasket on the bracket.
Insert the motor assembly back into the pump casing. Tighten the casing capscrews evenly.
Close the drain value and open the isolation valves. Inspect pump for leaks. If not leaking,
return pump to service.
Xylem Inc.
8200 N. Austin Avenue
Morton Grove, Illinois 60053
Phone: (847) 966-3700
Fax: (847) 965-8379
www.bellgossett.com
Bell & Gossett is a trademark of Xylem Inc. or one of its subsidiaries.
© 2013 Xylem Inc. P2001739B October 2013
 Loading...