

Page 1
INSTRUCTION MANUAL
6-71-075-003
REVISION A
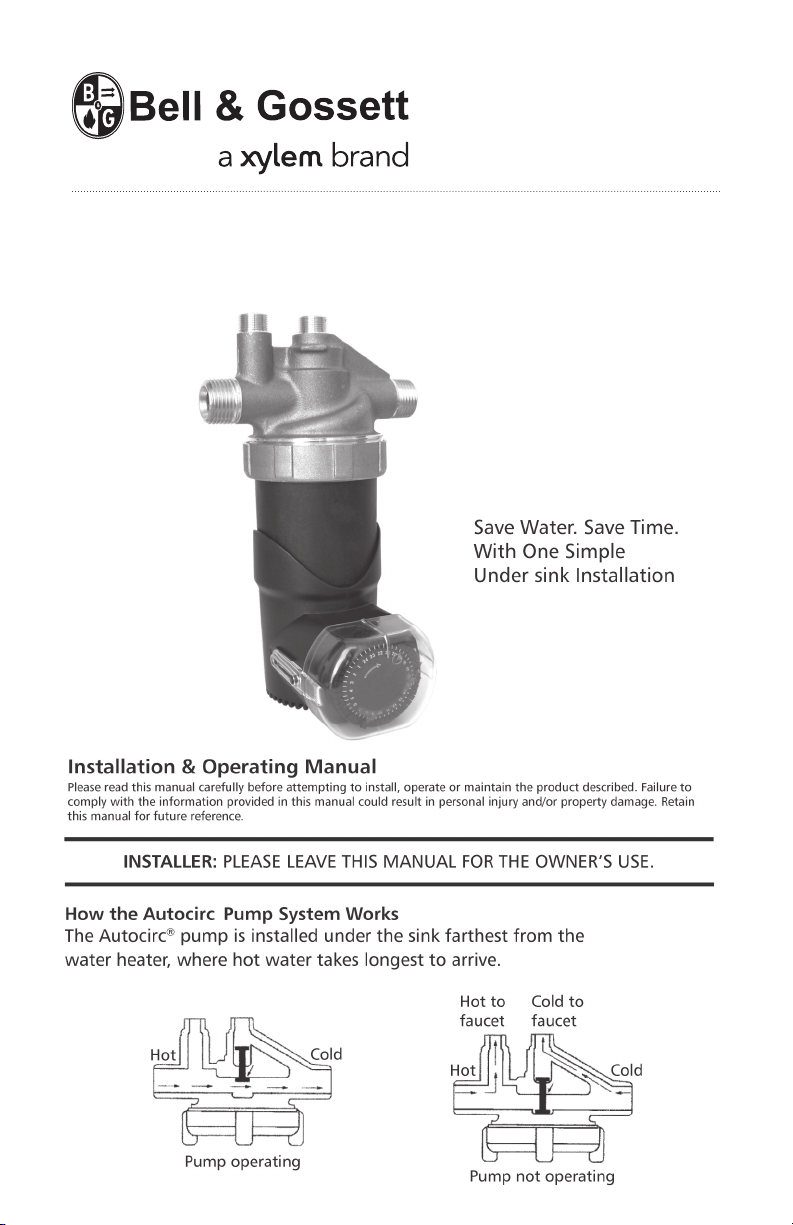
Autocirc® Instant Hot Water Pump
Models e3-4_/BDPQC and e3-4_/BDPRC
Page 2
Page 3
Preparation for Installation:
Assemble the parts and tools required:
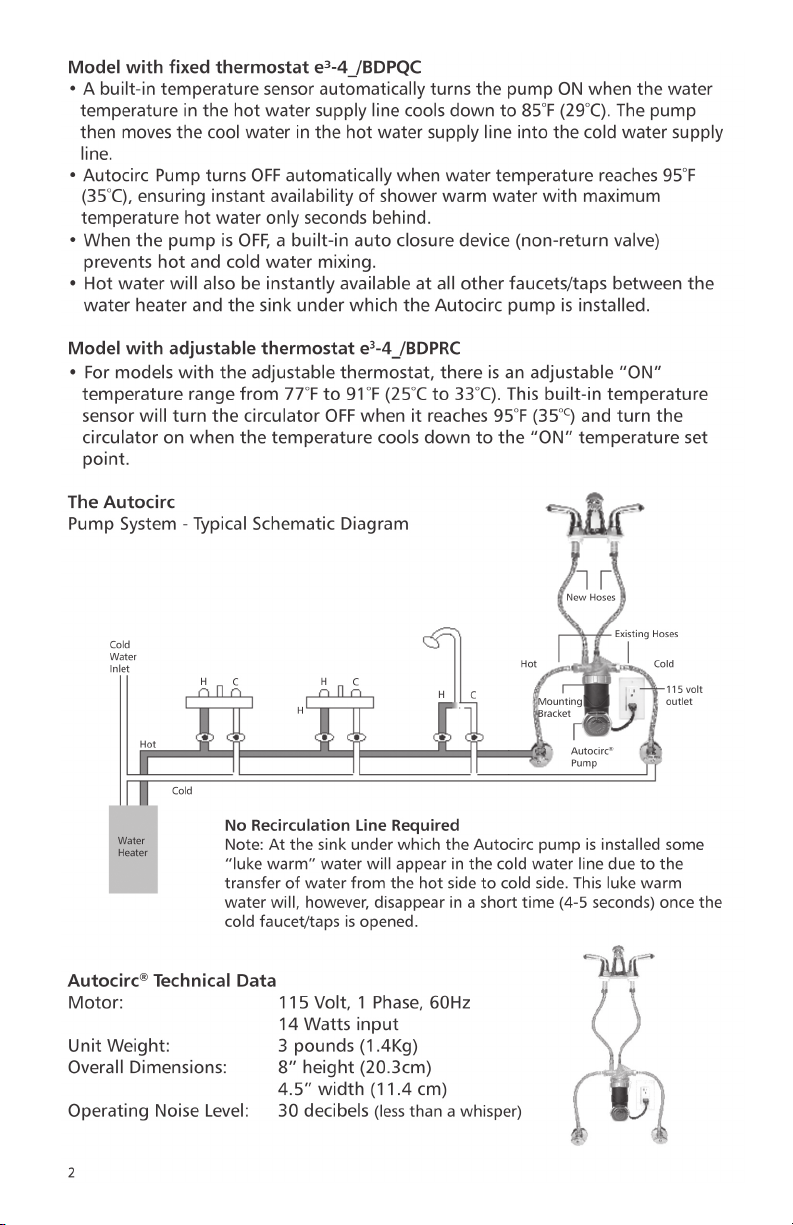
• Autocirc pump package includes the pump with a built-in timer, a 6ft. cord, and
wall mounting bracket.
• Two stainless steel flexible hoses (1/2” x 3/8”) - length as required. (sold separately)
• Adjustable wrench and screwdriver.
• Select the sink under which the Autocirc pump is to be located (the sink where hot
water takes longest to arrive).
This pump must be installed in accordance with AS3500.
This pump has been tested using water only. Its suitability for use with liquids other than
water is the end user’s responsibility.
Australia
U.L. Caution
Installation
Step 1
If not already available, install a 115 Volt/ 60Hz
outlet within six (6) feet of the installation site (the
faucet/tap farthest from the water heater), as the
Autocirc is supplied with a 6 ft. long, grounded
cord. The Autocirc pump requires only 14 watts and
0.3 amps of power (see Fig. 1).
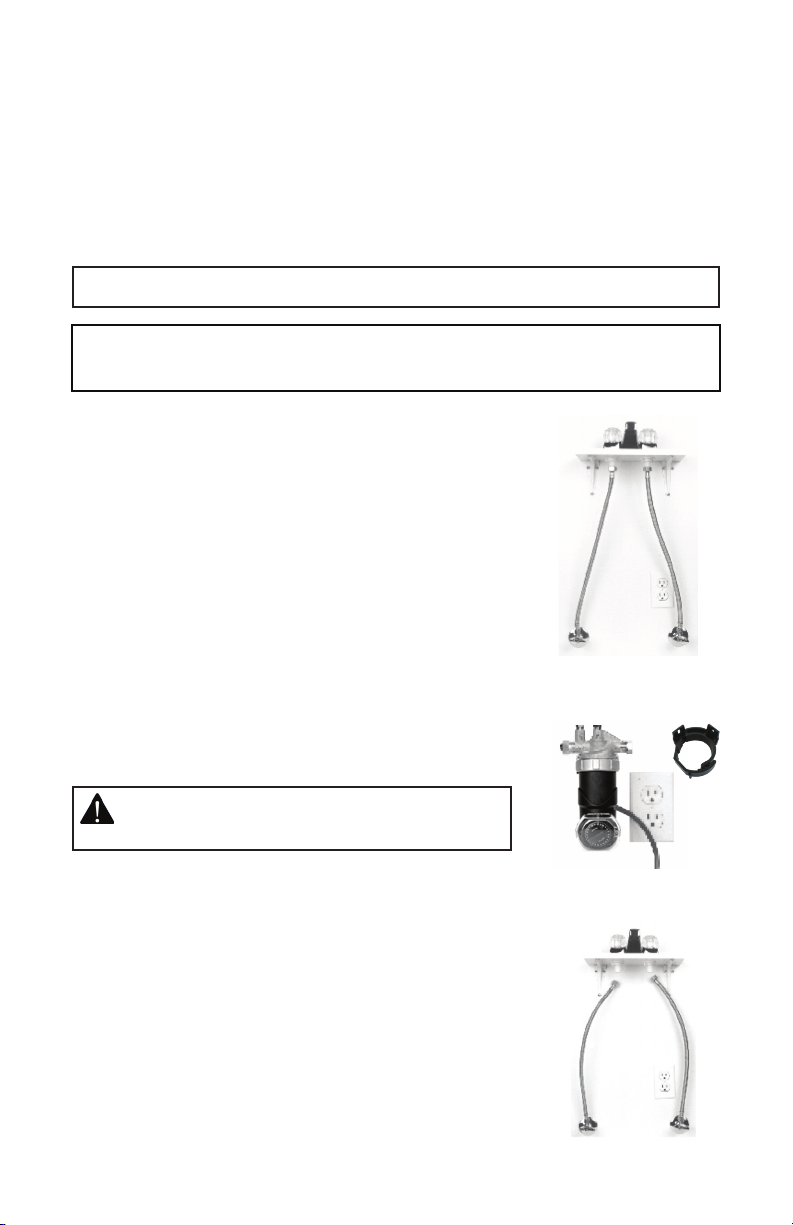
Step 2
Fasten the Autocirc to the wall under the sink using
the wall bracket provided in the Autocirc kit. Be sure
Figure 1
the pump timer is turned toward the front and is
accessible for setting and changing the time (see
Fig. 2). The pump must be installed only in a vertical
position as shown.
CAUTION: Do Not fasten pump to a thin wood panel
wall as this might create a vibration noise when the
pump is operating.
Step 3
Figure 2
Close the under sink hot and cold water riser
shut-off valves and open the hot and cold water
faucets/taps to relieve the water pressure. Close the
water faucets/taps.
Note: in some older homes, the riser shut-off valves
may be difficult to shut off completely. If this is the
case turn the water off at the main water inlet valve
to the house.
Remove the existing flexible line connection to the hot
and cold water faucet/tap threaded nipples (see Fig. 3).
Figure 3
3
Page 4

Note: If felt necessary, replace these existing flexible
hoses with new stainless steel braided flexible hoses
in the lengths required.
Step 4
Screw on the two existing 1/2” hose connections to
the corresponding hot and cold sides of the pump
housing (see Fig. 4). Be sure not to “kink” these
existing hose lines during bending which may
prevent adequate flow and/or cause the valves to
break.
Note: It is recommended that the rubber washers
in the hose connections be inspected to ensure
they are in reusable condition. If not, they should
be replaced.
Step 5
Screw on the 3/8” end of the purchased flexible
hoses to the 3/8” connections on the pump housing.
Screw on the 1/2” end of these same two hoses to
the underside of the hot and cold water faucets/taps
making sure to match the hot and cold sides marked
on the pump housing with the corresponding faucet/
tap. Be sure the hot side connection hose is attached
to the hot water faucet/tap and the cold water side
connection is attached to the cold water faucet/tap.
Be sure the hoses used are long enough to allow the
pump to be positioned as originally planned. ( see
Fig. 5)
Figure 4
Figure 5
Step 6
Be sure the screw ring attaching the motor to the pump housing is securely
hand tightened. Do not over tighten the screw ring. Open the faucet/tap hot
and cold riser shut off valves to insure there are no water leaks at any
connections.
CAUTION: Fasten screw ring until tight to prevent leakage.
Step 7
Plug the pump cord into the wall outlet and start up the pump system (see
next page).
Note: The above installation method applies to most situations where faucets/
taps are connected to the hot and cold water supply lines with braided flexible
hose/shut off valve arrangements. If the under sink arrangement is different
(i.e. the risers are hard copper or plastic), then other parts may be required for
the installation.
4
Page 5

Page 6

Page 7

Page 8

Xylem Inc.
8200 N. Austin Avenue
Morton Grove, Illinois 60053
Phone: (847) 966-3700
Fax: (847) 965-8379
www.xyleminc.com/brands/bellgossett
Bell & Gossett is a trademark of Xylem Inc. or one of its subsidiaries.
© 2012 Xylem, Inc. 6-71-075-003A July 2012
 Loading...