

Page 1
PLEASE READ INSTRUCTIONS PROVIDED IN THE
INSTRUCTION MANUAL. This is only a quick starter guide.
6 QT. PRESSURE COOKER
Gasket
Aluminum
cover
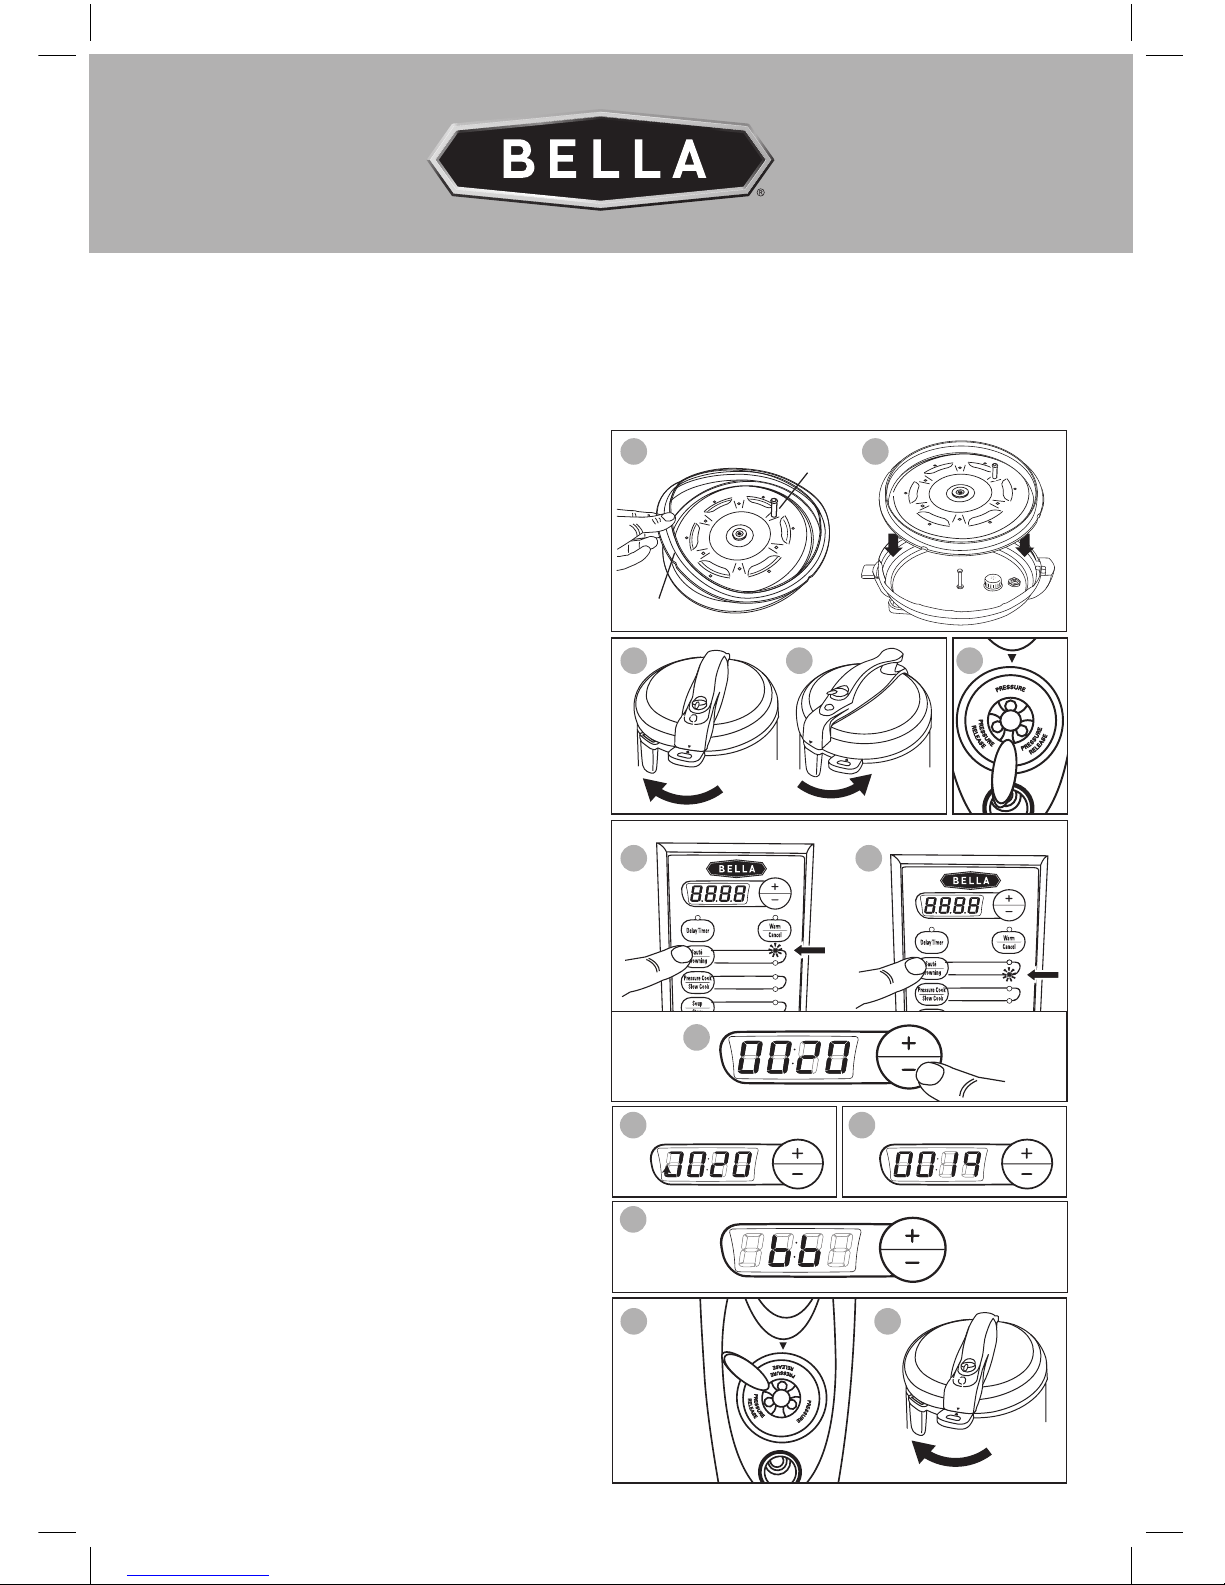
1. Ensure that gasket is secured around
aluminum cover (1a) & attach to housing lid (1b).
2. Turn the lid clockwise to UNLOCK
position to open the lid and place the
ingredients in the pot (2a).
3. Lock the lid by turning counter clockwise to LOCK position (2b) and set
pressure release valve to PRESSURE
position (3).
4. Press the setting button once (4a) or
twice (4b) & the corresponding light
will indicate the selected setting.
The default time (4c) can be manually
changed using the “+” and “-” buttons.
As a safety feature, the lid cannot be
opened when cooking is in process.
5. Pressure build up takes few minutes
during which the display will have an
animation to indicate this process.
6. Animation will stop after pressure is
created & the default time will begin to
count down.
7. After cooking is complete you will
hear a beep & the display will show
the depicted graphic.
8. Use an oven mitt or a towel to turn
the pressure release valve to the
PRESSURE RELEASE position and
let the steam escape (8a). Turn lid
clockwise to the UNLOCK position
to open (8b).
1X
2X
Pressure
Release
Turn
to open
1a
2a
4a
8a
4b
8b
1b
2b 3
4c
5 6
7
Turn
to close
Turn
to open
Page 2
LEA LAS INSTRUCCIONES DE ESTE MANUAL DE
INSTRUCCIONES. Esta es una guía de inicio rápido.
OLLA DE PRESIÓN DE 5,7 L
Junta
Cubierta
de aluminio
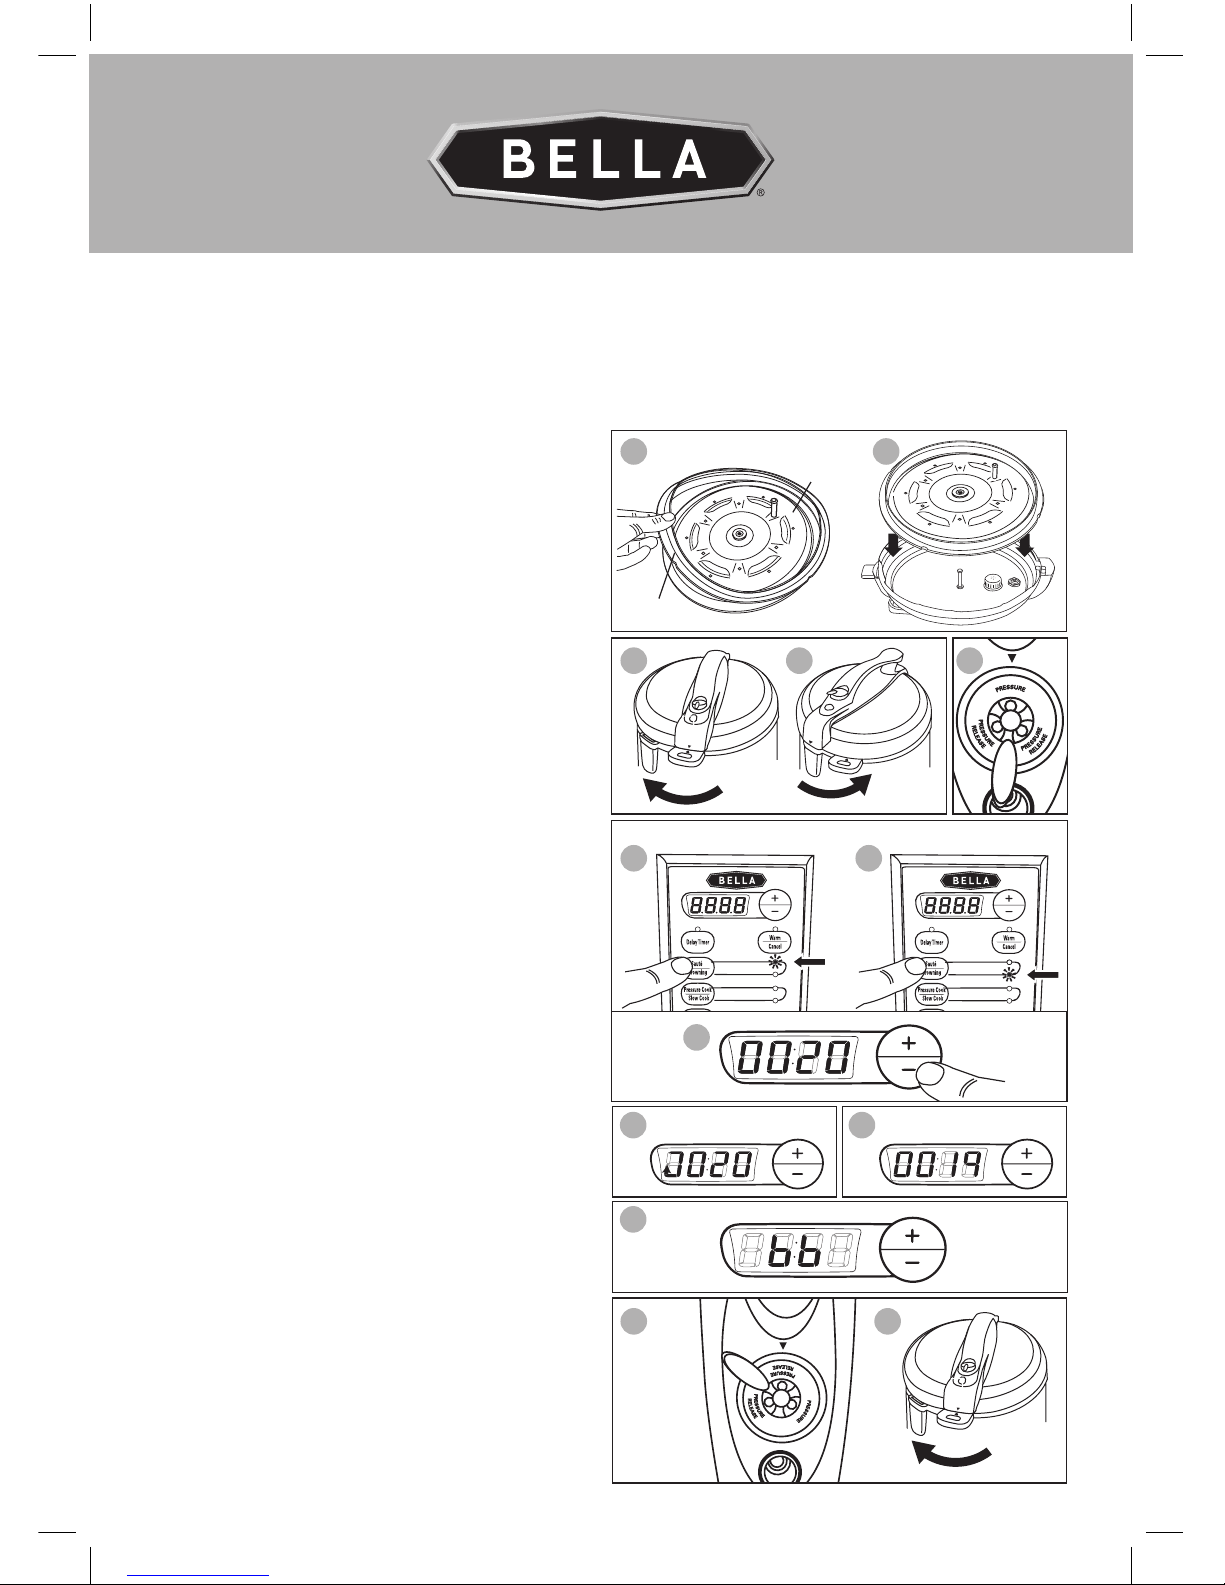
1. Asegúrese de que la junta este fijada
alrededor de la cubierta de aluminio (1a)
y adjuntar a la tapa de la carcasa (1b).
2. Gire la tapa hacia la derecha hasta la
posición de desbloqueo para abrir la tapa
y coloque los ingredientes en la olla (2a).
3. Bloquee la tapa girando en sentido
contrario a la posición del reloj LOCK
(2b) y ajuste de la válvula de alivio de
presión a la posición de presión (3).
4. Presione el botón de configuración
una (4a) o dos (4b) veces y la luz
correspondiente indicará la
configuración seleccionada.
El tiempo predeterminado comenzará
la cuenta regresiva que puede cambiarse
de forma manual con los botones “+”
y “-” (4c). Por seguridad, la tapa no se
puede abrir durante la cocción.
5. La acumulación de presión puede llevar
algunos minutos; durante este tiempo,
la pantalla tendrá una animación para
indicar este proceso.
6. La animación se detendrá luego
de que se haya creado la presión y
el tiempo predeterminado comenzará
la cuenta regresiva.
7. Luego de finalizar la cocción, oirá
una señal sonora y la pantalla mostrará
los siguientes gráficos.
8. Con un guante de horno o paño,
gire la válvula de alivio de presión
hacia la posición PRESSURE RELEASE
(LIBERACIÓN DE PRESIÓN) (8a) y deje
que salga el vapor. Gire la tapa en sentido
horario hacia la posición UNLOCK
(DESBLOQUEAR) para abrir (8b).
1X
2X
Alivio de
presión
Gire
para abrir
1a
4a
8a
4b
8b
1b
3
4c
5 6
7
2a 2b
Gire
para
cerrar
Gire
para
abrir
 Loading...