

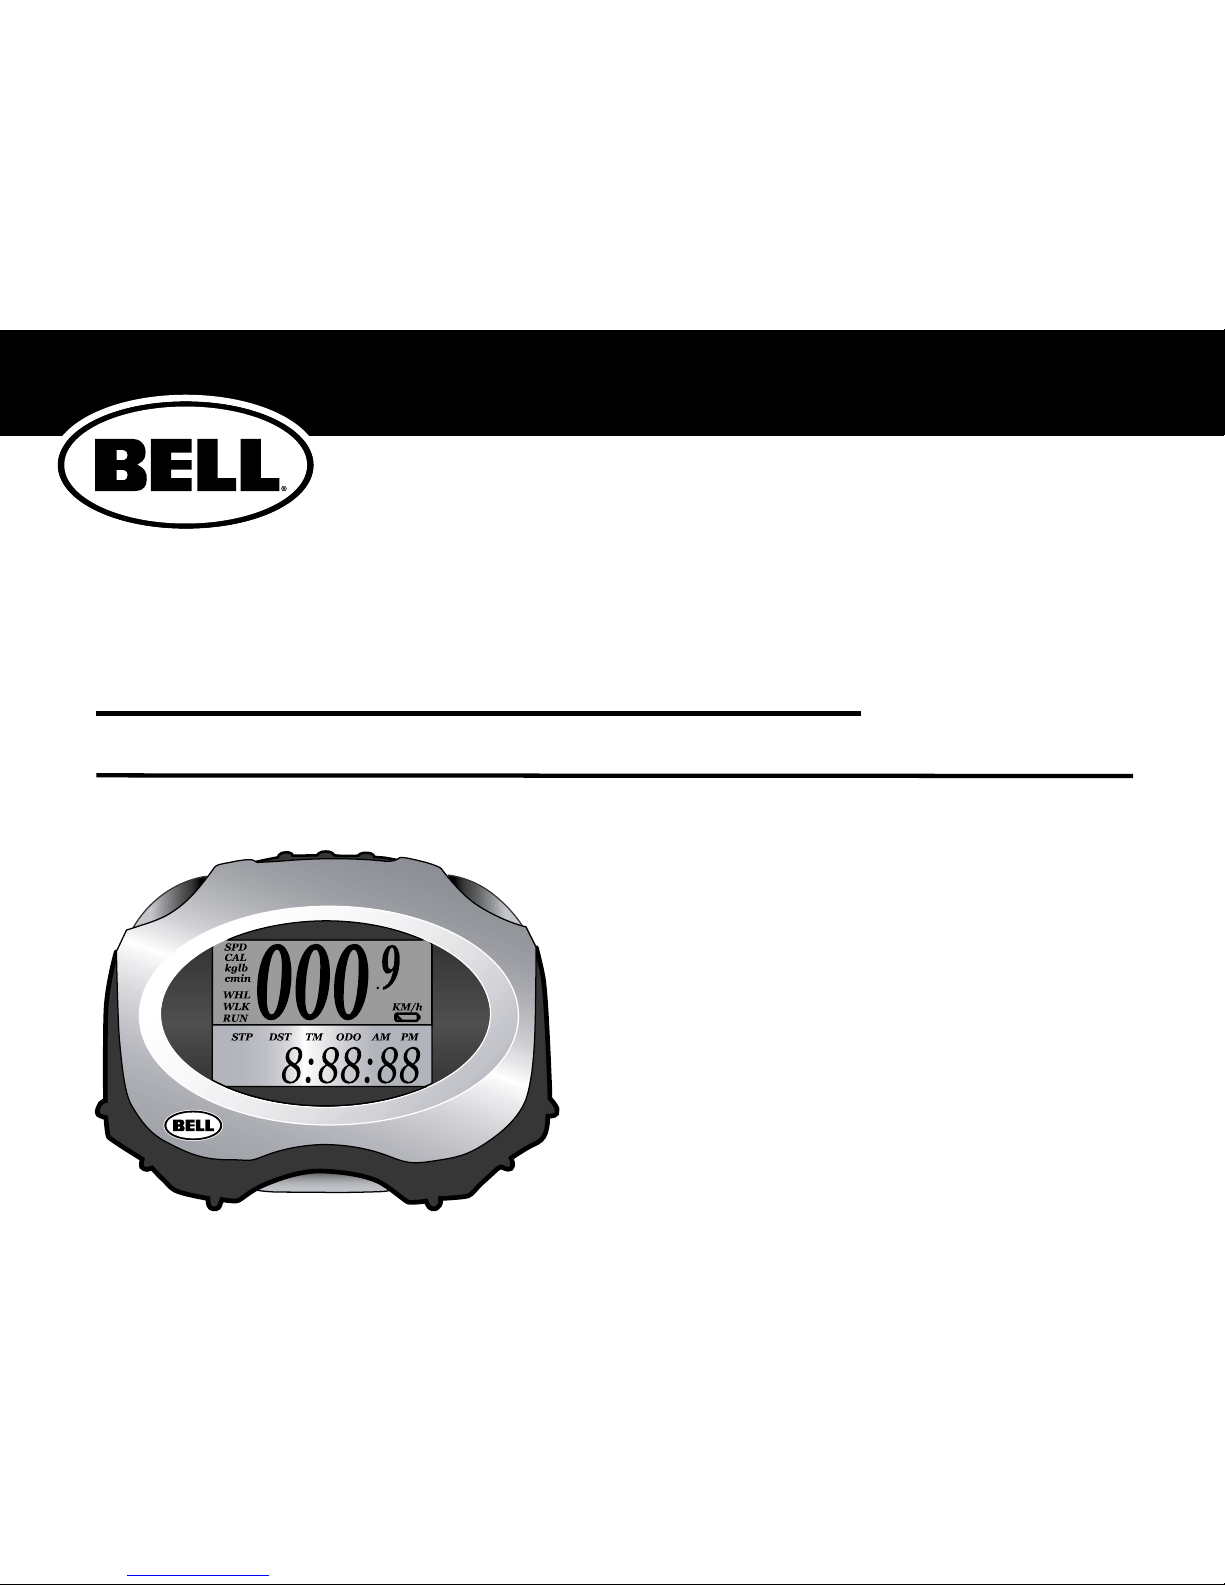
Bell TotalFit Nstruction Manual
INSTRUCTION MANUAL
MANUAL DE INSTRUCCIONES
MANUEL D’UTILISATION
TotalFit
™
Speedometer-pedometer
VeLoCÍmetro-podómetro
Compteur CyCLiSte et podomètre

! WARNING!
Improper installation of this or any other bike computer can result in an accident. Read and follow installation
instructions carefully.
Call our toll free customer service department at 1-800-456-BELL if you have any questions about installation.
Check mounting hardware and transmitter installation before each ride for adjustment and secure fit.
This computer will not fit all bikes. If you cannot get a secure installation per the instruction manual, do not use
this computer.
! ADVERTENCIA!
La instalación incorrecta de ésta u otra computadora para bicicletas puede provocar un accidente. Lee y sigue
cuidadosamente las instrucciones de instalación.
Si tienes preguntas sobre la instalación, llama gratis a nuestro departamento de servicio al cliente, al 1-800-456-BELL,
o sea 1-800-456-2355.
Verifica que los dispositivos de montaje y el transmisor del velocímetro estén bien instalados y ajustados, antes de
montar en tu bicicleta.
Esta computadora no está diseñada para usarse en cualquier bicicleta. Si no puedes instalarla de manera segura, de
acuerdo con el manual de instrucciones, no la uses.
! AVERTISSEMENT !
L’installation incorrecte de ce compteur pour bicyclette, comme de n’importe quel ordinateur pour bicyclette, peut
occasionner un accident. Lisez soigneusement, et observez à la lettre ces instructions d’installation.
Si vous vous trouvez en Amérique du Nord, appelez notre service d’assistance à la clientèle au numéro gratuit
1-800-456-BELL, si vous avez des questions à poser au sujet de l’installation.
Vérifiez l’installation du matériel de montage et du transmetteur avant chaque utilisation de la bicyclette pour vous
assurer qu’il est correctement réglé et qu’il est bien fixé.
Ce compteur ne peut s’adapter à toutes les bicyclettes. Si vous ne parvenez pas à effectuer une installation correcte
en suivant les instructions du mode d’emploi, n’utilisez pas ce compteur.
CONTENTS/CONTENIDO/MATIÈRES PAGE/PÁGINA/PAGE
English Instructions ..............................................................................................
4
Instrucciones en español ....................................................................................
25
Instructions en français ......................................................................................
46

CONTENTS
4
FUNCTIONS SUMMARY .................................................................................................................................................................5
INSTALLATION
Parts ...............................................................................................................................................................................................6
Pedometer Installation
Belt Clip .....................................................................................................................................................................................
7
Speedometer Installation
Magnet and Sensor ...................................................................................................................................................................
8
Handlebar Mounting Bracket .....................................................................................................................................................
9
Sensor Wiring ..........................................................................................................................................................................
10
COMPUTER CONFIGURATION
Getting Started
Battery Installation ..................................................................................................................................................................
11
Unit Set Up ..............................................................................................................................................................................
12
Pedometer or Speedometer Mode Selection .................................................................................................................................
13
Pedometer Configuration
Walk and Run Stride Length Input ...........................................................................................................................................
14
Speedometer Configuration
Wheel Size Input .....................................................................................................................................................................
15
Wheel Diameter Size Chart ......................................................................................................................................................
16
USAGE
Quickstart .....................................................................................................................................................................................17
Auto Start/Stop, Low Battery Indicator, Walk/Run Mode ................................................................................................................
18
Speed and Calorie Functions ........................................................................................................................................................
19
Step, Distance and Odometer Functions .......................................................................................................................................
20
Clock and Timer Functions
............................................................................................................................................................21
Reset Functions I ..........................................................................................................................................................................
22
Reset Functions II .........................................................................................................................................................................
23
TROUBLESHOOTING .....................................................................................................................................................................24

FUNCTIONS SUMMARY
5
Current Speed (SPD)
Calories Burned (CAL)
Trip Distance (DST)
Trip Timer (TM)
Odometer (ODO)
12 or 24 Hour Clock
Auto Start/Stop
US or Metric Unit Selection
Low Battery Indicator
‘New Trip’ Function Reset
Pedometer Only
Step Count (STP)
Walk or Run Mode (WLK/RUN)
6
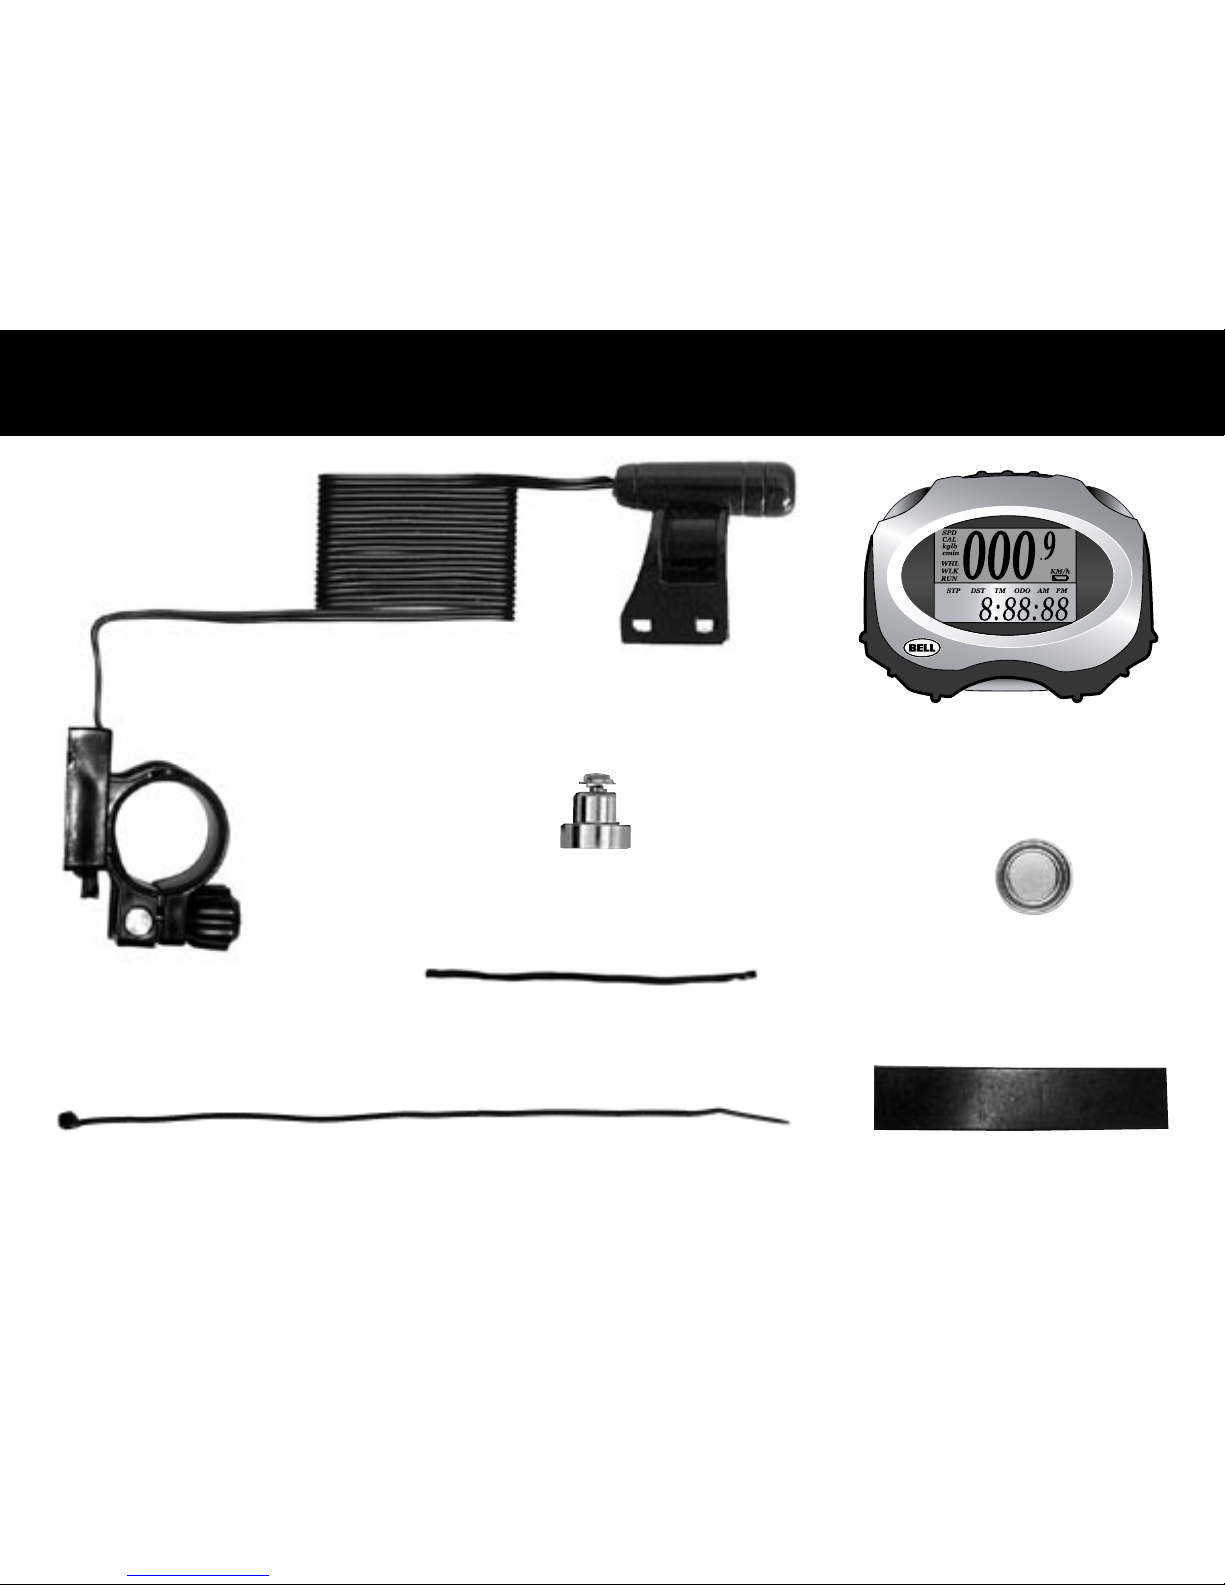
PARTS
Rubber Shims (2)
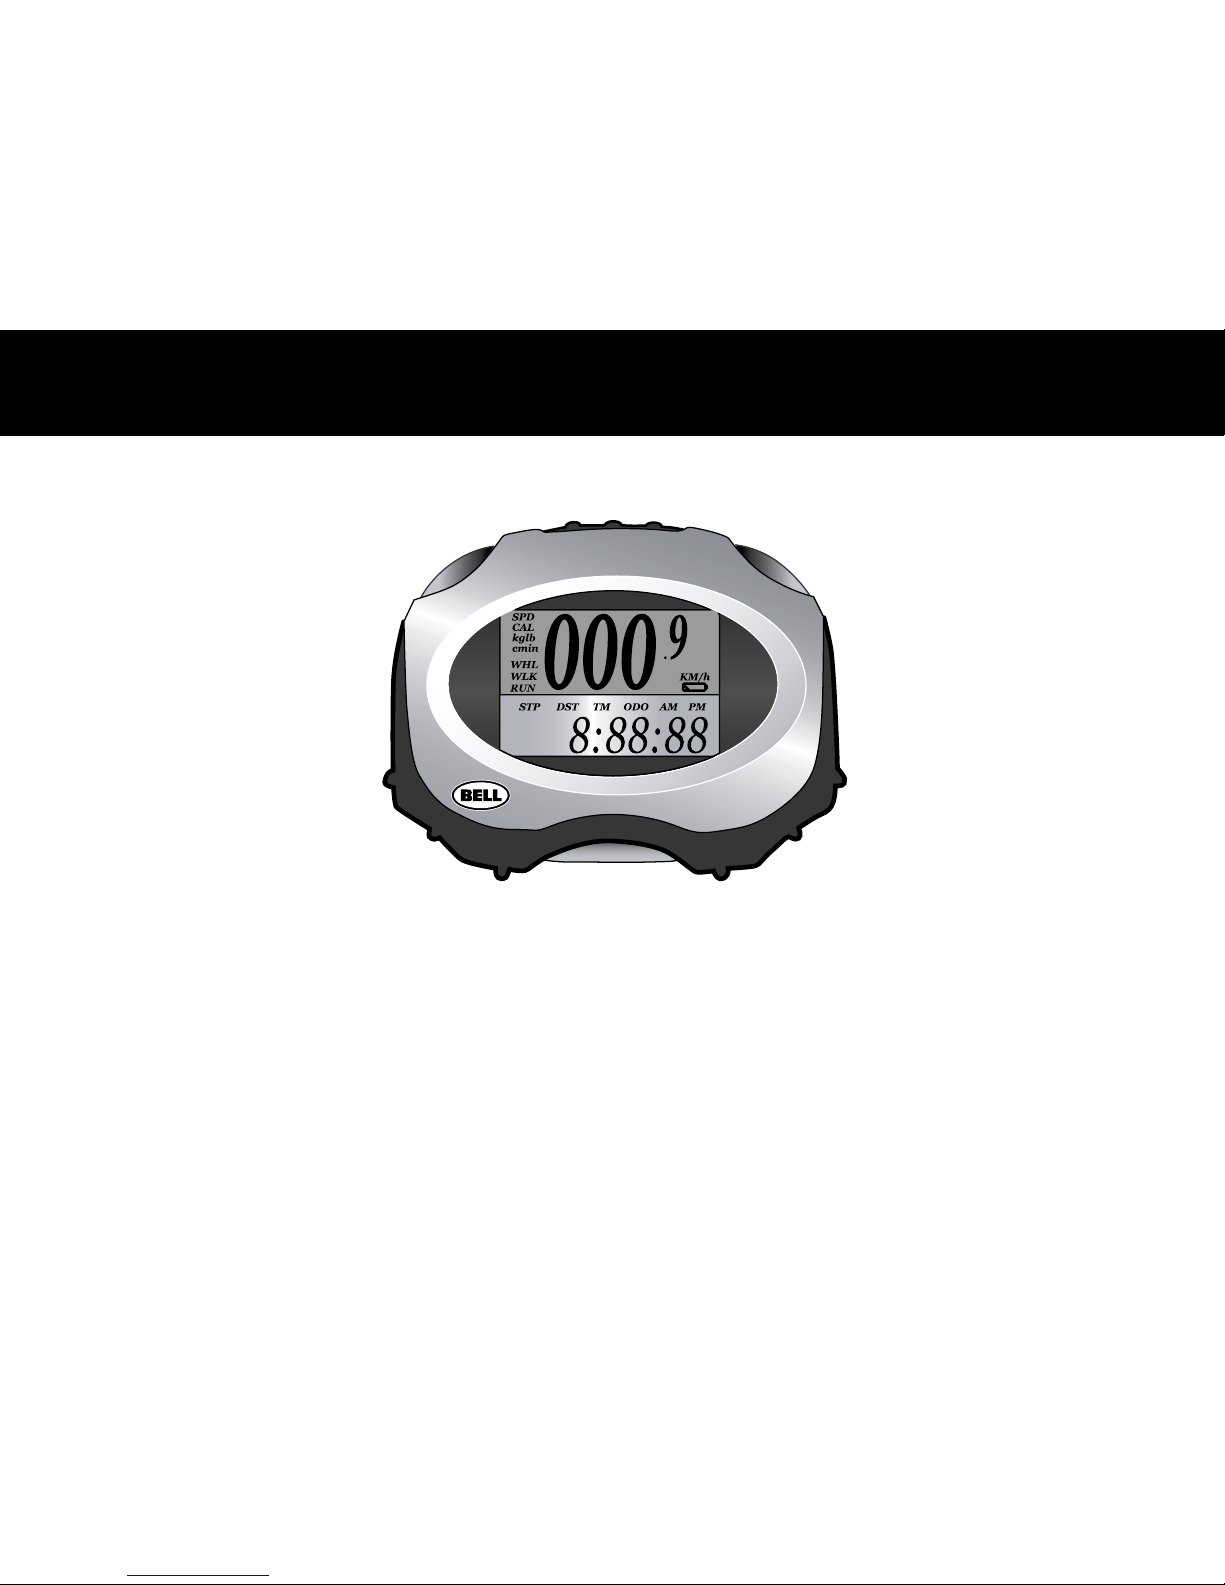
Computer Unit
Sensor
Wire
Handlebar Mounting
Bracket
Cable Ties (3)
Computer Battery
(1.5V/L1142)
Twist Ties (2)
Wheel Magnet
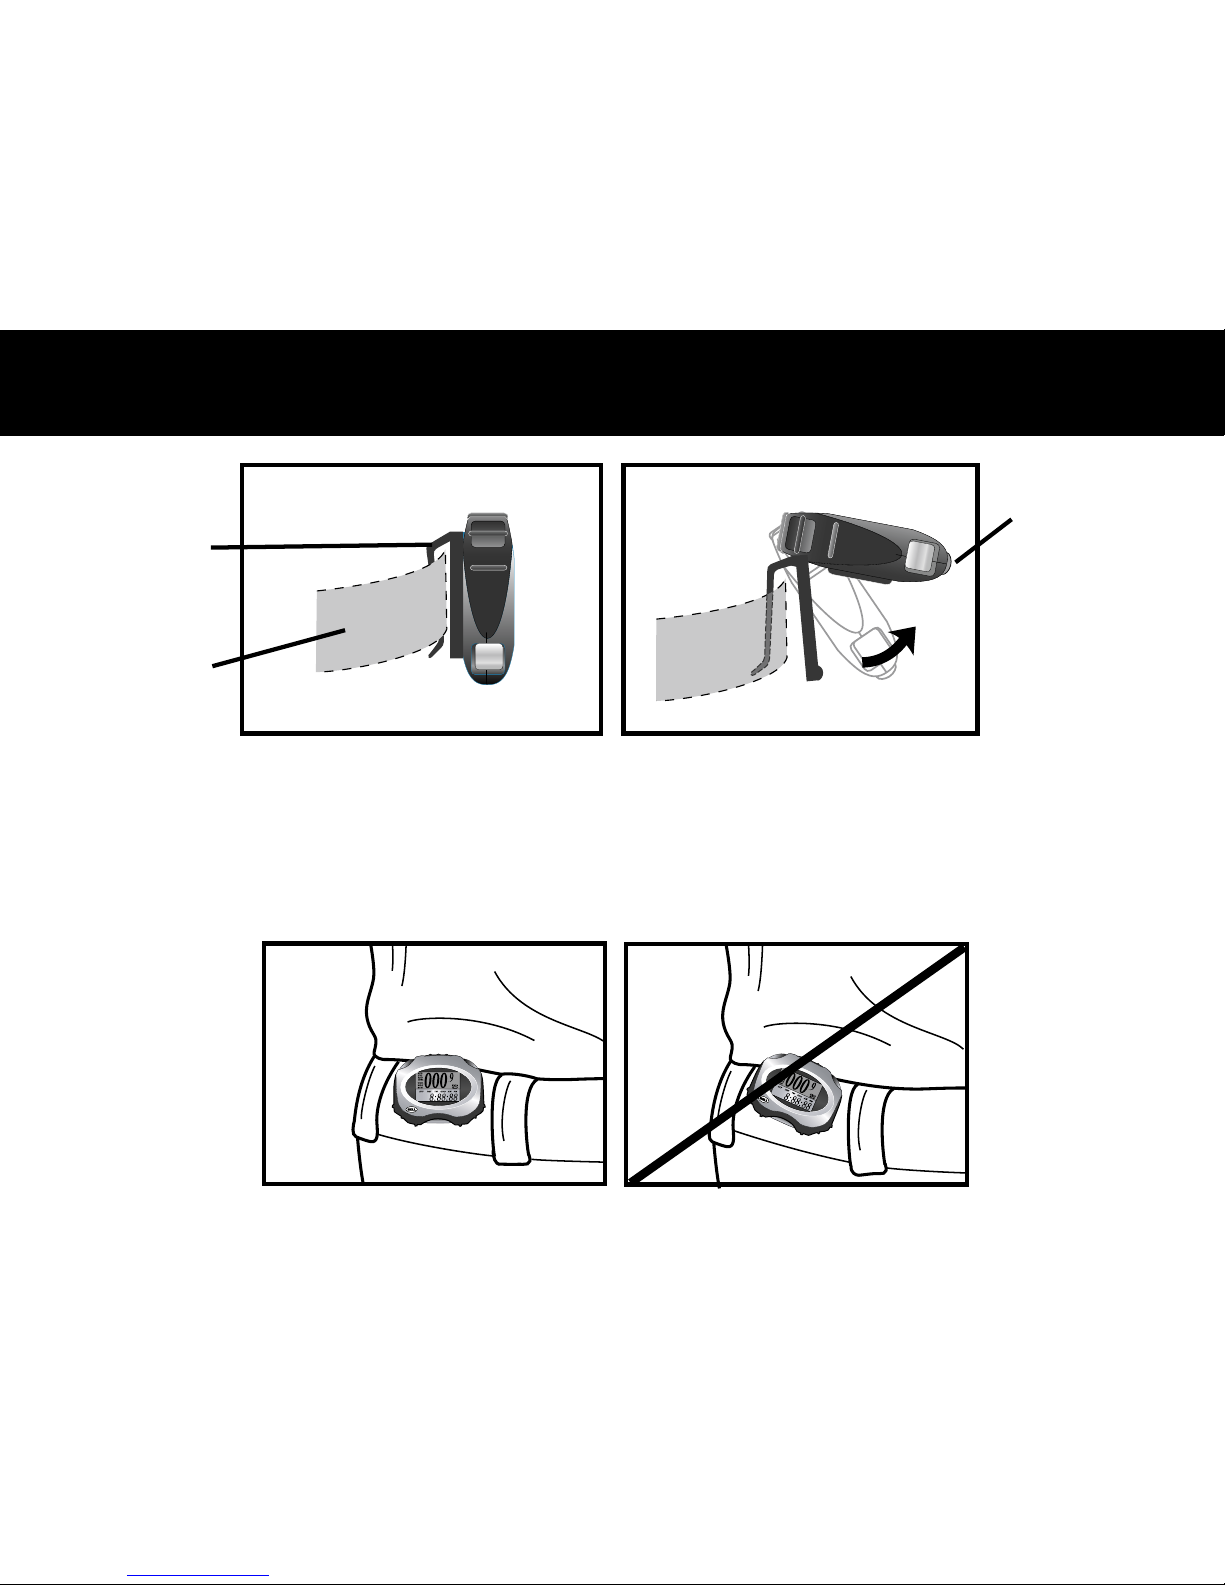
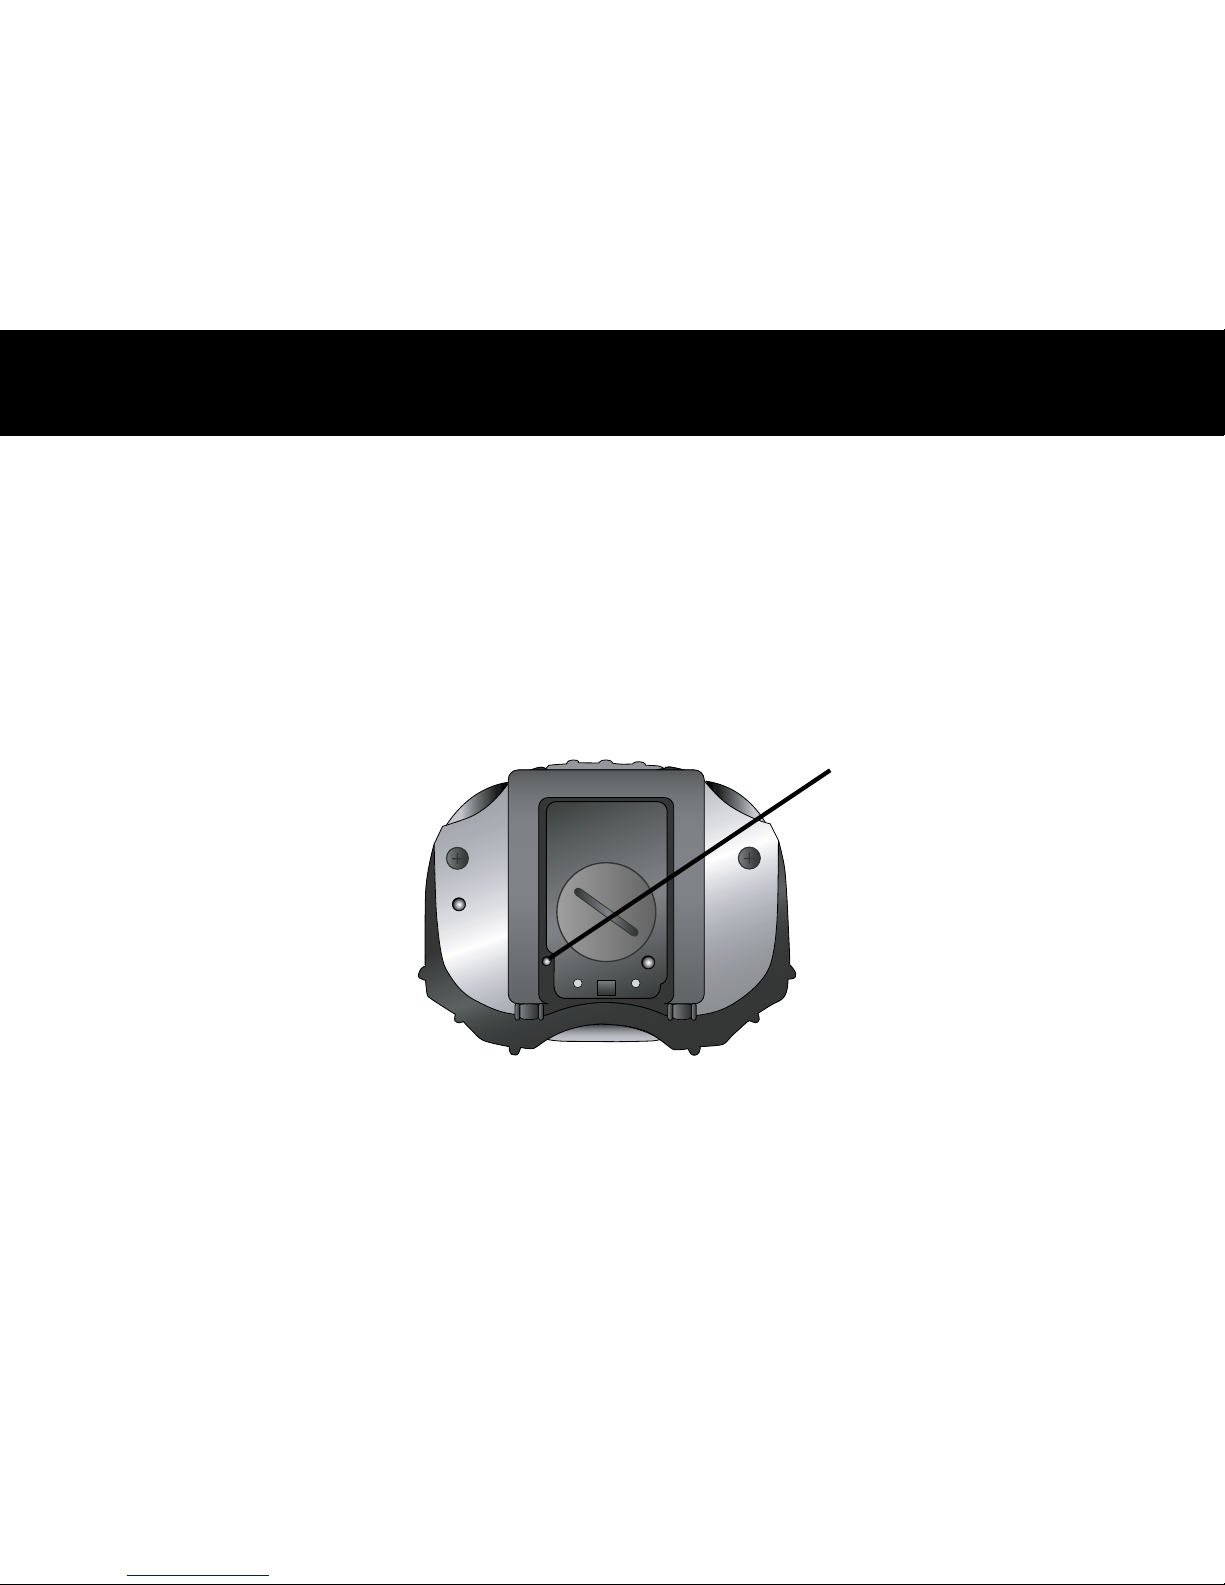
PEDOMETER INSTALLATION - BELT CLIP
Figure 2Figure 1
7
Right
Using its built-in belt clip, the pedometer can be easily and snugly attached to the waistband of shorts or
pants. When walking, hiking or running, make sure the unit stays
horizontally in line with the waistband.
After lifting up the pedometer and viewing the screen, it is recommended to put it back in original
position as on (Figure 1) to guarantee accurate measurements.
Wrong
Waistband
Built-In
Beltclip
Slide RELEASE
BUTTON to lift
pedometer and
view screen
SIDE VIEW
SIDE VIEW
8
SPEEDOMETER INSTALLATION - MAGNET AND SENSOR
Attach the speedometer sensor on the right fork of the front wheel using two of the cable ties provided.
Make sure the sensor is curved toward the wheel, and that the smooth side of the cable tie is facing
out. Do not fully secure the cable ties yet, as the sensor location might require some later adjustments
(Figure 2).
Clamp the round magnet on a spoke on the right side of the front wheel (Figure 1). Adjust the position
of the magnet so that when the wheel spins, the flat side of the magnet passes in front of the sensor
(Figure 2).
Adjust the sensor and magnet location so that clearance between magnet and sensor is not greater than
1/5" (5mm) (Figure 3). Once well positioned, secure the cable ties on the fork and tighten the magnet
screw on the spoke.
Note: Use caution when tightening the screw on the spoke as overtightening can strip the threads.
Figure 1
Sensor
Magnet
Figure 2
5mm
(1/5")
Magnet
Sensor
Bicycle fork
Figure 3
Top View
SPEEDOMETER INSTALLATION - HANDLEBAR MOUNTING BRACKET
9
In order to attach the mounting bracket to the bike handlebar, unscrew the twist knob on the bracket and
swing free. Fit the bracket around the handlebar and use the rubber shims provided to obtain a secure
fit. Slide the twist knob back into the slot and turn the knob until tight.
Computer Unit
Push button down to
remove Computer Unit
off on
OFF
SPEEDOMETER INSTALLATION - SENSOR WIRING
10
Route the sensor wire up the fork blade, using the
twist ties to secure it at the bottom and crown.
Wire must not hang loosely. Leave enough slack to
allow wheel to turn right and left freely. Route the
remaining wire around the front brake cable and
to the handlebar. Excess wire should be carefully
looped and secured to the stem with a twist tie.
Note: Make sure twist ties do not interfere with safe
operation of bicycle.
Magnet
Computer
Sensor
Brake cable
Sensor wire
11
GETTING STARTED - BATTERY INSTALLATION
Remove the battery cover from the back of the computer using a coin. Install the battery with the
positive (+) pole facing out and replace the cover. Should the computer screen show irregular figures,
take out the battery and install again. This will clear and restart the computer.
Battery
(1.5V/L1142)

Before starting to use the product, the following information has to be input. Once entered, the
computer will NOT ask again for this information.
Note: To correct or modify your selection at any time, push the MAJOR FUNCTION reset button at the
back of the computer (see page 23).
MILE/ HOUR OR KILOMETER/HOUR SELECTION
After installing the battery, the Speed Unit selection screen will appear. Press the UPPER RIGHT button
to choose between M/h or KM/h. Press the UPPER LEFT button to confirm choice.
WEIGHT AND STRIDE LENGTH UNIT SELECTION
After the M/h or KM/h selection, the Weight and Stride Length Unit screen will appear. Press the UPPER
RIGHT button to choose between “LB IN” (Pounds and Inches) or “KG CM” (Kilos and Centimeters).
Press the UPPER LEFT button to confirm choice.
WEIGHT INPUT
Now that the weight unit has been selected, the computer will ask the user to enter his/her weight. This
will allow the computer to estimate the number of Calories Burned while walking, running or cycling.To
enter the correct weight, press the UPPER RIGHT button until the correct right most digit appears. Press
the UPPER LEFT button to lock in the correct digit. Repeat until all digits are entered.
12 or 24 HR FORMAT SELECTION
After the weight input, the clock format screen will appear. Press the UPPER RIGHT button to choose
between 12hr or 24hr format. Press the UPPER LEFT button to confirm choice.
GETTING STARTED: UNIT SET UP
12
PEDOMETER OR SPEEDOMETER MODE SELECTION
13
When the product is NOT installed on the handlebar mounting bracket, it functions in Pedometer mode
by default.
When the product is installed on the handlebar mounting bracket, it functions in Speedometer mode.
Note: The Pedometer or Speedometer mode is determined by the Mode Button (Figure 1). When held
down by the mounting bracket it is in Speedometer mode. When released, it is in Pedometer mode.
Pedometer/Speedometer
Mode Button

Once all the units have been selected (See page 12), the computer, if it is in Pedometer mode, will
ask for the walk WLK and run
RUN stride length. This will allow the computer to accurately estimate
the Distance walked and run.
Once entered, the computer will NOT ask again for this information.
Note: To correct or modify the stride length at any time, press the UPPER RIGHT and BOTTOM button for
two seconds when the computer is in Pedometer Mode (See page 22).
HOW TO MEASURE STRIDE LENGTH
Walk 10 steps forward in a straight line. Measure the distance walked in inches (or centimeters) from
the heel of the first step to the toe of the last step. Divide the distance walked by 10 and you will have
the average walking stride length. Process in the same manner for the average running stride.
WALK STRIDE INPUT (WLK)
To enter the correct average walking stride, press the upper right button until the correct digit
furthest to the right appears. Press the upper left button to lock in the correct digit. Repeat until all
digits are entered.
RUN STRIDE INPUT (RUN)
After the WLK stride length is selected, the RUN stride length screen will appear. Press the upper right
button until the correct digit furthest to the right appears. Press the upper left button to lock in the
correct digit. Repeat until all digits are entered.
PEDOMETER CONFIGURATION - WALK AND RUN STRIDE LENGTH INPUT
14

d is the diameter
of wheel
in millimeters
Once all the units have been selected (see page 12), the computer, if it is installed on the handlebar
mounting bracket, will ask for the bike wheel size WHL. This will allow the computer to accurately
estimate the Speed and Distance while cycling. Once entered, the computer will NOT ask again for this
information.
Note: To correct or modify the bike wheel size at any time, press the UPPER RIGHT and BOTTOM
button for two seconds when the computer is in Speedometer Mode (See page 22).
The default wheel factor ‘2124’ will initially appear with the digit furthest to the right blinking. This is
the correct setting for a 26.6" (700 x 25C) tire. If this is your wheel size, press the UPPER LEFT button
four times to confirm each one of the four digits. If this is
not your wheel size, use the Wheel Diameter Size Chart
on the next page to find the correct wheel factor
(c). In the
event your tire size is not included in this chart, multiply
your wheel diameter
(d) in millimeters by 3.1416
to determine the correct wheel factor
(c).
To enter the correct wheel factor into the computer, press
the UPPER RIGHT button until the correct digit appears.
Press the UPPER LEFT button to lock in the correct digit.
Repeat until all four correct digits are entered.
SPEEDOMETER CONFIGURATION: WHEEL SIZE INPUT
15

SPEEDOMETER CONFIGURATION: WHEEL DIAMETER SIZE CHART
16
Wheel Wheel
Diameter (d) Factor (c)
20" 1596
22" 1759
24" 1916
26" (650A) 2073
26.4" (700 x 20C) 2107
26.5" (Tubular) 2117
26.6" (700 x 25C) 2124
26.8" (700 x 28C) 2136
Wheel Wheel
Diameter (d) Factor (c)
27" (700 x 32C) 2155
27" x 1.25 2155
28" (700B) 2237
ATB 24" x 1.75 1888
ATB 26" x 1.4 1995
ATB 26" x 1.5 2030
ATB 26" x 1.75 2045
ATB 26" x 2 (650B) 2099
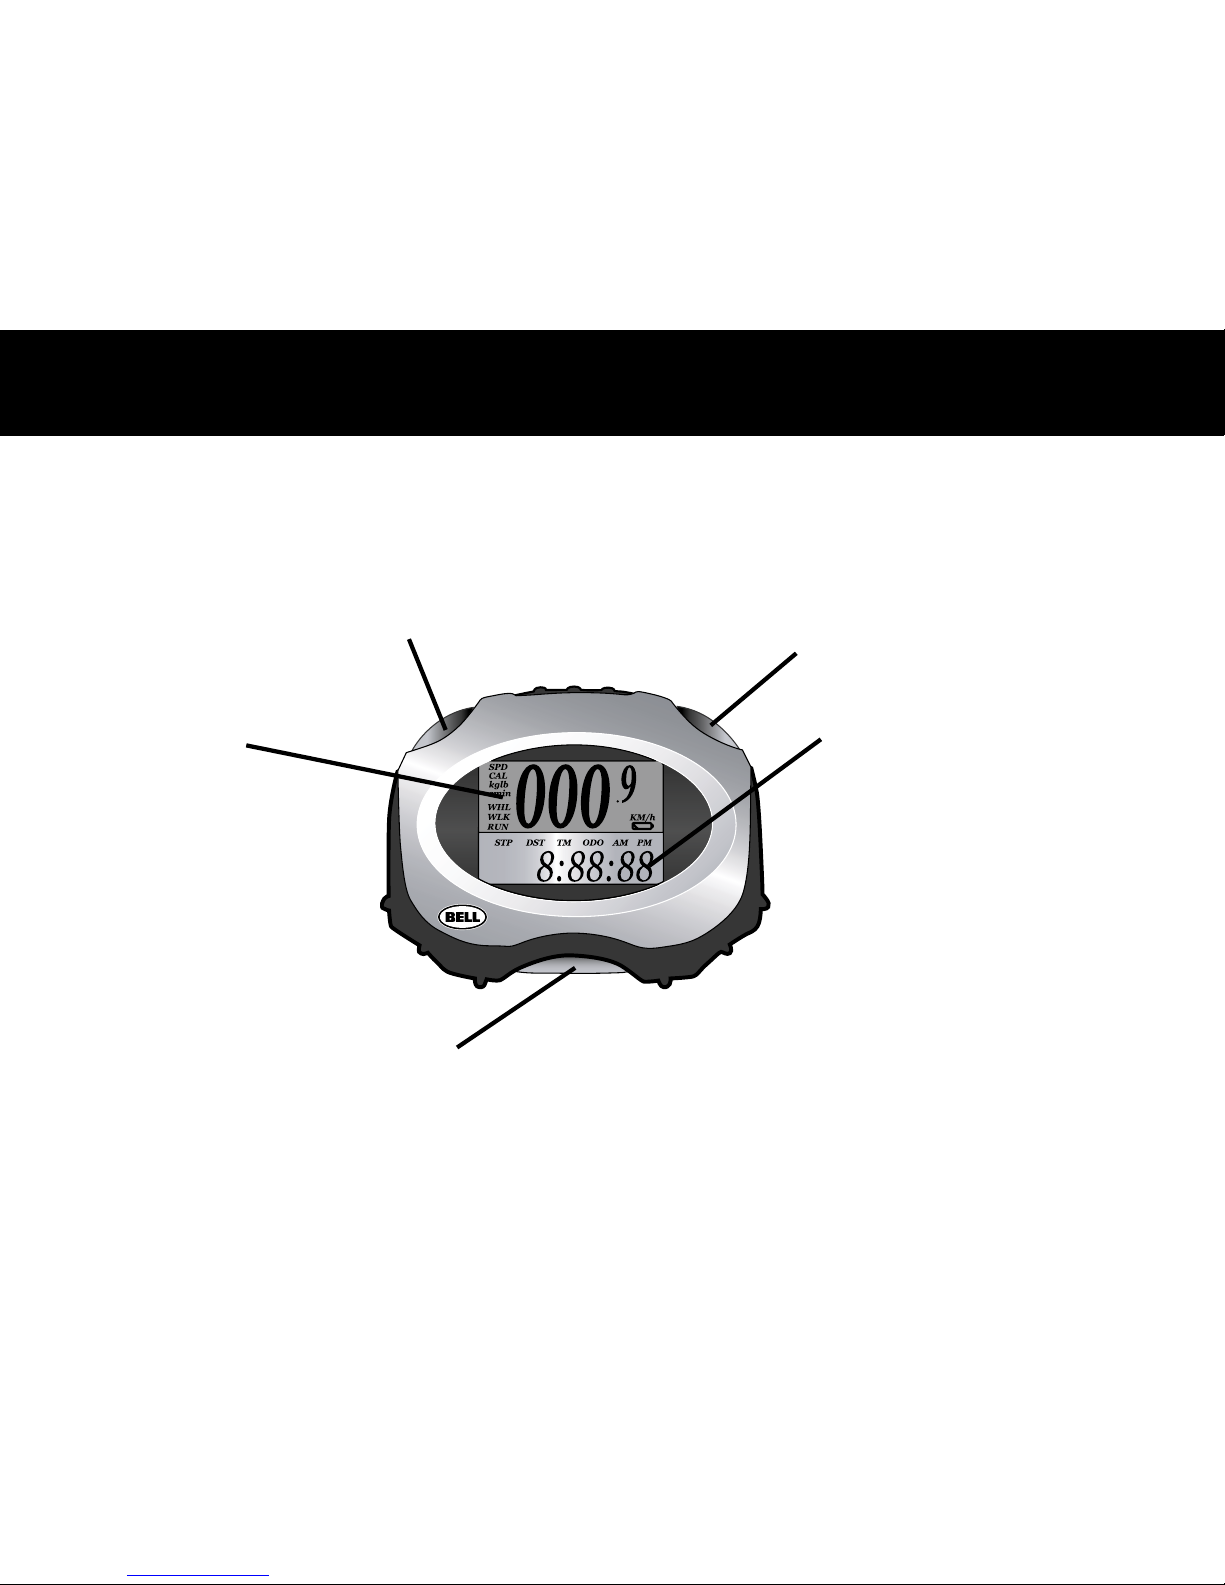
Now that the computer is configured, the product can be used either in Pedometer or Speedometer mode
(See page 13). The functions described below are available.
UPPER SCREEN
Current Speed (SPD)
0–199.99 KM/hr or M/hr
Calories Burned (CAL)
0–999 Calories Burned
LOWER SCREEN
Step Count (STP)
(ONLY in Pedometer Mode)
0-99999 steps
Trip Distance (DST)
0–999.9 KM or M
Trip Timer (TM)
9 hrs 59 min 59 sec
Total Distance (ODO)
0–9999.9 KM/hr or M/hr
Clock
Controls UPPER SCREEN
Controls LOWER SCREEN
Instantly switches between
WALK and RUN mode
17

AUTO START/STOP
To preserve the battery, the computer will automatically switch off if it is left unused for more than
five minutes. The display will reappear when either button is pressed or when the unit detects input
from the Pedometer or Speedometer sensor.
LOW BATTERY INDICATOR
The low battery indicator will be displayed to the right of the screen when the remaining battery lifetime
is approximately two months or less.
WALK/RUN MODE
When in Pedometer mode, pushing the bottom button once will allow the user to instantly switch
between the walk and running stride lengths initially input in the computer. All relevant functions (like
DST and SPD) will now be calculated based on the new stride length selected.
AUTO START/STOP, LOW BATTERY, WALK/RUN MODE
18

CURRENT SPEED (SPD)
Current Speed represents Instantaneous Speed. It is displayed on the upper screen.
CALORIES BURNED (CAL)
Calories Burned is displayed on the upper screen. It represents the accumulated number of calories
burned while riding. Calories Burned is estimated based on the following information:
User’s weight
Time spent riding
Average speed
The Calorie Count on the screen will start over once 999 Calories have been burned.
Calories Burned can be reset at any time by pressing the UPPER LEFT button for two seconds when
CAL is displayed on the screen.
SPEED AND CALORIES BURNED FUNCTIONS
19

STEP, DISTANCE AND ODOMETER FUNCTIONS
20
STEP COUNT (STP) – IN PEDOMETER MODE ONLY
Step Count is displayed on the lower screen. Step Count represents the numbers of steps either walked
or run. As with most pedometers, the step count is accurate within 90-99%.
Step Count can be reset to zero at any time by pressing the UPPER RIGHT button for two seconds when
STP is displayed on the screen.
Note: Resetting Step Count will automatically reset distance traveled and trip timer.
DISTANCE TRAVELED (DST)
Distance Traveled is displayed on the lower screen. Trip Distance is activated automatically with
pedometer or speedometer input.
Distance Traveled can be reset to zero at any time by pressing the UPPER RIGHT button for two seconds
when
DST is displayed on the screen.
Note: Resetting Distance Traveled will automatically reset Trip Timer and Step Count.
ODOMETER (ODO)
Odometer is displayed on the lower screen. Just like a car’s odometer,
ODO accumulates the distance
ridden over time.
Odometer can be reset to any desired value by pressing the UPPER RIGHT button for two seconds when
ODO is displayed on the screen.

CLOCK AND TIMER FUNCTIONS
21
CLOCK
The clock can be reset at any time by pressing the upper right button for two seconds when the clock
is displayed on the lower screen. To enter the correct time, press the upper right button until the correct
digit appears. Press the upper left button to lock in the correct digit. Repeat until all digits are entered.
TRIP TIMER (TM)
Trip Timer is displayed on the lower screen. Trip Timer is activated automatically with pedometer or
speedometer input: it is on when you walk, run or ride and off when you stop.
Trip Timer can be reset to zero at any time by pressing the upper right button for two seconds when TM
is displayed on the lower screen.
Note: Resetting Trip Timer will automatically reset Trip Distance and Step Count..
 Loading...