

Belkin P74992uk User Manual

Belkin GmbH
Hanebergstrasse 2
80637 Munich, Germany
+49 (0) 89 143405 0
+49 (0) 89 143405 100 fax
Belkin SAS
130 rue de Silly
92100 Boulogne-Billancourt, France
+33 (0) 1 41 03 14 40
+33 (0) 1 41 31 01 72 fax
Belkin Ltd.
Express Business Park, Shipton Way
Rushden, NN10 6GL, United Kingdom
+44 (0) 1933 35 2000
+44 (0) 1933 31 2000 fax
Belkin B.V.
Boeing Avenue 333
1119 PH Schiphol-Rijk, The Netherlands
+31 (0) 20 654 7300
+31 (0) 20 654 7349 fax
Belkin Tech Support
Europe: 00 800 223 55 460
© 2005 Belkin Corporation. All rights reserved. All trade names are registered trademarks of
respective manufacturers listed. Mac, Apple, and AirPort are trademarks of Apple Computer,
Inc., registered in the U.S. and other countries. The mark Wi-Fi is a registered mark of the
Wi-Fi Alliance.
P74992uk
Wireless G Universal
Range Extender/
Access Point
User Manual
F5D7132
Increase your wireless coverage
Wireless G Universal
Range Extender/
Access Point

1 Introduction. . . . . . . . . . . . . . . . . . . . . . . . . . . . . . . . . . . . . . . . . . . . . . 1
Advantages of a Wireless Network. . . . . . . . . . . . . . . . . . . . . . . . .
1
Placement of your Wireless Networking Hardware
for Optimal Performance
. . . . . . . . . . . . . . . . . . . . . . . . . . . . . . . . 2
2 Overview . . . . . . . . . . . . . . . . . . . . . . . . . . . . . . . . . . . . . . . . . . . . . . . .
5
Package Contents . . . . . . . . . . . . . . . . . . . . . . . . . . . . . . . . . . . . .
7
System Requirements . . . . . . . . . . . . . . . . . . . . . . . . . . . . . . . . . .
7
Specifications. . . . . . . . . . . . . . . . . . . . . . . . . . . . . . . . . . . . . . . . . .
7
3 Configuring the WURE . . . . . . . . . . . . . . . . . . . . . . . . . . . . . . . . . . . . . 8
Configuring as a Wireless Access Point. . . . . . . . . . . . . . . . . . . . .
8
Configuring as a Wireless G Universal Range Extender . . . . . . . 12
Auto Connect Button. . . . . . . . . . . . . . . . . . . . . . . . . . . . . . . . . . . 12
4 Using the Web-Based Advanced User Interface. . . . . . . . . . . . . . . 14
Understanding the Web-Based Advanced User Interface. . . . . . 16
Wireless > Basic . . . . . . . . . . . . . . . . . . . . . . . . . . . . . . . . . . . . . . 18
Changing the Wireless Network Name (SSID) . . . . . . . . . . . . . . 18
Using the Wireless Mode Switch
. . . . . . . . . . . . . . . . . . . . . . . . . 19
Changing the Wireless Channel . . . . . . . . . . . . . . . . . . . . . . . . . . 19
Using the Broadcast SSID Feature. . . . . . . . . . . . . . . . . . . . . . . . 20
Protected Mode
. . . . . . . . . . . . . . . . . . . . . . . . . . . . . . . . . . . . . . 21
Repeater Mode
. . . . . . . . . . . . . . . . . . . . . . . . . . . . . . . . . . . . . . . 22
Securing your Wi-Fi
®
Network . . . . . . . . . . . . . . . . . . . . . . . . . . . 24
WEP Setup
. . . . . . . . . . . . . . . . . . . . . . . . . . . . . . . . . . . . . . . . . . 28
WPA Setup
. . . . . . . . . . . . . . . . . . . . . . . . . . . . . . . . . . . . . . . . . . 30
MAC Address Control
. . . . . . . . . . . . . . . . . . . . . . . . . . . . . . . . . 32
5 Changing System Settings. . . . . . . . . . . . . . . . . . . . . . . . . . . . . . . . . 34
Setting or Changing the Administrator Password
. . . . . . . . . . . . 34
Restoring Factory Default Settings
. . . . . . . . . . . . . . . . . . . . . . . 34
Saving a Current Configuration
. . . . . . . . . . . . . . . . . . . . . . . . . . 35
Restoring
a Previous Configuration . . . . . . . . . . . . . . . . . . . . . . . 37
Updating Firmware
. . . . . . . . . . . . . . . . . . . . . . . . . . . . . . . . . . . . 38
6 Troubleshooting . . . . . . . . . . . . . . . . . . . . . . . . . . . . . . . . . . . . . . . . . 42
7 Information . . . . . . . . . . . . . . . . . . . . . . . . . . . . . . . . . . . . . . . . . . . . . 52
Table of Contents

Introduction
section
1
2
3
4
5
6
7
Thank you for purchasing the Belkin Wireless G Universal Range
Extender (WURE) and welcome to the world of wireless networking.
Now you can take advantage of this new high-speed wireless
technology and gain the freedom to connect to your home or office
network without using cables. This product acts as a wireless range
extender and access point. The easy installation and setup will have
you networking wirelessly in minutes. Please be sure to read through
this User Manual completely, and pay special attention to the section
entitled “Placement of your Wireless Networking Hardware for Optimal
Performance” on the next page. By following our simple setup
instructions, you will be able to use your Belkin Home Network to:
• Share one high-speed Internet connection with all the computers
in your home
• Share resources, such as files, and hard drives among all the
connected computers in your home
• Share a single printer among the entire family
• Share documents, music, video, and digital pictures
• Store, retrieve, and copy files from one computer to another
• Simultaneously play games online, check Internet email, and chat
Advantages of a Wireless Network
• Mobility – you no longer need a dedicated “computer room”—
now you can work on a networked laptop or desktop computer
anywhere within your wireless range
• Easy installation – Belkin Easy Installation Wizards make setup
simple
• Flexibility – set up and access printers, computers, and other
networking devices from anywhere in your home
• Easy expansion – the wide range of Belkin networking products
let you expand your network to include devices such as printers
and gaming consoles
• No cabling required – you can spare the expense and hassle of
retrofitting Ethernet cabling throughout the home or office
• Widespread industry acceptance – choose from a wide range
of interoperable networking products
1

Introduction
32
Placement of your Wireless Networking Hardware for Optimal
Performance
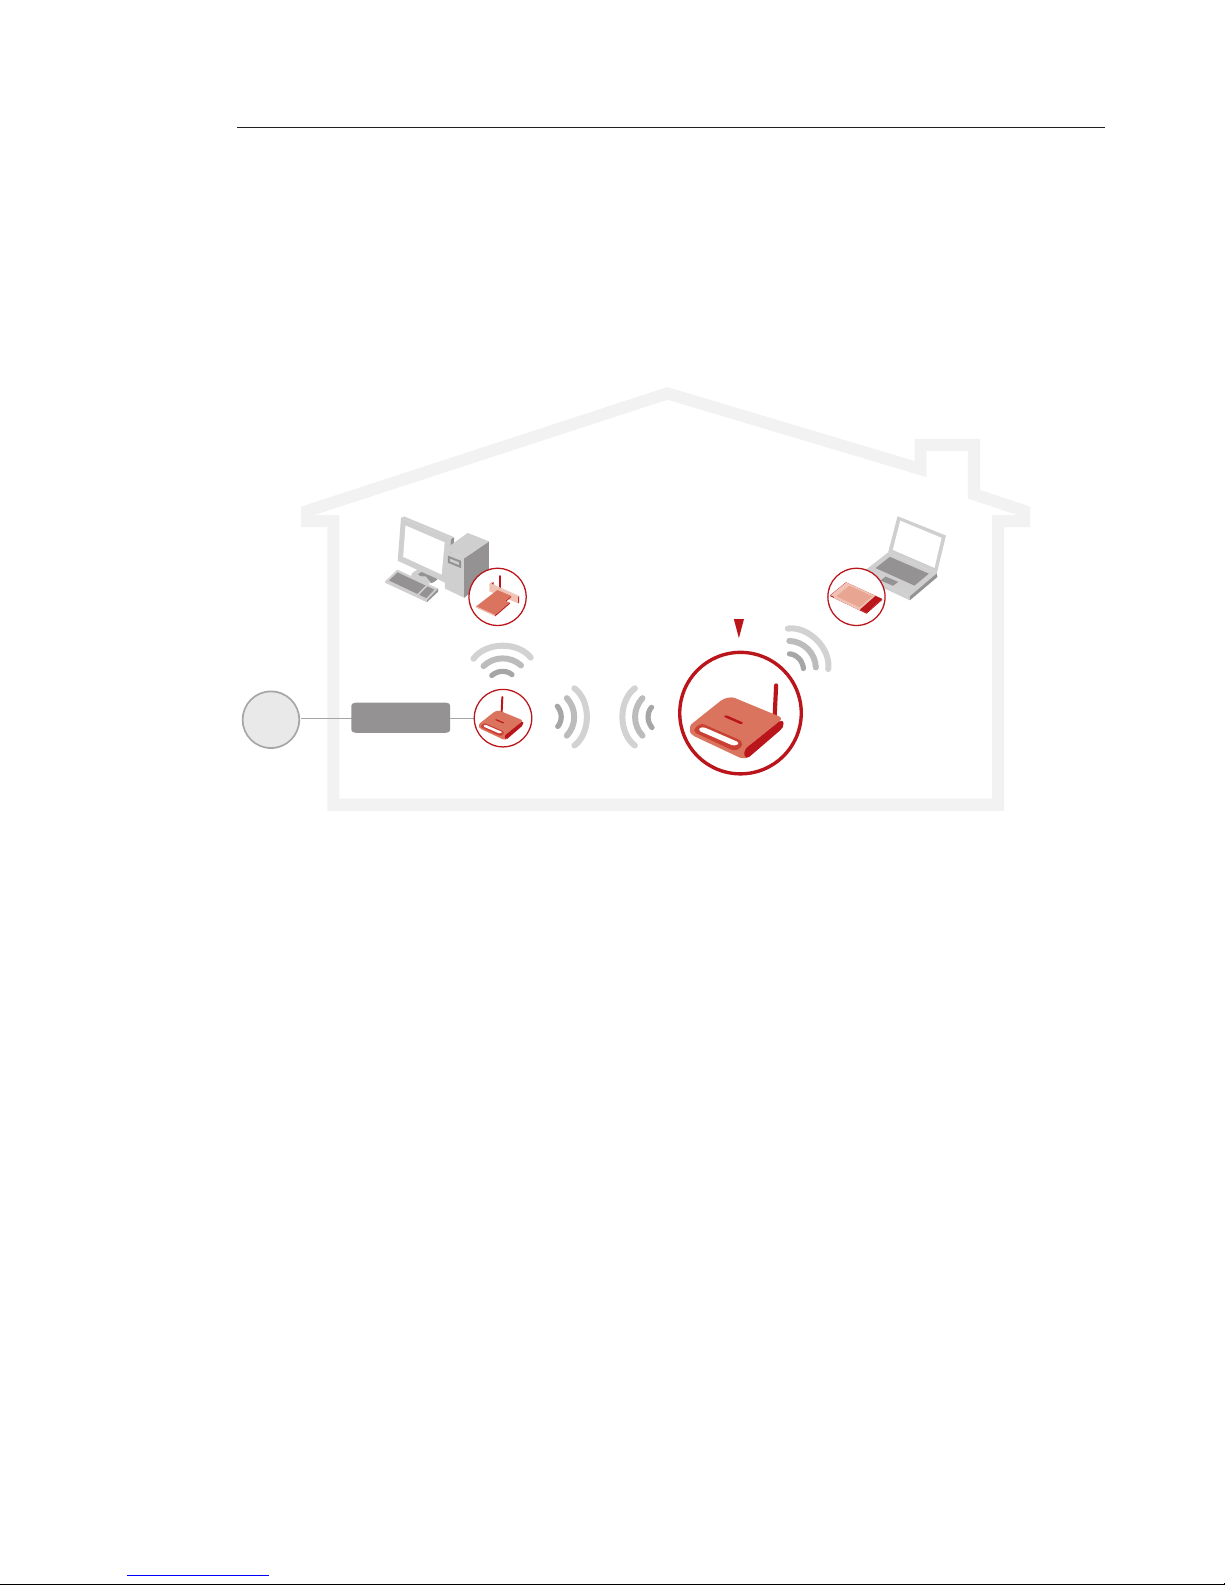
Access Point Mode: Your wireless connection will be stronger the closer
your computer is to your wireless Wireless Universal Repeater (WURE)
Typical indoor operating range for your wireless devices is between 100
and 200 feet. In the same way, your wireless connection and performance
will degrade somewhat as the distance between your computer and
the WURE increases. This may or may not be noticeable to you. As you
move farther from your WURE connection speed may decrease. The
signal quality can be greatly affected by obstacles as well as other factors
such as, metal surfaces, electrical appliances, and walls.
Universal repeater Mode: Out of the box the WURE will automatically
connect to the wireless network AP/ Router that has the strongest signal.
It is advisable to initiate the initial connection in close proximity to the
Wireless Access Point /Router that you want the WURE to connect to.
This way, a connection to the wrong Wireless network can be avoided.
Once satisfied the connection to the correct network has been
established, the WURE can be placed in a position approximately half
way between the Router /Access Point and your wireless computer(s).
If you have concerns about your network’s performance that might be
related to range or obstruction factors, try moving the computer to a
position between five and 10 feet from the wireless router (or access
point) in order to see if distance is the problem. If difficulties persist even
at close range, please contact Belkin Technical Support.
Note: While some of the items listed below can affect network
performance, they will not prohibit your wireless network from functioning.
If you are concerned that your network is not operating at its maximum
effectiveness, this checklist may help.
1. Wireless Router (or Access Point) Placement
Place your wireless router (or access point), the central connection
point of your network, as close as possible to the center of your
wireless network devices.
To achieve the best wireless network coverage for your “wireless
clients” (i.e., computers enabled by Belkin Wireless Notebook Network
Cards, Wireless Desktop Network Cards, and Wireless USB Adapters):
• Ensure that your wireless router’s (or access point’s) networking
antennas are parallel to each other, and are positioned vertically (toward
the ceiling). If your wireless router (or access point) itself is positioned
vertically, point the antennas as much as possible in an upward direction.
• In multistory homes, place the wireless router (or access point) on a floor
that is as close to the center of the home as possible. This may mean
placing the wireless router (or access point) on an upper floor.
• Try not to place the wireless router (or access point) near a cordless
2.4GHz phone.

3
Introduction
3
section
1
2
3
4
5
6
7
2. Avoid Obstacles and Interference
Avoid placing your wireless router (or access point) near devices that
may emit radio “noise,” such as microwave ovens. Dense objects that
can inhibit wireless communication include:
• Refrigerators
• Washers and/or dryers
• Metal cabinets
• Large aquariums
• Metallic-based, UV-tinted windows
If your wireless signal seems weak in some spots, make sure that
objects such as these are not blocking the signal’s path (between
your computers and wireless router or access point).
3. Cordless Phone Placement
If the performance of your wireless network is impaired after
attending to the above issues, and you have a cordless phone:
• Try moving cordless phones away from wireless routers (or
access points) and your wireless-enabled computers.
• Unplug and remove the battery from any cordless phone
that operates on the 2.4GHz band (check the manufacturer’s
information). If this fixes the problem, your phone may be
interfering.
• If your phone supports channel selection, change the
channel on the phone to the farthest channel from your
wireless network. For example, change the phone to channel
1 and move your wireless router (or access point) to channel
11. See your phone’s user manual for detailed instructions.
• If necessary, consider switching to a 900MHz or 5GHz
cordless phone.
4. Choose the “quietest” channel for your wireless network
In locations where homes or offices are close together, such as
apartment buildings or office complexes, there may be wireless
networks nearby that can conflict with yours.
Use the Site Survey capabilities found in the Wireless LAN Utility
of your wireless adapter to locate any other wireless networks that
are available (see your wireless adapter’s manual), and move your

Introduction
Introduction
wireless router (or access point) and computers to a channel as far
away from other networks as possible.
Experiment with more than one of the available channels in order to
find the clearest connection and avoid interference from neighboring
cordless phones or other wireless devices. For Belkin wireless
networking products, use the detailed Site Survey and wireless
channel information included in your User Manual. These guidelines
should allow you to cover the maximum possible area with your
wireless router (or access point).
5. Secure Connections, VPNs, and AOL
Secure connections typically require a user name and password, and
are used where security is important. Secure connections include:
• Virtual Private Network (VPN) connections, often used to connect
remotely to an office network
• The “Bring Your Own Access” program from America Online (AOL),
which lets you use AOL through broadband provided by another cable
or DSL service
• Most online banking websites
• Many commercial websites that require a user name and password to
access your account
Secure connections can be interrupted by a computer’s power
management setting, which causes the computer to “go to sleep.”
The simplest solution to avoid this is to simply reconnect by re-running
the VPN or AOL software, or by re-logging into the secure website. A
second alternative is to change your computer’s power management
settings so it does not go to sleep; however, this may not be
appropriate for portable computers. To change your power management
setting under
Windows, see the “Power Options” item in the Control Panel. If you continue
to have difficulty with Secure Connections, VPNs, and AOL, please
review the steps above to be sure you have addressed these issues.
For more information regarding our networking products, visit our website
at www.belkin.com/networking or call Belkin Technical Support at:
US: 877-736-5771
310-898-1100 ext. 2263
Europe: 00 800 223 55 460
Australia: 1800 235 546
New Zealand: 0800 235 546
Singapore: 800 616 1790
5
5
section
1
2
3
4
5
6
7
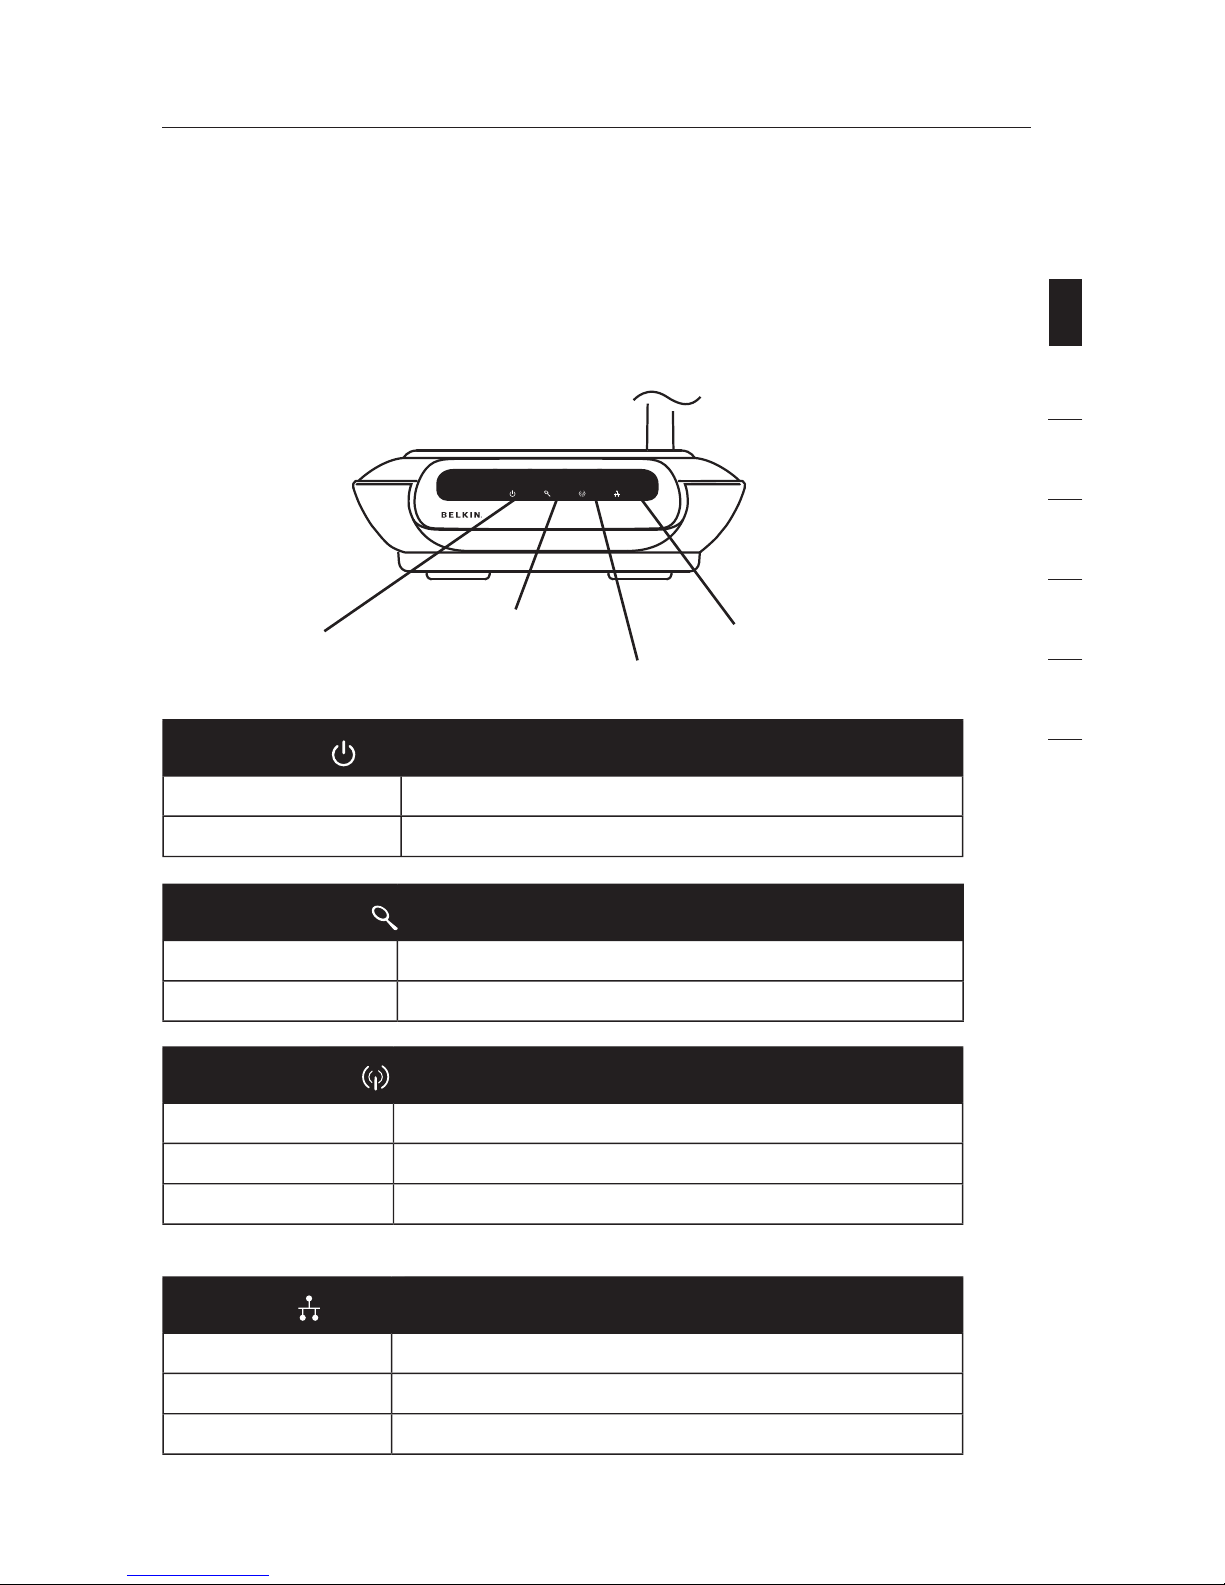
Overview
The WURE is designed to be positioned horizontally on a desktop, or
wall-mounted. All of the cables exit from the rear of the WURE for better
organization and utility. The LED indicators are easily visible on the front of the
WURE to provide you with information about network activity and status.
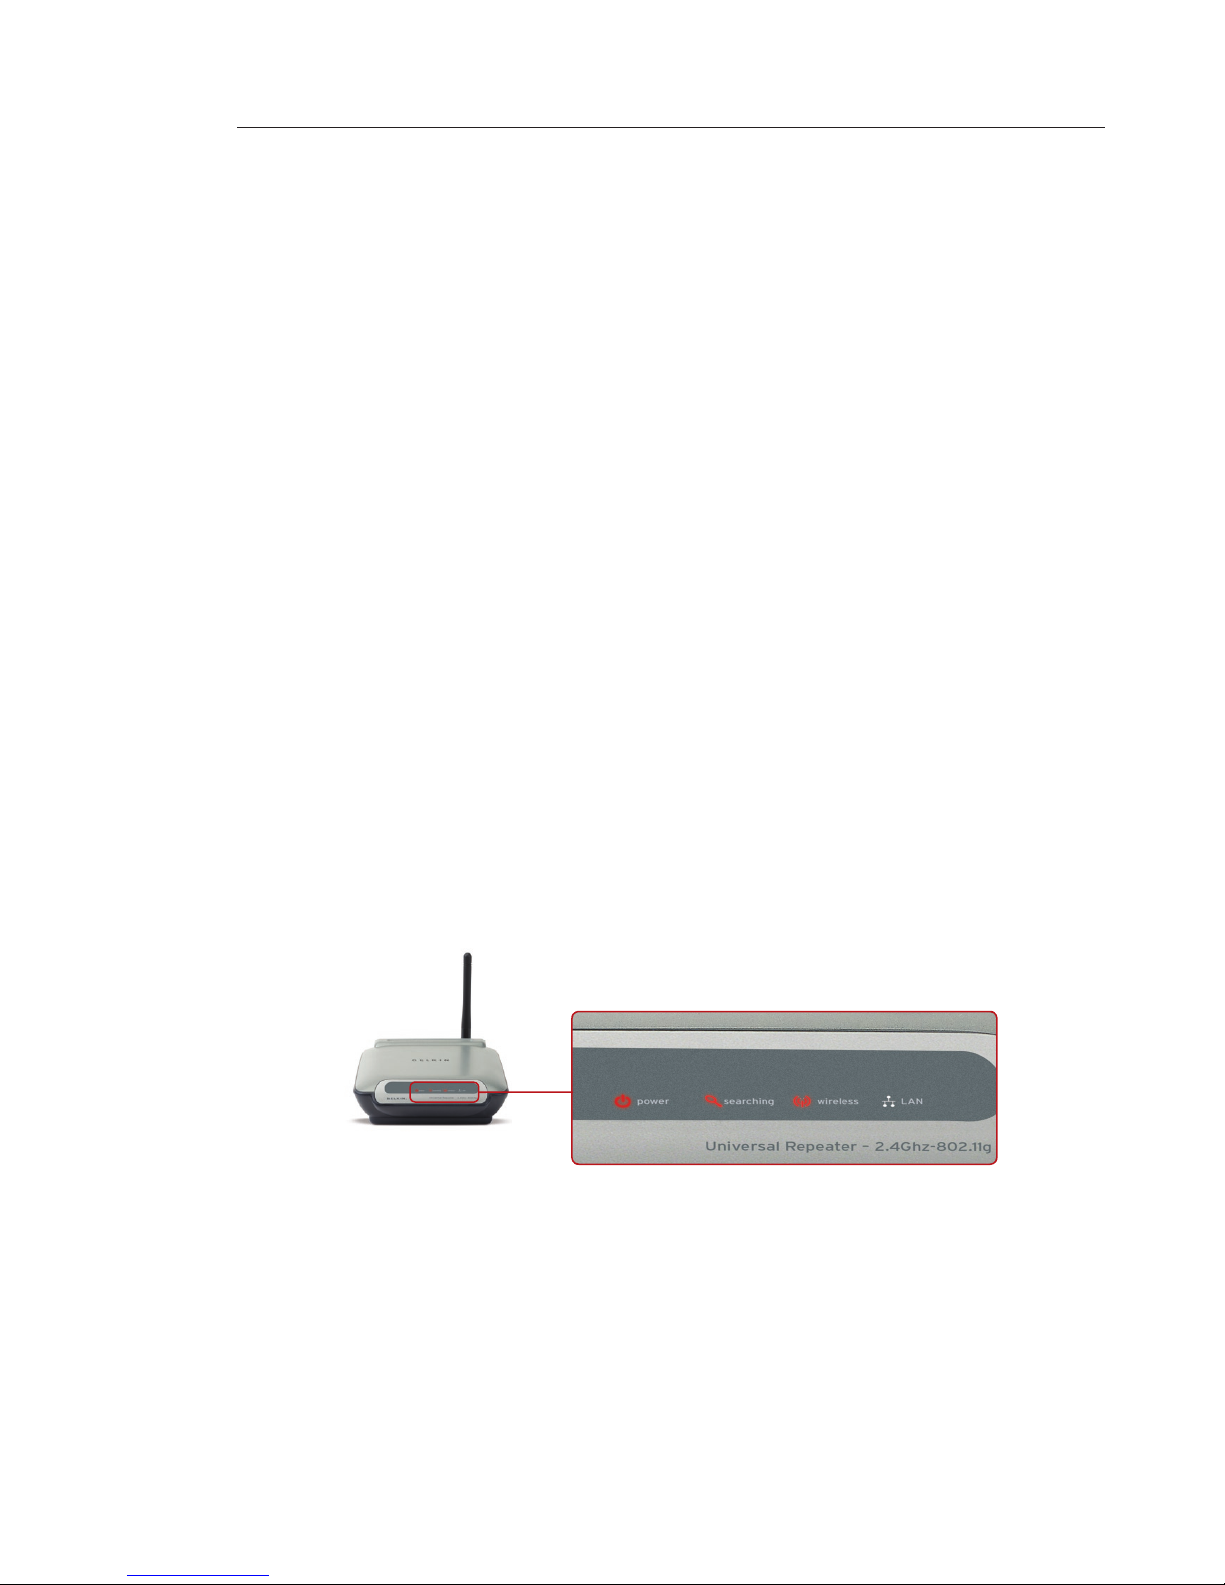
Front Panel
Power LED
LAN LED
Searching LED
Wireless LED
Power LED
OFF WURE power off
Solid Green WURE power on
Searching LED
Solid Red Error
Blinking Red Searching
Wireless LED
OFF No wireless connection available
Blinking Green Receiving/transmitting data
Solid Green WURE is ready
LAN LED
OFF No network is linked to the port
Blinking Green Receiving/transmitting data
Solid Green Linked to network

76
Overview
Back Panel
Power Jack
Connect the included 4.5V DC power supply to this jack.
RJ45 Ethernet Jack
Connect an Ethernet cable to this socket, and connect to an open
RJ45 10Base-T or 100Base-Tx port on a switch, hub, or router.
Auto Connect Button
The “Auto Connect” button will automatically connect and set up your
WURE to a wireless network. It is as simple as pushing a button.
Reset Button
The “Reset” button is to be used in the unlikely event that your WURE
malfunctions. Resetting the WURE restores its normal operation while
maintaining the programmed “settings”. You can also restore the
factory default settings by using the “Reset” button. Use the restore
option if, for example, you have forgotten your password.
a. Resetting the WURE
Push and release the “Reset” button. The lights on the WURE
will momentarily flash. The “Power/Ready” light will begin to
blink. When the “Power/Ready” light becomes solid again, the
reset is complete.
b. Restoring the Factory Defaults
Press and hold the “Reset” button for 10 seconds, then release
it. The lights on the WURE will momentarily flash. The “Power/
Ready” light will begin to blink. When the “Power/Ready” light
becomes solid again, the restore is complete.
Rotatable Dipole Antenna
An omnidirectional dipole antenna is located on the back of the
WURE. The antennas can rotate 180 degrees. The antenna should be
oriented in the vertical position for best performance.
Power Jack
Antenna
RJ45 Ethernet Jack Reset Button
Auto Connect Button

7
7
section
1
2
3
4
5
6
7
Overview
Package Contents
• Belkin Wireless G Wireless Universal Range Extender
• Detachable Antenna
• Power Supply
• User Manual
• Quick Installation Guide
• Ethernet Cable
• Easy Installation Wizard Software CD-ROM
System Requirements
• At least one computer with an installed 802.11g or 802.11bcompliant wireless Ethernet adapter
• TCP/IP networking protocol installed on each computer
• CAT5 networking cable (or better)
• Microsoft® Internet Explorer 4.0 or later, or Netscape® 4.0 or later
Specifications
Wireless:
Radio Technology Direct Sequence Spread Spectrum (DSSS)
• IEEE 802.3, IEEE 802.3u 10/100Base-Tx, auto-negotiation, auto-MDIX
802.11g:
• Network Standard IEEE 802.11b (Wi-Fi) and IEEE 802.11g compliance
• OFDM; 802.11b: CCK (11Mbps, 5.5Mbps), DQPSK (2Mbps),
DBPSK (1Mbps)
• Operating Frequencies: 2.412–2.497GHz
• Operating Channels 802.11g: 13 for North America, 13 for Europe
(ETSI), 14 for Japan
802.11b:
11 for North America, 14 for Japan, 13 for Europe (ETSI)
Security:
• WEP (64- and 128-bit keys) Open, Shared Authentication
• WPA-PSK (TKIP, AES)
• WPA2-PSK (AES)
Management: Browser-based
Maximum Users: 32 (WLAN)
Ports: 1 10/100Base-Tx RJ45 port (LAN)
1 power jack
1 reset button
1 Auto Connect button
LEDs: Power, Searching, LAN, Wireless
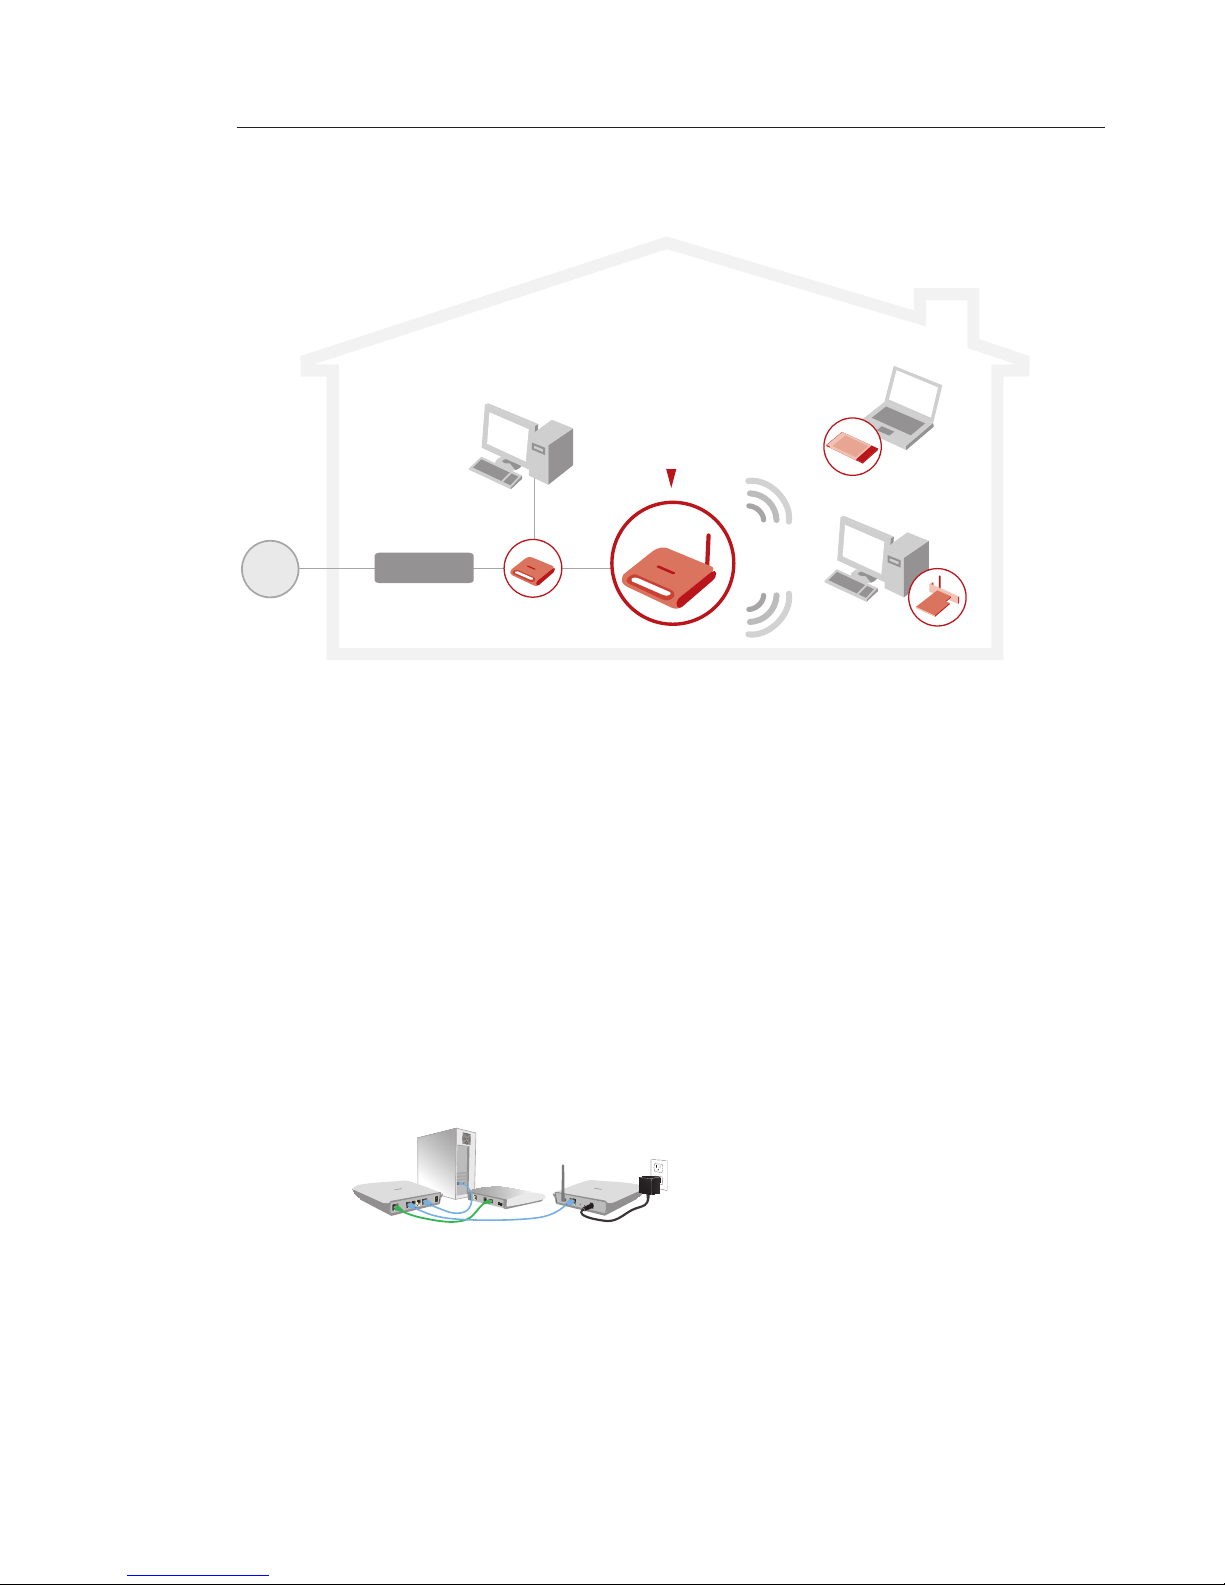
Configuring the WURE
98
Wireless G
Universal Range
Extender
Wireless G
Notebook Card
Wired Router
Wireless G
Desktop Card
Configuring as a Wireless Access Point
1. Connect
Connecting as a Wireless Access Point
The WURE can add wireless-enabled computers to an existing wired
network. The access point acts as a bridge between your existing
wired network and your wireless-equipped computers. Please be sure
to follow the steps below carefully.
1.1 Select a suitable place for your WURE.
1.2 Connect a CAT5 cable between the WURE and your router’s
LAN port, or an Ethernet switch or hub.
1.3 Connect the power supply to the WURE by plugging the
round DC connector into the DC jack on the WURE. Plug the
power supply into the wall. Verify that the “Power” LED and
the “LAN” LED are illuminated. If both LEDs are illuminated,
the WURE is connected properly.
9
Configuring the WURE
9
section
1
2
3
4
5
6
7
2. Install
Running the Easy Install Wizard Software
2.1
Shut down any programs that are running on your computer
at this time. Turn off any firewall or Internet-connectionsharing software on your computer.
2.2 Insert the Wireless Range Extender Management Utility
software CD into your CD-ROM drive. The Utility wizard will
automatically appear within 15 seconds.
NOTE: If the Utility wizard does not start up automatically, select
your CD-ROM drive from “My Computer” and double-click on the
file named “Setup.exe” on the CD-ROM.
2.3 You will now see the first of a series of progress screens
that will install the Wireless Range Extender Management
Utility. It is recommended to take the default settings.
2.4 Once installation is complete, you may run the Utility pro-
gram by double-clicking the shortcut icon.
NOTE: Both your PC and WURE must be wired into your network
for this Utility to work.
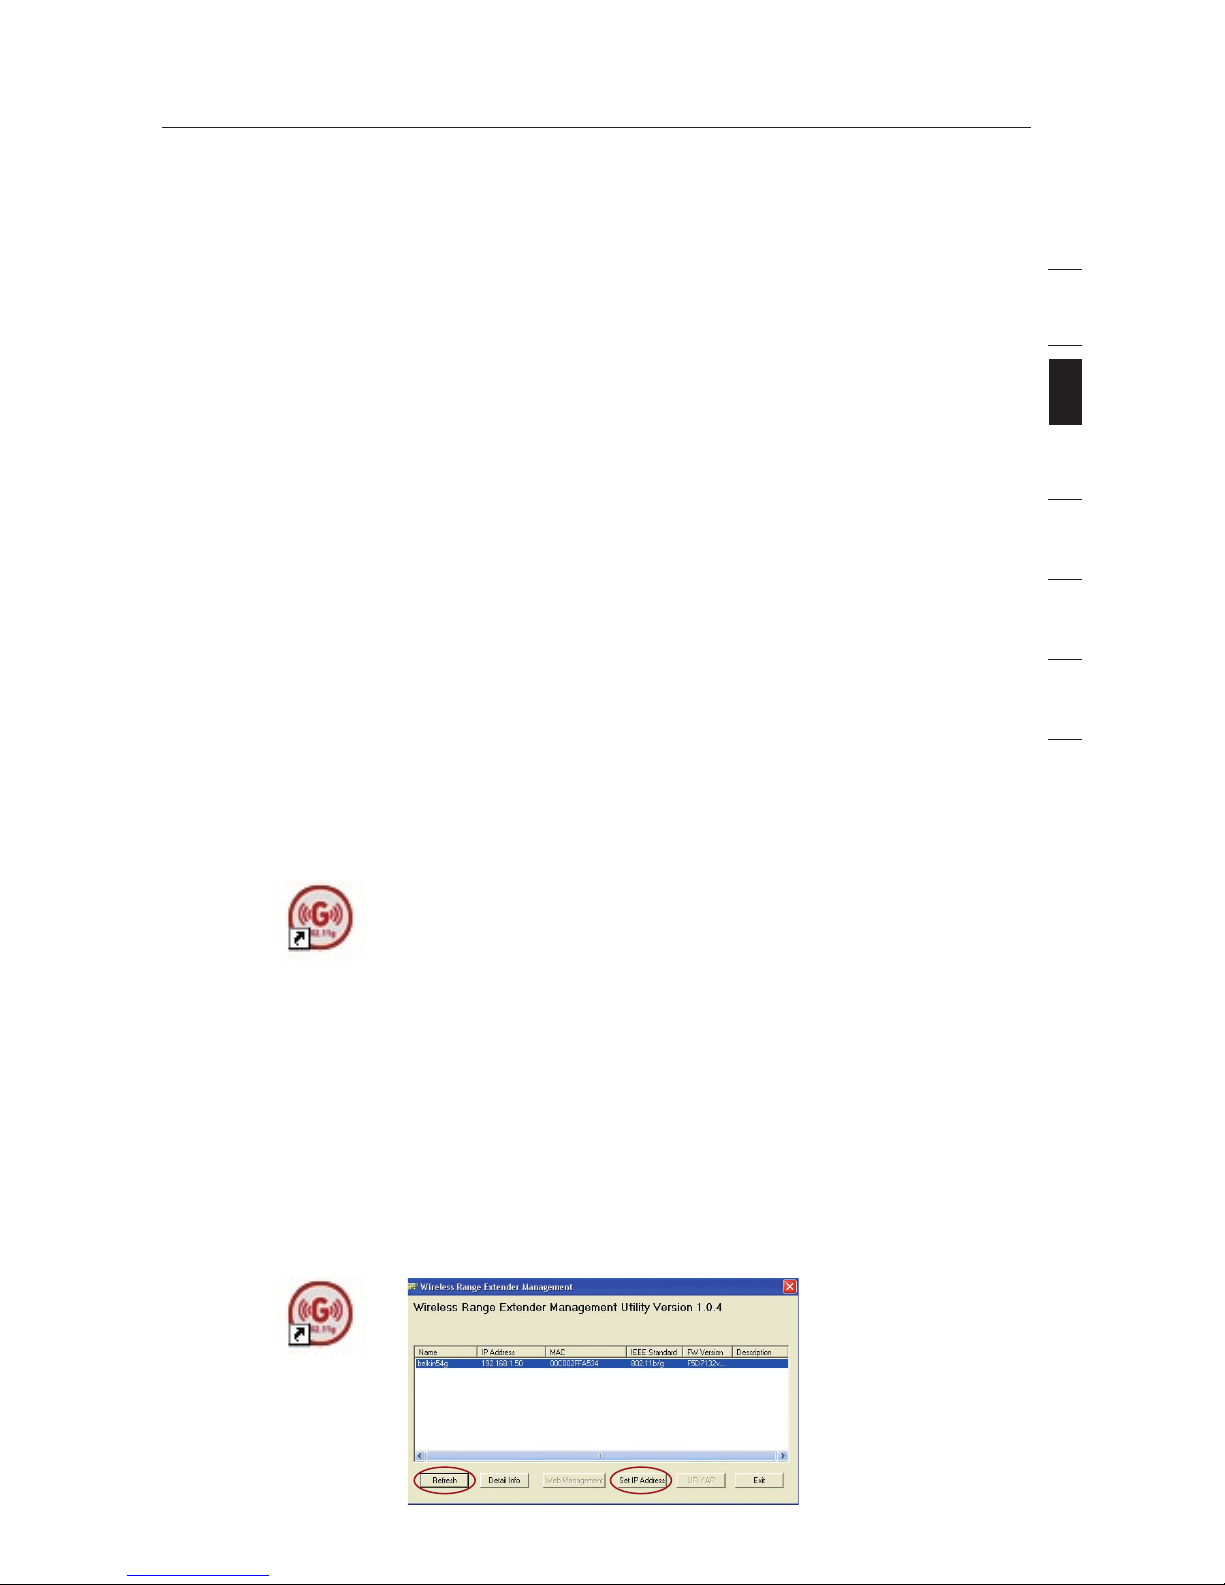
3. Configure
Running the Wireless Range Extender Management Utility
3.1
To start your Wireless Range Extender Management Utility,
double-click the “Belkin Range Extender Utility” icon. You
will see the following screen.
Wire less Range Exten der
Configuring the WURE
1110
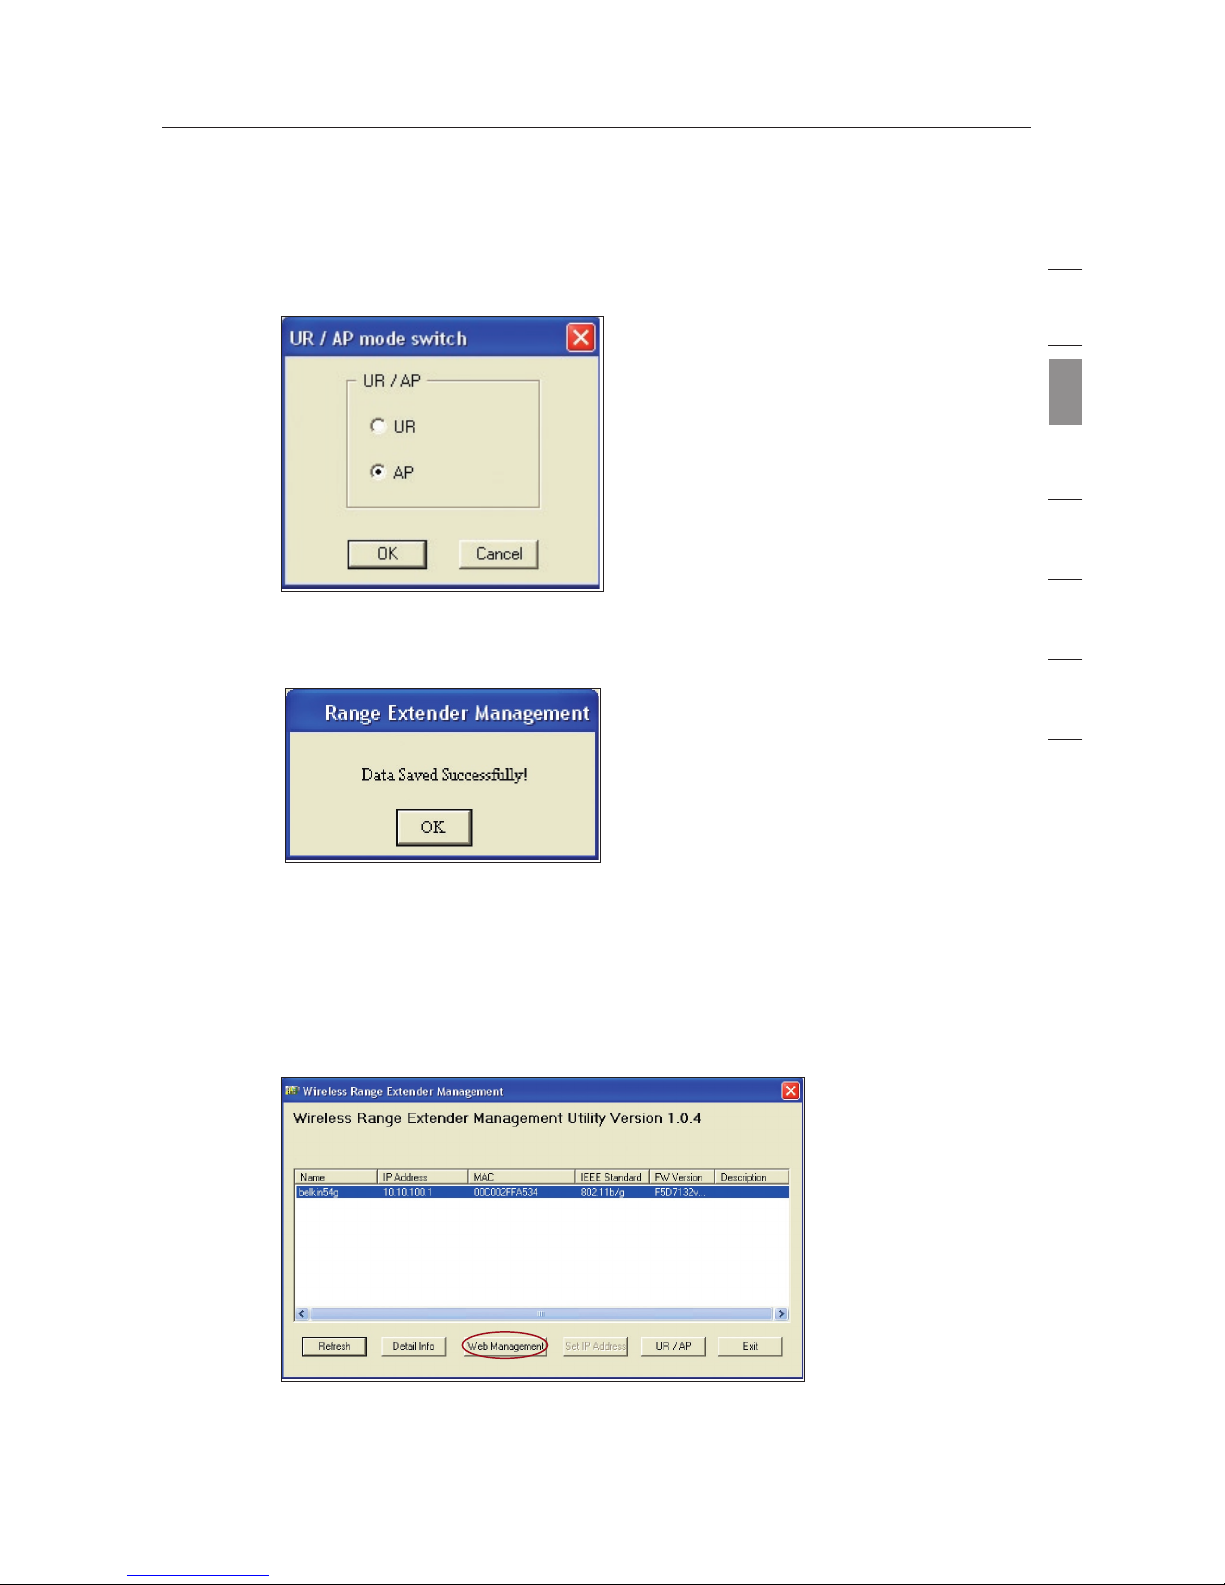
3.2 Click the “Refresh” button. The Utility will detect the
WURE(s) connected to your network. Select the WURE you
wish to configure.
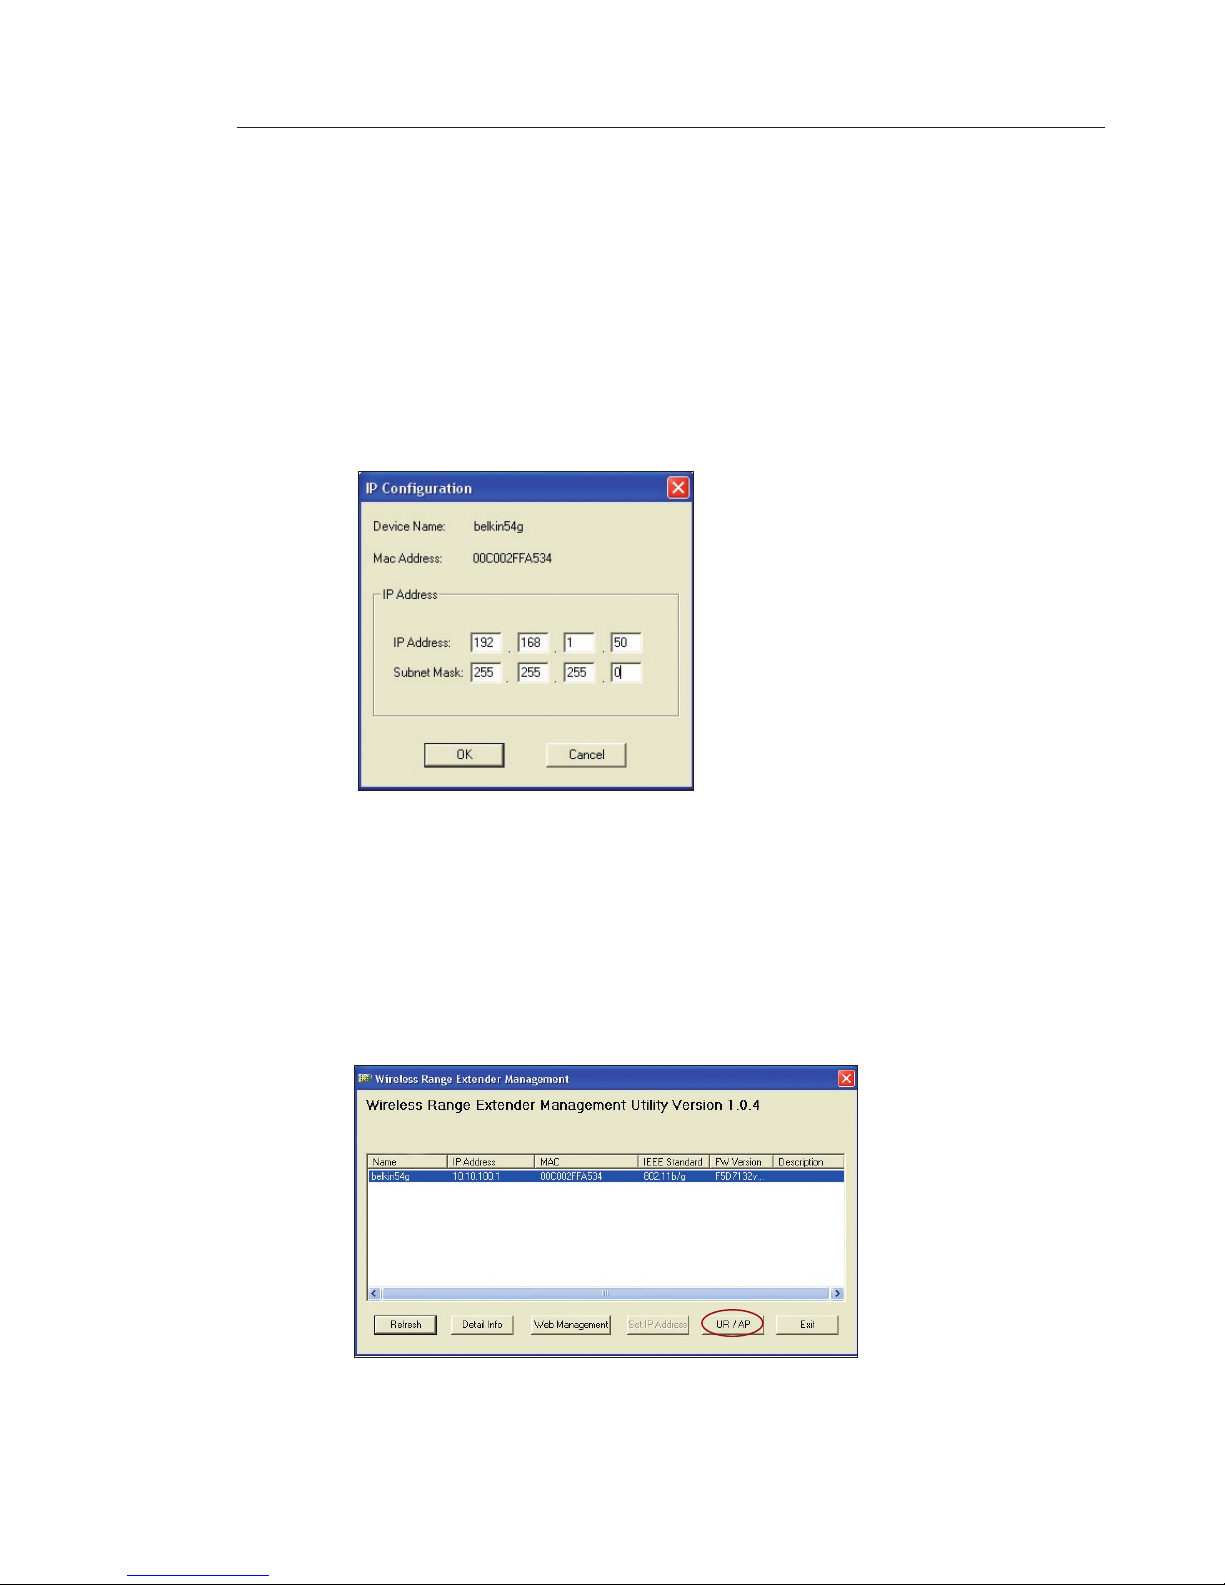
3.3 If your WURE’s IP address is not in the same subnet as your
network, the “Set IP Address” button will be enabled. Click
the “Set IP Address” button. A pop-up screen will appear.
3.4 Set the IP address of your WURE to be within the same sub-
net as your network. For example, if your router’s IP address
is 192.168.1.1, set your WURE to 192.168.1.xx (xx would
be any number between 2–254). Be careful of duplicate IP
addresses on your network. Then set the subnet mask to be
the same as your network’s subnet mask.
3.5 Click the “UR/AP” button.
Wire less Range Exten der
NOTE: If the “UR/AP” button is grayed out, click the
“Refresh” button.
11
Configuring the WURE
11
section
1
2
3
4
5
6
7
3.6 The “UR/AP mode switch” window will appear. Select the
AP radio button.
Congratulations. Your WURE is now set up for access point
mode.
4. Advanced Configuration
Configuring your WURE through the Web-Based Advanced User Interface
4.1
If you wish to use the Web-Based Advanced User Interface, click
the “Web Management” button.
4.2 For more details, see the “Understanding the Web-Based
Advanced User Interface” section.
Wire less Range Exten der
Configuring the WURE
1312
Configuring as a Wireless G Universal Range Extender
Auto Connect Button
Auto Connect is a quick and easy method to automatically set up your
WURE to your wireless network. It is designed to remove the need for
users to set the correct SSID and channel. It is as simple as pushing
a button.
Note: Auto Connect will work only if the wireless router (or access
point) has security disabled.
1. Connect
Connecting the WURE
1.1 Locate and position the WURE next to the router to which
you wish to expand the coverage area.
1.2 Connect the power supply to the WURE. Plug the power
supply into the wall.
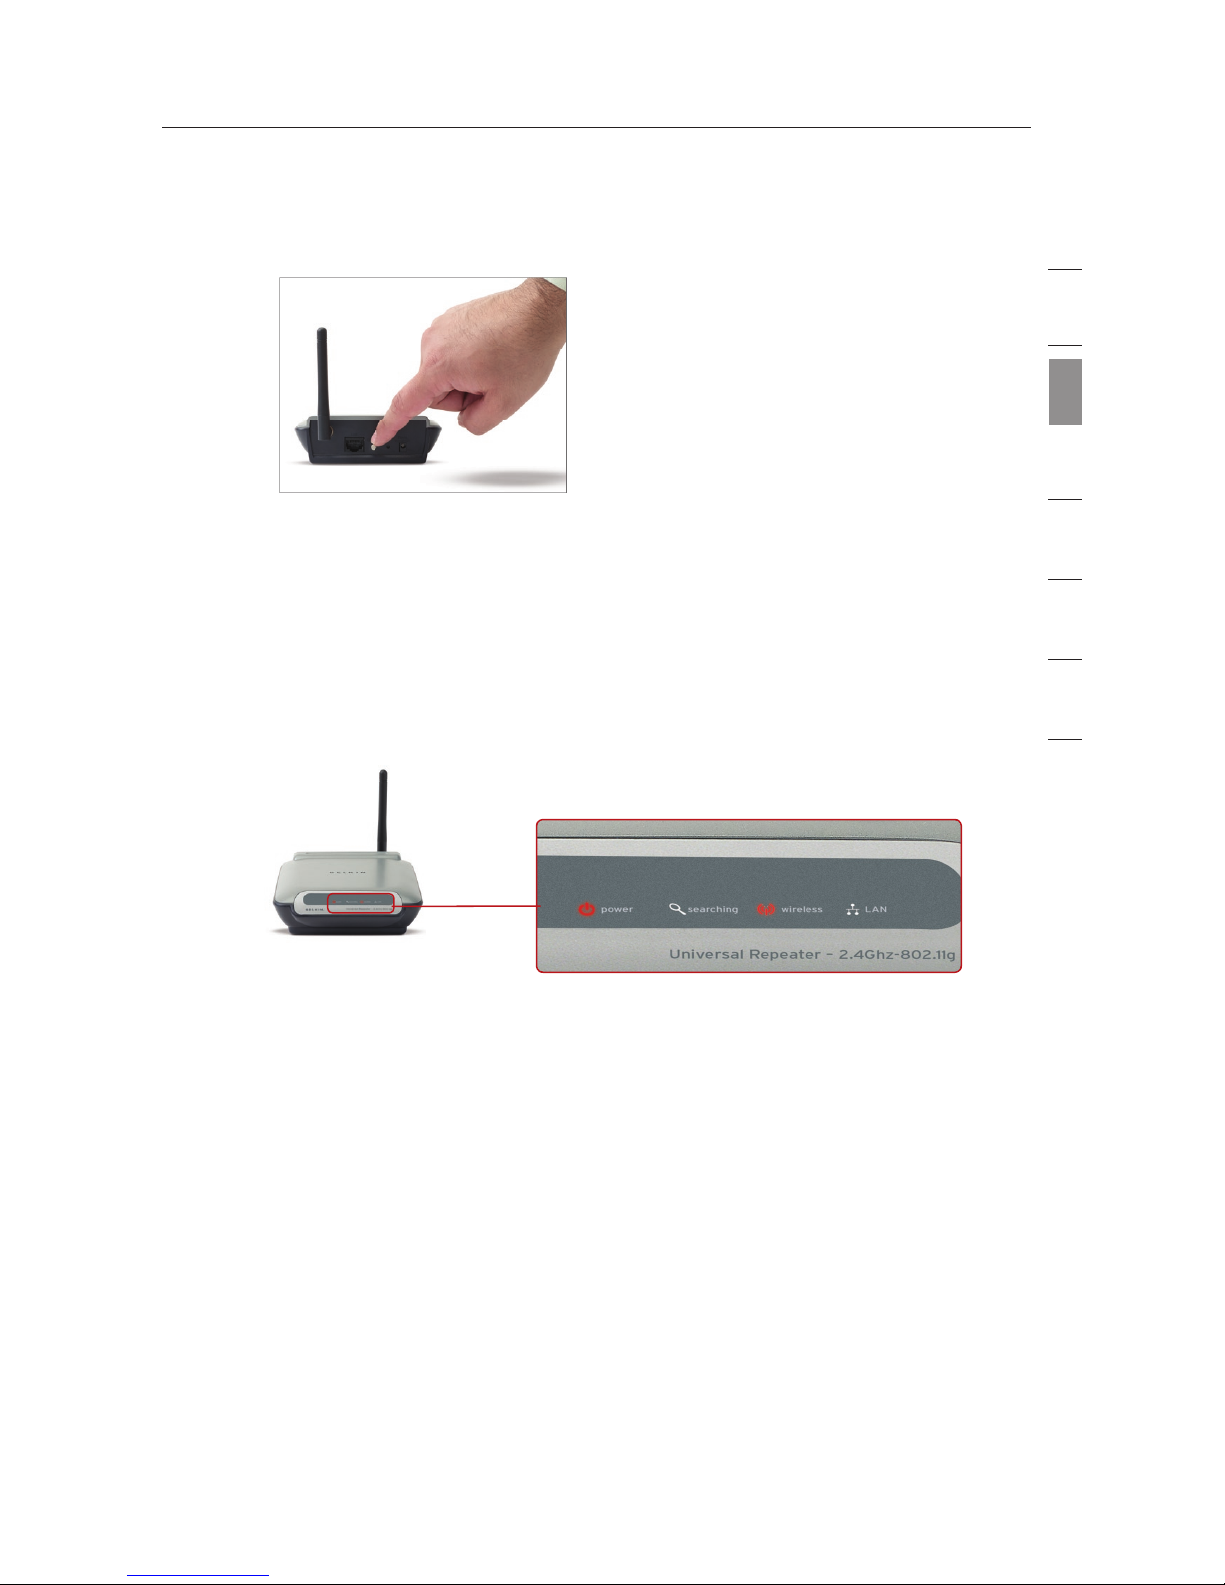
1.3 Verify that the “Power” LED and the “Wireless” LED are il-
luminated. The “Searching” LED should be blinking (red).
2. Configure
Configuring with One-Touch Setup
2.1 Push and hold the “Auto Connect” button for 10 seconds.
13
Configuring the WURE
13
section
1
2
3
4
5
6
7
2.2 Release the “Auto Connect” button; the WURE will automatically
associate to the wireless router (or access point) with the
strongest signal. In most cases, this will be the router to
which you positioned the WURE closest.
2.3 Once the WURE has associated to your router (or access
point), the “Searching” light (red) will not illuminate.
2.4 The configuration of your WURE is now complete. The SSID
of your WURE will automatically match the SSID of the wireless
router (or access point) to which it is associated.
3. Reposition
Repositioning the WURE in a Weak Signal Area or Dead Spot
3.1 Reposition the WURE between the wireless router and the
new coverage area.
3.2 Reconnect the power to the WURE and it will automatically
reassociate itself with the last wireless router (or access
point) to which you successfully connected.
Note: Auto Connect will work only if the wireless router (or access
point) has security disabled.
Using the Web-Based Advanced User Interface
1514
The most convenient way to access the WURE’s Web-Based
Advanced User Interface is to connect the unit to the wireless router
through the included cable. Once you finish configuring the device,
you can disconnect the cable.
Wireless G
Universal Range
Extender
Wireless G
Notebook Card
Wireless G
Router
Wireless G
Desktop Card
If you wish to connect a computer directly to the WURE to configure
it, you must set your client to match the settings of the WURE before
you can access the Web-Based Advanced User Interface. Perform the
following steps from the computer from which you wish to configure
your WURE.
Note: You must undo these steps once you have completed
configuring your WURE.
Windows 98SE, Me, 2000, and XP
1. Go to the Windows Control Panel and double-click on the
“Network” icon or the “Network Connections” icon.
2. Right-click on the “Local Area Connection” for your wireless
adapter and select “Properties”.
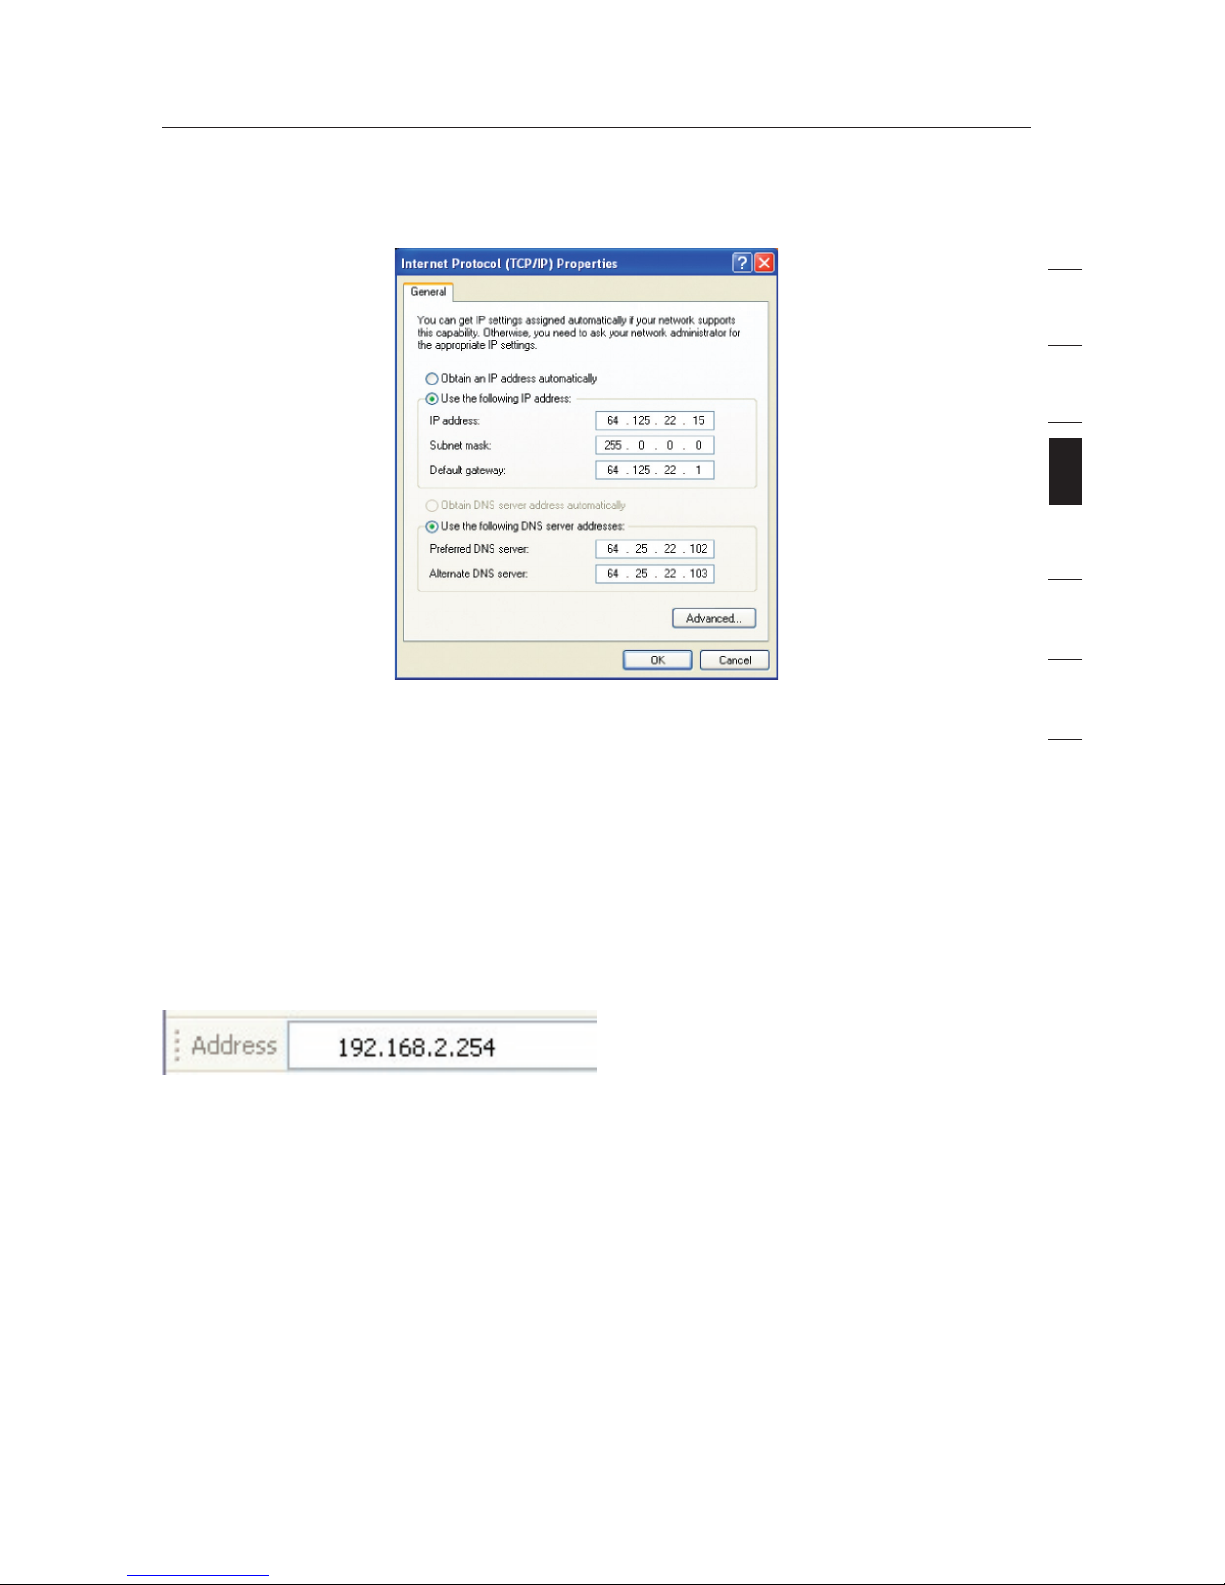
3. In the “General” tab, select the Internet Protocol TCP/IP settings
for your wireless adapter and click on the “Properties” button.
4. Select the “Use the following IP address” radio button.
5. Enter an IP address in the same subnet as the WURE. For
example, 192.168.2.200.
6. Enter the following subnet mask: 255.255.255.0. Then click “OK”.
15
Using the Web-Based Advanced User Interface
15
section
1
2
3
4
5
6
7
Note: Once you have completed configuring your WURE, repeat steps
1 through 3. Then select “Obtain an IP automatically” or set a valid IP
for your computer on the same subnet as the network to which you
are connecting.
Logging into the WURE
Using your Internet browser, you can access the WURE’s Web-Based
Advanced User Interface. In your browser, type “192.168.2.254” (do
not type in anything else such as “http://” or “www”). Then, press the
“Enter” key.
You will see the WURE’s home page in your browser window. The
home page is visible to any user who wants to see it. To make any
changes to the WURE’s settings, you have to log in. Clicking the
“Login” button or clicking on any one of the links on the home page
will take you to the login screen. The WURE ships with no password
entered. In the login screen, leave the password blank and click the
“Submit” button to log in.
Note: An IP address conflict can occur if you use a CAT5 cable to try
to manage the WURE while it already has a wireless connection to the
same router. To resolve this issue you need to disconnect one of the
connections to the WURE (wired or wireless).
1. (Wired) Disconnect the CAT5 cable; manage the WURE wirelessly.
2. (Wireless) Reset your WURE; manage the WURE though a CAT5 cable.
 Loading...