

Page 1
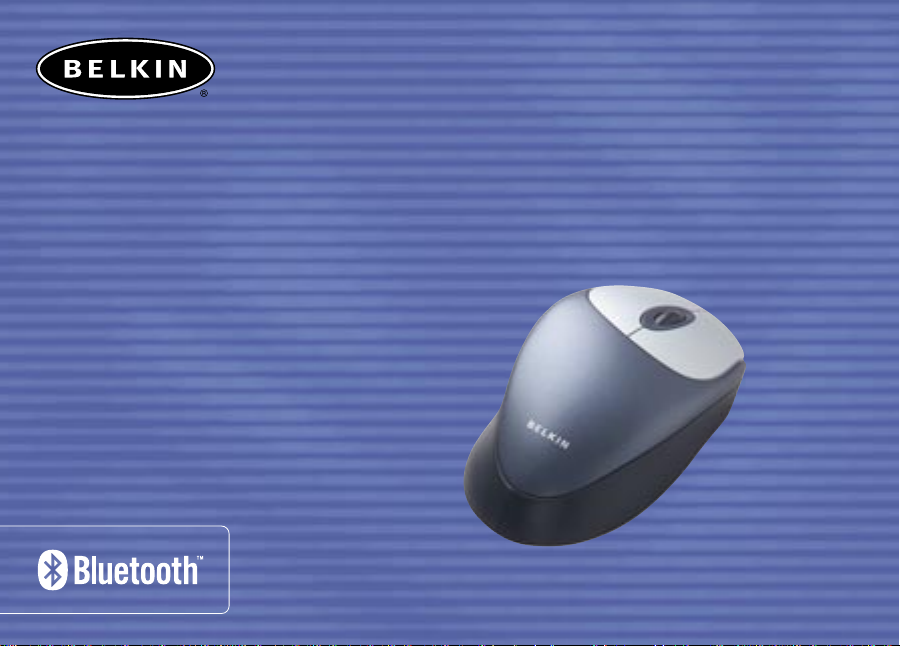
™
Bluetooth
Wireless
Optical Mouse
Enjoy the freedom and convenience
of wireless computing
User Manual
F8T041-B
Page 2

TABLE OF CONTENTS
Introduction. . . . . . . . . . . . . . . . . . . . . . . . . . . . . . . . . . . . . . . . . . . . . . . 2
Overview
Product Features . . . . . . . . . . . . . . . . . . . . . . . . . . . . . . . . . . . . . . . . . . . 4
System Requirements . . . . . . . . . . . . . . . . . . . . . . . . . . . . . . . . . . . . . . . . 6
Package Contents. . . . . . . . . . . . . . . . . . . . . . . . . . . . . . . . . . . . . . . . . . . 6
Mouse Specifications . . . . . . . . . . . . . . . . . . . . . . . . . . . . . . . . . . . . . . . . 7
USB Adapter Specifications . . . . . . . . . . . . . . . . . . . . . . . . . . . . . . . . . . . . 8
Supported Profiles . . . . . . . . . . . . . . . . . . . . . . . . . . . . . . . . . . . . . . . . . . 9
Software Setup . . . . . . . . . . . . . . . . . . . . . . . . . . . . . . . . . . . . . . . . . . . . . 11
Hardware Setup . . . . . . . . . . . . . . . . . . . . . . . . . . . . . . . . . . . . . . . . . . . . . 16
Initial Configuration Wizard . . . . . . . . . . . . . . . . . . . . . . . . . . . . . . . . . . . . . 20
Connecting the Bluetooth Mouse. . . . . . . . . . . . . . . . . . . . . . . . . . . . . . . . . . 23
Uninstalling the Software. . . . . . . . . . . . . . . . . . . . . . . . . . . . . . . . . . . . . . . 29
FAQs . . . . . . . . . . . . . . . . . . . . . . . . . . . . . . . . . . . . . . . . . . . . . . . . . . . . 30
Battery and Safety Information. . . . . . . . . . . . . . . . . . . . . . . . . . . . . . . . . . . 33
Information. . . . . . . . . . . . . . . . . . . . . . . . . . . . . . . . . . . . . . . . . . . . . . . 35
1
Page 3
OVERVIEWINTRODUCTION
Congratulations and thank you for purchasing the Bluetooth Wireless Optical Mouse
from Belkin. This breakthrough technology makes it easier than ever to connect many
of your computing and communications devices—without physical connections or
cables. The Bluetooth Mouse gives you the accuracy and high-performance of optical
input technology along with the freedom and convenience of wireless design. Please
be sure to review this manual carefully, to ensure that you take advantage of all the
features and capabilities of your new Bluetooth Mouse.
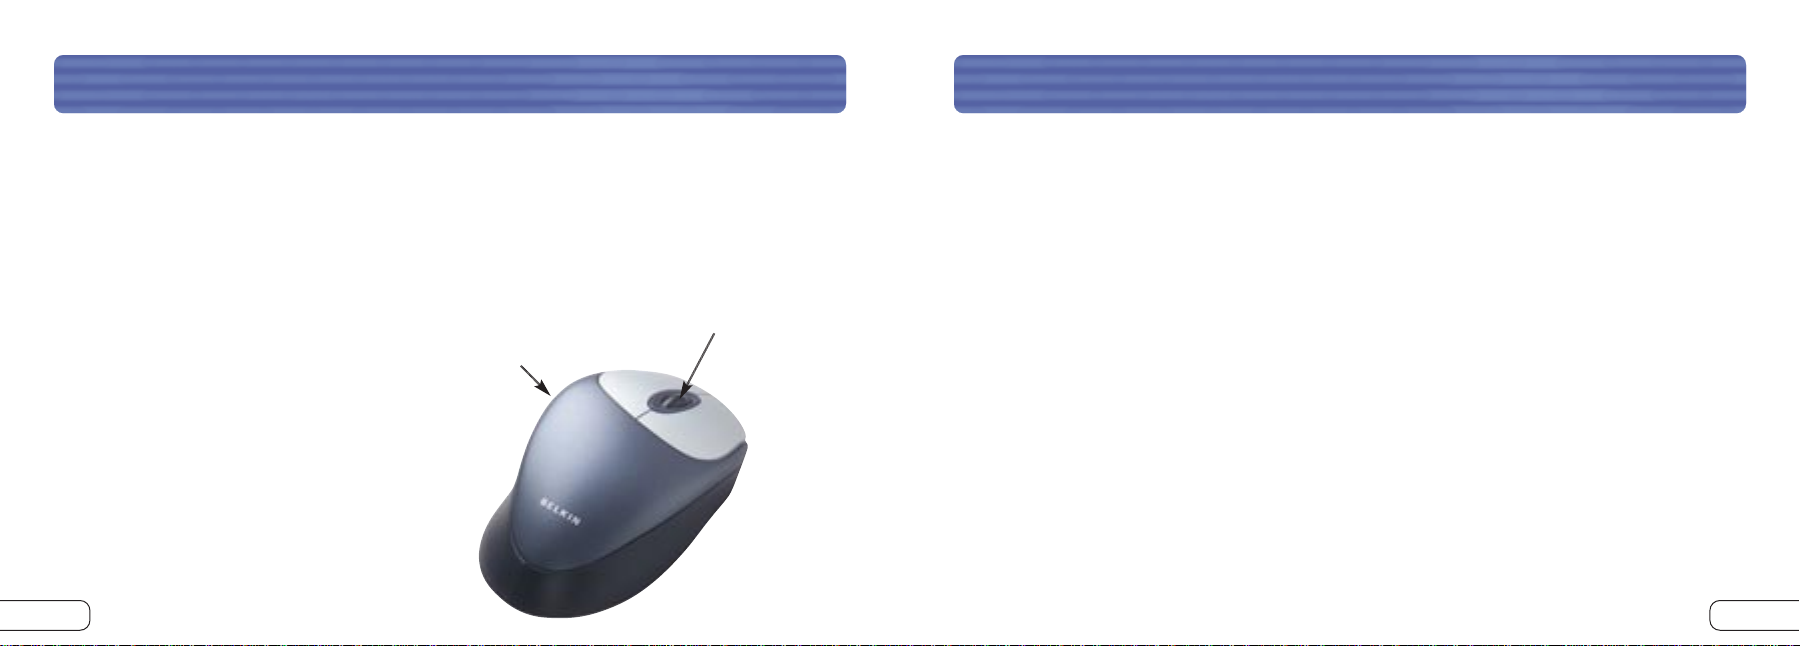
Please Note: References made to the
Bluetooth USB Adapter are to
Fourth button
Scroll wheel
and button
equipment included with our
Bluetooth Mouse, part number
F8T041-B. The Bluetooth USB
Adapter lets you easily add
Bluetooth capabilities to your
USB computer.
2
Benefits
• Offers the convenience of the wireless Bluetooth interface
• Delivers the accurate response of optical technology
• Features comfortable, ergonomic design
• Navigates easily using scroll wheel with blue LED indicator
• Works at distances of up to 10 meters (33 ft.)
• Installs and operates easily
• Includes Bluetooth USB Adapter that allows you to connect up to 7 Bluetooth
devices at one time
** Our Bluetooth Mouse, Belkin part number F8T041-B, includes our Bluetooth USB
Adapter (Belkin part number F8T005x).
3
Page 4

OVERVIEW
OVERVIEW
Product Features
The Bluetooth Mouse is compliant with Bluetooth standard version 1.1 and provides:
• Compliance with Bluetooth specification v1.1 devices
• 800dpi optical mouse technology for accuracy
• Side button acts as a browser and Windows back button
• Scroll wheel
• Operating distance of up to 10 meters
• Ergonomic design
4
The Bluetooth USB Adapter is compliant with Bluetooth standard version 1.1 and provides:
• Compliance with Bluetooth specification v1.1 devices
• USB bus powering; no external power supply necessary
• Support for Microsoft® Windows® 98 SE, Me, 2000, and XP
• Operating distance of up to 10 meters
• Point-to-multipoint connections
• Support for data rates up to 721Kbps
• Built-in security, including up to 128-bit encryption and authentication
• Compatibility with USB desktop and notebook computers
5
Page 5

OVERVIEW
OVERVIEW
System Requirements
• PC-compatible computer, CPU speed 200MHz or above
• Memory: 64MB or above, 128MB recommended
• One available USB port, USB 1.1 standard
• Windows 98 SE, Me, 2000, or XP
Package Contents
• Bluetooth Wireless Optical Mouse
• Bluetooth USB Adapter
• USB base with 6 ft. extension
• CD-ROM for installation and documentation
• User Manual
• Quick Installation Guide
• 2 AA Batteries
• Registration Card
6
Mouse Specifications
Bluetooth Compliance Version 1.1
Compatible to Bluetooth
HID Profile 0.95c
Operating Frequency: 2.4 to 2.4835GHz
Output Power: Class II (<4 dBm) RF
Operation Range: 10m (33 ft.) radius
indoors
Antenna: Integrated
Mouse
Pointing Device: Optical, 800dpi
Buttons: 4+ scroll-wheel button
Left/Right-Handed
Design: Right
Batteries Required: 2 AA (included)
Battery Life: 25 days under normal
usages 100 days standby
LED: Blue LED indicator
Dimensions: 74 (W) x 130 (L) x 45mm (H)
Weight: 108g (without battery)
Operating Temp: 0 to 50 degrees Celsius
Storage Temp: 10 to 70 degrees Celsius
Humidity: 5~90% non-condensing
Supported Profiles: GAP, SDP, HCRP
7
Page 6

OVERVIEW
OVERVIEW
USB Adapter Specifications
Bluetooth Compliance Version 1.1
Physical Interface: USB UHCI/OHCI
1.1-compliant
Operating Frequency: 2.4 to 2.4835GHz
Output Power: 0 dBm, Class 2
Sensitivity: <0.1% BER@ -80 dBm
Data Rate: 723/57.6Kbps
Operating Range: 10m radius indoors
Network Topology: Point-to-Multipoint
Packet Support: 1/3/5 Slots Packet
Operation: Master/Slave
Frequency Stability: +/- 10PPM
LED Indicator: Power On/Pairing/Low
Battery
Antenna Type: Internal
8
Dimensions: 57 (L) x 24 (W) x 10mm (H)
Weight: 0.3oz. (8.5g)
Operating Temp: 0 to 70 degrees Celsius
Storage Temp: -30 to 85 degrees Celsius
Humidity: 10-90% (non-condensing)
Supply Voltage: 5.0VDC (USB)
Nominal Current: 100mA
Support Profiles: Service Discovery, File
Transfer, LAN Access, Serial
Port, DUN, Generic Object
Exchange, Business Card,
Push, Pull & Exchange, Fax,
Synchronization, PAN, HCRP,
Audio Gateway, Headset,
Human Interface Device
OS Support: Windows 98 SE, Me, 2000,
and XP
Specifications subject to change without notice.
Supported Profiles
The services supported by your USB Adapter are defined as “Profiles”. Available
profiles include:
• Generic Access*
• Service Discovery*
• Serial Port
• LAN Access
• Dial-Up Networking
• Generic Object Exchange
• Object Push
• File Transfer
• Synchronization
• Fax
• Personal Area Network
• Human Interface Device*
• Audio Gateway
• Hardcopy Cable Replacement
*Supported by Bluetooth Mouse
9
Page 7
OVERVIEW
SOFTWARE SETUP
Supported Profiles
Your USB Adapter gives you the ability to do the following—without cables:
• Transfer files
• Access dial-up networks
• Connect to local area networks
• Perform an ActiveSync® session
The basic functions of the Bluetooth Neighborhood include:
• Device Discovery
• Service Discovery
• Establishing links with remote devices
10
• Connect to serial ports
• Exchange PIM data
• Send or exchange business cards
• Connect to input devices
Installing the USB Adapter
Software Setup for Windows 98 SE, Me, 2000, and XP
To install the software for the USB Adapter, follow the instructions below:
The installation process for Windows XP
may look slightly different from Windows
98 SE, Me, and 2000.
Note: Do not insert the USB Adapter into
the USB port prior to installation.
1. Insert the software installation CD into
the PC’s CD-ROM drive.
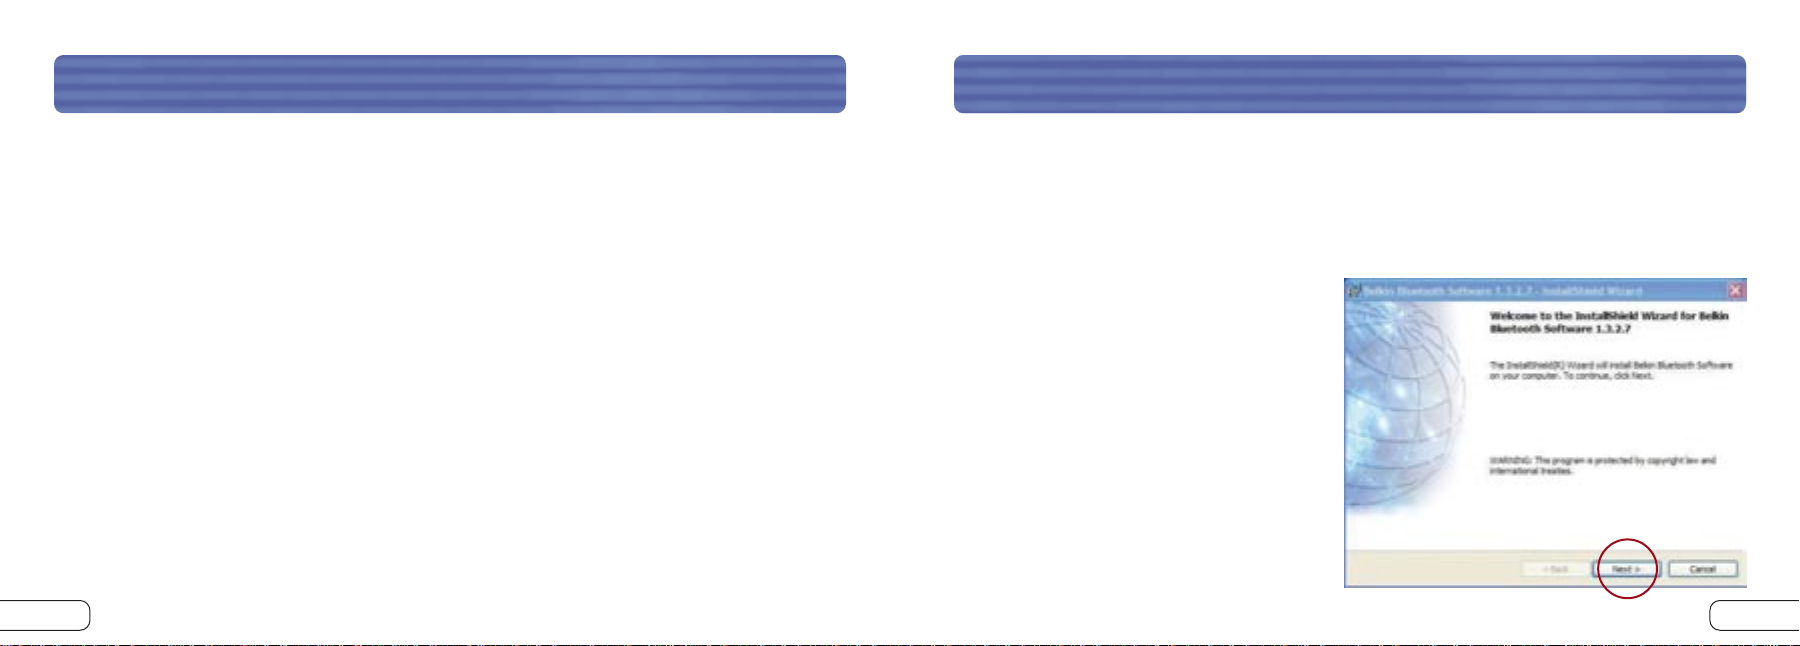
2. The “Software InstallShield Wizard”
window appears. Click on “Next” to
begin the installation process.
11
Page 8

SOFTWARE SETUP
SOFTWARE SETUP
3. Choose “I accept the terms in the license agreement” to accept the license
agreement. Click on “Next” to continue.
4. Specify the location where the software files will be installed on your hard drive.
It is recommended that you install the software in the default directory
“C:\Program Files\Belkin\Bluetooth\Software\”. Click on “Next” to continue.
12 13
5. Confirm that the device software is ready to be installed and click on “Install”.
6. The InstallShield Wizard will begin to install the Bluetooth software. This may
take several minutes.
Page 9

SOFTWARE SETUPSOFTWARE SETUP
7. During the installation process, you may be prompted to insert your Bluetooth
USB Adapter. If your Adapter is not plugged into your computer at this time, you
may insert it into an available USB 1.1-compliant port on your desktop or
notebook, then click “OK” to continue. Click on “Cancel” to continue installation
without the Bluetooth device inserted. Refer to the “Hardware Setup”
section on page 16 for detailed instructions on connecting the USB Adapter to
your computer.
14 15
Note: If at any time during the installation process you receive a “Driver Signature
Notice”, click “OK” to continue the installation process.
8. Confirm the completion of the software installation; click “Finish” and restart the
system if prompted to do so.
Page 10

HARDWARE SETUPHARDWARE SETUP
USB Adapter
You must connect the Bluetooth USB Adapter to an available Universal Serial Bus (USB)
port on your computer.
Note: Your USB Adapter is sensitive to static electricity, which can damage its delicate
electrical components. Electrostatic charges can be acquired simply by dry weather
conditions or they can occur when you walk across carpeted floors. To protect your
device, always touch the metal chassis of your computer before handling the USB
Adapter, or any internal computer component. This will ground a potential electrostatic
discharge. Avoid touching the metal connector when handling the USB Adapter.
There are two ways to connect your USB Adapter:
1. Connect the USB Adapter directly to an available USB A-type connector on your
desktop or notebook computer.
2. Connect the USB Adapter to the included USB base stand, and then connect the
other end of the cable to an available USB A-type connector on your desktop or
notebook computer. This is recommended for desktop computers.
Hardware Setup for Windows 98 SE, Me, 2000, and XP
1. Once you have connected the USB Adapter, your system will display a “New USB
device found” dialog box. Follow the prompts to install drivers for your Adapter.
2. Choose “Install from a list or Specific location”; then click “Next”.
1716
Page 11

HARDWARE SETUPHARDWARE SETUP
3. Browse for the location of the device driver “C:\Program Files\Belkin\
Bluetooth\Software\bin\” then click “Next”.
4. If you receive the following “Hardware installation notice”, click on “Continue
Anyway” to continue with the installation process.
18
5. A window will appear that confirms the completion of the hardware installation;
click on “Finish” to complete the installation process.
19
Page 12

INITIAL CONFIGURATION WIZARDINITIAL CONFIGURATION WIZARD
Configuring your Computer for Windows 98 SE, Me, 2000, and XP
1. Once the installation process is complete, the “Initial Bluetooth Configuration
Wizard” will prompt you. Follow the prompts as the Wizard guides you through the
initial setup of your Bluetooth device.
2. Name your computer with a name
you can easily remember. This name
will appear in reference to your
computer when it is discovered by
other Bluetooth devices.
20
3. Choose the type of computer you have installed the Bluetooth USB Adapter to in
the drop-down menu and click “Next”.
4. Continue to use the Wizard to configure the Bluetooth services that this computer
will allow other Bluetooth devices to access. Click “Next”.
21
Page 13

“MY BLUETOOTH PLACES” PROGRAMCONNECTING THE BLUETOOTH MOUSEINITIAL CONFIGURATION WIZARD
5. Choose the Bluetooth services your computer will offer. The most common service for
your computer type will be checked by default and then click “Next”.
6. Congratulations! Your computer is ready to connect to your Bluetooth devices.
7. If you have another Bluetooth device and you want to configure the way this
computer will use its services, click “Next”. Otherwise click “Skip”, and proceed to the
“Connecting the Bluetooth Mouse” section of this manual on page 23.
22
Inserting the Batteries
The Mouse requires two AA batteries to
run, and two are included in the package.
When it becomes necessary, replace them
be sure to use new batteries only; we
recommend alkaline batteries. Rechargeable
batteries may be used as well.
To insert the batteries:
1. Turn the Mouse upside down, and
remove the battery compartment cover.
2. Insert the new batteries. Make sure to
properly orient the positive (+) and
negative (-) ends as indicated on the
battery compartment label.
3. Close the battery compartment cover.
Connect button
23
Page 14

CONNECTING THE BLUETOOTH MOUSECONNECTING THE BLUETOOTH MOUSE
Important: Before boarding any aircraft, remove the batteries from the Wireless Mouse.
The Wireless Mouse can transmit radio frequency energy, much like cellular phones,
whenever the batteries are installed.
Please refer to the “Battery and Safety Information” section on page 33 for more
information regarding the handling and usage of batteries.
The following steps will allow you to establish the initial connection between your
Mouse and computer. Once a connection is established, your computer will
automatically connect to your Mouse every time you reboot. If the Mouse does not
reconnect at boot-up, follow the pairing and connection procedures on page 24.
Preparing the Mouse
1. Turn the Mouse upside down, and press the “Connect” button once. You should see
the Scroll Wheel LED blink rapidly. This indicates that the Mouse is in pairing mode
and is ready to connect to your computer.
2. On your computer, open “My Bluetooth Places” by double-clicking on the Bluetooth icon.
24
3. From the menu bar select “Bluetooth” then “Bluetooth Setup Wizard”.
4. Select “I want to find a specific Bluetooth device and configure how this computer
will use its services”. Then click “Next”.
25
Page 15

CONNECTING THE BLUETOOTH MOUSECONNECTING THE BLUETOOTH MOUSE
5. From the drop-down menu, select “Show mice, keyboards and joysticks” then click
on the “Search Again” button. Please verify that the Scroll Wheel LED continues to
flash rapidly.
6. The Belkin Mouse will be discovered. Click on the Belkin Mouse icon then click “Next”.
7. The services that are available from the device will be listed. Select “Bluetooth
Mouse” and click “Finish”.
8. Wait while the Mouse is installed. This may take several seconds.
9. Your Mouse is now connected. Move your Mouse to verify the connection.
2726
Page 16

CONNECTING THE BLUETOOTH MOUSE
UNINSTALLING THE SOFTWARE
Establishing a Manual Connection to your Mouse
You may establish a wireless connection to your Mouse by following these steps.
1. Turn the Mouse upside down, and press the “Connect” button once. You should see the
Scroll Wheel LED blink rapidly. This indicates that the Mouse is in pairing mode and is
ready to connect to your computer.
2. On your computer, open “My Bluetooth Places” by double-clicking on the Bluetooth icon.
3. From the menu bar, select “Bluetooth” then “Search for Devices”.
4. The Belkin Mouse will be discovered. Right-click on the Belkin Mouse icon then select
“Connect Device”.
28
Uninstalling the Software for Windows 98 SE, Me, 2000, and XP
Follow these instructions to uninstall your Bluetooth USB Adapter.
1. Insert the CD-ROM included with your USB Adapter.
2. This “InstallShield Wizard” should automatically load. If it does not load, explore the
CD and run the “Setup.exe” file.
3. The “InstallShield” window should now appear. Click “Next” to continue with the
uninstall process.
29
Page 17

“MY BLUETOOTH PLACES” PROGRAMFAQs
“MY BLUETOOTH PLACES” PROGRAMFAQs
Which Bluetooth Profiles does the USB Adapter support?
The included Bluetooth USB Adapter supports the most current Bluetooth profile set
including: Service Discovery, File Transfer, LAN Access, Serial Port, DUN, Generic Object
Exchange, Business Card, Push, Pull & Exchange, Fax, Synchronization, PAN, HCRP,
Audio Gateway, Headset, and Human Interface Device.
Which Bluetooth Profiles does the Bluetooth Mouse Support?
The Bluetooth Mouse supports the Human Interface Device profile.
Will the Bluetooth Mouse reconnect after I restart the computer?
Yes, the Bluetooth Mouse will automatically establish a connection with your PC every
time Windows restarts.
How does the Mouse’s side button function?
The side button allows you to navigate backward through a web browser or a
previous window.
30
What does the Scroll Wheel LED indicate?
• A slow blink every three seconds indicates normal operation.
• A rapid blink indicates that the Mouse is in connection mode and is ready to be
discovered and connected.
• Intermittent rapid blinking (every three seconds) indicates the battery is low.
Can I connect multiple Bluetooth Mice to the same computer?
Yes, you may. Bluetooth can support up to seven simultaneous connections. Simply
follow the pairing and connection instructions in this User Manual to add Bluetooth
mouse connections to your computer.
Can I use rechargeable AA batteries with the Bluetooth Mouse?
Yes, you may.
31
Page 18

UNINSTALLING THE SOFTWAREFAQs
UNINSTALLING THE SOFTWAREBATTERY AND SAFETY INFORMATION
Can my Bluetooth Mouse connect to other Bluetooth devices or adapters?
Yes, it can, as long as the other Bluetooth device supports the Human Interface Device
(HID) profile. Check with the device manufacturer to see if your device supports HID
Profiles. For WIDCOMM software users, you must have BTW version 1.4 or higher.
Can my Microsoft Bluetooth Mouse connect to my Belkin Bluetooth USB Adapter
included with this package?
Yes, it can. Follow the Mouse connection procedure as described in this
User Manual.
Can I connect the Belkin Bluetooth Mouse and the Microsoft Bluetooth Mouse to
the same computer at the same time?
Yes, you can.
32
General Precautions
• Keep batteries out of reach of children.
• Do not mix old and new batteries or batteries of different types (for example,
carbon and alkaline batteries).
• Always remove old, weak, or worn-out batteries promptly and recycle or dispose of
them in accordance with local and national disposal regulations.
• If a battery leaks, remove all batteries and recycle or dispose of them in
accordance with the battery manufacturer’s instructions and local and national
disposal regulations. Before inserting new batteries, thoroughly clean the battery
compartment with a damp paper towel, or follow the battery manufacturer’s
recommendations for cleanup. If fluid from the battery comes into contact with
skin or clothes, flush skin with water immediately.
• Remove the batteries if your device is to be stored for longer than a month
without being used.
33
Page 19

BATTERY AND SAFETY INFORMATION
INFORMATION
Special Precautions
The precautions below are to prevent the sudden release of electrolytes, which these
prohibited actions can cause:
• Do not open, puncture, or mutilate the batteries.
• Do not heat batteries.
• Do not use a fire to dispose of batteries.
Released battery electrolyte is corrosive, can cause damage to the eyes and skin, and
may be toxic if swallowed.
Product Disposal Information
Dispose of this product in accordance with local and national disposal regulations.
34
DECLARATION OF CONFORMITY WITH FCC RULES FOR
ELECTROMAGNETIC COMPATIBILITY
We, Belkin Corporation, of 501 West Walnut Street, Compton, CA 90220, declare under our sole
responsibility that the product,
F8T041
to which this declaration relates, complies with Part 15 of the FCC Rules. Operation is subject to the
following two conditions: (1) this device may not cause harmful interference, and (2) this device must
accept any interference received, including interference that may cause undesired operation.
Caution: Exposure to Radio Frequency Radiation.
The radiated output power of this device is far below the FCC radio frequency exposure limits. Nevertheless, the
device shall be used in such manner that the potential for human contact normal operation is minimized.
When connecting an external antenna to the device, the antenna shall be placed in such a manner to minimize
the potential for human contact during normal operation. In order to avoid the possibility of exceeding the FCC
radio frequency exposure limits, human proximity to the antenna shall not be less than 20cm (8 inches) during
normal operation.
Federal Communications Commission Notice
This equipment has been tested and found to comply with the limits for a Class B digital device, pursuant to Part
15 of the FCC Rules. These limits are designed to provide reasonable protection against harmful interference in a
residential installation.
35
Page 20

INFORMATION
INFORMATION
This equipment generates, uses, and can radiate radio frequency energy. If not installed and used in accordance with
the instructions, it may cause harmful interference to radio or television reception, which can be determined by
turning the equipment off and on, the user is encouraged to try and correct the interference by one or more of the
following measures:
• Reorient or relocate the receiving antenna.
• Increase the distance between the equipment and the receiver.
• Connect the equipment to an outlet on a circuit different from that to which the receiver is connected.
• Consult the dealer or an experienced radio/TV technician for help.
Modifications
The FCC requires the user to be notified that any changes or modifications to this device that are not expressly
approved by Belkin Corporation may void the users authority to operate the equipment.
Canada-Industry Canada (IC)
The wireless radio of this device complies with RSS 139 & RSS 210 Industry Canada. This Class B digital complies with
Canadian ICES-003.
Cet appareil numérique de la classe B conforme á la norme NMB-003 du Canada.
Europe-European Union Notice
Radio products with the CE alert marking comply with the R&TTE Directive
(1995/5/EC) issued by the Commission of the European Community.
36
Compliance with this directive implies conformity to the following European Norms
(in brackets are the equivalent international standards).
• EN 60950 (IEC60950) – Product Safety
• EN 300 328 Technical requirement for radio equipment
• ETS 300 826 General EMC requirements for radio equipment.
To determine the type of transmitter, check the identification label on your Belkin product.
Products with the CE marking comply with the EMC Directive (89/336/EEC) and the Low Voltage
Directive (72/23/EEC) issued by the Commission of the European Community. Compliance with these
directives implies conformity to the following European Norms (in brackets are the equivalent
international standards).
• EN 55022 (CISPR 22) – Electromagnetic Interference
• EN 55024 (IEC61000-4-2,3,4,5,6,8,11)- Electromagnetic Immunity
• EN 61000-3-2 (IEC610000-3-2) - Power Line Harmonics
• EN 61000-3-3 (IEC610000) – Power Line Flicker
• EN 60950 (IEC60950) – Product Safety
Products that contain the radio transmitter are labeled with the CE alert marking and may also carry the CE logo.
37
Page 21

INFORMATION
Belkin Corporation Limited Two-Year Product Warranty
Belkin Corporation warrants this product against defects in materials and workmanship for its warranty period. If a
defect is discovered, Belkin will, at its option, repair or replace the product at no charge provided it is returned
during the warranty period, with transportation charges prepaid, to the authorized Belkin dealer from whom you
purchased the product. Proof of purchase may be required.
This warranty does not apply if the product has been damaged by accident, abuse, misuse, or misapplication; if the
product has been modified without the written permission of Belkin; or if any Belkin serial number has been removed
or defaced.
THE WARRANTY AND REMEDIES SET FORTH ABOVE ARE EXCLUSIVE IN LIEU OF ALL OTHERS, WHETHER ORAL OR
WRITTEN, EXPRESSED OR IMPLIED. BELKIN SPECIFICALLY DISCLAIMS ANY AND ALL IMPLIED WARRANTIES, INCLUDING,
WITHOUT LIMITATION, WARRANTIES OF MERCHANTABILITY AND FITNESS FOR A PARTICULAR PURPOSE.
No Belkin dealer, agent, or employee is authorized to make any modification, extension, or addition to this warranty.
BELKIN IS NOT RESPONSIBLE FOR SPECIAL, INCIDENTAL, OR CONSEQUENTIAL DAMAGES RESULTING FROM ANY BREACH
OF WARRANTY, OR UNDER ANY OTHER LEGAL THEORY, INCLUDING BUT NOT LIMITED TO, LOST PROFITS, DOWNTIME,
GOODWILL, DAMAGE TO OR REPROGRAMMING OR REPRODUCING ANY PROGRAM OR DATA STORED IN, OR USED WITH,
BELKIN PRODUCTS.
Some states do not allow the exclusion or limitation of incidental or consequential damages or exclusions of implied
warranties, so the above limitations of exclusions may not apply to you. This warranty gives you specific legal rights,
and you may also have other rights that vary from state to state.
38
belkin.com
Belkin Corporation
501 West Walnut Street
Compton • CA • 90220 • USA
Tel: 310.898.1100
Fax: 310.898.1111
Belkin Components, Ltd.
Express Business Park • Shipton Way
Rushden • NN10 6GL • United Kingdom
Tel: +44 (0) 1933 35 2000
Fax: +44 (0) 1933 31 2000
Belkin, Ltd.
7 Bowen Crescent • West Gosford
NSW 2250 • Australia
Tel: +61 (0) 2 4372 8600
Fax: +61 (0) 2 4372 8603
Belkin Tech Support
US: 310.898.1100 ext. 2263
800.223.5546 ext. 2263
Europe: 00 800 223 55 460
Australia: 1800 666 040
P74312
© 2003 Belkin Corporation. All rights reserved. All trade names are registered trademarks of respective manufacturers listed.
The Bluetooth name and the Bluetooth trademarks are owned by Bluetooth SIG, Inc., and are used by Belkin Corporation under license.
 Loading...