

Page 1

F8E203
P73099 F8E203-BLK
ErgoMouse
™
User Manual
P73099-F8E203-US-man-qxd 3/9/00 8:15 AM Page 1
Page 2

ABOUT YOUR MOUSE
1.1 An Introduction to Your New Belkin ErgoMouse
™
The Belkin ErgoMouse™offers the ultimate in value and comfort.
A gentle thumb cradle supports your thumb, allowing the rest of
your fingers to rest naturally on the buttons, giving you true
ergo support.
This mouse is a high-resolution three-button mouse designed
for today's active PC user. It works with Windows®for optimum
compatibility, and its sleek design helps reduce stress and undue
hand and wrist fatigue. It features dynamic resolution, lowfriction rollers and three separate function micro-switches
buttons for years of productive use.
Once the software has been loaded onto your computer, the
center button of your mouse can be programmed to perform
the same tasks as:
• Left Button Double Click
• F1 through F12
• Enter Key
• Page Up Key
• Page Down Key
• Home Key
• End Key
1. Introduction
1
P73099-F8E203-US-man-qxd 3/9/00 8:15 AM Page 1
Page 3
2
1. Introduction (continued)
1.2 Connecting Your Mouse
Your mouse connects to either a PS/2 (or 6 pin MiniDIN) mouse
port or a 9 pin serial port. To verify your connectors, locate the
port on the back of your computer that is designated for your
mouse. Most PCs will have the word MOUSE marked next to
the PS/2 connector. Older PCs will have either Serial 1 (and up)
or COM 1 (and up) for the serial connector. If you are still
unsure, please refer to your hardware manual.
For PS/2 mouse port installation, simply remove the serial
adapter before connecting the mouse cable to the computer.
WARNING: To avoid damage, turn your computer off
before plugging or unplugging any
pointing devices.
a. Locate the computer PS/2 mouse port or Serial port
on the back of your computer.
b. Plug your mouse into the appropriate port suggested
above. Check the box in which your mouse was shipped to
verify the ports supported.
c. If applicable, tighten down the connector thumbscrews.
d. Turn your computer on. At this point, your mouse will work
with the built-in Microsoft®Operating System. To use the
extra features of your middle button, you must install the
included software.
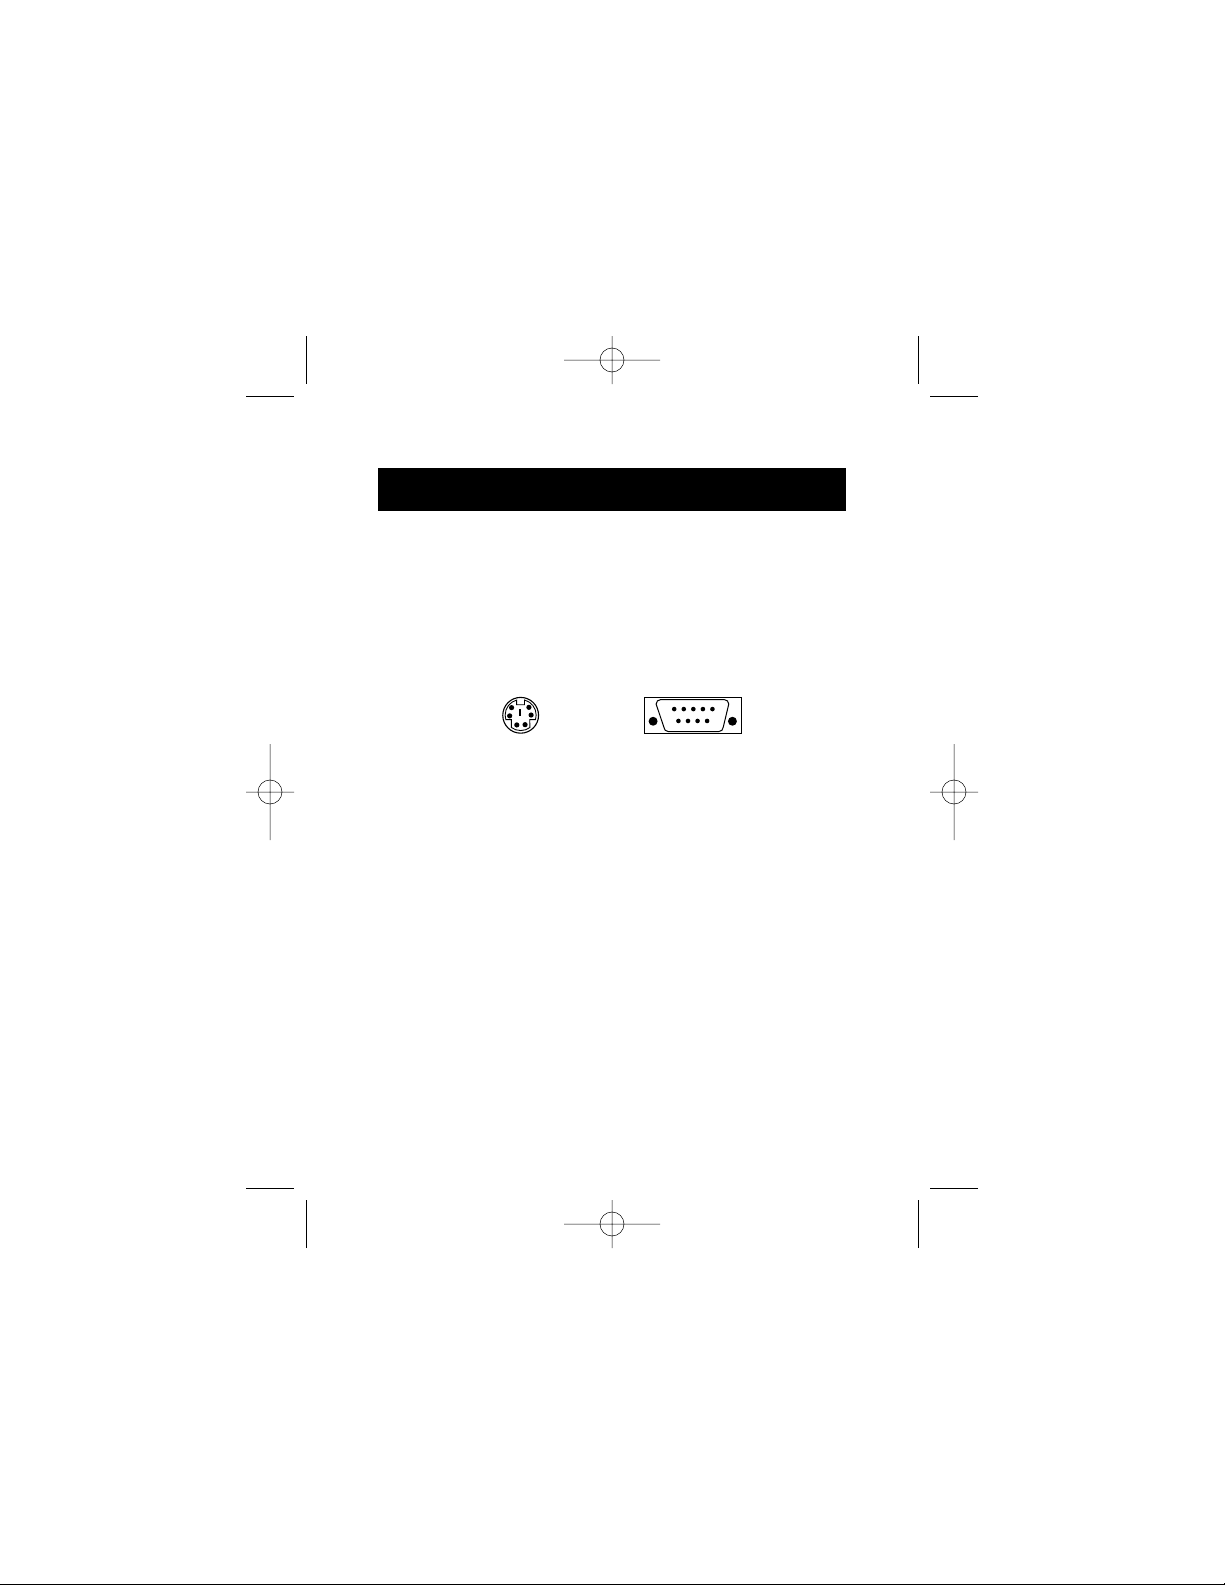
6 pin MiniDIN
9 pin Serial
P73099-F8E203-US-man-qxd 3/9/00 8:15 AM Page 2
Page 4

3
2. Software Installation
A STEP BY STEP GUIDE
2.1 Windows®3.1 and Windows®3.11
a. Insert the CursorWare™diskette in the A: or B: drive.
b. From the “Program Manager”, click on “File”.
c. Then click on "Run".
d. Type "A:INSTALL" (or "B:INSTALL") and then click on "OK".
e. Click on the “Install” command button and follow the on-screen
instructions to complete the installation.
f. Once the installation is complete, reboot your computer.
2.2 Windows®95, Windows®98 and Windows NT®4.0
a. Insert the CursorWare™diskette in the A: or B: drive.
b. Click on "Start" in the lower left corner of your screen.
c. Then click on "Run".
d. Type "A:INSTALL" (or "B:INSTALL") and then click on "OK".
e. Click "Next".
f. Click "Next".
g. Specify if you are using a PS/2 or Serial mouse (see Section 1.2).
h. Click “Next”.
i. Click “Yes, I want to restart my computer”, then click “Finish”.
Note: Remove the software from the disk drive before you
restart your computer. Don't worry if it has already
restarted before you can remove it. The computer will
prompt you to remove it.
P73099-F8E203-US-man-qxd 3/9/00 8:15 AM Page 3
Page 5

4
3. Troubleshooting
Q: I can get into Windows®or into Safe Mode but I cannot
use the mouse.
A: If you have more than one driver, this could be causing your
computer to boot in safe mode or not allow your mouse to
work at all. If you are using a PS/2 mouse then the driver
must state that it is using a PS/2 driver. If you are using a
Serial mouse then the driver must state that it is using a
Serial driver on COM1 or COM2. If you have a Serial Mouse
and you are not sure whether you are using COM1 or COM2
then try moving the mouse to another serial port on the
back of your computer, (most computers have two; if you
have only one then it will more than likely be COM1). If you
have more than one driver then you must remove the
excess drivers.
Q: If I have more than one mouse driver how do I remove
the driver without the mouse control? How do I boot
into normal Windows®mode?
A: Use your "Windows®" Key at the bottom left hand corner of
your keyboard if you have one, if not press "Alt + S" to go
to the "Start" button in Windows®98. Then use your "Up
Arrow" to select "Settings", then use your "Right Arrow" to
select "Control Panel" and then press "Enter".
These steps have taken you to the "Control Panel" where
you can gain access to your "Device Manager". The "Device
Manager" shows your driver status and information and it
will allow you to modify their settings.
After entering the "Control Panel" use your "Up" and
"Down" Arrows to select, "System" and then press "Enter".
After entering "System Properties" use your "Right Arrow"
to select "Device Manager". Then press "Tab" until you have
P73099-F8E203-US-man-qxd 3/9/00 8:15 AM Page 4
Page 6

5
3. Troubleshooting (continued)
selected "Computer" and then use the "Down Arrow" until
your "Mouse" is highlighted. Then use your "Right Arrow"
to expand and select your mouse driver or drivers. After you
have chosen your mouse driver you can now modify it by
removing the driver or changing the driver.
To remove the driver you have selected, use your "Tab" key
until the "Remove" tab is selected. Then press "Enter". This
will remove the driver. Use your "Arrow" Key to select any
other drivers and repeat the process until all but one driver
remains. Even if it is the wrong driver you can use it and
change it to the mouse driver you want.
After removing or changing the mouse driver, use your
"Tab" key until "Close" is selected and then press "Enter".
Then you will have to reboot your computer. Use your
"Windows®" Key at the bottom left hand corner of your
keyboard if you have one, if not press "Alt + S". Then use
the "Up Arrow" to select "Shut Down" and press "Enter".
Use your "Arrow" Key to select "Restart" and press "Enter".
Q: After installing the mouse driver and rebooting, my
mouse will not work. How do I change the mouse driver
without mouse control?
A: Use your "Windows®" Key at the bottom left hand corner of
your keyboard if you have one; if not press "Alt + S" to go
to the "Start" button in Windows®98. Then use your "Up"
Arrow to select "Settings" then use your "Right" Arrow to
select "Control Panel" and then press "Enter".
These steps have taken you to the "Control Panel" where
you can gain access to your "Device Manager". The "Device
Manager" shows your driver status and information and it
will allow you to modify their settings.
P73099-F8E203-US-man-qxd 3/9/00 8:15 AM Page 5
Page 7

3. Troubleshooting (continued)
6
After entering the "Control Panel" use the "Up" and
"Down" Arrows to select "System" and then press "Enter".
After entering "System Properties" use the "Right" Arrow
to select "Device Manager". Then press "Tab" to bring
your selection to "Computer" and then use the "Down"
Arrow until your "Mouse" is highlighted. Then use your
"Right" Arrow to expand and select your mouse driver or
drivers. After you select the mouse driver, use your "Tab"
key to select "Properties" and then press "Enter". Use your
"Right Arrow" key to choose the "Driver" tab and then use
your "Tab" key to choose "Update driver" and then press
"Enter".
The next options will vary from computer to computer
because there are many types of Windows®95 and
Windows®2000 versions. The wording or options will be a
little different but should be somewhat the same.
Windows®will then continue to ask questions and help guide
you through the changes. Use your "Arrow" Keys, "Enter",
and "Tab" keys to continue through the process. Windows
®
may or may not start searching for Plug-and-Play devices
right away, and it may or may not find anything new. If it
does not find anything new it will ask you another line of
questions, and if it does find something new choose
something similar to "This Device is not in the list".
Windows®will then ask if you want Windows®to search for a
new device or will ask if you want to select a driver from a
list. You will want to choose a device or driver from a list. Use
your "Arrow", "Tab" and "Enter" keys to navigate and finish
till the end of questioning. After finishing, Windows®may or
may not ask you to reboot your computer. Yes, you will want
P73099-F8E203-US-man-qxd 3/9/00 8:15 AM Page 6
Page 8

7
3. Troubleshooting (continued)
to restart your computer. If it does not ask you to restart
your computer you will have to close "System Properties".
Use the "Tab" key until "Close" is selected and then press
"Enter". Then you will have to reboot your computer. Use
your "Windows
®
" Key at the bottom left hand corner of your
keyboard if you have one, if not press "Alt + S". Then use
the "Up Arrow" to select "Shut Down" and use your "Enter"
key. Use the "Arrow" Key to select "Restart" and press
"Enter".
Q: Why does my external mouse not work with my
laptop computer?
A: You may have to disable the onboard mouse in order to use
an external mouse. Try looking in your CMOS or BIOS in
order to disable the onboard mouse. If you do not have this
option or do not know how to get into your BIOS or CMOS,
please follow instructions in your computer manual or call
the computer dealer/technical support for your computer.
P73099-F8E203-US-man-qxd 3/9/00 8:15 AM Page 7
Page 9

4. How to Use Your ErgoMouse
™
8
4.1 Changing Mouse Settings
You will find the CursorWare™program in your taskbar
on the bottom of your screen. Click on it to open
the window.
To the right of the picture ErgoMouse™you will find a section
labeled "Middle Button Assignment". You have the option of
programming your middle button to perform your most
common Windows®98 tasks. You can choose from one of the
following: "Backspace", "Close Application", "Delete", "Enter",
"Escape", "F1" through "F12", "Find File", "Maximize",
"Minimize", "Page Down", "Page Up", "Run", "Start Menu"
and "Double Click".
This can be activated by clicking on the circle by the words
“Win98 Function” then clicking on the box with the word
“Backspace”. Find the one you wish to use and click on it.
You can also select the zoom option. You can choose to zoom in
and observe something in large, medium or small. To select this,
simply click in the circle next to the words "Zoom In" then click
on the box with the word "Large". Select the one you want.
Below this section is a box marked "Button Swap". This allows
you the option to switch the functionality of the right and
left button.
To the right of this section in the top corner, you find a section
marked "Direction Changing" which allows you to change the
direction of the pointer to point either right or left.
Below this, you will find the section that allows you to change
the size of your cursor.
P73099-F8E203-US-man-qxd 3/9/00 8:15 AM Page 8
Page 10

9
4. How to Use Your ErgoMouse
™
(continued)
Below this, you will find the section that allows you to change
the color of the pointer. You can choose between solid white,
solid black or clear.
To the left, you will find the section marked "Mouse Speed".
Mouse Speed determines how quickly your pointer moves
about the screen. The faster the setting, the higher the
response. The slower the setting, the lower the response.
Below this is the "Mouse Trails" section. Click on the enable
box to choose how long of a tail you would like your arrow
to have.
And finally, in the bottom right corner is the "Set Double Click
Time" section. The double click speed allows you to modify
the speed at which your mouse responds. The slower the
setting, the slower you can double click for your mouse to
respond. To see which speed is best for you, try double
clicking within the "Test" box. If you double click and it does
not change color, you might want to change the speed to a
lower setting.
To activate the settings that you chose, select "Apply".
To keep your setting(s), select "OK".
To keep your settings as they were before you opened the
settings window, select "Cancel".
P73099-F8E203-US-man-qxd 3/9/00 8:15 AM Page 9
Page 11

4. How to Use Your ErgoMouse
™
(continued)
10
4.2 Care for Your Mouse
Maintenance of your ErgoMouse™is important. It is designed
to provide years of trouble-free service. A self-cleaning ball
cage helps prevent dust and lint from building up around the
ball. However, if the pointer should skip or move abnormally
on screen, we recommend you clean your mouse manually.
a. First, turn the retainer ring counterclockwise to remove
the ball.
b. Wipe the ball with a clean lint-free cloth.
c. Blow into the ball cage to dislodge any dust and lint.
d. If there is build-up on the rubber rollers inside the ball
cage, clean using a cotton swab lightly coated with
isopropyl alcohol to remove any debris.
P73099-F8E203-US-man-qxd 3/9/00 8:15 AM Page 10
Page 12

11
5. Uninstall
REMOVING THE MOUSE SOFTWARE FROM
YOUR COMPUTER
5.1 Windows®3.1 and Windows®3.11
a. Double click on the “Windows®Setup” icon in the
“Main Group”.
b. Select “Options”.
c. Select “Change System Setting …” in Windows®3.1.
d. Select “Mouse:\”.
e. Choose the new mouse driver you require. This will
override any previous settings.
f. If you are prompted to keep current driver, click
on “Current”.
5.2 Windows®95, Windows®98 and Windows NT®4.0
a. First, it will be necessary to close the CursorWare™Panel in
your taskbar. Click on the "X" button in the upper right
corner of the CursorWare™window. When asked if you are
sure if you want to quit, click on "Yes". Now you are ready
to begin the uninstall process.
b. Click on "Start".
c. Select "Settings".
d. Select "Control Panel".
e. Select "Add/Remove Programs".
f. Select "CursorWare™1.0", then click on "Add/Remove".
g. You will be asked if you are sure if you want to remove
selected application and all of its components. Click on "Yes".
h. The uninstall process will begin. Follow the on screen
instructions to complete the process.
P73099-F8E203-US-man-qxd 3/9/00 8:15 AM Page 11
Page 13

Information
FCC Statement
DECLARATION OF CONFORMITY WITH FCC RULES FOR
ELECTROMAGNETIC COMPATIBILITY
We, Belkin Components, of 501 West Walnut Street, Compton CA 90220,
declare under our sole responsibility that the product:
F8E203/F8E203-BLK
to which this declaration relates:
Complies with Part 15 of the FCC Rules. Operation is subject to the following
two conditions: (1) this device may not cause harmful interference, and (2) this
device must accept any interference received, including interference that may
cause undesired operation.
CE Declaration of Conformity
We, Belkin Components, declare under our sole responsibility that the F8E203/F8E203-BLK,
to which this declaration relates, is in conformity with Generic Emissions Standard EN500811 and with Generic Immunity Standard EN50082-1 1992.
Belkin Components Limited Lifetime Product Warranty
Belkin Components warrants this product against defects in materials and workmanship for
its lifetime. If a defect is discovered, Belkin will, at its option, repair or replace the product at
no charge provided it is returned during the warranty period, with transportation charges
prepaid, to the authorized Belkin dealer from whom you purchased the product. Proof of
purchase may be required.
This warranty does not apply if the product has been damaged by accident, abuse, misuse,
or misapplication; if the product has been modified without the written permission of Belkin;
or if any Belkin serial number has been removed or defaced.
THE WARRANTY AND REMEDIES SET FORTH ABOVE ARE EXCLUSIVE IN LIEU OF ALL OTHERS,
WHETHER ORAL OR WRITTEN, EXPRESSED OR IMPLIED. BELKIN SPECIFICALLY DISCLAIMS
ANY AND ALL IMPLIED WARRANTIES, INCLUDING, WITHOUT LIMITATION, WARRANTIES OF
MERCHANTABILITY AND FITNESS FOR A PARTICULAR PURPOSE.
No Belkin dealer, agent, or employee is authorized to make any modification, extension, or
addition to this warranty.
BELKIN IS NOT RESPONSIBLE FOR SPECIAL, INCIDENTAL, OR CONSEQUENTIAL
DAMAGES RESULTING FROM ANY BREACH OF WARRANTY, OR UNDER ANY OTHER
LEGAL THEORY, INCLUDING BUT NOT LIMITED TO LOST PROFITS, DOWNTIME,
GOODWILL, DAMAGE TO OR REPROGRAMMING, OR REPRODUCING ANY PROGRAM
OR DATA STORED IN OR USED WITH BELKIN PRODUCTS.
Some states do not allow the exclusion or limitation of incidental or consequential damages
or exclusions of implied warranties, so the above limitations of exclusions may not apply to
you. This warranty gives you specific legal rights, and you may also have other rights that
vary from state to state.
P73099-F8E203-US-man-qxd 3/9/00 8:15 AM Page 12
Page 14

Belkin Components B.V.
Diamantlaan 8 • 2132 WV
Hoofddorp • The Netherlands
Tel: +31 (0) 235698765
Fax: +31 (0) 235612694
Belkin Components, Ltd.
Unit 13 • Gatelodge Close • Round Spinney
Northampton • Northants • NN3 8RX • United Kingdom
Tel: +44 (0) 1604678300
Fax: +44 (0) 1604678330
belkin.com
Belkin Components
501 West Walnut Street
Compton • CA • 90220 • USA
Tel: 310.898.1100
Fax: 310.898.1111
© 2000 Belkin Components. All rights reserved.
All trade names are registered trademarks of respective manufacturers listed.
P73099-F8E203-US-man-qxd 3/9/00 8:15 AM Page 13
 Loading...