

Belkin F5U210 User Manual
F5U210
User Manual
Create a portable high-speed storage device for your
computer, instantly
Hi-Speed USB 2.0 & FireWire
External Drive Enclosure Kit

TABLE OF CONTENTS
Introduction . . . . . . . . . . . . . . . . . . . . . . . . . . . . . . . . . . . . . . .1
Overview . . . . . . . . . . . . . . . . . . . . . . . . . . . . . . . . . . . . . . . . .2
System Requirements . . . . . . . . . . . . . . . . . . . . . . . . . . . . . . .2
Assembling your Drive Enclosure . . . . . . . . . . . . . . . . . . . . . . . . . .3
Windows 98 SE Driver Installation . . . . . . . . . . . . . . . . . . . . . . . . .8
Windows Me, 2000, XP Driver Installation . . . . . . . . . . . . . . . . . . .10
Safe Removal of Disk from Windows . . . . . . . . . . . . . . . . . . . . . . .11
Format the Drive . . . . . . . . . . . . . . . . . . . . . . . . . . . . . . . . . . .12
Information . . . . . . . . . . . . . . . . . . . . . . . . . . . . . . . . . . . . . .17

INTRODUCTION
Congratulations and thank you for purchasing the Hi-Speed USB 2.0
& FireWire External Drive Enclosure Kit from Belkin. Your new Drive
Enclosure incorporates the amazing speed and flexibility of both the
Hi-Speed USB 2.0 (Universal Serial Bus 2.0) and IEEE 1394a (FireWire)
interfaces in one compact storage device. Featuring the easy flexibility
of Plug-and-Play technology, the Drive Enclosure can be disconnected
and reconnected while your computer is running, providing a fast,
simple way to add portable storage space through either a USB or
FireWire port. These ease-of-use advantages, along with its compact
size, make it an ideal tool for the computer user on the road.
Note: To enable Hi-Speed USB 2.0 mode (480Mbps), your computer
must be equipped with built-in Hi-Speed USB 2.0 ports or a Hi-Speed
USB 2.0 host adapter card.
1

OVERVIEW
2
System Requirements
Hardware:
Notebook or desktop computer with a USB 1.0 port, a Hi-Speed USB 2.0
port, or an IEEE 1394 FireWire port.
Operating System:
Windows® 98 SE, Me, 2000, or XP
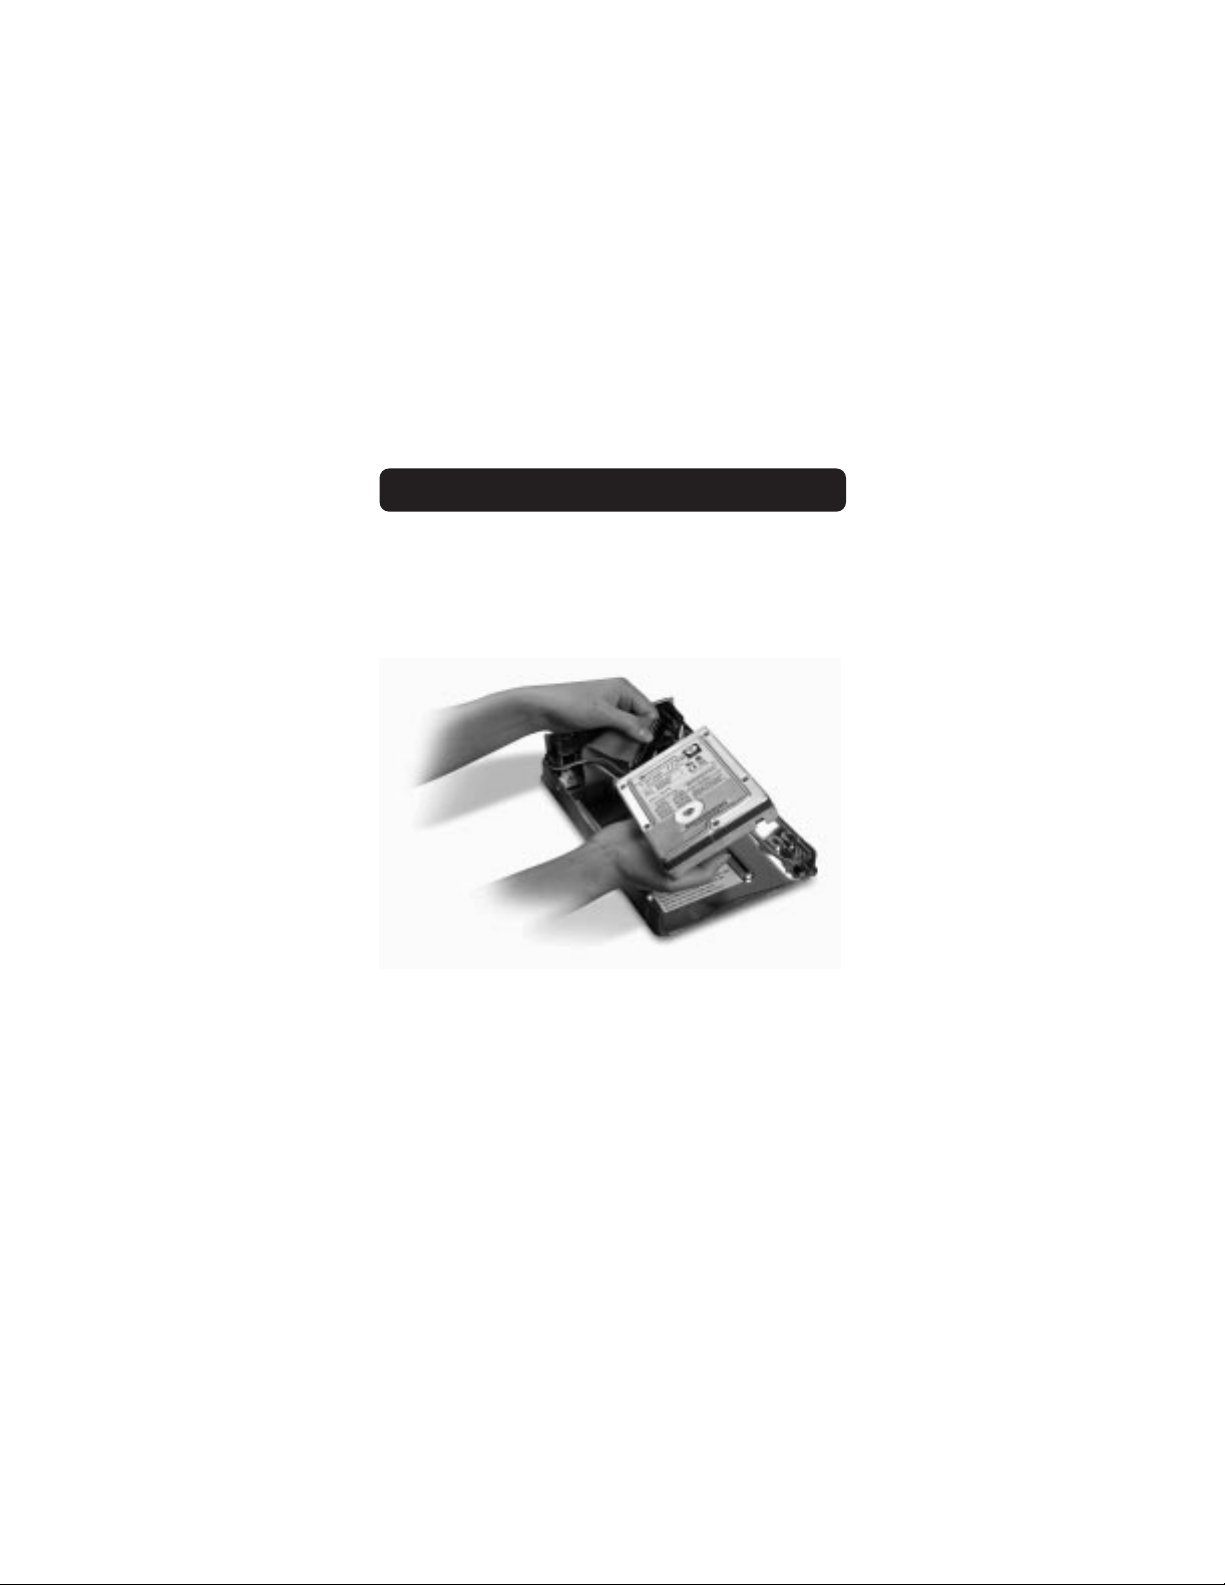
ASSEMBLING YOUR DRIVE ENCLOSURE
3
1. Remove top of drive bay enclosure.
2. If you are installing a 3
1
/2-inch hard drive, check to make sure your
drive is set to “Master” (see jumper setting information printed on
top of your disk drive), then connect the 34-position data cable and
4-position power cable.
3. If you are installing a CD/CD-RW drive, check to make sure your drive
is set to “Master”, then connect the 34-position data cable, 4-position
power cable, and 4-position audio cable.
4
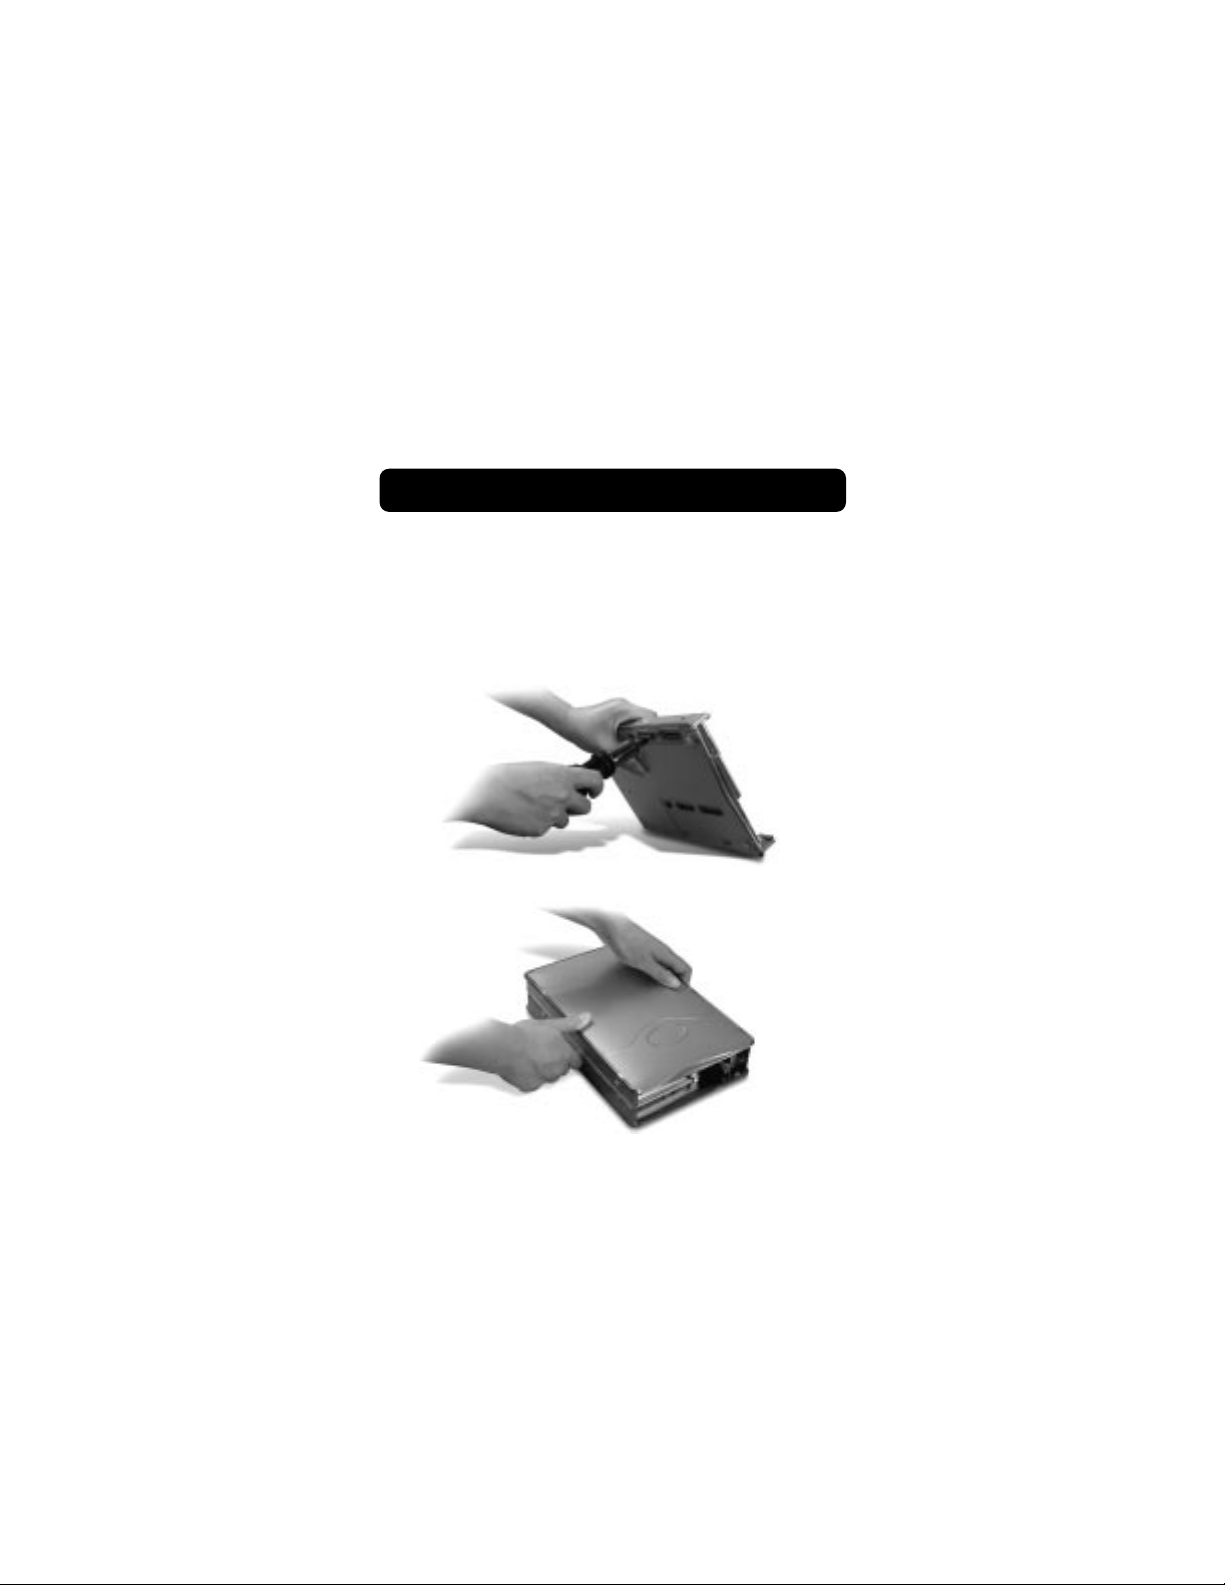
ASSEMBLING YOUR DRIVE ENCLOSURE
4. Choose the set of mounting holes that match the drive you intend to use,
and install at least four of the provided mounting screws.
Note: There are four fine-threaded screws, and four coarse-threaded screws
included with your Drive Enclosure Kit. Be sure to choose the screws that
match the mounting holes for your drive. Do not try to force a coarsethreaded screw into a fine-threaded mounting hole.
5. Replace top cover and make sure it is aligned with bottom cover.
 Loading...