

Page 1
USB 2.0 Flash Drive
User’s Manual
Easy data access;
transfer data
from one
computer to
another.
3
YEAR
WARRANTY
Features
Password
protection
!
F5U126eaXXX
EN
Manua ls an d/or S of tware ar e
ava il ab le in yo ur local la ng ua ge :
FR
Les manuel s e t/ ou le logiciel
sont disponibles e n f ra nç ais :
DE
Benut zerh an db uc h u nd /od er
Sof t ware gi bt es in Ihrer Sp ra che:
NL
Voor Ne de rlandsta lige handleidingen
en /o f sof t ware ku nt u ter echt op:
ES
Los manuales y/o el soft wa re están
disponibles e n l a lengua local:
IT
I ma nu al i e/ o il soft ware ne lla
propria lingua s i t ro vano su :
ww w.belkin.co.uk/support
YEAR
WARRANTY
Features
Page 2
USB 2.0 Flash Drive
User’s Manual
Easy data access;
transfer data from one
computer to another.
3
YEAR
WARRANTY
Features
Password
protection
!
F5U126eaXXX
Page 3

sect ion
Section 1. Introduction Page 3
Section 2. System Requirements Page 4
Section 3. Guide to Components Page 5
Section 4. Basic Functions Page 6-8
Section 5. Partition Type Page 9-10
Section 6. Using the Software
(Belkin U-Storage)
On Windows Platform Page 11-22
Section 7. Boot Up Function Page 23-26
Section 8. Recover Disk Page 27
Section 9. Known Problems Page 28-32
Section 10. Disclaimer Page 33
Section 11. Trademark Acknowledgments Page 34
Contents
2
1
2
3
4
5
6
7
8
9
10
11
Page 4

sect ion
Introduction
3
Thank you for purchasing the Belkin USB Flash Drive. The manual explains how to
use the Belkin software bundled with the device.
Safety Precautions
Please follow the safety precautions carefully before you use the Belkin USB
Flash Drive and the application software. Make sure that you use the application
software correctly according to the procedures described in this guide.
Warnings: This mark indicates topics that could lead to serious injury
of your body or damage of the product if ignored or handled
incorrectly.
Warnings
• Do not attempt to disassemble or alter any part of the product that is not
described in this guide.
• Do not allow the product to come into contact with water or other liquids. In
the event that water or other liquids enter the interior, immediately unplug the
product from the computer. Continued use of the product may result in fire or
electrical shock. Please consult your product distributor or the closest support
center.
• Do not handle the product to do the plug and unplug operation if your hands are
wet. Otherwise it will cause electrical shock.
• Do not place the product near a heat source or expose them to direct flame or
heat.
• Never place the product close to equipment generating strong electromagnetic
fields. Exposure to strong magnetic fields may cause malfunctions or corrupt
data.
1
2
3
4
5
6
7
8
9
10
11
Page 5

sect ion
There are minimum hardware and software requirements that must
be satisfied to ensure the product to function properly.
• Computer Model
- IBM PC/AT Compatible, Power Macintosh,
PowerBook, iMAC or iBook
• OS - Windows 98 Second Edition, Windows Millennium
Edition (Windows ME), Windows 2000, Windows
XP, Linux 2.4 or higher, Mac OS 9.0 or higher
• Interface - USB
• Free Hard Disk
Space 3 MB
and more - Windows 98 SE does not support default Mass
Storage Driver. You have to install the driver bundled
with the product (Driver for Windows 98/SE).
- The product can use the default driver in most of
the OS. If you want to run the application software
bundled with the product (“Belkin U-Storage “), install
the driver by clicking on the “Tools” in the “Driver
& Tools Installation” menu. Then, the application
software (“Belkin U-Storage”) will work properly.
- The application software (“Belkin U-Storage”)
can ONLY run in Microsoft Windows OS.
- However, the Belkin USB Flash Drive basic
functions can be supported in all OS listed above.
System Requirements
4
1
2
3
4
5
6
7
8
9
10
11
Page 6

USB Interface: - The interface connects to the
USB port of the computer.
LED Display:
- This LED Display will show the status
of the device. Once the device is in
operation, the LED will be turned on.
sect ion
Guide to Components
5
LED Display
USB interface
1
2
3
4
5
6
7
8
9
10
11
Page 7

sect ion
Basic Functions
6
1. Plug and Play
When you plug the device into the USB port of your computer,
you will see a “Removable Disk” icon in the file manager window.
In Macintosh, once you plug the Belkin USB Flash Drive into the
USB port. You can see the disk icon in the “Desktop”.
In Linux OS, you can mount the device by the following instruction.
• Execute cd /etc/sysconfig/ ( cat /etc/sysconfig/hwconf | more )
•
Check the device information in hwconf_
write down the mount point.
• Make a directory in /mnt (ex: mkdir /mnt/usbHD )
•
Then, execute mount /dev/sda1 /mnt usbHD
(if mount point was .dev/sda)
1
2
3
4
5
6
7
8
9
10
11
Page 8
sect ion
Basic Functions
7
2. Read and Write
You can retrieve files from or store files in the device
as you do with a hard disk. The read/write operation
of the device is the same as that of a hard disk.
3. Write-Protect Switch
When you turn the write-protect switch to “ON” position, you
cannot write any file or data into the device. You still can view and
read the files and data in the device. You can switch the “WriteProtect” switch even you do not disconnect the device. Due to
Linux OS limitation, the write-protect switch will not work on-line.
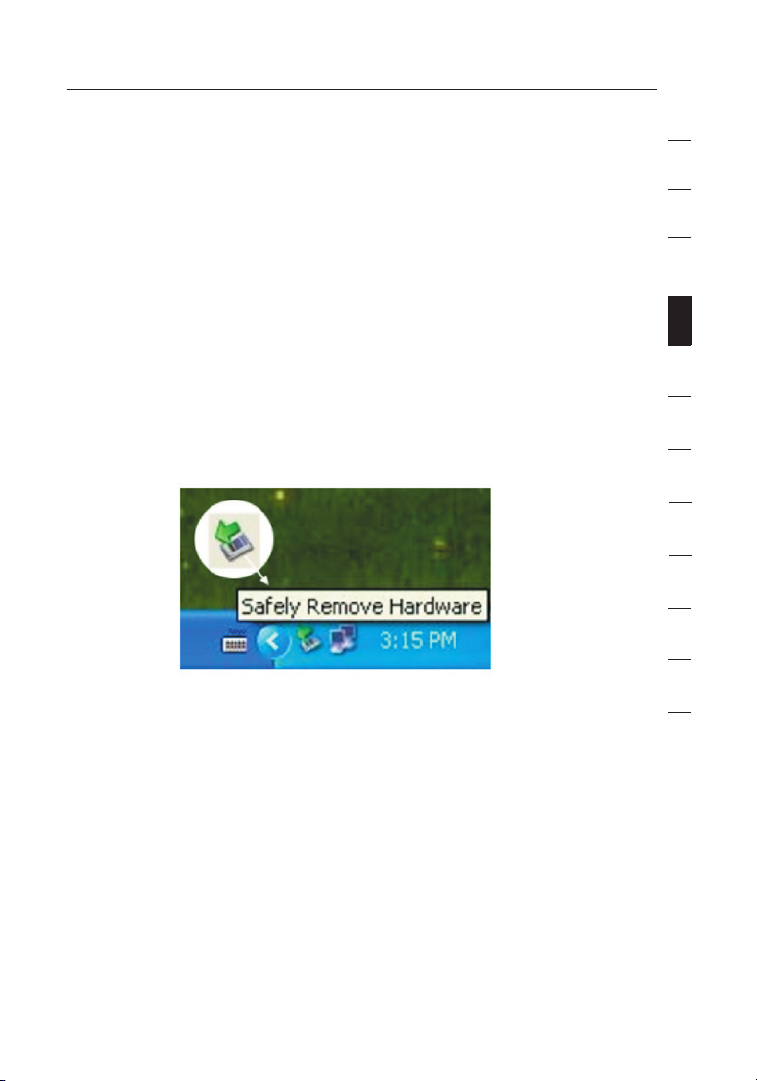
4. Unplug
You can remove the device after you finish the action with
the device. However, in Windows ME and Windows 2000,
please follow the safe removal procedure. You can find a
safe removal icon in your computer’s notification area.
Double click the “safe removal” icon; the “Unplug or Eject
Hardware” window will be pop up. You can select the device
you want to remove. Then, click the [Stop] button. After that you
can unplug the device from the USB port of your computer.
1
2
3
4
5
6
7
8
9
10
11
Page 9

sect ion
Basic Functions
8
Warnings: When you want to remove the Belkin USB Flash Drive,
make sure the LED is not flashing. When the LED flashes
quickly, there are some traffic on going between the OS
and the Belkin USB Flash Drive. Don’t remove the Belkin
USB Flash Drive at this moment. Otherwise, it will cause
some damages to the data or even the Belkin USB Flash
Drive itself.
Warnings: If you do not follow the safe removal procedure in
Windows ME and Windows 2000 systems, data loss
caused by the “write cache” issue may happen.
In Macintosh systems, you can drag the removable disk icon and put into the
trash. This action will perform the “Eject” function
In Linux OS, please follow the “un-mount” command procedure to un-mount
the device.
1
2
3
4
5
6
7
8
9
10
11
Page 10
sect ion
Partition Type
9
The Belkin USB Flash Drive may be partitioned into three types of disk. We will
use the following terms in this guide,
1. Public Area
There is an area where you , as well as anyone else can do any basic functions,
described in the “Basic Functions” section, in this area.
2. Security Area
This area cannot be viewed without the application software.
Once you do the “Log In” action in the application software,
you will switch view from “Public Area” to “Security Area”.
After successful switch, you can do any basic functions,
described in the “Basic Functions” section, in this area.
- You can only view either “Public Area” or “Security Area” at the
same time in the same disk logic unit number (Drive).
In Belkin USB Flash Drive, you can select the following partition combinations:
1. Single Public Area
Make all the device area accessible by everybody.
2. Security Area
Make the device area into two partitions in the same Drive, Public
Area and Security Area. Everybody can access the Public Area.
The Security Area can be accessed “Only” with a password.
3. Public Area Plus Security Area
Make the device area into three partitions in two Drives, Public
Area and Security Area in Drive1, and Public Area in Drive2. You
can access these partitions by the multiple-Drive driver. The
partition status was shown in the following figure. The partitions in
Drive1 will perform as described in item 2. The partition in Drive2
will perform as described in item1.
1
2
3
4
5
6
7
8
9
10
11
Page 11

This figure shows detailed operations of single Drive.
This figure shows detailed operations of multiple Drives.
This table describes the functions of the three partition types.
sect ion
Partition Type
10
Change View Through
Login & Logout
Public
Area
Security
Area
Drive1
Change View Through
Login & Logout
Public
Area
Security
Area
Drive1
Public
Area
Drive2
1
2
3
4
5
6
7
8
9
10
11
Function Type Security Password Disk Logical
Unit Number
Disk Letters in
OS
1. Public Area
Only
No No 1 (Drive1) 1
2. Security
Area
Yes Yes 1 (Drive1) 1
3. Public Area
Plus Security
Area
Yes Yes
2 (Drive1& 2) 2
Page 12

sect ion
Installing/Uninstalling the Application Software
(Belkin U-Storage):
Installing the software:
If you are installing the application software onto Windows OS, you must first
log in as the administrator and then install the application software.
Precaution about the USB Interface
• Please connect the device to the USB port of your computer
when you install the application software.
• If you do not connect the device to the USB port and install the
application software in the Microsoft Windows XP, you have to install
the Belkin 98/SE Driver again as you plug in the device.
• In Windows 98 SE and Win Me, you need to unplug the Belkin
USB Flash Drive and plug again after install the driver.
1 Place the “Driver & Tools” CD into the CD-ROM drive in the computer,
a menu called “Driver & Tools” Installation will pop up.
2 Left click on “Tools”.
3 Follow the on-screen instructions to proceed.
Uninstalling the software:
To remove the installed software, you can click the windows [Start] menu
and select [Setting], [Control Panel] and [Add/Remove Programs]. The
application software can also be uninstalled by clicking the [Start] menu and
selecting [Programs], [Belkin U-Storage], [Uninstall Belkin U-Storage].
Using the Software (Belkin U-Storage)
On Windows Platform
11
1
2
3
4
5
6
7
8
9
10
11
Page 13

12
sect ion
Notes:
• The “Driver for Windows 98/SE” will be required to install, as the device is
connected to the PC through the USB port for the fist time when operation is
made under Windows 98/98SE system. After that, the drive installation is no
more required in future uses.
• Do not cancel the installation during the procedure.
The Belkin USB Flash Drive may not operate correctly if the installation is
incomplete.
• Read the “Troubleshooting” Section if the installation cancels itself during the
procedure, if the installation did not proceed as described, or if you feel that the
driver are not properly installed
Installing the USB Driver:
For some Windows system, users should log in as the Administrator before
installation. Once you have inserted the Belkin USB Flash Drive into the computer,
under Windows ME/2000/XP, the OS will find the appropriate driver or the “Add
New Hardware Wizard” dialog will appear after a moment. In Windows 98/98SE,
you can do the installation of the driver manually; just place the “Driver & Tools” CD
into the CD-ROM drive in the computer and click on “Driver for Windows 98/SE “
when the “Driver & Tools” installation menu pops up. Follow along the instructions,
the driver will then be installed.
During the installation procedure, if the “Digital Signature Not Found” message
displays, just click the [Yes] button in the showing window.
Using “Belkin U-Storage” Program for the First Time:
Warnings:
Because the “Belkin U-Storage” program can only handle one
Belkin USB Flash Drive at the same time. If you don’t want to use
the functions of the “Belkin U-Storage”, like [Resize], [Change
Password], or [Log In], etc., you can insert more than two Belkin
USB Flash Drives. If you want to use the functions of the program,
remove all other Belkin USB Flash Drives. Otherwise, the “Belkin
U-Storage” may not perform properly or even cause data loss.
Using the Software (Belkin U-Storage)
On Windows Platform
1
2
3
4
5
6
7
8
9
10
11
Page 14

13
sect ion
Using the Software (Belkin U-Storage)
On Windows Platform
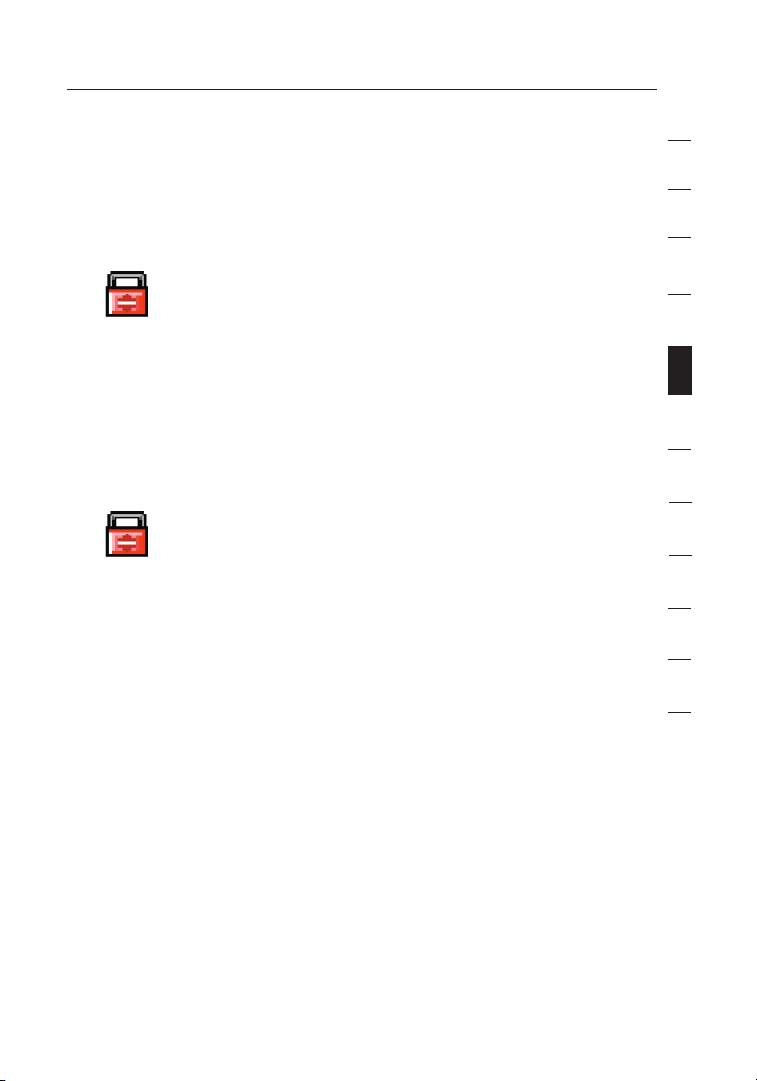
After you install the software and driver correctly, the “Belkin U-Storage “ icon
( shown as a“lock” ) will appear at the notification area automatically.
or
The display will depend on the status of the device.
• You can use the right button of your mouse to pop up the selection menu as
the following figures. Then, you can select the functions you want.
• Or you can double click the icon in the notification window. The “Belkin UStorage” manager window will pop up :
1
2
3
4
5
6
7
8
9
10
11
Page 15
sect ion
By default, the device is non-security. So, the “Resize” function will be active
when you run this software first time.
Belkin USB Flash Drive- Resize:
As described in the “Partition Type” section, you can do the “Resize” action to
your Belkin USB Flash Drive.
Warnings: The “Resize” action will erase all the data or files existing
in Belkin USB Flash Drive. The action is not reversible. You
have to backup all the important files or data. Also, please
close all the active programs and windows on the screen of
your computer.
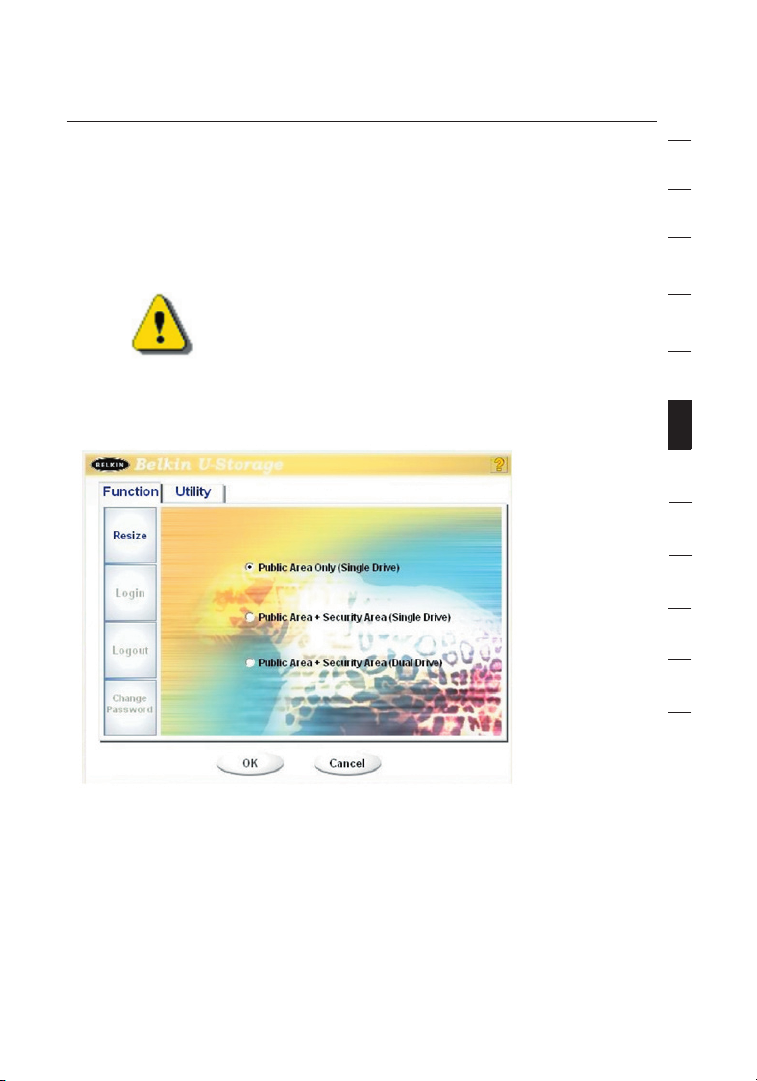
1. Click the [Resize] button in the “Belkin U-Storage” manager window. The
following “Resize Partition” window pop up.
2. Select the partition type you want.
3. If you select the “Public Area Only (Single Drive)”, then click the [OK] button.
The “Confirmation” window will pop up. Please make sure you already backup
all the important files or data.
14
Using the Software (Belkin U-Storage)
On Windows Platform
1
2
3
4
5
6
7
8
9
10
11
Page 16

sect ion
4. If you select the “Public Area + Security Area (Single Drive)”, then the following
“Security Area” window will pop up. You can drag the scroll bar in the middle of
the window to set the size of the “Public Area” and “Security Area”. Or you can
type in the size of each Zone you want in the “Size” window. You can set the
password for accessing the security area in the “New Password” window. The
maximum size of the password is 8 characters. You can key in the hint of your
new password in the “Password Hint” window. This hint will be displayed when
you click the [Hint] button in the “Unlock Protect” window. The maximum size
of the Hint is 32 characters. After you finished the setting, click the [OK] button.
The “Confirmation” window will pop up. Please make sure you already backup
all the important files or data.
Using the Software (Belkin U-Storage)
On Windows Platform
15
1
2
3
4
5
6
7
8
9
10
11
Page 17

16
sect ion
5. If you select the “Public Area + Security Area(Dual Drive)”, then the following
“Public Area(Drive1)/Security Area” window will pop up. You can drag the scroll
bar in the window to set the size of each area. First, please set the size of the
“Public Area (Drive2)”. The minimum size for each area is 1MB. The maximum
size of the “Public Area (Drive2)” is 1/4 of the total size. Once the size of the
“Public Area (Drive2)” was set, the scroll bar of the “Public Area (Drive1)” and
“Security Area” will be set in the middle automatically. Or you can type in the
size of each Zone you want in the “Size” window. You can set the password for
accessing the security area in the “New Password” window. The maximum size
of the password is 8 characters. You can key in the hint of your new password
in the “Password Hint” window. This hint will be displayed when you click the
[Hint] button in the “Unlock Protect” window. The maximum size of the Hint is 32
characters. After you finish the setting, click the [OK] button. The “Confirmation”
window will pop up. Please make sure you already backup all the important files
or data.
Using the Software (Belkin U-Storage)
On Windows Platform
1
2
3
4
5
6
7
8
9
10
11
Page 18

17
sect ion
6. Once the resizing is finished, the following message will pop up.
7. After you finish the “Resize”, the “Setup.exe” program (exactly the same as
“Tools.exe” in the “Driver & Tools” CD ) will be copied into the “Public Area
(Drive1)” automatically. It’s removable. However, it is needed when you insert
your device into another computer. It will install the “Belkin U-Storage” software
for you in the computer you want to operate on.
Using the Software (Belkin U-Storage)
On Windows Platform
1
2
3
4
5
6
7
8
9
10
11
Page 19
18
Log in the Security Area:
If you partition the device with security, you can execute the following “Login”
function to access the security Area.
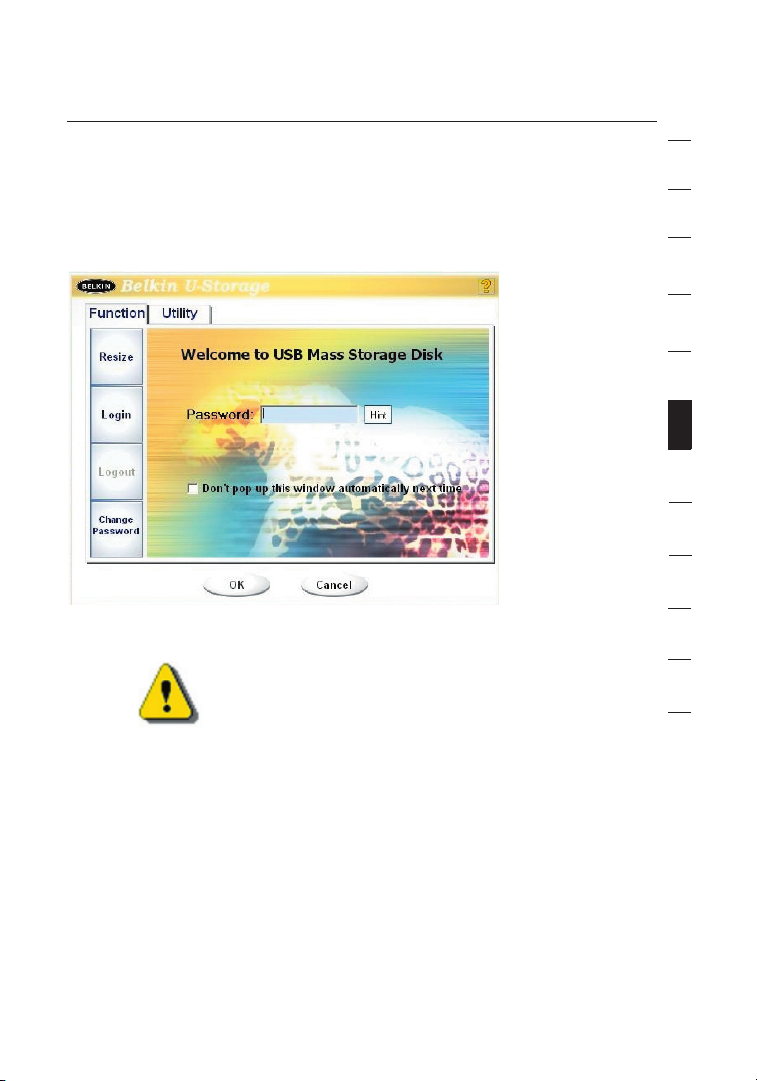
1. Double click the “Belkin U-Storage” icon in the notification window or click the
[Login] button in the “Belkin U-Storage” manager window. The “Unlock Protect”
window will pop up.
Warnings:
When you do the login and logout action with the device,
please make sure there is no application or program running
or document unclosed on the device. If so, it will cause data
loss or damage.
2. Key in the password in the “Password” area.
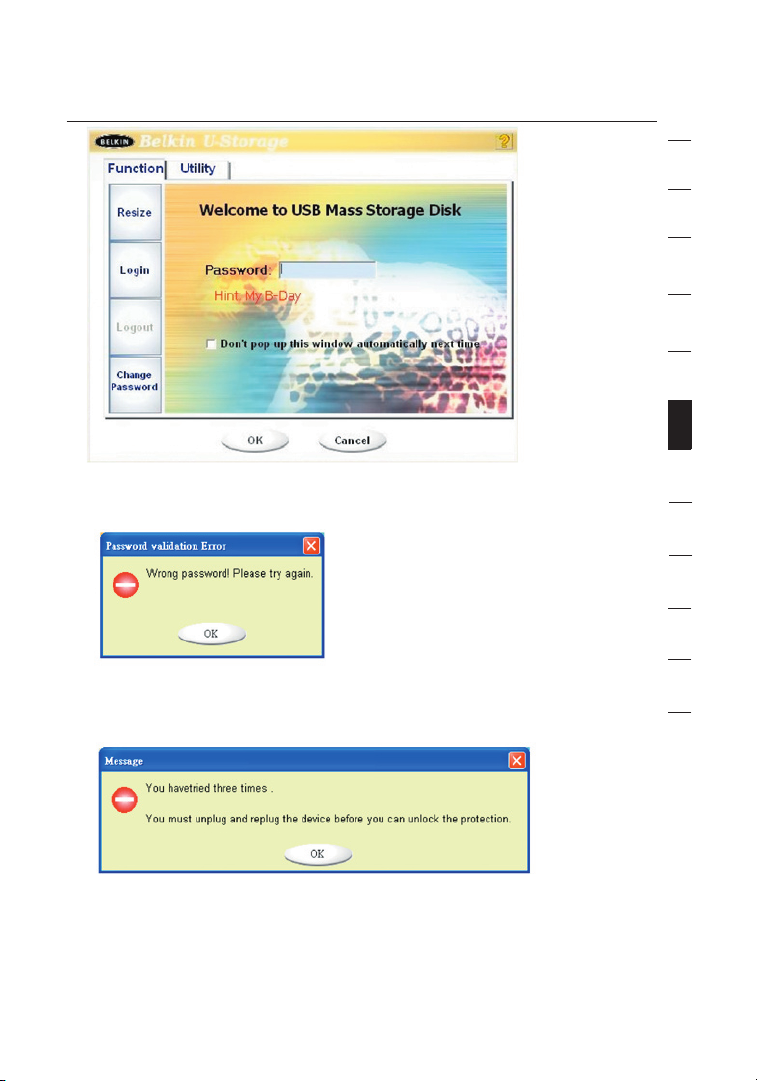
- You can create the password hint in the “Resize” or “Change Password”
functions. Once you create the password hint, you can click on the
[Hint] button in the “Unlock Protect” window to prevent you from
forgetting the password. The hint will show up in a couple of seconds.
Using the Software (Belkin U-Storage)
On Windows Platform
sect ion
1
2
3
4
5
6
7
8
9
10
11
Page 20
19
- If you key in the wrong password, the following message will be shown.
- You have three tries to input the password. After three tries, the following
message will pop up. And you have to unplug and plug the device again in
order to do future actions.
-
When you do the login or logout action, please make sure you
close all the programs or documents open connection on the
device. If there are some application programs running or
documents unclosed on the device, the following message will pop up.
Using the Software (Belkin U-Storage)
On Windows Platform
sect ion
1
2
3
4
5
6
7
8
9
10
11
Page 21

20
In Windows 2000, even the “file manager” has accessed
the device, it will be treated as “busy”. You have to close
the file manager in order to do the “Login”. However, not all
the connection could be checked in all kind of OS.
3. Click on the [OK] button.
4. Once the file manager window contains the “Security Area”
pops up, you can do the operation you want with the “Security
Area”. The file manager window looks like this :
Log out the Security Data Zone:
1. Double click the “Belkin U-Storage” icon in the notification
window or select the [Logout] button in the “Belkin U-Storage” manager window.
Using the Software (Belkin U-Storage)
On Windows Platform
sect ion
1
2
3
4
5
6
7
8
9
10
11
Page 22

21
Warnings: When you do the login and logout action with the device,
please make sure there is no application or program running
or document unclosed on the device. If so, it will cause data
loss or damage.
- When you do the login or logout action, please make sure you have
closed all the programs or documents on the device. If there are
any programs running or documents unclosed on the device, the
following message will pop up. In Windows 2000, even the “file
manager” has accessed the device, it will be treated as “busy”. You
have to close the file manager in order to do the “Login”. However,
not all the connection could be checked in all kind of OS.
2. Once the file manager window contains the “Public Area (Single Drive)
” pops up, you can do the operation you want with the Public Area.
Change Password:
User can change password and key in the password hint using the “Change
Password” selection in the “Belkin U-Storage” manager menu. You can only select
this item in “Security AP Zone”.
Using the Software (Belkin U-Storage)
On Windows Platform
sect ion
1
2
3
4
5
6
7
8
9
10
11
Page 23

22
1 Make sure the “Write Protect” switch is in “OFF” position.
2 Key in your current password in the “Current Password” area.
3 Then, key in your new password and confirm in the “Confirm Password” area.
- The maximum size of the password is 8 characters.
4 You can key in the hint of your new password in the “Password
Hint” window. This hint will be displayed when you click
the “Hint” button in the “Unlock Protect” window.
Using the Software (Belkin U-Storage)
On Windows Platform
sect ion
1
2
3
4
5
6
7
8
9
10
11
Page 24
Boot Up Function
23
The BootUp program in “Utility” section of “Belkin U-Storage” manager window
will build up the device as a bootable disk. Before you run the program, please
make the following preparations,
1 This program can run under Windows 98 SE, XP, and ME.
(The program can’t be supported in Windows 2000.)
2 Please turn off the anti-virus program during the procedure.
3 Make sure your Windows system was located in C Disk.
4 Make sure the “write-protect” switch is in “OFF” position.
5 This program only deals with one device at the same time.
6 Make sure your Belkin USB Flash Drive is in “Public
Area” if it is with “Security” function.
7 If you want to make your device as a bootable USB HDD, you can’t make the
device as a “Security” one. This option is only supported in Windows 98 SE.
Warnings:
If you performed the “Log In” action with your Belkin USB
Flash Drive and located in “Security Area” and run the
BootUp function, it will do the “Log Out” and erase all the
data in “Public Area”.
When you are ready to process, follow the following procedures, the procedures
for Windows XP is different from Windows 98 and ME. This program cannot be
run in Windows 2000.
Windows 98 SE and Windows ME:
1 You can click the [Utility] button in the “Belkin U-Storage”
manager window to execute the Boot-up utility.
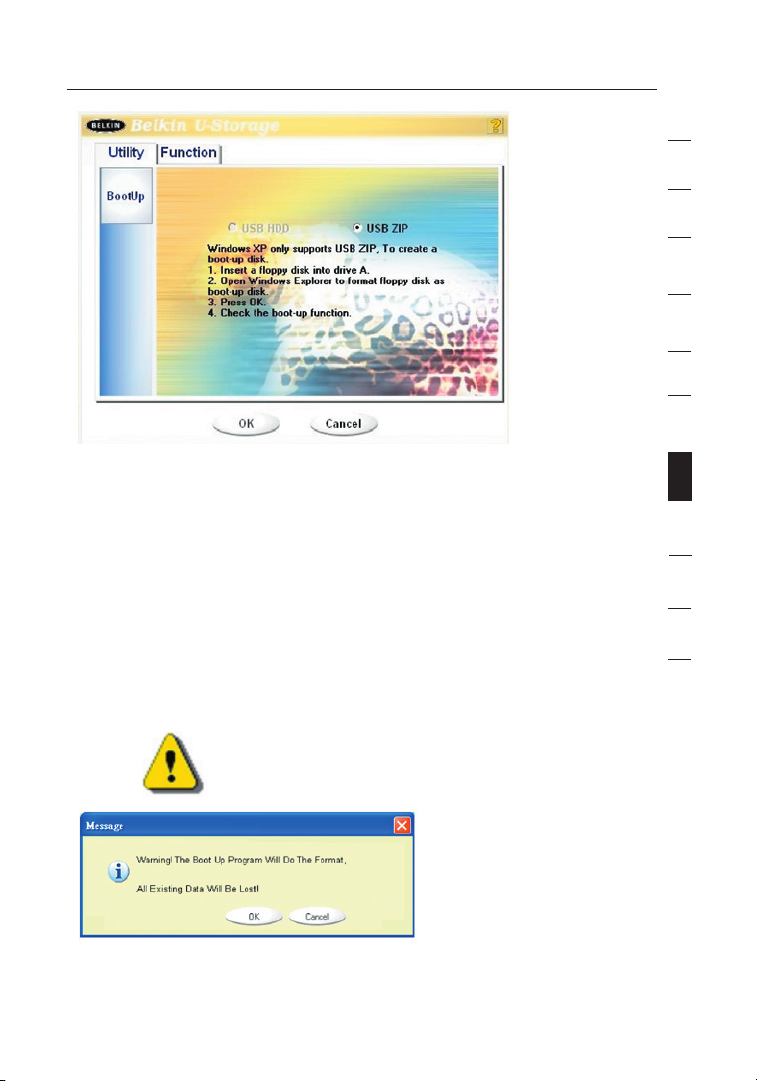
2 The following window will show up
sect ion
1
2
3
4
5
6
7
8
9
10
11
Page 25
24
Boot Up Function
3. You can select the type of the boot-up method, USB ZIP or USB HDD. The
USB HDD is only for Windows 98.
-
If you select “USB HDD”, the computer will get the “C:\>”
prompt after you boot from the Belkin USB Flash Drive.
-
If you select “USB ZIP”, the computer will get the “A:\>”
prompt after you boot from the Belkin USB Flash Drive.
-
If your device is with “Security” function, only USB ZIP can be selected.
4. After the selection, click the [OK] button. The following warning message will
be shown. The data in the “Public Area” will be lost. If it is OK, click the [OK]
button to continue the process.
Warnings:
The program will do the format. The existing data in the
“Public Area”, which you want to make, will be lost.
5. After the process is completed done, the finish message will be shown.
sect ion
1
2
3
4
5
6
7
8
9
10
11
Page 26

25
Boot Up Function
Windows XP:
1 Please make a bootable floppy first. You can insert a floppy
into the floppy drive. Then, click on the icon of 3.5” floppy in the
“My Computer”
window by using the right button of the mice. Select the “Format” item.
2 Select the item for build up a bootable floppy in the format options. Then, click
on the [Start] button.
3 Make a directory called XP_Bootable in the root directory of your computer
system disk.
4 Copy all the files in the floppy to the XP_Bootable directory.
5 Click on the [Utility] button in the “Belkin U-Storage” manager window. Then,
select the USB ZIP. Click on the [OK] button.
6 After the process is completed, the finish message will be shown.
sect ion
1
2
3
4
5
6
7
8
9
10
11
Page 27

26
Boot Up Function
Error Messages:
When this message shows up, the possible
reason is your Windows OS installation is not
completed. (Please
make sure the path \WINDOWS\COMMAND\
EBD in Windows 98,
\WINDOWS\COMMAND\EBD in Windows ME,
or \XP_Bootable in Windows XP is exists)
When this message shows up,
please make sure the “Write-Protect”
switch is in “OFF” position.
When this message shows up,
please make sure the capacity of
the “Public Area” is enough.
Notes:
• After you finish the program, you will see different disk property when
you select different disk type. For example, if you select it as “USB
HDD”, you will see the hard disk icon in the file manager window. If you
select it as “USB ZIP”, you will see the removable disk icon in the file
manager window. However, only Windows 2000 and above can identify
the difference. In Windows 98, you just can see the “Removable Disk”.
• After you finish the program, the device contains the files necessary for
boot up function. Please don’t remove any files in this area. Otherwise it
will cause failure when you do the boot-up procedure of your computer.
• When you want to use the Belkin USB Flash Drive to boot up
your computer, please select the appropriate setting of the
BIOS. Please refer to the user manual of the motherboard.
• Since the BIOS design of each motherboard is quite different, we
cannot guarantee the boot up device is suitable for every computer.
• Since Award changed their BIOS spec. In March 2002, the boot
up procedure is different from before. We cannot identify if the
BIOS is new or old. So, this boot up utility is not suitable for
Award’s new BIOS if you use USB ZIP boot up option.
sect ion
1
2
3
4
5
6
7
8
9
10
11
Page 28

sect ion
Recover Disk
27
1
2
3
4
5
6
7
8
9
10
11
Once your device is damaged, you can use this utility to recover the device.
It will check if there are too many bad block in device and try to repair it.
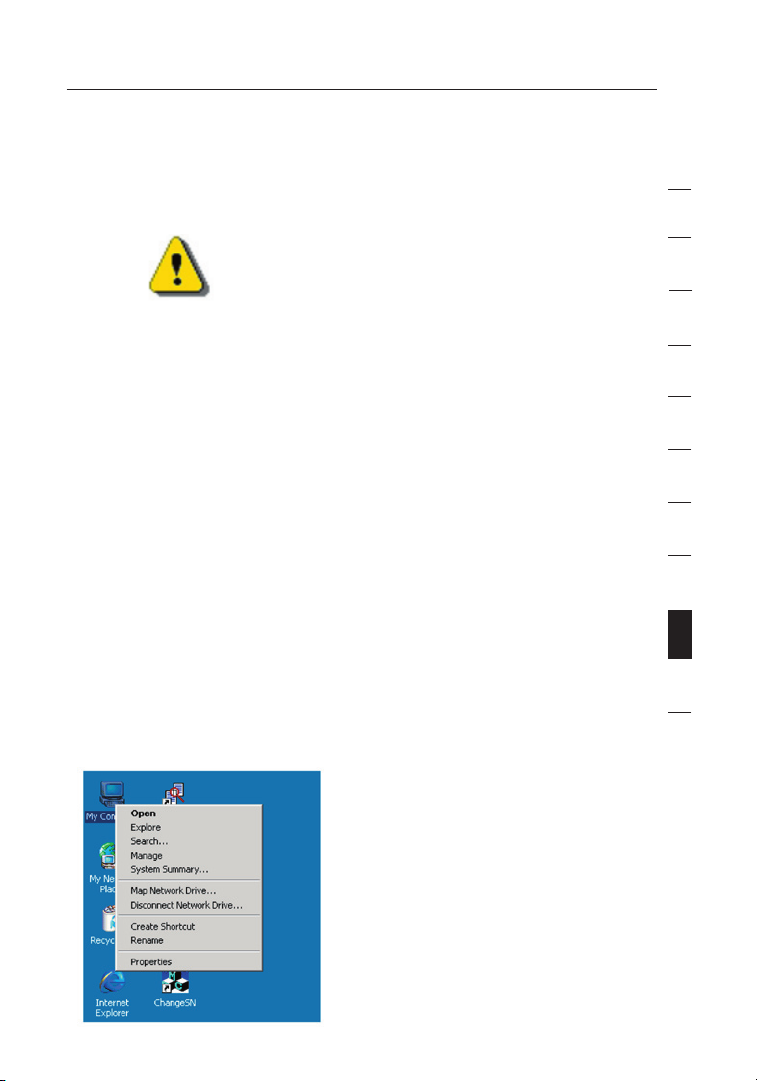
1 After you double click on the Recover Disk shortcut in start menu, the
following window will pop up.
Warnings:
The “Recover Disk” action will erase all the data or files
existing in Belkin USB Flash Drive. The action is not
reversible. You have to backup all the important files or
data.
2 There are two steps in Recover Disk, one is “scan bad block” and the other
is “Read/Write” testing for each block. It will take a long time to scan each
block. It will take about 1.5 minutes for each 16 MB.
3 After you click the [Start] button in the window, the Recover process will be
started.
4 Once the job is finished, the complete message will be shown in the middle
area, or else it will show error message.
Page 29
sect ion
Problem 1:
The “Write-Protect” switch can not work on-line on Macintosh computer with
Mac OS 10.1.4.
Warnings: The “Recover Disk” action will erase all the data or files
existing in Belkin USB Flash Drive. The action is not
reversible. You have to backup all the important files or
data.
Workaround: Disconnect the device when you need to switch the
“Write-Protect” with Mac OS 10.1.4. We will solve the
system hang-up problem in the near future. However,
due to the OS operation issue, we don’t recommend
you switch the “Write-Protect” on-line.
Problem 2:
In Window2k or Window XP, when user use VIA USB 2.0 host controller and run
resize in Belkin USB Flash Drive AP will cause OS reboot or resize function fail.
Solution: In Windows XP:
Update USB 2.0 driver from Microsoft Windows
Update(usually Windows XP will update automatically).
Windows 2k:
When your OS detect USB 2.0 host controller PCI
card or onboard chip at first time, OS will show new
hardware detect and request to direct driver location,
please select Microsoft Windows Update to update
from internet, otherwise if you install VIA driver before,
you must update manually follow below step:
Right click My Computer and select Properties.
Known Problems
28
1
2
3
4
5
6
7
8
9
10
11
Page 30

29
sect ion
Select Device Manager… in Hardware page
Select VIA PCI to USB Enhanced Host Controller under Universal
Serial Bus controllers and click right mouse button to select Properties.
Then select Update Driver… in Driver page.
Known Problems
1
2
3
4
5
6
7
8
9
10
11
Page 31

30
sect ion
Press Next.
Select Search for a suitable driver for my device (recommended).
Known Problems
1
2
3
4
5
6
7
8
9
10
11
Page 32

31
sect ion
Then select Microsoft Windows Update to update driver.
In Windows 98 and Windows ME:
Please update VIA driver to V2.42 or higher from VIA website to prevent above
issues.
If user uses other manufacturer’s USB 2.0 card and occur this issue, follow the
same step to update USB 2.0 driver or connect USB card manufacturer for
solution.
Known Problems
1
2
3
4
5
6
7
8
9
10
11
Page 33

32
sect ion
Problem 3:
In Windows XP, when user uninstall Belkin USB Flash Drive, it may cause
Belkin 98/SE Driver not to be removed in VIA USB 2.0 host controller, but
this situation will not take any bad effect to use device. After user reboot OS,
Belkin 98/SE Driver will be replaced to default(Microsoft) driver.
Known Problems
1
2
3
4
5
6
7
8
9
10
11
Page 34

33
sect ion
We made every effort to ensure that the information and procedure in this
guide is accurate and complete, no liability can be accepted for any errors or
omissions. The controller manufacturer of this Belkin USB Flash Drive, Ours
Technology Inc. (OTI) reserves the right to make any changes without further
notice to any products herein.
Disclaimer
1
2
3
4
5
6
7
8
9
10
11
Page 35

34
sect ion
• IBM is a registered trademark of international Business Machines
Corporation.
• iBook and iMac are trademarks of Apple Computer, Inc.
• Macintosh, PowerBook, Power Macintosh are trademarks of Apple
Computer, Inc.
• Microsoft, Windows, Windows 98, Windows ME, Windows 2000, and
Windows XP are either registered trademarks of Microsoft Corporation in the
United Stats and/or other countries.
• Other names and products not mentioned above may be registered
trademarks of their respective companies.
Trademark Acknowledgments
1
2
3
4
5
6
7
8
9
10
11
Page 36

© 200 4 Belkin Corporation. All rights reserved. All trade names are regist ered trademar ks
of respective manufacturers l isted.
P7472 2ea
Belkin GmbH
Hanebergstraße 2
80637 München • Germany
Tel: +49 (0) 89 143405 0
Fax: +49 (0) 89 143405 100
Belkin SAS
5 Rue du Petit Robinson • 3ème étage
78350 Jouy en Josas • France
Tel: +33 (0) 1 34 58 14 00
Fax: +33 (0) 1 39 46 62 89
Belkin Ltd.
Express Business Park • Shipton Way
Rushden • NN10 6GL • United Kingdom
Tel: +44 (0) 1933 35 2000
Fax: +44 (0) 1933 31 2000
Belkin B.V.
Starparc Building • Boeing Avenue 333
1119 PH Schiphol-Rijk • The Netherlands
Tel: +31 (0) 20 654 7300
Fax: +31 (0) 20 654 7349
Belkin Tech Support
Europa: 00 800 223 55 460
US: 877 736 5771
USB 2.0 Flash Drive
User’s Manual
Page 37

Lecteur Flash USB 2.0
Manuel De L’utiIisateur
Accès aux données facile;
permet de transférer des
données d’un ordinateur à
l’autre.
3
ANS
DE GARANTIE
Accés
sécurisé
avec un mot
de passe
F5U126eaXXX
Page 38

sect ion
Section 1. Introduction Page 3
Section 2. Manuel de l’utiIisateur Page 4
Section 3. Guide des composants Page 5
Section 4. Fonctions de base Page 6-8
Section 5. Type de partition Page 9-10
Section 6.
Utilisation du logiciel U-Storage
de Belkin sous la plate-forme
Windows Page 11-22
Section 7. Fonction de démarrage Page 23-26
Section 8. Restauration du disque Page 27
Section 9. Problèmes courants Page 28-32
Section 10. Limitation de responsabilité Page 33
Section 11. Marques de commerce Page 34
Table des Matières
2
1
2
3
4
5
6
7
8
9
10
11
Page 39

sect ion
Introduction
3
Merci d’avoir choisi le lecteur Flash USB de Belkin. Ce manuel vous explique
comment utiliser le logiciel Belkin fourni avec ce périphérique.
Consignes de sécurité
Veuillez suivre rigoureusement les consignes de sécurité avant d’utiliser le lecteur
Flash USB de Belkin et l’application logicielle. Assurez-vous d’utiliser celle-ci
correctement, conformément aux procédures décrites dans ce guide.
Avertissements: Ce signe désigne les facteurs qui pourraient entraîner des
blessures graves ou des dommages au produit s’ils sont
ignorés ou traités de façon inadéquate.
Avertissements
• N’essayez pas de désassembler ou de modifier une quelconque pièce de ce
produit qui n’est pas décrite dans ce guide.
• Ne mettez pas ce produit en contact avec l’eau ou autres liquides. Si de l’eau ou
un tout autre liquide pénètre à l’intérieur, déconnectez immédiatement le produit
de l’ordinateur, car si vous continuez d’utiliser celui-ci, vous pouvez provoquer
un incendie ou un choc électrique. Veuillez consulter votre distributeur ou le
centre d’assistance le plus proche.
• Ne branchez pas et ne débranchez pas ce produit avec les mains mouillées, au
risque de provoquer un choc électrique.
• Ne placez pas le produit près d’une source de chaleur et ne l’exposez pas
directement aux flammes ou à la chaleur.
• Ne placez jamais le produit à proximité d’un équipement produisant de
puissants champs électromagnétiques. Une telle exposition peut provoquer des
défaillances ou corrompre les données.
1
2
3
4
5
6
7
8
9
10
11
Page 40

sect ion
Pour assurer le bon fonctionnement du produit, des exigences minimales doivent
être satisfaites en matière de matériel et de logiciel.
• Modèle d’ordinateur - IBM PC/AT Compatible, Power Macintosh, PowerBook,
iMAC ou iBook.
• Système
d’exploitation - Windows 98 Deuxième Edition, Windows Millenium
Edition (Windows ME), Windows 2000, Windows
XP, Linux 2.4 ou version ultérieure, Mac OS 9,0 ou
version ultérieure.
• Interface - USB
• Espace libre de
3 Mo ou plus
sur le disque dur - Windows 98 SE ne prend pas en charge le pilote de
stockage de masse par défaut. Vous devez installer
le pilote fourni avec le produit (pilote pour Windows
98/SE).
- Ce produit peut utiliser le pilote par défaut avec
la majorité des systèmes d’exploitation. Si vous
souhaitez exécuter l’application logicielle « UStorage » de Belkin fournie avec le produit, installez
le pilote en cliquant sur « Outils » dans le menu «
Installation du pilote et des outils ». L’application
logicielle « U-Storage » de Belkin fonctionnera alors
correctement.
- L’application logicielle « U-Storage » de Belkin peut
SEULEMENT fonctionner sous Microsoft Windows.
- Toutefois, les fonctions de base du lecteur Flash
USB de Belkin sont prises en charge par tous les
systèmes d’exploitation mentionnés ci-dessus.
Configuration requise
4
1
2
3
4
5
6
7
8
9
10
11
Page 41

Interface USB : - L’interface connecte le port USB à l’ordinateur.
Voyant lumineux :
- Ce voyant lumineux indique l’état du
périphérique. Dès que celui-ci fonctionne, le
voyant lumineux s’allume.
sect ion
Guide des composants
5
Voyant lumineux
Interface USB
1
2
3
4
5
6
7
8
9
10
11
Page 42

sect ion
Fonctions de base
6
1. Plug and Play
Lorsque vous connectez le périphérique au port USB de votre ordinateur,
vous apercevez l’icône « Removable Disk » (Disque amovible) dans la
fenêtre du gestionnaire de fichiers. Si vous utilisez Macintosh, lorsque vous
avez connecté le lecteur Flash USB de Belkin au port USB, vous apercevez
l’icône du disque sur le bureau.
Si vous utilisez le système d’exploitation Linux, vous pouvez installer le
périphérique en suivant les instructions ci-après.
• Exécutez cd /etc/sysconfig/ ( cat /etc/sysconfig/hwconf | et )
• Vérifiez les informations sur le périphérique dans hwconf_ et prenez note
du point de montage.
• Créez un répertoire dans /mnt (ex : mkdir /mnt/usbHD )
•
Ensuite, exécutez mount /dev/sda1 /mnt/usbHD (si le point de montage
était .dev/sda)
1
2
3
4
5
6
7
8
9
10
11
Page 43

sect ion
Fonctions de base
7
2. Lecture et écriture
Vous pouvez extraire les fichiers ou les stocker sur le périphérique comme vous
le faites avec un disque dur. Le périphérique exécute la lecture et l’écriture de la
même façon qu’un disque dur.
3. Interrupteur de protection contre l’écriture
Si vous placez l’interrupteur de protection contre l’écriture « Write-Protect » sur
la position « ON » (Marche), il devient impossible d’écrire dans les fichiers ou
les données se trouvant sur le périphérique. Toutefois, vous pouvez toujours
afficher et lire les fichiers et les données que contient le périphérique. Vous
pouvez changer la position de l’interrupteur de protection contre l’écriture
sans déconnecter le dispositif. En raison des limites de Linux, l’interrupteur de
protection contre l’écriture ne fonctionne pas en ligne.
4. Déconnexion
Vous pouvez retirer le périphérique lorsque vous avez fini de l’utiliser. Toutefois,
si vous utilisez Windows ME ou Windows 2000, veuillez suivre la procédure de
suppression en toute sécurité. Vous apercevrez l’icône de suppression en toute
sécurité dans la zone de notification de votre ordinateur.
Cliquez deux fois sur l’icône « Safe removal » (Suppression en toute sécurité) ;
la fenêtre « Unplug or Eject Hardware » (Déconnexion ou éjection de matériel)
apparaît. Vous pouvez alors sélectionner le périphérique que vous souhaitez
supprimer. Cliquez ensuite sur le bouton [Stop]. Vous pouvez alors déconnecter
le périphérique du port USB de votre ordinateur.
1
2
3
4
5
6
7
8
9
10
11
Page 44

sect ion
Fonctions de base
8
Avertissement: Avant de supprimer le lecteur Flash USB de Belkin, assurez-
vous que le voyant lumineux ne clignote pas. Si le voyant
lumineux clignote rapidement, cela signifie que le système
d’exploitation et le lecteur Flash USB de Belkin sont en
communication. Ne supprimez pas le lecteur Flash USB
de Belkin pour le moment, vous pourriez endommager les
données ou même le lecteur Flash USB de Belkin.
Avertissement
: Si vous ne suivez pas la procédure de suppression en toute
sécurité avec les systèmes Windows ME et Windows 2000,
une perte de données causée par le problème de cache de
l’écriture pourrait se produire.
Avec les systèmes Macintosh, vous pouvez faire glisser l’icône du disque
amovible et la déposer dans la poubelle, ce qui a pour effet de déclencher la
fonction d’éjection.
Avec le système d’exploitation Linux, veuillez suivre la procédure relative à la
commande « Un-mount » (désinstaller) pour désinstaller le périphérique.
1
2
3
4
5
6
7
8
9
10
11
Page 45

sect ion
Type de partition
9
Le lecteur Flash USB de Belkin peut être partitionné en trois types de disque. Les
termes suivants sont fréquemment utilisés dans ce guide :
1. Zone publique
Zone dans laquelle vous pouvez, ainsi que n’importe qui
d’autre, exécuter les fonctions de base décrites dans le
chapitre « Fonctions de base ».
2. Zone de sécurité
Pour pouvoir afficher cette zone, vous devez utiliser
l’application logicielle. Lorsque vous aurez exécuté la
connexion dans l’application logicielle, vous passerez
de l’affichage de la zone publique à celui de la zone de
sécurité. Après avoir changé d’affichage, vous pouvez
exécuter toutes les fonctions de base, décrites dans le
chapitre Fonctions de base, que vous souhaitez.
- Vous ne pouvez afficher qu’une zone à la fois, soit la «
Public Area » (Zone publique) ou la « Security Area » (Zone
de sécurité), sur le même numéro d’unité logique de disque
(lecteur).
Sur le lecteur Flash USB de Belkin, vous pouvez sélectionner les combinaisons de
partition suivantes :
1. Single Zone publique unique
Rend toute la zone du périphérique accessible à tous.
2. Zone de sécurité
Divise la zone du périphérique en deux partitions sur le
même lecteur, la zone publique et la zone de sécurité. Tout
le monde a accès à la zone publique. La zone de sécurité
est uniquement accessible au moyen d’un mot de passe.
3. Zone publique et zone de sécurité
Divise la zone du périphérique en trois partitions sur
deux lecteurs : la zone publique et la zone de sécurité
sur le lecteur 1 et la zone publique sur le lecteur 2. Vous
pouvez accéder à ces partitions par le pilote de lecteurs
multiples. Les états des partitions sont illustrés dans le
tableau suivant. Les partitions du lecteur 1 fonctionneront
tel qu’expliqué au numéro 2, tandis que la partition du
lecteur 2 fonctionnera tel qu’expliqué au numéro 1.
1
2
3
4
5
6
7
8
9
10
11
Page 46

La figure suivante détaille les fonctions du lecteur unique.
Le tableau suivant détaille les fonctions des lecteurs multiples.
Ce tableau décrit les fonctions des trois types de partition.
sect ion
Partition Type
10
Change View Through
Login & Logout
Public
Area
Security
Area
Drive1
Change View Through
Login & Logout
Public
Area
Security
Area
Drive1
Public
Area
Drive2
Type de
fonction
Sécurité Mot de
passe
Numéro d’unité
logique de
disque
Désignation du
disque dans
le SE
1. Zone
publique
seulement
Non Non 1 (Lecteur 1) 1
2. Zone de
sécurité
Oui Oui 1 (Lecteur 1) 1
3. Zone
publique et
zone de
sécurité
Oui Oui 2 (Lecteur 1& 2) 2
1
2
3
4
5
6
7
8
9
10
11
Page 47

sect ion
Installation et désinstallation de l’application logicielle
U-Storage de Belkin :
Installation du logiciel :
Si vous installez l’application logicielle sous Windows, vous devez
d’abord vous connecter en tant qu’administrateur, avant de procéder à
l’installation.
Précautions à observer concernant l’interface USB
• Veuillez connecter le périphérique au port USB lorsque vous installez
l’application logicielle.
• Si vous ne connectez pas le périphérique au port USB et si vous
installez l’application logicielle sous Windows XP de Microsoft,
vous devez réinstaller le pilote 98/SE de Belkin au moment où vous
connectez le périphérique.
• Sous Windows 98 SE ou Windows ME, vous devez déconnecter le
lecteur Flash USB de Belkin et le reconnecter après avoir installé le
pilote.
1 Insérez le CD « Driver & Tools » (Pilote et outils) dans le lecteur de
CD-ROM de l’ordinateur ; un menu « Driver & Tools Installation »
(Installation du pilote et des outils) apparaît.
2 Cliquez sur « Tools » (Outils).
3 Suivez les instructions qui apparaissent à l’écran pour continuer.
Désinstallation du logiciel :
Pour désinstaller le logiciel, vous pouvez cliquer sur le menu Windows
[Start] (Démarrer), puis sélectionner [Setting], (Paramètres), [Control
Panel] (Panneau de configuration) et enfin [Add/Remove Programs]
(Ajout/Suppression de programmes). Vous pouvez aussi désinstaller
l’application logicielle en cliquant sur le menu [Start] (Démarrer), puis
sélectionner [Programs] (Programmes), [Belkin U-Storage] et enfin
[Uninstall Belkin U-Storage] (Désinstaller U-Storage de Belkin).
Utilisation du logiciel U-Storage de Belkin
sous la plate-forme Windows
11
1
2
3
4
5
6
7
8
9
10
11
Page 48

12
sect ion
Remarques:
• Vous devrez installer le pilote pour Windows 98/SE car le périphérique
est connecté au PC par l’intermédiaire du port USB lors de la première
utilisation sous Windows 98/98SE. Par la suite, vous n’aurez plus à installer
le lecteur.
• N’annulez pas l’installation pendant la procédure. Le lecteur Flash USB
de Belkin pourrait ne pas fonctionner correctement si l’installation est
incomplète.
• Consultez la section sur le dépannage si l’installation s’annule pendant la
procédure, si elle ne se déroule pas tel qu’expliqué ou si vous pensez que
les pilotes ne sont pas correctement installés.
Installation du pilote USB
:
Avec certains systèmes Windows, les utilisateurs doivent se connecter en
tant qu’administrateur avant de procéder à l’installation. Sous Windows
ME, 2000 ou XP, dès que vous avez inséré le lecteur Flash USB de Belkin
dans votre ordinateur, le système d’exploitation trouve le pilote approprié
ou bien une boîte de dialogue « Add New Hardware Wizard » (Assistant
Ajout de nouveau matériel) apparaît après quelques instants. Sous Windows
98 et 98SE, vous pouvez exécuter l’installation du pilote manuellement ; il
vous suffit d’insérer le CD « Driver & Tools » (Pilote et outils) dans le lecteur
de CD-ROM de l’ordinateur et de cliquer sur « Driver for Windows 98/SE »
(Pilote pour Windows 98/SE) lorsque le menu d’installation « Driver & Tools »
(Pilote et outils) apparaît. Suivez ensuite les instructions qui vous permettront
d’installer le pilote.
Au cours de la procédure d’installation, si le message « Digital Signature Not
Found » (Signature numérique introuvable) apparaît, il vous suffit de cliquer
sur le bouton [Yes] (Oui) de la fenêtre d’affichage.
Utilisation du programme « U-Storage » de Belkin pour la
première fois :
Avertissement :
Le programme « U-Storage » de Belkin peut seulement
prendre en charge un lecteur Flash USB de Belkin à la fois.
Toutefois, si vous ne souhaitez pas utiliser les fonctions de
« U-Storage » telles que [Resize], (Redimensionner) [Change
Password] (Changer le mot de passe) ou [Log In] (Connexion),
etc., vous pouvez insérer plus de deux lecteurs Flash USB de
Belkin. Par contre, si vous souhaitez utiliser les fonctions du
programme, retirez tous les autres lecteurs Flash USB de Belkin.
Sinon, le programme « U-Storage » de Belkin, pourrait ne pas
fonctionner correctement, voire entraîner une perte de données.
Utilisation du logiciel U-Storage de Belkin
sous la plate-forme Windows
1
2
3
4
5
6
7
8
9
10
11
Page 49

13
sect ion
Utilisation du logiciel U-Storage de Belkin
sous la plate-forme Windows
Après avoir installé le logiciel et le pilote correctement, l’icône du
programme « U-Storage » de Belkin apparaît automatiquement
(sous forme de cadenas) dans la zone de notification
ou
OU
L’activité de ce voyant lumineux dépend de l’état du périphérique.
• Vous pouvez utiliser le bouton droit de la souris pour faire apparaître le menu
de sélection, tel illustré ci-après. Vous pouvez ensuite sélectionner les fonctions
que vous souhaitez.
• Vous pouvez aussi cliquer deux fois sur l’icône figurant dans la zone de
notification. La fenêtre du gestionnaire du programme « U-Storage » de Belkin
apparaît :
1
2
3
4
5
6
7
8
9
10
11
Page 50

sect ion
Par défaut, le périphérique n’est pas protégé. La fonction « Resize »
(Redimensionner) est donc active lorsque vous utilisez le logiciel pour la première
fois.
Lecteur Flash USB de Belkin – Fonction « Resize » (Redimensionner) :
Comme l’explique la section « Type de partition », vous pouvez redimensionner
votre lecteur Flash USB de Belkin.
Avertissement
: L’exécution de « Resize » (Redimensionner) efface toutes les
données et tous les fichiers se trouvant sur le lecteur Flash
USB de Belkin. Cette action ne peut pas être annulée. Vous
devez donc faire une copie de sauvegarde de toutes les
données et de tous les fichiers importants. De plus, veuillez
fermer toutes les fenêtres et tous les programmes ouverts à
l’écran de votre ordinateur.
1. Cliquez sur le bouton [Resize] (Redimensionner) de la fenêtre du gestionnaire
du programme « U-Storage » de Belkin. La fenêtre de redimensionnement de la
partition apparaît comme suit.
2. Sélectionnez le type de partition que vous souhaitez.
3. Si vous sélectionnez « Public Area Only (Single Drive) » [Zone publique
seulement (Lecteur unique)], cliquez sur le bouton [OK]. La fenêtre de
confirmation apparaît. Veuillez vous assurer qu vous avez déjà fait une copie de
sauvegarde de toutes les données et de tous les fichiers importants.
14
Utilisation du logiciel U-Storage de Belkin
sous la plate-forme Windows
1
2
3
4
5
6
7
8
9
10
11
Page 51

sect ion
4. Si vous sélectionnez “Public Area + Security Area (Single Drive)” [Zone publique
+ Zone de sécurité (Lecteur unique)], la fenêtre « Security Area » suivante
apparaît. Vous pouvez faire glisser la barre de défilement située au milieu de la
fenêtre pour dimensionner la taille de la zone publique et de la zone de sécurité.
Vous pouvez aussi entrer la taille que vous souhaitez pour chaque zone dans
la fenêtre « Size » (Taille). Dans la fenêtre « New Password » (Nouveau mot de
passe), vous pouvez définir le mot de passe qui vous permettra d’accéder à la
zone de sécurité. Le mot de passe ne doit pas contenir plus de huit caractères.
Pour retenir votre nouveau mot de passe, vous pouvez saisir un aide-mémoire
dans la fenêtre « Password Hint » (Aide-mémoire). Cet aide-mémoire s’affichera
lorsque vous cliquerez sur le bouton [Hint] (Aide-mémoire) de la fenêtre « Unlock
Protect » (Déverrouiller la protection). L’aide-mémoire ne doit pas contenir plus
de trente-deux caractères. Une fois les paramètres saisis, cliquez sur le bouton
[OK]. La fenêtre de confirmation apparaît. Veuillez vous assurer qu vous avez
déjà fait une copie de sauvegarde de toutes les données et de tous les fichiers
importants.
Utilisation du logiciel U-Storage de Belkin
sous la plate-forme Windows
15
1
2
3
4
5
6
7
8
9
10
11
Page 52

16
sect ion
5. Si vous sélectionnez « Public Area + Security Area (Dual Drive) » [Zone
publique + Zone de sécurité (Lecteur double)], la fenêtre « Public
Area(Drive1)/Security Area » [Zone publique (Lecteur 1)/Zone de sécurité]
apparaît. Il vous suffit de faire glisser la barre de défilement située dans la
fenêtre pour définir la taille de chaque zone. Tout d’abord, veuillez définir
la taille de la zone « Public Area (Drive2) » [Zone publique (Lecteur 2)]. La
taille minimum de chaque zone est de 1 Mo. La taille maximum de la zone
« Public Area (Drive2) »[Zone publique (Lecteur 2)] est équivalente au quart
de la taille totale. Une fois que la taille de la « Public Area (Drive2) » [Zone
publique (Lecteur 2)] a été définie, la barre de défilement de la zone « Public
Area (Drive1) » [Zone publique (Lecteur 1)] et de la « Security Area » (Zone de
sécurité) sera automatiquement placée au milieu. Vous pouvez aussi saisir la
taille que vous souhaitez pour chaque zone dans la fenêtre « Size » (Taille).
Dans la fenêtre « New Password » (Nouveau mot de passe), vous pouvez
définir le mot de passe qui vous permettra d’accéder à la zone de sécurité.
Le mot de passe ne doit pas contenir plus de huit caractères. Pour retenir
votre nouveau mot de passe, vous pouvez saisir un aide-mémoire dans la
fenêtre « Password Hint » (Aide-mémoire). Cet aide-mémoire s’affichera
lorsque vous cliquerez sur le bouton [Hint] (Aide-mémoire) de la fenêtre «
Unlock Protect » (Déverrouiller la protection). L’aide-mémoire ne doit pas
contenir plus de trente-deux caractères. Une fois les paramètres entrés,
cliquez sur le bouton [OK]. La fenêtre de confirmation apparaît. Veuillez
vous assurer qu vous avez déjà fait une copie de sauvegarde de toutes les
données et de tous les fichiers importants.
Utilisation du logiciel U-Storage de Belkin
sous la plate-forme Windows
1
2
3
4
5
6
7
8
9
10
11
Page 53

17
sect ion
6. Lorsque le redimensionnement est terminé, le message suivant apparaît.
7. Lorsque le redimensionnement est terminé, le programme « Setup.exe »
(identique au programme « Tools.exe » se trouvant sur le CD « Driver & Tools »
(Pilote et outils) est automatiquement copié dans la « Public Area (Drive1) » [Zone
publique (Lecteur 1)]. Il peut être supprimé. Cependant, vous en aurez besoin
lorsque vous insérerez votre périphérique dans un autre ordinateur. Il se chargera
d’installer le logiciel « U-Storage » de Belkin sur l’ordinateur que vous souhaitez
utiliser.
Utilisation du logiciel U-Storage de Belkin
sous la plate-forme Windows
1
2
3
4
5
6
7
8
9
10
11
Page 54

18
Connexion à la zone de sécurité :
Si vous incluez une zone de sécurité dans le périphérique, vous pouvez
exécuter la fonction « Login »(Connexion) suivante pour accéder à cette zone.
1. Cliquez deux fois sur l’icône du programme « U-Storage » de Belkin qui se
trouve dans la fenêtre de notification ou sur le bouton [Login] (Connexion) de
la fenêtre du gestionnaire du programme « U-Storage » de Belkin. La fenêtre «
Unlock Protect » (Déverrouiller la protection) apparaît.
Avertissement:
Lorsque vous exécutez la connexion ou la
déconnexion avec ce périphérique, assurez-vous
qu’aucune application, aucun programme ou aucun
document n’est ouvert sur le périphérique. Ceci
pourrait entraîner une perte de données ou des
dommages.
2. Saisissez le mot de passe dans la zone « Password » (Mot de passe).
- Vous pouvez associer un aide-mémoire avec les fonctions «
Resize » (Redimensionner) ou « Change Password » (Changer
le mot de passe). Une fois cet aide-mémoire créé, vous pouvez
cliquer sur le bouton [Hint] (Aide-mémoire) de la fenêtre « Unlock
Protect » (Déverrouiller la protection) pour éviter d’oublier le mot
de passe. L’aide-mémoire apparaît après quelques secondes.
Utilisation du logiciel U-Storage de Belkin
sous la plate-forme Windows
sect ion
1
2
3
4
5
6
7
8
9
10
11
Page 55

19
- Si vous entrez un mot de passe erroné, le message suivant s’affiche.
- Vous avez droit à trois tentatives de saisie du mot de passe. Après
la troisième tentative, le message suivant apparaît. Vous devez alors
déconnecter et reconnecter le périphérique pour pouvoir exécuter
d’autres actions.
- Lorsque vous exécutez une connexion ou une déconnexion, veuillez vous
assurer que vous fermez tous les programmes ou documents ouverts sur
le périphérique. Si certaines applications tournent ou si des documents
sont ouverts, le message ci-après apparaît. Sous Windows 2000, même
si le gestionnaire de fichiers a accédé au périphérique, il sera considéré
comme « occupé ». Vous devez fermer le gestionnaire de fichiers pour
exécuter la connexion. Toutefois, il n’a pas été possible de tester les
connexions avec tous les types de systèmes d’exploitation.
Utilisation du logiciel U-Storage de Belkin
sous la plate-forme Windows
sect ion
1
2
3
4
5
6
7
8
9
10
11
Page 56

20
3. Cliquez sur le bouton [OK].
4. Dès que la fenêtre du gestionnaire de fichiers contenant la «
Security Area » (Zone de sécurité) apparaît, vous pouvez exécuter
l’action que vous souhaitez dans cette dernière. La fenêtre
du gestionnaire de fichiers se présente comme suit :
Déconnexion de la zone de sécurité :
1. Cliquez deux fois sur l’icône du programme « U-Storage » de Belkin dans
la fenêtre de notification ou sélectionnez le bouton [Logout] (Déconnexion)
de la fenêtre du gestionnaire du programme « U-Storage » de Belkin.
Utilisation du logiciel U-Storage de Belkin
sous la plate-forme Windows
sect ion
1
2
3
4
5
6
7
8
9
10
11
Page 57

21
Avertissement: Lorsque vous exécutez la connexion à ce périphérique, ou la
déconnexion, assurez-vous qu’aucune application ou aucun
document n’est ouvert sur le périphérique. Ceci pourrait
entraîner une perte de données ou des dommages.
- Lorsque vous exécutez une connexion ou une déconnexion, veuillez
vous assurer que vous fermez tous les programmes ou documents
ouverts sur le périphérique. Si certains programmes tournent ou si des
documents sont ouverts, le message ci-après apparaît. Sous Windows
2000, même si le gestionnaire de fichiers a accédé au périphérique, il
sera considéré comme « occupé ». Vous devez fermer le gestionnaire de
fichiers pour exécuter la connexion. Toutefois, il n’a pas été possible de
tester les connexions avec tous les types de systèmes d’exploitation.
2. Dès que la fenêtre du gestionnaire des fichiers contenant la «
Public Area » (Zone publique) apparaît, vous pouvez exécuter
l’action que vous souhaitez dans cette dernière..
Changement de mot de passe :
L’utilisateur peut changer son mot de passe et saisir l’aide-mémoire au moyen
de la sélection « Change Password » (Changer le mot de passe) du menu du
gestionnaire du programme « U-Storage » de Belkin. Vous pouvez uniquement
sélectionner cet élément dans « Security AP Zone ».
Utilisation du logiciel U-Storage de Belkin
sous la plate-forme Windows
sect ion
1
2
3
4
5
6
7
8
9
10
11
Page 58

22
1 Assurez-vous que l’interrupteur de protection contre l’écriture
« Write Protect » est sur la position « OFF » (Arrêt).
2 Saisissez votre mot de passe actuel dans la zone «
Current Password » (Mot de passe actuel).
3 Ensuite, entrez votre nouveau mot de passe et confirmez-le dans
la zone « Confirm Password » (Confirmer le mot de passe).
- Le mot de passe ne doit pas contenir plus de huit caractères.
4 Pour retenir votre nouveau mot de passe, vous pouvez saisir un aide-
mémoire dans la fenêtre « Password Hint » (Aide-mémoire). Cet aidemémoire s’affichera lorsque vous cliquerez sur le bouton « Hint » (Aidemémoire) de la fenêtre « Unlock Protect » (Déverrouiller la protection).
Utilisation du logiciel U-Storage de Belkin
sous la plate-forme Windows
sect ion
1
2
3
4
5
6
7
8
9
10
11
Page 59

Fonction de démarrage
23
Le programme « BootUp » (démarrer) de la section « Utility » (Utilitaire) figurant
dans la fenêtre du gestionnaire du programme « U-Storage » de Belkin vous
permettra de mettre à niveau le périphérique à un disque de démarrage. Avant
d’exécuter ce programme, veuillez effectuer les préparations suivantes :
1 Ce programme peut tourner sous Windows 98 SE, XP et
ME (il n’est pas pris en charge par Windows 2000.)
2 Veuillez désactiver le programme anti-virus pendant la procédure.
3 Assurez-vous que votre système Windows se trouve sur le disque C.
4 Assurez-vous que l’interrupteur de protection contre l’écriture
« Write Protect » est sur la position « OFF » (Arrêt).
5 Ce programme ne peut tourner que sur un seul périphérique à la fois.
6 Assurez-vous que le lecteur Flash USB de Belkin est dans la « Public Area
» (Zone publique) s’il est utilisé avec la fonction « Security » (Sécurité).
7 Si vous souhaitez que votre périphérique soit un lecteur de disque dur USB
de démarrage, vous ne pouvez pas en faire un périphérique de sécurité.
Cette option est uniquement prise en charge par Windows 98 SE.
Avertissement :
Si vous avez effectué la connexion à votre lecteur Flash
USB de Belkin dans la « Security Area » (Zone de sécurité)
et si vous exécutez la fonction BootUp (Démarrer), une
déconnexion s’ensuivra et effacera toutes les données
figurant dans la « Public Area » (Zone publique).
Lorsque vous êtes prêt à exécuter le programme, suivez les procédures
suivantes : sous Windows XP, les procédures sont différentes de celles utilisées
sous Windows 98 et Windows ME. Ce programme ne peut pas être exécuté
sous Windows 2000.
Windows 98 SE et Windows ME :
1 Vous pouvez cliquer sur le bouton [Utility] (Utilitaire) de la fenêtre
du gestionnaire du programme « U-Storage » de Belkin.
2 La fenêtre suivante apparaît.
sect ion
1
2
3
4
5
6
7
8
9
10
11
Page 60

24
Fonction de démarrage
3. Vous pouvez sélectionner le type de méthode de démarrage : USB ZIP ou USB
HDD. La méthode USB HDD n’est utilisée que sous Windows 98.
- Si vous sélectionnez « USB HDD », l’ordinateur obtient l’invite « C:\> »
après que vous avez effectué le démarrage à partir du lecteur Flash USB
de Belkin.
-
Si vous sélectionnez « USB ZIP », l’ordinateur obtient l’invite « A:\> » après
que vous avez effectué le démarrage à partir du lecteur Flash USB de
Belkin.
- Si votre périphérique utilise la fonction « Security » (Sécurité), seule l’option
« USB ZIP » peut être sélectionnée.
4. Après avoir effectué la sélection, cliquez sur le bouton [OK]. Le message
d’avertissement suivant apparaît à l’écran : « Les données contenues dans
la « Public Area » (Zone publique) vont être perdues. » Si vous acceptez que
les données soient perdues, cliquez sur le bouton [OK] pour continuer la
procédure.
Avertissement :
Le programme exécutera le formatage. Les données
contenues dans la « Public Area » (Zone publique), que vous
souhaitez créer seront perdues.
5. Après l’exécution complète du processus, le message de fin apparaît.
sect ion
1
2
3
4
5
6
7
8
9
10
11
Page 61

25
Fonction de démarrage
sect ion
1
2
3
4
5
6
7
8
9
10
11
Windows XP:
1 Veuillez tout d’abord créer une disquette de démarrage. Vous pouvez insérer
une disquette dans le lecteur de disquette. Cliquez ensuite sur l’icône de
disquette 3,5 de la fenêtre « My Computer » (Poste de travail) en utilisant le
bouton droit de la souris. Sélectionnez l’élément « Format ».
2 Sélectionnez l’élément de création d’une disquette de démarrage dans les
options de « Format ». Cliquez ensuite sur le bouton [Start] (Démarrer).
3 Créez un répertoire nommé « XP_Bootable » dans le répertoire racine de la
disquette système.
4 Copiez tous les fichiers que contient la disquette dans le répertoire « XP_
Bootable ».
5 Cliquez sur le bouton [Utility] (Utilitaire) de la fenêtre du gestionnaire du
programme « U-Storage » de Belkin. Ensuite, sélectionnez l’option USB ZIP.
Cliquez sur le bouton [OK].
6 Après l’exécution complète du processus, le message de fin apparaît.
Page 62

26
Fonction de démarrage
Messages d’erreur :
Ce message pourrait apparaître en raison
de l’installation incomplète du système
d’exploitation Windows. (Veuillez vous
assurer de l’existence du chemin d’accès
\WINDOWS\COMMAND\EBD dans Windows 98,
\WINDOWS\COMMAND\EBD dans Windows
ME et \XP_Bootable dans Windows XP.)
A l’apparition de ce message, assurez-vous que
l’interrupteur de protection contre l’écriture «
Write Protect » est sur la position « OFF » (Arrêt).
A l’apparition de ce message, assurez-
vous que la taille de la « Public Area
» (Zone publique) est suffisante.
Remarques :
• Lorsque vous aurez exécuté le programme, vous noterez que les propriétés
diffèrent selon le type de disque. Par exemple, si vous sélectionnez « USB HDD
», vous apercevez l’icône du disque dur dans la fenêtre du gestionnaire de
fichiers. Si vous sélectionnez « USB HDD », vous apercevez l’icône du disque
amovible dans la fenêtre du gestionnaire de fichiers. Cependant, seul Windows
2000 et ses versions ultérieures peuvent vous permettre de percevoir ces
différences. Sous Windows 98, vous apercevez seulement le disque amovible.
• Après l’exécution du programme, le périphérique contient les fichiers requis
par la fonction de démarrage. Ne supprimez pas les fichiers de cette zone
sinon, la procédure de démarrage de votre ordinateur va échouer.
• Si vous souhaitez utiliser le lecteur Flash USB de Belkin pour démarrer
votre ordinateur, veuillez sélectionner le paramètre BIOS approprié.
Veuillez vous reporter au manuel de l’utilisateur de la carte mère.
• Comme la conception du BIOS diffère avec chaque carte
mère, il nous est impossible de garantir que le périphérique de
démarrage est compatible avec tous les ordinateurs.
• Depuis qu’Award a modifié ses spécifications BIOS en mars 2002,
la procédure de démarrage a changé. Or, il nous est impossible de
déterminer s’il s’agit du nouveau BIOS ou de l’ancien. Par conséquent,
cet utilitaire de démarrage n’est pas compatible avec le nouveau
BIOS d’Award si vous utilisez l’option de démarrage USB ZIP.
sect ion
1
2
3
4
5
6
7
8
9
10
11
Page 63

sect ion
Restauration du disque
27
1
2
3
4
5
6
7
8
9
10
11
Si votre périphérique a été endommagé, cet utilitaire peut vous permettre de le
restaurer. Il va déterminer s’il y a trop de blocs endommagés sur le périphérique
et va essayer de les réparer.
1 Cliquez deux fois sur le raccourci « Recover Disk » (Restauration du disque) du
menu Start (Démarrer) ; la fenêtre suivante s’affiche.
Avertissement
: L’exécution de « Recover Disk » (Restauration du disque)
efface toutes les données et tous les fichiers se trouvant sur
le lecteur Flash USB de Belkin. Cette action ne peut pas être
annulée. Vous devez donc faire une copie de sauvegarde de
toutes les données et de tous les fichiers importants.
2 La restauration du disque s’effectue en deux étapes : l’une consiste à analyser
les blocs défectueux et l’autre à effectuer un essai de lecture et d’écriture de
chaque bloc. L’analyse de chaque bloc prend du temps : environ 1,30 minute
par bloc de 16 Mo.
3 Dès que vous avez cliqué sur le bouton [Start] (Démarrer) de la fenêtre, le
processus de restauration commence.
4 A la fin du processus, le message indiquant que la restauration est terminée
apparaît au centre de la zone ou bien, un message d’erreur s’affiche ailleurs.
Page 64

sect ion
Problem 1:
L’interrupteur de protection contre l’écriture « Write-Protect » ne fonctionne
pas en ligne avec les ordinateurs Macintosh équipés du système d’exploitation
Mac OS 10.1.4.
Avertissement: Sous Mac OS 10.1.4, si vous activez l’interrupteur
de protection contre l’écriture « Write-Protect » en
ligne, l’ordinateur raccroche lorsque vous exécutez
l’opération de lecture et d’écriture.
Pour contourner le problème :
Déconnectez le périphérique lorsque vous devez activer l’interrupteur de
protection contre l’écriture « Write-Protect » sous Mac OS 10.1.4. Nous serons
bientôt en mesure de résoudre ce problème de raccrochage. Toutefois, pour
ne pas nuire au bon fonctionnement du système d’exploitation, nous vous
recommandons de ne pas activer l’interrupteur de protection d’écriture «
Write-Protect » en ligne.
Problem 2:
Sous Window XP, Window 2K, Window 98 ou Windows ME, si vous utilisez
le contrôleur d’hôte VIA USB 2.0 et si vous exécutez le redimensionnement
sur le lecteur Flash USB de Belkin, le point d’accès fait redémarrer le système
d’exploitation et le redimensionnement échoue.
Solution A: Sous Windows XP :
Mettez le pilote USB 2.0 à jour à partir de Microsoft
Windows Update (en général Windows XP exécute
automatiquement la mise à jour).
Solution B: Sous Windows 2000 :
Lorsque votre système d’exploitation détecte pour la
première fois le contrôleur d’hôte USB 2.0, la carte PCI
ou la puce intégrée, il signale le nouveau composant
matériel détecté et vous demande où placer le pilote
; veuillez d’abord sélectionner Microsoft Windows
Update pour effectuer une mise à jour à partir
d’Internet. Sinon, si vous installez d’abord le pilote VIA,
vous devrez effectuer la mise à jour manuellement en
exécutant les étapes suivantes :
Problèmes courants
28
1
2
3
4
5
6
7
8
9
10
11
Page 65

29
sect ion
Cliquez sur le menu contextuel My Computer (Poste de travail) et
sélectionnez Properties (Propriétés).
Sélectionnez Device Manager… (Gestionnaire de périphériques) à la page
Hardware (Matériel).
Sélectionnez VIA PCI to USB Enhanced Host Controller (VIA PCI vers
Contrôleur d’hôte USB amélioré) sous Universal Serial Bus controllers
(Contrôleurs de bus USB) et cliquez avec le bouton droit de la souris pour
sélectionner Properties (Propriétés).
Problèmes courants
1
2
3
4
5
6
7
8
9
10
11
Page 66

30
sect ion
Sélectionnez ensuite Update Driver… (Mettre le pilote à jour) à la page
Driver (Pilote).
Cliquez sur « Next » (Suivant).
Problèmes courants
1
2
3
4
5
6
7
8
9
10
11
Page 67

31
sect ion
Sélectionnez l’option « Search for a suitable driver for my device
(Recommended) » (Rechercher un meilleur pilote que celui que vous utilisez
en ce moment (Recommandé).
Sélectionnez ensuite Microsoft Windows Update pour mettre le pilote à
jour.
Problèmes courants
1
2
3
4
5
6
7
8
9
10
11
Page 68

32
sect ion
Solution C : Sous Windows 98 et Windows ME
Veuillez mettre le pilote VIA à jour à la version V2.42 ou à une version ultérieure
à partir du site Web de VIA afin d’éviter les problèmes mentionnés plus haut.
Si vous utilisez une carte USB 2.0 d’un autre fabricant et si ce problème
survient, suivez les mêmes étapes de mise à jour du pilote USB 2.0 ou
contactez le fabricant de cartes USB pour trouver une solution.
Problème 3:
Sous Windows XP : Lorsque l’utilisateur désinstalle le lecteur Flash USB
de Belkin, il se peut que le pilote de Windows 98/SE ne soit pas supprimé
du contrôleur d’hôte VIA USB 2.0. Ceci n’a aucune conséquence négative
sur l’utilisation du périphérique ou sur le système. Après que l’utilisateur a
redémarré le système d’exploitation, le pilote de Windows 98/SE est redéfini
au pilote par défaut (Microsoft).
Problèmes courants
1
2
3
4
5
6
7
8
9
10
11
Page 69

33
sect ion
Nous avons fourni tous les efforts possibles pour nous assurer que les
informations et les procédures contenues dans ce guide sont exactes et
complètes ; toutefois, nous ne pouvons être tenus responsables en cas
d’erreurs ou d’omissions. Le fabricant du contrôleur du lecteur Flash USB de
Belkin, Ours Technology Inc. (OTI), se réserve le droit d’apporter sans préavis
des modifications aux produits mentionnés aux présentes.
Limitation de responsabilité
1
2
3
4
5
6
7
8
9
10
11
Page 70

34
sect ion
• IBM est une marque déposée d’International Business Machines
Corporation.
• iBook et Mac sont des marques de commerce d’Apple Computer, Inc.
• Macintosh, PowerBook et Power Macintosh sont des marques de commerce
d’Apple Computer, Inc.
• Microsoft, Windows, Windows 98, Windows ME, Windows 2000 et Windows
XP sont des marques déposées de Microsoft Corporation aux Etats-Unis
et/ou dans d’autres pays.
• Les autres noms et produits non mentionnés ci-dessus pourraient être des
marques de commerce de leurs détenteurs respectifs.
Marques de commerce
1
2
3
4
5
6
7
8
9
10
11
Page 71

© 200 4 Belkin Corporation. Tous droits réservés. Toutes les marques de commerce
sont des marques déposées de leurs fabricants respectifs.
P7472 2ea
Belkin GmbH
Hanebergstrasse 2
80637 Munich • Allemagne
Tél.: +49 (0) 89 143405 0
Fax: +49 (0) 89 143405 100
Belkin SAS
5 Rue du Petit Robinson • 3ème étage
78350 Jouy en Josas • France
Tél.: +33 (0) 1 34 58 14 00
Fax: +33 (0) 1 39 46 62 89
Belkin Ltd.
Express Business Park • Shipton Way
Rushden • NN10 6GL • Royaume-Uni
Tél.: +44 (0) 1933 35 2000
Fax: +44 (0) 1933 31 2000
Belkin B.V.
Starparc Building • Boeing Avenue 333
1119 PH Schiphol-Rijk • Pays-Bas
Tél.: +31 (0) 20 654 7300
Fax: +31 (0) 20 654 7349
Assistance technique Belkin
Europa: 00 800 223 55 460
États-Unis: 877 736 5771
Lecteur Flash USB 2.0
Manuel De L’utiIisateur
Page 72

USB 2.0 Flash-Laufwerk
Benutzerhandbuch
Einfacher Zugang zu Daten;
Datenübertragung von
Computer zu Computer.
3
JAHRE
GARANTIE
Passwort
Schutzt
F5U126eaXXX
Page 73

sect ion
Section 1. Einführung Page 3
Section 2. Systemanforderungen Page 4
Section 3. Erläuterung der Komponenten Page 5
Section 4. Grundfunktionen Page 6-8
Section 5. Partitionsart Page 9-10
Section 6. Verwenden der Software
(Belkin U-Storage)
auf Windows-Plattformen Page 11-22
Section 7. Start-Funktion Page 23-26
Section 8. Wiederherstellungsdiskette Page 27
Section 9. Bekannte Probleme Page 28-32
Section 10. Haftungsausschluss Page 33
Section 11. Handelsmarken Page 34
Contents
2
1
2
3
4
5
6
7
8
9
10
11
Page 74

sect ion
Einführung
3
Vielen Dank für den Kauf des Belkin USB Flash-Laufwerks. In diesem Handbuch
wird die mit dem Gerät gelieferte Software erläutert.
Sicherheitshinweise
Beachten Sie bitte die Sicherheitshinweise, bevor Sie das USB Flash-Laufwerk
von Belkin benutzen. Verwenden Sie die Software genauso, wie es in diesem
Handbuch beschrieben ist.
Warnungen: Bei diesen Warnungen werden Sie auf Verletzungsgefahren
oder auf mögliche Beschädigungen des Produkts bei falschem
Umgang hinwiesen.
Warnungen
• Versuchen Sie nicht, Teile des Produkts auszubauen oder zu verändern, wenn
dies nicht in diesem Handbuch beschrieben ist.
• Vermeiden Sie den Kontakt des Produkts mit Wasser oder anderen
Flüssigkeiten. Gerät das Produkt dennoch in Berührung mit Wasser oder
anderen Flüssigkeiten, entfernen Sie es sofort vom Computergehäuse. Bei
weiterer Benutzung können Brände oder Kurzschlüsse entstehen. Bitte wenden
Sie sich an Ihren Händler oder die nächstliegende Service-Stelle.
• Berühren Sie das Produkt nicht mit nassen Händen, da das zu einem
elektrischen Schock führen kann.
• Setzen Sie das Produkt keinem Feuer, direkter oder indirekter Hitze aus.
• Setzen Sie das Produkt niemals starken elektromagnetischen Feldern aus. Dies
kann zu Fehlfunktionen oder beschädigten Daten führen.
1
2
3
4
5
6
7
8
9
10
11
Page 75

sect ion
An die Software und Hardware werden einige Mindestanforderungen gestellt, die
erfüllt sein müssen, damit das Produkt richtig funktioniert.
• Computermodell - IBM PC/AT-kompatible, Power Macintosh, PowerBook,
iMAC oder iBook
• Betriebssystem - Windows 98 Second Edition, Windows Millennium
Edition (Windows ME), Windows 2000, Windows XP,
Linux 2.4 oder höher, Mac OS 9.0 oder höher
• Schnittstelle - USB
• Mindestens 3 MB freier
Festplattenspeicher - Der Massenspeichertreiber wird von Windows
98 SE nicht unterstützt. Sie müssen den Treiber
installieren, der mit dem Produkt geliefert wird
(Treiber für Windows 98 SE).
- Das Produkt kann mit den Standardtreibern der
meisten Betriebssysteme verwendet werden.
Wenn Sie die Software, die mit dem Produkt
geliefert wurde (“Belkin U-Storage“), ausführen
möchten, installieren Sie den Treiber, indem Sie
im Menü “Driver & Tools Installation” (Treiber- und
Programminstallation) auf “Tools” (Programme)
klicken. Die Software (“Belkin U-Storage”) arbeitet
dann einwandfrei.
- Die Software (“Belkin U-Storage”) kann NUR unter
Microsoft Windows ausgeführt werden.
-
Die Grundfunktionen des Belkin USB FlashLaufwerks werden jedoch von allen oben genannten
Betriebssystemen unterstützt.
Systemanforderungen
4
1
2
3
4
5
6
7
8
9
10
11
Page 76

USB-Schnittstelle : - An der Schnittstelle werden USB-Geräte am
Computer angeschlossen.
LED-Anzeige :
- Diese LED-Anzeige zeigt den Status des Geräts
an. Wenn das Gerät in Betrieb ist, leuchtet die
Anzeige.
sect ion
Erläuterung der Komponenten
5
LED-Anzeige
USB-Schnittstelle
1
2
3
4
5
6
7
8
9
10
11
Page 77

sect ion
Grundfunktionen
6
1. Plug and Play
Wenn Sie das Gerät in den USB-Port des Computers stecken, wird ein
Symbol („Austauschmedium“) für das Gerät im Dateimanager angezeigt.
Bei Macintosh-Computern wird das Symbol auf dem Desktop angezeigt.
Mit Linux-Systemen können Sie das Gerät folgendermaßen nutzen:
• Führen Sie cd /etc/sysconfig/ ( cat /etc/sysconfig/hwconf | more ) aus
• Überprüfen Sie die Geräteinformationen in hwconf und notieren Sie den
„Mount Point“.
• Erstellen Sie ein Verzeichnis in /mnt (ex: mkdir /mnt/usbHD)
• Führen Sie dann mount /dev/sda1 /mnt/usbHD aus (wenn der „Mount
Point“ .dev/sda lautet)
1
2
3
4
5
6
7
8
9
10
11
Page 78

sect ion
Grundfunktionen
7
2. Lesen und Schreiben
Sie können Dateien wie von einer Festplatte aufrufen und speichern. Die
Lese-/Schreibe-Funktion des Geräts ist dieselbe wie bei einer Festplatte.
3. Schreibschutz-Schalter
Wenn Sie den Schreibschutz auf die Position „ON“ (AN) einstellen, können
keine Ordner oder Dateien auf das Gerät geschrieben werden. Sie können
die Ordner und Dateien aber noch immer aufrufen und lesen. Sie können
den Schalter auch bedienen, wenn das Gerät am Computer angeschlossen
ist. Aufgrund der Linux-Limitation funktioniert der Schreibschutz nicht
online.
4. Entfernen
Sie können das Gerät vom Computer entfernen, wenn Sie die Arbeit
beendet haben. Unter Windows ME und Windows 2000 nutzen Sie jedoch
bitte die Funktion “Safe Removal Procedure” (Sicheres Entfernen). Sie
finden das entsprechende Symbol dafür in der Windows-Systemleiste.
Klicken Sie doppelt auf das Symbol “Safe Removal” (Sicheres Entfernen);
Das Fenster “Unplug or Eject Hardware” (Hardware entfernen) wird
angezeigt. Wählen Sie das Gerät aus, das Sie entfernen möchten. Klicken
Sie anschließend auf die Schaltfläche „Stopp“. Entfernen Sie danach das
Gerät vom USB-Anschluss des Computers.
1
2
3
4
5
6
7
8
9
10
11
Page 79

sect ion
Grundfunktionen
8
Warnung: Wenn Sie das Belkin USB Flash-Laufwerk entfernen möchten, darf
die LED-Anzeige nicht blinken. Wenn die LED-Anzeige schnell blinkt,
werden aktuell Daten zwischen dem Betriebssystem und dem FlashLaufwerk ausgetauscht. Entfernen Sie das Laufwerk nicht in diesem
Moment. Die Daten oder das Gerät selbst könnten in diesem Fall
beschädigt werden.
Warnung
: Wenn Sie das Verfahren für die sichere Entfernung in Windows ME
und Windows 2000 nicht befolgen, kann dies zu Datenverlusten durch
den sogenannten “write cache” führen.
Unter Macintosh-Systemen können Sie dieses Symbol in den Papierkorb
verschieben. Diese Aktion entspricht der Funktion „Auswerfen“.
Unter Linux OS befolgen Sie bitte das „Un-Mount“-Verfahren, um das Gerät zu
entfernen.
1
2
3
4
5
6
7
8
9
10
11
Page 80

sect ion
Partitionsart
9
Das Belkin USB Flash-Laufwerk kann in drei verschiedene Speicherarten
partitioniert werden. In diesem Handbuch verwenden wir die folgenden Begriffe:
1. Offener Bereich
Es gibt einen Bereich, in dem Sie, wie auch jeder andere,
die Grundfunktionen bedienen können, die im Abschnitt
„Grundfunktionen“ beschrieben sind.
2. Sicherer Bereich
Dieser Bereich kann nicht ohne entsprechende Software
eingesehen werden. Wenn Sie sich im Programm
angemeldet haben, werden Sie vom „Offenen Bereich“
in den „Sicheren Bereich“ umgeleitet. Danach
können Sie alle Grundfunktionen bedienen, die im
Abschnitt „Grundfunktionen“ beschrieben sind.
-
Sie können in einem Laufwerk (LUN - disk logic unit number)
entweder den „Offenen Bereich“ oder den „Sicheren Bereich“
öffnen.
Beim Belkin USB Flash-Laufwerk können Sie die folgenden
Partitionskombinationen auswählen:
1. Ein Offener Bereich
Alle Gerätebereiche können von jedem eingesehen werden.
2. Sicherer Bereich
Teilt den Laufwerksbereich in zwei Partitionen eines
Laufwerks auf, dem Offenen und dem Sicheren Bereich.
Jeder hat Zugriff auf den Offenen Bereich. Auf den Sicheren
Bereich kann nur mit einem Kennwort zugegriffen werden.
3. Offener Bereich plus Sicherer Bereich
Teilt den Laufwerksbereich in drei Partitionen auf zwei
Laufwerken, Offener Bereich und Sicherer Bereich auf
Laufwerk1 (Drive1) und Offener Bereich auf Laufwerk2
(Drive2). Sie können auf diese Partitionen mit dem MehrfachLaufwerkstreiber zugreifen. Die Partitionseinstellung wird in der
folgenden Abbildung dargestellt. Die Partitionen auf Laufwerk1
werden wie in Punkt 2 beschrieben ausgeführt. Die Partition
auf Laufwerk2 wird wie in Punkt 1 beschrieben ausgeführt.
1
2
3
4
5
6
7
8
9
10
11
Page 81

Diese Abbildung gibt die genauen Vorgänge eines Einzellaufwerks wieder.
Diese Abbildung gibt die genauen Vorgänge eines Mehrfachlaufwerks wieder.
.
In dieser Tabelle sind die Funktionen der drei Partitionsarten aufgeführt.
sect ion
Partitionsart
10
Ansicht durch An- und
Abmelden ändern
Offener
Bereich
Sicherheitsbereich
Laufwerk 1
Ansicht durch An- und
Abmelden ändern
Offener
Bereich
Sicherheitsbereich
Laufwerk 1
Offener
Bereich
Laufwerk 2
Funktionsart Sicherheit Kennwort LUN Laufwerks-
buchstabe
1. Nur Offener
Bereich
Nein Nein 1 (Laufwerk1) 1
2. Sicherer
Bereich
Ja Ja 1 (Laufwerk1) 1
3. Offener
Bereich plus
Sicherer
Bereich
Ja Ja 2 (Laufwerk1& 2) 2
1
2
3
4
5
6
7
8
9
10
11
Page 82

sect ion
Installieren / Deinstallieren der Software (Belkin U-Storage):
Installieren der Software:
Wenn Sie die Software auf einem Windows-Betriebssystem installieren,
müssen Sie sich erst als Administrator anmelden, bevor Sie die
Installation durchführen können.
Vorsichtsmaßnahmen für die USB-Schnittstelle
• Bitte verbinden Sie das Gerät mit dem USB-Port Ihres Computers,
wenn Sie die Software installieren.
• Wenn das Gerät bei der Installation unter Windows XP nicht mit dem
Computer verbunden ist, müssen Sie den Belkin 98/SE-Treiber erneut
installieren, wenn Sie das Gerät anschließen.
• Unter Windows 98 SE und Windows Me, müssen Sie das FlashLaufwerk entfernen und nach der Installation des Treibers wieder
anschließen.
1 Legen Sie die CD “Driver & Tools” (Treiber & Programme) in das
CD-ROM-Laufwerk des Computers ein. Das Menü “Driver & Tools
Installation“ (Treiber- & Programm-Installation) wird angezeigt.
2 Klicken Sie auf „Tools“ (Programme)
3 Folgen Sie den Anweisungen auf dem Bildschirm.
Deinstallieren der Software:
Um die installierte Software zu entfernen, klicken Sie unter Windows auf
„Start“ und wählen Sie die Installationsroutine in der Systemsteuerung
aus. Die Software kann auch deinstalliert werden, indem Sie im
Startmenü auf „Programme“ klicken und dort unter “Belkin U-Storage”
auf “Uninstall Belkin U-Storage”.
Verwenden der Software (Belkin U-Storage)
auf Windows-Plattformen
11
1
2
3
4
5
6
7
8
9
10
11
Page 83

12
sect ion
Hinweise:
• Der “Driver for Windows 98/SE” (Treiber für Windows 98/SE) ist erforderlich,
wenn das Gerät zum ersten Mal über einen USB-Port mit einem Computer
unter Windows 98/98SE verbunden ist. Die Treiberinstallation ist danach
nicht mehr notwendig.
• Brechen Sie die Installation nicht ab. Das Belkin USB Flash-Laufwerk wird
unter Umständen nicht richtig funktionieren, wenn die Installation nicht
beendet wurde.
• Bitte beachten Sie den Abschnitt „Problemlösungen“, falls die Installation
von selbst abbricht, die Installation nicht wie beschrieben vonstatten geht
oder wenn Sie das Gefühl haben, dass der Treiber nicht richtig installiert ist.
Installation der USB-Treiber:
Bei einigen Windowssystemen müssen Sie sich vor der Installation als
Administrator anmelden. Wenn Sie das Belkin USB Flash-Laufwerk
angeschlossen haben, wird unter Windows ME/2000/XP nach einem
kurzen Augenblick der richtige Treiber gefunden oder das Dialogfeld „Neue
Hardware hinzufügen“ geöffnet. Sie können die Installation unter Windows
98/98SE auch manuell vornehmen; Legen Sie die CD “Driver & Tools”
(Treiber & Programme) in das CD-ROM-Laufwerk des Computers und klicken
Sie auf “Driver for Windows 98/SE“ (Treiber für Windows 98/SE) im dem
Installationsmenü. Folgen Sie der Anleitung für die Installation des Treibers.
Klicken Sie während der Installation auf „Ja“, wenn die Meldung “Digitale
Signatur nicht gefunden” angezeigt wird.
Bevor Sie das Programm “Belkin U-Storage” zum ersten Mal
verwenden:
Warnung
: Das Programm “Belkin U-Storage” kann nur ein
USB Flash-Laufwerk zugleich steuern. Wenn Sie die
Funktionen von “Belkin U-Storage”, wie “Größe ändern”,
“Kennwort ändern” oder “Anmelden”, nicht benötigen,
können Sie mehr als ein Belkin USB Flash-Laufwerk
anschließen. Wenn Sie diese Funktionen des Programms
benötigen, entfernen Sie alle anderen Belkin USB FlashLaufwerke. Der „Belkin U-Storage” wird sonst nicht richtig
funktionieren oder Datenverluste verursachen.
Verwenden der Software (Belkin U-Storage)
auf Windows-Plattformen
1
2
3
4
5
6
7
8
9
10
11
Page 84

13
sect ion
Verwenden der Software (Belkin U-Storage)
auf Windows-Plattformen
Nach der Installation der Software und des Treibers, wird
das Symbol „Belkin U-Storage” (als Vorhängeschlossabbild)
auf der Systemleiste automatisch angezeigt.
ou
OU
Diese Anzeige gibt den Status des Geräts wieder.
• Sie können über die rechte Maustaste das Auswahlmenü wie folgt anzeigen
lassen. Wählen Sie dann nach Wunsch eine Funktion aus.
• Oder Sie klicken doppelt auf das Symbol. Das Verwaltungsfenster „Belkin U-
Storage” wird angezeigt:
1
2
3
4
5
6
7
8
9
10
11
Page 85

sect ion
Die Voreinstellung steht auf nicht gesichert. Die Funktion „Resize“ (Größe ändern)
ist aktiv, wenn Sie diese Software zum ersten Mal ausführen.
Belkin USB Flash-Laufwerk – Größe ändern :
Wie im Abschnitt „Partitionsart“ beschrieben, können Sie den Befehl „Resize“
(Größe ändern) für das Belkin USB-Laufwerk ausführen.
Warnung
: Der Befehl „Resize“ (Größe ändern) löscht alle Daten oder Dateien
auf dem Belkin USB Flash-Laufwerk. Dieser Vorgang ist nicht
rückgängig zu machen. Sie sollten vorher eine Sicherheitskopie aller
wichtigen Daten oder Dateien anlegen. Bitte schließen Sie zuvor alle
Programme und offenen Fenster.
1. Klicken Sie im Fenster “Belkin U-Storage” auf die Schaltfläche „Resize“ (Größe
ändern). Das folgende Fenster wird geöffnet.
2. Wählen Sie den Partitionstyp aus.
3. Wenn Sie “Public Area Only (Single Drive)” (Nur Offener Bereich – Ein
Laufwerk) ausgewählt haben, klicken Sie auf “OK”. Das Fenster „Confirmation”
(Bestätigung) wird angezeigt. Sie sollten vorher eine Sicherheitskopie aller
wichtigen Daten oder Dateien anlegen.
14
Verwenden der Software (Belkin U-Storage)
auf Windows-Plattformen
1
2
3
4
5
6
7
8
9
10
11
Page 86

sect ion
4. Wenn Sie “Public Area + Security Area (Single Drive)” (Offener Bereich +
Sicherer Bereich – Ein Laufwerk) auswählen, wird das folgende Fenster
“Sicherer Bereich” geöffnet. Sie können die Bildlaufleiste in der Mitte des
Fensters verwenden, um die Größe der Bereiche einzustellen. Oder Sie geben
die Größe für jede Zone direkt in das Fenster „Size“ (Größe) ein. Sie können
das Kennwort für den Zugriff auf den Sicheren Bereich im Fenster “New
Password” (Neues Kennwort) einstellen. Das Kennwort darf maximal 8 Zeichen
lang sein. Sie können einen Hinweis auf Ihr neues Kennwort im Fenster
„Password Hint” (Kennworthinweis) eingeben. Dieser Hinweis wird angezeigt,
wenn Sie auf die Schaltfläche „Hint“ (Hinweis) im Fenster “Unlock Protect”
(Sperrschutz) klicken. Der Hinweis darf maximal 32 Zeichen lang sein. Klicken
Sie auf OK, um die Einstellung abzuschließen. Das Fenster „Confirmation”
(Bestätigung) wird angezeigt. Sie sollten vorher eine Sicherheitskopie aller
wichtigen Daten oder Dateien anlegen.
Verwenden der Software (Belkin U-Storage)
auf Windows-Plattformen
15
1
2
3
4
5
6
7
8
9
10
11
Page 87

16
sect ion
5. Wenn Sie “Public Area + Security Area (Dual Drive)” (Offener Bereich +
Sicherer Bereich – Zwei Laufwerke) auswählen, wird das folgende Fenster
“Public Area(Drive1)/Security Area” (Offener Bereich[Laufwerk1]/Sicherer
Bereich) geöffnet. Sie können die Bildlaufleiste im Fenster verwenden, um
die Größe für jeden Bereich einzustellen. Stellen Sie bitte zuerst die Größe
von “Public Area (Drive2)” (Offener Bereich [Laufwerk2]) ein. Die Größe muss
mindestens 1 MB betragen. Die maximal einstellbare Größe für “Public
Area (Drive2)” (Offener Bereich [Laufwerk2]) beträgt 1/4 der Gesamtgröße.
Nachdem die Größe für “Public Area (Drive2)” (Offener Bereich [Laufwerk2])
eingestellt ist, wird der Wert für “Public Area (Drive1)” (Offener Bereich
[Laufwerk1]) und „Security Area” (Sicherer Bereich) automatisch in der Mitte
eingestellt. Oder Sie geben die Größe für jede Zone direkt in das Fenster
„Größe“ ein. Sie können das Kennwort für den Zugriff auf den Sicheren
Bereich im Fenster “New Password” (Neues Kennwort) einstellen. Das
Kennwort darf maximal 8 Zeichen lang sein. Sie können einen Hinweis
auf Ihr neues Kennwort im Fenster „Password Hint” (Kennworthinweis)
eingeben. Dieser Hinweis wird angezeigt, wenn Sie auf die Schaltfläche
„Hint“ (Hinweis) im Fenster “Unlock Protect” (Sperrschutz) klicken. Der
Hinweis darf maximal 32 Zeichen lang sein. Klicken Sie auf OK, um die
Einstellung abzuschließen. Das Fenster „Confirmation” (Bestätigung) wird
angezeigt. Sie sollten vorher eine Sicherheitskopie aller wichtigen Daten
oder Dateien anlegen.
Verwenden der Software (Belkin U-Storage)
auf Windows-Plattformen
1
2
3
4
5
6
7
8
9
10
11
Page 88

17
sect ion
6. Nach Beendigung der Größeneinstellung wird folgendes Fenster angezeigt.
7. Nach der Änderung der Größeneinstellung, wird das Programm “Setup.exe” (das
ist exakt dasselbe wie das Programm “Tools.exe” auf der CD “Driver & Tools”)
automatisch in den Offenen Bereich (Laufwerk1) kopiert. Es kann gelöscht
werden. Es wird jedoch benötigt, um Ihr Gerät mit einem anderen Computer zu
verbinden. Es wird dann die Software “Belkin U-Storage” auf dem Computer
installieren.
Verwenden der Software (Belkin U-Storage)
auf Windows-Plattformen
1
2
3
4
5
6
7
8
9
10
11
Page 89

18
Melden Sie sich im Sicheren Bereich an:
Wenn Sie das Gerät mit einem Sicheren Bereich partitionieren möchten, können
Sie die folgenden Anmeldefunktion ausführen, um auf den Sicheren Bereich
zuzugreifen.
1. Klicken Sie im Meldefenster doppelt auf das Symbol “Belkin U-Storage” oder
klicken Sie im Verwaltungsfenster auf die Schaltfläche „Login“ (Anmelden).
Das Fenster “Unlock Protect” (Sperrschutz) wird angezeigt.
Warnung :
Wenn Sie sich anmelden oder abmelden, sollte kein
Programm und keine Anwendung laufen und sollten
alle Dokumente geschlossen sein. Dies kann zu
Datenverlusten oder Beschädigungen führen.
2. Geben Sie das Kennwort in das Feld „Password” (Kennwort) ein.
- Sie können in den Funktionen „Resize” (Größe ändern) oder “Change
Password” (Kennwort ändern) einen Kennworthinweis erstellen.
Wenn Sie einen Kennworthinweis erstellt haben, können Sie auf die
Schaltfläche „Hint“ (Hinweis) klicken, wenn Sie sich an das Kennwort
erinnern müssen. Der Hinweis wird nach einigen Sekunden angezeigt.
Verwenden der Software (Belkin U-Storage)
auf Windows-Plattformen
sect ion
1
2
3
4
5
6
7
8
9
10
11
Page 90

19
- Wenn Sie ein falsches Kennwort eingeben, wird die folgende Mitteilung
angezeigt.
- Sie haben drei Versuche, um das richtige Kennwort einzugeben. Nach drei
Versuchen wird das folgende Fenster angezeigt. Sie müssen das Gerät nun
entfernen und wieder anschließen, um weiter zu arbeiten.
- Vor der An- oder Abmeldung müssen alle Programme und Dokumente in
Verbindung mit dem Gerät geschlossen werden. Sollten Programme noch
laufen oder Dokumente geöffnet sein, wird die folgende Meldung angezeigt. In
Windows 2000 gilt dies auch für den Zugriff des „Dateimanagers“ auf das Gerät.
Sie müssen den Dateimanager schließen, bevor Sie sich anmelden können. Es
werden aber nicht alle Verbindungen in allen Betriebsystemen geprüft.
Verwenden der Software (Belkin U-Storage)
auf Windows-Plattformen
sect ion
1
2
3
4
5
6
7
8
9
10
11
Page 91

20
3. Klicken Sie auf “OK”.
4. Sobald im Dateimanager der „Sichere Bereich“ angezeigt
wird, können Sie die gewünschten Vorgänge ausführen. Das
Fenster des Dateimanagers sieht folgendermaßen aus:
Vom Sicheren Bereich abmelden:
1. Klicken Sie im Meldefenster doppelt auf das Symbol “Belkin U-Storage” oder
klicken Sie im Verwaltungsfenster auf die Schaltfläche „Logout“ (Abmelden).
Verwenden der Software (Belkin U-Storage)
auf Windows-Plattformen
sect ion
1
2
3
4
5
6
7
8
9
10
11
Page 92

21
Warnung : Wenn Sie sich anmelden oder abmelden, darf kein Programm und
keine Anwendung laufen und alle Dokumente müssen geschlossen
sein. Dies kann zu Datenverlusten oder Beschädigungen führen.
- Vor der An- oder Abmeldung müssen alle Programme und
Dokumente in Verbindung mit dem Gerät geschlossen werden.
Sollten Programme noch laufen oder Dokumente geöffnet sein, wird
die folgende Meldung angezeigt. In Windows 2000 gilt dies auch
für den Zugriff des „Dateimanagers“ auf das Gerät. Sie müssen den
Dateimanager schließen, bevor Sie sich anmelden können. Es werden
aber nicht alle Verbindungen in allen Betriebsystemen geprüft.
2. Sobald im Dateimanager der „Offene Bereich (Einzellaufwerk)“
angezeigt wird, können Sie die gewünschten Vorgänge ausführen.
Kennwort ändern:
Sie können das Kennwort und den Kennworthinweis ändern, indem Sie die
Funktion “Change Password” (Kennwort ändern) im Verwaltungsmenü von “Belkin
U-Storage wählen. Sie haben darauf nur im „Sicheren Bereich“ Zugriff.
Verwenden der Software (Belkin U-Storage)
auf Windows-Plattformen
sect ion
1
2
3
4
5
6
7
8
9
10
11
Page 93

22
1 Der Schreibschutz-Schalter muss sich in der Position „OFF“ (AUS) befinden.
2 Geben Sie Ihr aktuelles Kennwort in das Feld “Current
Password” (Aktuelles Kennwort) ein.
3 Geben Sie dann Ihr neues Kennwort ein und bestätigen Sie dies
im Feld „Confirm Password” (Kennwort bestätigen).
-
Das Kennwort darf maximal 8 Zeichen lang sein.
4 Sie können einen Hinweis auf Ihr neues Kennwort im Fenster „Password Hint”
(Kennworthinweis) eingeben. Dieser Hinweis wird angezeigt, wenn Sie auf die
Schaltfläche „Hint“ (Hinweis) im Fenster “Unlock Protect” (Sperrschutz) klicken.
Verwenden der Software (Belkin U-Storage)
auf Windows-Plattformen
sect ion
1
2
3
4
5
6
7
8
9
10
11
Page 94

Start-Funktion
23
Mit dem Start-Programm im Abschnitt “Utility” (Hilfsprogramm) im “Belkin
U-Storage”-Verwaltungsfenster erstellen Sie auf dem Gerät eine StartdiskettenFunktion. Bevor Sie das Programm ausführen, treffen Sie bitte folgende
Vorbereitungen:
1 Dieses Programm kann unter Windows 98 SE, XP und ME ausgeführt
werden (Das Programm wird unter Windows 2000 nicht unterstützt)
2 Deaktivieren Sie während des Vorgangs alle Antivirus-Programme
3 Die Windows-Systemdateien müssen sich auf der
Partitur C: der Festplatte befinden
4 Der Schreibschutz-Schalter muss sich in der Position „OFF“ (AUS) befinden.
5 Mit diesem Programm kann immer nur ein Gerät zugleich verwaltet werden.
6 Das Belkin USB Flash-Laufwerk muss im „Offenen Bereich“ zugänglich sein.
7 Wenn Sie das Gerät als startfähigen USB-Datenträger (USB
HDD) nutzen möchten, kann es nicht „abgesichert“ werden.
Diese Option wird nur unter Windows 98 SE unterstützt.
Warnung
: Wenn Sie sich am Belkin USB Flash-Laufwerk angemeldet
und den “Sicheren Bereich” geöffnet haben und die
Startfunktion dann ausführen, meldet das Gerät sie ab und
löscht alle Daten im “Offenen Bereich”.
Um fortzufahren, folgen Sie der folgenden Anleitung. Die Vorgänge für Windows
XP unterscheiden sich von denen für Windows 98 und ME. Dieses Programm
kann unter Windows 2000 nicht ausgeführt werden.
Windows 98 SE und Windows ME:
1 Sie können zum Einrichten der Funktion auf die Schaltfläche „Utility“
(Hilfsprogramm) im Verwaltungsfenster „Belkin U-Storage” klicken.
2 Das folgende Fenster wird geöffnet.
sect ion
1
2
3
4
5
6
7
8
9
10
11
Page 95

24
Start-Funktion
3. Sie können nun die Startmethode auswählen (USB ZIP oder USB HDD). USB
HDD gilt nur für Windows 98.
- Wenn Sie „USB HDD“ auswählen, gibt der Computer nach dem Start vom
Belkin USB Flash-Laufwerk die Eingabeaufforderung “C:\>” an.
-
Wenn Sie „USB ZIP“ auswählen, gibt der Computer nach dem Start vom
Belkin USB Flash-Laufwerk die Eingabeaufforderung “A:\>” an.
- Wenn Ihr Gerät über einen „Sicheren Bereich“ verfügt, kann nur die
Funktion USB ZIP ausgewählt werden.
4. Klicken Sie nach der Auswahl auf “OK”. Es wird der folgende Warnhinweis
angezeigt. Die Daten im „Offenen Bereich“ werden gelöscht. Wenn das in
Ordnung ist, klicken Sie auf „OK“, um fortzufahren.
Warnung
: Das Programm formatiert den Bereich. Alle Daten im „Offenen
Bereich“ werden gelöscht.
5. Nach dem Vorgang wird die folgende Mitteilung angezeigt.
sect ion
1
2
3
4
5
6
7
8
9
10
11
Page 96

25
Start-Funktion
sect ion
1
2
3
4
5
6
7
8
9
10
11
Windows XP:
1 Erstellen Sie bitte erst eine startfähige Diskette. Legen Sie die Diskette in
das Diskettenlaufwerk Ihres Computers ein. Klicken Sie dann mit der rechte
Maustaste auf das Diskettensymbol im Fenster „Arbeitsplatz“. Wählen Sie die
Funktion „Formatieren...“.
2 Aktivieren Sie im Feld „Formatierungsoptionen“ den Eintrag „MS-DOS-
Startdiskette erstellen“. Klicken Sie auf die Schaltfläche „Starten“.
3 Erstellen Sie ein Verzeichnis mit dem Namen „XP_Bootable” im
Stammverzeichnis Ihrer Systempartitur.
4 Kopieren Sie die Dateien von der Diskette in das Verzeichnis „XP_Bootable”.
5 Klicken Sie im Fenster “Belkin U-Storage” auf die Schaltfläche „Utility“
(Hilfsprogramm). Wählen Sie USB ZIP aus. Klicken Sie auf “OK”.
6 Nach dem Vorgang wird die folgende Mitteilung angezeigt.
Page 97

26
Start-Funktion
Fehlermeldungen:
Wenn diese Meldung angezeigt wird,
kann die Ursache darin liegen, dass
das Windows-Betriebssystem, nicht
vollständig installiert ist. (Prüfen Sie,
ob der Pfad \WINDOWS\COMMAND\
EBD für Windows 98, WINDOWS\
COMMAND\EBD für Windows ME oder
XP_Bootable in Windows XP existiert)
Wenn dieses Mitteilung angezeigt wird,
prüfen Sie, ob sich der SchreibschutzSchalter in der Position „OFF“ (AUS) befindet.
Wenn diese Mitteilung angezeigt
wird, prüfen Sie, ob die Kapazität des
„Offenen Bereichs“ ausreichend ist.
Hinweise :
• Nach Beendigung des Programms, werden die verschiedenen
Laufwerksdaten angegeben. Wenn Sie zum Beispiel „USB HDD“
auswählen, wird das Symbol für die Festplatte im Verwaltungsfenster
angezeigt. Wenn Sie „USB ZIP“ auswählen, wird das Symbol für das
Austauschmedium im Verwaltungsfenster angezeigt. Der Unterschied
wird aber nur von den Betriebssystemen ab Windows 2000 erkannt.
In Windows 98 wird nur „Austauschmedium“ angegeben.
• Nach Beendigung des Programms, enthält das Gerät die für
einen Systemstart notwendigen Dateien. Bitte entfernen Sie aus
diesem Bereich keine Dateien. Sie könnten dann mit dem Laufwerk
keinen fehlerfreien Start Ihres Computers mehr ausführen.
• Wenn Sie das Belkin USB Flash-Laufwerk nutzen möchten, um
den Computer zu starten, wählen Sie bitte die entsprechenden
Einstellungen im BIOS aus. Weitere Informationen hierzu finden
Sie im Benutzerhandbuch für die Platine (Motherboard).
• Weil der Aufbau des BIOS bei jeder Platine unterschiedlich ist, können wir
nicht garantieren, dass Startfunktion bei jedem Computer funktioniert.
• Seit Award die Spezifikation für ihr BIOS im März 2002 geändert haben,
sind auch die Startvorgänge verändert. Wir können nicht erkennen, ob es
sich um ein altes oder neues BIOS handelt. Diese Startfunktion eignet sich
bei Verwendung der Option USB ZIP nicht für das neue BIOS von Award.
sect ion
1
2
3
4
5
6
7
8
9
10
11
Page 98

sect ion
Wiederherstellungsdiskette
27
1
2
3
4
5
6
7
8
9
10
11
Wenn Ihr Gerät beschädigt ist, können Sie dieses Hilfsprogramm verwenden, um
es wiederherzustellen. Das Programm prüft, ob zu viele Blöcke beschädigt sind
und versucht, diese zu reparieren.
1 Klicken Sie doppelt auf die Verknüpfung „Recover Disk“ (Wiederherstellungsdis
kette) im Startmenü. Das folgende Fenster wird angezeigt.
Warnung
: Der Befehl „Recover Disk“ (Wiederherstellungsdiskette) löscht alle
Daten oder Dateien auf dem Belkin USB Flash-Laufwerk. Dieser
Vorgang ist nicht rückgängig zu machen. Sie sollten vorher eine
Sicherheitskopie aller wichtigen Daten oder Dateien anlegen.
2 Es gibt zwei Schritte für die Funktion, eine heißt “scan bad block”
(Beschädigten Block scannen), die andere “Read/Write testing for each block”
(Jeden Block prüfen). Es nimmt viel Zeit in Anspruch, jeden Block zu scannen.
Das Scannen von 16 MB dauert etwa 1,5 Minuten.
3 Nachdem Sie auf die Schaltfläche „Start“ geklickt haben, wird der Wiederher-
stellungsvorgang gestartet.
4 Nach Ausführung des Befehls, wird in der Mitte die vollständige Mitteilung oder
anderswo eine Fehlermeldung angegeben.
Page 99

sect ion
Problem 1:
Der Schreibschutz-Schalter funktioniert unter Mac OS 10.1.4 nicht online.
Warnung : Wenn Sie den Schreibschutz online unter Mac OS
10.1.4 betätigen, führt dies zu einem Systemabsturz
beim Schreiben oder Lesen.
Umgehung des Problems:
Entfernen Sie das Gerät, wenn Sie unter Mac OS 10.1.4 den Schreibschutz
aktivieren möchten. Das Problem wird in naher Zukunft gelöst werden.
Aufgrund der Eigenschaften dieses Betriebssystems empfehlen wir jedoch,
den Schreibschutz nicht online zu bedienen.
Problem 2:
Windows XP, Windows 2000, Windows 98 oder Windows ME: Bei Verwendung
von VIA USB 2.0 Host-Controller und Ausführung der Größenänderung, startet
das Betriebssystem neu oder die Größenänderung funktioniert nicht.
Lösung A: Windows XP :
Aktualisieren Sie den USB 2.0-Treiber über „Microsoft
Windows Update” (Normalerweise wird Windows XP
automatisch aktualisiert).
Lösung B: Windows 2000 :
Wenn Ihr Betriebssystem eine USB 2.0 Host-ControllerPCI-Karte oder einen Platinenchip zum ersten Mal
erkennt, zeigt es die neue Hardware an und fragt
um den Bereich, in dem sich der Treiber befindet.
Wählen sie die Aktualisierungsfunktion über „Microsoft
Windows Update” über das Internet aus. Oder
installieren Sie den VIA-Treiber vorher und führen Sie
die Aktualisierung manuell durch, wie im Folgenden
beschrieben:
Bekannte Probleme
28
1
2
3
4
5
6
7
8
9
10
11
Page 100

29
sect ion
Klicken Sie mit der rechten Maustaste auf das Symbol Arbeitsplatz, und
wählen Sie Eigenschaften.
Klicken Sie auf der Seite Hardware auf Geräte-Manager.
Wählen Sie unter Universal Serial Bus controllers den Eintrag VIA PCI
to USB Enhanced Host Controller aus und klicken Sie mit der rechten
Maustaste auf Eigenschaften
Bekannte Probleme
1
2
3
4
5
6
7
8
9
10
11
 Loading...