

Page 1

F5D
9230-4
Share your broadband Internet connection
Wireless G Plus MIMO
Page 2

Advantages of a Wireless Network
. . . . . . . . . . . . . . . . . . . . . . . . . . . . . . . . . .
. . . . . . . . . . . . . . . . . . . . . . . . . . . . . . . . .
. . . . . . . . . . . . . . . . . . . . . . . . . . . . . . .
. . . . . . . . . . . . . . . . . . . . . . . . . . . . . . . .
. . . . . . . . . .
Viewing the DHCP Client List Page
. . . . . . . . . . . . . . . . . . . . . . . . . . . . .
. . . . . . . . . . . . . . . . . . . . . . . . . . . . . . . . . . . . .
. . . . . . . . . . . . . . . . . . . . . . . . .
Page 3

1
secti o n
Thank you for p urchasing the B el ki n Wireless G Pl us M IMO Router
– you’ll no l on ge r need a dedicated “c om pu te r room”—now
– Belkin’s Easy Installatio n Wi za rd makes
– set up and ac ce ss printers, computer s, a nd other
– the wide ra ng e of Belkin networking products let
– you can spa re the expense an d ha ss le of
Widesprea d industry acceptance
– choose from a wide range of
2
3
4
5
6
7
8
9
10
11
Page 4

Introduction
Your wireless connection w il l be stronger t he c lo ser your computer i s
While some o f th e items listed below ca n affect networ k
To achiev e th e best wirele ss n et work coverage for y ou r “w ireless
This m ay mean placing t he Route r (or a ccess po in t) on a n
Page 5

Introduction
Avo id p la cing your Router (or ac ce ss point) near device s th at may
secti o n
1
2
3
4
5
6
7
8
9
10
11
Page 6

Introduction
These guideli ne s sh ould allow you to c ov er t he maximum possible
A second alte rnative is t o change your computer’s power
Page 7

Introduction
or call Belk in Technical
310-898-1100 ext. 2263
secti o n
1
2
3
4
5
6
7
8
9
10
11
Page 8

Computers
The Ro ut er support s a var ie ty of networking en vi ronments including
95, 98, Me , NT
TCP/IP (the s ta nd ard language of t he Inter ne t).
You can s et u p the Router’s a dvanced functions eas il y th rough your
Your Rout er e mp loys Network Address Translation (NAT) to share the
Your Rout er i s equipped with a firewall that will p rotect your netwo rk
Page 9

1
secti o n
The Router ha s a bu ilt-in, four-port ne tw or k switch to allow y ou r wi red
The Easy Ins ta ll Wizard ta ke s the guesswork out of setting up yo ur
Ea sy Install Wizard software is compatible w it h Wind ow s 98SE ,
2
3
4
5
6
7
8
9
10
11
Page 10

Product Overview
Page 11

1
secti o n
9 8S E, Me, 2000, or XP, or a Mac
9 .x or O S X
2
3
4
5
6
7
8
9
10
11
Page 12
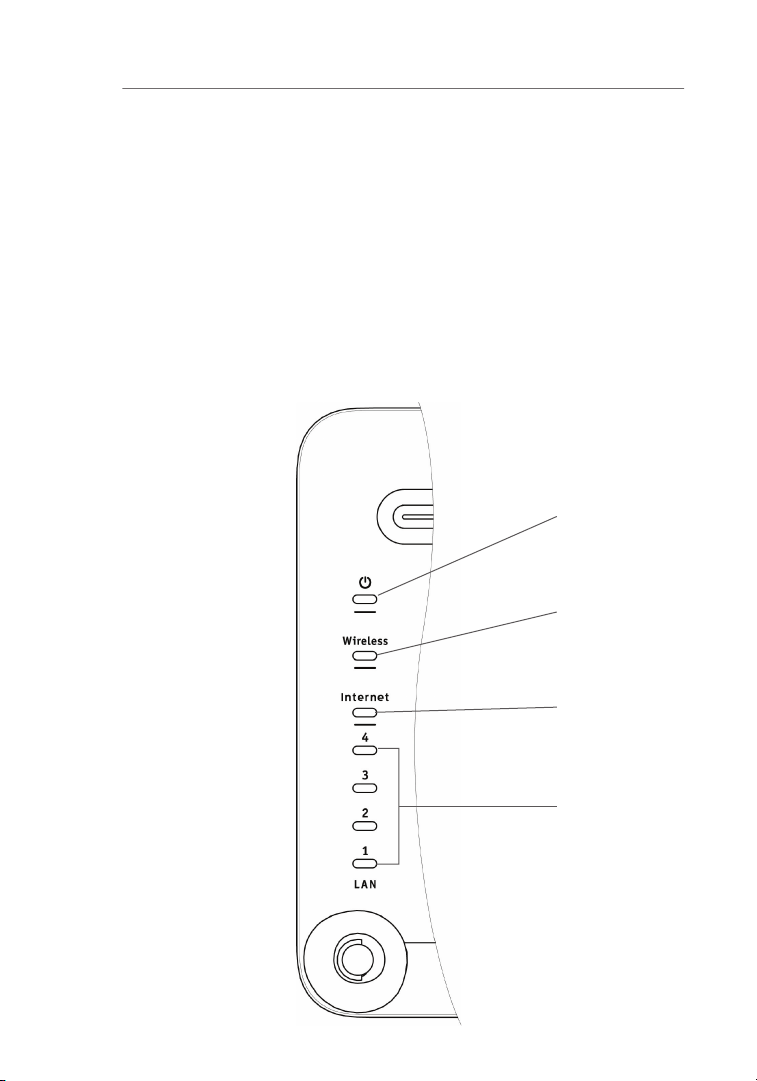
Knowing your Router
The Router ha s be en designed to be pla ce d on a desktop. All of th e
The Router ha s be en designed to be pla ce d on a desktop. All of th e
Page 13
Knowing your Router
This LED ligh ts i n GREEN to indicate t ha t yo ur modem is
These LEDs are labeled 1–4 and c or respond to th e nu mb ered
AMBER means a 1 00 Ba se-T device is conn ec te d. When
1
2
3
4
5
6
7
8
9
10
secti o n
11
Page 14
Knowing your Router
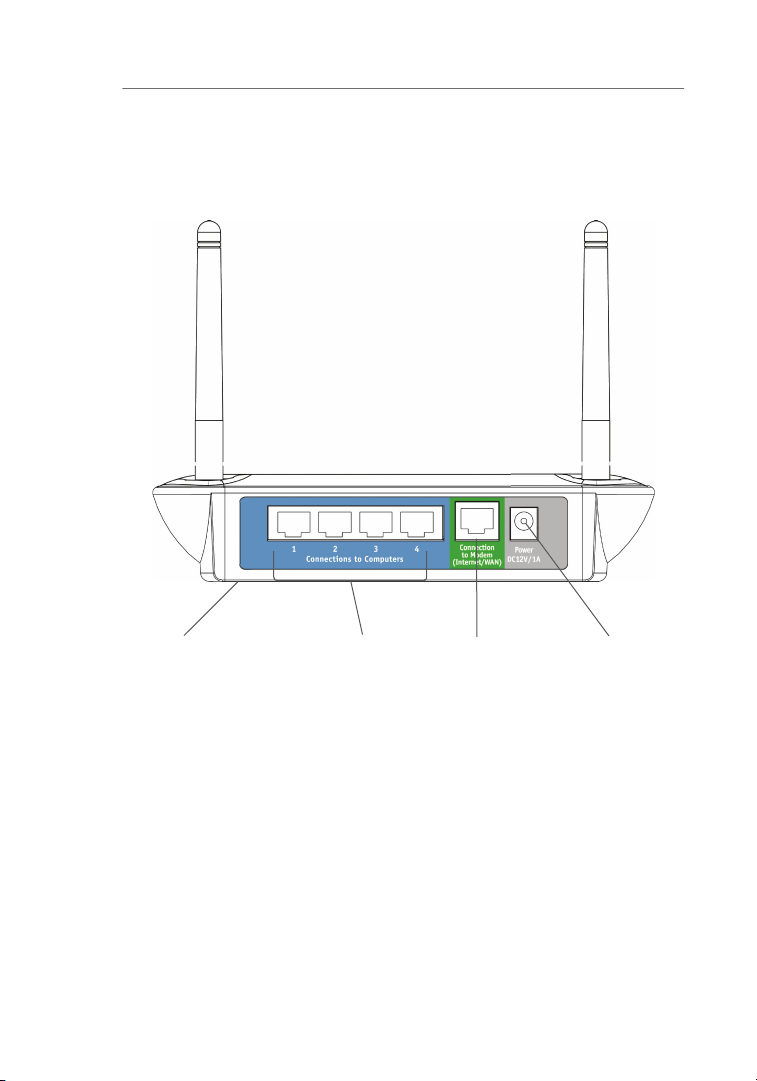
These ports a re RJ45, 10/100 a ut o- ne gotiation, auto-upl in ki ng
Page 15

Knowing your Router
This port is fo r co nnection to your ca bl e or DSL modem. Use the
The “Reset” b ut to n is used in rare c ases when the Route r ma y
(b) Restoring the Factory Defaults
1
2
3
4
5
6
7
8
9
10
secti o n
11
Page 16
Verify the contents of your box. You should have the following:
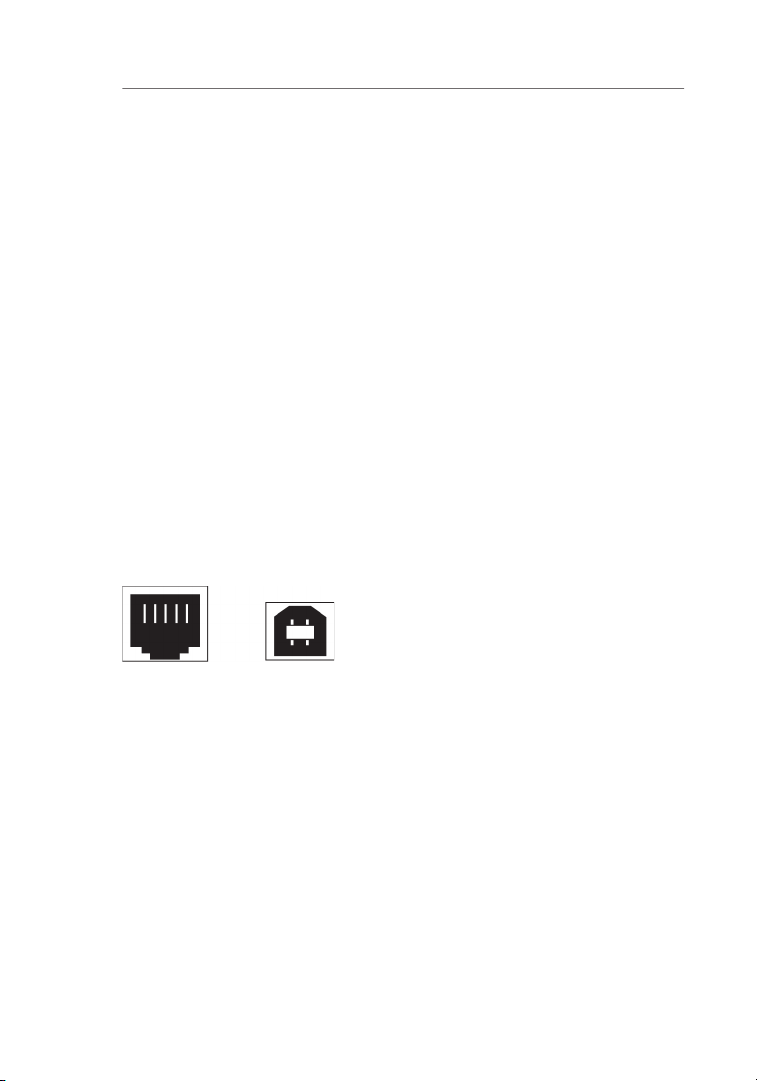
Your cable or DSL modem must be equipped with an RJ45 Ethernet po rt .
Ethernet USB
Page 17
1
secti o n
Run the Easy I ns ta ll Wizard f rom the computer
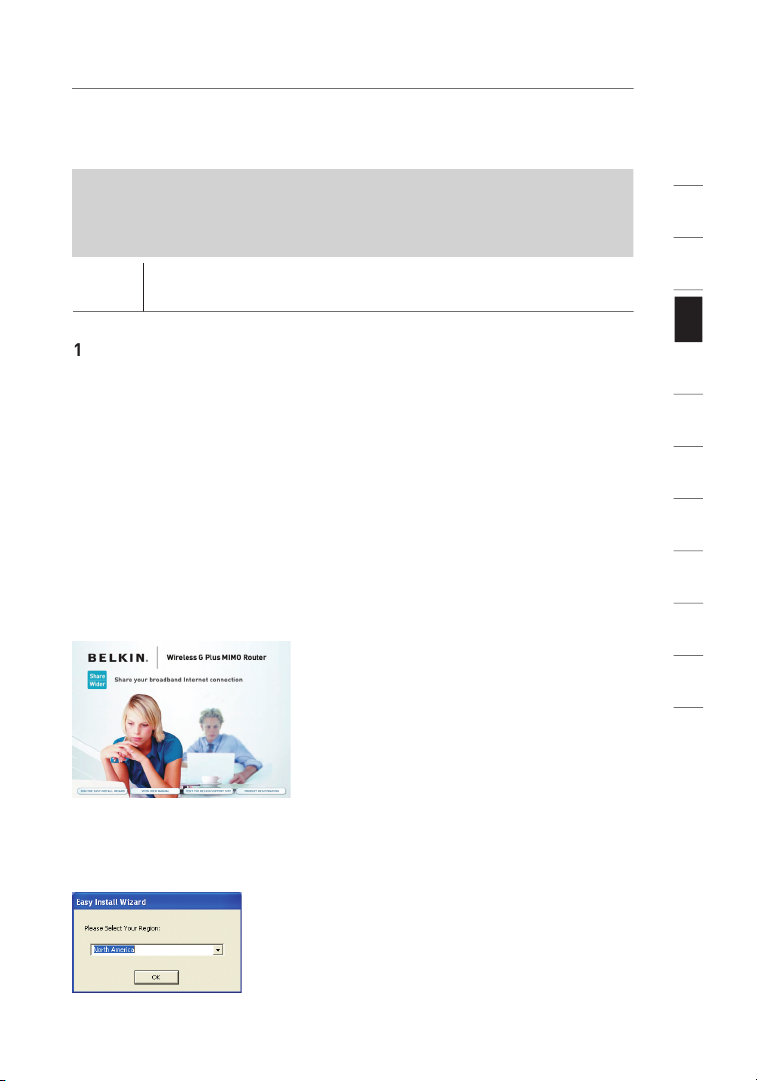
Run the Easy Install Wizard Software
Shut down any programs that are running on your computer at
Make sure you have the following items at the computer that is now
THE ROUTER AT THIS TIME.
Turn off any firewall or Internet-connection-sharing software on
Windows User:
Select your region from the drop-down box shown on the screen.
2
3
4
5
6
7
8
9
10
11
Page 18
Connecting and Configuring your Router
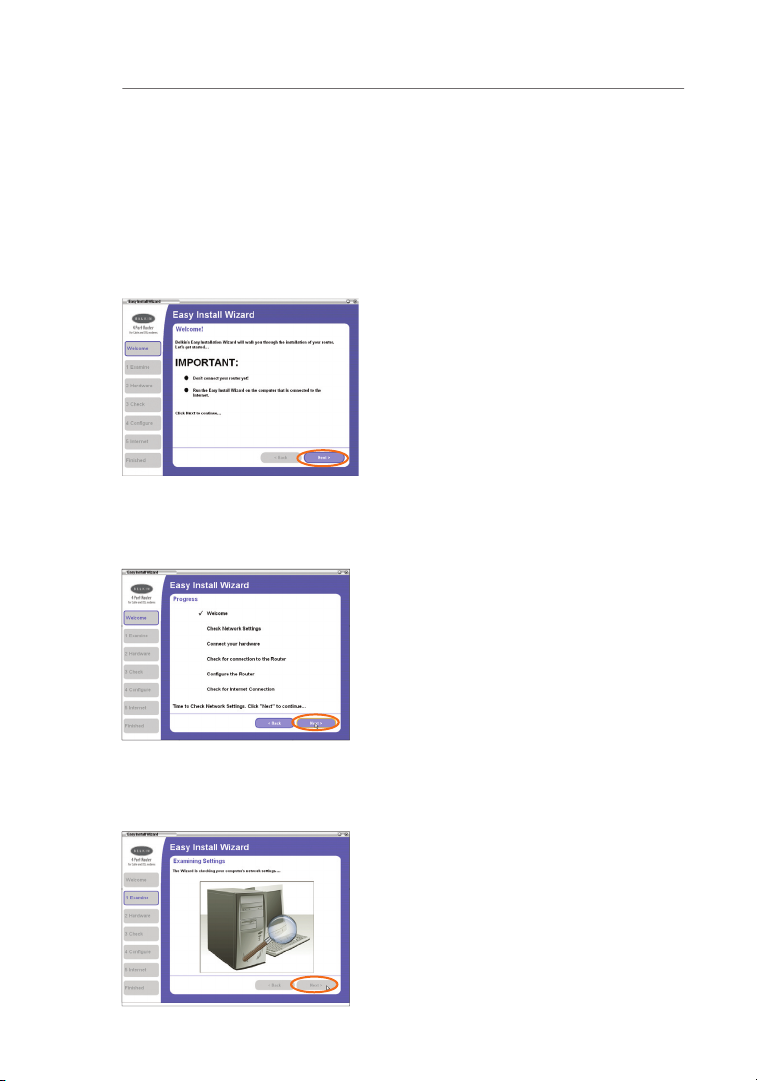
Follow the Easy Install Wizard to complete the installation.
After you ins er t th e CD into
The Wizard will now examine yo ur
Page 19
Connecting and Configuring your Router
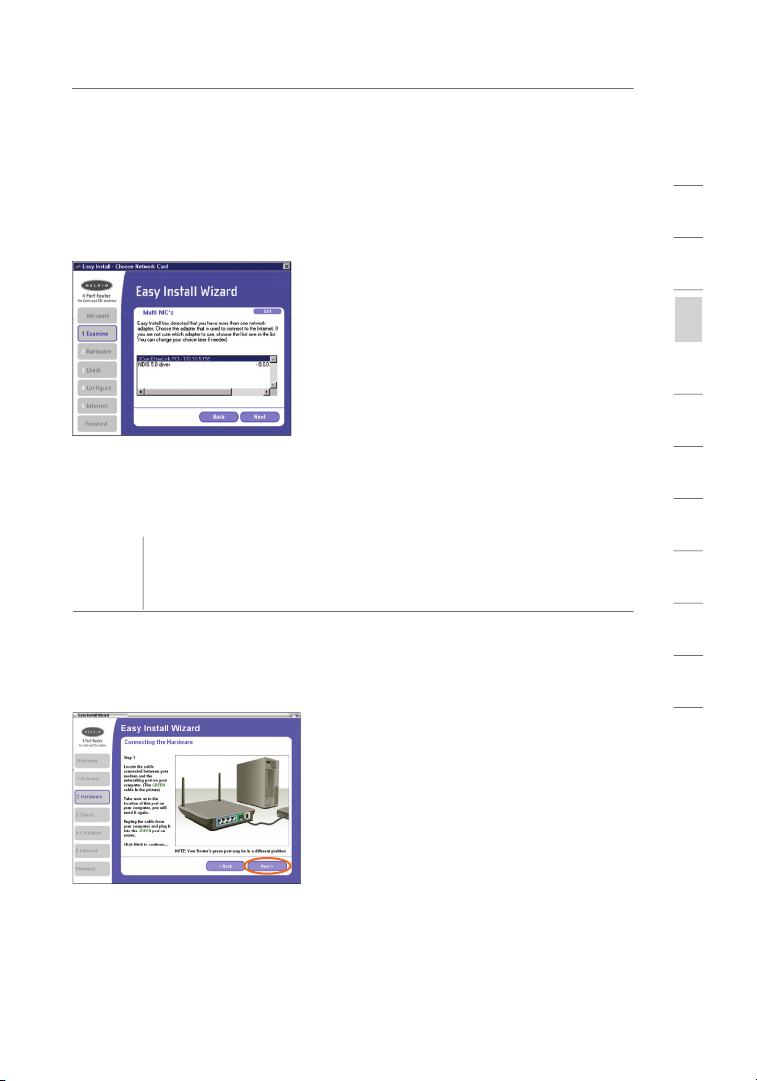
This scre en will appear ONLY i f you have more t ha n one network
Hardware Setup – Connect the Router to your
The Wizard will walk you through connecting you r Ro ut er to your
This step instructs you to locate
1
2
3
4
5
6
7
8
9
10
secti o n
11
Page 20
Connecting and Configuring your Router
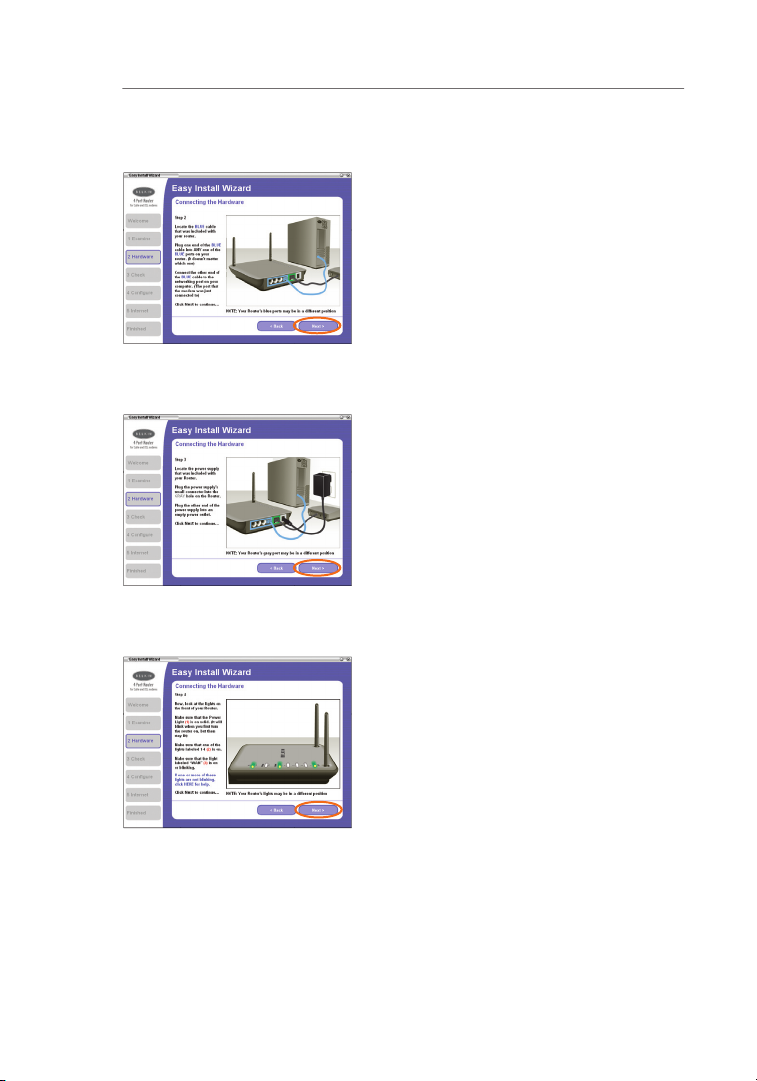
This step instructs you to locate
This step instructs you to locate
This step instructs you to look at
Page 21

Connecting and Configuring your Router
Checking the Connection
Once you have completed
User Name and Password Needed
Your user name and password is
1
2
3
4
5
6
7
8
9
10
secti o n
11
Page 22
Connecting and Configuring your Router
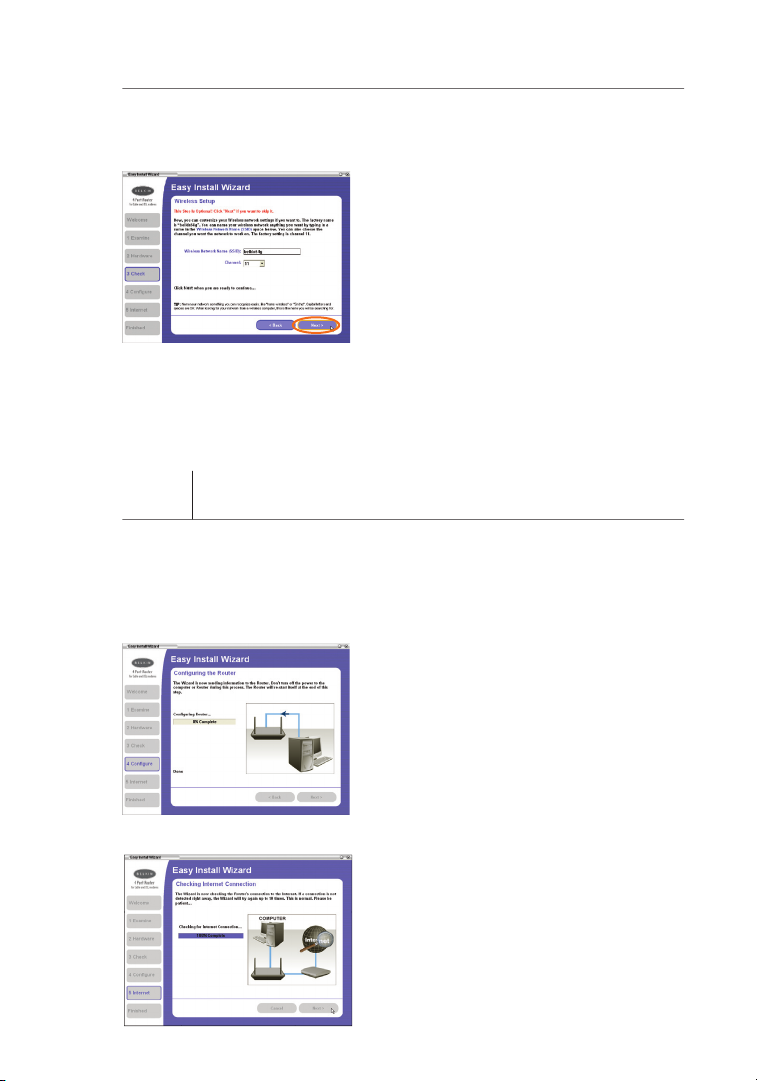
Thi s St ep Is Optional. Click
Usi ng t hi s step, you can
Configuring the Router
The Wizard will now transfer a ll o f the configuration i nf or ma tion to the
The W iz ard will now ch ec k for
Page 23
Connecting and Configuring your Router
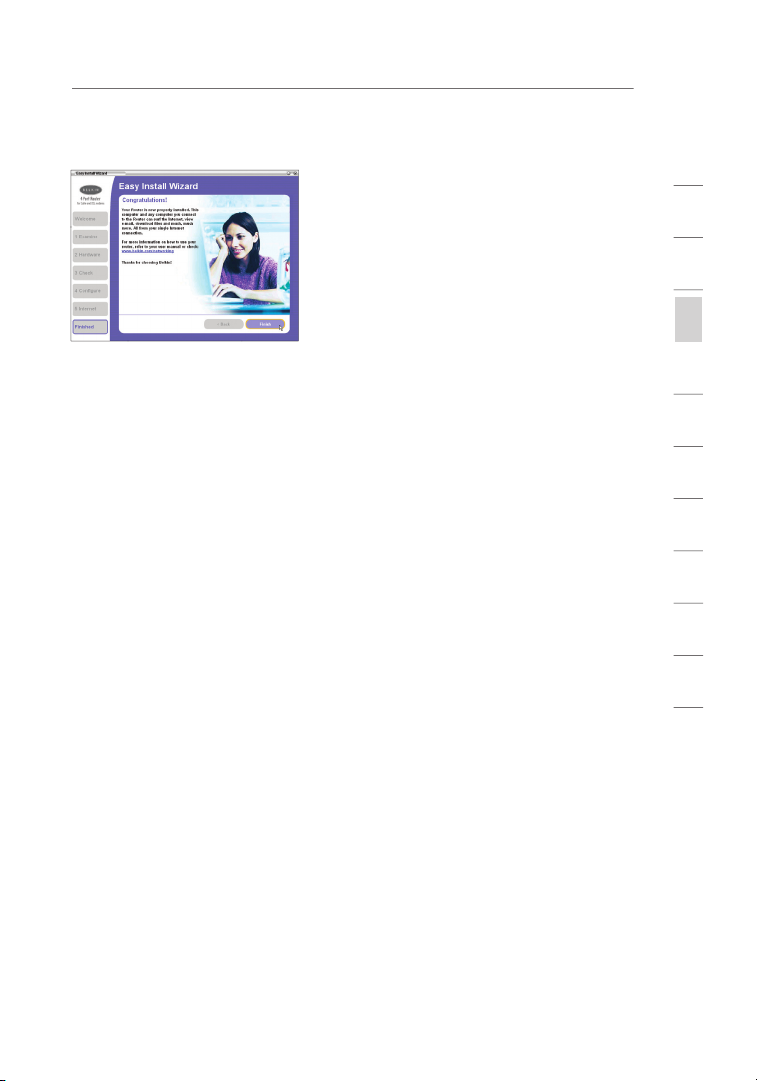
Whe n th e Intern et c onnection
Your Rout er i s now connected to th e In te rnet . No w you can begin
You have fi ni sh ed installing your ne w Be lkin Router.
You are ready to s et u p the other computers i n yo ur home. You can
1
2
3
4
5
6
7
8
9
10
secti o n
11
Page 24
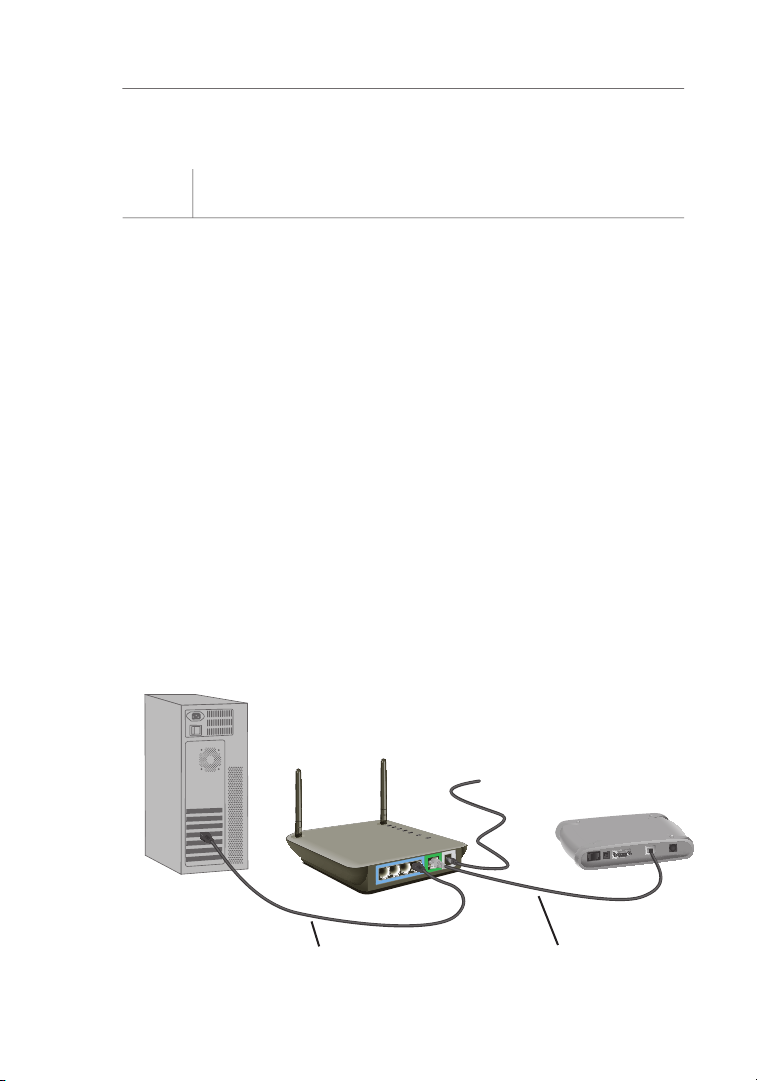
Connecting your Gateway Router
Turn off the power to your modem by unplugging the power supply
Locate the network cable that is connected between your modem
Plug the loose end of the cable you just unplugged into the port on
Connect a new network cable (not included) from the back of the
Turn your cable or DSL modem on by reconnecting the power
Before plugging the power cord into the Router, plug the cord into
was originally
Page 25

1
secti o n
Verify that your modem is connected to the Router by checking
Verify that your computer is connected properly to the Router
Set your Computer’s Network Settings to Work
with a DHCP Server
Configuring the Router Using the Web-Based
Advanced User I nt er face. In your bro wser, type “192.168.2.1” (d o
2
3
4
5
6
7
8
9
10
11
Page 26
Alternate Setup Method
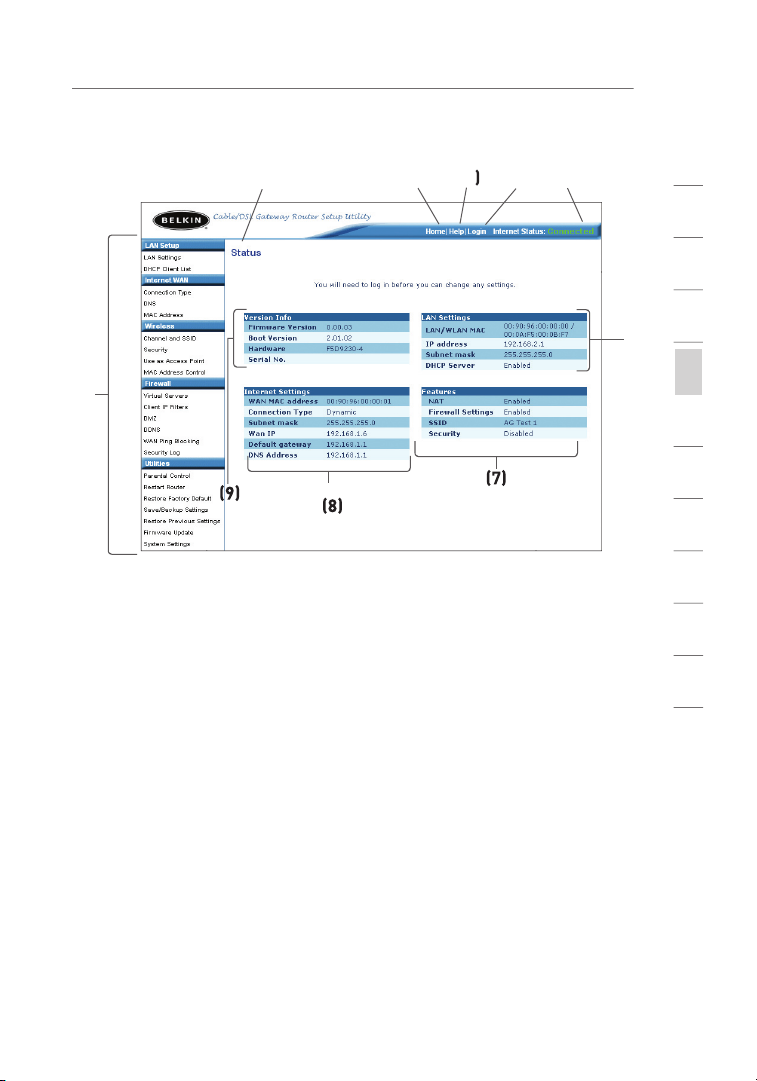
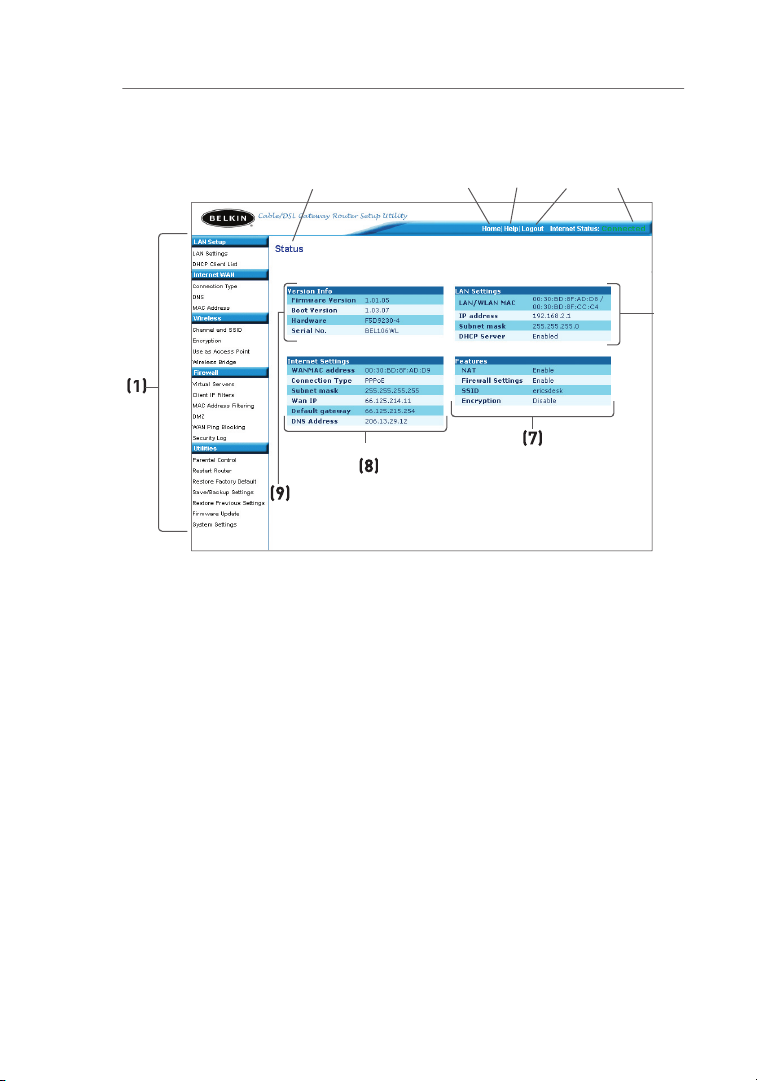
You will se e th e Router’s h om e page in your browser window. The
The home page i s th e first page you wi ll s ee when you access the
Advanced User I nt er face (UI). The home p ag e shows you a quick vie w
Page 27
Alternate Setup Method
You can g o di rectly to any o f th e Router’s a dv anced UI pages by
The home butt on i s available in every pa ge o f the UI. Pre ss in g this
This indicato r is v isible in all pages o f th e Router, indicating
1
2
3
4
secti o n
5
6
7
8
9
10
11
Page 28
Alternate Setup Method
This button e na bl es you to log in and ou t of the Router with the
The “Help” bu tt on g ives you access to th e Ro uter’s hel p pa ge s.
Page 29

Alternate Setup Method
The page you are on can be ide nt if ie d by this name. Thi s ma nu al
1
2
3
4
secti o n
5
6
7
8
9
10
11
Page 30
Alternate Setup Method
Configuring your Router for Connection to your
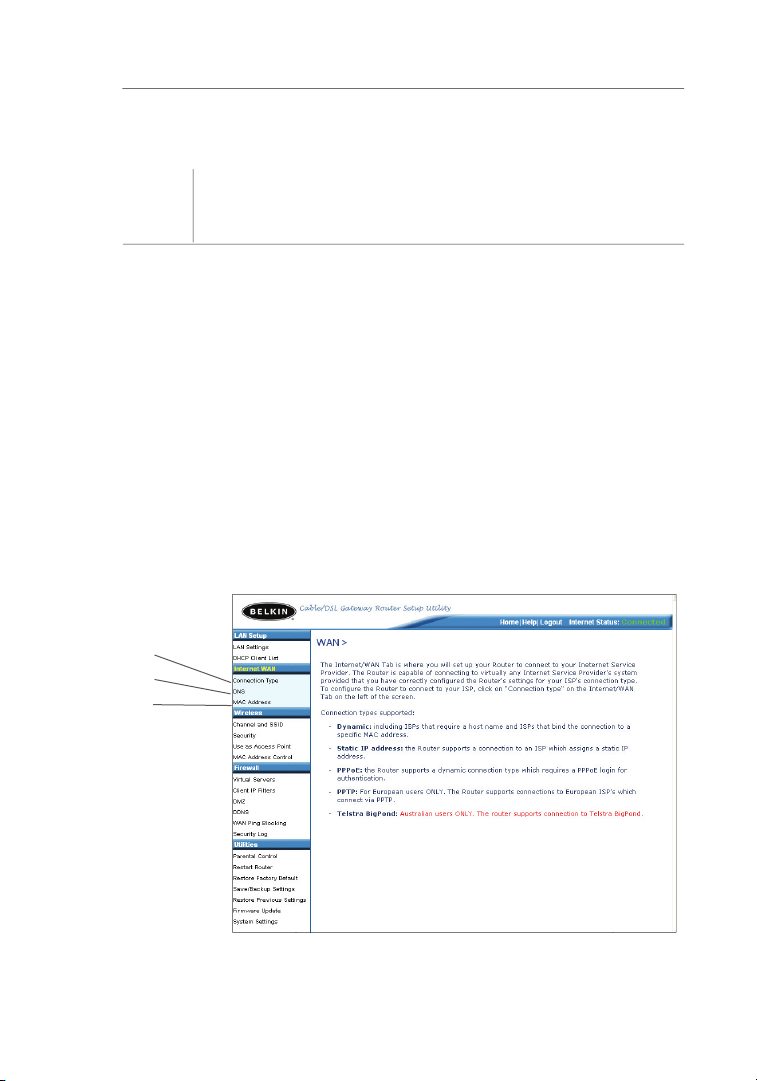
The “Internet/WAN” tab is where you will set up your Ro ut er to
Type”
on the left si de o f the scree n. S el ect the connection ty pe y ou
allows you
will let you c lo ne your computer’s MAC
Page 31

Alternate Setup Method
next to your c on ne ction type and then c li ck ing “Next”
1
2
3
4
secti o n
5
6
7
8
9
10
11
Page 32

Alternate Setup Method
A dynamic con ne ct io n type is the most co mm on connection type
This space is p rovided to ente r a ho st name that needs to b e
Page 33

Alternate Setup Method
A static IP a dd ress connection t yp e is less common than o th er
1
2
3
4
secti o n
5
6
7
8
9
10
11
Page 34

Alternate Setup Method
Your connection type is PPPoE if:
Your ISP gave you a user name and password which is required to
Your ISP gave you software such as WinPOET or Enternet300 that
You have to double-click on a desktop Icon other than your browser
Page 35

Alternate Setup Method
This space is p rovided to type i n yo ur User name that w as
Type in y ou r pa ssword and re-type it into t he “ Re type Password ”
A Service nam e is r arely required by an I SP. If you a re not sure i f
The MTU setti ng s ho uld never be change d un le ss your ISP gives
The Disconnec t fe at ure is used t o au tomatically disconn ec t th e
This option s ho ul d be used if you pay fo r yo ur Inter ne t service by
1
2
3
4
secti o n
5
6
7
8
9
10
11
Page 36

Alternate Setup Method
Type in y ou r pa ssword and retype it into th e “R et ype Password”
Page 37

Alternate Setup Method
The Disconnec t fe at ure is used t o au tomatically disconn ec t th e
1
2
3
4
secti o n
5
6
7
8
9
10
11
Page 38

Alternate Setup Method
BigPond User
Your user n am e and password are pro vi de d to you by Telst ra B ig Pond.
will automatically fill in yo ur l ogin server IP address. If your
and type in th e
Page 39

Alternate Setup Method
Type in y ou r pa ssword and retype it into th e “R et ype Password”
A “Domain Nam e Se rv er” is a server loc at ed o n the Internet that
should be ch ec ke d if your ISP did not g iv e you a specific DNS
1
2
3
4
secti o n
5
6
7
8
9
10
11
Page 40

Alternate Setup Method
All network c om po ne nts including cards, adapters, and routers, have
Page 41

Alternate Setup Method
To clone yo ur M AC address, m ak e sure that y ou a re using the
You can m an ua ll y enter one in the “M AC A ddress” pag e. Type in a
(2)
and click “A pp ly C hanges”
to save the ch an ge s. The Router’s WAN MAC a dd ress will now b e
1
2
3
4
secti o n
5
6
7
8
9
10
11
Page 42

Advanced User I nt er face. In your bro wser, type “192.168.2.1” (d o
You will se e th e Router’s h om e page in your browser window.
Viewing the LAN Settings
will take yo u to t he LAN tab’s
To view t he s et tings or make chang es t o any of the LAN settin gs , cl ick
or to view t he l is t of connected comp ut er s, click
Page 43

1
secti o n
All settings fo r th e intern al LAN setup of the R ou te r can be viewed and
The “IP address” is the internal IP ad dress of the Rout er. Th e
The IP address you choose shou ld b e a non-routa bl e IP. Exampl es
There i s no need to change the s ub ne t mask. This is a u ni qu e,
2
3
4
5
6
7
8
9
10
11
Page 44

Using the Web-Based Advanced User Interface
The DHCP serv er f un ction makes setting u p a network very easy
The range of IP a dd resses set as id e for dynamic assignm en t
The length of t im e the DHCP server wil l reserve the IP ad dress
The default s et ti ng is “Belkin”. You c an set a local domain n am e
You can n am e th e network anything yo u wa nt such as
Page 45

Using the Web-Based Advanced User Interface
Viewing the DHCP Client List Page
You can v ie w a list of the compute rs ( kn own as clients), whic h are
of
(if the comp ut er h as been assigned
of the compu te r’s network in te rf ace
button will up da te the list. If
10
1
2
3
4
5
secti o n
6
7
8
9
11
Page 46

Using the Web-Based Advanced User Interface
The “Wire less” tab lets you ma ke c ha nges to the wirel ess network
To identi fy y ou r wireless ne tw or k, a name called th e SS ID (Service
and click “A pp ly C hanges”
Page 47

Using the Web-Based Advanced User Interface
This switch a ll ow s you to set the Rout er ’s wirel es s modes. There are
This mode wil l tu rn O FF t he Router’s Ac ce ss Point, so no wireless
10
1
2
3
4
5
secti o n
6
7
8
9
11
Page 48

Using the Web-Based Advanced User Interface
There a re a number o f op er ating channels you ca n ch oo se from. In t he
Page 49

Using the Web-Based Advanced User Interface
For security, you can choo se n ot to broadca st y ou r
VoIP on yo ur n et work, the QoS feature should be enable d.
10
1
2
3
4
5
secti o n
6
7
8
9
11
Page 50

Using the Web-Based Advanced User Interface
There a re two acknow le dg em ent (ACK) modes that ca n be employed
Allows you to t ur n ON o r OF F QoS.
Your Rout er i s equipped with the l at es t security standard called WPA
Page 51

Using the Web-Based Advanced User Interface
To use W PA security, your wire le ss network card s mu st be
Your Rout er s up ports WPA- PS K (no server). WPA-PSK uses what is
To use W PA security, your wire le ss network card s mu st be
From the “Security Mode” drop-down menu, select “WPA-PSK
For “Encryption Technique”, select “TKIP” or “AES”. This setting will
Enter your pre-shared key. This can be from eight to 63 characters
Click “Apply Changes” to finish. You must now set all clients to
10
1
2
3
4
5
secti o n
6
7
8
9
11
Page 52

Using the Web-Based Advanced User Interface
The “Passphr as e” o ption will not oper at e wi th
Apple
AirPort
Select “128-bit WEP” or “64-bit WEP” from the drop-down menu.
After selecting your WEP encryption mode, you can enter you WEP
Encryption in the Router is now set. Each of your computers on
Page 53

Using the Web-Based Advanced User Interface
A hexadecimal k ey i s a mixture o f nu mbers and letters f rom A–F
AF 0F 4B C3 D 4
Original App le A ir Port produc ts s up port 64-bit
10
1
2
3
4
5
secti o n
6
7
8
9
11
Page 54

Using the Web-Based Advanced User Interface
This advance d fe at ure should be e mp loyed by advanced
Enable the AP mode my selecting “Enable” in the “Use as Access
Set your IP settings to match your network. Click “Apply Changes”.
Connect a cable from the WAN port on the Router to your
The Router is n ow a cting as an access po in t. To access the Ro ut er
Page 55

Using the Web-Based Advanced User Interface
The MAC address filter is a po we rf ul security feature that allows you
This list ap pl ie s only to wirel es s computers. This lis t ca n be
Select the “Allow” radio button
to begin setting up a list of
Next, in the “MAC Address” field that is blank
Continue to do this until all of the computers you want to add have
Click “Apply Changes”
to finish.
10
1
2
3
4
5
secti o n
6
7
8
9
11
Page 56

Using the Web-Based Advanced User Interface
The “Deny Acc es s” l ist lets you specif y co mp uters that you DO NOT
Select the “Deny” radio button
(2)
to begin setting up a list of
Next, in the “MAC Address” field that is blank
Continue to do this until all of the computers you want to deny
Click “Apply Changes”
to finish.
Page 57

Using the Web-Based Advanced User Interface
Your Rout er i s equipped with a firewall that will p rotect your netwo rk
The firew all also masks common p or ts that are f requently used to
10
1
2
3
4
5
secti o n
6
7
8
9
11
Page 58

Using the Web-Based Advanced User Interface
The Vir tu al Servers function w il l al low you to ro ut e extern al (Intern et )
To manual ly e nt er settings, enter th e IP address in t he s pace provid ed
Page 59

Using the Web-Based Advanced User Interface
The Router ca n be c onfigured t o restrict access t o th e Intern et,
To re strict Internet access to a s in gl e computer for example, e nt er the
on the
Click “Apply C ha ng es”. The computer a t
10
1
2
3
4
5
secti o n
6
7
8
9
11
Page 60

Using the Web-Based Advanced User Interface
The DMZ featu re allows you to sp ec if y one computer on y ou r ne twork
The computer in t he DMZ is NOT pro te cted from h ac ke r attacks.
To put a co mp ut er in the DMZ, ente r th e last digits of its IP a dd ress in
Page 61

Using the Web-Based Advanced User Interface
The Dynamic D NS s er vice allows you to al ia s a dynamic IP address
The Dynamic D NS SM s ervice is ideal for a h om e website, file serve r, or
To re gister free f or y our Dynamic DNS host na me , please visit
You must register with Dyn DN S. org’s free up da te s ervice before
Enter your DynDNS.org user name in the “User Name” field
Enter your DynDNS.org password in the “Password” field
(2).
Enter the DynDNS.org domain name you set up with DynDNS.org in
Click “Update Dynamic DNS” to update your IP address.
10
1
2
3
4
5
secti o n
6
7
8
9
11
Page 62

Using the Web-Based Advanced User Interface
To turn off t he ping respo ns e, s elect “Block ICMP P in g”
and click
(1)
Page 63

Using the Web-Based Advanced User Interface
The “Utilitie s” s creen lets yo u ma na ge different parameters of t he
10
1
2
3
4
5
secti o n
6
7
8
9
11
Page 64

Using the Web-Based Advanced User Interface
delete any o f yo ur configuration sett in gs .
Click the “Restart
The following message
The following message
A 60-second countdown will appear on the screen. When the
Restarting the Router to Restore Normal Operation
Page 65

Using the Web-Based Advanced User Interface
Click the “Restore
The following message
The following message
A 60-second countdown will appear on the screen. When the
10
1
2
3
4
5
secti o n
6
7
8
9
11
Page 66

Using the Web-Based Advanced User Interface
You can s av e yo ur current co nf ig uration by using th is f ea ture. Savin g
Click “Save”. A window
A window will open
You can name the file
Page 67

Using the Web-Based Advanced User Interface
When the save is
The configuration is
This option w il l al low you to re st ore a pre viously saved configu ra ti on .
Click “Browse”. A window will open that allows you to select the
10
1
2
3
4
5
secti o n
6
7
8
9
11
Page 68

Using the Web-Based Advanced User Interface
You will be asked if you want to continue. Click “OK”.
A reminder window will appear. It will take up to 60 seconds for the
A 60-second countdown will appear on the screen. When the
The Router home page should appear automatically. If not, type in
Page 69

Using the Web-Based Advanced User Interface
The “Check Fi rm wa re”
button allow s yo u to instantly check fo r a
10
1
2
3
4
5
secti o n
6
7
8
9
11
Page 70

Using the Web-Based Advanced User Interface
To download the new version of firmware, click “Download”.
A window will open that allows you to select the location where you
Page 71

Using the Web-Based Advanced User Interface
In the “Firmware
Browse to the firmware
When the save is complete, you will see the following window.
The download of t he firmware i s co mp lete. To update t he f irmware,
10
1
2
3
4
5
secti o n
6
7
8
9
11
Page 72

Using the Web-Based Advanced User Interface
The “Update Firmware”
just selected. Click
You will be asked if you
You will see one more message. This message tells you that the
A 60-second countdown will appear on the screen. When the
Page 73

Using the Web-Based Advanced User Interface
The “System S et ti ng s” page is where you can enter a new
The Router sh ip s wi th NO password en tered. If y ou w is h to add a
The login tim e- ou t option allows you t o se t the period of time th at y ou
Only one com pu te r can be logged into th e Ro uter’s adv an ce d
1
2
3
4
5
secti o n
6
7
8
9
10
11
Page 74

Using the Web-Based Advanced User Interface
The Router ke ep s ti me by connecting to a S im ple Network Time
Page 75

Using the Web-Based Advanced User Interface
This advance d fe at ure should be e mp loyed by advanced
ADMINISTRATOR PASS WO RD
This usually require s op en ing TCP and UDP ports , an d in some
1
2
3
4
5
secti o n
6
7
8
9
10
11
Page 76

This innovati on p rovides the R ou te r with the built-in c ap ab il ity to
Using the Web-Based Advanced User Interface
Page 77

1
secti o n
Pull down the Apple menu. Select “Control Panels” and
You will see the TCP/IP control panel. Select “Ethernet Built-In” or
Next to “Configure”
If not already set, at
If “Use the following IP address”
is selected, your Router will
2
3
4
5
6
7
8
9
10
11
Page 78

Manually Configuring Network Settings
Click on the “System Preferences” icon.
Select “Network”
from the “System Preferences” menu.
Select “Built-in Ethernet”
next to “Show” in the Network menu.
(1)
(2)
(3)
(4)
Page 79

Manually Configuring Network Settings
Select the “TCP/IP” tab
to make sure that “Connect using PPPoE” is NOT selected. If it
If “Manually” is selected, your Router will need to be set up for a
If not already selected, select “Using DHCP” next to “Configure”
Your network settin gs a re now config ured for use with t he R outer.
1
2
3
4
5
6
secti o n
7
8
9
10
11
Page 80

Manually Configuring Network Settings
Click “Start”, “Settings”, then “Control Panel”.
Double-click on the “Network and dial-up connections” icon
Right-click on the “Local Area Connection” associated with your
In the “Local Area Connection Properties” window, click “Internet
If “Use the following IP address”
is selected, your Router will
If not already selected, select “Obtain an IP address automatically”
and “Obtain DNS server address automatically”
Your network settin gs a re now config ured for use with t he R outer.
(1)
(2)
(3)
Page 81

Manually Configuring Network Settings
Right-click on “My Network Neighborhood” and select “Properties”
Select “TCP/IP Settings” for your installed network adapter. You will
If “Specify and IP address” is selected, your Router will need to
Write the IP address and subnet mask from the “IP Address”
Click the “Gateway” tab
Click the “DNS
If not already selected,
1
2
3
4
5
6
secti o n
7
8
9
10
11
Page 82

Start your web browser. Select “Tools” then “Internet Options”.
In the “Inter net Options” screen, there are three selections: “Never
Under the “Internet Options” screen, click on “Connections” and
Page 83

1
secti o n
Make sure there are no check marks next to any of the displayed
Start Netscape. Click on “Edit” then “Preferences”.
In the “Preferences” window, click on “Advanced” then select
2
3
4
5
6
7
8
9
10
11
Page 84

There a re two types of A OL connections availabl e— ei th er AOL DSL
Access). This i s us ed along with an ex is ti ng broadband co nn ec tion,
C reate AO L scre en names for th e Router and fo r each
C on fi gu re t he Router for A OL for Broadband .
C on fi gu re y ou r comput er s with the ne w AOL s creen names
AOL DSL Users: Creating new AOL screen names
If your Router is currently connected to the network, remove it from
Then, log on to AOL as you normally do.
Log on to your AOL master account.
P er fo rm a keyword searc h on
Page 85

1
secti o n
I n the “ Keyword”
You will see t he
A window will ap pe ar
2
3
4
5
6
7
8
9
10
11
Page 86

How to Set Up your Network
T he “Choose a Sc reen
The “C hoose a
Page 87

How to Set Up your Network
T he “Select a Pa rental
T he “Confirm your
1
2
3
4
5
6
7
8
secti o n
9
10
11
Page 88

How to Set Up your Network
T he “AOL S creen
R ep ea t steps 1-11
Page 89

How to Set Up your Network
AOL DSL Users: Creating new AOL screen names
Open your web browser.
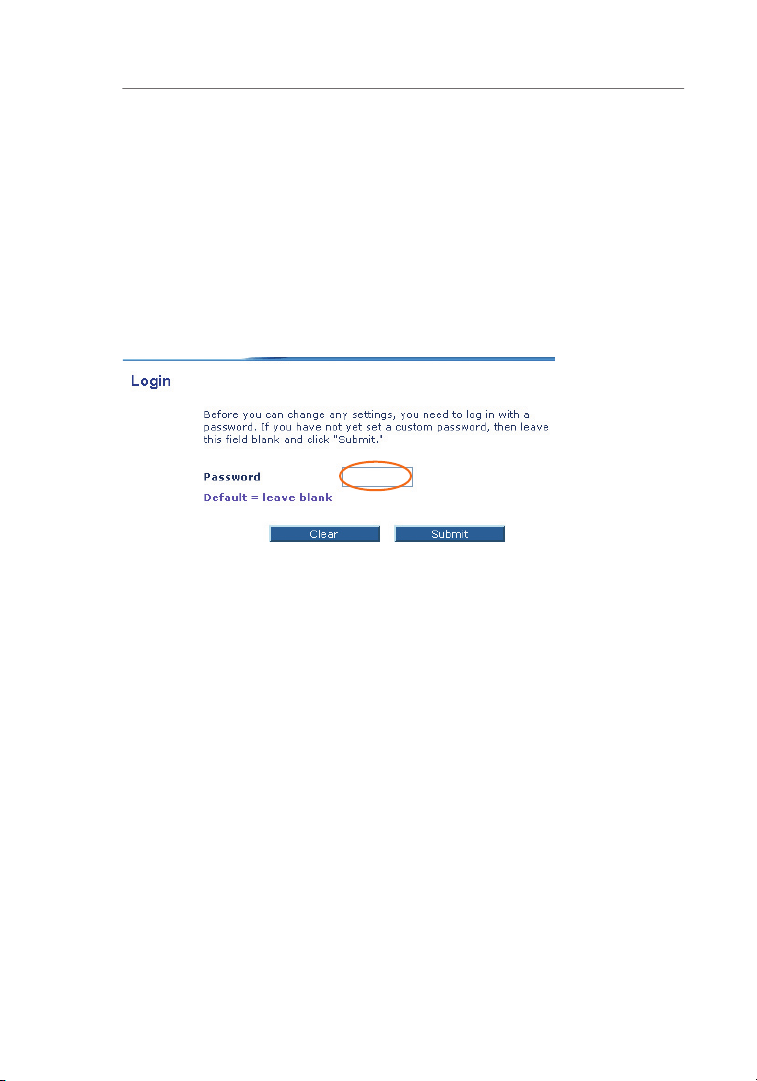
In the address bar of your browser, type http://192.168.2.1 and
You will see the Router’s login page. Leave the “Password” field
You will now see the PPPoE setup page.
1
2
3
4
5
6
7
8
secti o n
9
10
11
Page 90

How to Set Up your Network
In the “User Name” field, type in the screen name that you created
In the “Password” fields, type in the password you created for the
Leave the “Service Name” field blank. Do not change the
Click on “Apply Changes”.
Click on the “Home” link at the top of the screen. The Internet
Go to AOL DSL Users STEP 3.
Page 91

How to Set Up your Network
just created
This s tep cons is ts of i nstalling th e AOL software on e ac h computer
AOL’s t ec hn ical sup po rt departmen t.
1
2
3
4
5
Network Configuration
6
7
8
secti o n
9
10
11
Page 92

How to Set Up your Network
AOL Cable use rs n ee d to follow these d irections. If you h av e AOL DSL,
Creating new AOL screen names
Your AOL connections must be set to opera te on t he TCP/IP
TCP/IP before proceedin g.
L og on t o your AOL
P er fo rm a keyword
In the “K ey wo rd”
Page 93

How to Set Up your Network
You should see t he
A window will ap pe ar
T he “Choose a Sc reen
1
2
3
4
5
6
7
8
secti o n
9
10
11
Page 94

How to Set Up your Network
T he “Choose a
T he “Select a Pa rental
10.
T he “Confirm your
Page 95

How to Set Up your Network
11.
T he “AOL Screen
R ep ea t steps 1-11 fo r
names you just created
This step con si st s of installing the A OL s of tware on ea ch c om puter
1
2
3
4
5
6
7
8
secti o n
9
10
11
Page 96

Problem:
Ne xt , double-c li ck on t he CD-RO M drive that th e Easy In stallation
The Ea sy Insta ll Wizard should start wi th in a few se co nd s. If,
Page 97

1
secti o n
Unp lu g power to the Router for 10 seconds, a nd then plug th e
t he network (Ethernet) p or t on
o ne of t he LAN ports, l abeled
The co mputer s ho ul d NOT be conn ec te d to the po rt
Try sh ut ti ng down and restarting your com pu te r, then rerunning
2
3
4
5
6
7
8
9
10
11
Page 98

Troubleshooting
The Ea sy Insta ll Wizard completed installation, but m y web
Page 99

Troubleshooting
Technical Support.
Try sh ut ti ng down and restarting your com pu te r.
The Ea sy Insta ll Wizard completed installation, but m y web
You may ne ed to c on figure your Ro ut er to meet th e specific
1
2
3
4
5
6
7
8
9
secti o n
10
11
Page 100

Troubleshooting
The Ea sy Insta ll Wizard completed, but my web browser
 Loading...