

Page 1
ATA User Manual
Please insert your installation CD now and
then follow the on screen instructions
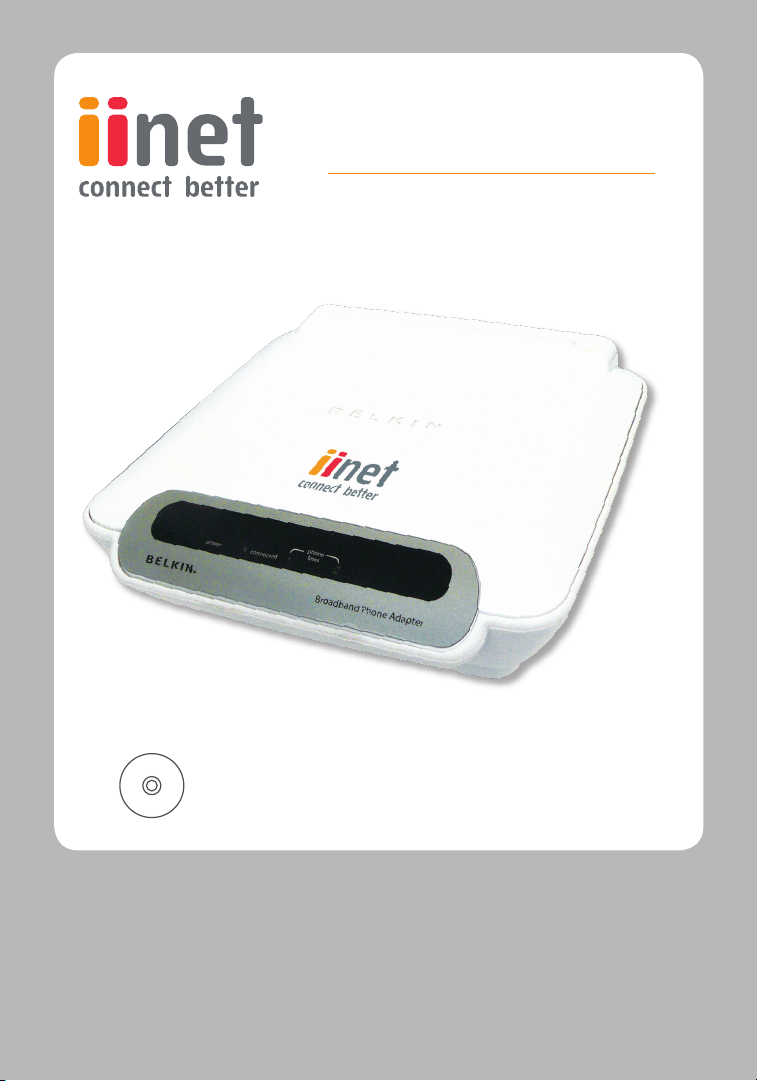
iiNet ATA Telephone Adapter
Setting up for ADSL and VoIP.
For model F1PG200ENau
F1P G20 0EN au
Page 2

Table of Contents
1
1 Introduction . . . . . . . . . . . . . . . . . . . . . . . . . . . . . . . . . . . . . . . 1
2 Product Overview . . . . . . . . . . . . . . . . . . . . . . . . . . . . . . . . . . . 2
Key Features. . . . . . . . . . . . . . . . . . . . . . . . . . . . . . . . . . . . . 2
3 Knowing your Phone Adapter . . . . . . . . . . . . . . . . . . . . . . . . . . 4
Package Contents . . . . . . . . . . . . . . . . . . . . . . . . . . . . . . . . 4
System Requirements . . . . . . . . . . . . . . . . . . . . . . . . . . . . . . 4
Product Specifications . . . . . . . . . . . . . . . . . . . . . . . . . . . . . 5
4 Connecting and Configuring your Phone Adapter . . . . . . . . . . . 8
Connecting your Phone Adapter
to a Gateway/Router. . . . . . . . . . . . . . . . . . . . . . . . . . . . . . . 9
5 Troubleshooting . . . . . . . . . . . . . . . . . . . . . . . . . . . . . . . . . . 10
6 Information . . . . . . . . . . . . . . . . . . . . . . . . . . . . . . . . . . . . . . 13
Page 3

1
Introduction
Thank you for purchasing the Phone Adapter. This User Manual provides
instructions for installing and configuring the Phone Adapter. In minutes,
you will be able to place phone calls to any location in the world
using your standard phone equipment and your broadband Internet
connection.
section
1
2
3
4
5
6
1
Page 4

3
Product Overview
Key Features
Voice over Internet Phone Dialing
This exciti ng, ne w te chnology allo ws y ou t o plac e ca lls over your
existin g broadband Int er ne t co nnection with the sam e qual ity and
functio nality as your standard t elephon e serv ice.
Compatible with both PCs and Mac® Computers
The Phone Adapt er sup ports a variety of networki ng e nviro nm ents
includi ng M ac O S® 8 .x, 9. x, X v10 .x, Linux®, Windows® 9 5, 9 8, Me,
NT®, 2000, XP, and others . It req uires an Inte rnet browser and a
network ada pter t hat supports TCP/ IP ( the st andard la nguage
of the I nternet).
Front-Panel LED Display
Lighted LED s on the fro nt o f th e Ph one Ad apter indicat e wh ich
functio ns a re in operation . You’ ll k now at-a-glan ce w hether your
Phone Adapt er i s conn ected to the I nternet. This featu re eliminat es
the need for advanced sof tware and statu s-monitor ing procedu res.
Web-Based Advanced User Interface
You can set up t he P hone A dapter’s a dvanced funct ions easily
throu gh y our web browser, withou t ha ving to in stall additio nal
software onto the computer. There are no d isks to in stall or store,
and you can make changes and perf or m se tup functions from any
compute r on the netwo rk q uickly and easily.
NAT IP Address Sharing
Your Phone Adap te r em ploys Network Add ress Translatio n (N AT) to
share the sin gle IP a dd ress assi gned t o yo u by you r In te rn et S ervice
Pro vi der while saving the cost of adding IP addresses to your Internet
service acc ount.
Universal Plug-and-Play (UPnP) Compatibility
UPnP (Unive rsal P lug-and -P lay) is a te chnology that offers seamles s
operati on o f vo ic e me ssaging, vide o me ssaging, game s, and oth er
applica tions that are UPnP -complian t.
Page 5

32
Product Overview
Built-In Dynamic Host Configuration Protocol (DHCP) Client
Built-I n Dy namic Host Configur ation Pro to col (DHCP) client
on-board makes for the easiest possi ble connectio n to you r router.
The DHCP server in your rou ter will assign IP addresses to y our
Phone Adapt er a ut omatica ll y so the re is no n eed fo r a comp licated
network ing setup.
1
section
2
3
4
5
6
3
Page 6

5
Knowing your Phone Adapter
Package Contents
• Phone Adapter
• RJ45 E thernet Network ing Cable
• RJ11 P hone Cord
• Power Supply
• User M anual
• Quick Install at ion Guide
• Feature s Ov erview
System Requirements
• Broadba nd I nter net service, such as cabl e or DSL
• Unused LAN port on a router
Router requirements:
• Connect ion to a broadband Inte rnet ser vice
• DHCP server sup port s ervice
• One st andard te lephone
Page 7

54
Knowing your Phone Adapter
Product Specifications
Standards
IEEE 802.3u 10/ 10 0Base-T x Fast Eth er net (WAN)
Protocols Supported
SIP, CSM A/CD, TCP/IP, UD P, DHCP (clien t)
Voice Compression
G.711, G.72 9
Management
Bro ws er-Based Use r In te rface
Ports
1 10/100Bas e-Tx a uto-sen si ng R J45 port, WAN
2 FXS vo ice ports (Line 1 and 2)
LEDs
Network : Co nnection to rou ter
Voice: Line 1, Line 2
Dimensi ons and Weight
127mm x 119.5mm x 39mm
165g (5.82o z.)
1
2
section
3
4
5
6
Power
5VDC, 2.4A
The Phone Adapt er is desi gned to be pla ced on a des ktop n ext to
your teleph one or mou nted on a wa ll. Al l of the cab les ex it f rom the
rea r of the Phone Ada pt er f or b etter org anization and uti li ty. The
LED indicat ors are easily visi bl e on the front of the Ph one Adapter to
pro vi de y ou w ith informati on a bo ut y our call and n etwork activi ty a nd
status.
5
Page 8

Knowing your Phone Adapter
7
Line 2 Line 1
Connection to
Router
Reset
DC Power
5V/2.4A
[a] L ine 2
[b] L ine 1
[c] C onn ec tio n to Route r
[d] R ese t
[e] P owe r
[a]
[b] [d] [e]
[c]
(a/b) Phone Ports
These ports are f or c on nection to your telep hone h andset. Use the
RJ11 cable that was pro vided with the Phone Adap te r to con nect the
telepho ne t o th es e po rts.
(c) Connection to Router
This port is for connecti on t o yo ur router. Use the c able that was
pro vi ded with the Phone Adapte r to conne ct t he router to this port.
Or you m ay u se i t to con ne ct t o yo ur e xisting rou ter setup.
(d) Reset Switch
The “Reset” but to n is use d in rare cases when the Phone Adapte r
may functio n im properl y. Resetti ng t he Pho ne A dapter will res tore the
Phone Adapt er’s norma l oper ation while maint aining the prog rammed
setting s. You c an als o restore t he fac tory default sett ings by us ing the
“Reset” but ton. U se t he restore option in instances whe re you may
have forgotten your cust om pas sword .
1. Resetting the Phone Adapter
Pus h and re lease the “Reset” but ton. T he l ights on the
Pho ne Ada pter will momenta rily f lash while the unit reb oots.
2. Restoring the Factory Defaults
Press and hold the “Reset ” bu tton for a t le ast five seconds, the n
rel ea se i t. T he l ights on t he P hone Adapter will momen tarily flash
while the unit re boots.
Page 9

76
Knowing your Phone Adapter
(e) Power Jack
Connect the inc lu ded 5VDC, 2.4A power supp ly t o this jac k.
LEDs
A B
When you apply power to the Phone Adapt er o r restart it, a short
period of time elapse s wh ile the Ph one Adapter start s up (ab out 30
seconds ). D uring this time, you will see all the LEDs flash on, and
then off. Whe n th e Ph on e Ad apter has complet ely st arted up, the
power LED will light, ind icating the Phone Adapt er i s ready for use.
A. Connected LED
This LED ligh ts i n GREE N to ind icate that your modem is
connect ed t o th e router. It b links rapidly when info rmation is
being sent over the port betw een th e Ph one Adapter and the
modem.
Solid Gre en Connect ed t o router
Blinkin g Green Internet acti vi ty
Off No physical con ne ction
1
2
section
3
4
5
6
B. Phone LED
These LED lig hts (1 and 2) illu minate in GREEN to indicate tha t
your Phone Adap te r is ready to make or ac cept a c all.
Solid Gre en Phone Adapt er i s ready to m ake or a ccept a
Off Phone Adapt er d id not suc cessfully register
call
for service
7
Page 10

Connecting and Configuring your
9
Phone Adapter
Router Requirements
Your cable or DSL rou te r mu st b e eq uipped with an RJ45 Ethernet
port. Many ro uters have both an RJ45 Ethernet port and a USB
connect ion. If yo u ha ve a router with both Ether net and USB, and you
are using the USB con ne ction at this time, you will be instruc ted to
use the RJ45 Ethernet port duri ng the ins tallation procedure. I f yo ur
rou te r ha s on ly a USB port, you can request a d ifferent type of route r
fro m your ISP, o r yo u ca n, in some cas es, purchas e a ro uter that has
an RJ45 Ethernet port on it.
ALWAYS INSTAL L YO UR N ETWORK FIRST! IF YOU ARE SETTIN G
UP YOUR NETWORK FOR THE FIRST TIM E, IT IS IMPORTANT
THAT Y OUR NETWORK IS CONNEC TE D AN D RU NNING BEFORE
ATTEMPTIN G TO SET UP THE PHONE ADAPTE R. B E SU RE THAT AT
LEAST ONE COMPU TE R ON YOU R NE TWORK HAS ACCESS TO THE
INTERNE T BE FORE S ETTING UP THE PHONE ADAPT ER.
Determining your Current Network and Connection
The Phone Adapt er can onl y fu nction as a cl ient in an e xi sting
network con figuratio n. F or exa mple, if you c urren tly have b roadb and
access and a gateway/ route r in st alled in your locatio n, y ou may add
the Phone Adapt er as a client to your netwo rk.
This is the simplest and fast est me thod to install your Phon e Ad ap ter.
Page 11

98
Connecting and Configuring your
Phone Adapter
Connecting your Phone Adapter to a Gateway/Router
Install ing the Ph one Adapter as a c lient to a router that already
exists.
1. Identif y an ava il able LAN port on y our existing ro uter or
home gatewa y.
2. Using the Ether net cabl e th at i s incl uded with your Phone
Adapter, take one end of the cable and connec t it to the availa bl e
LAN port on your Router. Connect the oppo site e nd t o th e
“Connec tion to Ro uter” port on the Phone Adapter.
3. Connect a stand ard analog phon e to the “Phon e 1” por t on the
Phone Adapt er.
4. Locate the powe r supp ly t hat is i nc luded with your Phone
Adapter. Plug the power sup pl y’s small conn ector into the DC
power jack on the Phone Adapt er. Plug the pow er sup ply into an
empty power out le t.
5. The Phone Adapt er aut omaticall y co nnects to the Internet.Th e
“connec ted” LED w ill blink gre en to indi cate that there is an
Internet connec tion.
6. Wait up t o five min utes while the Phone Adapte r au tomatical ly
reg is ters to the iiNetphon e Broadband Pho ne S er vice.
7. Once a c onnecti on to the iiNe tphone Broa dband Phone Servi ce is
establi shed, the phone LED will illumi nate.
8. Pick up your handset and ensu re you hear a si ngle audible tone .
If you h ear a se ries of be eps then your phone adapt er h as not
reg is tered on the iiNetp hone network.
1
2
3
section
4
5
6
9
Page 12

Troubleshooting
11
Problem:
• Phone Adapter is not workin g.
• LEDs d o no t co me o n.
Solution:
If the LED i ndicato rs a re not O N, t he p roble m ma y be that the Phon e
Adapter is not connec ted prope rl y.
Verify that the Phon e Ad ap ter is p lugged into a power sourc e. C heck
to see t hat the cables are conn ected to t he c orrec t po rt s an d th at
they are secu re.
Problem:
There is no dial tone and the “Line 1” (or “Line 2”) LED is not lit.
Solution:
1. Power off your cab le o r DS L mo de m by unp lugging its
power adapt er.
2. Power off the ro uter by unpluggin g it s po we r ad apter.
3. Disconnec t al l Ethe rn et c ab les from both the modem and router.
4. Wai t fo r three minutes , and then pow er o n your cab le o r DS L
modem by pluggi ng its pow er a dapter into an electric al o utlet.
5. Wa it f or t hree minute s, a nd t he n po wer on y our router by
pluggin g it s po we r ad apter into an electri ca l ou tlet.
6. Wa it f or f ive minutes, and then power on the Phone Adap ter by
pluggin g it s po we r ad apter into an electri ca l ou tlet.
7. Make s ure the RJ11 teleph one cable between the tel ep hone
handset and the Phone Ada pter is co nnected to the Phone
Adapter ’s “Line 1” port, and that the RJ11 teleph one cable is
firmly in place .
8. Make s ure the “conn ec ted” LED on the front panel of the Phone
Adapter is lit, then chec k yo ur router and netwo rk con nection to
the Internet.
Page 13

1110
Troubleshooting
Problem:
• The Phone Adapte r ca nnot c onnect to the route r.
• The “connect ed” light does not come on.
Solution:
If your Phone Adapter app ears to be pow ered but the “conne cted”
light is not gree n, t he problem may be that your rou ter and Ph one
Adapter are n ot c onnected properly.
Make sure the net work c able between the ro uter and the P hone
Adapter is conn ec ted to t he P hone A dapter’s “ Connectio n to
Router” por t an d that the cab le i s firm ly i n pl ace. Power off the
rou te r fo r a few seco nd s an d th en p ower i t on aga in.
1
2
3
4
section
5
6
11
Page 14

Troubleshooting
Technical Support
You can find technica l su pport informa tion a t ht tp://www.iinet.ne t.au
or contact iiNe t cust omer support on 13 22 58.
Page 15

FCC Statement
1
DECLARATI ON OF CONF ORMITY WITH FCC RULES FOR
ELECTRO MAGNETIC COMPATIBILITY
We, Belkin Corpo ration, of 501 West Walnut Stre et, Compton,
CA 90220, decla re under our sole res po nsibili ty tha t th e product,
F1PG200 ENau
to which this declara tion rela te s, c omplies with Part 15 of the
FCC Rules. Oper at ion is s ubject to the following two con ditions:
(1) this device may not cause har mf ul i nterference, and (2)
this device mus t acce pt a ny i nterference rece iv ed, including
interfe rence that may caus e un de sired ope ration.
Caution: Exposure to Radio Frequency Radiation.
The radiate d ou tp ut p ower of this d evice is far below the FCC radio
fre qu ency exposure l imits. Nevert heless, the devic e sh al l be use d in
such a m anner that the potent ial fo r hu man contact durin g no rmal
operati on i s mi ni mized. When conne cting an external antenna to the
device, the ant en na s hall be placed in such a m anner to m inimize the
potenti al f or h um an c ontact during nor mal op eration . In order t o av oid
the possibi lity o f ex ceeding the FCC radio frequency expo su re limits ,
human pro ximity to the antenna shall not be less than 20cm (8 inch es )
during norm al o pe ration.
Federal Communications Commission Notice
This equipm ent ha s be en t ested and found to comply with the limi ts
for a Cl ass B di gital device, pur su ant to P art 15 o f th e FCC Rule s.
These limit s are designed to pro vide reason able protec tion against
harmful int erferen ce i n a re sidential ins tallation . Th is equ ipment
generat es, uses, and can radiate radio frequency energy. If thi s
equipme nt d oes ca use harmful inter feren ce to radi o or tel ev ision
rec ep tion, which can be determ in ed b y tu rn in g th e eq uipment off and
on, the user is encourage d to try and correct the interference by one
or more of the follow in g me asure s:
• Reorien t or relocate the rec eiving antenn a.
• Increase the d istance betwe en t he e quipment and the re ce iver.
• Connec t the equi pment to a n ou tlet on a ci rcuit differen t from
that to which the rec ei ver is c onnected.
• Consult the dealer or an expe rienced radio/TV technic ian for help.
2
3
4
5
section
6
1312
13
Page 16

Information
15
Modifications
The FCC requi res the user to be n otified that any chan ge s or
modific ations to this device that are no t ex pressly app roved by Belkin
Corpora tion may v oid the user’s aut hority to operate the equip ment.
Canada-Industry Canada (IC)
The wirel ess radio of t his device compli es w ith RS S 13 9 & RSS
210 Industr y Ca na da. This Class B digital appa ra tus complies with
Canadia n IC ES-003. Cet appareil numériq ue de la class e B confor me
á la n or me N MB-003 du Canada.
Europe-European Union Notice
Radio pro ducts with the CE 0682 or CE a le rt m arking comply wit h
the R&TTE Directive (1995/ 5/EC) issued by the Commiss ion of
the Europ ean Community. Complian ce w it h th is d irect iv e im plies
conform ity to t he fol lowing Euro pean Norms (in bracke ts a re the
equival ent international sta ndard s).
• EN 6 09 50 ( IEC60950) – Pro duct Safety
• EN 3 00 328 Tec hnical re quireme nt f or r adio e quipmen t
• ETS 30 0 82 6 Ge neral EMC requi remen ts for rad io e quipment.
To determin e th e type of tran smitter, check the identifi cation label
on your Belkin product. Prod ucts with the CE m arking comply wit h
the EMC Direc tive (89/336/ EEC) a nd t he L ow Vo ltage Direc tive
(72/23/ EEC) issued by the Commissi on o f th e European Comm un ity.
Complia nce with t hese dire ctives implie s conf ormity to the followi ng
Europ ean Norms (in bracket s are the eq uivalen t inte rn ational
standards).
• EN 5 50 22 ( CISPR 22) – El ectro magnetic Inte rferenc e
• EN 5 50 24 ( IEC6100 0- 4-2,3,4 ,5 ,6,8,11 ) – Electromagnet ic I mmunity
• EN 6 10 00-3-2 (IEC61 0000-3-2) – Power Lin e Harm onics
• EN 6 10 00-3-3 (IEC61 0000) – Power Line Flicker
• EN 6 09 50 ( IEC60950) – Pro duct Safety
Pro du cts that contain the radi o tran smitter are lab eled with CE 0 682
or CE al ert marking and may also carry the CE logo.
Page 17

1514
Information
Belkin Corporation Limited 2-Year Product Warranty
Belkin Corp oration warra nt s th is p roduc t agai nst defects in materi al s
and workman ship f or 2 yea rs. If a def ec t is dis covered , Be lkin will,
at its o ption, re pair o r replace the product at no c harge provided it
is returned dur in g th e wa rranty period , wi th tra nsportati on c harge s
pre pa id, to t he a uthorized Bel ki n de aler from whom you purchased
the produ ct. Proof of purc hase may be required.
This warran ty d oe s no t ap ply if t he product has been damag ed b y
acciden t, a buse, misuse, or misapp lication; if the product has been
modifie d wi thout the written permi ssion of B elkin; or if any Belkin
serial numb er h as bee n removed or deface d.
THE WAR RANTY AND REMEDIES SET FORTH ABOVE ARE
EXCLUSI VE I N LI EU OF ALL OTHE RS, WH ETHER ORAL OR WRITTEN ,
EXPRESS ED O R IM PL IED. BELKIN SPECI FICALLY DISCL AIMS A NY
AND ALL IMPLIED WARRANTIES , IN CLUDING, WITH OUT LI MITATION,
WAR RANTIES OF MERCHA NTAB ILITY AND FITNESS FOR A
PARTICULA R PURP OSE.
No Belkin deale r, agent , or emplo yee is a uthorized to make any
modific ation, extens ion, o r ad dition to this warran ty.
BELKIN IS NOT RESPONS IBLE FOR SPECIAL, INC ID ENTAL, OR
CONSEQU ENTIAL DAMAGE S RE SU LTING FROM A NY B REACH OF
WAR RANTY, OR UND ER A NY O THER L EGAL THEORY, INC LUDING
BUT NOT LIMITED TO, LOST PROF ITS, D OWNTIME , GOOD WILL,
DAMAGE TO OR REPROGRA MMING OR REPRODUC ING AN Y
PROGRAM OR DATA STORED IN, OR USED WITH, BELKIN
PRODUCT S.
1
2
3
4
5
section
6
Some states do not allow the excl us ion or l imitation of inci dental or
consequ ential damage s or exclu sions of implied warr an ties, so the
above limit ations or exclusion s ma y no t ap pl y to you . Th is w arranty
gives you speci fi c le gal rights, and you may also have other rig ht s
that vary fro m st ate to sta te.
15
Page 18

ATA Hardware Setup
For Advanced trouble shooting, technical
support and VoIP setup please call our
dedicated Belkin ATA support hotline on:
1300 552 002
Open Monday - Friday 8am - 8pm EST
VoIP Account Support/Settings
If you have any questions that relate to your
account details and VoIP account settings with
iiNet please call:
13 22 58
Press 1 for Support and then 1 for Broadband.
Open 24 hours, 7 days a week.
Belkin, Inc. Belkin International, Inc.
4 Pioneer Avenue, Tuggerah Business Park 501 West Walnut Street
Tuggerah NSW 2259, Australia Los Angeles,CA, 90220, USA
 Loading...