

Belkin AC1900 DB User Manual

User Guide
Wireless AC+
Gigabit ROUTER
AC1900 DB
F9K1124
1

Contents
Getting Started .............................................................................................. 3
Quick Setup Guide .................................................................................................................3
Additional Capabilities ................................................................................ 19
Adding USB Devices ............................................................................................................19
Getting to Know Your Router ...................................................................... 24
Front Panel ...........................................................................................................................24
Back Panel ...........................................................................................................................25
Technical Details ......................................................................................... 27
Technical Features ...............................................................................................................27
Using Your Router ....................................................................................... 28
Auto Update on Your Belkin Router .....................................................................................28
Updating the Router’s Firmware via the Web Interface ........................................................28
Resetting the Router ............................................................................................................30
Troubleshooting, Support, and Warranty ................................................... 32
Troubleshooting ...................................................................................................................32
Technical Support ....................................................................................... 35
Regulatory Information ................................................................................ 37
2
Getting Started
What’s in the Box
AC1900 DB Wireless AC+ Gigabit Router
•
Ethernet cable (attached to router)
•
Power supply (attached to router)
•
Network information card (attached to router)
•
Quick Setup Guide
Initial Setup
Where to Place Your Router
For the best results, place the router next to your modem in an open location, away from large metal
objects and magnets such as those found in speakers. Raising the router above floor level can improve
the strength of your wireless signal.
How to Set It Up
Connect Your AC1900 DB Router
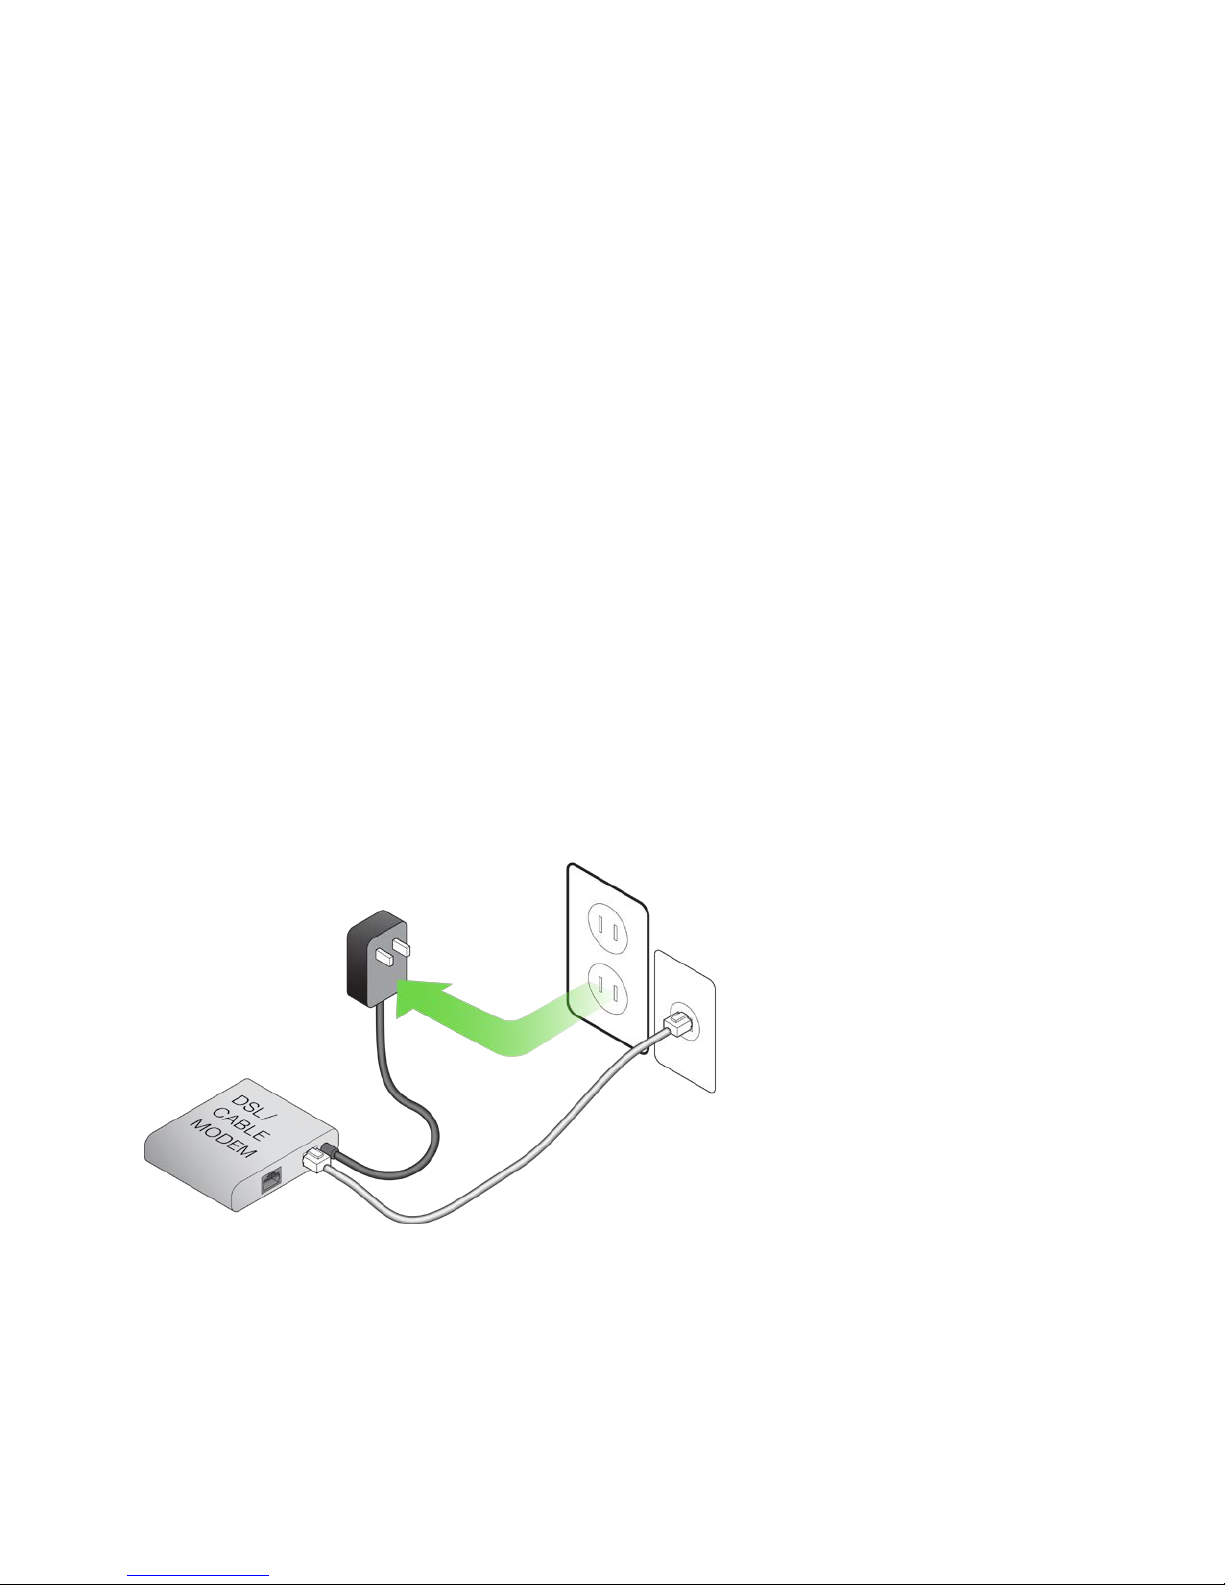
Turn off your modem by disconnecting its power supply. Some modems have a battery backup; this will
need to be disconnected at this time as well.
Connect your router to your modem using the cable (already attached).
3
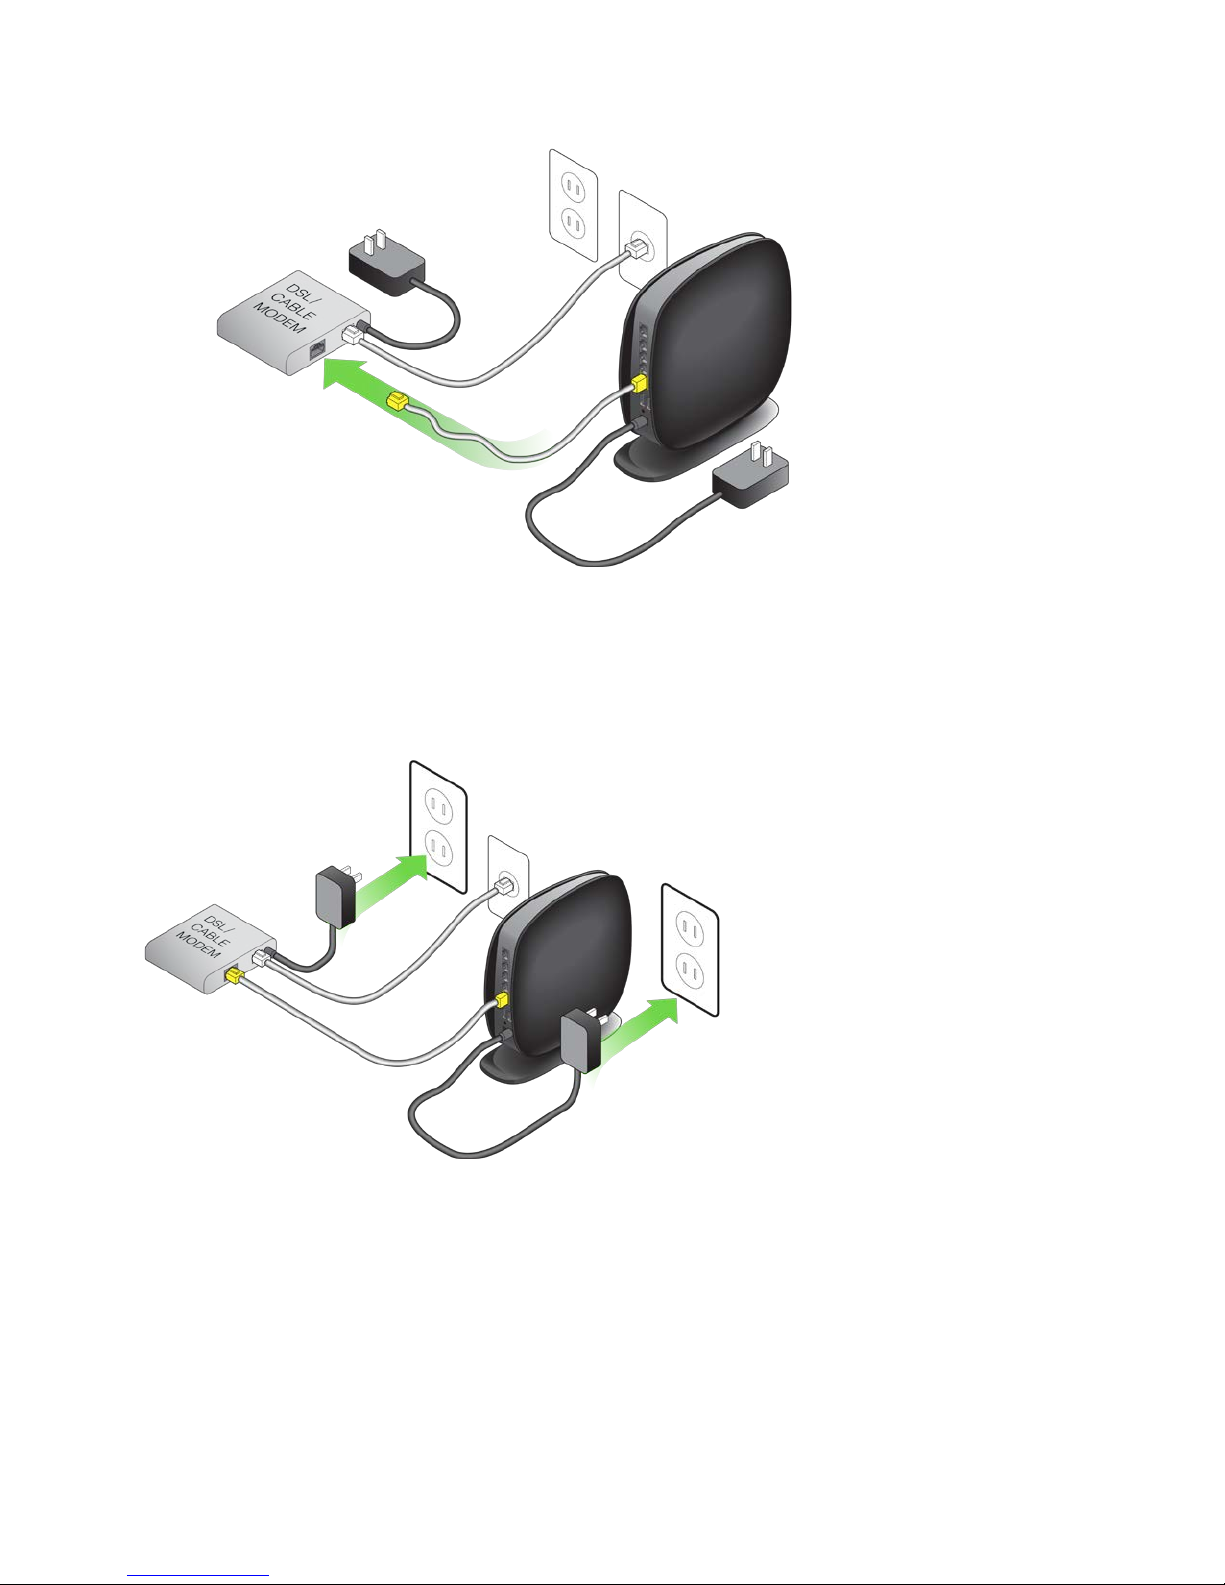
Power up your modem by plugging in its power supply. If your modem has a battery backup, it can be
reconnected at this time; you may need to hold the reset button for 10 seconds. Power up your router by
plugging in its power supply.
4
Connect to Your Router
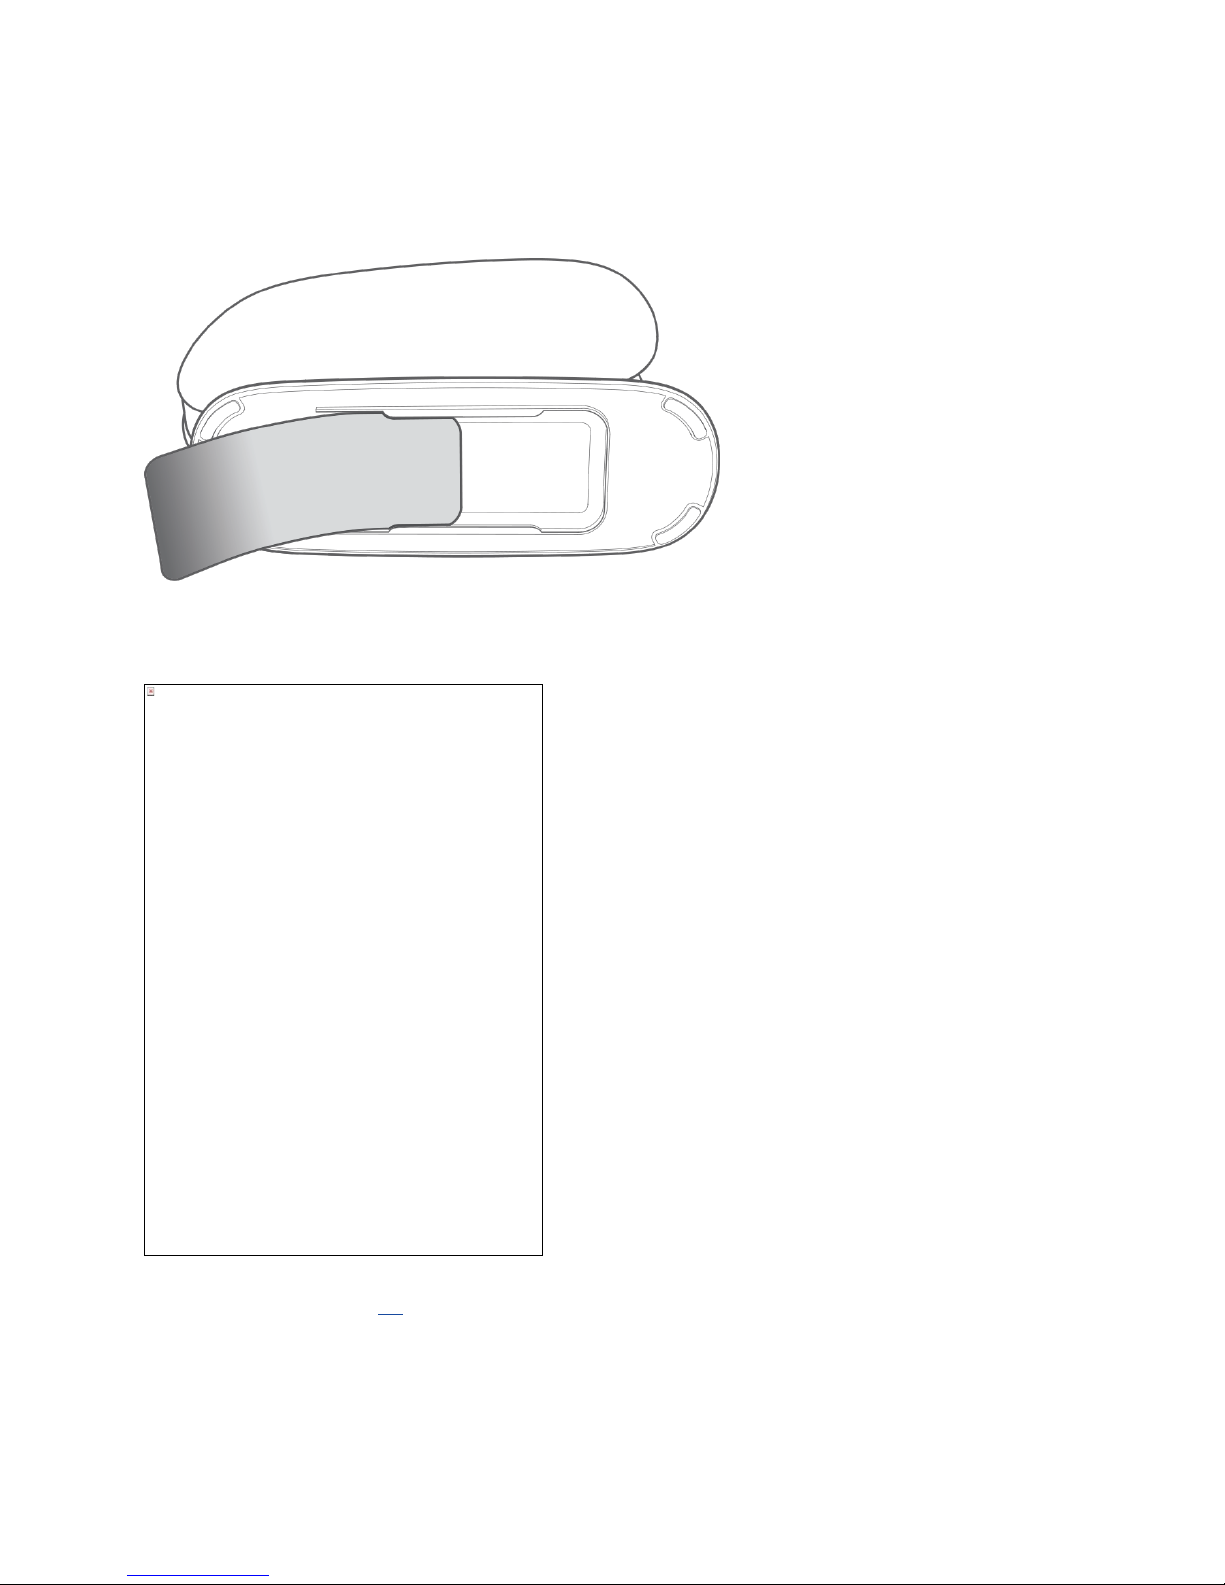
Retrieve the network ID card from the foot of your new Belkin router.
Can’t find the card? The default network name and password are also printed on the foot of the router.
Use your computer, tablet, or smartphone to connect to the wireless network shown on the network ID
card.
This image cannot currently be displayed.
For information on how to connect your wireless devices, please see the “Connect Your Wireless
Devices” section on page
When requested, please enter the password (security key) provided on the card.
When your device has connected to the router, use a browser to visit http://router/. The router
homepage will appear.
18
.
5
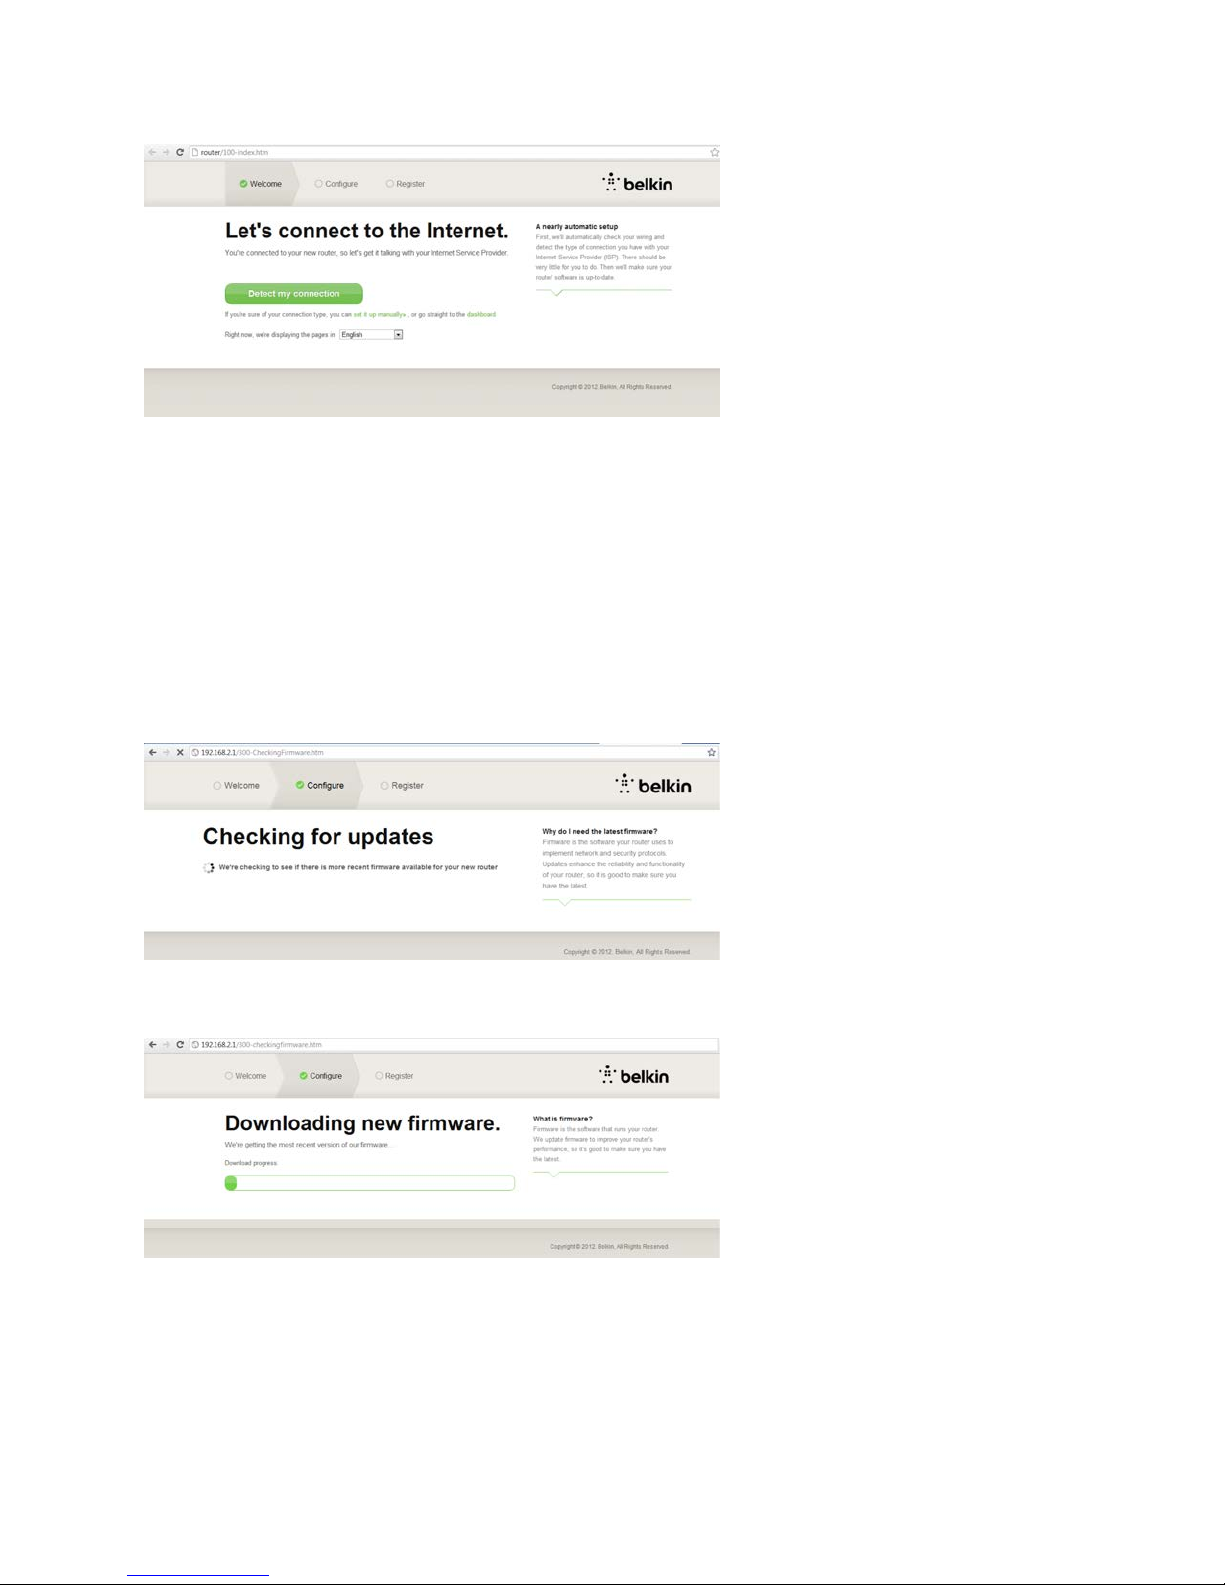
If the page does not load, then try visiting http://192.168.2.1 to see the router homepage.
Click or tap the
click or tap the “set it up manually” link and proceed to page 10.)
After several moments, your router should automatically detect your Internet connection and restart. This
can take anywhere from 30 seconds to 3 minutes depending on your connection type.
If your router is unable to establish an Internet connection on its own, you may be asked to restart your
modem or provide a username and password if your connection requires one. Follow the on-screen
instructions provided.
Once your router is online, it will determine if there is a firmware update available and offer to install it.
Detect my connection
button in green. (If you would rather set up the router manually,
Please allow up to 5 minutes for the firmware to update.
If there are no updates available, then setup will proceed.
6

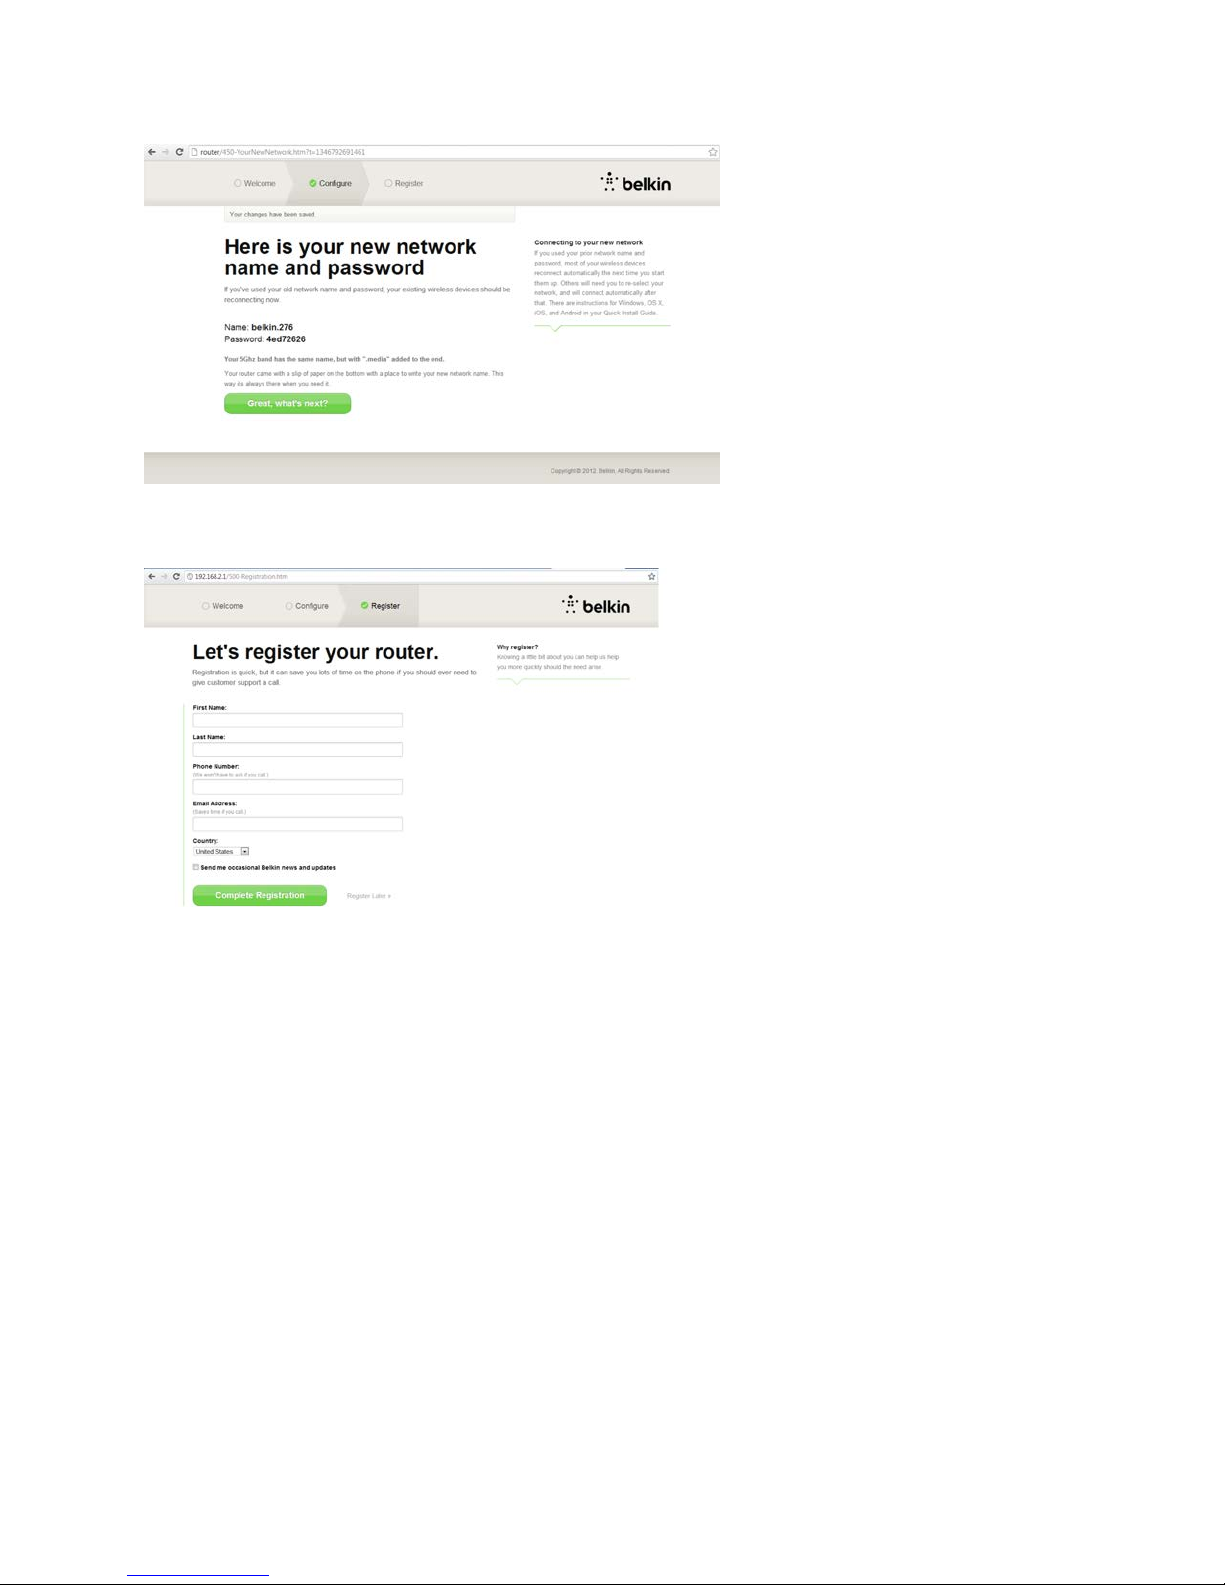
At the next screen you will be invited to change your network name and password. Re-using your
previous network name (SSID) and password makes connecting your existing devices to the new router
much easier.
If you decide to change these settings, then enter the new values and click or tap
Save and Continue
(Note: The password must be at least 8 characters long.)
If you changed your network name and password, make note of it on the service card located on the
foot of the router. You will then have to connect to the new network.
This image cannot currently be displayed.
Please take this opportunity to register your router. This will help technical support if there is a problem
with your router.
.
7
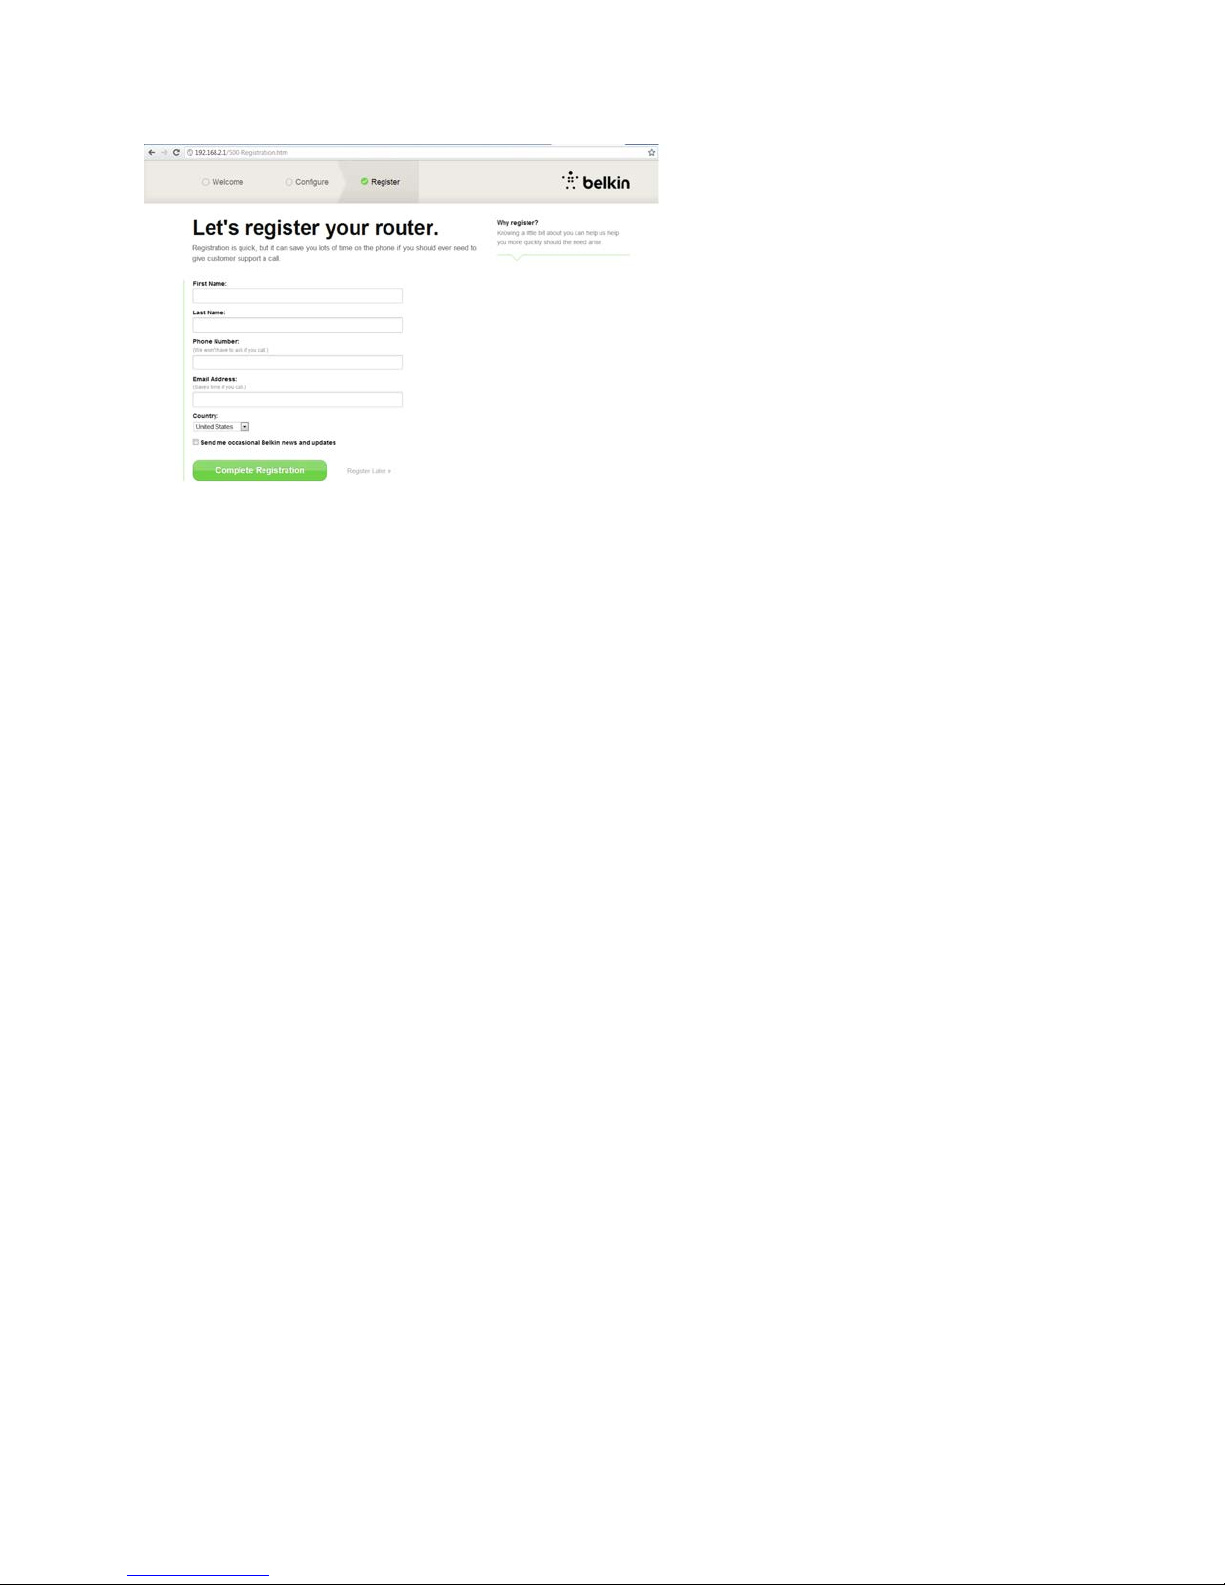
Simply complete each of the required fields and click or tap
to register right now, click or tap
Register Later
to proceed.
Complete Registration
. If you don’t want
8
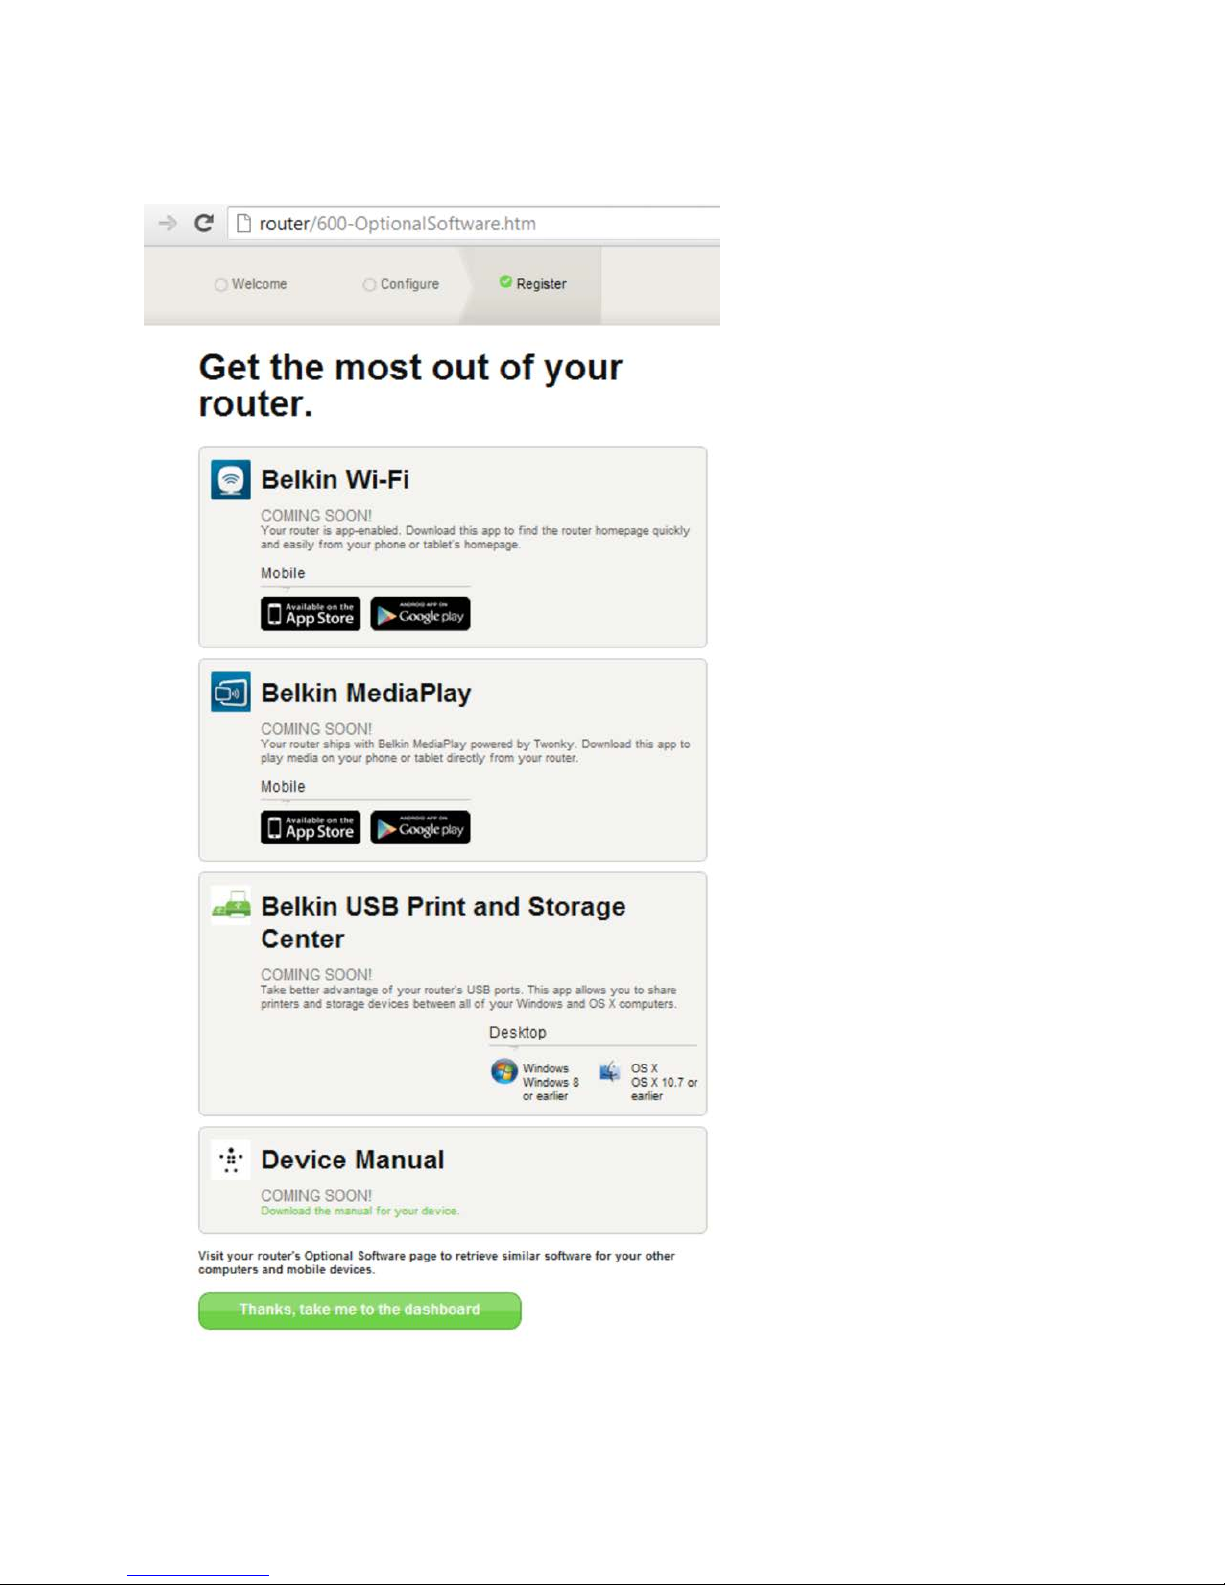
At the next screen you can download optional software that was bundled with your router.
9
This screen shows you optional software that is available for your router, such as the USB software to
allow you to print through the router’s USB port. If you wish to download and install any of these
software programs, simply click on or tap the button appropriate for your device.
When finished installing optional software, click or tap
Your router is now set up and ready to use.
Thanks, take me to the dashboard
.
Using the WPS Button
1. Start WPS Push Button Connection (WPS PBC) on your computer or other Wi-Fi device that you
would like to connect wirelessly to your router. Often there will be a button for this purpose in
software that came with the device, or a physical “WPS,” “PBC,” or “Security” button on the
device itself.
2. Within two minutes, press the WPS button on your router and hold for two seconds.
The WPS light (small light above WPS button) will blink blue while it listens for your Wi-Fi device.
Once a connection is established, the light will turn blue and then go out. If a connection is not
established, the light will blink amber. You may repeat the process to try again.
You can repeat this process for each WPS-enabled device you’d like to add to your network.
Manually Set Up Your Internet Connection
Use a browser to visit http://router/. You can also try visiting http://192.168.2.1/. The router’s Welcome
page should appear.
10
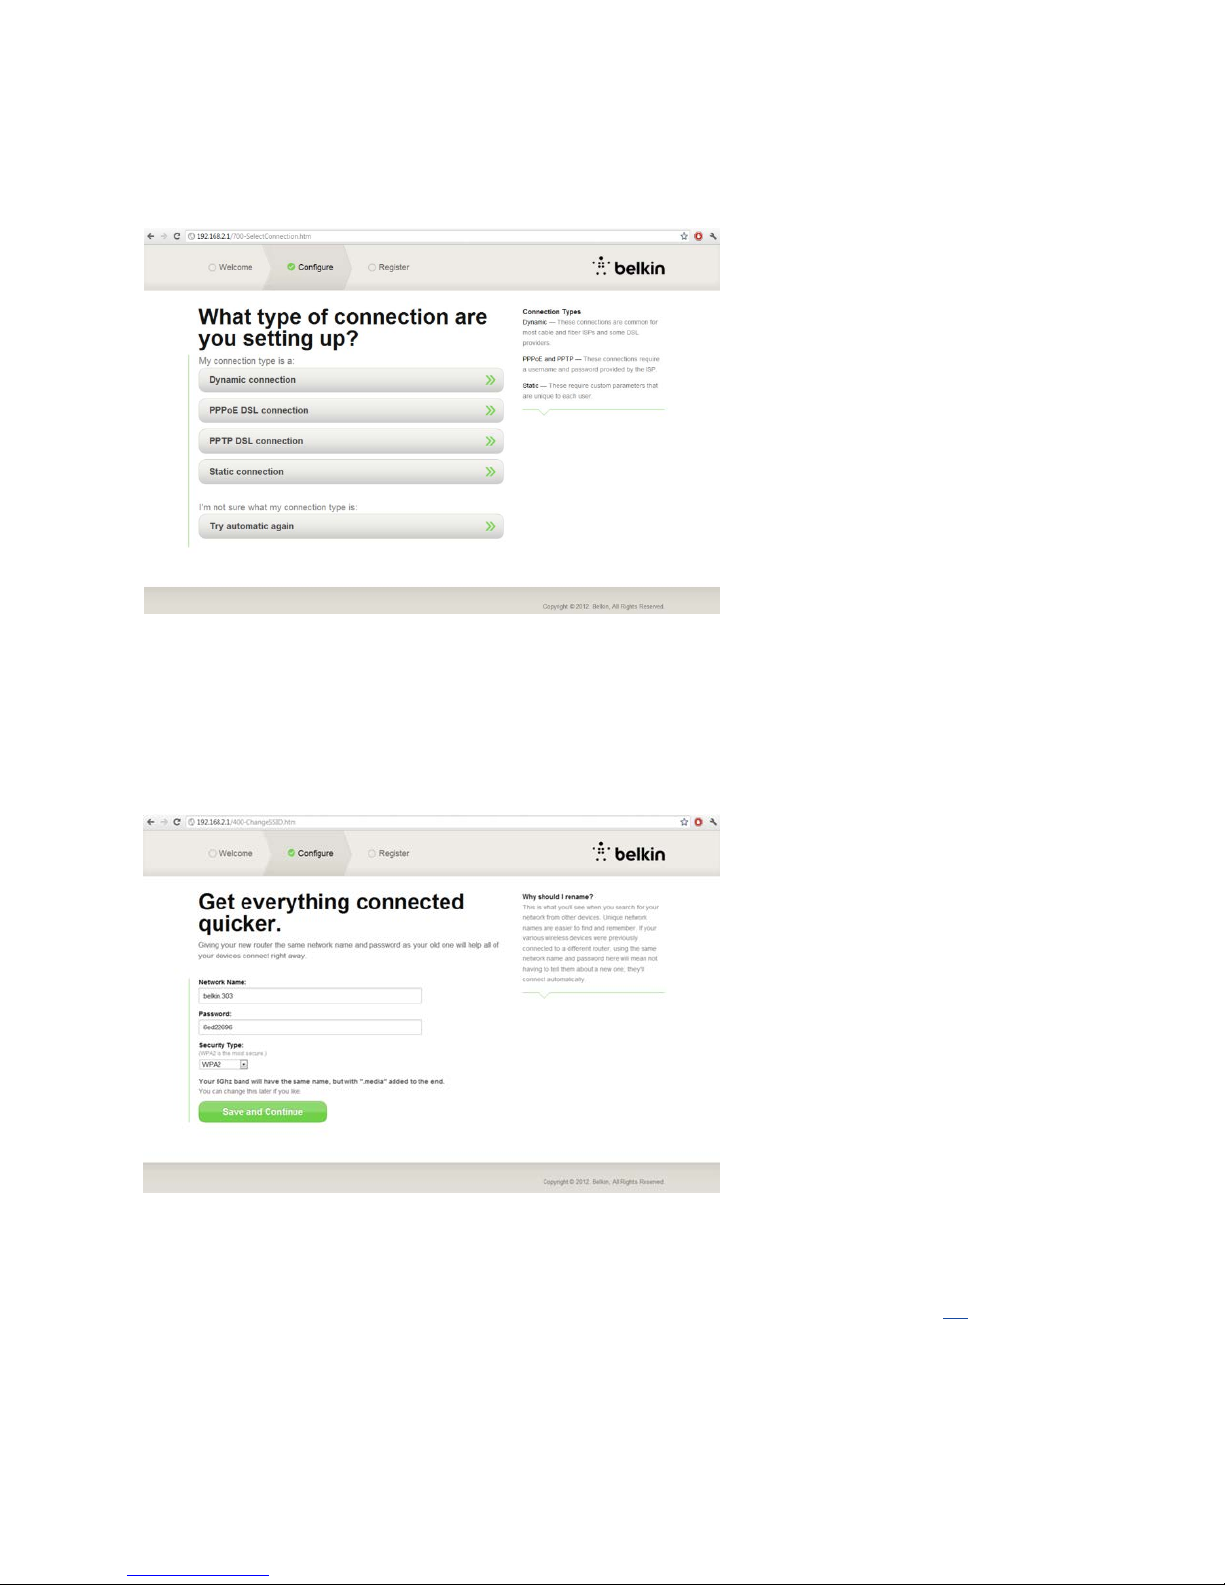
Click or tap the “Set it up manually” link. Please select the type of connection your ISP provides. Refer
to page 15 for a description of the connection types.
If the selected connection type requires additional information (such as an ISP username and password),
the system will ask you for it.
At the next screen you will be invited to change your network name and password. Reusing your
previous network name (SSID) and password makes connecting your existing devices to the new router
much easier.
If you decide to change these settings, then enter the new values and click or tap
(Note: The password must be at least 8 characters long.)
If you changed your network name and password, make note of it on the service card located on the
foot of the router. You will then have to connect to the new network. Please refer to page
Save and Continue
18
to do this.
.
11
Click or tap
Great, what’s next?
Please take this opportunity to register your router. This will help technical support if there is a problem
with your router.
Simply complete each of the required fields and click or tap
to register right now, click or tap Register Later to proceed.
Complete Registration
. If you don’t want
12
 Loading...