

Belkin 8820au00376, F7D3302AU User Manual

Share
WIRELESS ROUTER
User Manual
F7D3302au 8820au00376

TABLE OF CONTENTS
Regulatory Information ................................... 33
FCC Statement..............................................33
Getting Started ............................................1
What’s in the Box ............................................. 1
Initial Setup .................................................. 1
Advanced Tools & Settings..................................... 6
The Belkin Router Manager .................................... 7
Manual Setup Using Your Browser .............................. 8
Adding Computers to Your Network ............................. 9
Adding USB Devices ......................................... 11
Bundled Software ........................................... 14
Additional Capabilities ....................................... 15
Getting to Know Your Router ...............................16
Front Panel ................................................. 16
Back Panel ................................................. 17
Technical Details .........................................18
Technical Features .......................................... 18
System Requirements........................................ 19
Troubleshooting, Support, and Warranty ................... 20
Troubleshooting .............................................20
Technical Support ...........................................29
Belkin International, Inc., Limited 3-Year Product Warrant y.........30

1
What’s in the Box
Share Wireless Router
Ethernet cable (attached to router)
Power supply (attached to router)
Network information card (attached to router)
Belkin Setup CD with User Manual
Initial Setup
Where to Place Your R outer
For the best results, place the Router next to your mo dem in
an open location away from large metal objects and magnets
such as th ose found in speakers. Raising the Router above
floor level can improve the strength of your wireless signal.
GETTING STARTED
2
GETTING STARTED
2 3
modem
1
How to Set It Up
3
GETTING STARTED
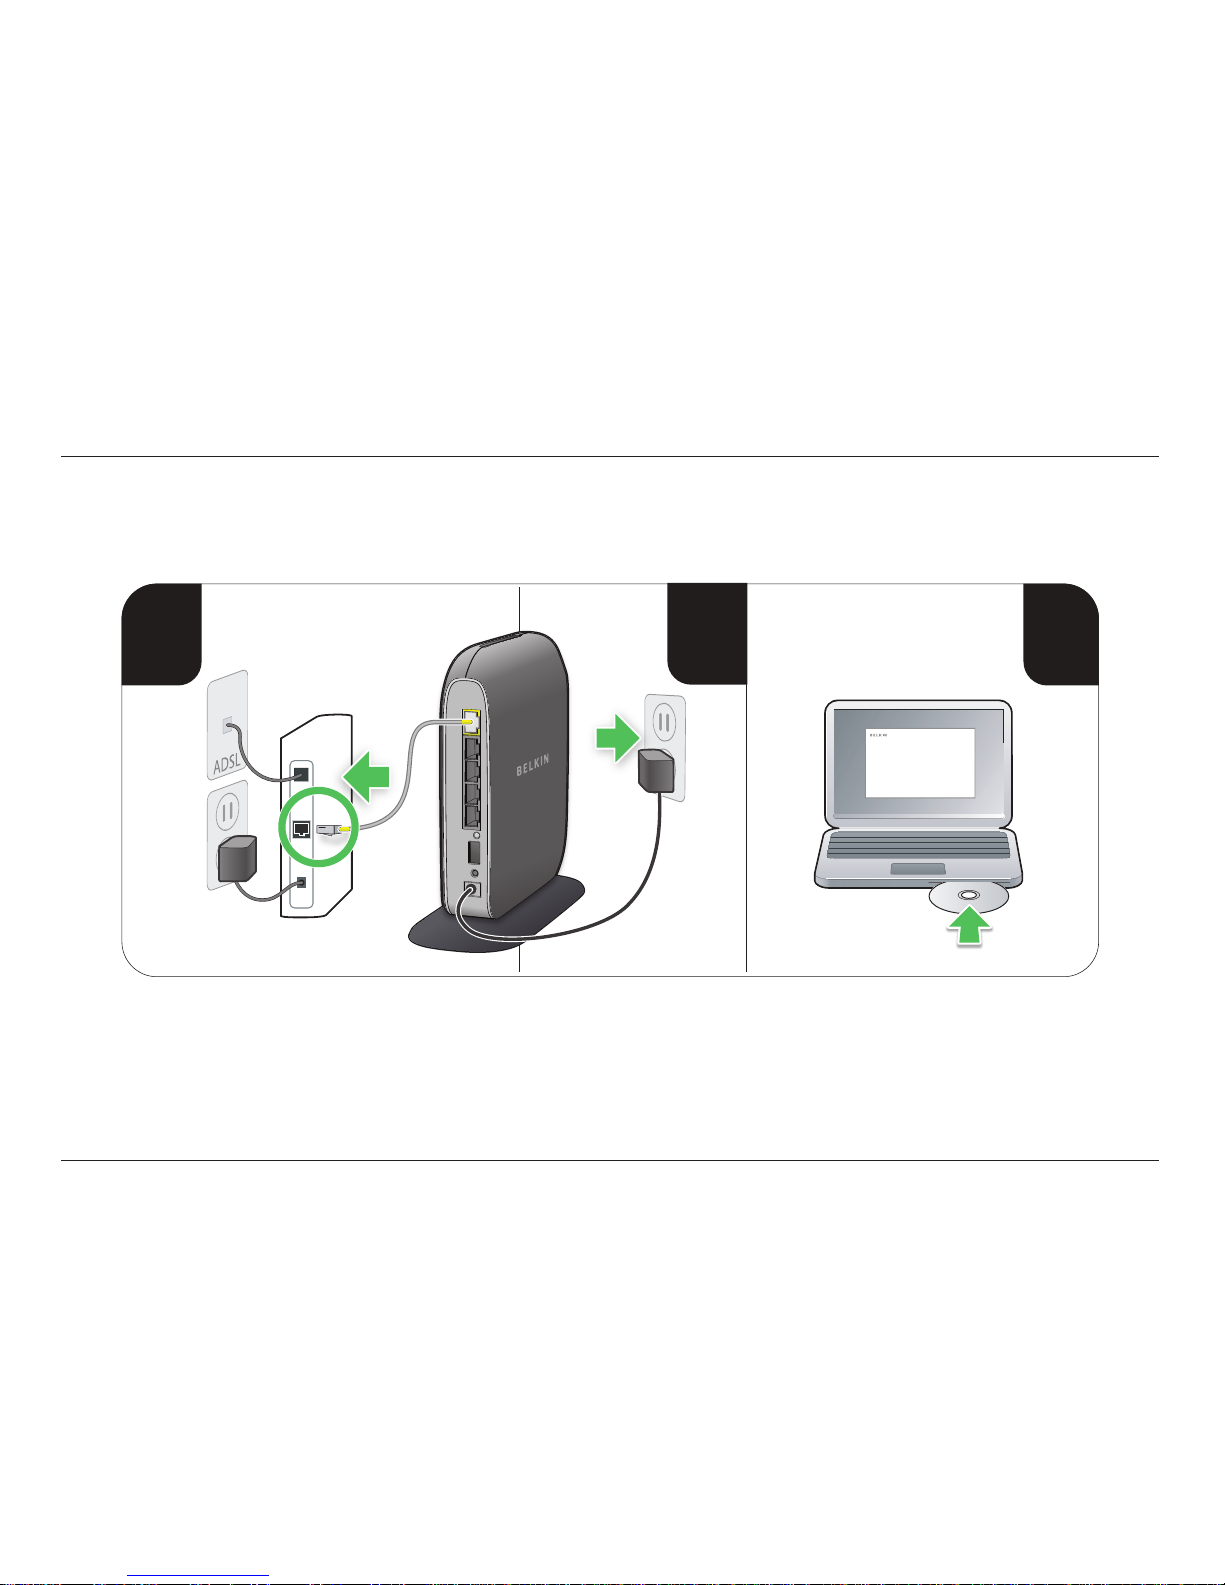
1. Connec t you r Rou ter’s Ethernet cable to your modem’s Ethe rn et
port (on the back of yo ur modem). This port might be labe led
differently on yo ur pa rticul ar modem. If you are adding a
Rou ter for th e first time, this port may be connected to your
computer by an Ethernet cable. It is OK to disconnect your
computer and plug the Router into the modem instead.
2. Plug the Router’s power supply into a wall outlet.
3. Put the CD into your c omputer. If the CD does n’t
open automatically, ple as e browse to your CD dri ve
and double-click on the Belkin Setup CD icon.
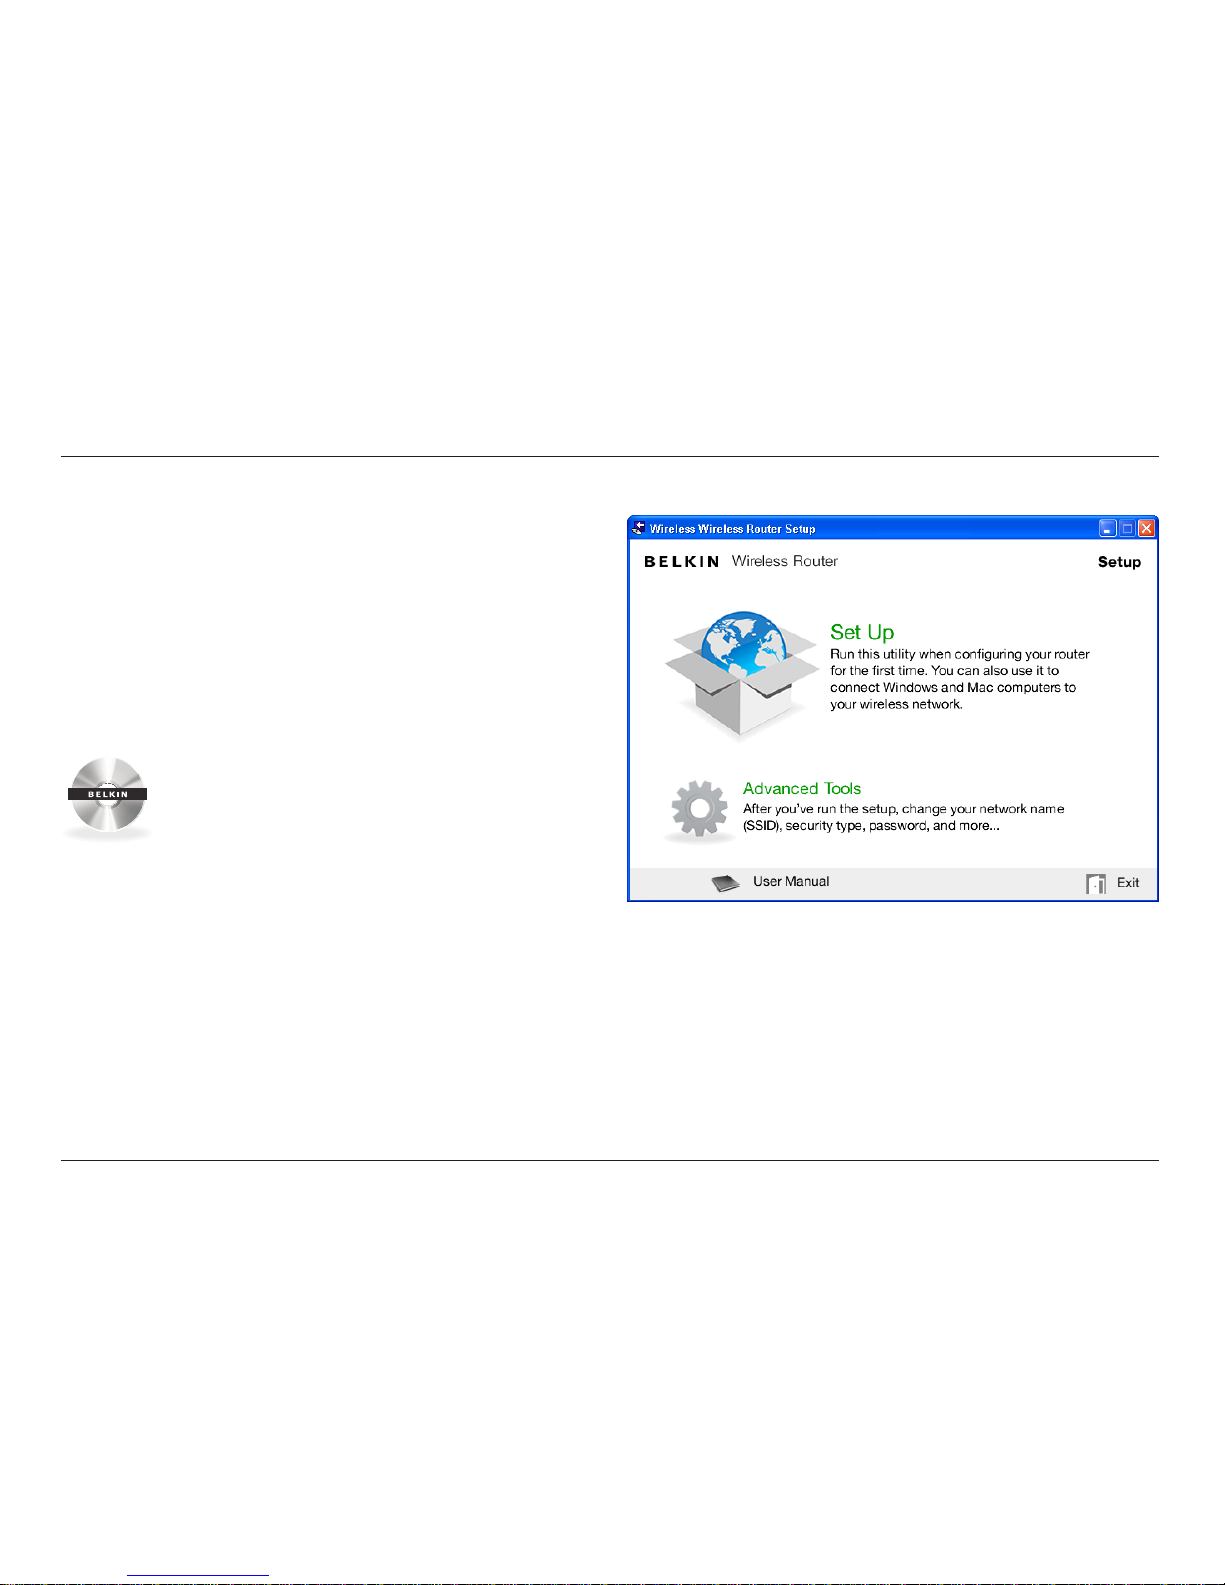
4. Click the Setup icon on the CD menu.
Setup
4
GETTING STARTED
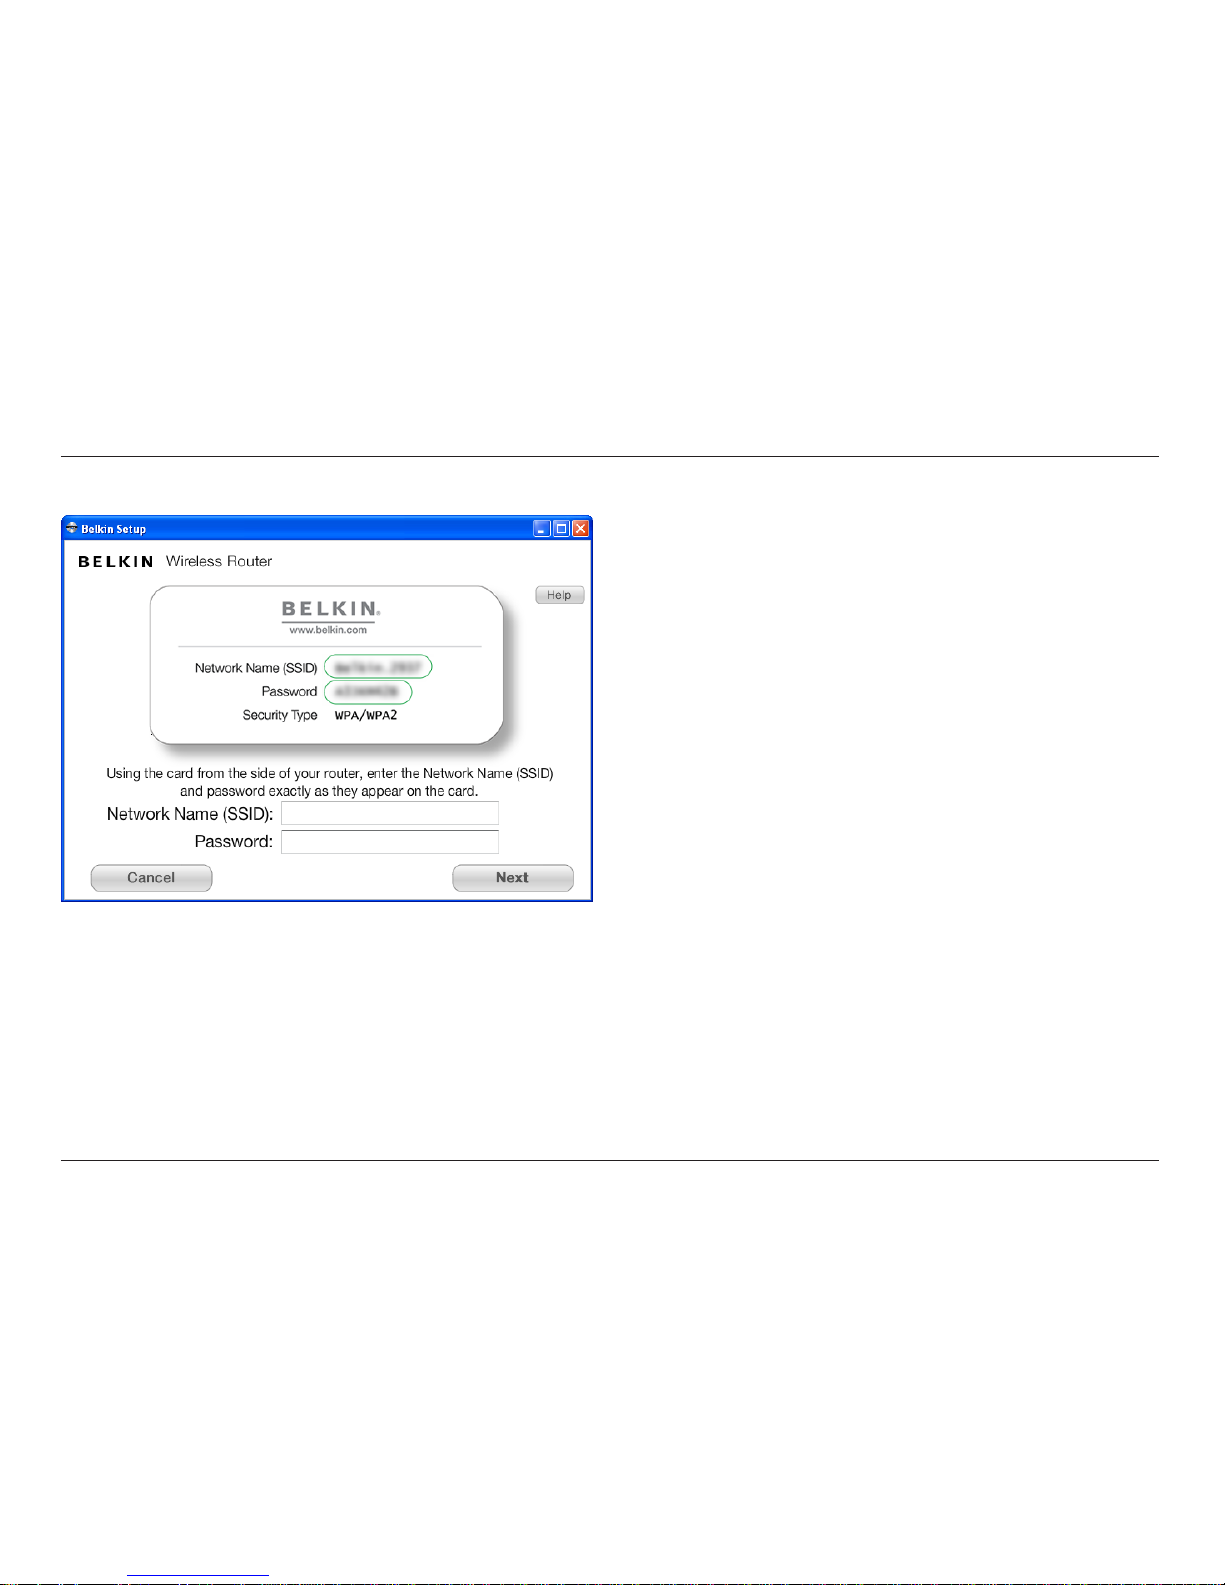
5. After a bri ef inst allation, the setup software will a sk you
for the network name a nd password from the net work
information card that is at tached to your Router. Store the
card under the base of your Router for future reference.
5
GETTING STARTED
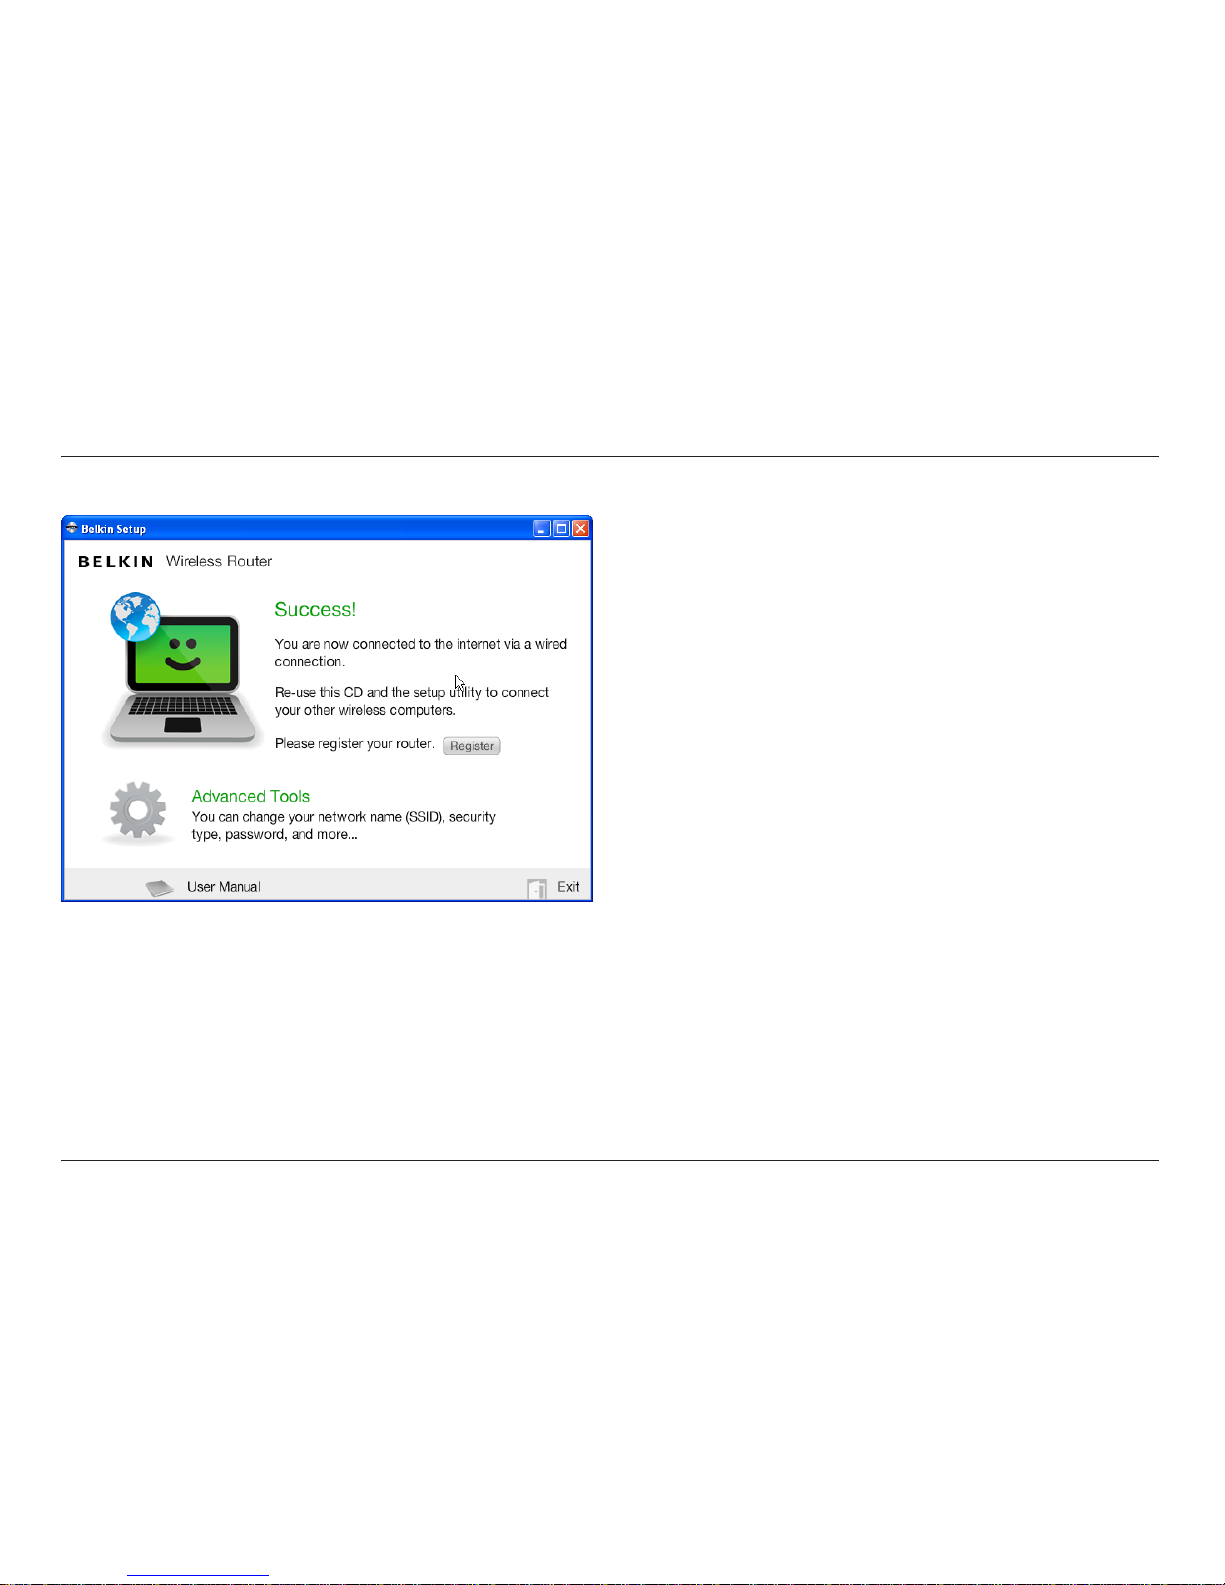
6. A progress screen will appear while addition al software is
insta lled. This m ay ta ke a few minu tes to com plete. Once
finis hed, a “Success” message will appear indicat ing tha t you
are connected to the Internet via your new Belkin Router.
During setup you may be asked for additional information.
You m ay ne ed to enter a username and pa sswor d provided
by you r ISP. T his use rn ame and password is likely to be
found on mate rials t hat cam e from you r ISP when you
signe d up for ser vice. If necessary, you may need to contact
your ISP to retrieve your username and password.
If you have a static IP ad dress, you may need to enter
additional information also provided by your ISP.
If your computer doe sn’t have a wireless adapte r, o r the
set up software is unable to c ontrol it, you may be asked to
connect your computer to the Router with a network cable.
6
GETTING STARTED
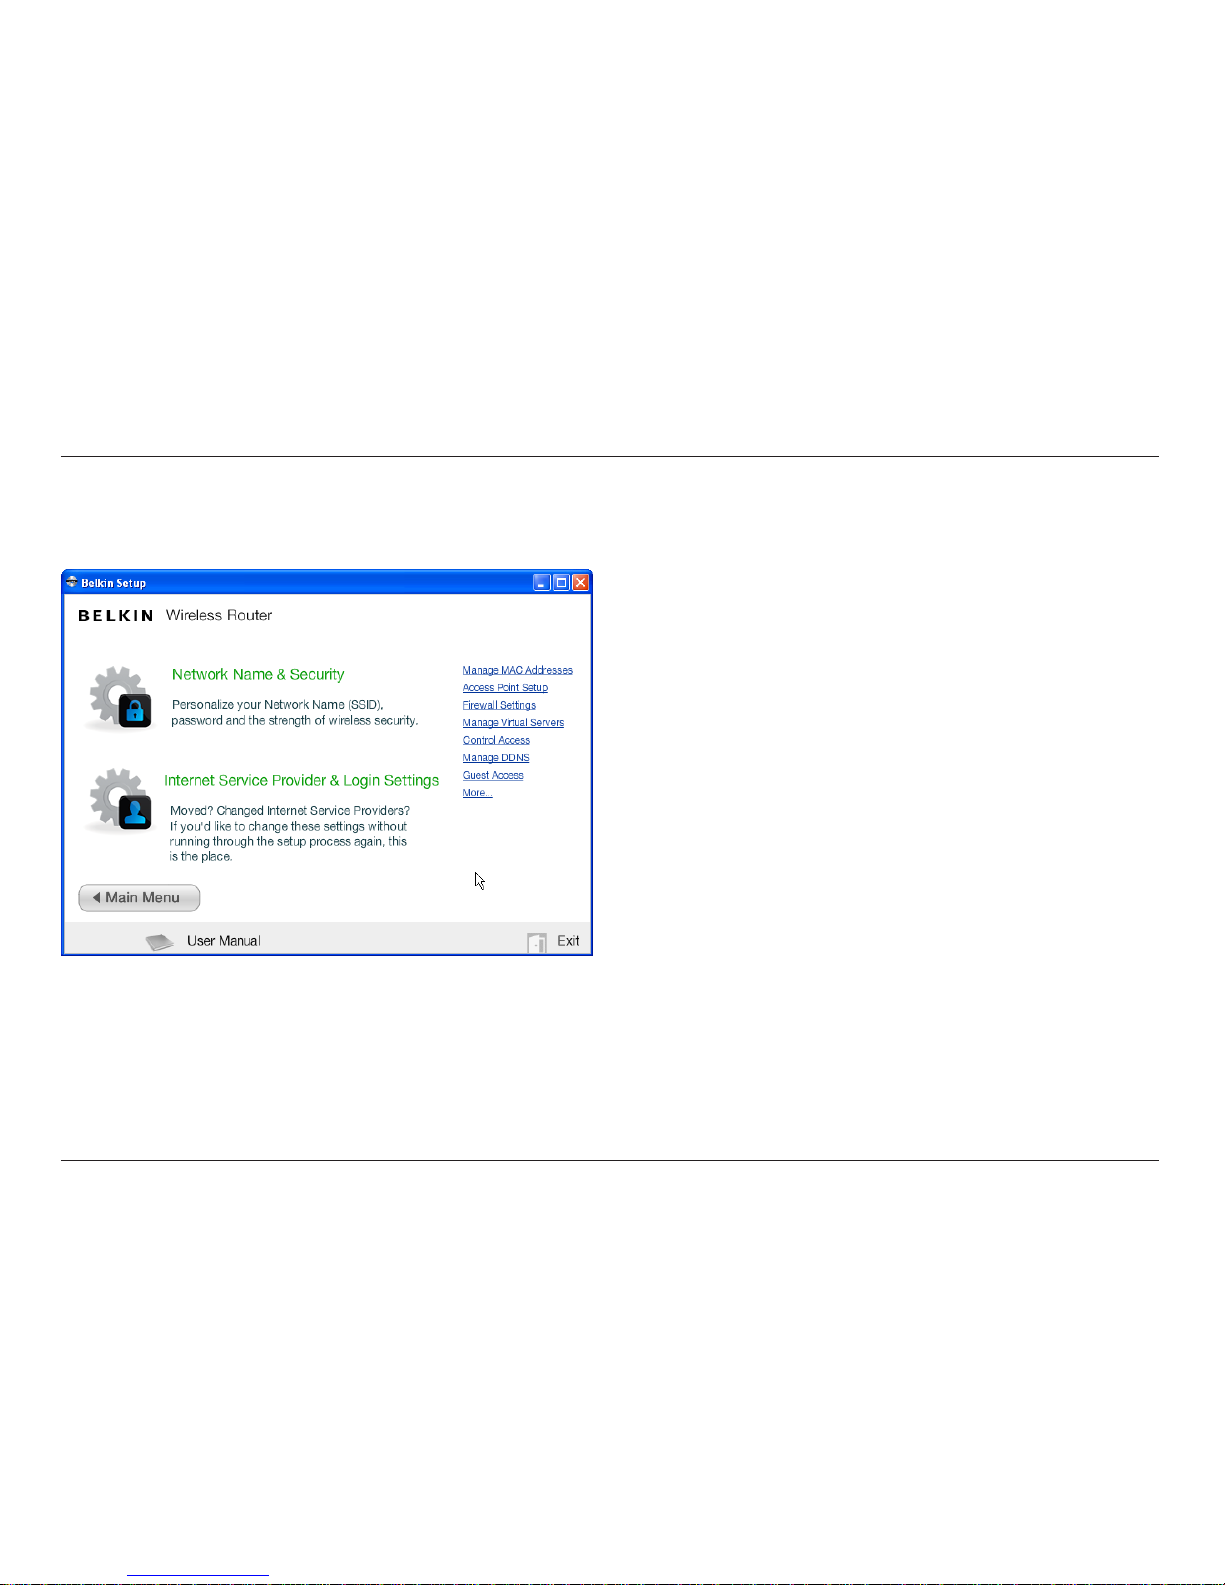
Advanced Tools & Settings
After the initial setup is co mplete, you have the option to
change settings like your network name, security type, and
password. To make th ese cha nges an d other s, clic k on the
Advanced Too ls icon at the CD Setu p menu and select o ne
of the following settings that you would like to change:
Network Name & Security – Personalize your n et work na me
(SSID), password, and strength of wireless security.
Internet Service Provider & Login Settings – Have
you moved or changed Internet Service Providers?
If you’d like to change these settings w ithout running
through the setup process again, this is the place.

7
GETTING STARTED
The Belkin Router Manager
Belkin.2234
Router Settings
User Manual
USB Print & Storage Manager
Memory Safe: Get Started!
Check for Updates
Options
Exit
The Belkin Router Manager appears in your system tray
(Windows) o r menu bar (Mac). Its icon indica tes t he curr ent
status of you r Router and also allows you to access your
Rou ter’s settin gs to make change s. It also provid es quic k
access to software that came bundled with your Router.
To access the Router settings, click on the icon
and select from the menu that appears.
The status of your Router is shown by the Belkin Router Manager
icon, which closely mimics the light on the front of the Router.
Green: You are connec ted to your Bel kin Rou ter
and it is connected to the Internet.
Amber: You a re conn ected to your B elkin R outer,
but it is not connected to the Internet.

8
GETTING STARTED
In your browser, type “ht tp: //router ” (you do not need to type
in anything else su ch as “ www ”). T hen pre ss the Enter key. If
you’re stil l hav ing trouble ru nning t he manu al setup option, type
“192.168.2.1” in your browser (you do not need to type in anything
else such as “http://” or “www”). Then press the Enter key.
Manual Setup Using Your Browser

9
GETTING STARTED
Adding Computers to Your Network
Wireless devices such as computer s, ne twork pri nters, and gaming
systems can connect to your Router with a few simple steps.
Using the CD
1. Put the Setup CD into your compute r. If the CD
doesn’t op en automatical ly, browse to your CD
drive and open the Belkin Setup CD icon.
2. Click the Setup icon on the CD menu.
3. After a brief installation, the setup software will ask you for the
net wo rk name and passwor d fro m the network infor mation ca rd
that came with your Router. Thi s card is mo st likely now l oc ated
underneath the foot of your Router in the provided card slot.
4. A progress screen will appear while addition al software is
insta lled. This m ay ta ke a few minu tes to com plete. Once
finis hed, a “Success” message will appear indicat ing tha t you
are connected to the Internet via your new Belkin Router.
Note: Th e set up software runs only o n
Windows and Mac OS X systems.

10
GETTING STARTED
Manually
If you choose not to use the included Setup CD for
add ing additional computer s or wireles s dev ic es, you
can manually add these items to your network.
1. Locate th e wireless-network-connection s optio n
on your computer or wireless device.
2. Select your Belkin Router from the l ist of available networks. You
can identify your B elkin Router by locating the network n ame
(SSID) from the card located underneath the foot of your Router.
3. Enter your net work passwor d (lo cated on
your network information card).
Your wireless device will take a few moments to connect to your
network. If the connection is not made the first time, try this
proce ss again. If you still have difficul ty connecting to your network
after try ing thi s proce ss a few times, see the “Troublesho oting”
section in this manual for help with connecting to your network.
Note: In some cases you may be prompted to select the
security type. It is printed on the card for your convenience.
Using the WPS Button
1. Start WPS Pus h Button Connectio n (WPS PBC) on your
compu ter o r oth er Wi-Fi device that you would like to connect
wirelessly to your Router. Often there w ill be a b ut ton for this
purpo se in software that c ame wit h the device, or a physical
“WPS,” “PBC,” or “Security” button on the device itself.
2. Within two minutes, press the WPS button on your Router.
The WPS light (small light a bove WPS button) will b link green w hile
it liste ns fo r your Wi-Fi device. Once a con ne ction i s establi shed, the
light will turn green and t hen go out. If a connection is not estab lished,
the light will blink amber. You may repeat the process to try again.
You can repeat this process for each WPS-enabled
device you’d like to add to your network.
 Loading...