

Page 1
Page 2

TABLE OF CONTENTS
Table of Contents Page 1
General Information: General Info. & Safety Precautions Page 2-5
Before You Start: Features, Disc Compatibility Page 6-8
Front Panel: Front Panel Controls and Functions Page 9
Rear Panel: Controls and Connections Page 10
Remote Control/Display: Description and Functions Page 11-13
Getting Started: On-screen Displays, Setup Navigator Page 14-16
Playing Discs Page 17-19
FAQ: Frequently Asked Questions Page 20-21
Disc Navigator: Introduction and Use Page 22-23
Playing Discs: Scanning, Using the Multi Dial Page 24
Slow Motion, Frame Advance, Looping Page 25-26
Repeat and Random Play Page 27-28
Programming Page 29-31
Disc Search Page 32
Switching Subtitles/DVD/Video Language Page 33
Switching DVD-RW/CD/MP3 Audio Channels Page 34
Displaying Disc Information Page 35
Audio Settings: Audio DRC, Virtual Surround Page 36-37
Set Speaker Distance Page 38
Video Settings: Video Adjust Page 39-40
Initial Settings Menu: Using Settings, Digital Audio Out Page 41-42
Video Out, Language and Display Settings Page 43-47
Options, Parental Lock, Setting Country Code Page 47-50
Bonus Group, Auto Disc Menu Page 50
Group Playback, DVD, SACD Playback Page 51
CD Playback, Audio output Mode Page 52
Speaker Installation, Distance Page 52-54
Additional Information: Care of the Player and Discs Page 55-56
Screen Sizes and Disc Formats Page 57
Audio Output Setting Variations Page 58
Language and Country Code List - Selecting Page 59-60
Glossary Page 60-61
Troubleshooting Page 62-65
Specifications Page 66
Appendix: RS-232 Protocol and Control Details Page 67-72
Page 3

CONGRATULATIONS
You have just acquired the finest player available for the playback of digitally
encoded source material for both audio and video formats
.
IMPORTANT
Save all packaging in a dry place away from fire hazards. Your Bel Canto player
is a precision electronic instrument and should be properly packaged any time
shipment is made. In the unlikely event that you have to return your unit to the
factory for service, or if you send it to us for updating, the original packaging will
best protect the unit from shipping damage or delay.
In order to achieve the fullest flexibility and enjoyment from your player, we at Bel
Canto recommend that you read this manual in full before connecting the unit to
your audio/video system.
WARRANTY REGISTRATION
Complete and return by fax or mail your warranty document enclosed in product
box for extended warranty coverage. Please return this document to Bel Canto
within 30 days of original purchase.
Bel Canto Design offers a 90-day factory warranty from the date of purchase that
can be extended to 2 year LIMITED WARRANTY. The original owner
can obtain the LIMITED WARRANTY, by returning a completed warranty form
along with a copy of the original sales receipt from your authorized Bel Canto
Dealer. The extended LIMITED WARRANTY coverage extends the warranty to a
period of 1 year on the Laser and Loader (mechanical portion of the unit and 2
years on the electronics, from the date of purchase by the original owner and
includes all parts and workmanship. The warranty automatically commences on
the date of purchase or I year from the date of shipment to an authorized Bel
Canto dealer, which ever comes first, and terminates 3 years from date of
shipment to an authorized Bel Canto dealer. Units purchased from a source
other than an authorized dealer are not covered by this warranty. Warranty is
void if damage is due to abuse, neglect or unauthorized modification. Cost
associated with the return of this product is the sole responsibility of the owner.
All repair work must be done by an authorized Bel Canto repair center. Work
done by unauthorized persons will void all warranty coverage. Bel Canto Design
products are uniquely identified with a serial number on the back panel of each
unit. This number is required to validate your warranty. Please reference your
serial number if service is required. If you have any questions, comments or if we
can be of service, please contact us Monday through Friday 9:00a.m. - 5:00p.m.,
Central Time in the United States.
Bel Canto Design, Ltd.
212 3rd Avenue North,
Minneapolis, MN
55401 USA
Tel: 612-317-4550 2003 FLC - Bel Canto/LFM
Page 4
READ INSTRUCTIONS — All the safety and
operating instructions should be read before
the product is operated.
RETAIN INSTRUCTIONS — The safety and
operating instructions should be retained for
future reference.
HEED WARNINGS — All warnings on the
product and in the operating instructions should
be adhered to.
FOLLOW INSTRUCTIONS — All operating and
use instructions should be followed.
CLEANING — Unplug this product from the wall
outlet before cleaning. The product should be
cleaned only with a polishing cloth or a soft dry
cloth. Never clean with furniture wax, benzine,
insecticides or other volatile liquids since they
may corrode the cabinet.
ATTACHMENTS — Do not use attachments not
recommended by the product manufacturer as
they may cause hazards.
WATER AND MOISTURE — Do not use this
product near water — for example, near a
bathtub, wash bowl, kitchen sink, or laundry
tub; in a wet basement; or near a swimming
pool; and the like.
ACCESSORIES — Do not place this product on
an unstable cart, stand, tripod, bracket, or table.
The product may fall, causing serious injury to a
child or adult, and serious damage to the
product. Use only with a cart, stand, tripod,
bracket, or table recommended by the
manufacturer, or sold with the product. Any
mounting of the product should follow the
manufacturer’s instructions, and should use a
mounting accessory recommended by the
manufacturer.
CART — A product and cart
combination should be moved with
care. Quick stops, excessive force,
and uneven surfaces may cause the
product and cart combination to
overturn.
VENTILATION — Slots and openings in the
cabinet are provided for ventilation and to
ensure reliable operation of the product and to
protect it from overheating, and these openings
must not be blocked or covered. The openings
should never be blocked by placing the product
on a bed, sofa, rug, or other similar surface.
This product should not be placed in a built-in
installation such as a bookcase or rack unless
proper ventilation is provided or the
manufacturer’s instructions have been adhered
to.
POWER SOURCES — This product should be
operated only from the type of power source
indicated on the marking label. If you are not
sure of the type of power supply to your home,
consult your product dealer or local power
company.
LOCATION – The appliance should be installed
in a stable location.
NONUSE PERIODS – The power cord of the
appliance should be unplugged from the outlet
when left unused for a long period of time.
GROUNDING OR POLARIZATION
• If this product is equipped with a polarized
alternating current line plug (a plug having one
blade wider than the other), it will fit into the
outlet only one way. This is a safety feature. If
you are unable to insert the plug fully into the
outlet, try reversing the plug. If the plug should
still fail to fit, contact your electrician to replace
your obsolete outlet. Do not defeat the safety
purpose of the polarized plug.
• If this product is equipped with a three-wire
grounding type plug, a plug having a third
(grounding) pin, it will only fit into a grounding
type power outlet. This is a safety feature. If
you are unable to insert the plug into the outlet,
contact your electrician to replace your
obsolete outlet. Do not defeat the safety
purpose of the grounding type plug.
IMPORTANT SAFETY INSTRUCTIONS
The lightning flash with arrowhead
symbol, within an equilateral
triangle, is intended to alert the
user to the presence of uninsulated
“dangerous voltage” within the
product's enclosure that may be of
sufficient magnitude to constitute
a risk of electric shock to persons.
IMPORTANT
CAUTION:
TO PREVENT THE RISK OF ELECTRIC
SHOCK, DO NOT REMOVE COVER
(OR BACK). NO USER-SERVICEABLE
PARTS INSIDE. REFER SERVICING
TO QUALIFIED SERVICE
PERSONNEL.
The exclamation point within an
equilateral triangle is intended to
alert the user to the presence of
important operating and
maintenance (servicing)
instructions in the literature
accompanying the appliance.
H002_En
RISK OF ELECTRIC SHOCK
DO NOT OPEN
CAUTION
Page 5
POWER-CORD PROTECTION — Power-supply
cords should be routed so that they are not
likely to be walked on or pinched by items
placed upon or against them, paying particular
attention to cords at plugs, convenience
receptacles, and the point where they exit from
the product.
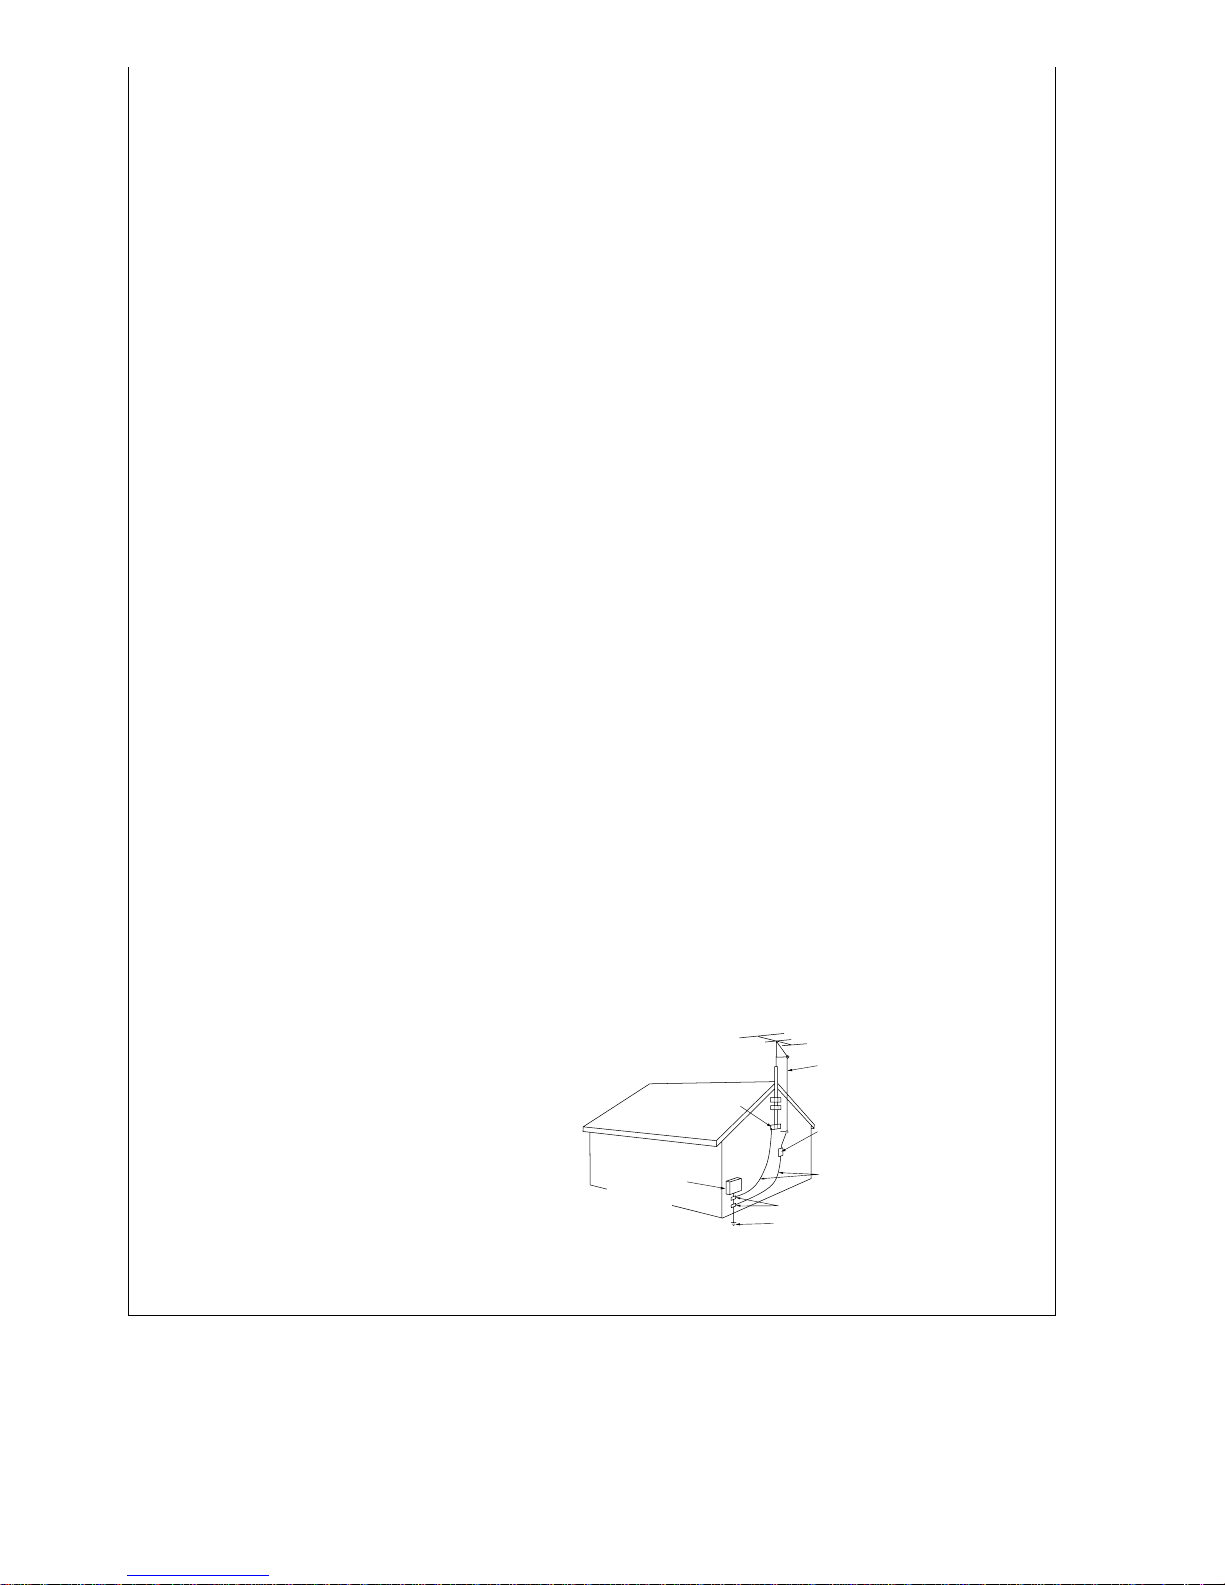
OUTDOOR ANTENNA GROUNDING — If an
outside antenna or cable system is connected
to the product, be sure the antenna or cable
system is grounded so as to provide some
protection against voltage surges and built-up
static charges. Article 810 of the National
Electrical Code, ANSI/NFPA 70, provides
information with regard to proper grounding of
the mast and supporting structure, grounding
of the lead-in wire to an antenna discharge unit,
size of grounding conductors, location of
antenna-discharge unit, connection to
grounding electrodes, and requirements for the
grounding electrode. See Figure A.
LIGHTNING — For added protection for this
product during a lightning storm, or when it is
left unattended and unused for long periods of
time, unplug it from the wall outlet and
disconnect the antenna or cable system. This
will prevent damage to the product due to
lightning and power-line surges.
POWER LINES — An outside antenna system
should not be located in the vicinity of
overhead power lines or other electric light or
power circuits, or where it can fall into such
power lines or circuits. When installing an
outside antenna system, extreme care should
be taken to keep from touching such power
lines or circuits as contact with them might be
fatal.
OVERLOADING — Do not overload wall outlets,
extension cords, or integral convenience
receptacles as this can result in a risk of fire or
electric shock.
OBJECT AND LIQUID ENTRY — Never push
objects of any kind into this product through
openings as they may touch dangerous voltage
points or short-out parts that could result in a
fire or electric shock. Never spill liquid of any
kind on the product.
SERVICING — Do not attempt to service this
product yourself as opening or removing covers
may expose you to dangerous voltage or other
hazards. Refer all servicing to qualified service
personnel.
[For U.S. model]
IMPORTANT NOTICE
The serial number for this equipment is located
on the rear panel. Please write this serial
number on your enclosed warranty card and
keep it in a secure area. This is for your
security.
H006A_En
DAMAGE REQUIRING SERVICE — Unplug this
product from the wall outlet and refer servicing
to qualified service personnel under the
following conditions:
• When the power-supply cord or plug is
damaged.
• If liquid has been spilled, or objects have fallen
into the product.
• If the product has been exposed to rain or
water.
• If the product does not operate normally by
following the operating instructions. Adjust only
those controls that are covered by the
operating instructions as an improper
adjustment of other controls may result in
damage and will often require extensive work
by a qualified technician to restore the product
to its normal operation.
• If the product has been dropped or damaged in
any way.
• When the product exhibits a distinct change in
performance — this indicates a need for
service.
REPLACEMENT PARTS — When replacement
parts are required, be sure the service
technician has used replacement parts
specified by the manufacturer or have the
same characteristics as the original part.
Unauthorized substitutions may result in fire,
electric shock, or other hazards.
SAFETY CHECK — Upon completion of any
service or repairs to this product, ask the
service technician to perform safety checks to
determine that the product is in proper
operating condition.
WALL OR CEILING MOUNTING — The product
should not be mounted to a wall or ceiling.
HEAT — The product should be situated away
from heat sources such as radiators, heat
registers, stoves, or other products (including
amplifiers) that produce heat.
POWER SERVICE GROUNDING
ELECTRODE SYSTEM
(NEC ART 250, PART H)
GROUND CLAMPS
GROUNDING CONDUCTORS
(NEC SECTION 810-21)
ANTENNA
DISCHARGE UNIT
(NEC SECTION 810-20)
GROUND
CLAMP
Fig. A
NEC — NATIONAL ELECTRICAL CODE
ANTENNA
LEAD IN WIRE
ELECTRIC
SERVICE
EQUIPMENT
WARNING: TO PREVENT FIRE OR SHOCK
HAZARD, DO NOT EXPOSE THIS APPLIANCE
TO RAIN OR MOISTURE. H001_En
Page 6

ADDITIONAL SAFTEY REQUIREMENTS
Please carefully read each item of the operating instructions and safety precautions before using this
product. Use extra care to follow the warnings written on the product itself and/or in the operating
instructions. Keep the operating instructions and safety precautions for future reference.
Caution: to reduce the risk of electrical shock, do not remove any of the cover panels.
No user-serviceable parts inside. Refer all servicing to qualified service personnel only.
To prevent fire or shock hazard, do not allow liquids to spill or objects to fall into any openings of the
product.
This unit is supplied with a 3 pin grounded AC plug. Always insert the ac plug into a grounded outlet. Do
not remove the ground pin or d isable the gro und for any purpo s e.
Before making any connections to the unit, first turn off the power and then disconnect the ac power cord.
When installing the unit in your system, make certain to allow a minimum of 1½ inches of ventilation on
each side of the unit. Also allow at least 2½ inches of ventilation space above the unit. Improper ventilation
of the unit may cause overheating, which may damage the unit and it to fail. Place the unit on a solid
surface only. i.e. not on carpet, etc.
Do not place the unit near heat sources such as direct sunlight, stoves, heat registers, radiators or other heat
producing equipment.
To prevent damage to the digital or analog output circuitry, be certain not to short the output signal pin(s)
to ground. E nsure that your outp ut cables do not have any internal shorts before connecting them.
IMPORTANT NOTICE
Due to the computer-based circuitry used in this product, it is imperative that the player be connected to a
ground via its three-wire AC power cord. It is important that the AC power outlet, which the unit is plugged
into, is actually grounded. Failure to do so will severely compromise the performance, reliability and safety o f
use of the unit.
It is also important to prevent contact with static electricity when connecting other components and cables to
the unit. When connecting cables, simply place one hand on top of the player and then grasp the metal “barrel”
of the cable with the other hand and plug (unplug) the cable into (from) the appropriate jack on the unit.
At times a snapping sound may o ccur or the unit may “lockup” and fail to operate. This is NOT A
MALFUNCTION of the unit. This is normally caused by exposure to static electricity and can be cured by
turning off the power amplifier(s) and then turning the unit off and then on with the rear mounted power
switch.
Ventilation is an important issue when placing the unit in a system. Make certain that the unit is in a wellventilated area or rack unit.
Please take note, that some power line conditioners defeat the AC power ground on their outlets. If the
intention is to plug the unit into a line conditioner, check with your dealer to make certain that the particular
conditioner that is intended for use DOES NOT DEFEAT THE AC GROUND on its AC outlets.
DO NOT remove the cover from the player, as there are no user serviceable components inside. Refer
servicing and updating to qualified service personnel only.
Page 7
Before You Start01
8
En
Features
DVD-Audio and SACD compatible
Experience the super high-quality audio
performance of DVD-Audio and Super Audio
CD (SACD).
The on-board 24-bit/192kHz DAC means that
this player is fully compatible with high
sampling-rate discs, capable of delivering
exceptional sound quality in terms of
dynamic range, low-level resolution and
high-frequency detail.
Built-in Dolby*1 Digital and DTS*
2
decoding with multichannel outputs
Logos: 1
R
This player features multichannel analog
outputs for connection to an AV amplifier to
give you stunning surround sound from
Dolby Digital, DTS and multichannel DVDAudio discs.
TruSurround*3 and Virtual Dolby
Digital
Logo:
TruSurround/Virtual Dolby Digital creates a
realistic surround-sound effect from any
Dolby Digital source using just two speakers.
PureCinema progressive scan
When connected to a progressive scancompatible TV or monitor using the component video outputs, you can enjoy extremely
stable, flicker free images, with the same
frame refresh rate as the original movie (see
page 50).
Super Fine Focus digital filter
This improves the quality of the video output
by reducing video noise and increasing the
horizonatal resolution to 540 lines.
MP3 compatibility
This player is compatible with CD-R, CD-RW
and CD-ROM discs that contain MP3 audio
tracks.
Graphical on-screen displays
Setting up and using your DVD player is
made very easy using the graphical onscreen displays.
*1 Manufactured under license from Dolby Laboratories. “Dolby” and the double-D symbol are trademarks of
Dolby Laboratories.
*2 “DTS” and “DTS Digital Surround” are registered
trademarks of Digital Theater Systems, Inc.
*3 TruSurround and the
® symbol are trademarks
of SRS Labs, Inc. TruSurround technology is incorporated
under license from SRS Labs, Inc.
Page 8
Before You Start01
10
En
Disc / Content Format Playback Compatibility
General Disc Compatibility
• This player was designed and engineered to be compatible with software
containing one or more of the following
logos.
DVD-Video DVD-R DVD-RWDVD-Audio
Video CD
Super Audio CD
Audio CD CD-R
CD-RW
• Other formats, including but not limited
to the following, are not playable in this
player:
Photo CD / DVD-RAM / DVD-ROM /
CD-ROM
(except those that contain MP3 files
formatted as specified in the “Com-
pressed Audio Compatibility” section)
• DVD-R/RW and CD-R/RW discs (Audio
CDs and Video CDs) recorded using a
DVD Recorder, CD Recorder or Personal
Computer may not be playable on this
machine. This may be caused by a
number of possibilities, including but
not limited to: the type of disc used; the
type of recording; or damage, dirt or
condensation on either the disc or the
player’s pick-up lens.
Special note about particular formats or
software follows below:
CD-R/RW Compatibility
• This unit will play CD-R and CD-RW
discs recorded in CD Audio, Video CD,
or MP3 audio formatting. However, any
other content may cause the disc not to
play, or create noise/distortion in the
output.
• This unit cannot record CD-R or CD-RW
discs.
• Un-finalized CD-R/RW discs recorded in
CD Audio can be played, but not all
Table of Contents (playing time, etc..)
will be displayed.
DVD-R/RW Compatibility
• This unit will play DVD-R/RW discs that
were recorded using the DVD Video
format.
• This unit will play DVD-RW discs that
were recorded using the Video Recording format.
• This unit cannot record DVD-R/RW
discs.
• Un-finalized DVD-R/RW discs cannot be
played in this player.
Compressed Audio Compatibility
• This unit will play compressed audio
files formatted in the MPEG-1 Audio
Layer 3 format (MP3) with a 44.1 or
48kHz fixed bit rate. Incompatible files
will not play and “UNPLAYABLE” will be
displayed on the unit.
• Variable Bit-Rate (VBR) files are
playable, but playing time may not be
shown correctly.
• The CD-ROM used to compile your MP3
files must be ISO 9660 Level 2 compliant.
• CD physical format: Mode1, Mode2 XA
Form1.
• This player only plays tracks that are
named with the file extension “.mp3” or
“.MP3”.
Page 9
Before You Start
11
En
• This player is compatible with multisession discs, but only plays sessions
that are closed.
• Use CD-R or CD-RW media for recording your MP3 files.
• This player can recognize a maximum of
250 folders or 250 tracks. Discs containing more than 250 folders or 250 tracks
will play, but only the first 250 folders /
tracks.
• Folder and track names (excluding the
“.mp3” extension) are displayed.
• There are many different recording bit-
rates available to encode your MP3 files.
This unit was designed to be compatible
with all of them. Audio encoded at
128Kbps should sound close to regular
CD Audio quality. This player will play
lower bit-rate MP3 tracks, but please
note that the sound quality becomes
noticeably worse at lower bit-rates.
PC Created Disc Compatibility
• If you record a disc using a Personal
Computer, even if it is recorded in a
“compatible format” as listed above,
there will be cases in which the disc
may not be playable in this machine due
to the setting of the application software
used to create the disc. In these
particular incidences, check with the
software publisher for more detailed
information.
• DVD-R/RW and CD-R/RW software disc
boxes also have additional compatibility
information.
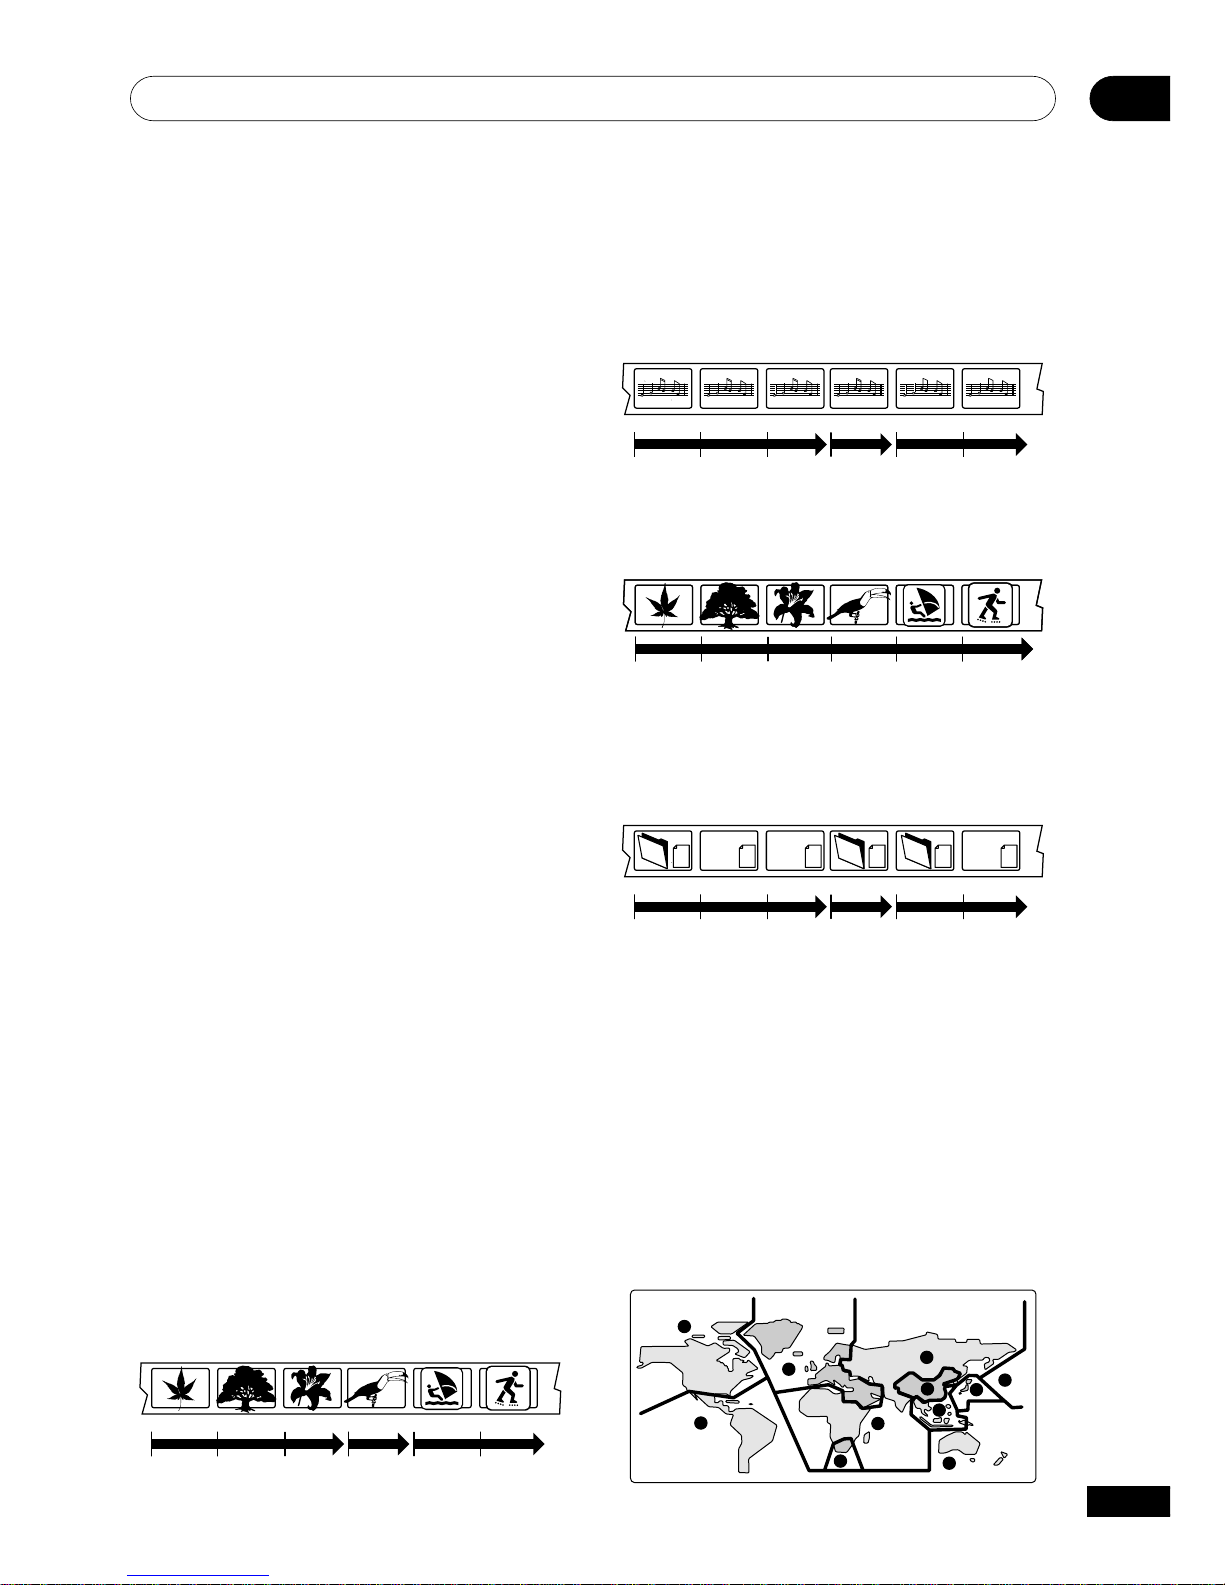
Titles, chapters, Groups and tracks
DVD-Video discs are generally divided into
one or more titles. Titles may be further
subdivided into chapters.
Title 1 Title 2 Title 3
Chapter 1 Chapter 2 Chapter 3 Chapter 1 Chapter 1 Chapter 2
DVD-Audio discs are divided into one or
more groups that can each contain a
number of tracks.
Group 1 Group 2 Group 3
Track 1 Track 2 Track 3 Track 1 Track 1
Track 2
CDs, SACDs and Video CD are divided into
tracks.
Track 1 Track 2 Track 3 Track 4 Track 5 Track 6
CD-ROMs containing MP3 files are divided
into folders and tracks. Folders may also
contain further subfolders.
Folder A Folder B Folder C
Track 1 Track 2 Track 3 Track 1 Track 1
Track 2
mp3
mp3
mp3
mp3
mp3
mp3
DVD-Video regions
All DVD-Video discs carry a region mark on
the case somewhere that indicates which
region(s) of the world the disc is compatible
with. Your DVD player also has a region
mark, which you can find on the rear panel.
Discs from incompatible regions will not play
in this player. Discs marked ALL will play in
any player.
The diagram below shows the various DVD
regions of the world.
1
2
2
5
5
6
3
2
1
4
4
Page 10
Page 11
Page 12
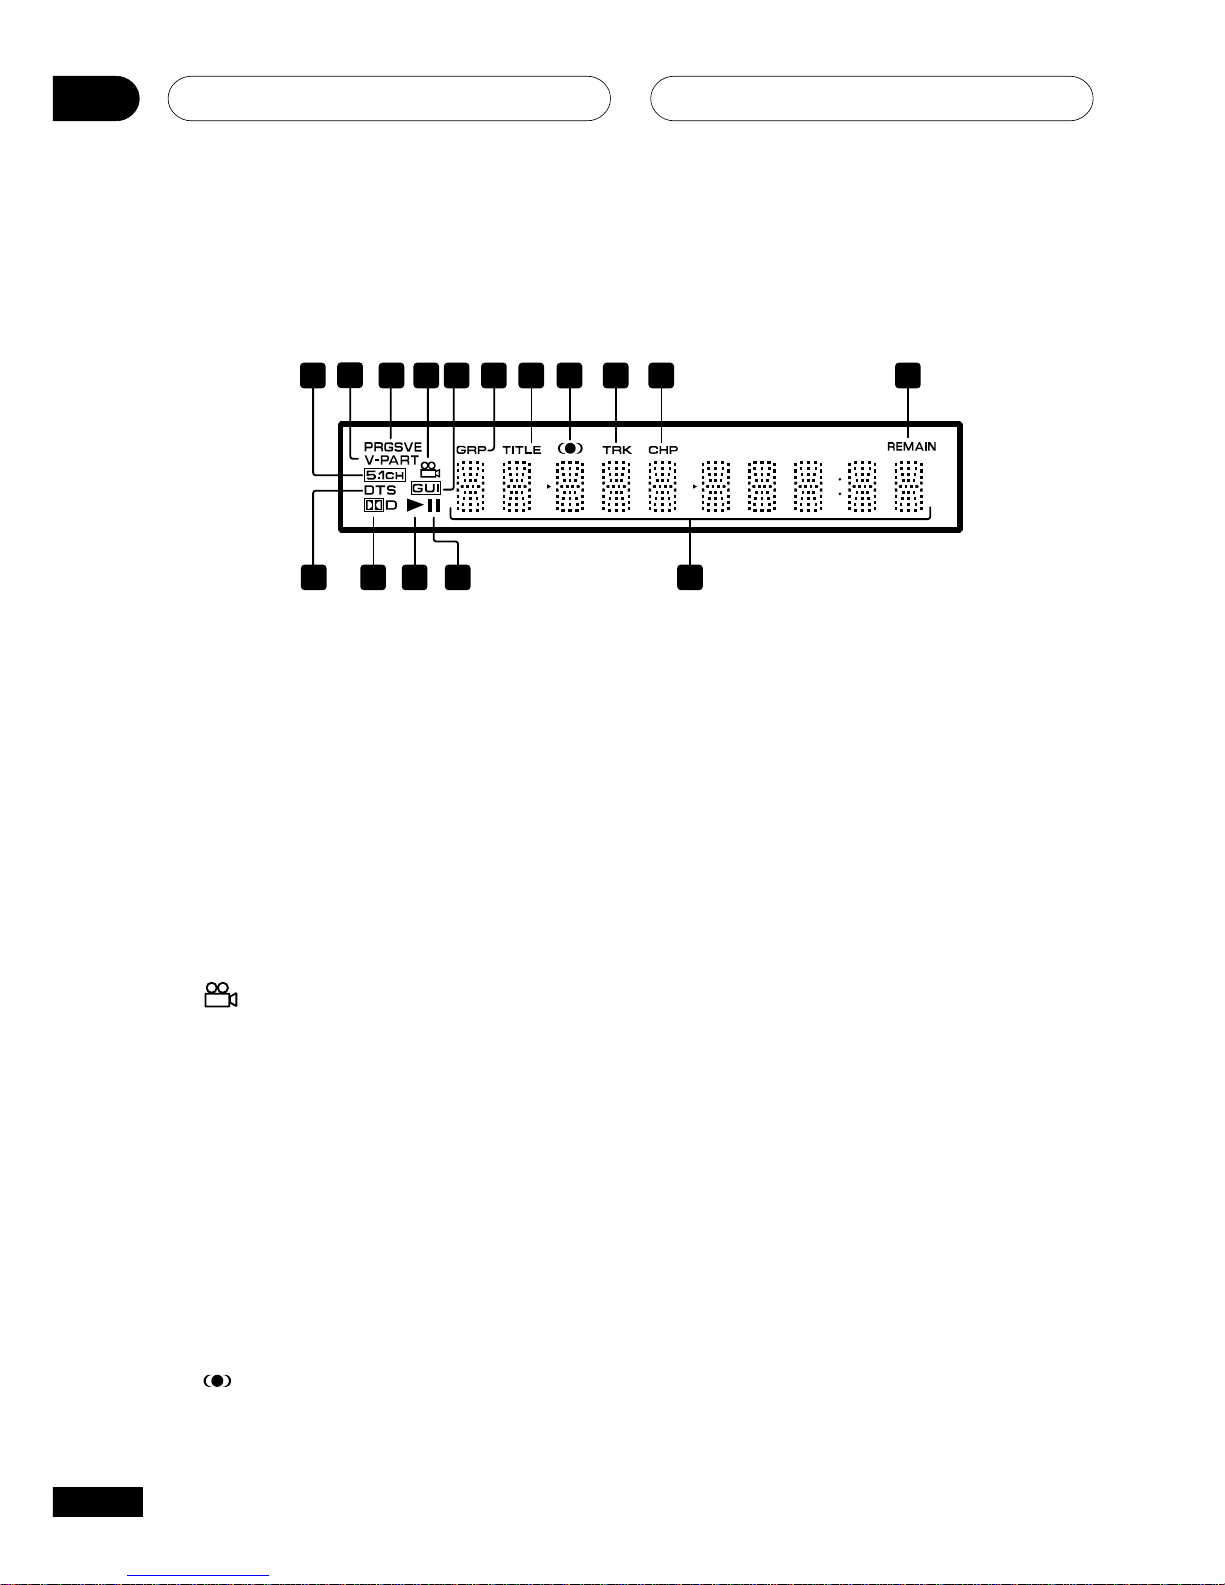
Controls and Displays
03
20
En
1 5.1CH
Lights when analog 5.1 channel output is
selected.
2V-PART
Lights when playing a video part of a DVD
disc
3 PRGSVE
This indicator is not used on this player.
See Section for front panel controls.
4
Lights during multi-angle scenes on a DVD
disc.
5 GUI (Graphical User Interface)
Lights when a menu is displayed on-screen
6GRP
Indicates that the character display is
showing a DVD-Audio group number
7 TITLE
Indicates that the character display is
showing a DVD-Video title number
8
Lights when 2V/TruSurround is active.
9 TRK
Indicates that the character display is
showing a track number
10 CHP
Indicates that the character display is
showing a DVD chapter number
11 REMAIN
Lights when the character display is showing
the time or number of tracks/titles/chapters
remaining
12 Character display
13 8
Lights when a disc is paused
14 3
Lights when a disc is playing
15 2 D
Lights when a Dolby Digital soundtrack is
playing
16 DTS
Lights when a DTS soundtrack is playing
1
1516 1214 13
3 5 76 8 9 10 11
2
4
Display
Page 13
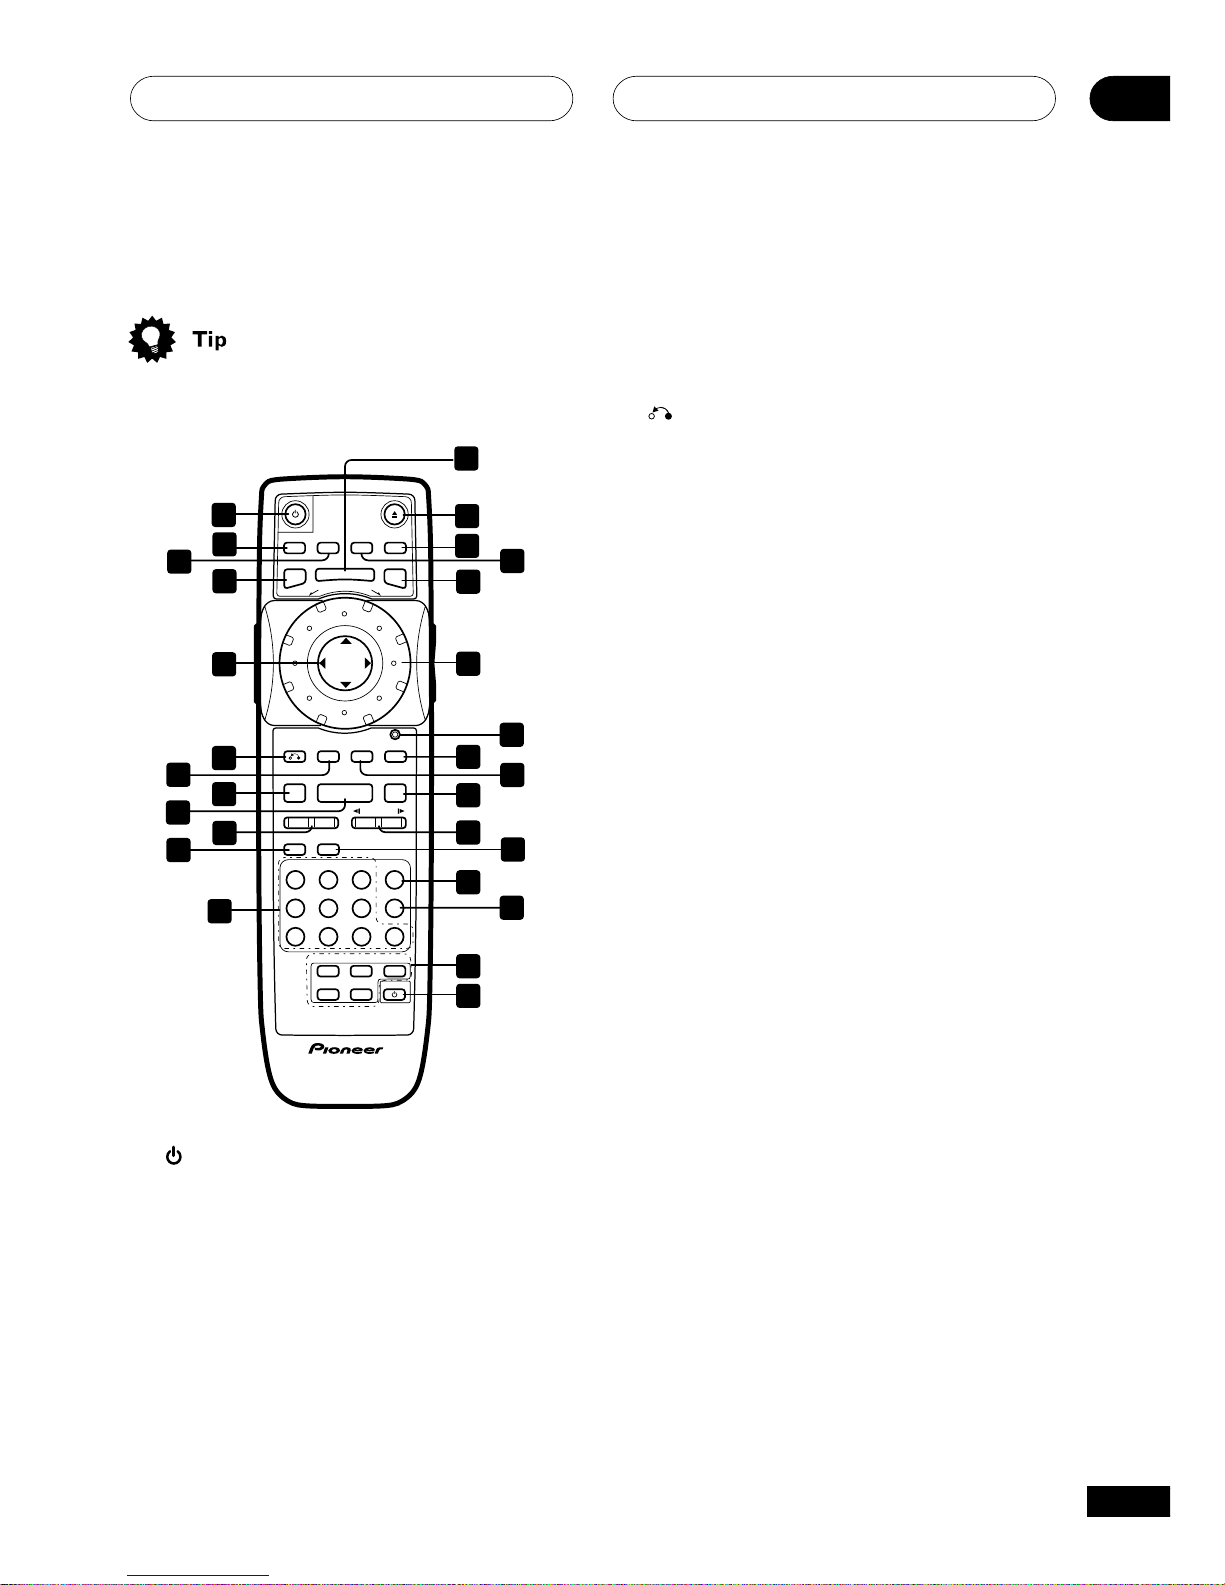
Controls and Displays
03
21
En
1 (STANDBY/ON)
Press to switch the player on or into standby
2 DISPLAY
Press to display information about the disc
playing (page 46)
3 AUDIO
Press to select the audio channel or
language.
4 SETUP
Press to display (or exit) the on-screen
display
Remote control
• Buttons 6 thru 9 and 20 thu 22 glow
slightly in the dark for ease of use.
E/
E/
SETUP
DISPLAY AUDIO SUBTITLE ANGLE
TOP MENU
OPEN /
CLOSE
MENU
– MULTI SPEED +
ENTER
VIDEO
ADJUST DIMMER
JOG MODE
RETURN
V.ADJ
FL JOG
PLAY MODE SURROUND
873
4¢ 1 ¡
0987
E654
C321
CLEAR
ENTER
VOLUME
CHANNEL
TV CONTROL
+
FUNC
–
+
–
TV
1
14
15
16
17
18
20
21
22
25
27
28
23
2
4
5
6
7
8
10
12
13
3
9
19
26
11
24
5 ENTER & Joystick
Use to navigate on-screen displays and
menus. Press ENTER to select an option or
execute a command
6
(RETURN)
Press to return to a previous menu screen
7 V.ADJ (VIDEO ADJUST )
Press to display the Video Adjust menu.
8 7
Press to stop the disc (you can resume
playback by pressing 3 (play))
9 3
Press to start or resume playback
10 4 ¢
Press to jump to the start of the previous /
next chapter / track
11 PLAY MODE
Press to display the Play Mode menu.
(You can also get to the Play Mode menu
by pressing SETUP and selecting Play Mode)
12 Number buttons
13 MENU
Press to display a DVD disc menu, or the
Disc Navigator if a DVD-RW, CD, Video CD or
MP3 disc is loaded
14 0 OPEN/CLOSE
Press to open or close the disc tray
15 ANGLE
Press to change the camera angle during
DVD multi-angle scene playback.
16 SUBTITLE
Press to select a subtitle display.
17 TOP MENU
Press to display the top menu of a DVD disc
Page 14
Controls and Displays
03
2152
En
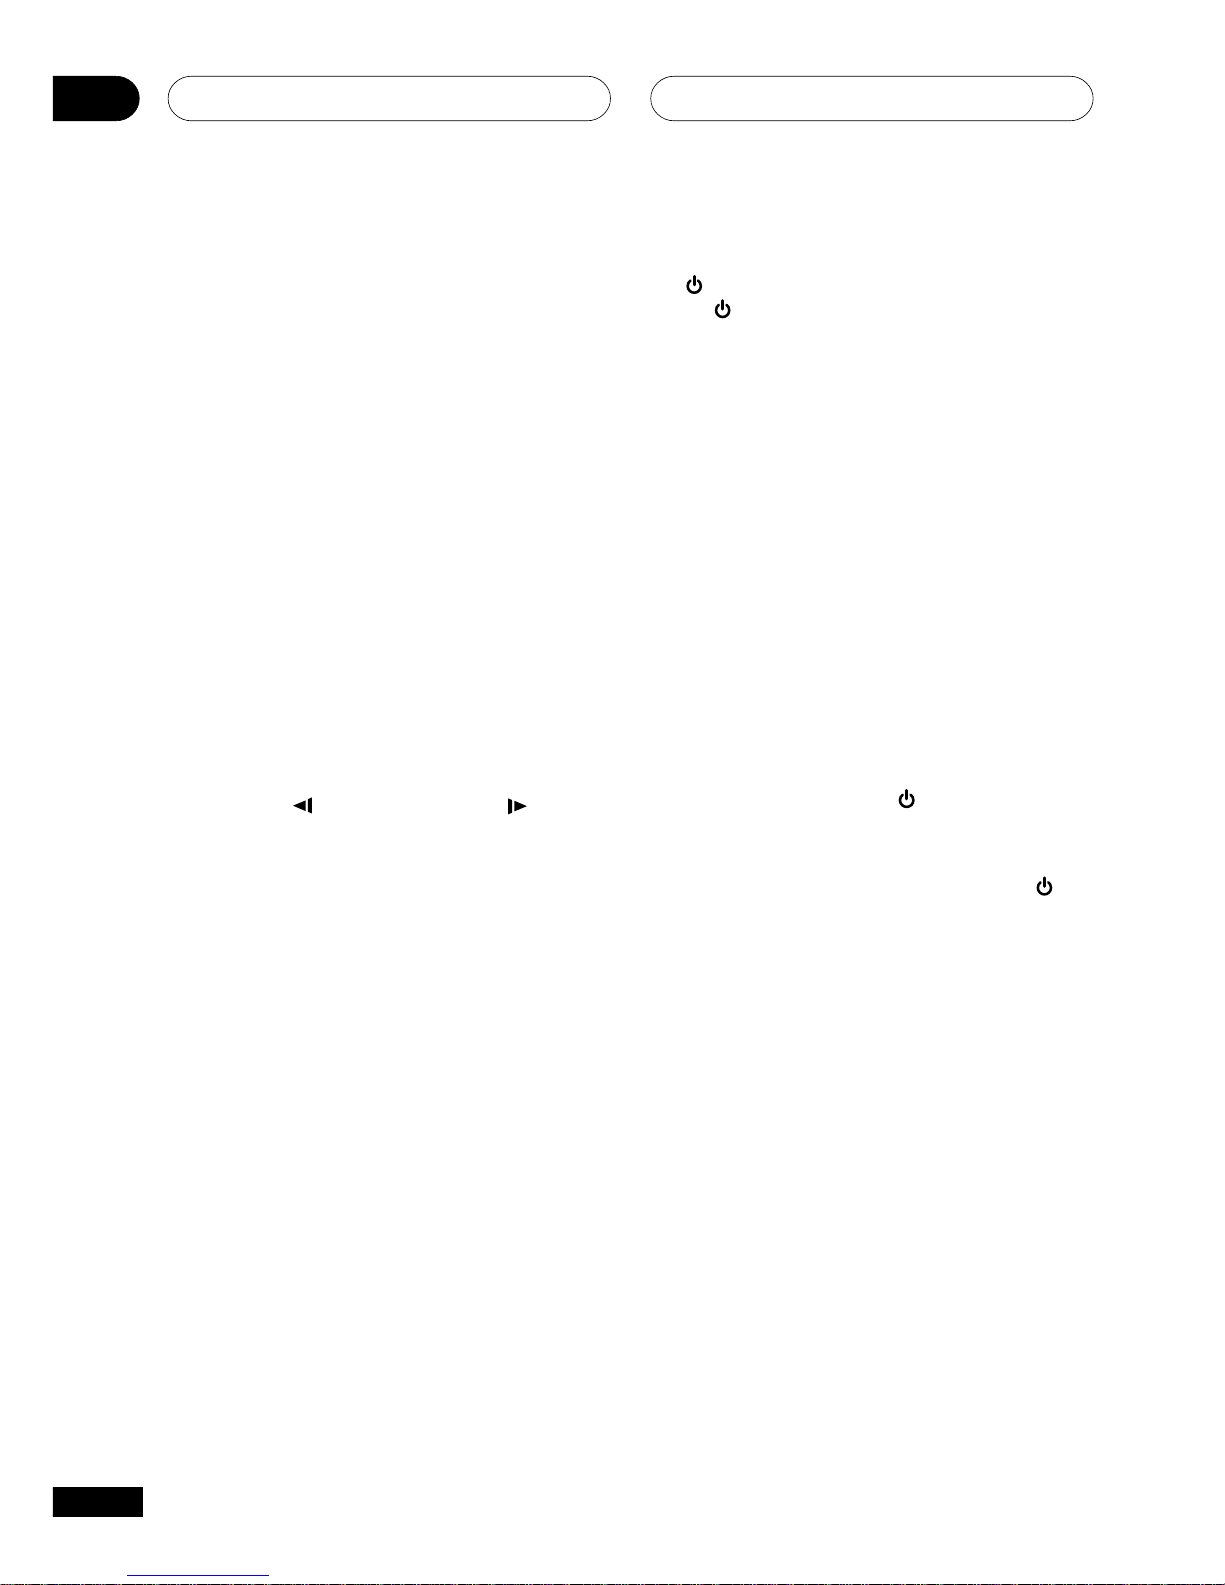
18 MULTI DIAL
Use for scanning and slow motion control.
19 Jog indcator
Lights when multi dial is in jog mode .
20 JOG (JOG MODE)
Press to put switch jog mode on/off. When
on, use the MULTI DIAL to advance or
reverse frames.
21 FL (DIMMER)
Press to change the display brightness
22 8
Press to pause playback; press again to
restart
23 1 and
/e
/ ¡ and
E/
Use for reverse / forward slow motion
playback, frame reverse / advance and
reverse / forward scanning.
24 SURROUND
Press to activate/switch off 2V/TruSurround.
25 CLEAR
Press to clear a numeric entry
26 ENTER
Press to select an option or execute a
command
27 TV CONTROL buttons
VOLUME
Use to adjust the volume
CHANNEL
Use to select TV channel
FUNC
Press FUNC to select the TV for remote
control operation
28
TV
Press
TV to turn the TV’s power on or put
in to standby
Setting up the Remote Control to
TV
This most be set to use buttons 27 and 28.
1. Input the Manufacturer code.
While holiding down the CLEAR button,
input the two digit code from the table next
page that corresponds to the make of your
TV.
For example, If you have a Pioneer TV, press
and hold CLEAR, then press 0, 0 on the
remote control.
2. Confirm that the TV is responding to
the programmed code.
On the remote, press the
TV button. If the
TV swithches on (or into standby if it was on
previously), then you have the correct code.
If nothing happens when you press the
TV
button, start again from step 1 using a
different code.
• Some manufacturers have several
codes. Try each one until you find the
one that works.
Preset code list
00, PIONEER1
01, RCA1
02, SHARP3
03, ZENITH1
04, SONY
05, TOSHIBA1
06, HITACHI1
07, PHILIPS
08, PANASONIC1
09, MITSUBISHI
10, GOLDSTAR1
11, GE1
12, MAGNAVOX1
13, JVC1
14, SANYO2
15, RCA2
16, RCA3
17, RCA4
18, RCA5
19, SHARP1
20, ZENITH12
21, SANYO1
22, PANASONIC2
23, GOLDSTAR2
24, HITACHI2
25, HITACHI3
26, TOSHIBA2
27, SHARP2
28, GE2
29, MAGNAVOX2
30, TOSHIBA3
31, HITACHI4
32, JVC2
33, FUJITSU
34, PIONEER2
35, GRANDIENTE
Page 15
Getting Started
04
25
En
• Information at the bottom of every OSD
screen explains the currently selected
menu item and shows which buttons
can be used for that screen.
Setting up with the Setup
Navigator
Using the Setup Navigator you can make a
number of other initial settings for this
player. We recommend using the Setup
Navigator, especially if you connected this
player to an AV receiver for playing surround
sound. To answer some of the questions
about digital audio formats you may need to
look at the instructions that came with your
AV receiver.
1 If a disc is playing, press 7 (stop).
Also turn on your TV and make sure that it is
set to the correct video input.
2 Press SETUP.
The on-screen display (OSD) appears.
Video Adjust
Audio Settings
Play Mode
Setup Navigator
Disc Navigator
Initial Settings
3 Select ‘Setup Navigator’.
Audio Settings
Play Mode
Setup Navigator
Disc Navigator
Initial Settings
Video Adjust
Using the on-screen displays
For ease of use, this player makes extensive
use of graphical on-screen displays (OSDs).
You should get used to the way these work as
you’ll need to use them when setting up the
player, using some of the playback features,
such as program play, and when making
more advanced settings for audio and video.
All the screens are navigated in basically the
same way, using the cursor buttons to
change the highlighted item and pressing
ENTER to select it.
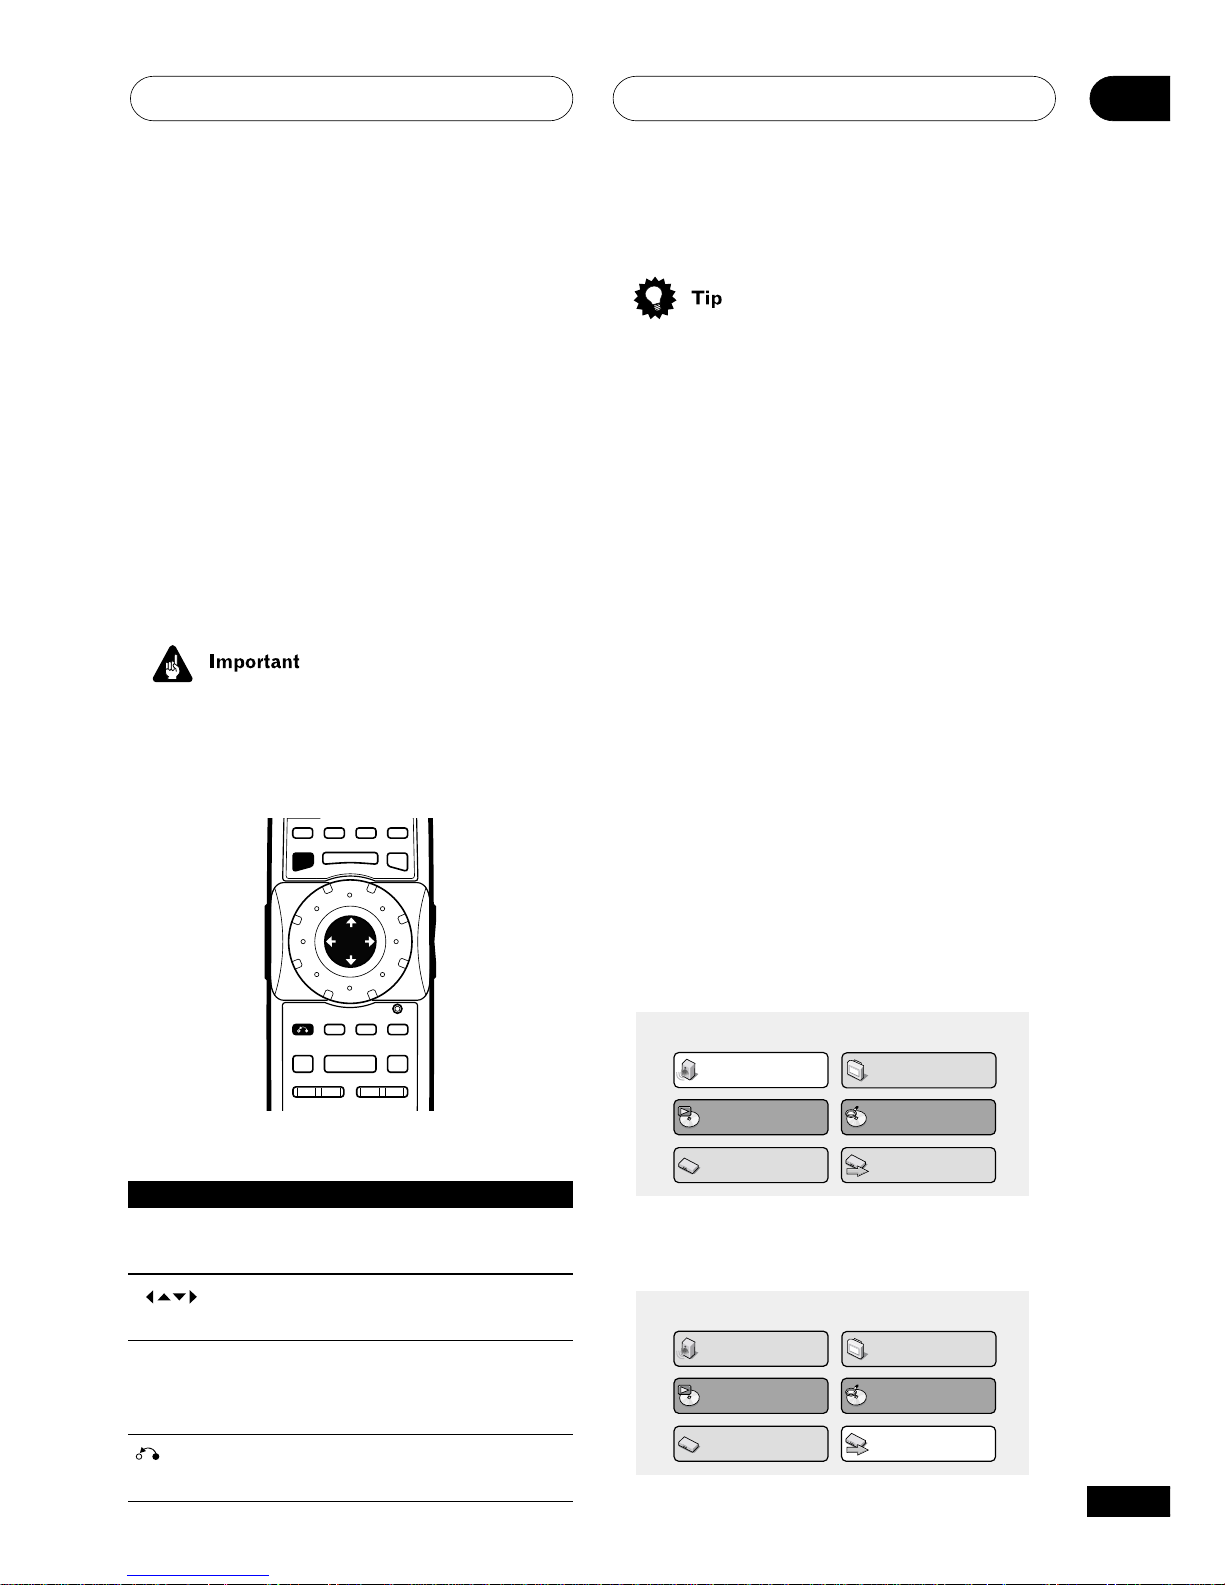
• Throughout this manual, ‘Select’ means
use the Joystick to highlight an item onscreen, then press ENTER.
E/
E/
SETUP
DISPLAY AUDIO SUBTITLE ANGLE
TOP MENU
MENU
– MULTI SPEED +
ENTER
VIDEO
ADJUST DIMMER
JOG MODE
RETURN
V.A DJ
FL JOG
PLAY MODESURROUND
873
4¢ 1¡
Button What it does
SETUP Display/exit the on-screen
display
Changes the highlighted
menu item
ENTER Selects the highlighted menu
item (both ENTER buttons
work in exactly the same way)
(RETURN) Returns to the previous menu
without saving changes
(Joystick)
Page 16
Getting Started04
26
En
7 Did you connect a digital output to
your AV receiver?
Select Connected or Not Connected.
Connected
Not Connected
AV Receiver
5.1ch Audio Out
Digital Audio Out
Language Settings
Audio Out Settings
Speaker Settings
AV Receiver Func.
Setup Navigator
• If you selected Not Connected in both
steps 6 and 7, that completes the setup.
Press ENTER to leave the Setup
Navigator.
If you selected Connected in step 6, then
answer the following questions about the
speakers in your system, otherwise jump to
step 11.
8 Do you have a center speaker connected to your AV receiver?
Select Connected or Not Connected.
Connected
Not Connected
Center SpeakerLanguage Settings
Audio Out Settings
Speaker Settings
AV Receiver Func.
Setup Navigator
9 Do you have surround speakers
connected to your AV receiver?
Select Connected or Not Connected.
Connected
Not Connected
Center Speaker
Surround Speakers
Language Settings
Audio Out Settings
Speaker Settings
AV Receiver Func.
Setup Navigator
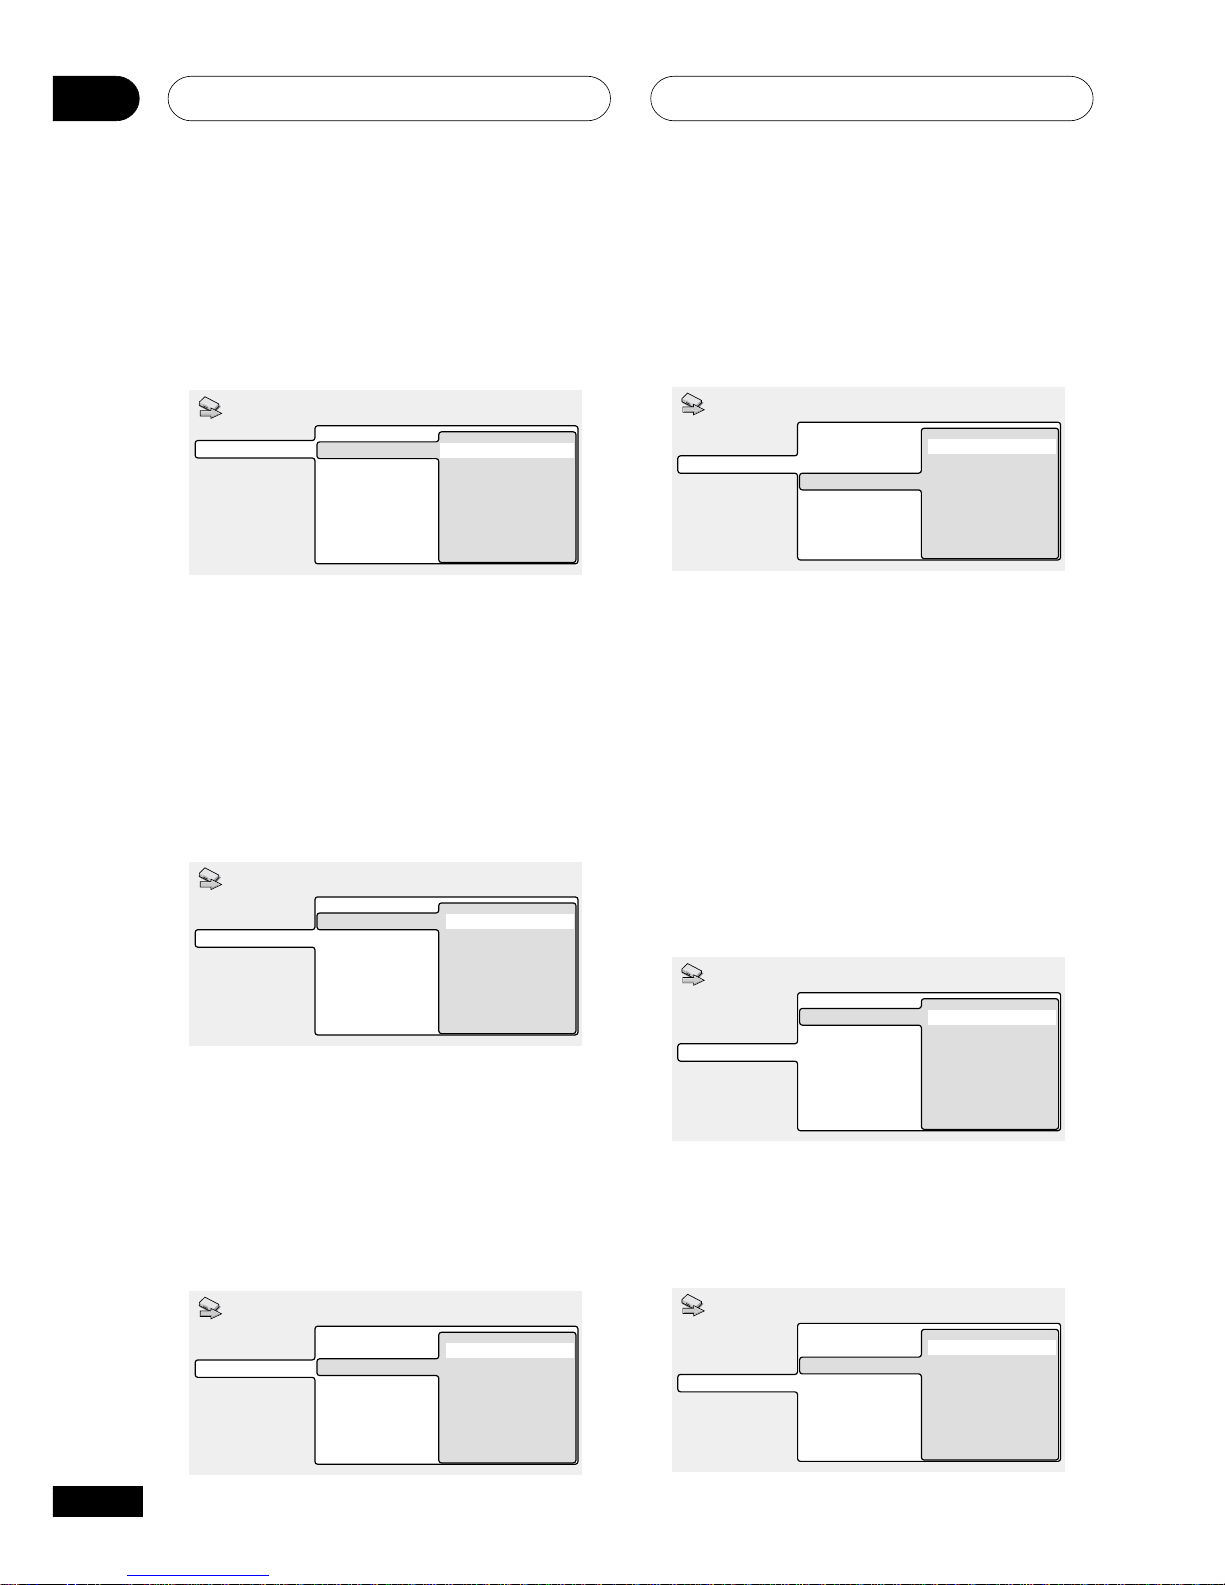
4 Select a DVD language.
Some DVD discs feature on-screen menus,
soundtracks and subtitles in several languages. Set your preferred language here.
English
French
German
Italian
Spanish
Dutch
Other Language
DVD LanguageLanguage Settings
Audio Out Settings
Speaker Settings
AV Receiver Func.
Setup Navigator
• Note that the language you choose here
may not be available on all discs.
• If you want to select a language other
than those listed, select Other Lan-
guage. See Selecting languages using
the language code list for details.
5 Did you connect this player to an AV
receiver?
Connected
Not Connected
AV ReceiverLanguage Settings
Audio Out Settings
Speaker Settings
AV Receiver Func.
Setup Navigator
• If you selected Not Connected here,
that completes the setup. Press ENTER
to leave the Setup Navigator.
6 Did you connect the 5.1 channel
analog audio outputs to your AV receiver?
Select Connected or Not Connected.
Connected
Not Connected
AV Receiver
5.1ch Audio Out
Language Settings
Audio Out Settings
Speaker Settings
AV Receiver Func.
Setup Navigator
Page 17
Getting Started
04
27
En
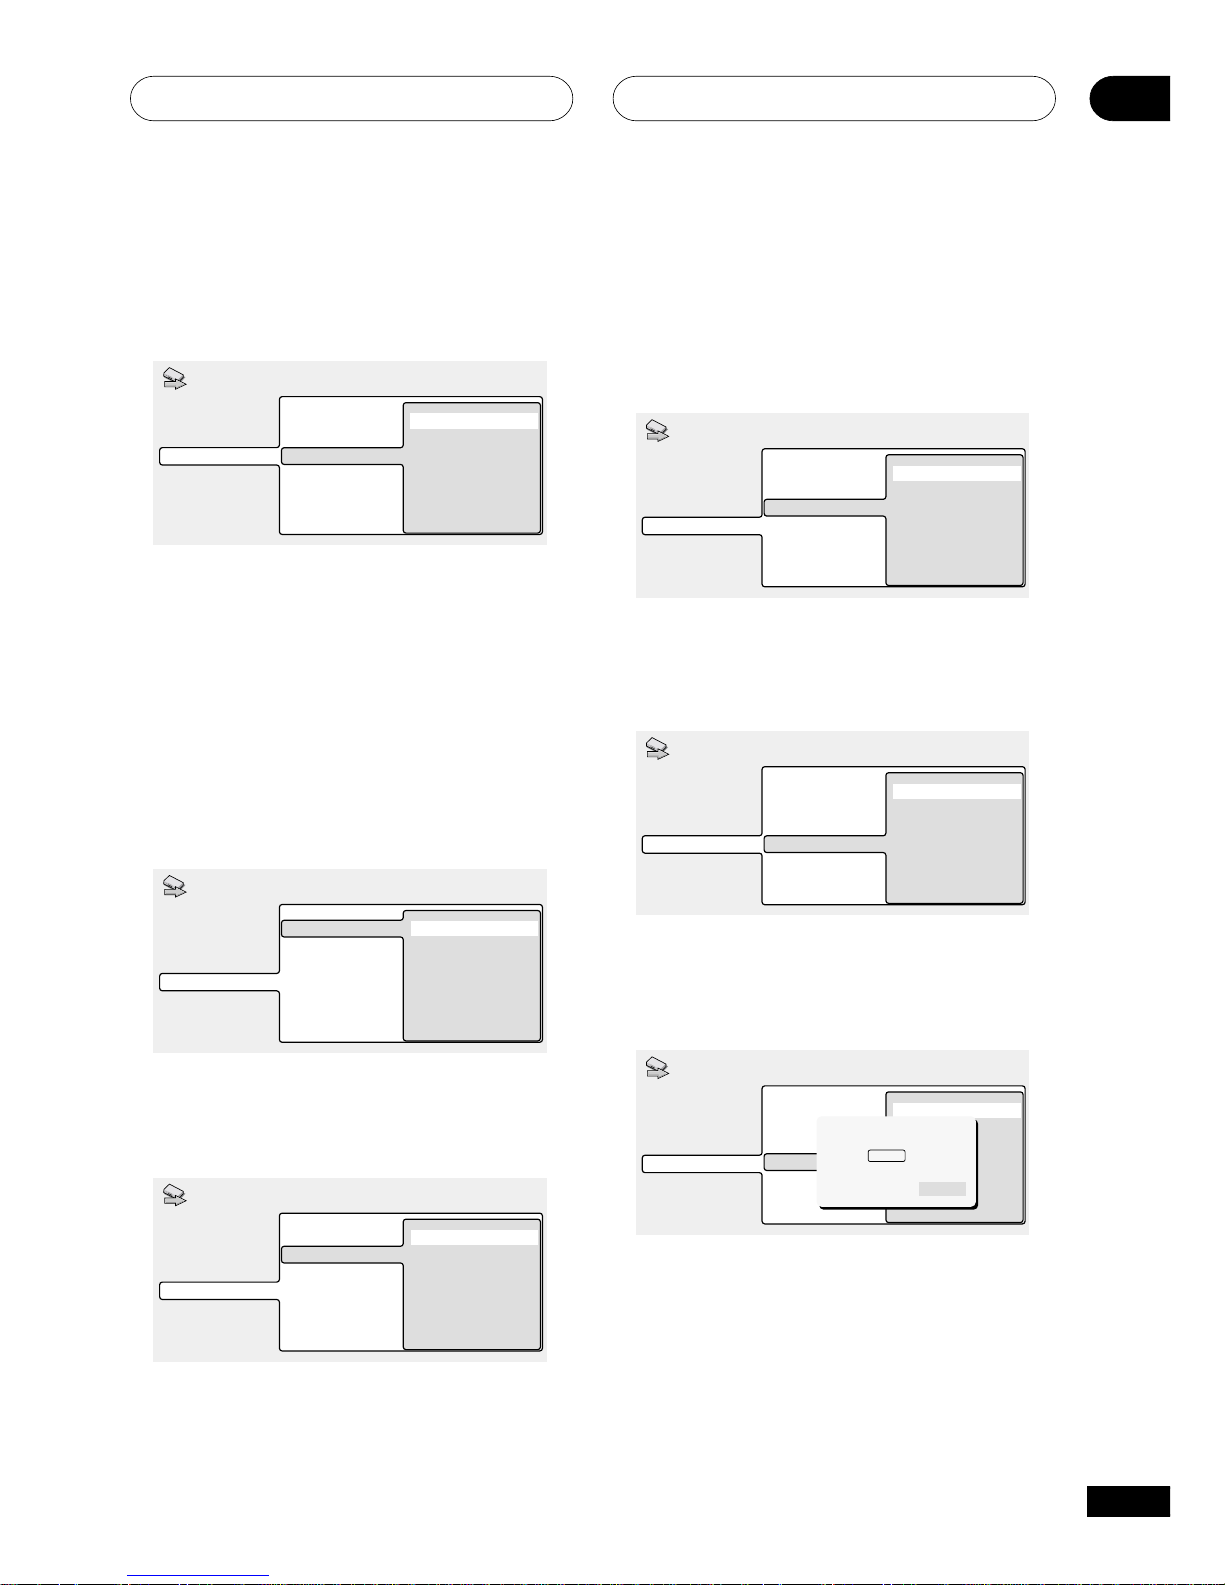
13 Is your AV receiver compatible with
96kHz Linear PCM audio?
Select Compatible, Not Compatible or
Don’t Know.
Compatible
Not Compatible
Don't Know
Dolby Digital
DTS
96kHz Linear PCM
Language Settings
Audio Out Settings
Speaker Settings
AV Receiver Func.
Setup Navigator
14 Is your AV receiver MPEG compatible?
Select Compatible, Not Compatible or
Don’t Know.
Compatible
Not Compatible
Don't Know
Dolby Digital
DTS
96kHz Linear PCM
MPEG
Language Settings
Audio Out Settings
Speaker Settings
AV Receiver Func.
Setup Navigator
15 Press ENTER to complete the setup, or
press SETUP to quit the Setup Navigator
without making any changes.
Compatible
Not Compatible
Unknown
Dolby Digital
DTS
96kHz Linear PCM
MPEG
Language Settings
Audio Out Settings
Speaker Settings
AV Receiver Func.
Setup Navigator
Settings complete
Press
ENTER
to exit
ENTER
Congratulations, setup is complete!
10 Do you have a sub-woofer connected
to your AV receiver?
Select Connected or Not Connected.
Connected
Not Connected
Center Speaker
Surround Speakers
Sub-woofer
Language Settings
Audio Out Settings
Speaker Settings
AV Receiver Func.
Setup Navigator
• If you selected Not Connected in step
7, that completes the setup. Press
ENTER to leave the Setup Navigator.
Questions 11 through 14 are concerned with
the digital decoding capabilities of your AV
receiver.
11 Is your AV receiver Dolby Digital
compatible?
Select Compatible, Not Compatible or
Don’t Know.
Compatible
Not Compatible
Don't Know
Dolby DigitalLanguage Settings
Audio Out Settings
Speaker Settings
AV Receiver Func.
Setup Navigator
12 Is your AV receiver DTS compatible?
Select Compatible, Not Compatible or
Don’t Know.
Compatible
Not Compatible
Don't Know
Dolby Digital
DTS
Language Settings
Audio Out Settings
Speaker Settings
AV Receiver Func.
Setup Navigator
Page 18
Getting Started04
28
En
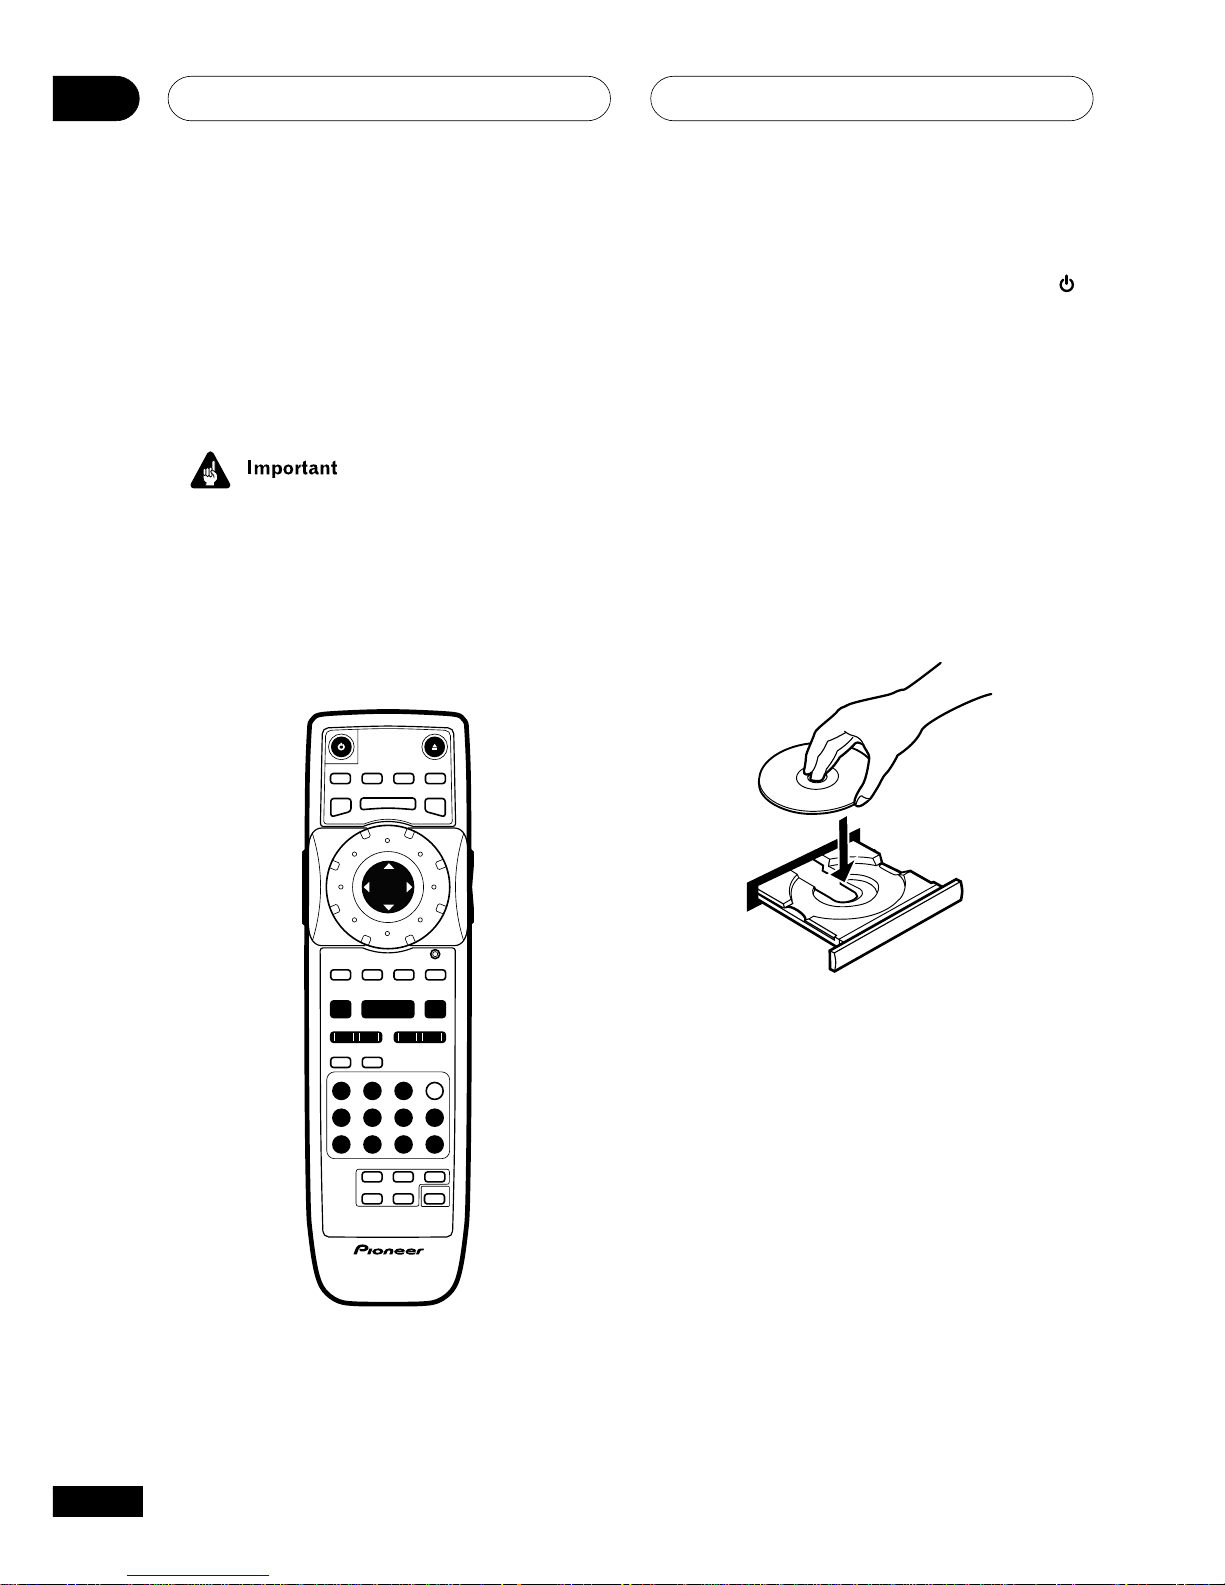
1 If the player isn’t already on, press
STANDBY/ON to switch it on.
If you’re playing a DVD or Video CD, also turn
on your TV and make sure that it is set to the
correct video input.
2 Press 0 OPEN/CLOSE to open the disc
tray.
3 Load a disc.
Load a disc with the label side facing up,
using the disc tray guide to align the disc.
Never load more than one disc at a time.
4 Press 3 (play) to start playback.
If you’re playing a DVD or Video CD, a menu
may appear.
If you’re playing an MP3 disc, it may take a
few seconds before playback starts, depending on the complexity of the file structure on
the disc.
Basic playback controls
The table below shows the basic controls on
the remote for playing discs. The folllowing
chapter covers more playback features in
more detail.
Playing discs
The basic playback controls for playing DVD,
CD, SACD, Video CD and MP3 discs are
covered here. Further functions are detailed
in the next chapter.
Throughout this manual, the term ‘DVD’
means DVD-Video, DVD-Audio and
DVD-R/RW. If a function is specific to a
particular kind of DVD disc, it is
specified.
E/
E/
SETUP
DISPLAY AUDIO SUBTITLE ANGLE
TOP MENU
OPEN /
CLOSE
MENU
– MULTI SPEED +
ENTER
VIDEO
ADJUST DIMMER
JOG MODE
V.A DJ
FL JOG
PLAY MODE SURROUND
873
4¢ 1¡
0987
E
654
C321
CLEAR
ENTER
VOLUME
CHANNEL
TV CONTROL
+
FUNC
–
+
–
TV
Page 19
Getting Started
04
29
En
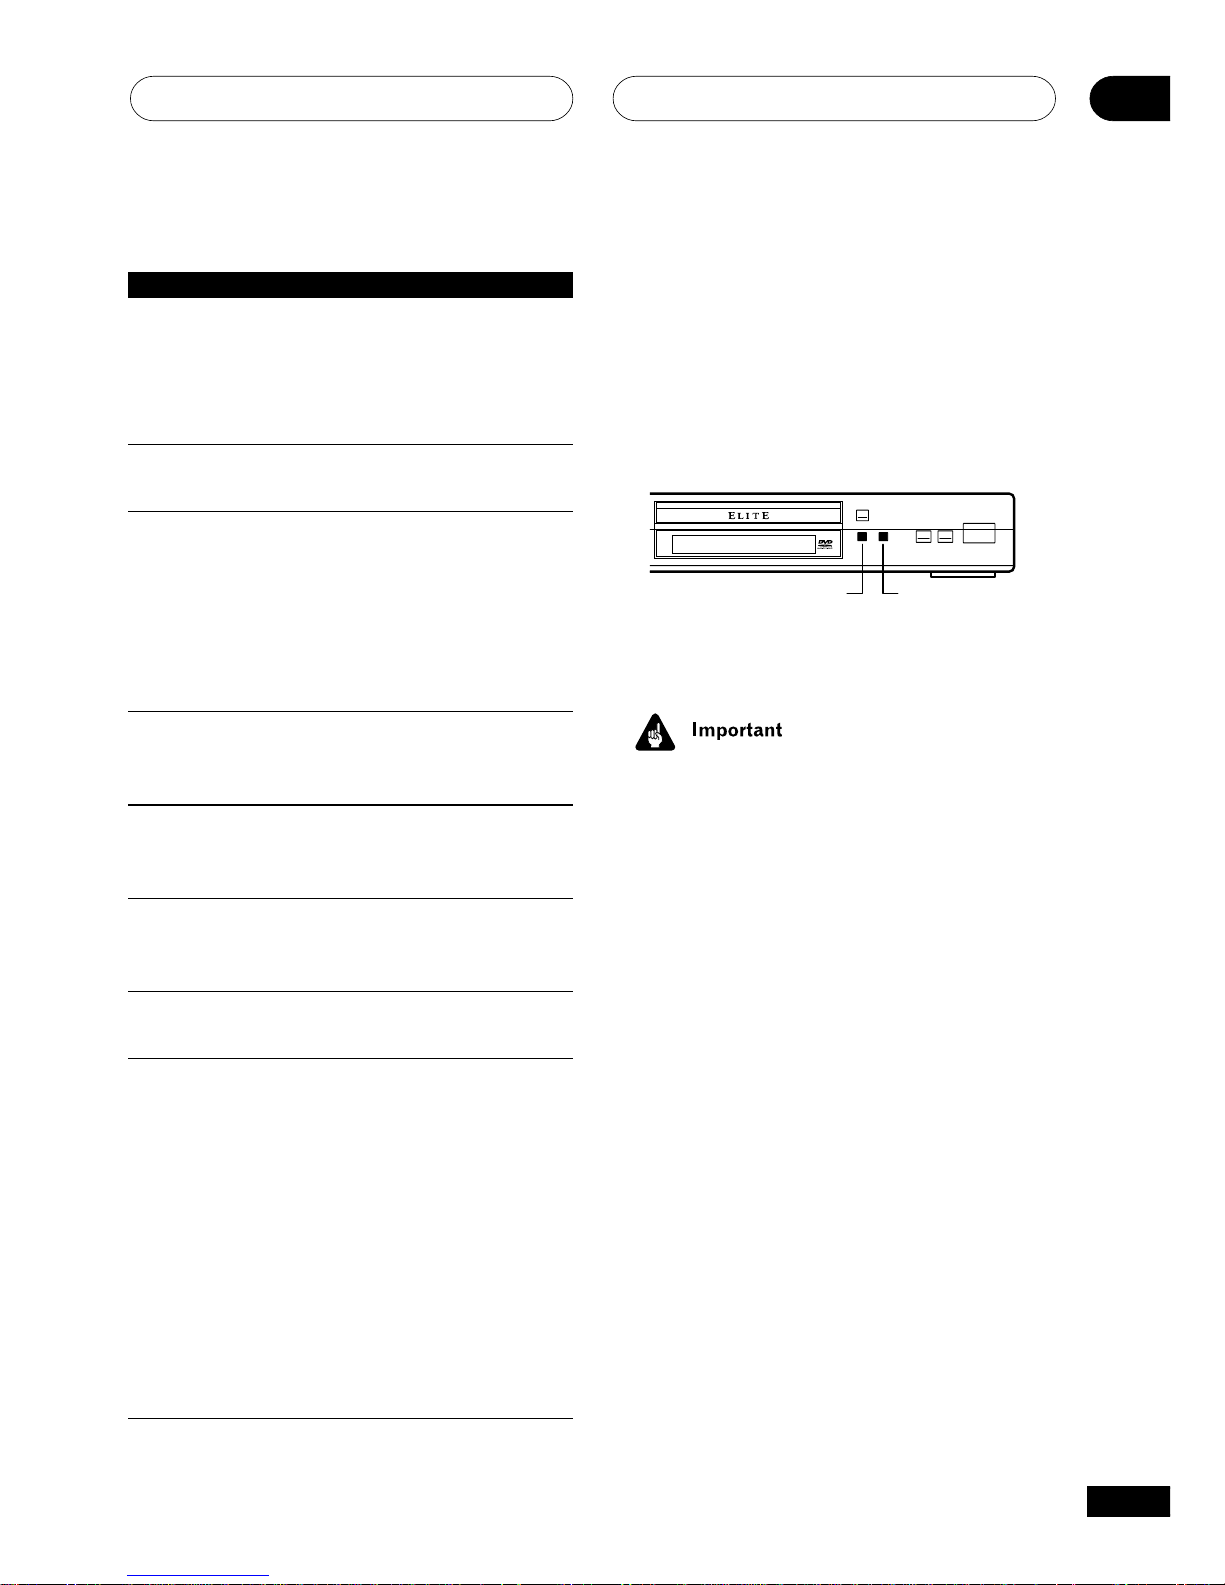
Front panel controls
The 3 (play), 7 (stop), and 8 (pause) buttons
on the front panel work in exactly the same
way as their remote control equivalents. The
combined scan/skip buttons on the front
panel (4 1 and ¡ ¢) work slightly
differently from the remote buttons.
3 PLAY
OPEN/CLOSE
0
7
41 ¡¢
8
3
Î
41 ¡¢
Press and hold for fast scan; press for track/
chapter skip.
• You may find with some DVD discs that
some playback controls don’t work in
certain parts of the disc. This is not a
malfunction.
DVD disc menus
Many DVD-Video and DVD-Audio discs
contain menus from which you can select
what you want to watch or listen to. They
may give access to additional features, such
as subtitle and audio language selection, or
special features such as slideshows. See the
disc packaging for details.
Sometimes menus are displayed automatically when you start playback; others only
appear when you press MENU or TOP
MENU.
Button What it does
3 Starts playback.
DVD and Video CD: if the
display shows RESUME,
playback starts from the
resume point.
8 Pauses a disc that’s playing,
or restarts a paused disc.
7 Stops playback.
DVD and Video CD: Display
shows RESUME. Press 7
(stop) again to cancel the
resume function (The resume
function is also cancelled
when you eject the disc tray.).
1 Press to start fast reverse
scanning. Press 3 (play) to
resume normal playback.
¡ Press to start fast forward
scanning. Press 3 (play) to
resume normal playback.
4 Skips to the start of the
current track or chapter, then
to previous tracks/chapters.
¢ Skips to the next track or
chapter.
Numbers Use to enter a title/group/track
number. Press ENTER to select
(or wait a few seconds).
• If the disc is stopped, playback starts from the selected
title/group (for DVD) or track
number (for CD/SACD/Video
CD/MP3).
• If the disc is playing,
playback jumps to the start of
the selected chapter or track
(within the current group for
DVD-Audio).
Page 20
Getting Started04
30
En
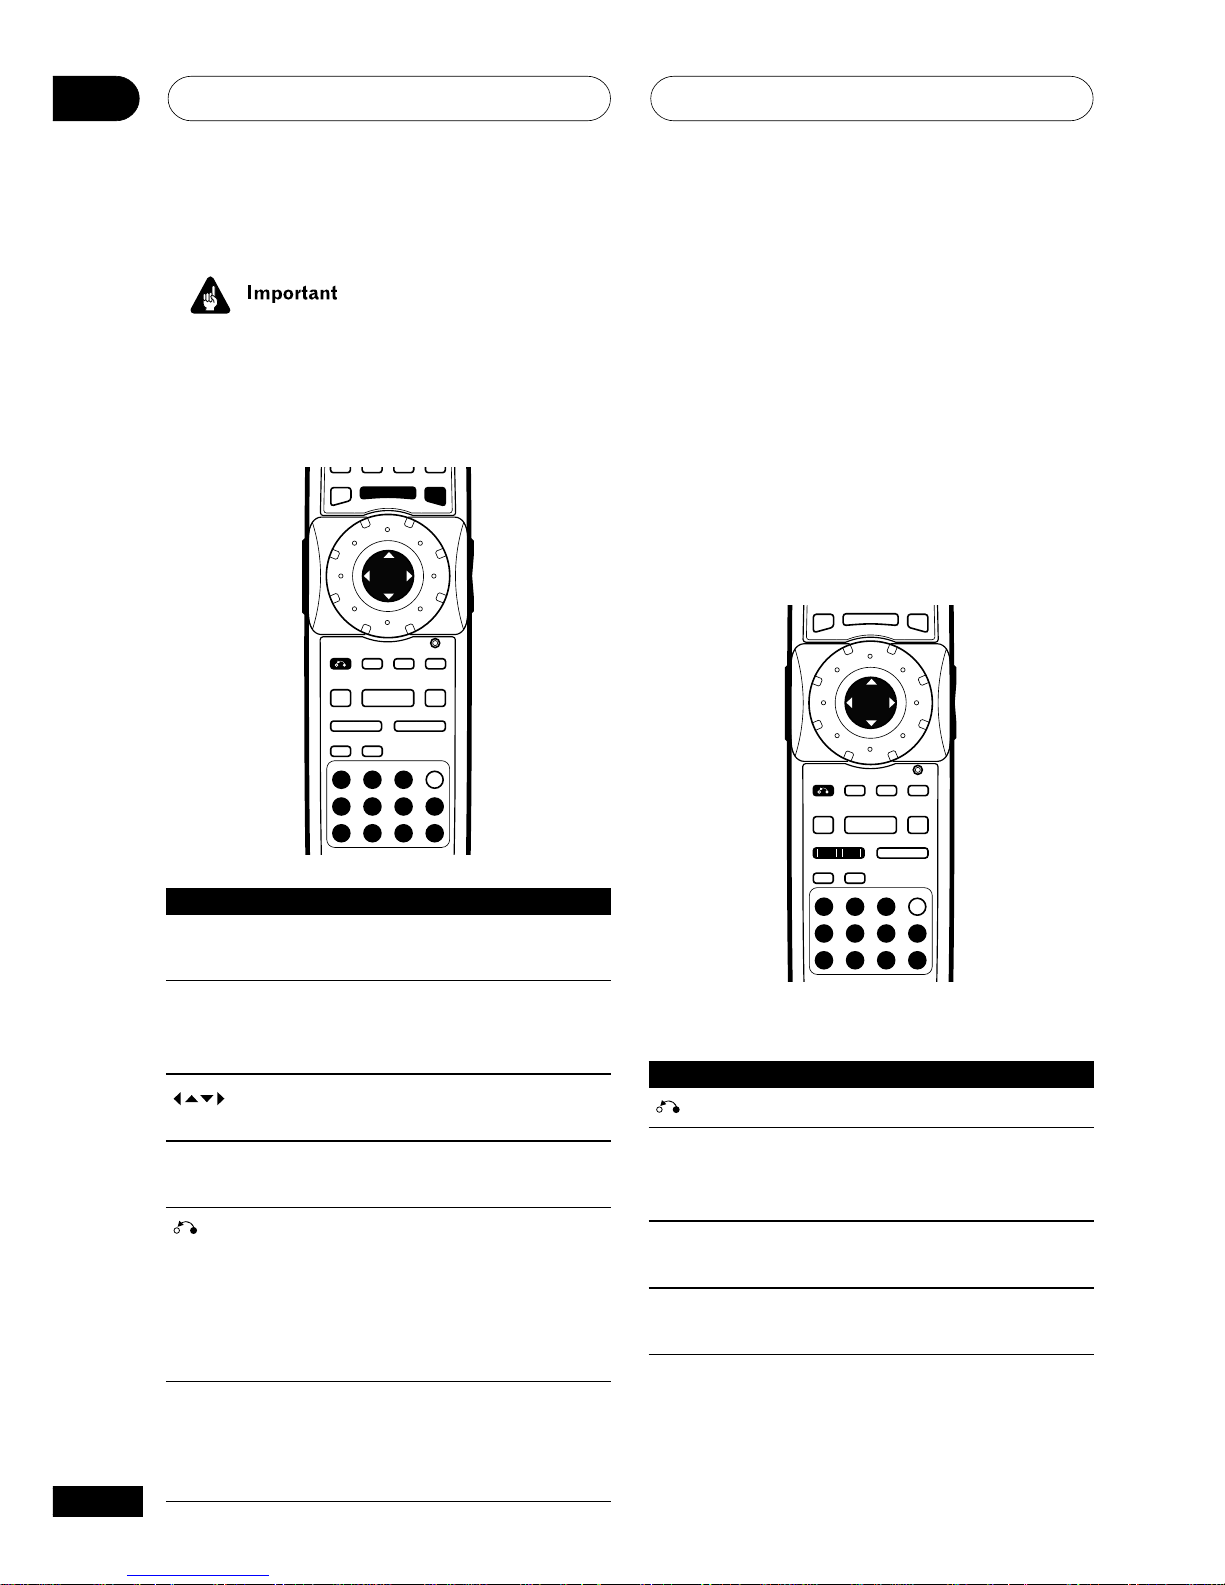
Video CD PBC menus
Some Video CDs have menus from which
you can choose what you want to watch.
These are called PBC (Playback control)
menus.
You can play a PBC Video CD/Super VCD
without having to navigate the PBC menu by
starting playback using a number button or
track skip button (¢) to select a track,
rather than the 3 (play) button.
E
ENTER
E/
E/
SETUP
TOP MENU
MENU
– MULTI SPEED +
ENTER
VIDEO
ADJUST DIMMER
JOG MODE
RETURN
V.A DJ
FL JOG
PLAY MODE SURROUND
873
4¢ 1¡
0987
654
C321
CLEAR
Button What it does
(RETURN) Displays the PBC menu.
Numbers Use to enter a numbered
menu option. Press ENTER to
select (or wait a few seconds).
4 Displays the previous menu
page (if there is one).
¢ Displays the next menu page
(if there is one).
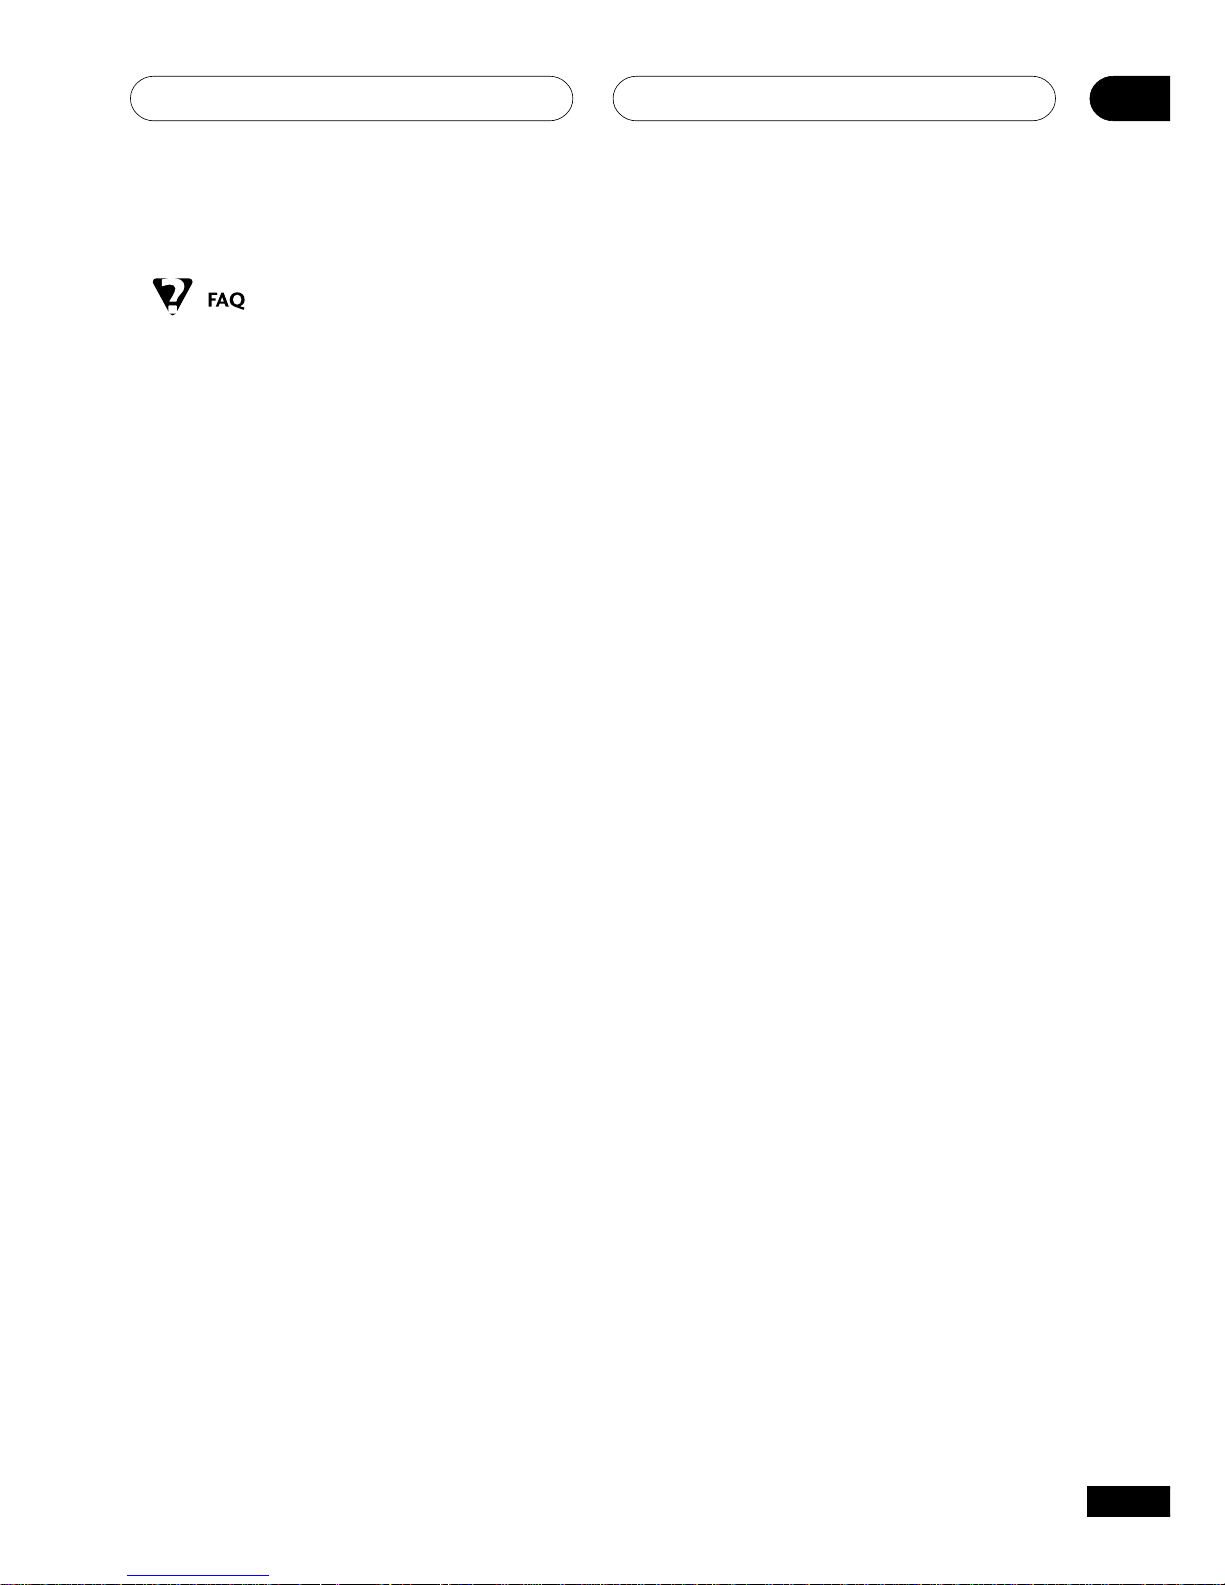
• Some DVD-Audio discs feature a ‘bonus
group’. To access this group you have to
input a password, which you can find on
the disc’s packaging.
E/
E/
SETUP
TOP MENU
MENU
– MULTI SPEED +
ENTER
VIDEO
ADJUST DIMMER
JOG MODE
RETURN
V.A DJ
FL JOG
PLAY MODE SURROUND
873
4¢ 1¡
0987
E
654
C321
CLEAR
ENTER
Button What it does
TOP MENU Displays the ‘top menu’ of a
disc—this varies with the disc.
MENU Displays a disc menu—this
varies with the disc and may
be the same as the ‘top menu’.
Moves the cursor around the
screen.
ENTER Selects the current menu
option.
(RETURN) Returns to the previously
displayed menu screen. On
some DVD-Audio discs
featuring browsable pictures,
press to display the browser
screen.
Numbers Highlights a numbered menu
option (some discs only).
Press ENTER to select (or wait
a few seconds).
(Joystick)
Page 21
Getting Started
04
31
En
• After I load a DVD disc, it ejects automatically after a few seconds!
Most likely, the disc is the wrong region
for your player. The region number
should be printed on the disc; check it
against the region number of the player
(which you can find on the rear panel).
If the region number is OK, it may be
that the disc is damaged or dirty. Clean
the disc and look for signs of damage.
Check also that the disc is aligned
properly in the disc tray and that it’s
loaded label-side up.
• Why won’t the disc I loaded play?
First check that you loaded the disc the
right way up (label side up), and that it’s
clean and not damaged.
If a disc loaded correctly won’t play, it’s
probably an incompatible format or disc
type, such as DVD-ROM.
• There’s no picture!
Check the front panel and make sure
that the VIDEO OFF indicator isn’t lit. If
it is, press the VIDEO OFF button to
switch the video output back on.
Also make sure that if your TV isn’t
compatible with progressive scan video,
that the PROGRESSIVE indicator isn’t lit.
If it is, press the PROGRESSIVE button
to switch the video output back to
interlace. See also page 18.
• I have a widescreen TV so why are there
black bars at the top and bottom of the
screen when I play some discs?
Some movie formats are such that even
when played on a widescreen TV, black
bars are necessary at the top and
bottom of the screen. This is not a
malfunction.
• I have a standard (4:3) TV and set the
player to show widescreen DVDs in pan &
scan format, so why do I still get black
bars top and bottom with some discs?
Some discs override the display
preferences of the player, so even if you
have 4:3 (Pan & Scan) selected, those
discs will still be shown in letterbox
format. This is not a malfunction.
• My AV receiver is definitely compatible
with 96/88.2kHz Linear PCM audio, but it
doesn’t seem to work with this player.
What’s wrong?
For digital copy-protection purposes,
some 96/88.2kHz DVD discs only
output digital audio downsampled to
48/44.1kHz. This is not a malfunction.
To fully take advantage of the high
sampling rate audio, connect the analog
audio outputs to your amplifier/receiver.
• Why can’t I hear SACD audio through the
digital outputs?
SACD audio is only available through
the analog outputs. This is not a
malfunction. Some DVD-Audio discs too
only output audio through the analog
outputs.
Page 22

Getting Started04
32
En
• Is it better to listen to DVD-Audio discs
through the analog outputs?
Some DVD-Audio discs do not output
anything through the digital outputs,
and multichannel discs are downmixed
to stereo for the digital output. In
addition, high sampling rate DVD-Audio
discs (higher than 96kHz) automatically
downsample audio output from the
digital outputs.
Using the multichannel analog audio
outputs for DVD-Audio have none of
these limitations.
• My DVD-Audio disc starts playing, but
then suddenly stops!
The disc may have been illegally copied.
• My CD with MP3 tracks won’t play!
Also make sure that the tracks are
encoded in MPEG1 audio layer 3 format.
• Some MP3 tracks don’t show up. Where
are they?
Filenames that don’t end with the
extension “.mp3” won’t be recognized by
this player. Also, if there are more than
250 folders or tracks on the disc, only
the first 250 are recognized.
Page 23
Playing Discs
05
33
En
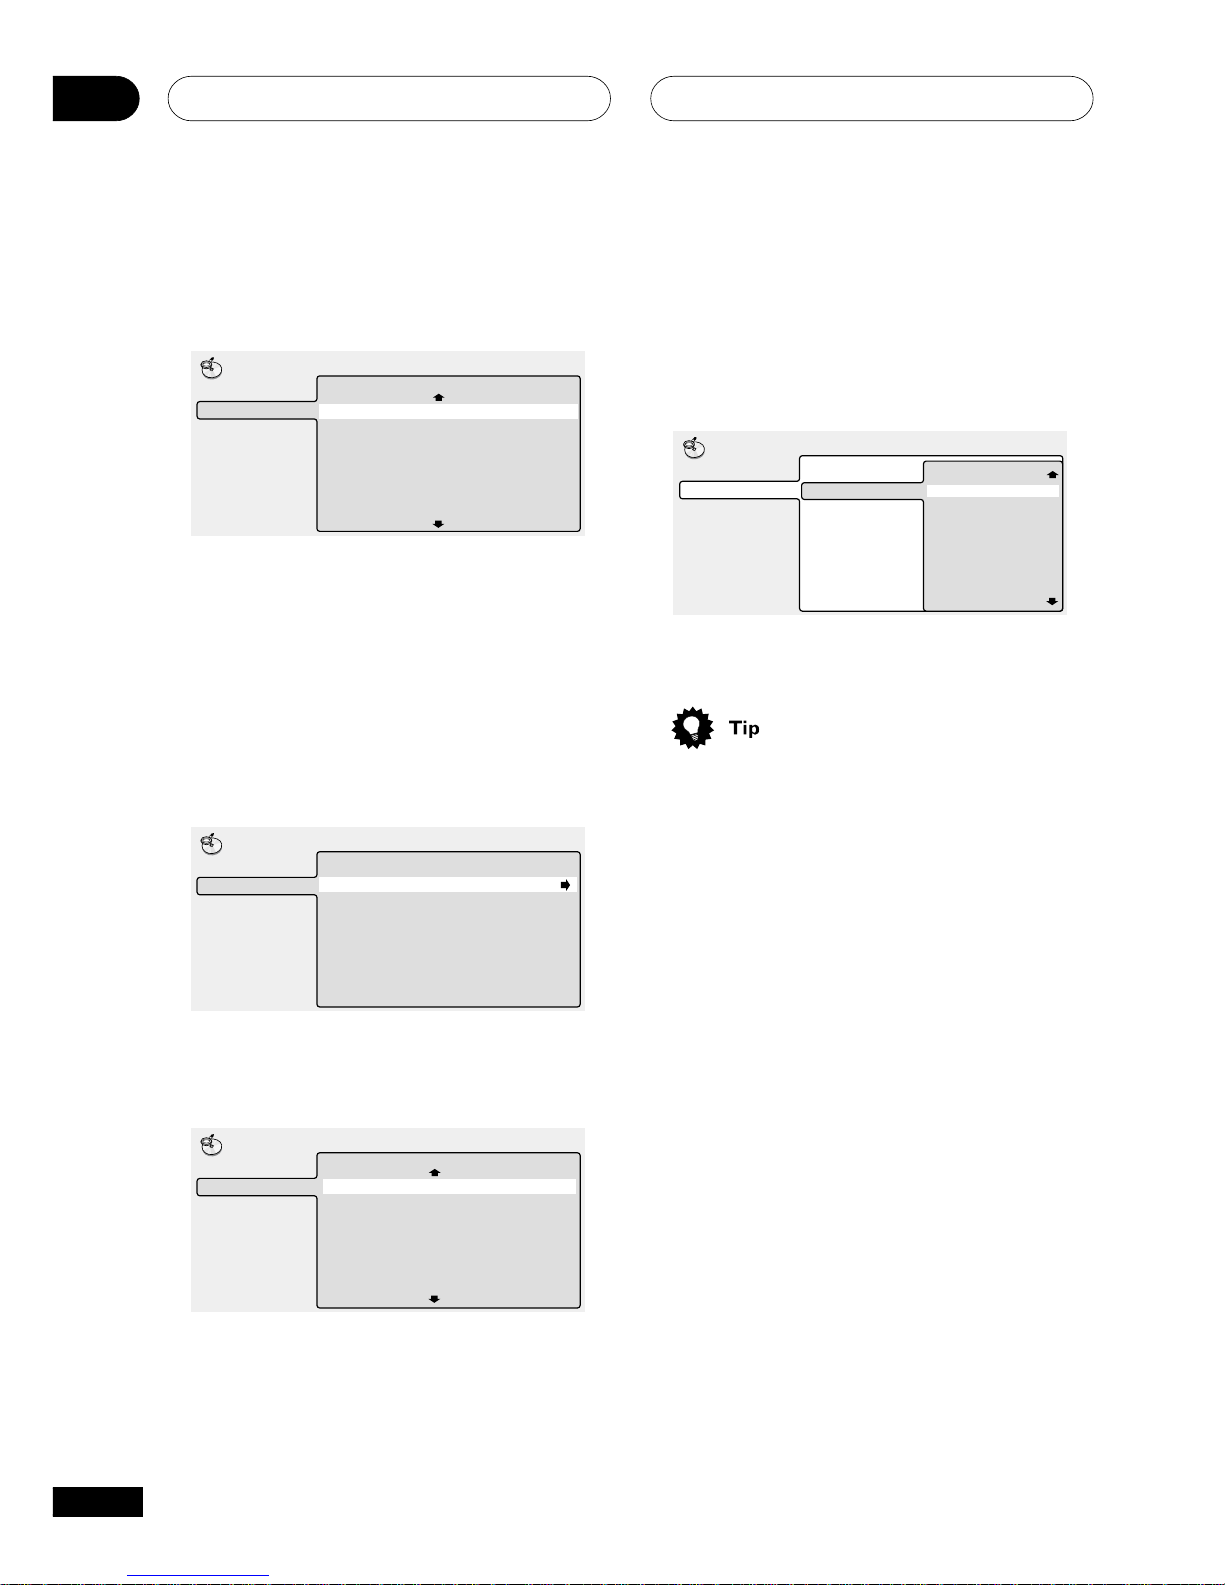
1 Press SETUP and select ‘Disc Navigator’ from the on-screen display.
Alternatively, if a DVD-RW, CD, Video CD or
MP3 disc is loaded, you can press MENU,
which takes you straight to the Disc Navigator screen.
Audio Settings
Play Mode
Setup Navigator
Disc Navigator
Initial Settings
Video Adjust
2 Select what you want to play.
Depending on the type of disc you have
loaded, the Disc Navigator looks slightly
different.
For DVD-Video discs select a title, or a
chapter within a title.
Title(1-03)
DVD
Disc Navigator
Chapter(1-036)
Title 01
Title 02
Title 03
Chapter 001
Chapter 002
Chapter 003
Chapter 004
Chapter 005
Chapter 006
Chapter 007
Chapter 008
For DVD-Audio discs select a group, or a
track within a group.
Group(1-03)
DVD-Audio
Disc Navigator
Track(1-14)
Group 01
Group 02
Group 03
Track 01
Track 02
Track 03
Track 04
Track 05
Track 06
Track 07
Track 08
Introduction
Most of the features described in this
chapter make use of on-screen displays. Fo
an explanation of how to navigate these
r
see - Using the on-screen displays.
Many of the functions covered in this chapter
apply to DVD and SACD discs, Video CDs,
CDs and MP3 discs, although the exact
operation of some varies slightly with the
kind of disc loaded.
Some DVD discs restrict the use of some
functions (random or repeat, for example).
This is not a malfunction.
When playing Video CDs, some of the
functions are not available during PBC
playback. If you want to use them, start the
disc playing using a number button to select
a track.
Using the Disc Navigator to
browse the contents of a disc
Use the Disc Navigator to browse through
the contents of a disc to find the part you
want to play. You can use the Disc Navigator
when a disc is playing or stopped.
• It’s not possible to use the Disc Navigator when playing a Video CD/Super VCD
in PBC mode, or when a DVD disc menu
is displayed.
Page 24
Playing Discs05
34
En
For MP3 discs select a folder, or a track
within a folder. (Note that if a folder or track
name contains accented or non-roman
characters, they may show up with generic
names – F_033, T_035, etc.).
Folder(1-017)
MP3
Disc Navigator
Track(1-010)
001. ACP
002. Nth Degree
003. Pfeuti
004. Live
005. Glitch music
006. CodHead
007. Thermo
008. Missing Man
001. Gravity deluxe
002. Tesla's patent
003. Border dispute
004. Delayed by rain
005. Accident incident
006. Pigeon post
007. Outernational
008. Vacuum tube
Playback starts after you press ENTER.
• The Disc Navigator is not available
unless there is a disc loaded.
• Another way to find a particular place on
a disc is to use one of the search
modes. See Searching a disc.
For SACD discs select a track within the
current playback area.
Track(1-009)
Track 001
Track 002
Track 003
Track 004
Track 005
Track 006
Track 007
Track 008
2ch Area
Disc Navigator
Total Time 40.31
For a VR mode DVD-RW disc select beween
the Playlist and Original areas of the disc, or
a title. Move the joystick right to preview the
title.
• It’s not possible to switch between
Original and Playlist during playback.
• Not all DVD-RW discs have a Playlist.
Title(1-03)
01. 3/31 FIRST LEAGUE
02. 4/28 SECOND LEAGUE
03. 4/29 FINAL ROUND
Original
Play List
Disc Navigator
DVD-RW
For CDs and Video CDs select a track.
Track(1-13)
Track 01
Track 02
Track 03
Track 04
Track 05
Track 06
Track 07
Track 08
CD
Disc Navigator
Total Time 58.27
Page 25
Playing Discs
05
35
En
Scanning discs
You can fast-scan discs forward or backward
at various different speeds using the remote.
1 During playback, press 1 or ¡ to
start scanning.
2 Press repeatedly to increase the
scanning speed.
• MP3s can only be scanned at one speed.
• The scanning speed is shown on-screen.
3 To resume normal playback, press 3
(play).
• Sound can be heard while scanning
SACDs, audio CDs, and MP3 discs.
• There is no sound while scanning DVDVideos and Video CDs, and no subtitles
while scanning DVD-Video.
• Depending on the disc, normal playback
may automatically resume when a new
chapter is reached on a DVD-Video disc.
Using the Multi Dial
You can use the Multi Dial to control fast and
slow motion scanning and frame advance of
DVD-Video, DVD-R/RW and Video CDs.
When scanning, no audio is output, even
when the scanning speed is 1/1 (normal
playback speed).
To start scanning playback at 1/16 speed,
turn the MULTI DIAL (clockwise for
forward; anticlockwise for reverse)
during playback.
• Turn the MULTI DIAL in the same
direction to increase the scan speed—
the speed is indicated at the top left of
the screen.
• Turn in the opposite direction to slow the
scan speed/reverse direction.
To start high-speed scanning, turn the
MULTI DIAL quickly (clockwise for
forward; anticlockwise for reverse)
during playback.
• Change the speed/direction in the same
way as above.
• To resume normal playback, press 3.
To start manual scanning, press JOG (JOG
MODE), then use the MULTI DIAL to
advance frames in either direction.
To switch off jog mode, press JOG (JOG
MODE) again. The picture remains
paused until you restart playback.
• To resume normal playback, press 3.
• You can scan Video CDs in the same
way as DVD-Video discs (see above).
However, reverse slow-motion scanning
is not possible, and there are just two
fast scanning speeds.
Page 26
Playing Discs05
36
En
Playing in slow motion
You can play DVD-Videos, DVD-R/RW and
Video CDs at four different forward slow
motion speeds, and DVD-Videos, DVD-R/RW
also at two reverse speeds.
1 During playback, press 8 (pause).
2 Press and hold
/e
or
E/
until
slow motion playback starts.
• The slow motion speed is shown onscreen.
• There is no sound during slow motion
playback.
3 Press repeatedly to change the slow
motion speed.
• The slow motion speed is displayed onscreen.
4 To resume normal playback, press 3
(play).
• You can’t use slow motion playback with
some titles on some DVDs.
• Video CD only supports forward slow
motion playback.
• The picture quality during slow motion
playback is not as good as during
normal playback.
• Depending on the disc, normal playback
may automatically resume when a new
chapter is reached.
• For DVD-Audio discs featuring
browsable pictures, press
/e/E/
to view the previous/next
picture.
Frame advance/frame reverse
You can advance or back up DVD-Video or
DVD-RW discs frame-by-frame. With Video
CDs, you can only use frame advance.
1 During playback, press 8 (pause).
2 Press
/e
or
E/
to reverse or
advance a frame at a time.
3 To resume normal playback, press 3
(play).
• The picture quality when using frame
reverse is not as good as frame advance.
• Depending on the disc, normal playback
may automatically resume when a new
chapter is reached.
• When changing direction of a DVDVideo disc, the picture may ‘move’ in an
unexpected way. This is not a malfunction.
• For DVD-Audio discs featuring
browsable pictures, press
/e/E/
to view the previous/next
picture.
Page 27
Playing Discs
05
37
En
Looping a section of a disc
The A-B Repeat function allows you to
specify two points (A and B) within a track
(DVD-Audio, CD and Video CD) or title (DVDVideo and DVD-RW) that form a loop which
is played over and over.
• A-B Repeat is not available with SACDs,
MP3s, Super VCDs, Video CD in PBC
mode, or while a DVD disc menu is
being displayed.
1 During playback, press PLAY MODE
and select ‘A-B Repeat’ from the list of
functions on the left.
A(Start Point)
B(End Point)
Off
A-B Repeat
Repeat
Random
Program
Search Mode
Play Mode
2 Press ENTER on ‘A(Start Point)’ to set
the loop start point.
A(Start Point)
B(End Point)
Off
A-B Repeat
Repeat
Random
Program
Search Mode
Play Mode
3 Press ENTER on ‘B(End Point)’ to set
the loop end point.
A(Start Point)
B(End Point)
Off
A-B Repeat
Repeat
Random
Program
Search Mode
Play Mode
After pressing ENTER, playback jumps back
to the start point and plays the loop.
4 To resume normal playback, press
CLEAR or select ‘Off’ from the menu.
Page 28
Playing Discs05
38
En
Using repeat play
There are various repeat play options,
depending on the kind of disc loaded. It’s
also possible to use repeat play together with
program play to repeat the tracks/chapters in
the program list (see Creating a program list.
• Repeat play is not available with Video
CDs/Super VCD in PBC mode, or while
a DVD disc menu is being displayed.
1 During playback, press PLAY MODE
and select ‘Repeat’ from the list of
functions on the left.
Title Repeat
Chapter Repeat
Repeat Off
A-B Repeat
Repeat
Random
Program
Search Mode
Play Mode
2 Select a repeat play option.
The repeat play options available depend on
the type of disc loaded. The screen below
appears when a DVD-Video disc is loaded.
Title Repeat
Chapter Repeat
Repeat Off
A-B Repeat
Repeat
Random
Program
Search Mode
Play Mode
DVD-Video and DVD-RW discs
• Title Repeat
• Chapter Repeat
• Repeat Off
DVD-Audio discs
• Group Repeat
• Track Repeat
• Repeat Off
SACD, CD and Video CD discs
• Disc Repeat
• Track Repeat
• Repeat Off
MP3 discs
• Disc Repeat
• Folder Repeat
• Track Repeat
• Repeat Off
• If you’ve made a program list, the
Program Repeat option also appears as
a repeat option.
• To stop the disc and cancel repeat play,
press 7 (stop).
• You can also cancel repeat play without
stopping playback by pressing CLEAR.
The disc will play to the end, then stop.
• You can’t use repeat and random play at
the same time.
• If you switch camera angle during
repeat play, repeat play is canceled.
Page 29
Playing Discs
05
39
En
Using random play
Use the random play function to play titles or
chapters (DVD-Video ), groups or tracks
(DVD-Audio), or tracks (CD, Video CD and
MP3 discs) in a random order.
You can set the random play option when a
disc is playing or stopped.
• You can’t use random play with SACDs,
DVD-RWs, Video CDs/Super VCDs
playing in PBC mode, or while a DVD
disc menu is being displayed.
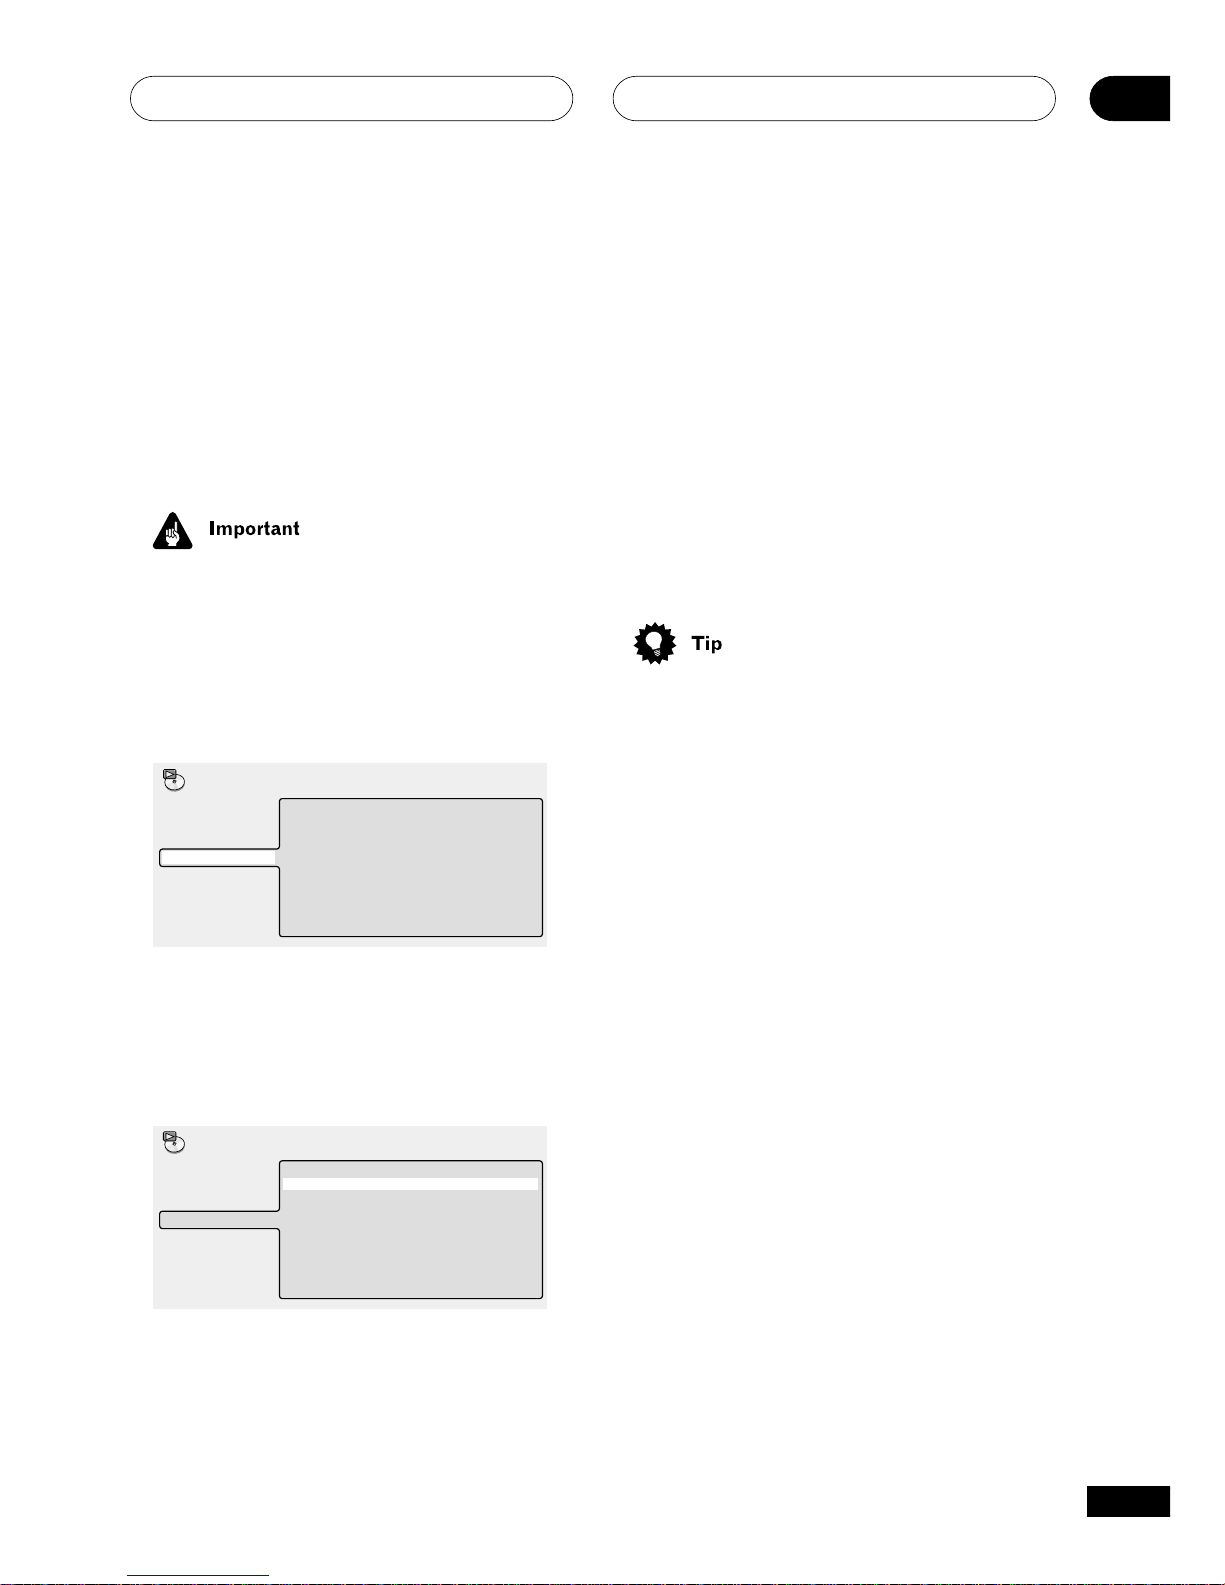
1 Press PLAY MODE and select ‘Random’
from the list of functions on the left.
Random Title
Random Chapter
Random Off
A-B Repeat
Repeat
Random
Program
Search Mode
Play Mode
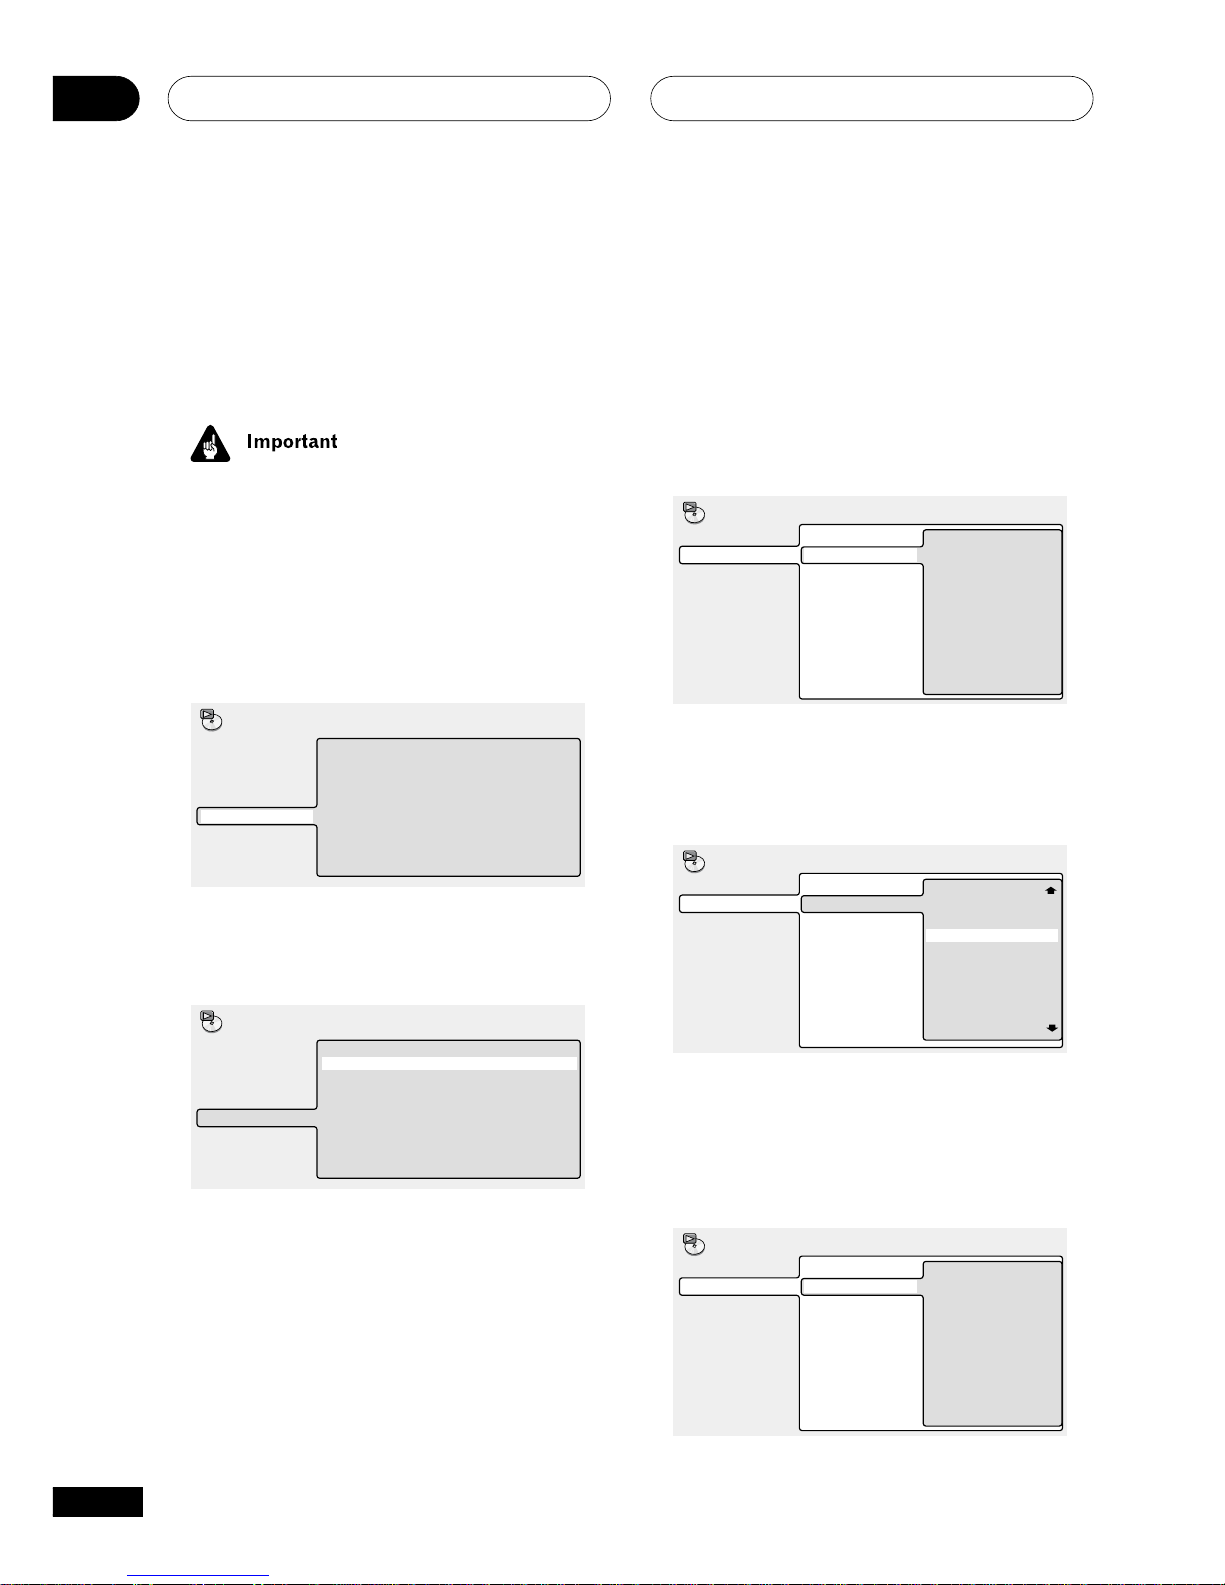
2 Select a random play option.
The random play options available depend on
the type of disc loaded. The screen below
appears when a DVD-Video disc is loaded.
Random Title
Random Chapter
Random Off
A-B Repeat
Repeat
Random
Program
Search Mode
Play Mode
DVD-Video discs
• Random Title
• Random Chapter
• Random Off
DVD-Audio discs
• Random Group
• Random Track
• Random Off
MP3, CD and Video CD discs
• On
• Off
• To stop the disc and cancel random
playback, press 7 (stop).
• You can also cancel random playback
without stopping the disc by presssing
CLEAR. The disc will play to the end,
then stop.
• During random play, the 4 and ¢
buttons function a little differently to
normal: 4 returns to the beginning of
the current track/chapter. You can't go
back further than this. ¢ selects
another track/chapter at random from
those remaining.
• You can't use random play together with
program or repeat play.
Page 30
Playing Discs05
40
En
Creating a program list
This feature lets you program the play order
of titles/group/chapters/folders/tracks on a
disc.
• Program play is not available with DVDRWs, Video CDs/Super VCDs playing in
PBC mode, or while a DVD disc menu is
being displayed.
1 Press PLAY MODE and select ‘Pro-
gram’ from the list of functions on the
left.
Create/Edit
Playback Start
Playback Stop
Program Delete
Program Memory ‰ Off
A-B Repeat
Repeat
Random
Program
Search Mode
Play Mode
2 Select ‘Create/Edit’ from the list of
program options.
Create/Edit
Playback Start
Playback Stop
Program Delete
Program Memory ‰ Off
A-B Repeat
Repeat
Random
Program
Search Mode
Play Mode
The Program edit screen that appears
depends on the kind of disc loaded.
On the left side is the program list, then to
the right is a list of titles (if a DVD-Video disc
is loaded), groups (for DVD-Audio), tracks
(for SACDs, CDs and Video CDs/Super VCD),
or folder names (for MP3 discs). On the far
right is a list of chapters (for DVD-Video) or
tracks (for DVD-Audio and MP3).
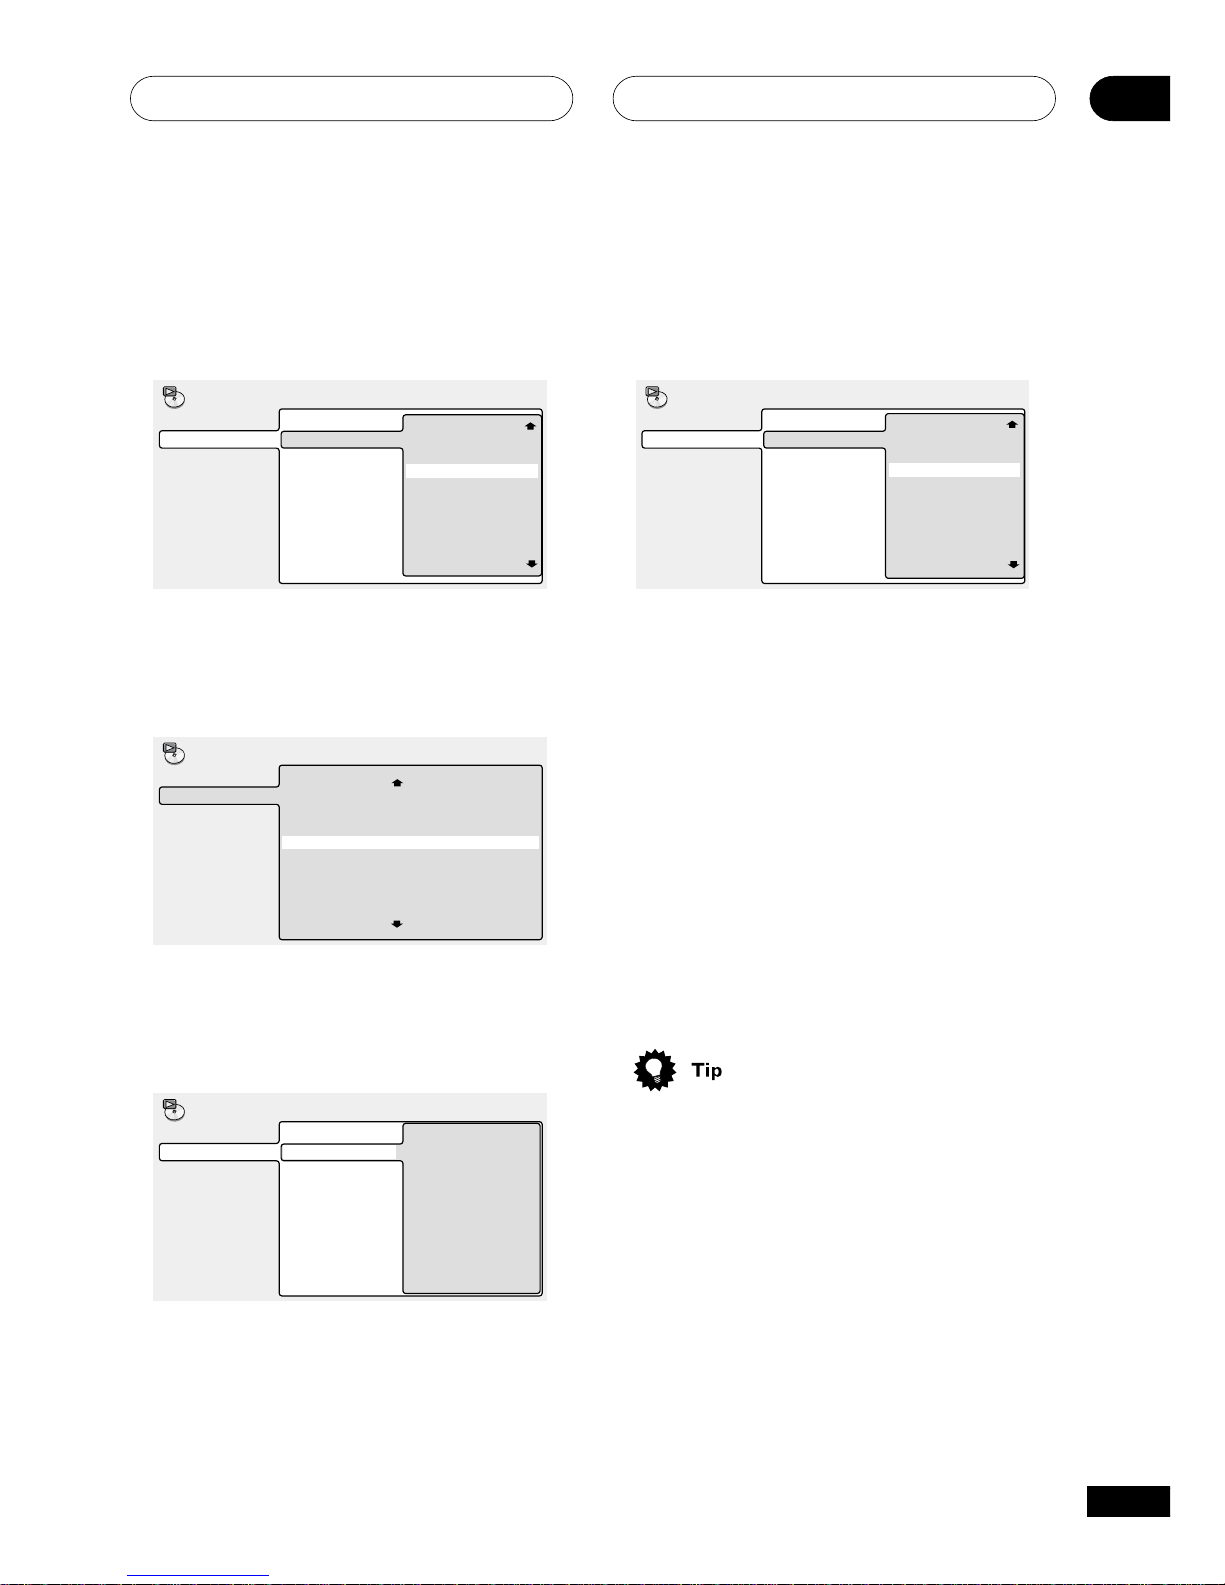
3 Select a title, chapter, group, folder or
track for the current step in the program
list.
For a DVD-Video disc, you can add a whole
title, or a chapter within a title to the
program list.
• To add a title, select the title.
01. 01
02.
03.
04.
05.
06.
07.
08.
Title(1-03)
Title 01
Title 02
Title 03
Chapter(1-036)
Chapter 001
Chapter 002
Chapter 003
Chapter 004
Chapter 005
Chapter 006
Chapter 007
Chapter 008
Program
Program Step
• To add a chapter, first highlight the title,
then move the cursor right and select a
chapter from the list.
01. 01-003
02.
03.
04.
05.
06.
07.
08.
Title(1-03) Chapter(1-036)
Program
Title 01
Title 02
Title 03
Chapter 001
Chapter 002
Chapter 003
Chapter 004
Chapter 005
Chapter 006
Chapter 007
Chapter 008
Program Step
For a DVD-Audio disc, you can add a whole
group, or a track within a group to the
program list.
• To add a group, select the group.
01. 01
02.
03.
04.
05.
06.
07.
08.
Group(1-03)
Group 01
Group 02
Group 03
Track(1-14)
Track 01
Track 02
Track 03
Track 04
Track 05
Track 06
Track 07
Track 08
Program
Program Step
Page 31
Playing Discs
05
41
En
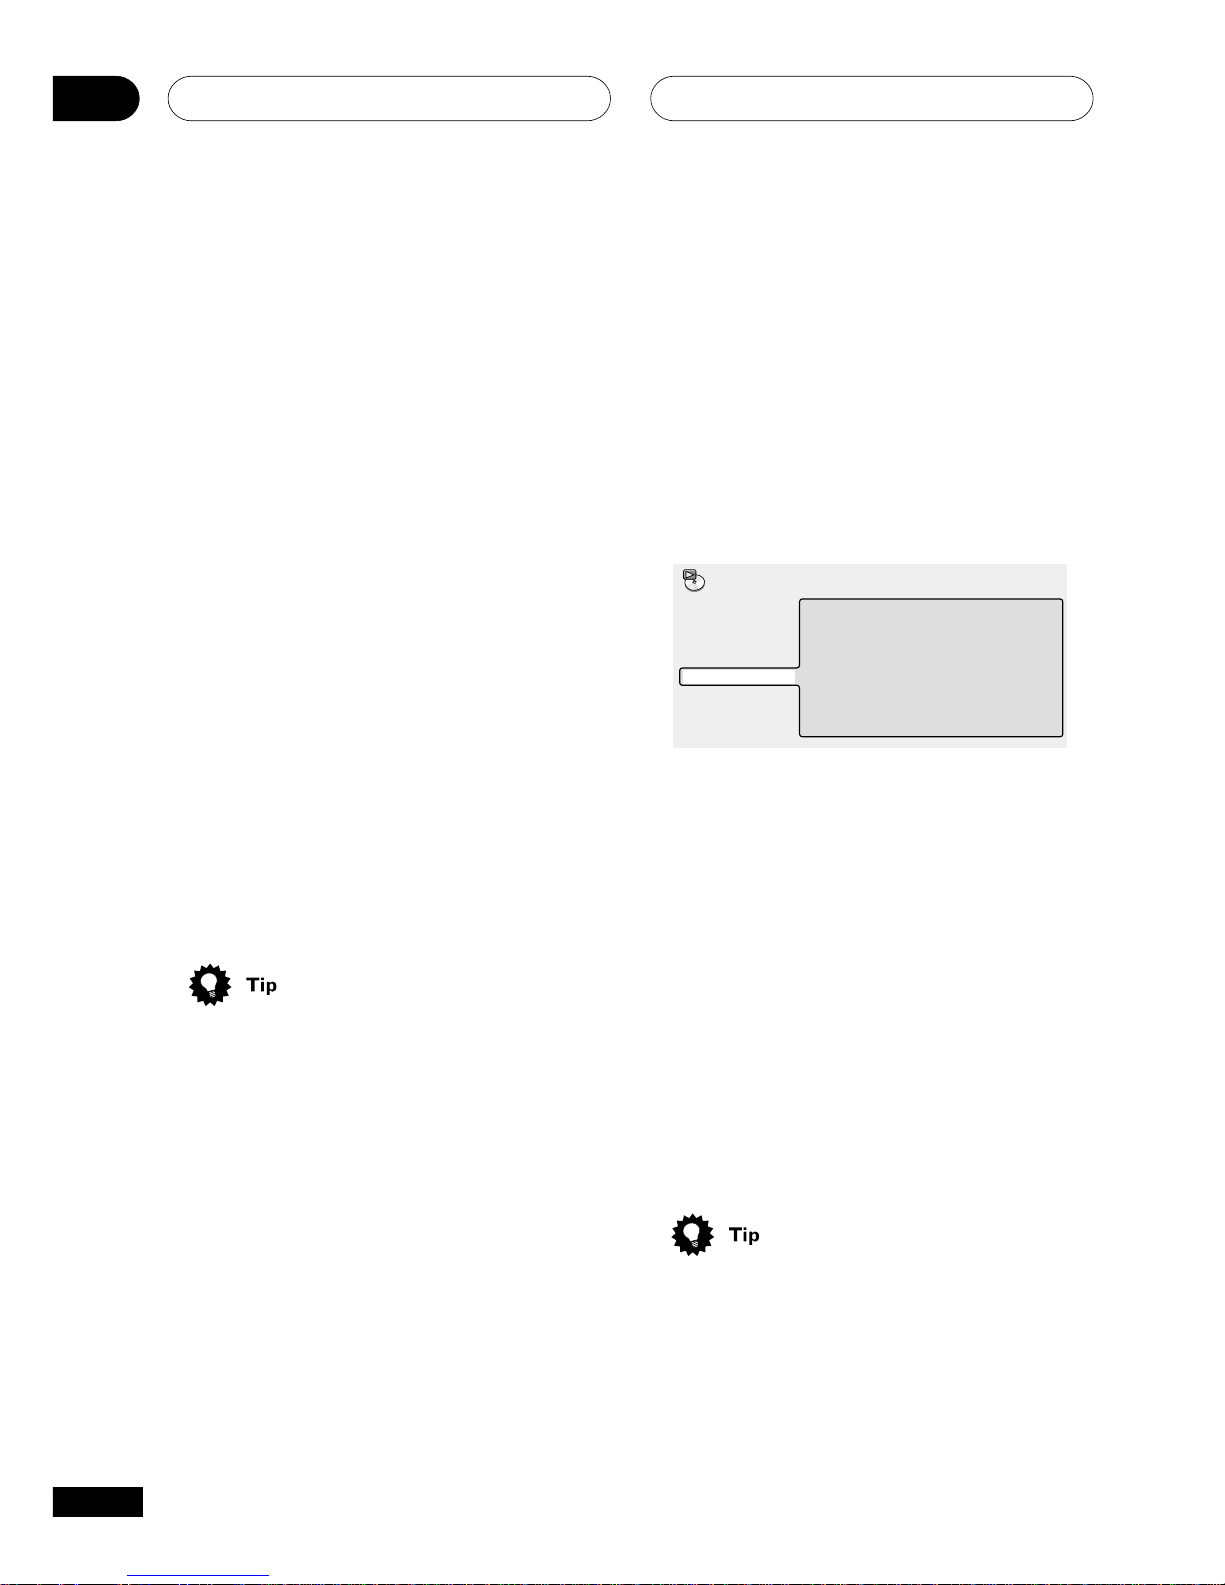
• To add a track, first highlight the group,
then move the cursor right and select a
track from the list.
01. 01-03
02.
03.
04.
05.
06.
07.
08.
Group(1-03) Track(1-14)
Program
Group 01
Group 02
Group 03
Track 01
Track 02
Track 03
Track 04
Track 05
Track 06
Track 07
Track 08
Program Step
For SACD, CD or Video CD/Super VCD, select
a track to add to the program list.
(The screen below shows a CD loaded.)
01. 04
02.
03.
04.
05.
06.
07.
08.
Track(1-12)
Track 01
Track 02
Track 03
Track 04
Track 05
Track 06
Track 07
Track 08
Program
Total Time 0.00
Program Step
For an MP3 disc, you can add a whole folder,
or a track within a folder to the program list.
• To add a folder, select the folder.
01. 001
02.
03.
04.
05.
06.
07.
08.
001. ACP
002. Nth Degree
003. Pfeuti
004. Live
005. Glitch music
006. CodHead
001. Gravity deluxe
002. Tesla's patent
003. Border dispute
004. Delayed by rain
005. Accident incident
006. Pigeon post
007. Outernational
008. Vacuum tube
Program
Folder(1-006)
Track(1-010)
Program Step
• To add a track, first find the folder, then
move the cursor right and select a track
name from the list.
01. 001-003
02.
03.
04.
05.
06.
07.
08.
Program
001. ACP
002. Nth Degree
003. Pfeuti
004. Live
006. CodHead
001. Gravity deluxe
002. Tesla's patent
003. Border dispute
004. Delayed by rain
005. Accident incident
006. Pigeon post
007. Outernational
008. Vacuum tube
Folder(1-006)
Track(1-010)
Program Step
After pressing ENTER to select the title/
group/chapter/folder/track, the step number
automatically moves down one.
4 Repeat step 3 to build up a program
list.
A program list can contain up to 24 titles/
chapters/groups/folders/tracks.
5 To play the program list, press 3
(play).
Program play remains active until you turn
off program play (see below), erase the
program list (see below), eject the disc or
switch off the player.
• To exit the program edit screen without
starting playback, press PLAY MODE or
SETUP. (Don’t press RETURN—your
program list will be lost.)
• During program play, press ¢ to skip
to the next program step.
• Press CLEAR during playback (though
not if the program list OSD is displayed)
to switch off program play. Press while
stopped to erase the program list.
Page 32
Playing Discs05
42
En
Editing a program list
After creating a program list, you can add,
delete and change steps.
1 Press PLAY MODE and select ‘Pro-
gram’ from the list of functions on the
left.
2 Select ‘Create/Edit’ from the list of
program options.
3 To clear a step, highlight the step
number and press CLEAR.
4 To insert a step in the middle of the
program list, highlight the step where
you want the new step to appear, then
select a title/group/chapter/folder/track
to add.
After pressing ENTER, the new step is
inserted into the list.
5 To add a step to the end of the
program list, highlight the next free step
then select a title/group/chapter/folder/
track to add.
• To exit the program edit screen without
starting playback, press PLAY MODE or
SETUP.
• If you want to exit the program edit
screen without saving the changes you
made, press RETURN.
Other functions available from
the program menu
As well as creating and editing a program
list, you can start and stop program play,
erase the program list, and memorize a DVD
program list from the Program menu.
1 Press PLAY MODE and select ‘Pro-
gram’ from the list of functions on the
left.
Create/Edit
Playback Start
Playback Stop
Program Delete
Program Memory ‰ Off
A-B Repeat
Repeat
Random
Program
Search Mode
Play Mode
2 Select a program play function.
• Create/Edit – See Creating a program
list.
• Playback Start – Starts playback of the
program list
• Playback Stop – Turns off program play,
but does not erase the program list
• Program Delete – Erases the program
list and turns off program play
• Program Memory (DVD-Video only) –
Select On to save the program list for
the disc loaded. (Select Off to cancel
the program memory for the disc
loaded)
• After saving a program list using the
Program Memory feature, whenever
you load that disc, the program list is
automatically recalled and program play
switched on.
• You can save program lists for up to 24
discs. After that, the oldest one is
replaced with the new one saved.
Page 33
Playing Discs
05
43
En
Searching a disc
Using the search mode function from the
Play Mode menu you can quickly jump to a
particular part of the disc that you’re
watching or listening to.
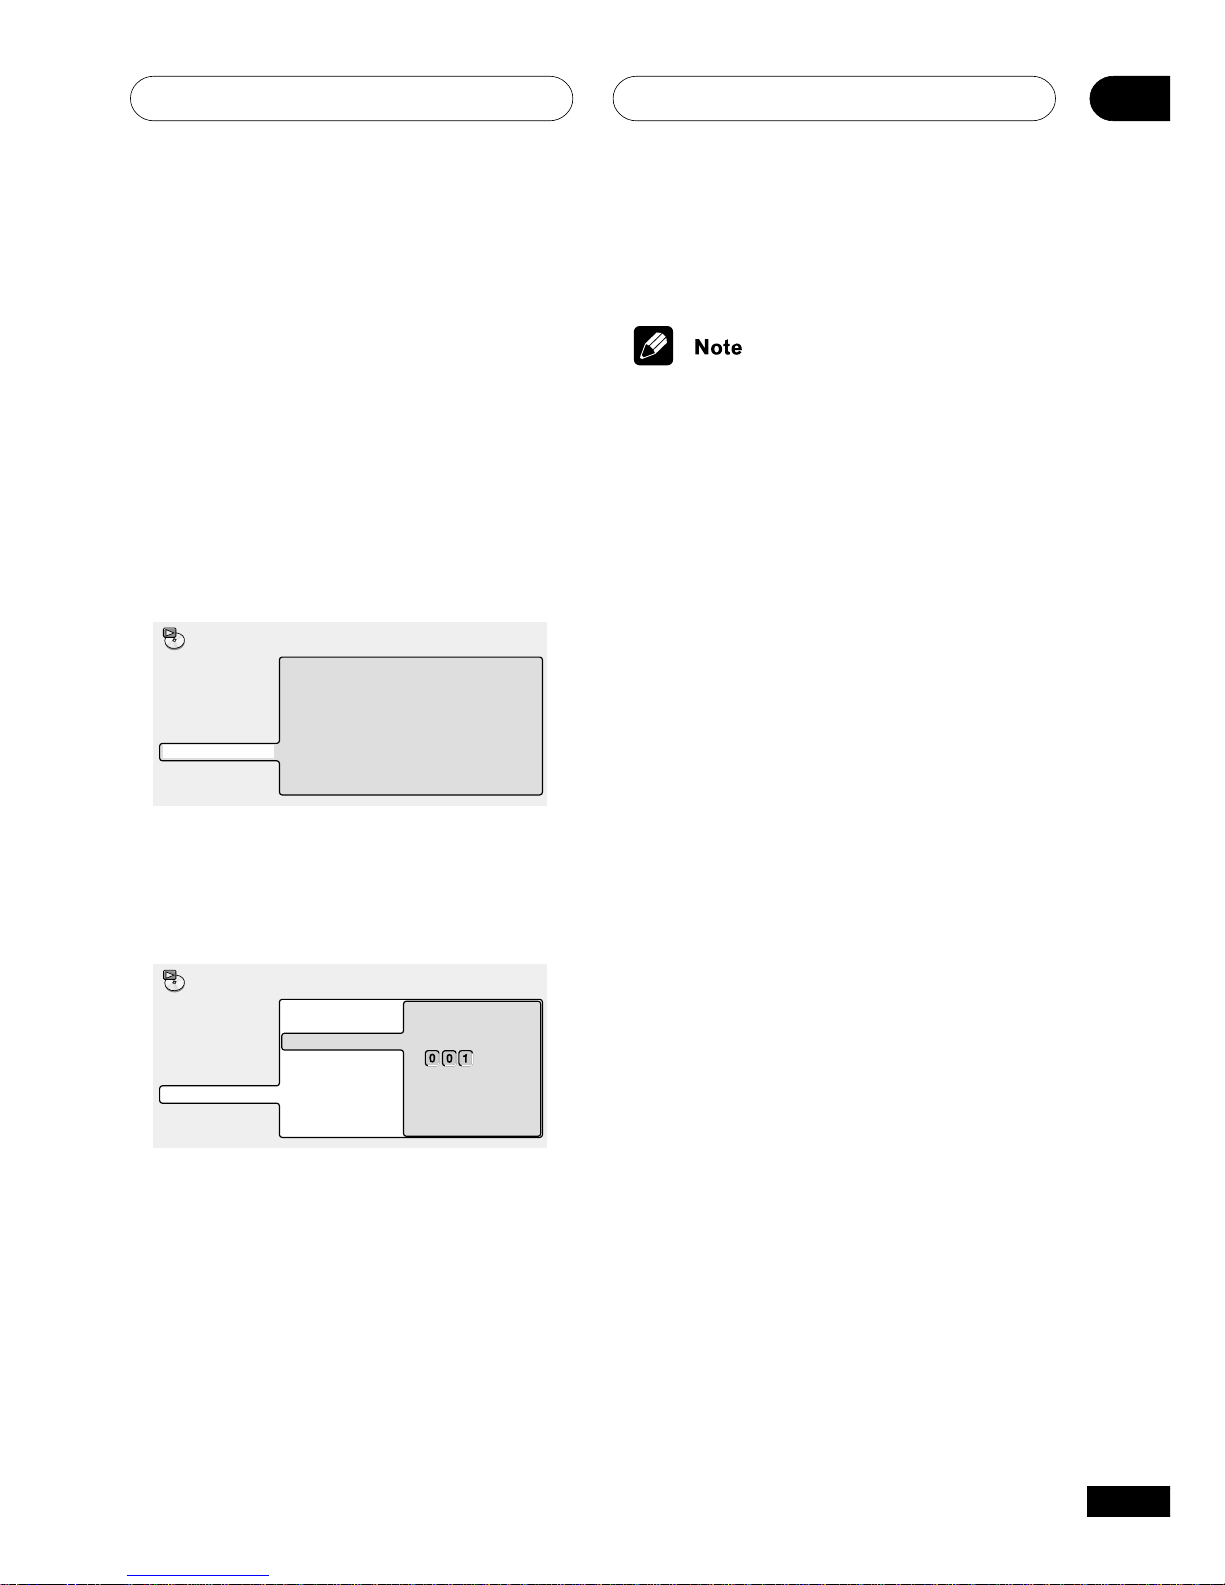
1 Press PLAY MODE and select ‘Search
Mode’ from the list of functions on the
left.
The search options that appear depend on
the kind of disc loaded. The screen below
shows the DVD-Video search options.
Title Search
Chapter Search
Time Search
A-B Repeat
Repeat
Random
Program
Search Mode
Play Mode
2 Select a search mode.
3 Use the number buttons to enter a
title, group, chapter, page, folder or track
number, or a time.
Title Search
Chapter Search
Time Search
Input Chapter
A-B Repeat
Repeat
Random
Program
Search Mode
Play Mode
• For a time search, enter the number of
minutes and seconds into the currently
playing title (DVD-Video/DVD-RW) or
track (Video CD) you want playback to
resume from. For example, press 4, 5, 0,
0 to have playback start from 45 minutes
into the disc. For 1 hour, 20 minutes and
30 seconds, press 8, 0, 3, 0.
• Some DVD-Audio discs feature pages of
browsable pictures. Enter the page
number you want.
4 Press ENTER to start playback.
• You can only use time search with DVDVideo and Video CD discs.
• The disc must be playing in order to use
time search.
• Search functions are not available with
Video CDs/Super VCD in PBC mode
(start non-PBC playback by stopping
playback, then pressing ¢, then 3
(play)).
• You can often select what you want to
watch from a DVD disc menu.
Page 34
Playing Discs05
44
En
Switching subtitles
Some DVD-Video discs have subtitles in one
or more languages; the disc box will usually
tell you which subtitle languages are
available. You can switch subtitle language
during playback.
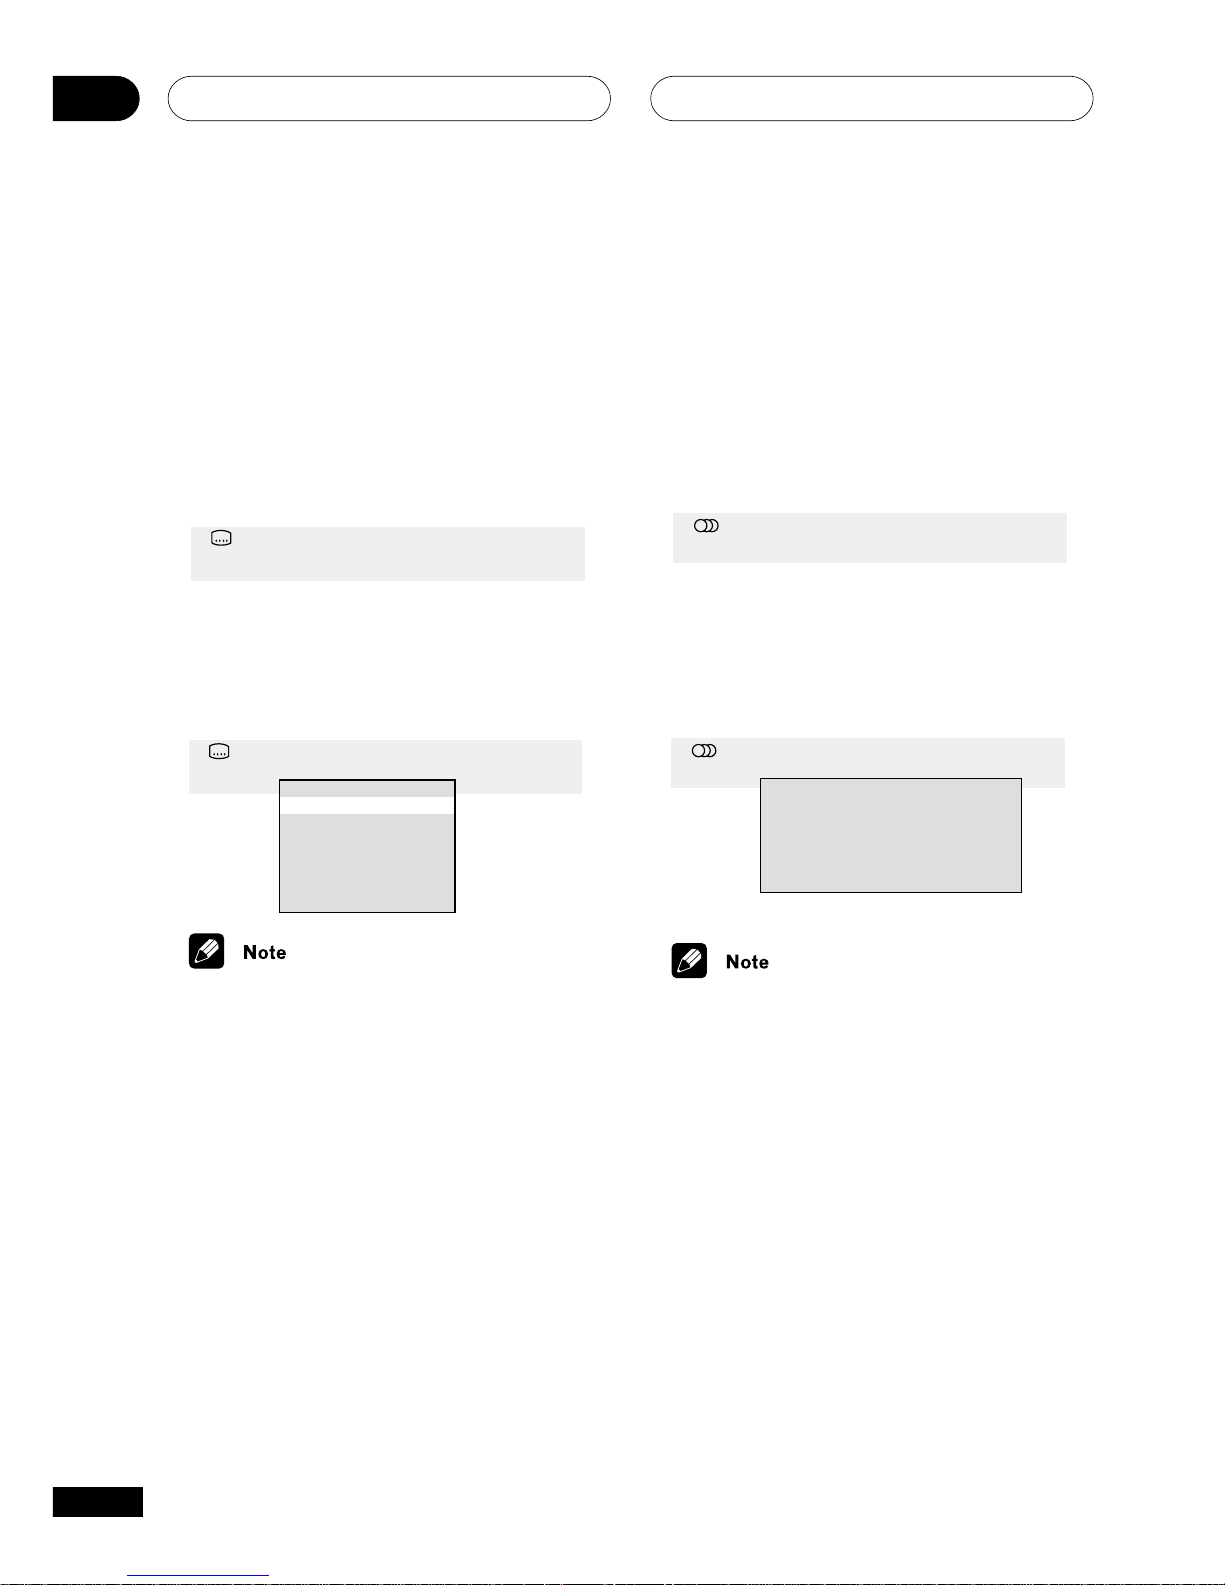
1 Press SUBTITLE repeatedly to select a
subtitle option.
Subtitle 1 English
• While the above display is showing, you
can also use the joystick (up/down) and
ENTER to select a subtitle language
from a drop-down menu.
Subtitle 1 English
Off
1. English
2. French
3. German
4. Italian
1/ 1
• Some discs only allow you to change
subtitle language from the disc menu.
Press TOP MENU to access.
• To set subtitle preferences, see Subtitle
Language.
Switching DVD-Video audio
language
When playing a DVD-Video disc recorded
with dialog in two or more languages, you
can switch audio language during playback.
1 Press AUDIO repeatedly to select an
audio language option.
Audio Dolby Digital 3/2.1CH2 French
• With some discs, while the above
display is showing, you can also use the
joystick (up/down) and ENTER to select
an audio language from a drop-down
menu.
Audio Dolby Digital 3/2.1CH
Dolby Digital 3/2.1CH
Dolby Digital 3/2.1CH
Dolby Digital 2CH
Dolby Digital 2CH
2 French
1. English
2. French
3. German
4. Italian
1/ 1
• Some discs only allow you to change
audio language from the disc menu.
Press TOP MENU to access.
• To set audio language preferences, see
Audio Language.
Page 35
Playing Discs
05
45
En
Switching DVD-RW audio
channel
When playing a DVD-RW disc recorded with
dual-mono audio, you can switch between
the main, sub, and mixed channels during
playback.
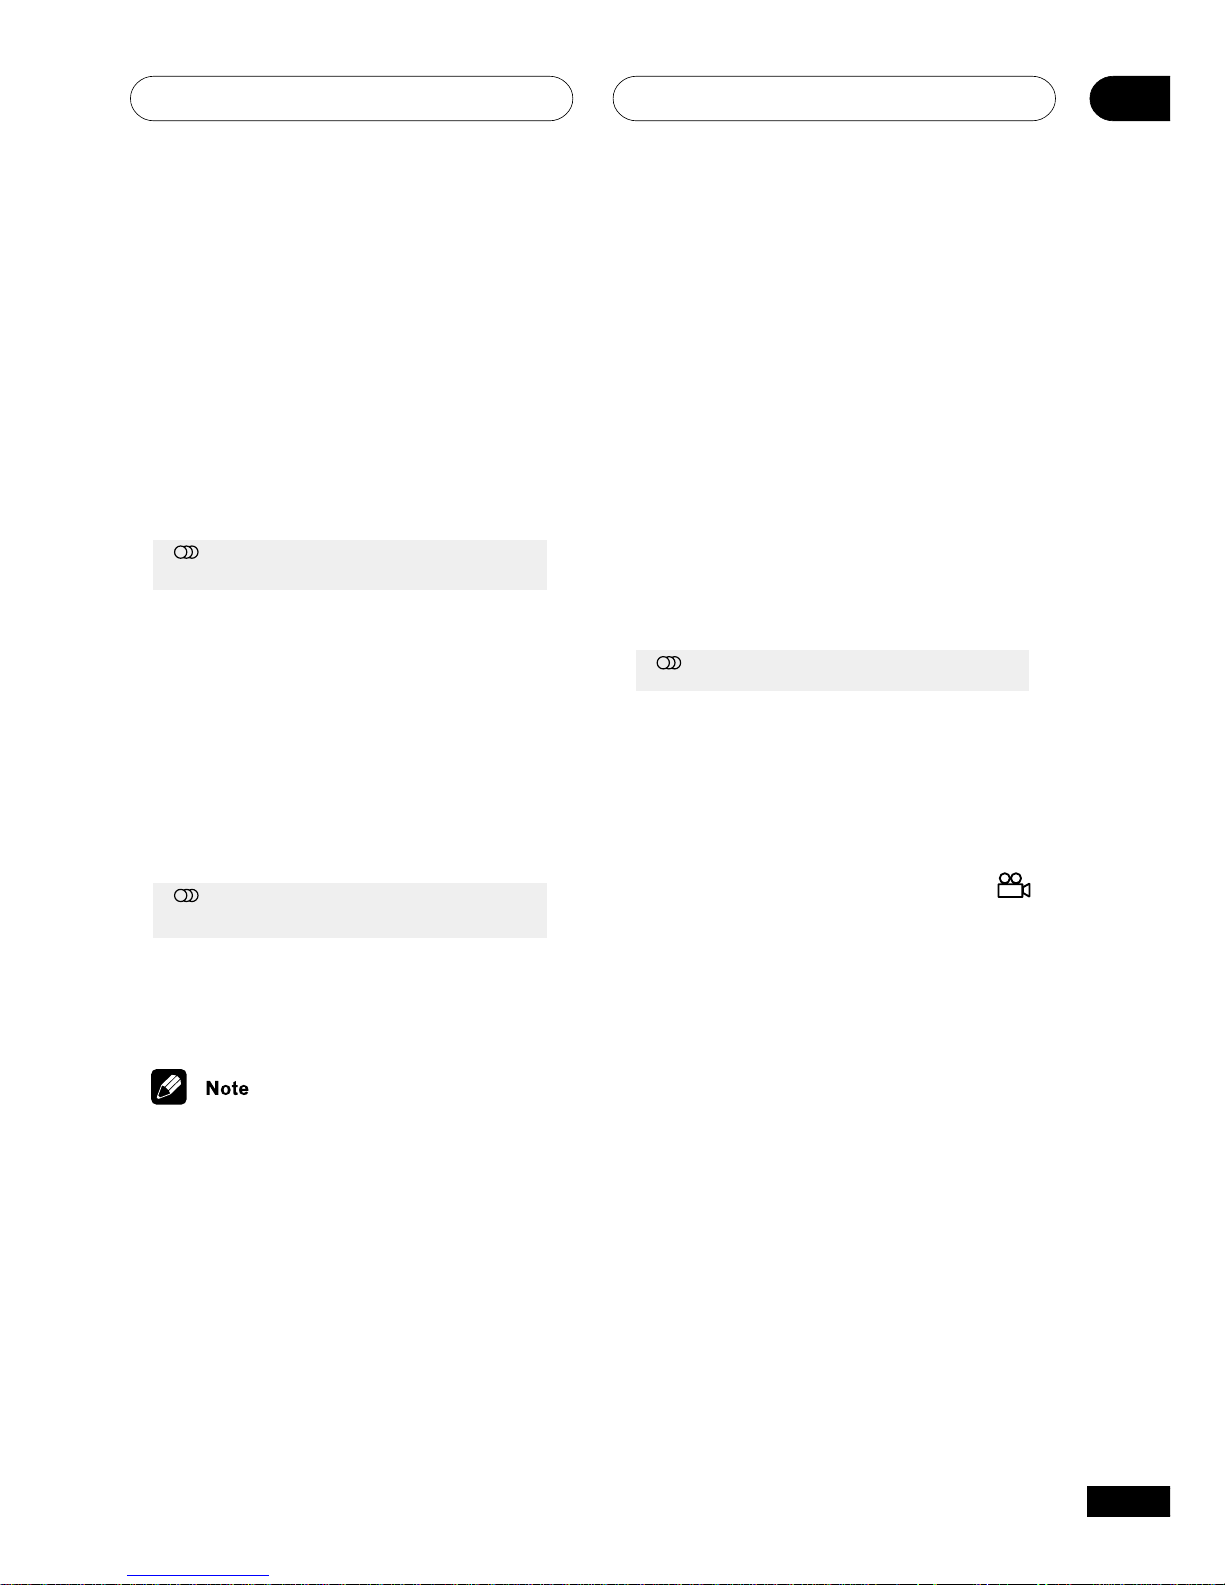
1 Press AUDIO repeatedly to select an
audio channel option.
Audio Dolby Digital 1+1CH1L
Switching DVD-Audio audio
channel
Depending on the disc, you may be able to
switch channels when playing DVD-Audio
discs—see the disc box for details.
1 Press AUDIO repeatly to select an
audio channel option.
Audio
Linear PCM 192kHz24bit
1
2CH
Digital Out Converted
When you change the audio channel,
playback restarts from the beginning of the
current track.
• Some discs only allow you to change
audio channel from the disc menu.
Press TOP MENU to access.
• To set audio language preferences, see
Audio Language.
Switching CD/MP3/Video CD
audio channel
You can switch between stereo, just the left
channel or just the right channel of a CD/
MP3/Video CD/Super VCD. (To change the
audio channel of a CD it must be playing.)
Some Super VCDs have two soundtracks.
With these discs you can switch between the
two soundtracks as well as individual
channels in each.
1 Press AUDIO repeatly to select an
audio channel option.
Audio
Stereo
Switching camera angles
Some DVD-Video discs feature scenes shot
from two or more angles—check the disc
box for details.
When a multi-angle scene is playing, a
icon appears on screen to let you know that
other angles are available (this can be
switched off if you prefer).
¶ During playback press ANGLE to
switch angle.
Page 36
Playing Discs05
46
En
Displaying disc information
Various track, chapter and title information,
as well as the video transmission rate for
DVD discs, can be displayed on-screen.
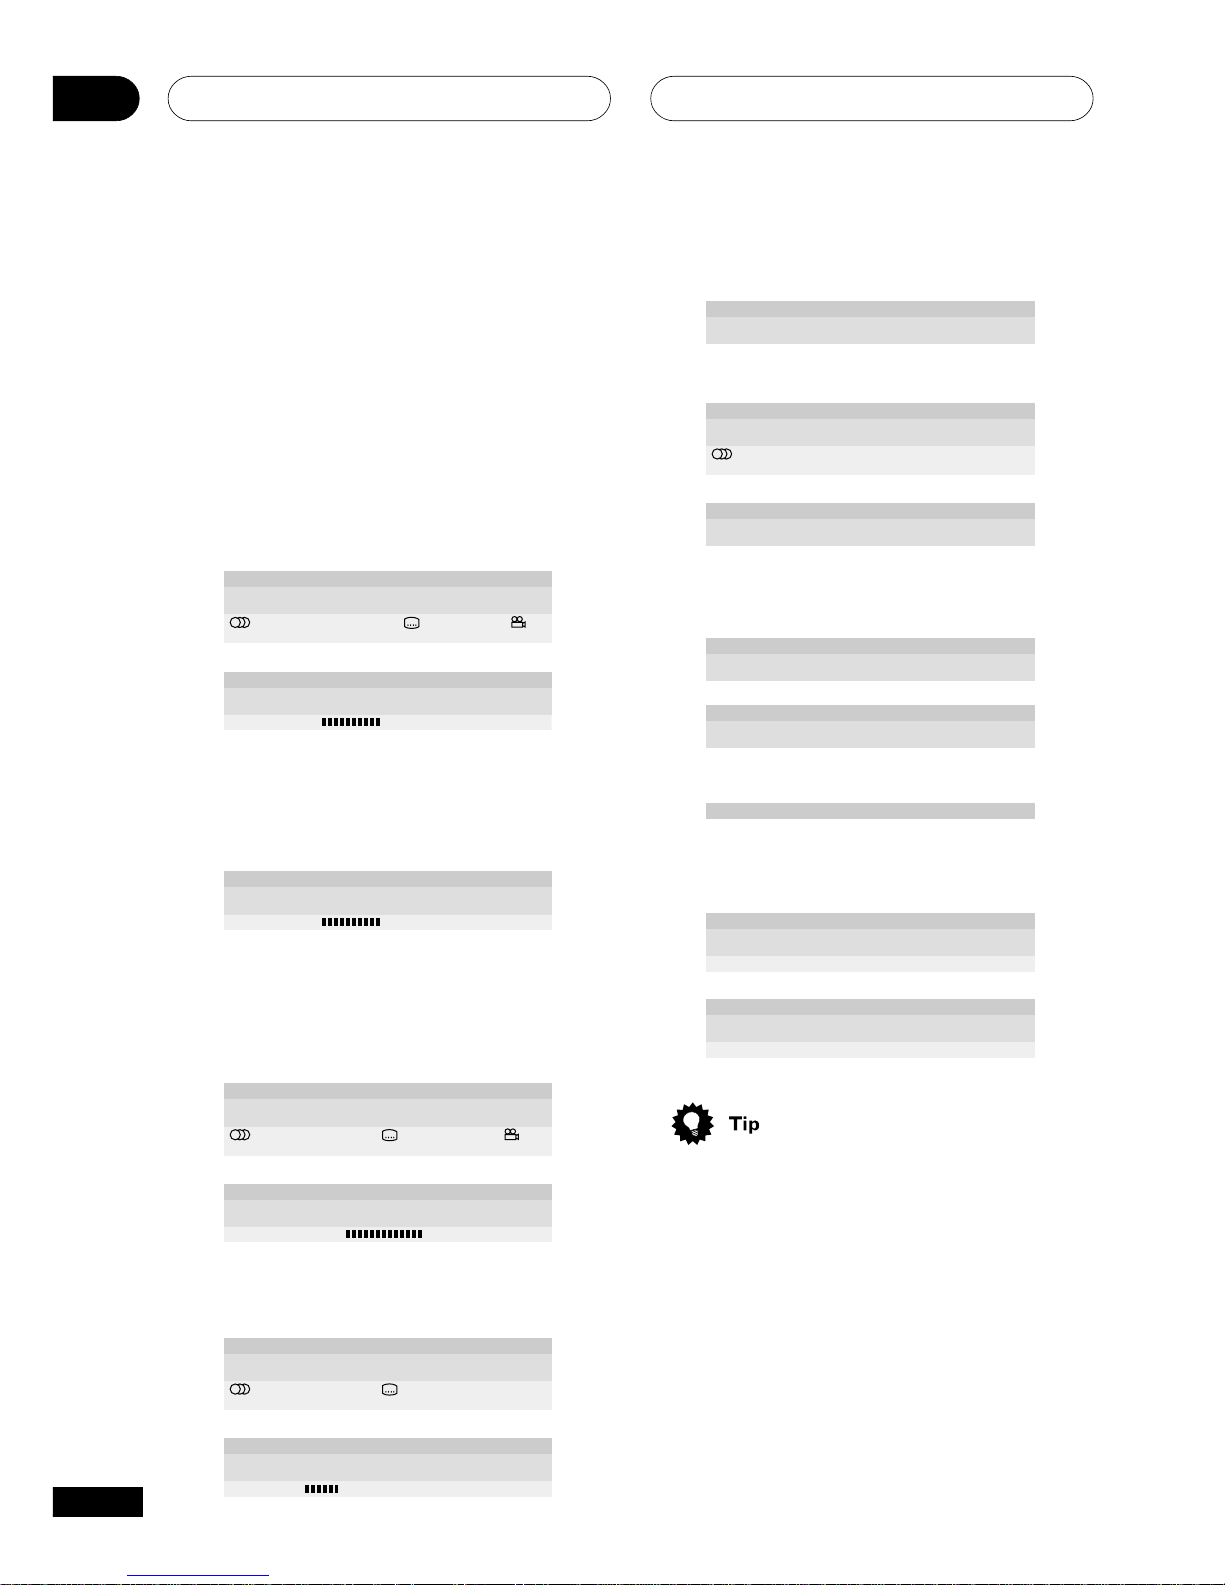
1 During playback, press DISPLAY to
show/switch the information displayed.
Keep pressing DISPLAY to change the
displayed information.
• DVD-Video displays
Audio
Dolby Digital 3/2.1CH
AngleSubtitle
1 English 1
Title
Play DVD
3
2.231/3
Current / Total Elapsed
138.36
Remain
138.59
Total
1 English
# Tr. Rate : 6.0Mbps
Chapter
Play DVD
3
0.062/36
Current / Total Elapsed
1.40
Remain
1.46
Total
The # mark displayed with some
DVD-Video discs means that the
video is playing at 24 frames/second,
progressive.
Tr. Rate : 6.0Mbps
Chapter
Pause DVD
8
0.06 152/36
Current / Total Elapsed
1.40
Remain
1.46
Total
When the disc is paused, the display
also shows the frame number.
• DVD-Audio displays
Audio
1 Linear PCM
AngleSubtitle
- - 1
Track
Play DVD-Audio
3
3.201/14
Current / Total Elapsed
2.41
Remain
6.01
Total
192kHz 24bit 2/0CH
Tr. Rate : 9.5Mbps
Group
Play DVD
3
3.211/3
Current / Total Elapsed
53.20
Remain
56.41
Total
-Audio
• DVD-RW displays
Audio Dolby Digital 2/0CH
1
Subtitle
- -
Title
Play DVD-RW Original
3
0.081/32
Current / Total Elapsed
30.22
Remain
30.30
Total
Tr. Rate 4.3Mbps
Chapter
Play DVD-RW Original
3
1/1
Current / Total
• SACD displays
Track
Play SACD
3
0.221/9
Current / Total Elapsed
3.38
Remain
4.00
Total
(During multichannel playback only)
Audio
3/2.1CH
Track
Play SACD
3
0.221/9
Current / Total Elapsed
3.38
Remain
4.00
Total
Disc
Play SACD
3
0.24
Elapsed
40.07
Remain
40.31
Total
• CD and Video CD displays
Disc
Play VCD
3
0.23
Elapsed
58.51
Remain
57.14
Total
Track
Play VCD
3
0.232/16
Current / Total Elapsed
4.20
Remain
4.43
Total
(During PBC playback only)
Play VCD
3
• MP3 disc displays
Play MP3
3
Track
Track Name Outernational
0.181/17
Current / Total Elapsed
12.42
Remain
13.00
Total
Play MP3
3
Folder
Folder Name ACP
2/7
Current / Total
• You can see disc information (number of
titles/chapters, groups, tracks, folders
and so on) from the Disc Navigator
screen. See Using the Disc Navigator to
browse the contents of a disc.
Page 37
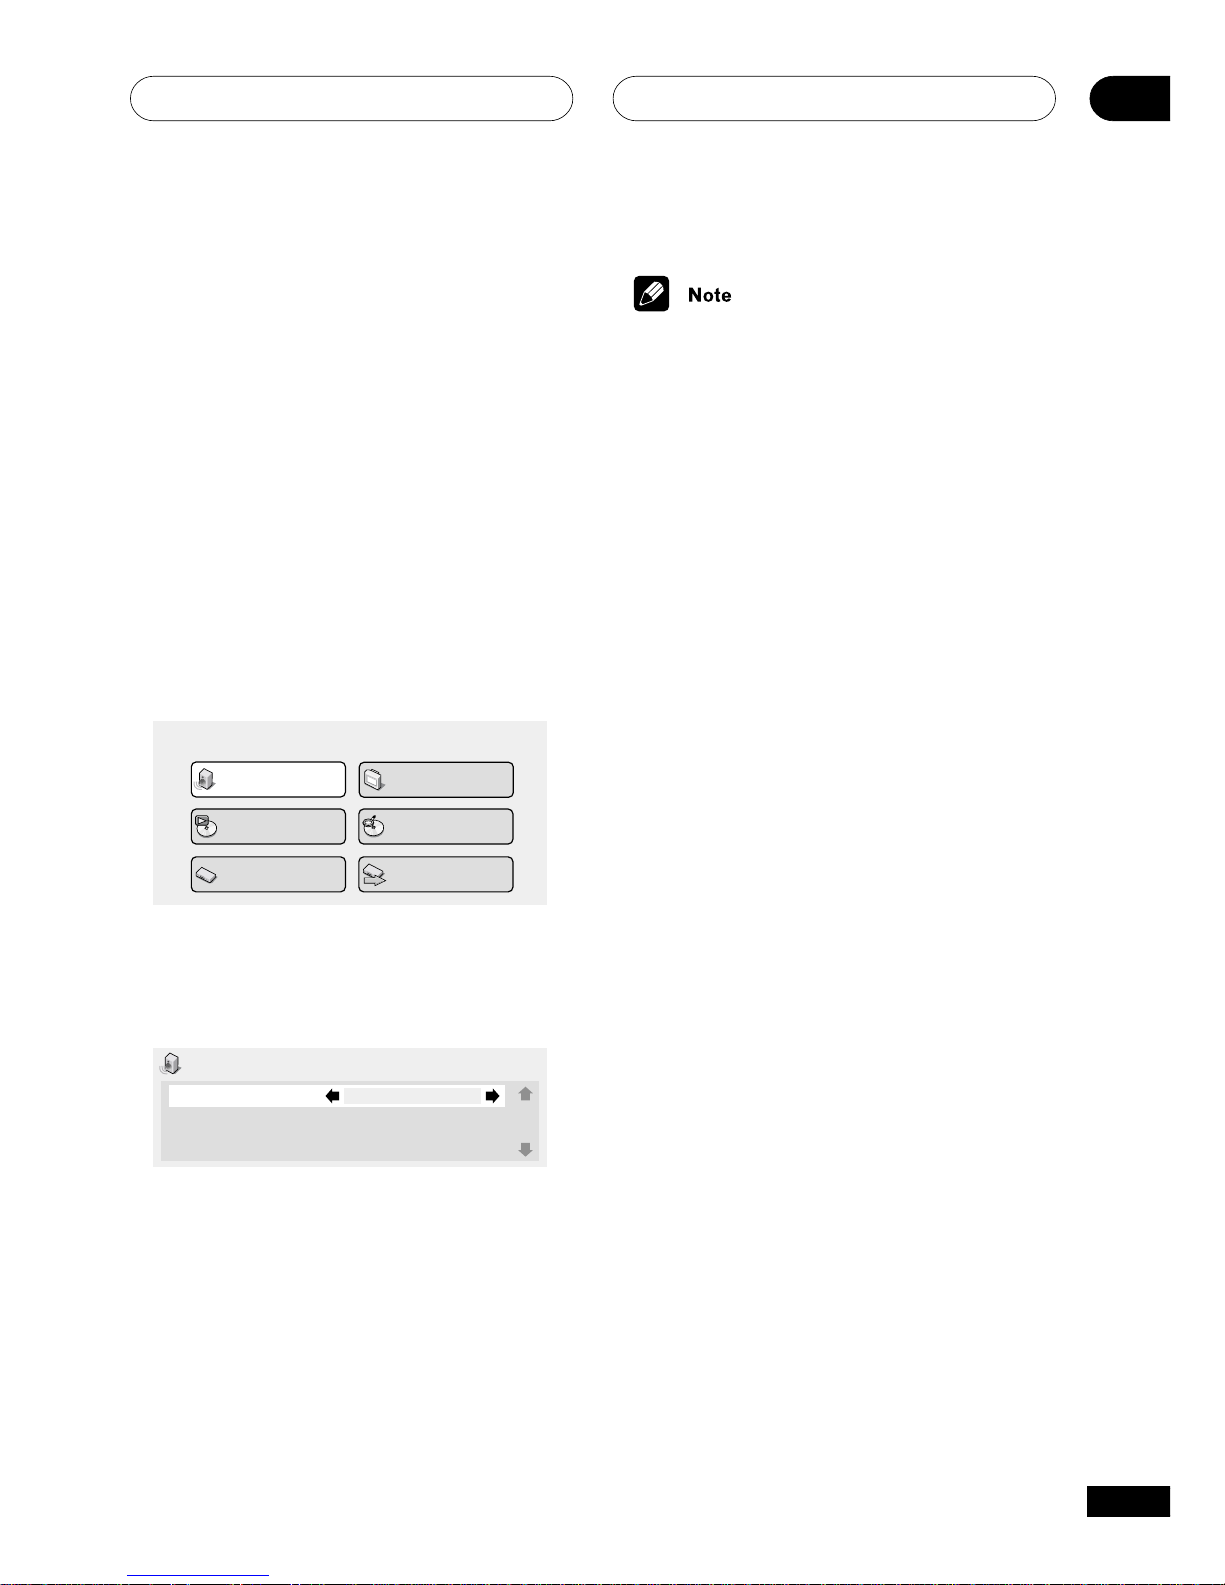
The Audio Settings Menu
06
47
En
• Audio DRC is only effective with Dolby
Digital audio sources.
• Audio DRC is only effective through the
digital output when Digital Out is set to
On, and Dolby Digital Out is set to
Dolby Digital > PCM.
• The effect of Audio DRC depends on
your speakers and AV receiver settings.
Audio DRC
• Default setting: Off
When watching Dolby Digital DVDs at low
volume, it’s easy to lose the quieter sounds
completely—including some of the dialog.
Switching Audio DRC (Dynamic Range
Control) to On can help by bringing up the
quieter sounds, while controlling loud peaks.
How much of a difference you hear depends
on the material you’re listening to. If the
material doesn’t have wide variations in
volume, you may not notice much change.
1 Press SETUP and select ‘Audio Settings’ from the on-screen display.
Video Adjust
Audio Settings
Play Mode
Setup Navigator
Disc Navigator
Initial Settings
2 Highlight Audio DRC, then use the
Joystick (left/right) to change to ‘On’ or
‘Off’, as required.
Audio Settings 1/ 2
Audio DRC
Virtual Surround
Channel Level
Off
Off
Fix
3 Press ENTER to make the setting and
exit the Audio Settings screen.
Page 38
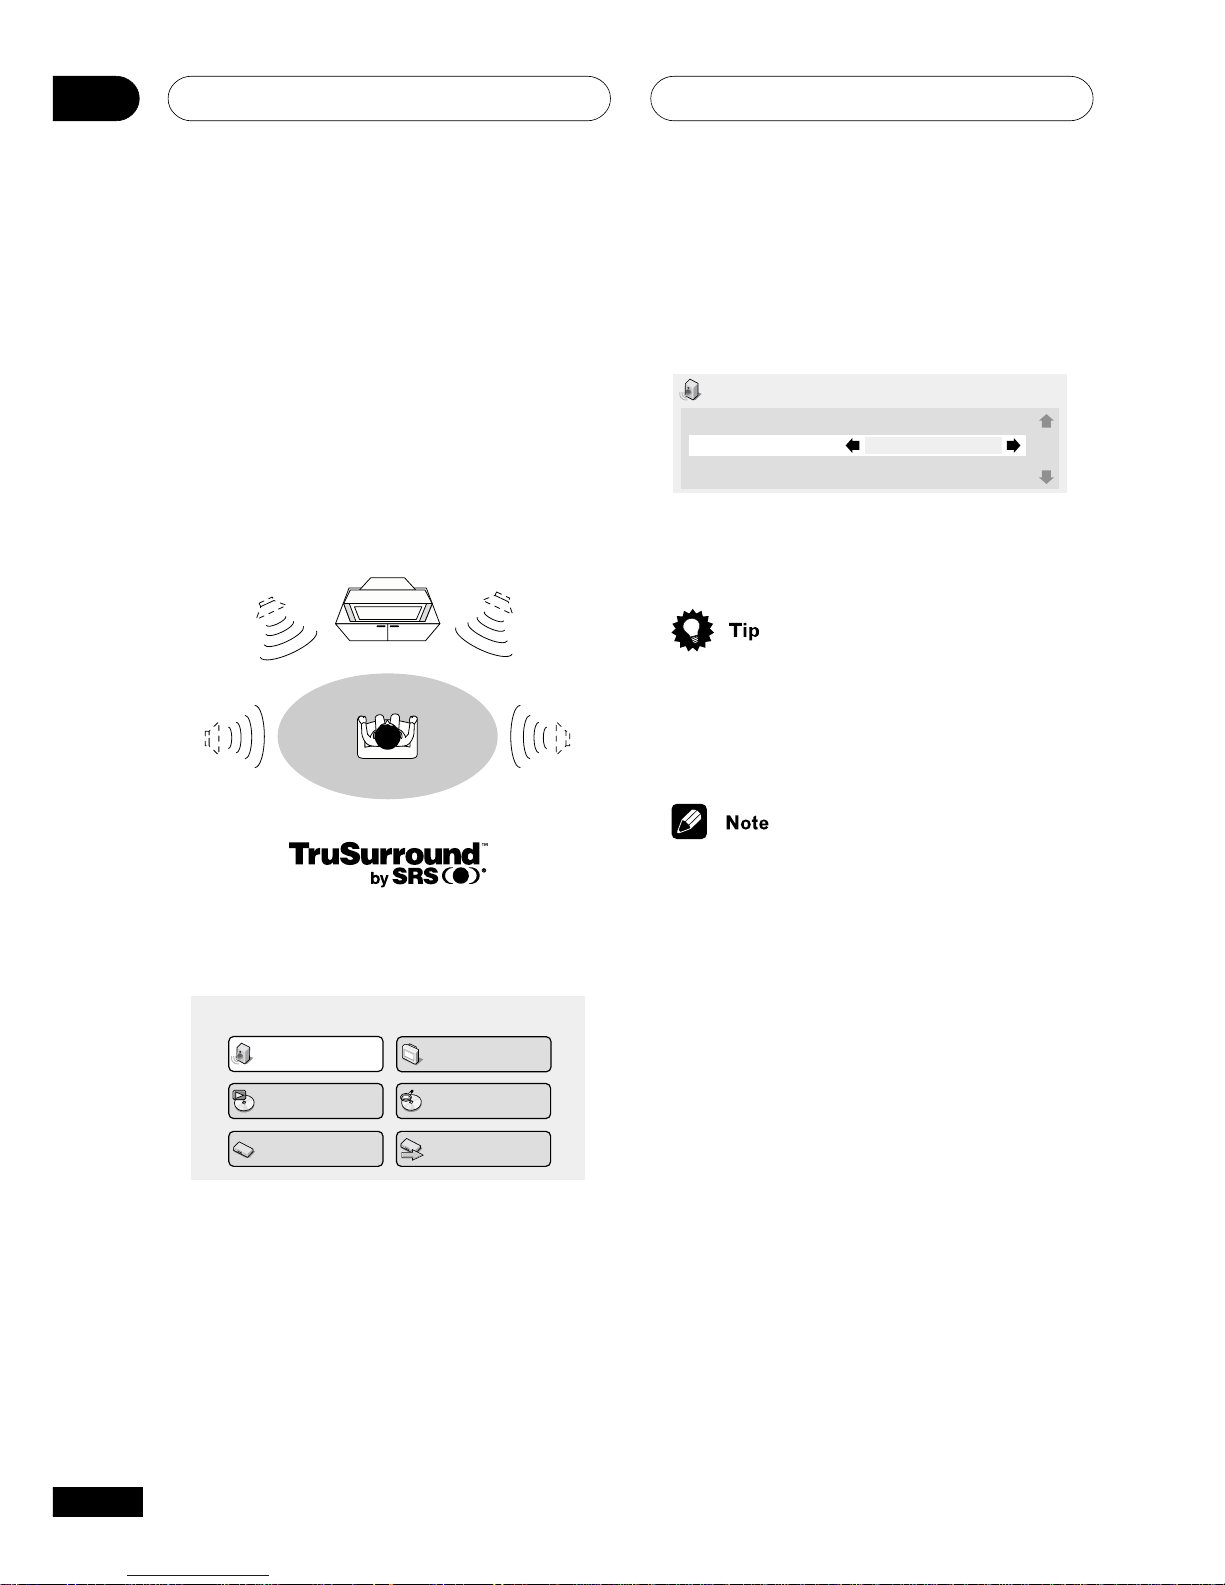
The Audio Settings Menu
06
48
En
Virtual Surround
• Default setting: Off
Switch on Virtual surround to enjoy surround
sound effects from just two speakers.
When you play a Dolby Digital soundtrack,
Virtual Dolby Digital, which uses
TruSurround technology from SRS, produces
a deep, realistic 3D soundspace from a pair
of stereo speakers.
1 Press SETUP and select ‘Audio Settings’ from the on-screen display.
Video Adjust
Audio Settings
Play Mode
Setup Navigator
Disc Navigator
Initial Settings
2 Highlight TruSurround, then use the
Joystick (left/right) to change to ‘2V/
TruSurround’ or ‘Off’, as required.
Audio Settings
1/ 2
Audio DRC
Virtual Surround
Channel Level
Off
Off
Fix
3 Press ENTER to make the setting and
exit the Audio Settings screen.
• You can also use the SURROUND
button on the remote control to switch
Virtual Surround on (2V/
TruSurround)/Off.
• Virtual Surround does not work with CD,
MP3, DVD-Audio or SACD discs, or
96kHz Linear PCM soundtracks.
• The Virtual Surround effect is output
only through the analog AUDIO OUT
jacks.
• Make sure that Audio Output Mode is
set to 2 Channel.
• How good the surround effect is varies
with the disc.
Page 39
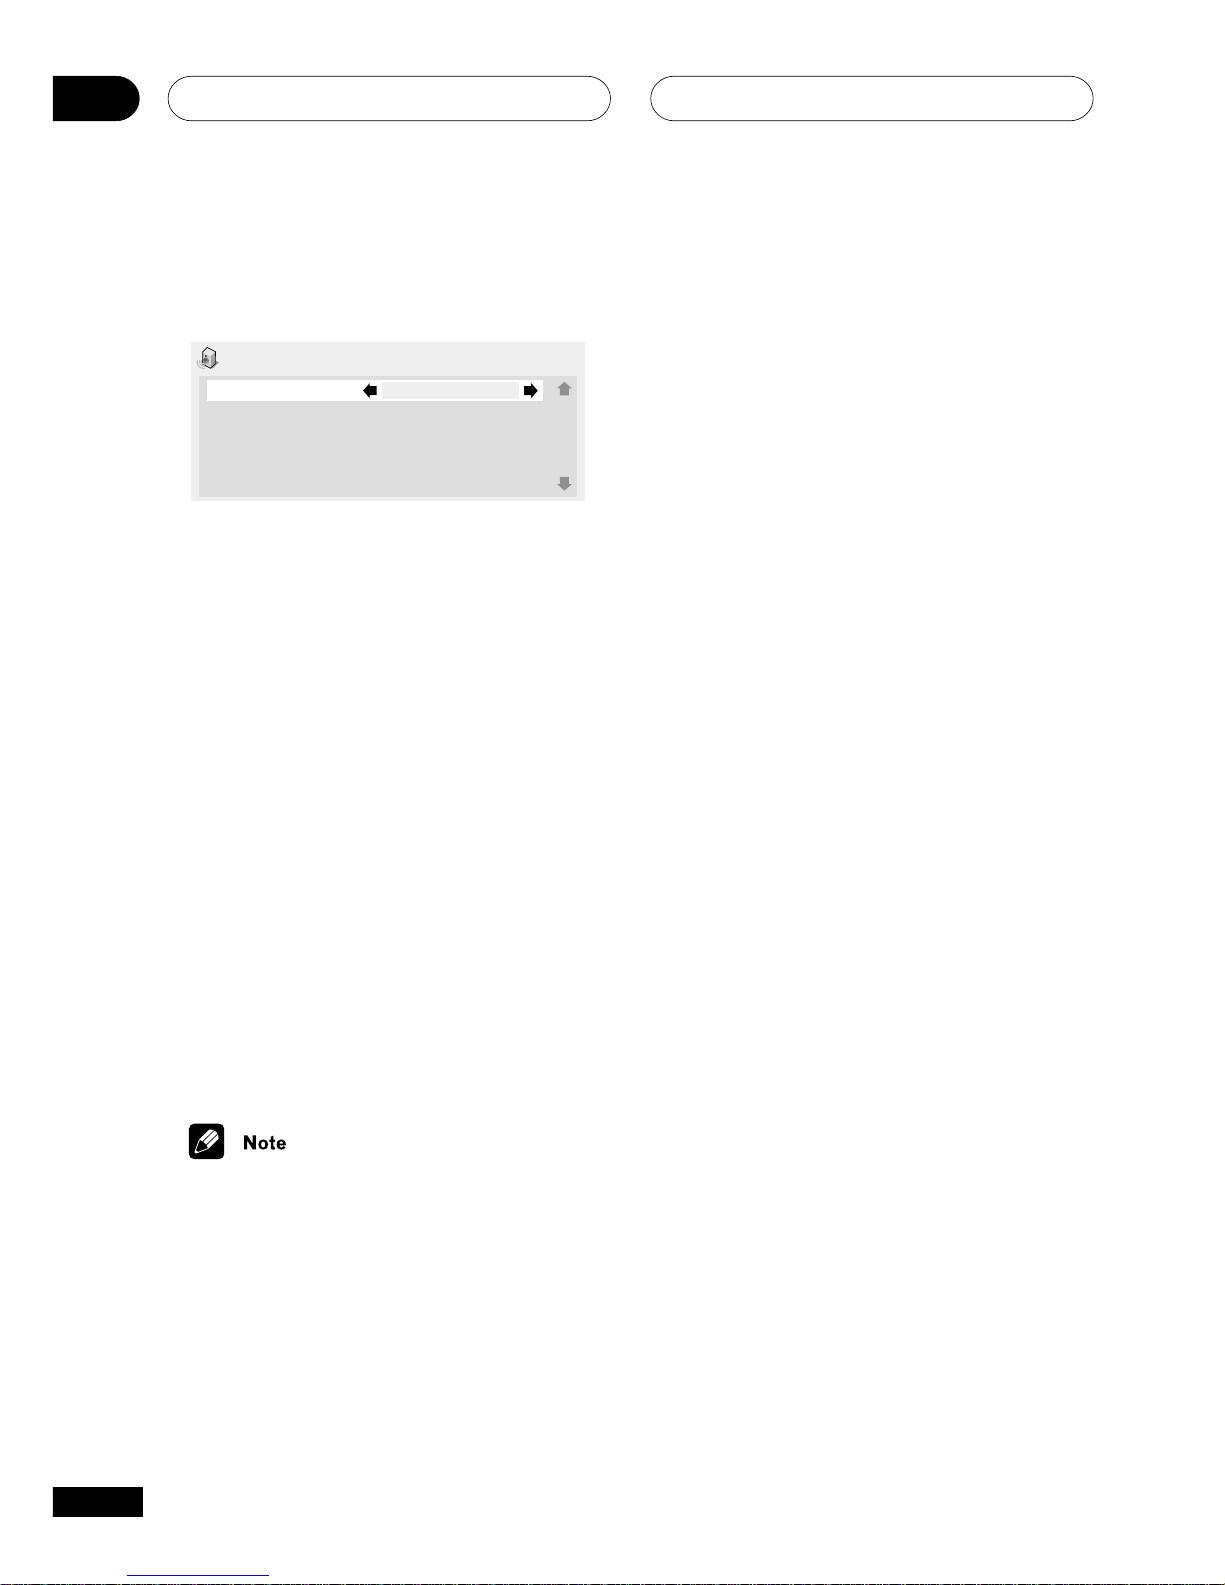
The Audio Settings Menu
06
50
En
Set the distance for each speaker.
Audio Settings 3/3
Speaker Distance L
Speaker Distance C
Speaker Distance R
Speaker Distance LS
Speaker Distance RS
Speaker Distance SW
10.0 ft.
10.0 ft.
10.0 ft.
10.0 ft.
10.0 ft.
10.0 ft.
• Use the joystick (up/down) to select a
speaker.
• Use the joystick (left/right) to adjust the
distance from your listening position to
that speaker.
Front left/right (L/R) speakers can be set
from 1.0 ft. to 30 ft. in 0.5 ft. increments.
Center speaker (C) and subwoofer (SW) can
be set from – 6.5 ft. to +6.5 ft. relative to the
front left/right speakers
Surround left/right (LS/RS) speakers can be
set from –20 ft. to +6.5 ft. relative to the front
left/right speakers.
When you adjust the front left (L) or front
right (R) speaker, all the other speaker
distances are adjusted relative to that
speaker.
6 Press ENTER to make the settings and
exit the audio settings screen.
• The speaker distance settings have no
effect on SACD playback.
• You can’t adjust the channel level for
any speakers that are set to Off in the
Speaker Installation menu screen
(page 64).
• The Fix setting is equivalent to setting
all the channel levels to +6 dB. Therefore, the Variable setting will usually
sound quieter than the Fix setting.
Page 40
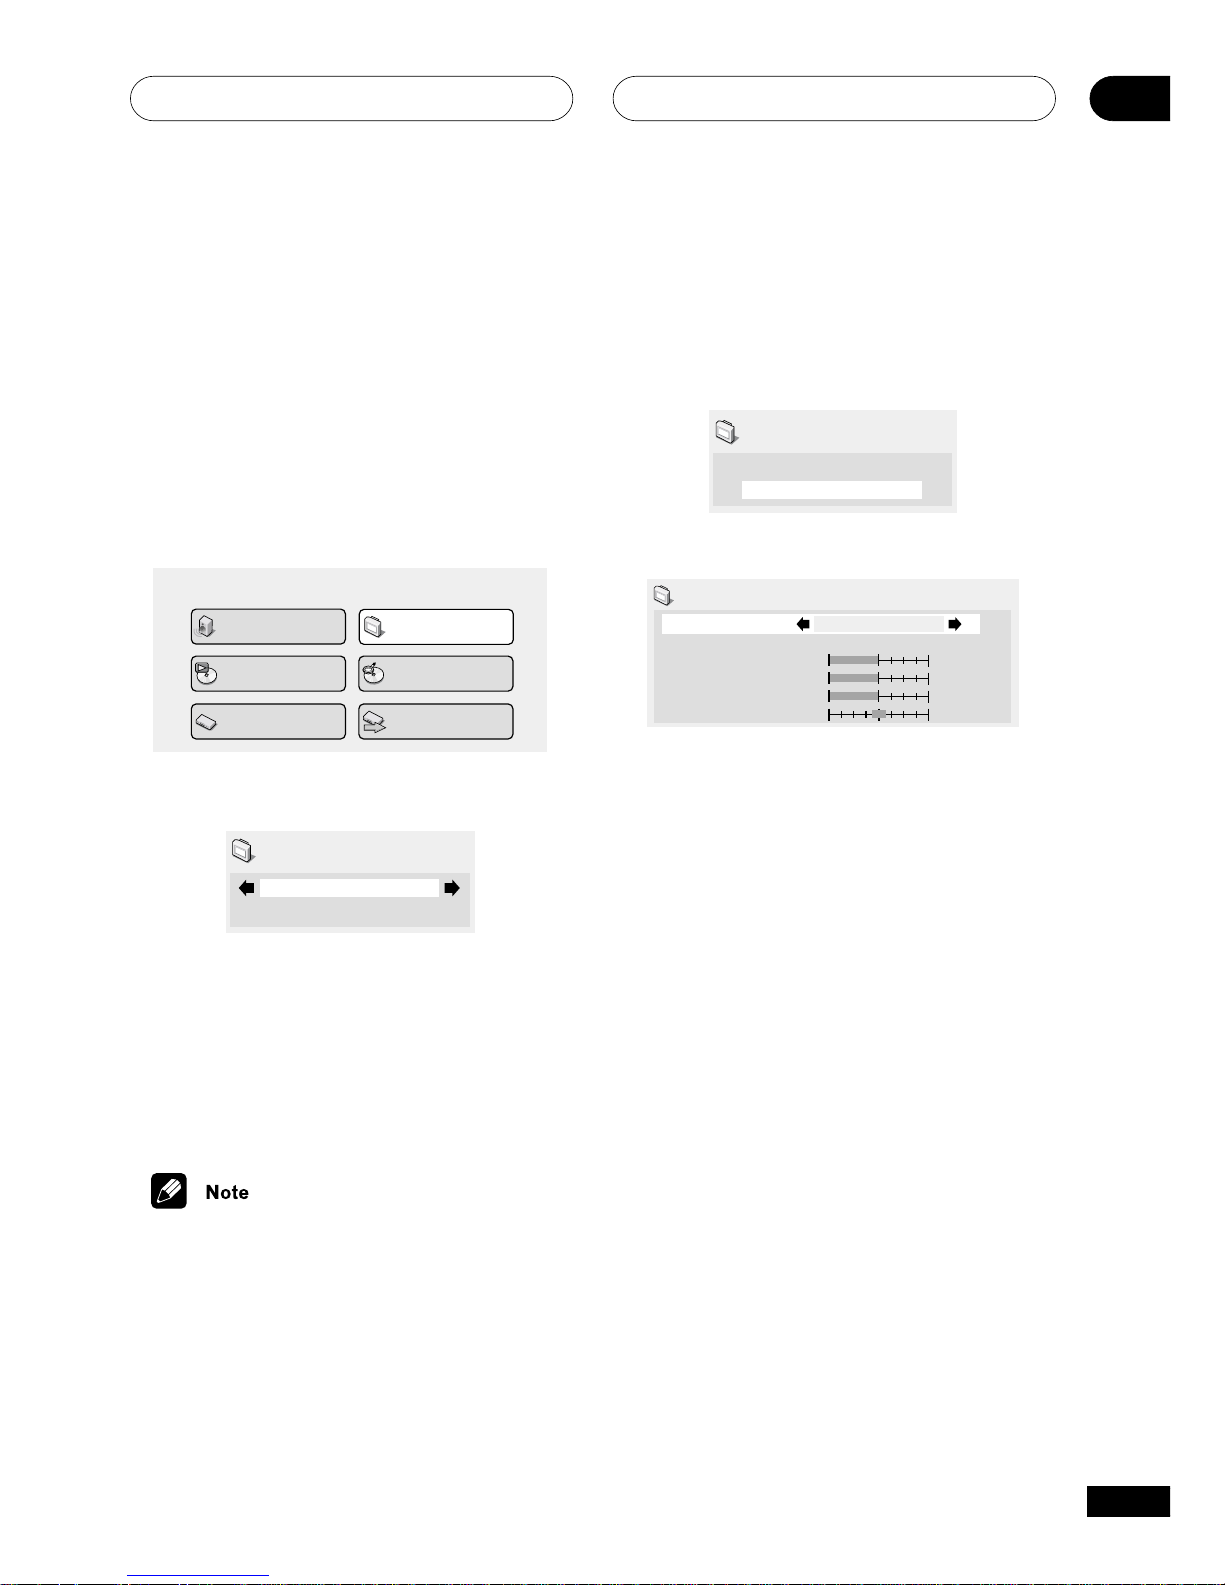
The Video Settings Menu
07
51
En
1 Select one of the Memory presets (see
above).
2 Move the joystick down to select
‘Detailed Settings’ then press ENTER.
I.Memory1
Detailed Settings
Video Adjust
3 Adjust the picture quality settings.
Recall Settings
Fine Focus
Contrast
Sharpness
Chroma Level
Hue
I.Memory1
On
Interlace Memory 1 (I. Memory 1)
min max
soft fine
min
max
green
red
• Use the joystick (up/down) to select a
setting.
• Use the joystick (left/right) to adjust the
current setting.
• Press DISPLAY to switch between full
and single view.
• You can change the preset number from
the Recall Settings menu item.
You can adjust any or all of the following
picture quality settings:
• Fine Focus – Switch On to reveal
greater detail (high resolution) in the
picture.
• Contrast – Adjusts the contrast
between light and dark elements in the
picture.
• Sharpness – Adjusts the sharpness of
the mid-frequency (less detailed)
elements in the picture. (This setting is
only effective when Fine Focus is On.)
• Chroma Level – Adjusts how saturated
colours appear.
• Hue – Adjusts the overall colour
balance between red and green. (This is
Video Adjust - Interlace Only
• Default setting: Standard
From the Video Adjust screen you can select
the standard video presentation or define
presets of your own.
1 Press SETUP and select ‘Video Adjust’
from the on-screen display.
You can also access these settings by
pressing V.ADJ (VIDEO ADJUST).
Audio Settings
Play Mode
Setup Navigator
Disc Navigator
Initial Settings
Video Adjust
2 Use the joystick (left/right) to select a
preset.
Standard
Video Adjust
• Standard – Normal
• I. Memory1–2 Use for making your own
interlaced presets (see below)
3 Press ENTER to make the setting and
exit the Video Adjust screen.
• Depending on the disc and the TV/
monitor, you may not see the effect
clearly.
Creating your own interlace
output presets
Page 41
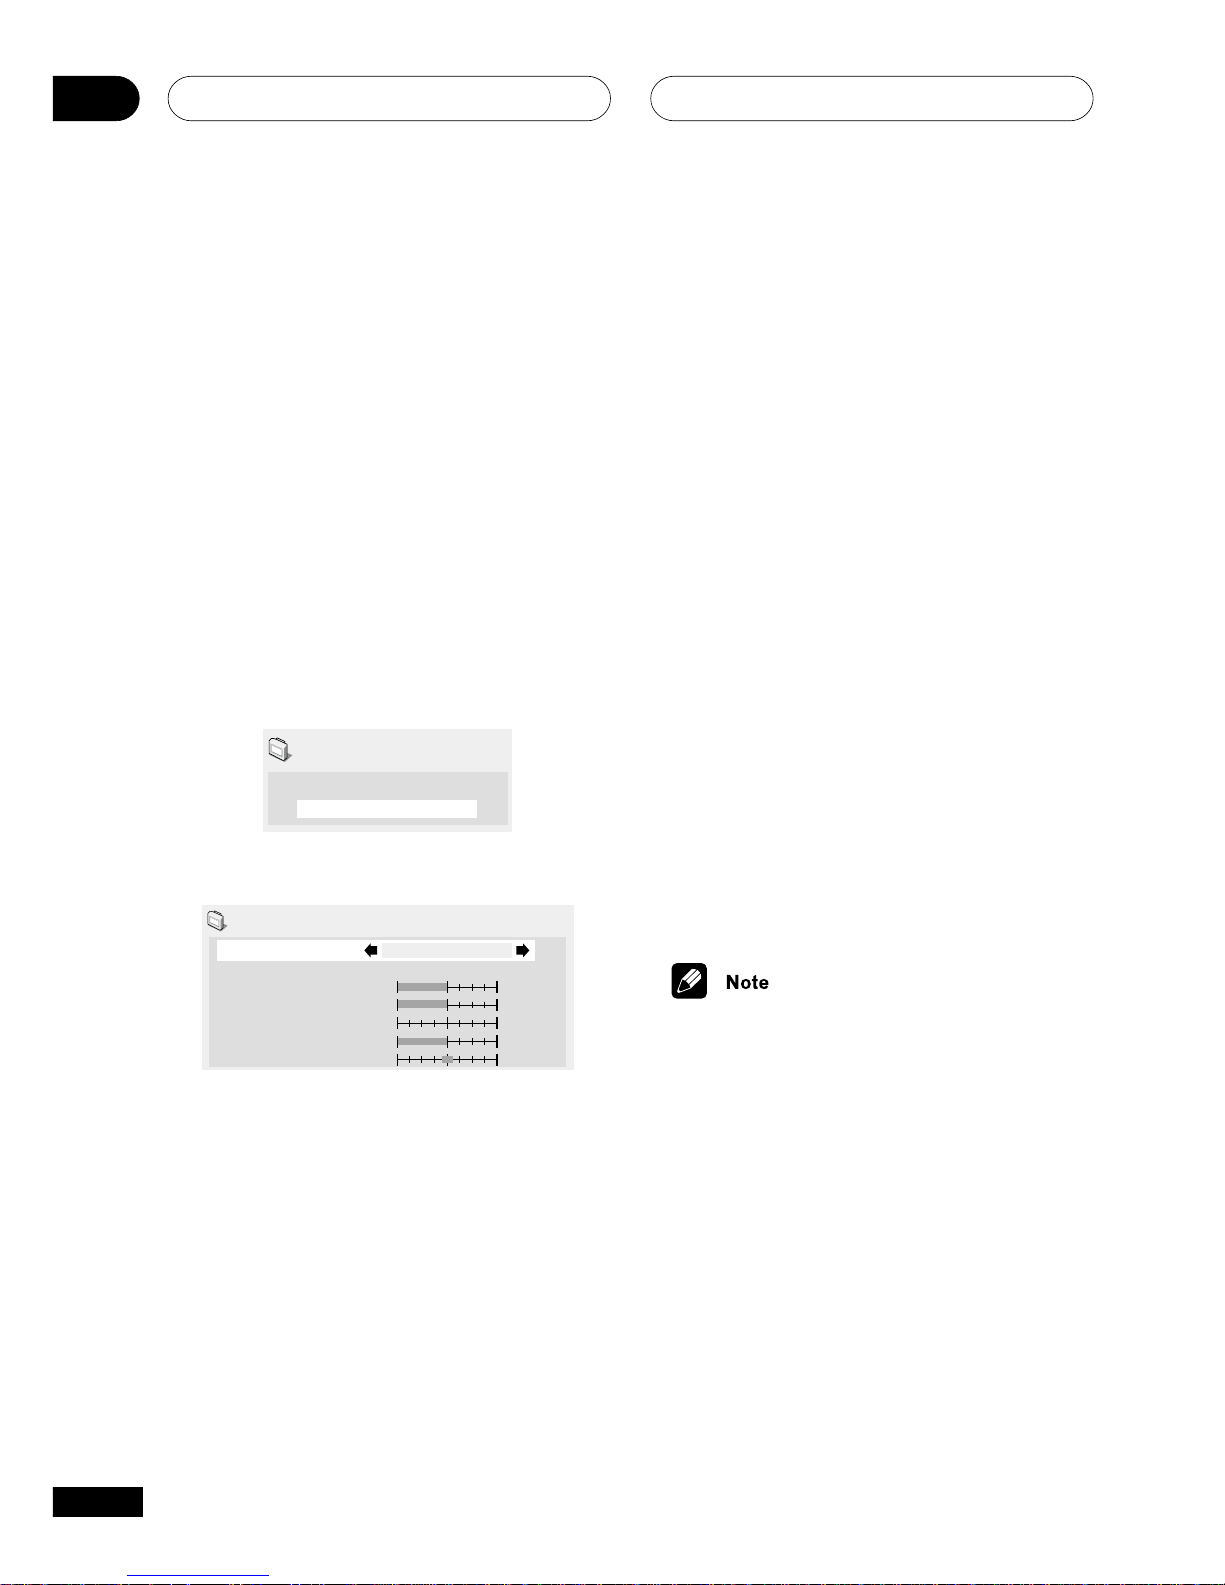
The Video Settings Menu
07
52
En
You can adjust any or all of the following
picture quality settings:
• PureCinema – When watching DVD
movies, PureCinema optimizes the
picture quality. The default setting is
Auto, but if the picture appears
unnatural, then set to On or Off, as
appropriate.
• Sharpness – Adjusts the sharpness of
the mid-frequency (less detailed)
elements in the picture.
• Contrast – Adjusts the contrast
between light and dark elements in the
picture.
• Brightness – Adjusts the overall
brightness of the picture.
• Chroma Level – Adjusts how saturated
colours appear.
• Hue – Adjusts the overall colour
balance between red and green.
3 Press ENTER to save the preset and
exit the Video Adjust screen.
• Video on a DVD discs may be either
video material (originally shot on video)
or film material (originally shot on film).
Video material has a frame rate of 30
frames/sec.(NTSC), compared with 24
frames/sec. for film. This player converts
film material to 60 frames/sec. (in
progressive scan mode). PureCinema
adjusts the picture so that it matches
more closely the picture quality of a
cinema screen.
You can see whether video on a DVD
disc is film or video material by displaying the video transmission rate (see
If a hash mark (#) appears next to the
transmission rate display, it is film
material.
4 Press ENTER to save the preset and
exit the Video Adjust screen.
Creating your own progressive
output presets
These presets are available when the video
output is set to progressive. (Use the front
panel PROGRESSIVE button to switch
between interlace and progressive video
output. See also page 18)
1 Select one of the Memory presets (see
above).
2 Move the joystick down to select
‘Detailed Settings’ then press ENTER.
P. Memory1
Detailed Settings
Video Adjust
3 Ajust the picture quality settings.
Recall Settings
PureCinema
Sharpness
Contrast
Brughtness
Chroma Level
Hue
soft
fine
soft
fine
off
max
min
max
green
red
Progressive Memory 1 (P. Memory 1)
Auto
P.Me m o r y 1
• Use the joystick (up/down) to select a
setting.
• Use the joystick (left/right) to adjust the
current setting.
• Press DISPLAY to switch between full
and single view.
• You can change the preset number from
the Recall Settings menu item.
Page 42
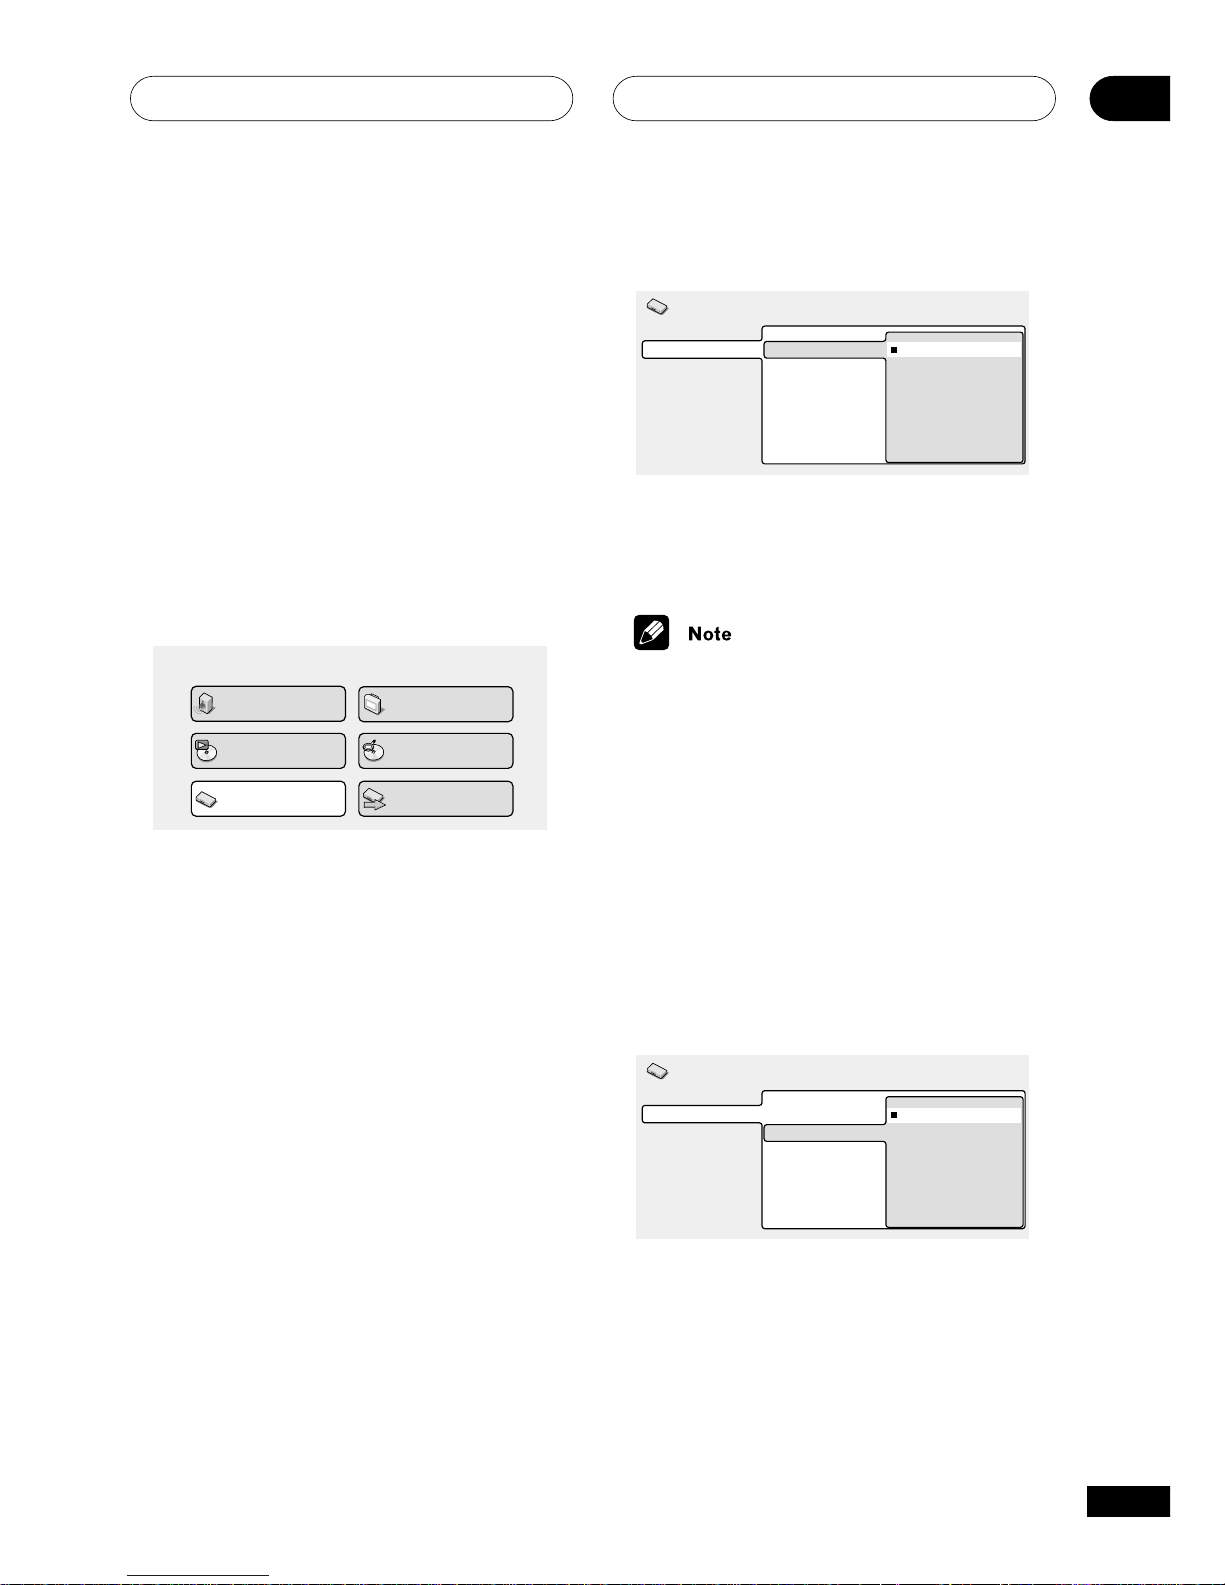
The Initial Settings Menu
08
53
En
Digital Audio Out
Video Output
Language
Display
Options
Speakers
Digital Out
Dolby Digital Out
DTS Out
Linear PCM Out
MPEG Out
On
Off
Initial Settings
If at any time you need to switch off the
digital audio output, set this to Off, otherwise leave it On.
• You can’t switch on/off the optical and
coaxial outputs individually.
• There is no digital output when playing
SACDs and some DVD-Audio discs
regardless of this setting.
Dolby Digital Out
• Default setting: Dolby Digital
You only need to make this setting if you
connected this system to an AV receiver (or
other component) using one of the digital
outputs.
Digital Audio Out
Video Output
Language
Display
Options
Speakers
Digital Out
Dolby Digital Out
DTS Out
Linear PCM Out
MPEG Out
Dolby Digital
Dolby Digital > PCM
Initial Settings
If your AV receiver (or other connected
component) is Dolby Digital compatible, set
to Dolby Digital, otherwise set to Dolby
Digital > PCM.
Using the Initial Settings
menu
The Initial Settings menu is where you can
set preferences for language, audio and
video output, and so on.
If a menu option is grayed out it means that
it cannot be changed at the current time.
This is usually because a disc is playing.
Stop the disc, then change the setting.
1 Press SETUP and select ‘Initial Settings’ from the on-screen display.
Audio Settings
Play Mode
Setup Navigator
Disc Navigator
Video Adjust
Initial Settings
2 Select the setup category from the list
on the left, then select an item from the
menu list to the right.
3 Make the setting you want.
Digital Audio Out settings
Digital Out
• Default setting: On
You only need to make this setting if you
connected this system to an AV receiver (or
other component) using one of the digital
outputs.
Page 43
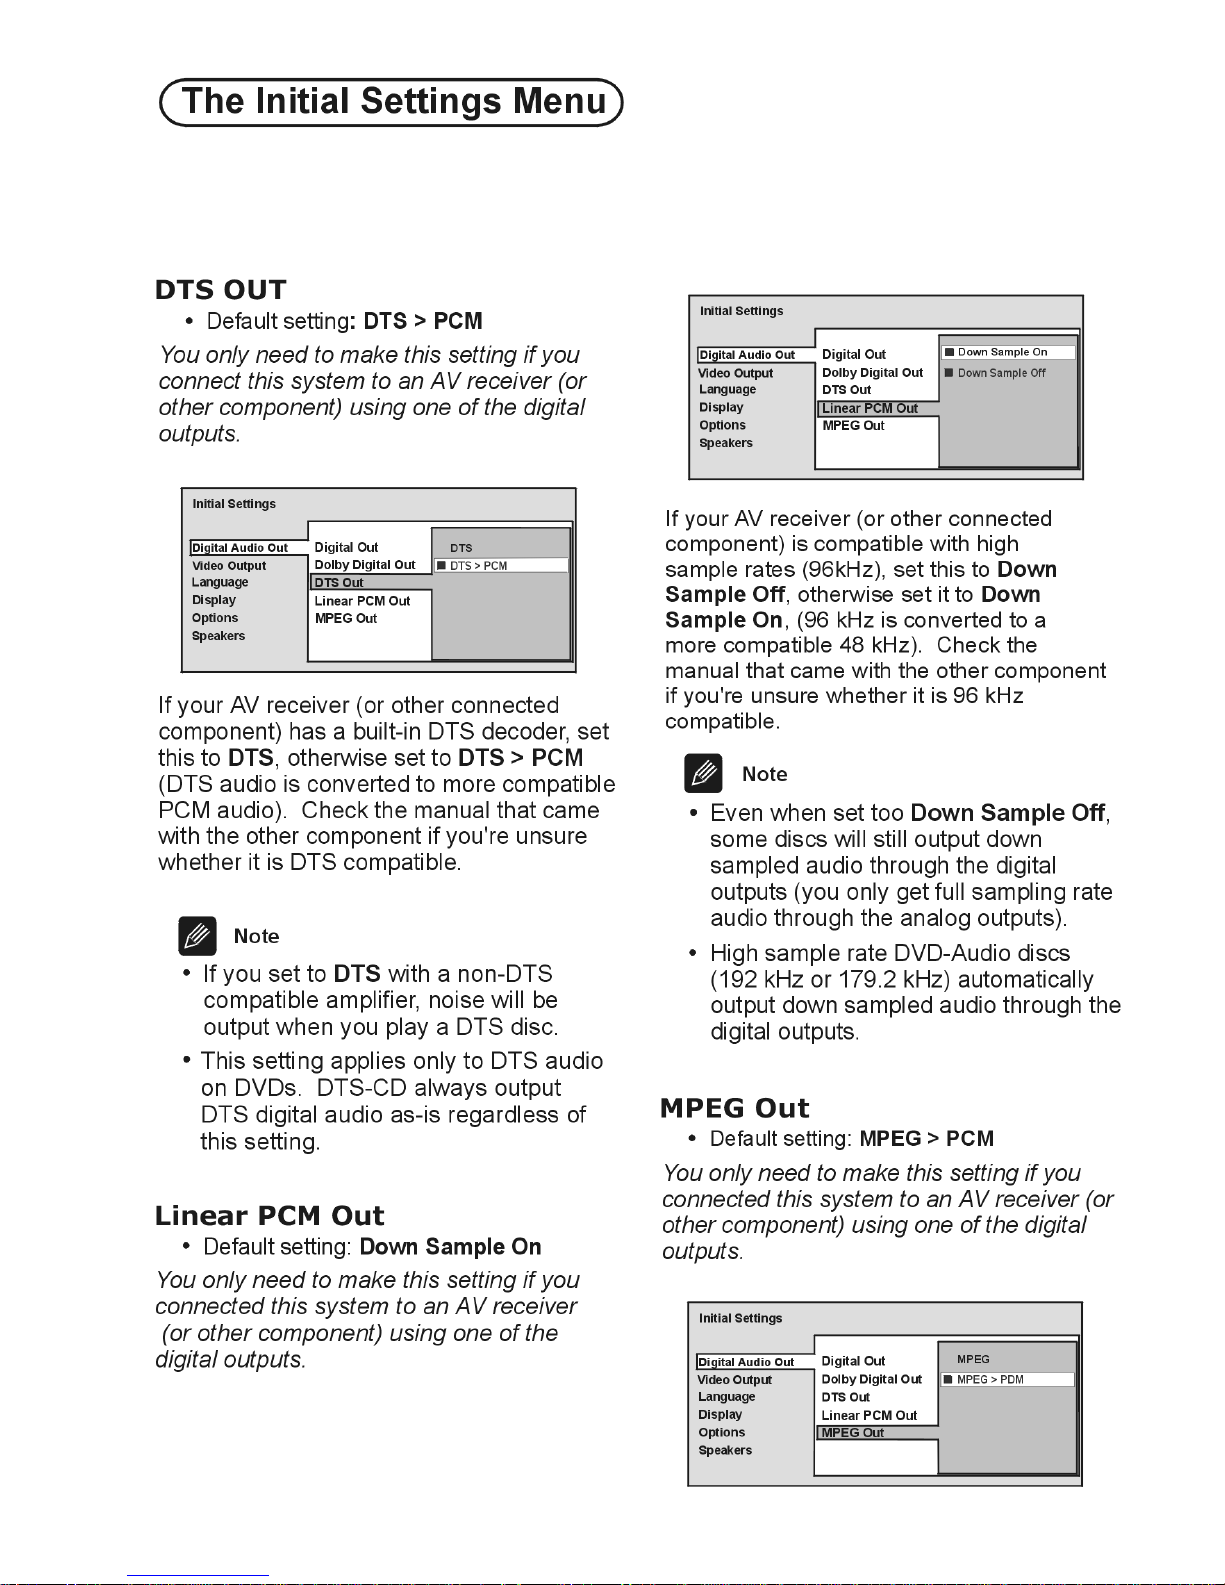
Page 44
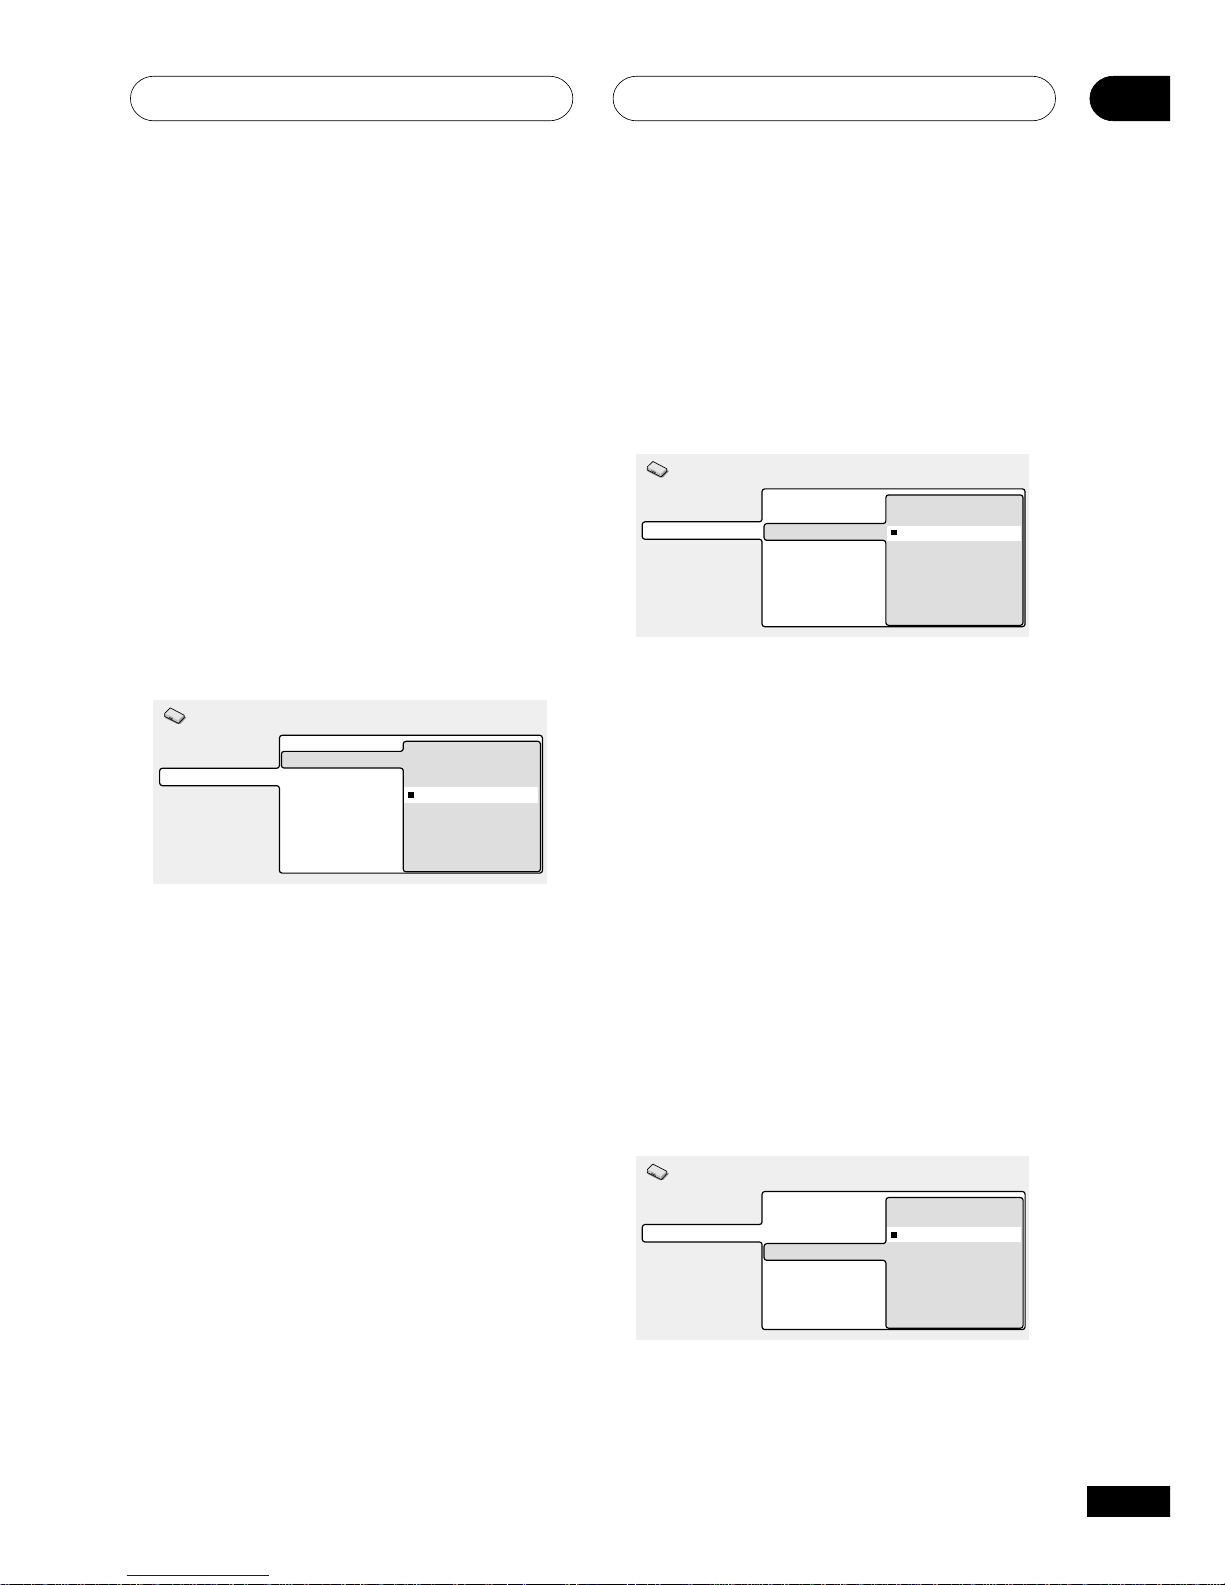
The Initial Settings Menu
08
55
En
S-Video Out
• Default setting: S2
You only need to make this setting if you
connected this player to your TV using an
S-Video cord.
Digital Audio Out
Video Output
Language
Display
Options
Speakers
TV Screen
Auto Progressive
S-Video Out
Still Picture
S1
S2
Initial Settings
If you find that the picture is stretched or
distorted on the default S2 setting, try
changing it to S1. (See also S1 and S2 in the
Glossary .)
experience this problem you can leave this
setting as Off.
S-Video Out
• Default setting: S2
You only need to make this setting if you
connected this player to your TV using an
S-Video cord.
Digital Audio Out
Video Output
Language
Display
Options
Speakers
TV Screen
Auto Progressive
S-Video Out
Still Picture
S1
S2
Initial Settings
If you find that the picture is stretched or
distorted on the default S2 setting, try
changing it to S1. (See also S1 and S2 in the
Glossary .)
If your AV receiver (or other connected
component) is compatible with MPEG audio,
set this to MPEG, otherwise set it to MPEG >
PCM (MPEG audio is converted to more
compatible PCM audio). Check the manual
that came with the other component if you’re
unsure whether it is MPEG audio compatible.
Video Output settings
TV Screen
• Default setting: 16:9 (Wide)
Digital Audio Out
Video Output
Language
Display
Options
Speakers
TV Screen
Auto Progressive
S-Video Out
Still Picture
4:3 (Letter Box)
4:3 (Pan&Scan)
16:9 (Wide)
Initial Settings
If you have a widescreen TV, select the 16:9
(Wide) setting—widescreen DVD software is
then shown using the full screen area. When
playing software recorded in conventional
(4:3) format, the settings on your TV will
determine how the material is presented—
see the manual that came with your TV for
details on what options are available.
If you have a conventional TV, select either
4:3 (Letter Box) or 4:3 (Pan & Scan). In
Letter Box mode, widescreen software is
shown with black bars at the top and bottom
of the screen. Pan & Scan chops the sides off
widescreen material to make it fit the 4:3
screen (so even though the image looks
larger on the screen, you’re actually seeing
less of the picture).
Page 45
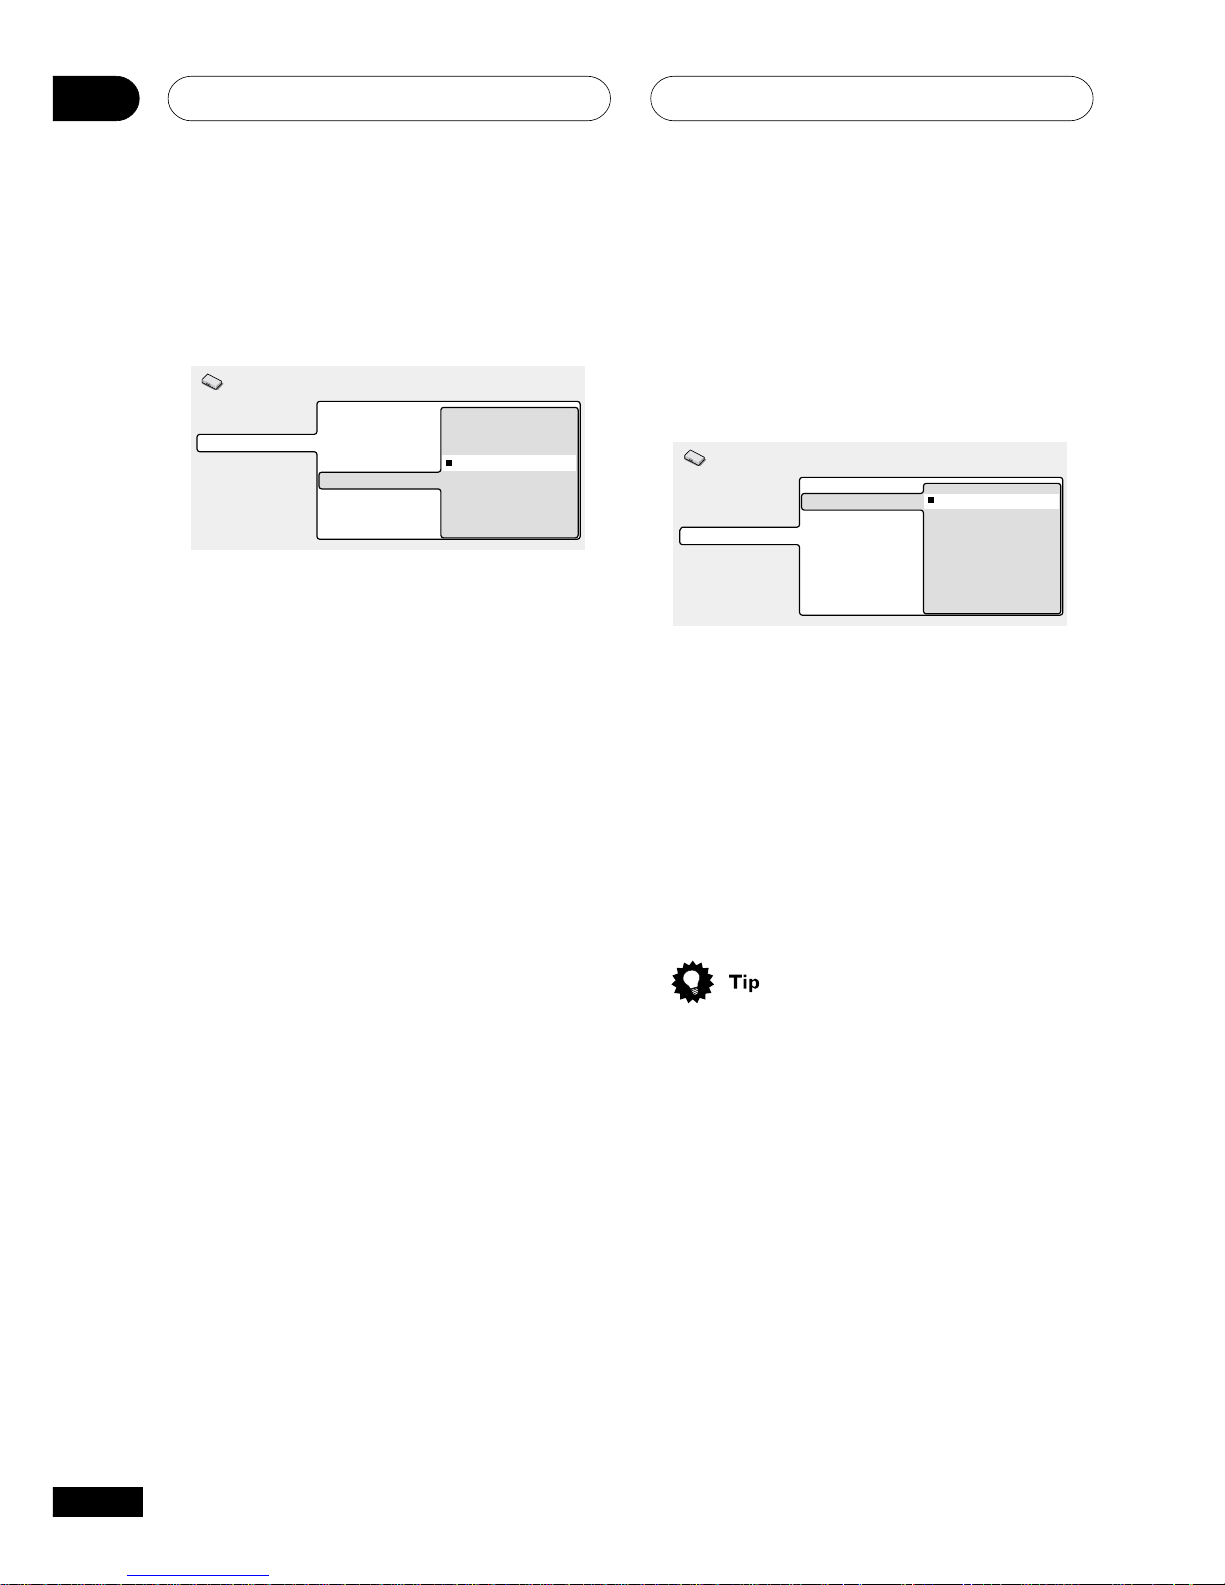
The Initial Settings Menu08
56
En
Language settings
Audio Language
• Default setting: English
Digital Audio Out
Video Output
Language
Display
Options
Speakers
Audio Language
Subtitle Language
Auto Language
DVD Menu Lang.
Subtitle Display
English
French
German
Italian
Spanish
Dutch
Other Language
Initial Settings
This setting is your preferred audio language
for DVD-Video discs. If the language you
specify here is recorded on a disc, the
system automatically plays the disc in that
language.
The DVD-Video format recognizes 136
different languages. Select Other Language
if you want to specify a language other than
those listed. See also Selecting languages
using the language code list.
• You can switch between the languages
recorded on a DVD disc during playback
using the AUDIO button. (This does not
affect this setting.)
• Some DVD discs set the audio language
automatically when loaded, overriding
the audio language you set in the Initial
Settings menu.
• Discs with two or more audio languages
usually allow you to select the audio
language from the disc menu. Press
TOP MENU to access the disc menu.
Still Picture
• Default setting: Auto
Digital Audio Out
Video Output
Language
Display
Options
Speakers
TV Screen
Auto Progressive
S-Video Out
Still Picture
Field
Frame
Auto
Initial Settings
This player uses one of two processes when
displaying a still frame from a DVD disc. The
default Auto setting automatically chooses
the best setting each time.
• Field – produces a stable, generally
shake-free image
• Frame – produces a sharper image, but
more prone to shake than field stills
Page 46
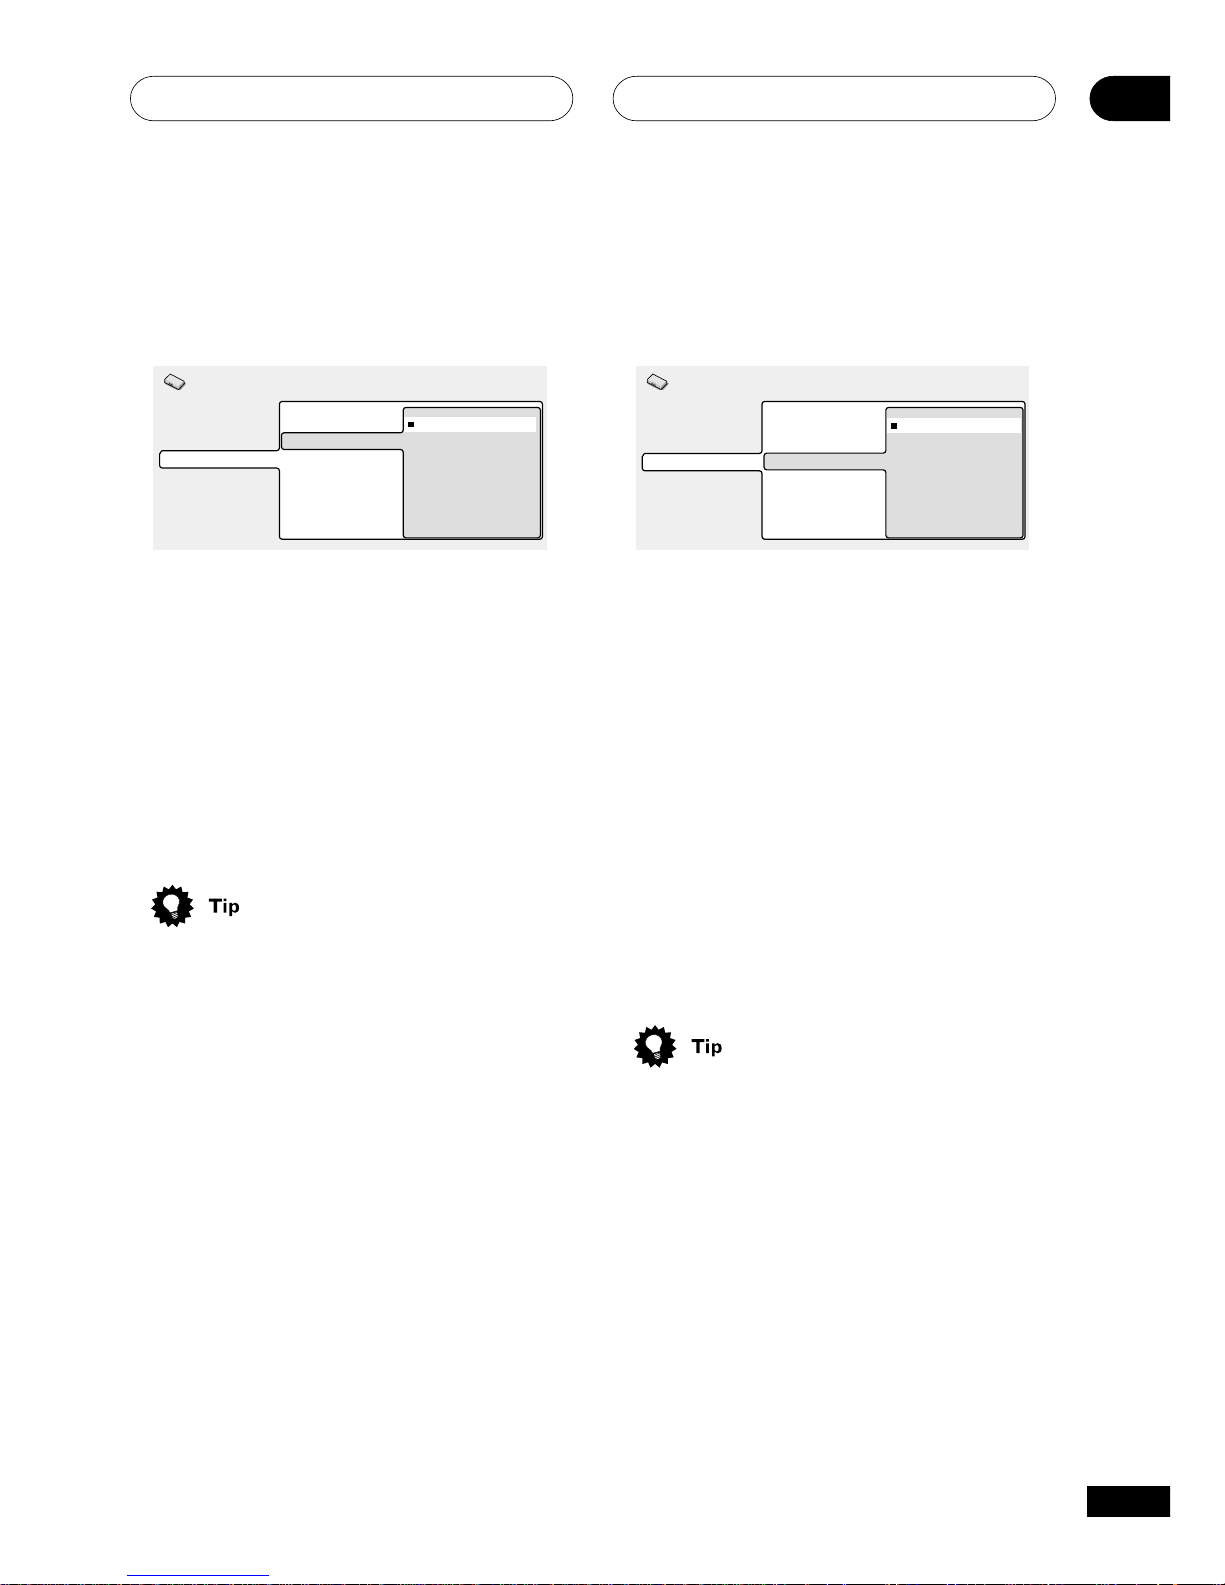
The Initial Settings Menu
08
57
En
Auto Language
• Default setting: On
Digital Audio Out
Video Output
Language
Display
Options
Speakers
Audio Language
Subtitle Language
Auto Language
DVD Menu Lang.
Subtitle Display
On
Off
Initial Settings
When set to On, the player always selects
the default audio language on a DVD-Video
disc (French dialog for a French movie, for
example), and displays subtitles in your
preferred subtitle language only if that is set
to something different. In other words,
movies in your native language won’t have
any subtitles, while foreign language movies
will be shown with subtitles.
Set to Off to have the player play discs
strictly according to your Audio Language
and Subtitle Language settings.
For Auto Language to work, the Audio
Language and Subtitle Language settings
must be the same.
• You can still switch audio and subtitle
language on playback using the AUDIO
and SUBTITLE buttons.
Subtitle Language
• Default setting: English
Digital Audio Out
Video Output
Language
Display
Options
Speakers
Audio Language
Subtitle Language
Auto Language
DVD Menu Lang.
Subtitle Display
English
French
German
Italian
Spanish
Dutch
Other Language
Initial Settings
This setting is your preferred subtitle
language for DVD-Video discs. If the language you specify here is recorded on a disc,
the system automatically plays the disc with
those subtitles.
The DVD-Video format recognizes 136
different languages. Select Other Language
if you want to specify a language other than
those listed. See also Selecting languages
using the language code list.
• You can change or switch off the
subtitles on a DVD disc during playback
using the SUBTITLE button. (This does
not affect this setting.)
• Some DVD discs set the subtitle
language automatically when loaded,
overriding the subtitle language you set
in the Initial Settings menu.
• Discs with two or more subtitle
languages usually allow you to select
the subtitle language from the disc
menu. Press TOP MENU to access the
disc menu.
Page 47
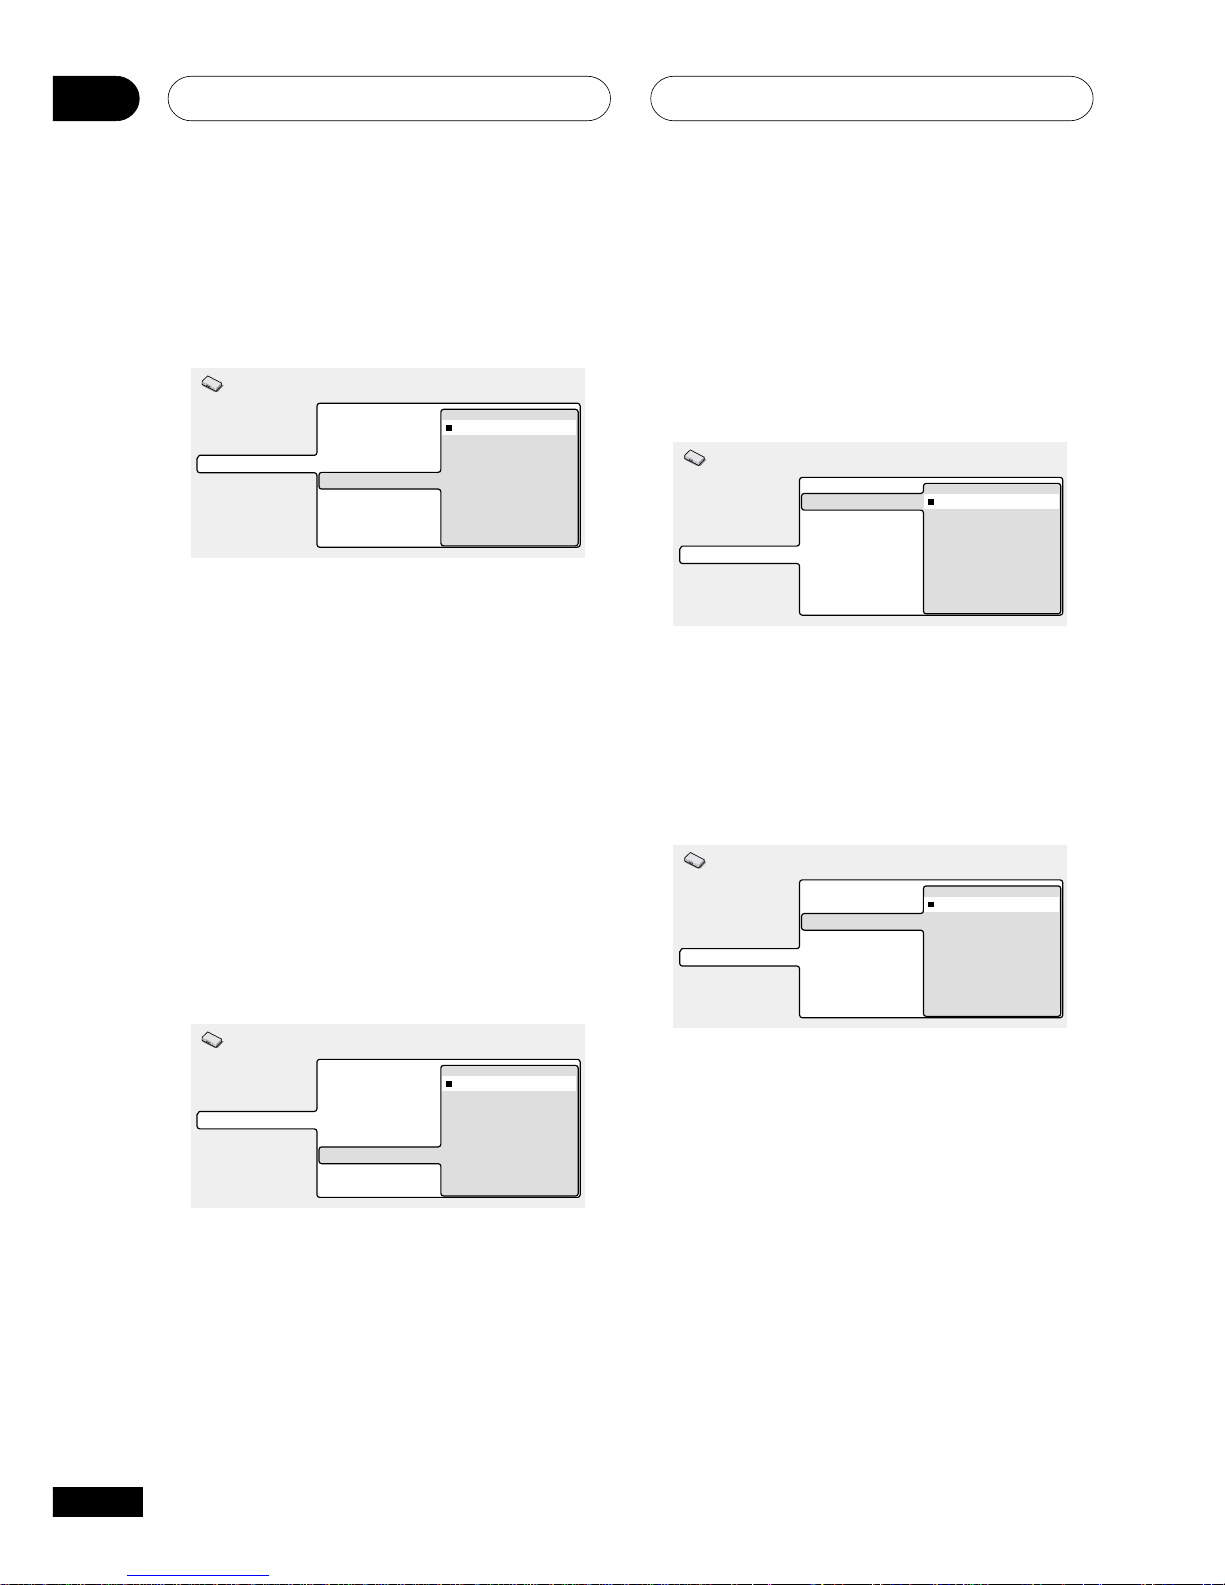
The Initial Settings Menu08
58
En
DVD Menu Language
• Default setting: w/Subtitle Lang.
Digital Audio Out
Video Output
Language
Display
Options
Speakers
Audio Language
Subtitle Language
Auto Language
DVD Menu Lang.
Subtitle Display
w/Subtitle Lang.
Other Language
Initial Settings
Some multilingual discs have disc menus in
several languages. This setting specifies in
which language the disc menus should
appear. Leave on the default setting for
menus to appear in the same language as
your Subtitle Language.
The DVD-Video format recognizes 136
different languages. Select Other Language
if you want to specify a language other than
those listed. See also Selecting languages
using the language code list.
Subtitle Display
• Default setting: On
Digital Audio Out
Video Output
Language
Display
Options
Speakers
Audio Language
Subtitle Language
Auto Language
DVD Menu Lang.
Subtitle Display
On
Off
Assist Subtitle
Initial Settings
When set to On, the player displays subtitles
according to the Subtitle Language and Auto
Language settings. Set to Assist Subtitle to
have the player display the extra assistive
subtitles recorded on to some DVD discs. Set
to Off to switch subtitles off altogether.
Display settings
OSD Language
• Default setting: English
Digital Audio Out
Video Output
Language
Display
Options
Speakers
OSD Language
On Screen Display
Angle Indicator
Background
Screen Saver
English
français
Deutsch
Italiano
Español
Nederlands
Initial Settings
This sets the language of this player’s onscreen displays.
On Screen Display
• Default setting: On
Digital Audio Out
Video Output
Language
Display
Options
Speakers
OSD Language
On Screen Display
Angle Indicator
Background
Screen Saver
On
Off
Initial Settings
This sets whether operation displays are
shown on-screen (Play, Resume, Scan and
so on.)
Page 48
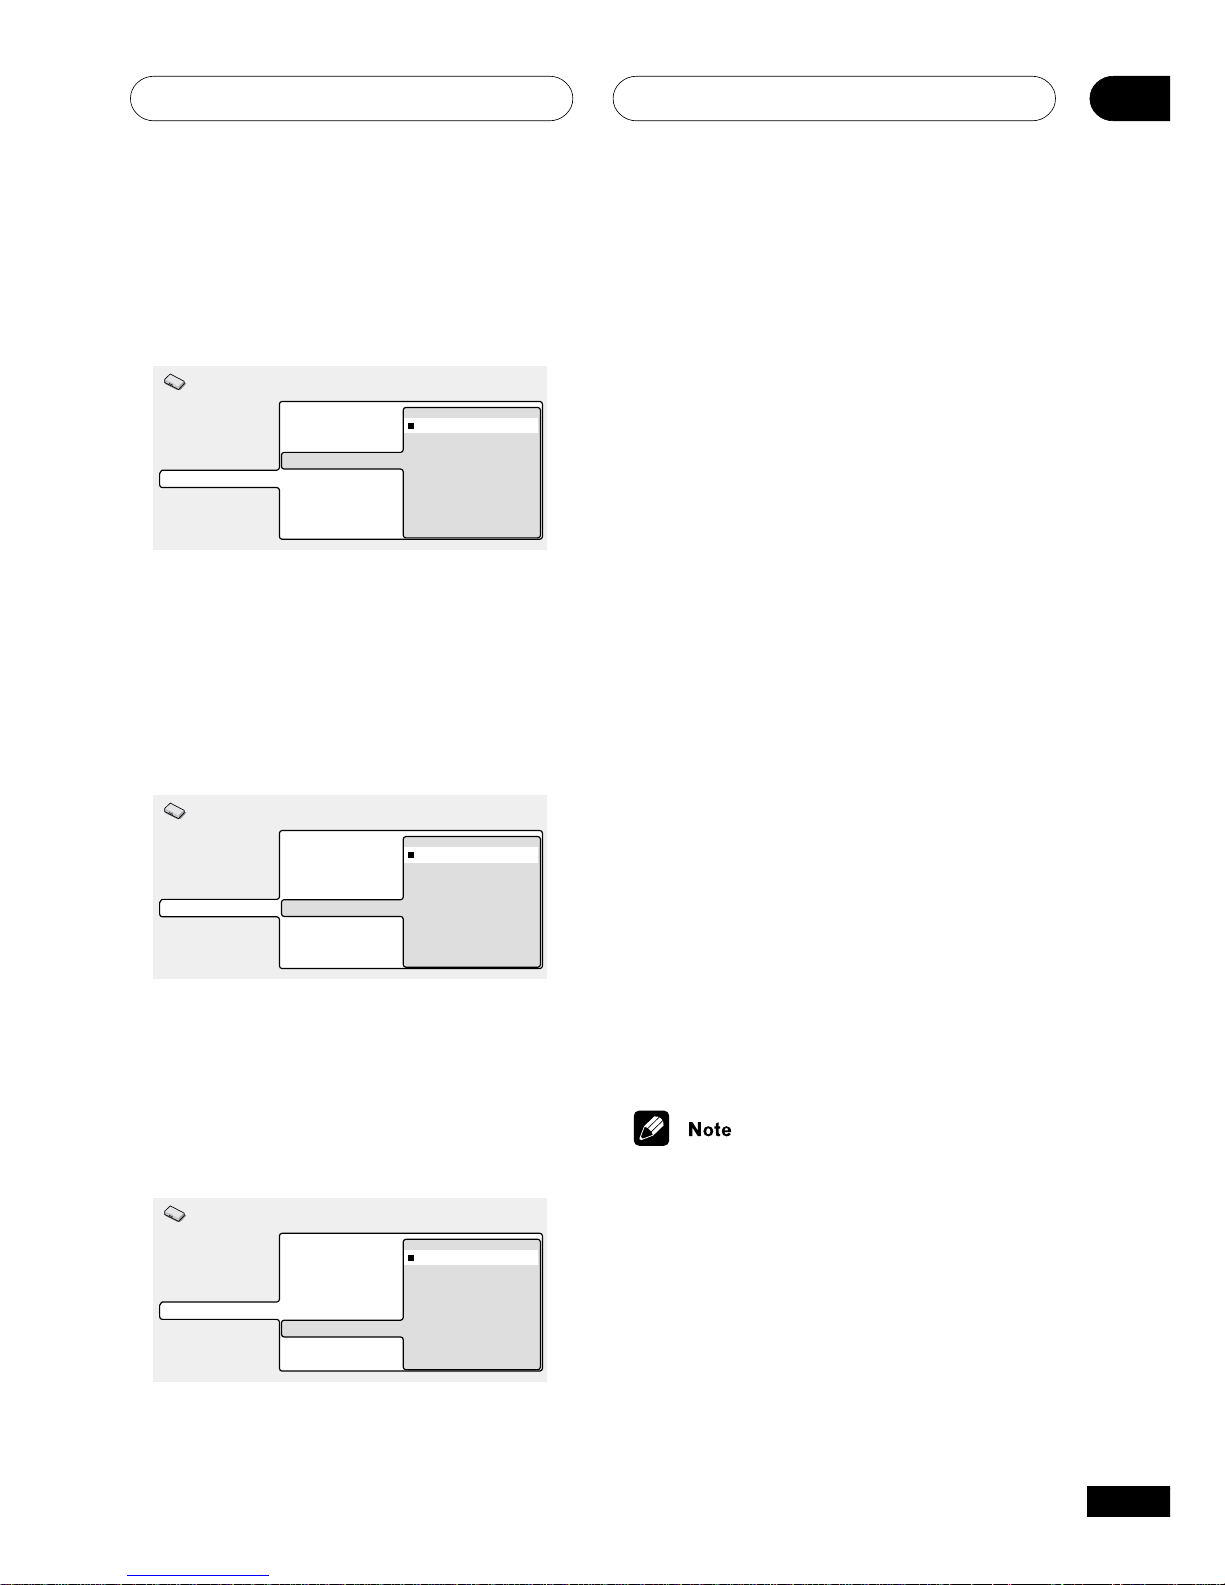
The Initial Settings Menu
08
59
En
Angle Indicator
• Default setting: On
Digital Audio Out
Video Output
Language
Display
Options
Speakers
OSD Language
On Screen Display
Angle Indicator
Background
Screen Saver
On
Off
Initial Settings
If you prefer not to see the camera icon onscreen during multi-angle scenes on DVD
discs, change this setting to Off.
Background
• Default setting: Logo
Digital Audio Out
Video Output
Language
Display
Options
Speakers
OSD Language
On Screen Display
Angle Indicator
Background
Screen Saver
Logo
Black
Initial Settings
This specifies what is displayed on-screen
when the player is stopped.
Screen Saver
• Default setting: On
Digital Audio Out
Video Output
Language
Display
Options
Speakers
OSD Language
On Screen Display
Angle Indicator
Background
Screen Saver
On
Off
Initial Settings
If a constant image is displayed on a
conventional CRT-type TV, it can ‘burn in’
leaving a ghost image on the screen. Switch
to On to make sure that a constant image is
not displayed for a dangerously long time.
Options
Parental Lock
• Default level: Off
• Default password: none
• Default country code: us (2119)
Some DVD Video discs feature a Parental
Lock level. If your player is set to a lower level
than the disc, the disc won’t play. This gives
you some control about what your children
watch on your DVD player.
Some discs also support the Country Code
feature. The player does not play certain
scenes on these discs, depending on the
country code you set.
Before you can set the Parental Lock level or
the Country Code you must register a
password. As the password owner, you can
change the Parental Lock level or Country
Code whenever you like. You can also change
the password.
• Not all discs that you may consider
inappropriate for your children use the
Parental Lock feature. These discs will
always play without requiring the
password first.
• If you forget your password, you’ll need
to reset the player to it’s factory settings
then register a new password.
Page 49
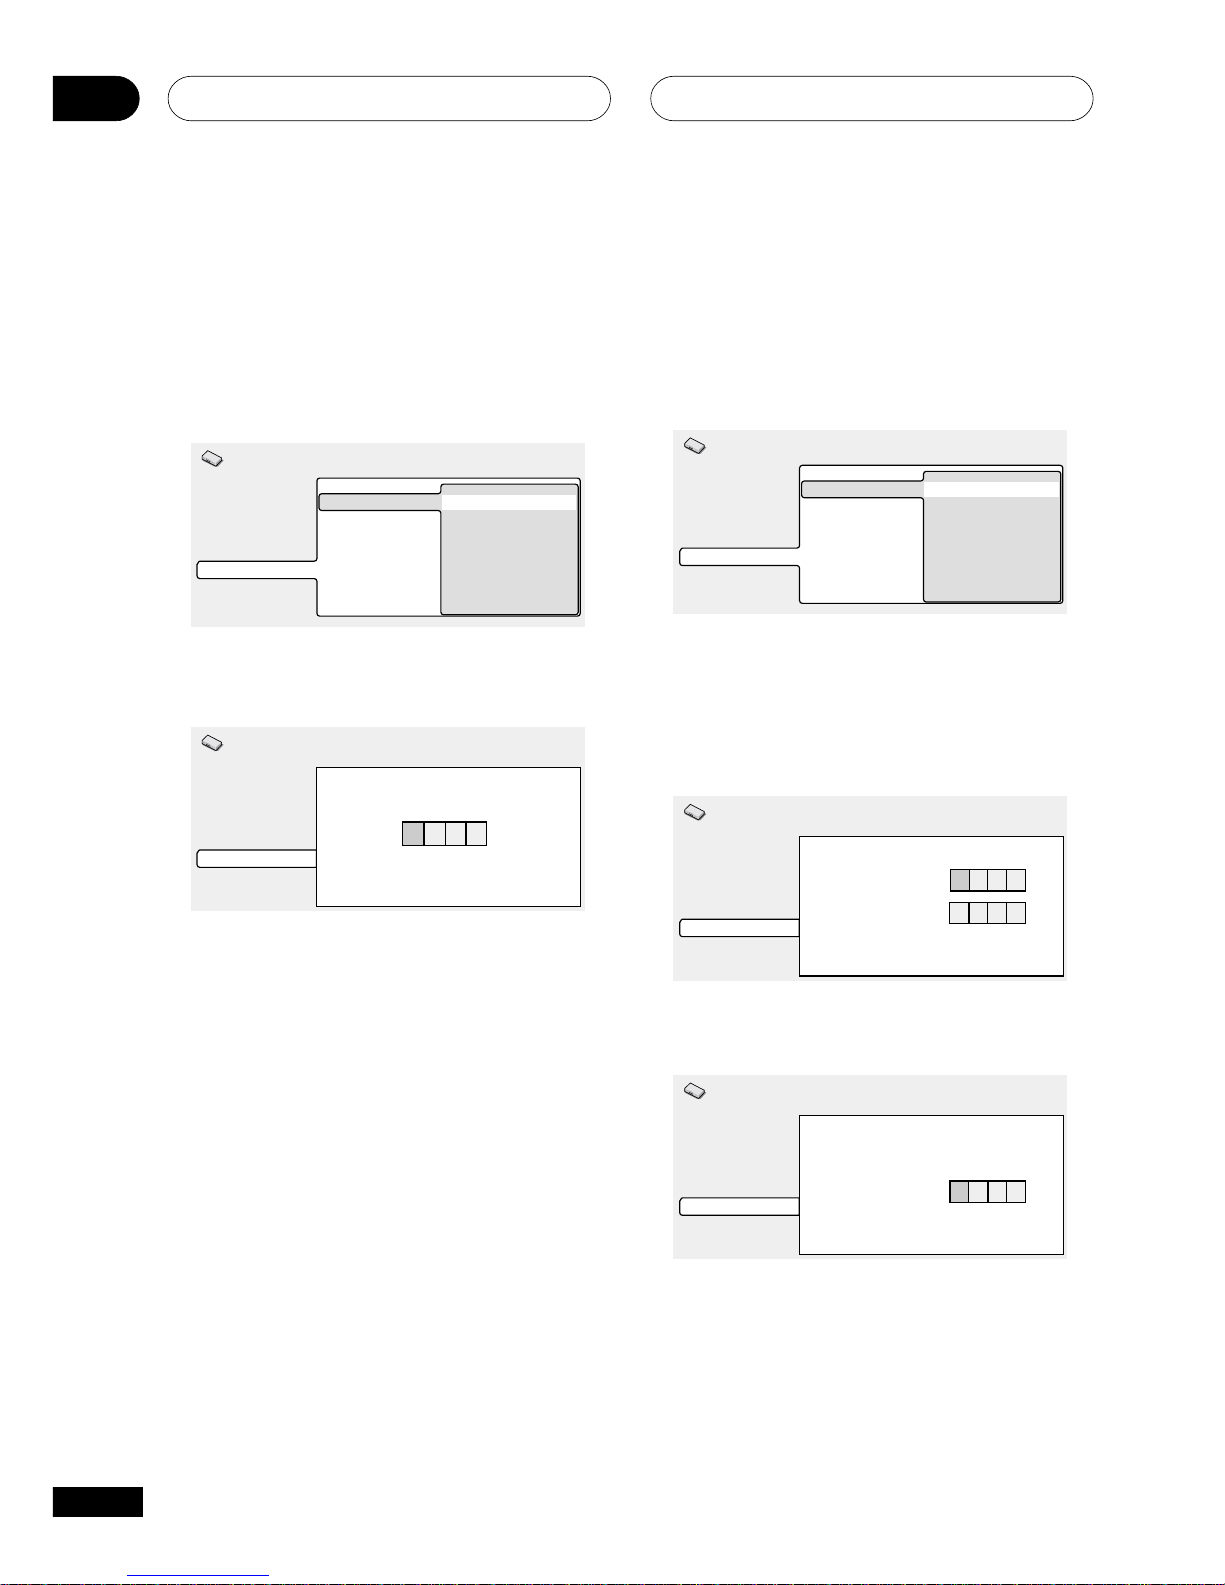
The Initial Settings Menu08
60
En
Registering a new password
You must register a password before you can
change the Parental Lock level or enter a
Country Code.
1 Select ‘Password’.
Digital Audio Out
Video Output
Language
Display
Options
Speakers
Parental Lock
Bonus Group
Auto Disc Menu
Group Playback
DVD Playback Mode
SACD Playback
CD Playback
Password
Level Change
Country Code
Initial Settings
2 Use the number buttons to enter a 4digit password.
Digital Audio Out
Video Output
Language
Display
Options
Speakers
Parental Lock: Register Code Number
Initial Settings
1
2
3
4
The numbers you enter show up as asterisks
(*) on-screen.
3 Press ENTER to register the password
and return to the Options menu screen.
If you forget your password, you can reset
the system then register a new one.
Changing your password
To change your password, confirm your
existing password then enter a new one.
1 Select ‘Password Change’.
Digital Audio Out
Video Output
Language
Display
Options
Speakers
Parental Lock
Bonus Group
Auto Disc Menu
Group Playback
DVD Playback Mode
SACD Playback
CD Playback
Password Change
Level Change
Country Code
Initial Settings
2 Use the number buttons to enter your
existing password, then press ENTER.
• The numbers appear as asterisks as you
enter them.
Digital Audio Out
Video Output
Language
Display
Options
Speakers
Parental Lock : Password Change
Initial Settings
1
**
*
Password
New Password
3 Enter a new password.
Digital Audio Out
Video Output
Language
Display
Options
Speakers
Parental Lock : Password Change
Initial Settings
2
3
4
5
****
Password
New Password
4 Press ENTER to register the new
password and return to the Options
menu screen.
Page 50
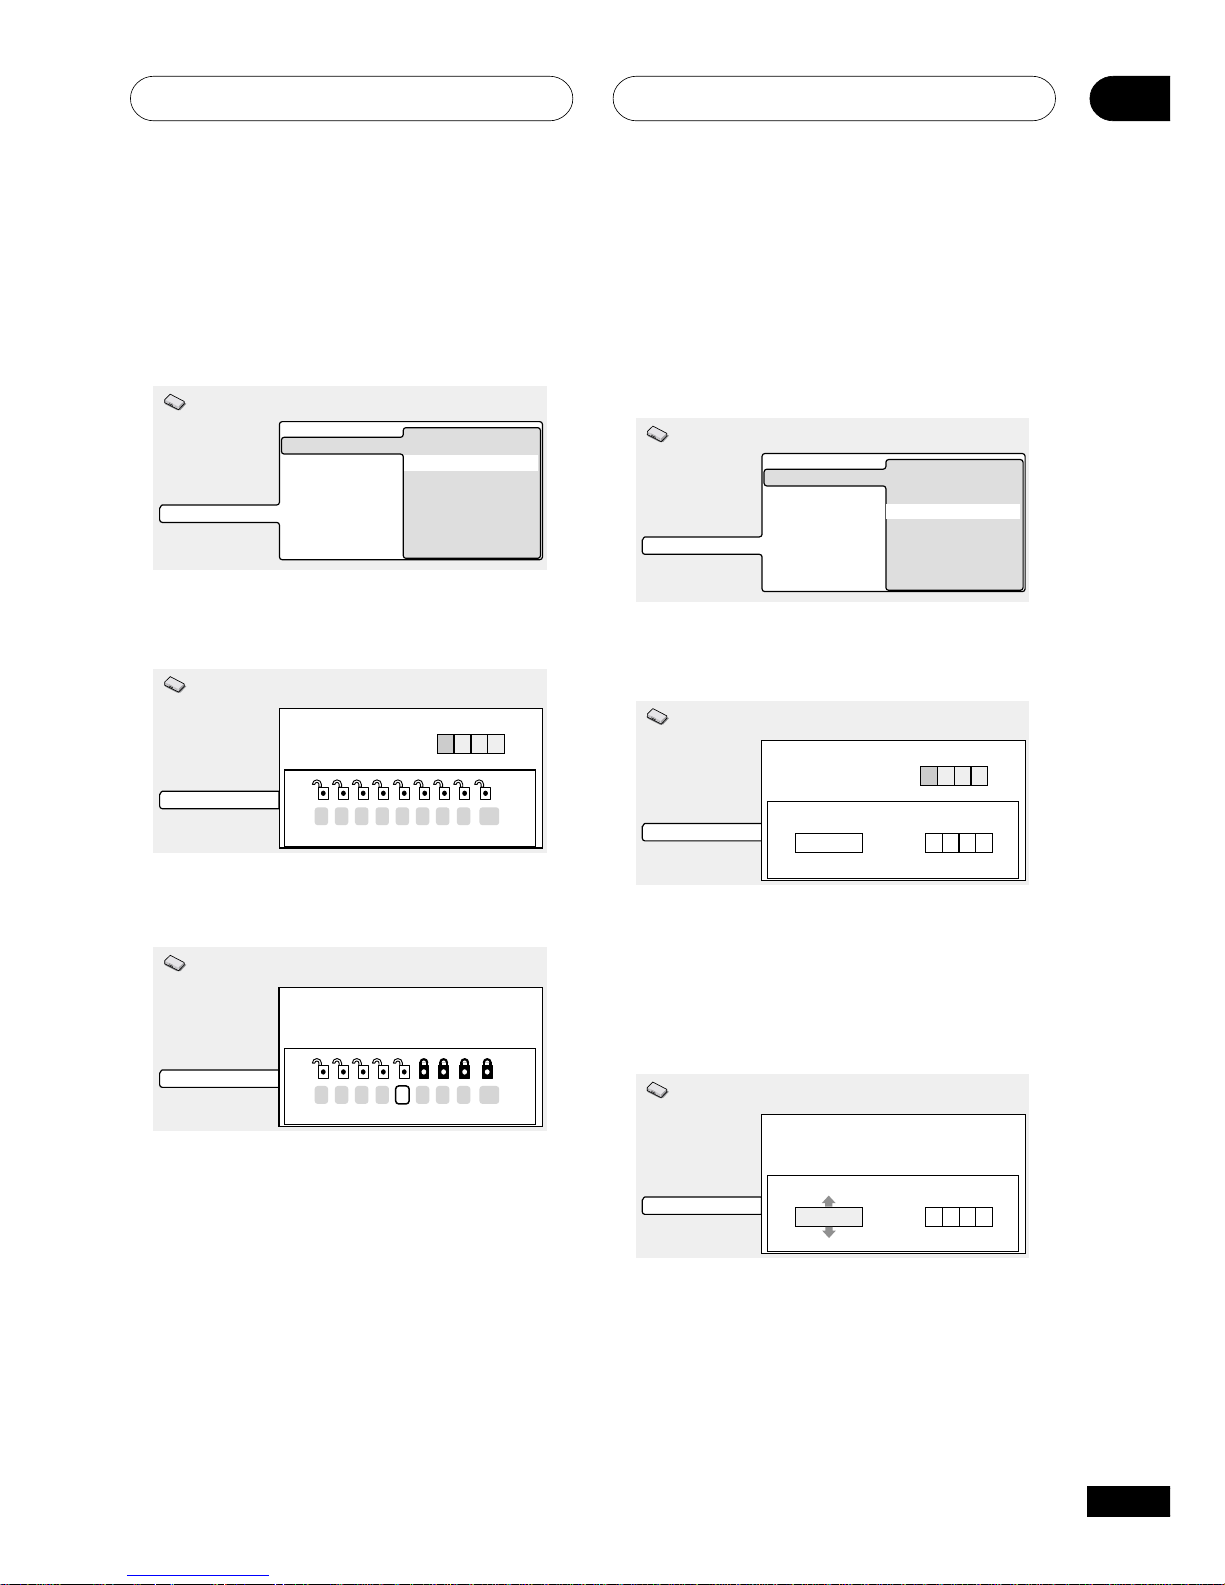
The Initial Settings Menu
08
61
En
Setting/changing the Parental Lock
level
1 Select ‘Level Change’.
Digital Audio Out
Video Output
Language
Display
Options
Speakers
Parental Lock
Bonus Group
Auto Disc Menu
Group Playback
DVD Playback Mode
SACD Playback
CD Playback
Password Change
Level Change
Country Code
Initial Settings
2 Use number buttons to enter your
password, then press ENTER.
Digital Audio Out
Video Output
Language
Display
Options
Speakers
Initial Settings
Parental Lock : Level Change
1
**
*
Password
1 2 3 4 5 6 7 8 off
3 Select a new level.
Digital Audio Out
Video Output
Language
Display
Options
Speakers
Parental Lock : Level Change
Initial Settings
****
Password
1 2 3 4 5 6 7 8 off
Move the joystick left to lock more levels
(more discs will require the password); move
right to unlock levels. You can’t lock level 1.
4 Press ENTER to set the new level and
return to the Options menu screen.
Setting/changing the Country Code
You may also want to refer to the Country
code list.
1 Select ‘Country Code’.
Digital Audio Out
Video Output
Language
Display
Options
Speakers
Parental Lock
Bonus Group
Auto Disc Menu
Group Playback
DVD Playback Mode
SACD Playback
CD Playback
Password Change
Level Change
Country Code
Initial Settings
2 Use number buttons to enter your
password, then press ENTER.
Digital Audio Out
Video Output
Language
Display
Options
Speakers
Initial Settings
Country Code List
Code
us
2 1 1 9
Parental Lock : Change Country Code
1
**
*
Password
3 Select a country code.
There are two ways you can do this.
• Select by code letter: Use the joystick
(up/down) to change the country code.
Digital Audio Out
Video Output
Language
Display
Options
Speakers
Initial Settings
Country Code List
Code
us
2 1 1 9
Parental Lock : Change Country Code
***
*
Password
• Select by code number: Move the
joystick right then use the number
buttons to enter the 4-digit country code
See Country code list).
Page 51
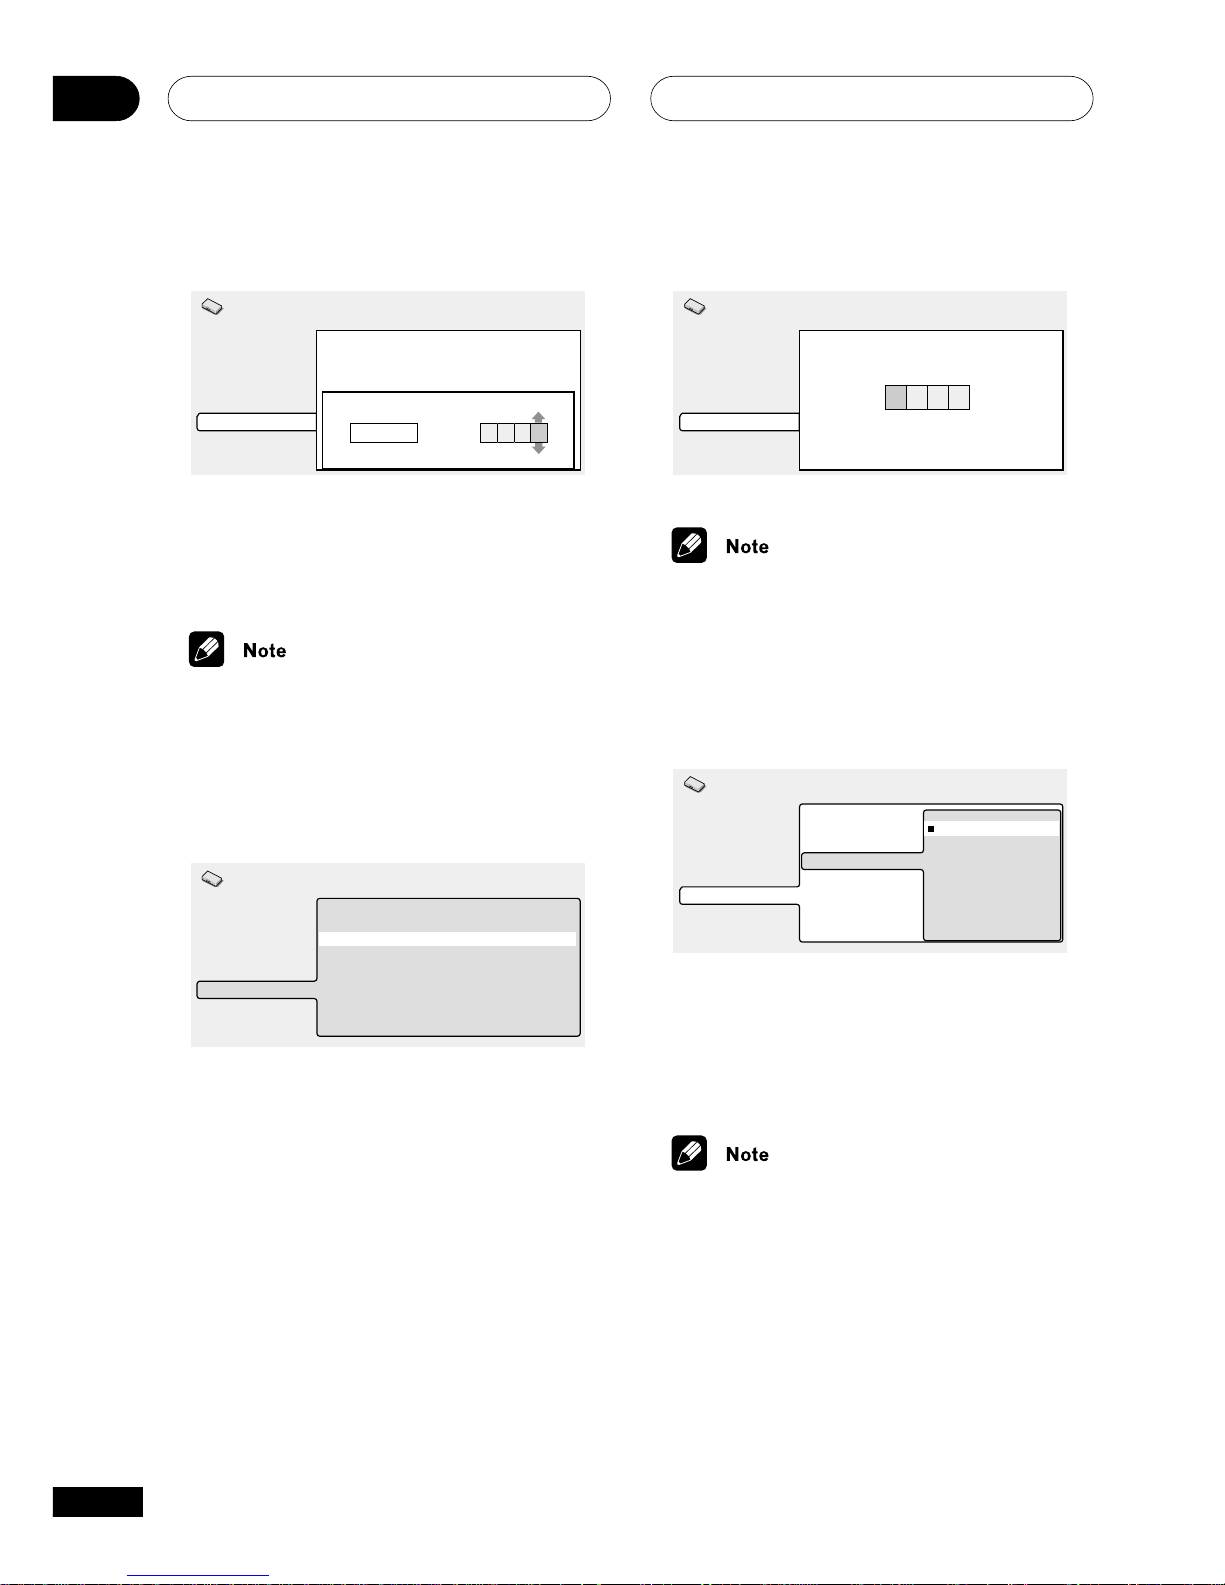
The Initial Settings Menu08
62
En
Digital Audio Out
Video Output
Language
Display
Options
Speakers
Initial Settings
Country Code List Code
us
2 1 1 9
Parental Lock : Change Country Code
****
Password
4 Press ENTER to set the new Country
Code and return to the Options menu
screen.
• Changing the country code does not
take effect until the next disc is loaded
(or the current disc is reloaded).
Bonus Group
Digital Audio Out
Video Output
Language
Display
Options
Speakers
Parental Lock
Bonus Group
Auto Disc Menu
Group Playback
DVD Playback Mode
SACD Playback
CD Playback
‰ Off (us)
‰ On
‰ Single
‰ DVD-Audio
‰ 2ch Area
‰ PCM Playback
Initial Settings
Some DVD-Audio discs have an extra ‘bonus’
group that requires a 4-digit key number to
access. See the disc packaging for details
and the key number.
When you play a DVD-Audio disc that has a
bonus group, the key number input screen
appears automatically. You can also access
the same screen here.
Digital Audio Out
Video Output
Language
Display
Options
Speakers
Bonus Group : Key Number Input
Initial Settings
2
*
*
*
• If you eject the disc, switch the power
off, or unplug the player, you will need to
re-enter the key number.
Auto Disc Menu
• Default setting: On
Digital Audio Out
Video Output
Language
Display
Options
Speakers
Parental Lock
Bonus Group
Auto Disc Menu
Group Playback
DVD Playback Mode
SACD Playback
CD Playback
On
Off
Initial Settings
This specifies whether the menu (Top menu)
is automatically displayed after loading a
disc. Set to On if you want the menu
displayed automatically, or Off if you don’t
want it displayed.
• Some DVD discs display a menu
automatically regardless of this setting.
If you press 3 while a disc is loading,
this setting is ignored.
Page 52
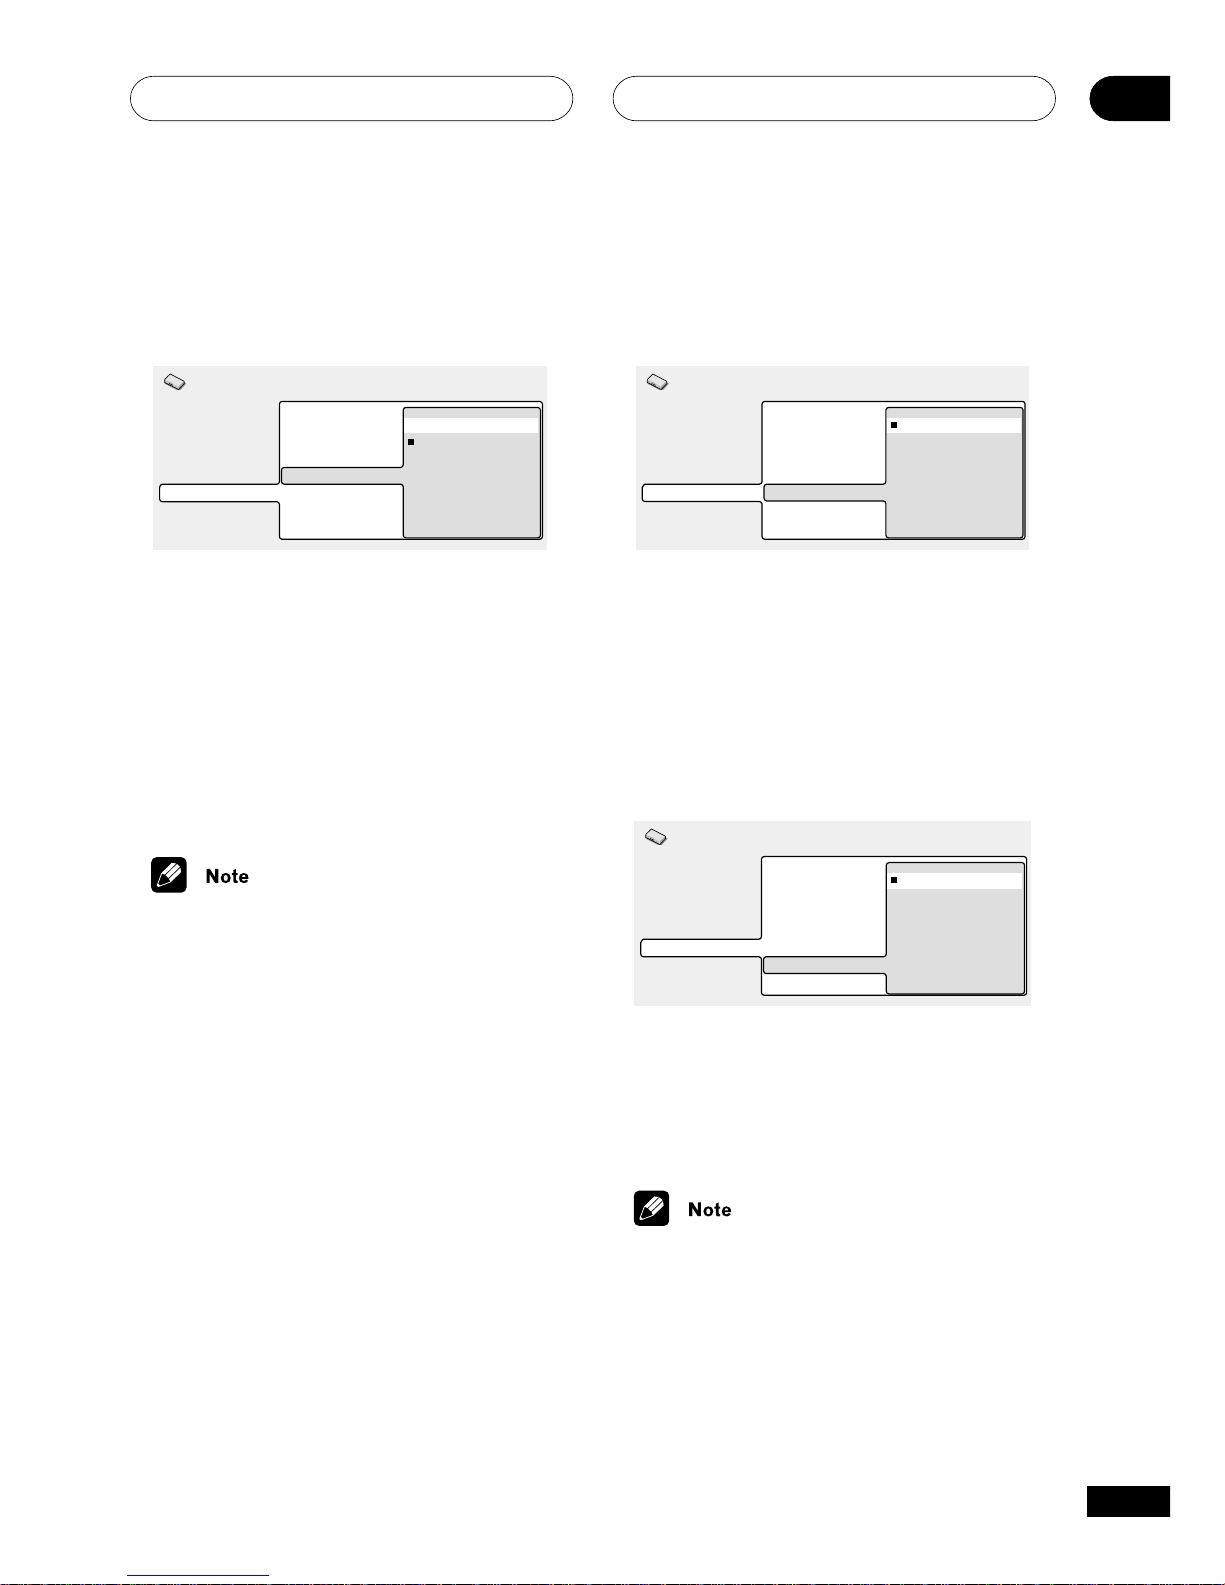
The Initial Settings Menu
08
63
En
Group Playback
• Default setting: Single
Digital Audio Out
Video Output
Language
Display
Options
Speakers
Parental Lock
Bonus Group
Auto Disc Menu
Group Playback
DVD Playback Mode
SACD Playback
CD Playback
All
Single
Initial Settings
DVD-Audio discs can have up to 9 groups of
tracks. When set to Single, the selected
group plays and then the disc stops, or
returns to the menu screen. Use Group
Search to select the group to play.
(You cannot use the track skip 4 / ¢ or
scan buttons 1 / ¡ in this mode.)
Set to All if you want to play all the groups
on a disc consecutively.
• Even if the players is set to All but you
select a group to play from the disc
menu, only that group will play. If you
stop playback, all groups will play again
when you restart playback.
DVD Playback Mode
• Default setting: DVD-Audio
Digital Audio Out
Video Output
Language
Display
Options
Speakers
Parental Lock
Bonus Group
Auto Disc Menu
Group Playback
DVD Playback Mode
SACD Playback
CD Playback
DVD-Audio
DVD-Video
Initial Settings
Some DVD-Audio discs contain DVD-Video
content in addition to the DVD-Audio. Set to
DVD-Video to play a DVD-Audio disc as if it
were a DVD-Video disc. Note that in this case
only the DVD-Video part of the disc will play.
SACD Playback
• Default setting: 2ch Area
Digital Audio Out
Video Output
Language
Display
Options
Speakers
Parental Lock
Bonus Group
Auto Disc Menu
Group Playback
DVD Playback Mode
SACD Playback
CD Playback
2ch Area
Multi-ch Area
CD Area
Initial Settings
SACD discs can be divided up into several
different areas — stereo audio (2ch Area),
multi-channel audio (Multi-ch Area) and, for
hybrid SACDs, standard CD audio (CD
Area). Select which you want to listen to.
• If you select an area that isn’t on the
disc loaded, a different area of the disc
will play. For example, if you choose
standard CD audio but the disc loaded
is not a hybrid SACD, the stereo SACD
audio will play.
Page 53
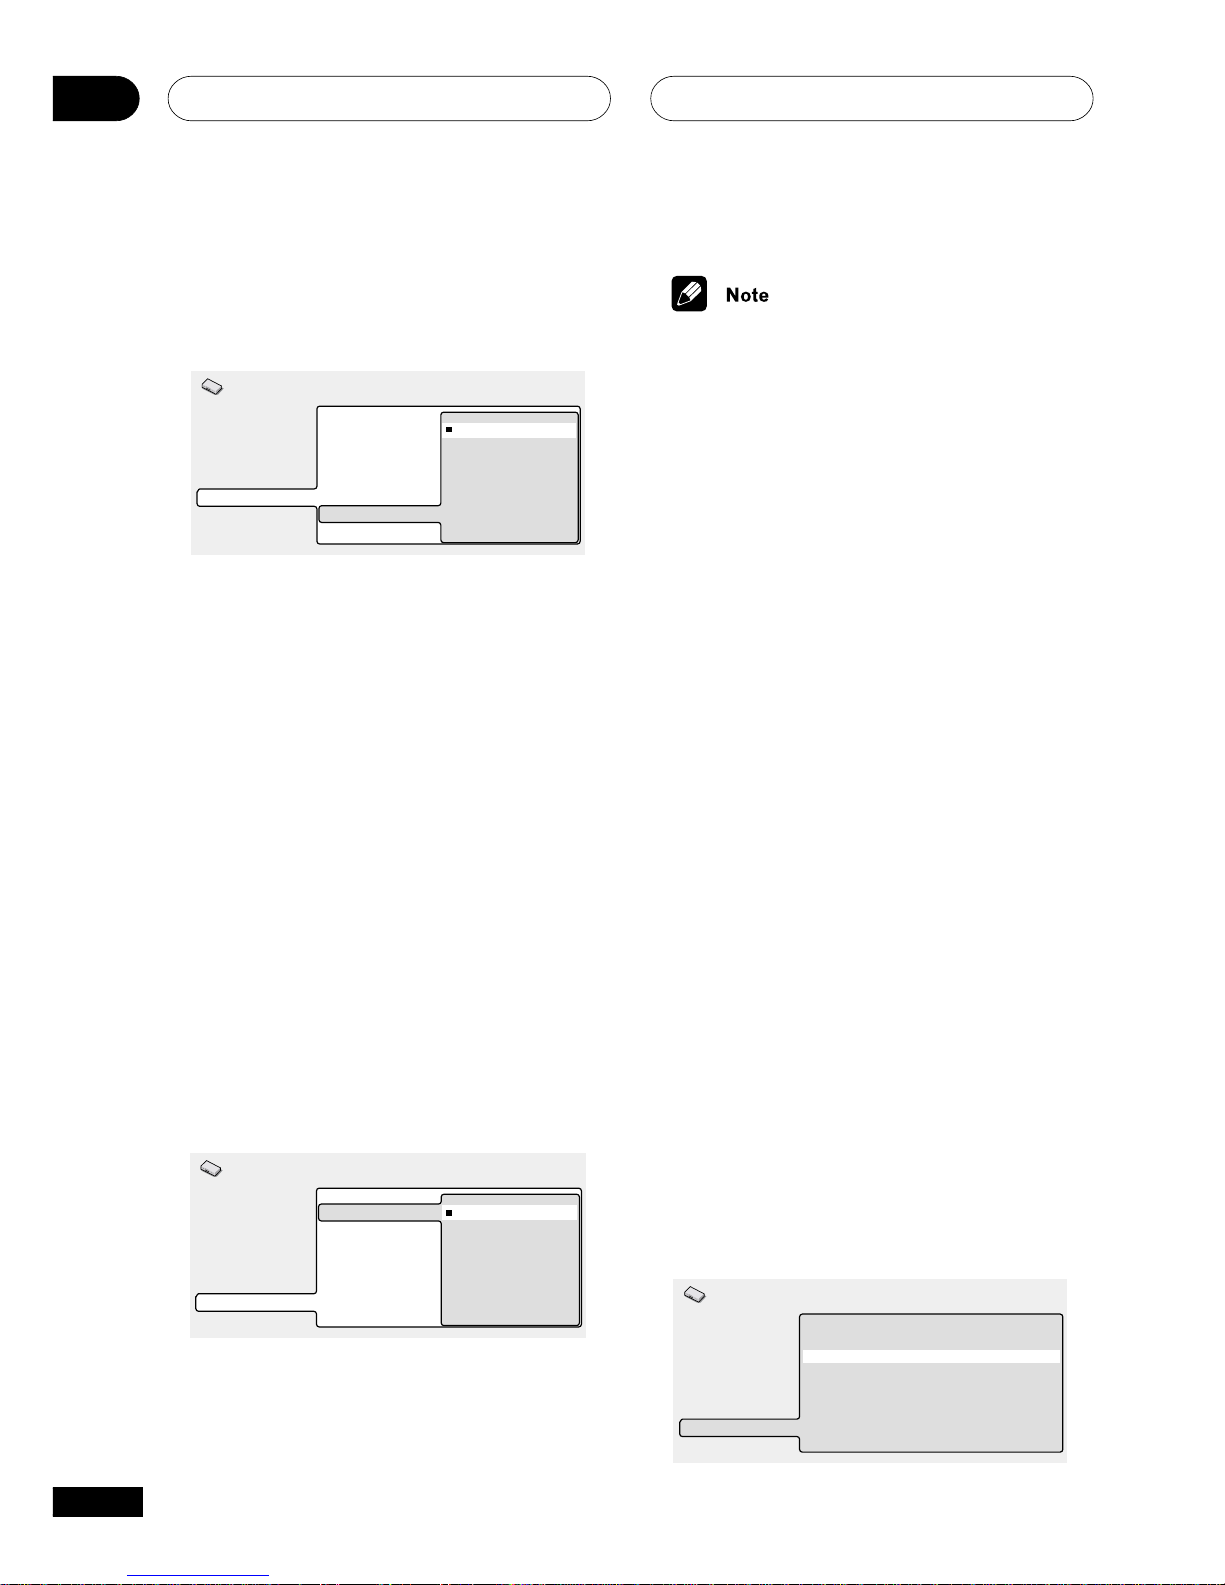
The Initial Settings Menu08
64
En
CD Playback
• Default setting: PCM Playback
Digital Audio Out
Video Output
Language
Display
Options
Speakers
Parental Lock
Bonus Group
Auto Disc Menu
Group Playback
DVD Playback Mode
SACD Playback
CD Playback
PCM Playback
DTS CD Playback
Initial Settings
When set to PCM Playback, playback is
optimized for standard audio CDs. You can
also play DTS CDs, however you may notice
some noise when a DTS CD starts playing.
Also, speakers which were set to Small in
the Speaker Installation screen are
automatically set to Large. This is not a
malfunction.
When set to DTS CD Playback, playback is
optimized for DTS CDs. In this mode you
cannot play standard audio CDs through the
analog outputs. Change the setting back to
PCM Playback to play standard CDs.
Speakers
Audio Output Mode
• Set in Setup Navigator (Default: 2
Channel)
Digital Audio Out
Video Output
Language
Display
Options
Speakers
Audio Output Mode
Speaker Installation
Speaker Distance
2 Channel
5.1 Channel
Initial Settings
If you connected this player to your amplifier
using the 5.1 channel analog outputs (front,
surround, center and subwoofer outs), set
this to 5.1 Channel; if you connected only
the stereo outs, set to 2 Channel.
• Even if you set Audio Output Mode to
5.1 Channel, you’ll only get sound from
all speakers when playing a multichannel DVD-Audio disc, SACD, or
Dolby Digital or DTS encoded DVD disc.
• When set to 5.1 Channel, only the front
left/right channels are output from the
AUDIO OUT (L/R) jacks. Change to
2 Channel if you want to listen to
downmixed stereo audio (for example,
because you are listening through the
TV’s built-in speakers).
• When set to 5.1 Channel there is no
digital output when playing DVD-Audio.
• If you set to 2 Channel, Dolby Digital,
DTS and MPEG audio is mixed down to
two channels so you still hear all the
audio recorded on the disc.
• Some DVD-Audio discs don’t allow
down-mixing of audio. These discs
always output multi-channel audio
regardless of the setting made here.
Speaker Installation
• Set in Setup Navigator (default: L/R:
Large | C: Large | LS/RS: Large| SW:
On )
You only need to make this setting if you
connected this player to your amplifier using
the 5.1 channel analog outputs.
This setting does not affect digital audio
output.
Digital Audio Out
Video Output
Language
Display
Options
Speakers
Audio Output Mode
Speaker Installation
Speaker Distance
Initial Settings
‰ 2 Channel
Page 54
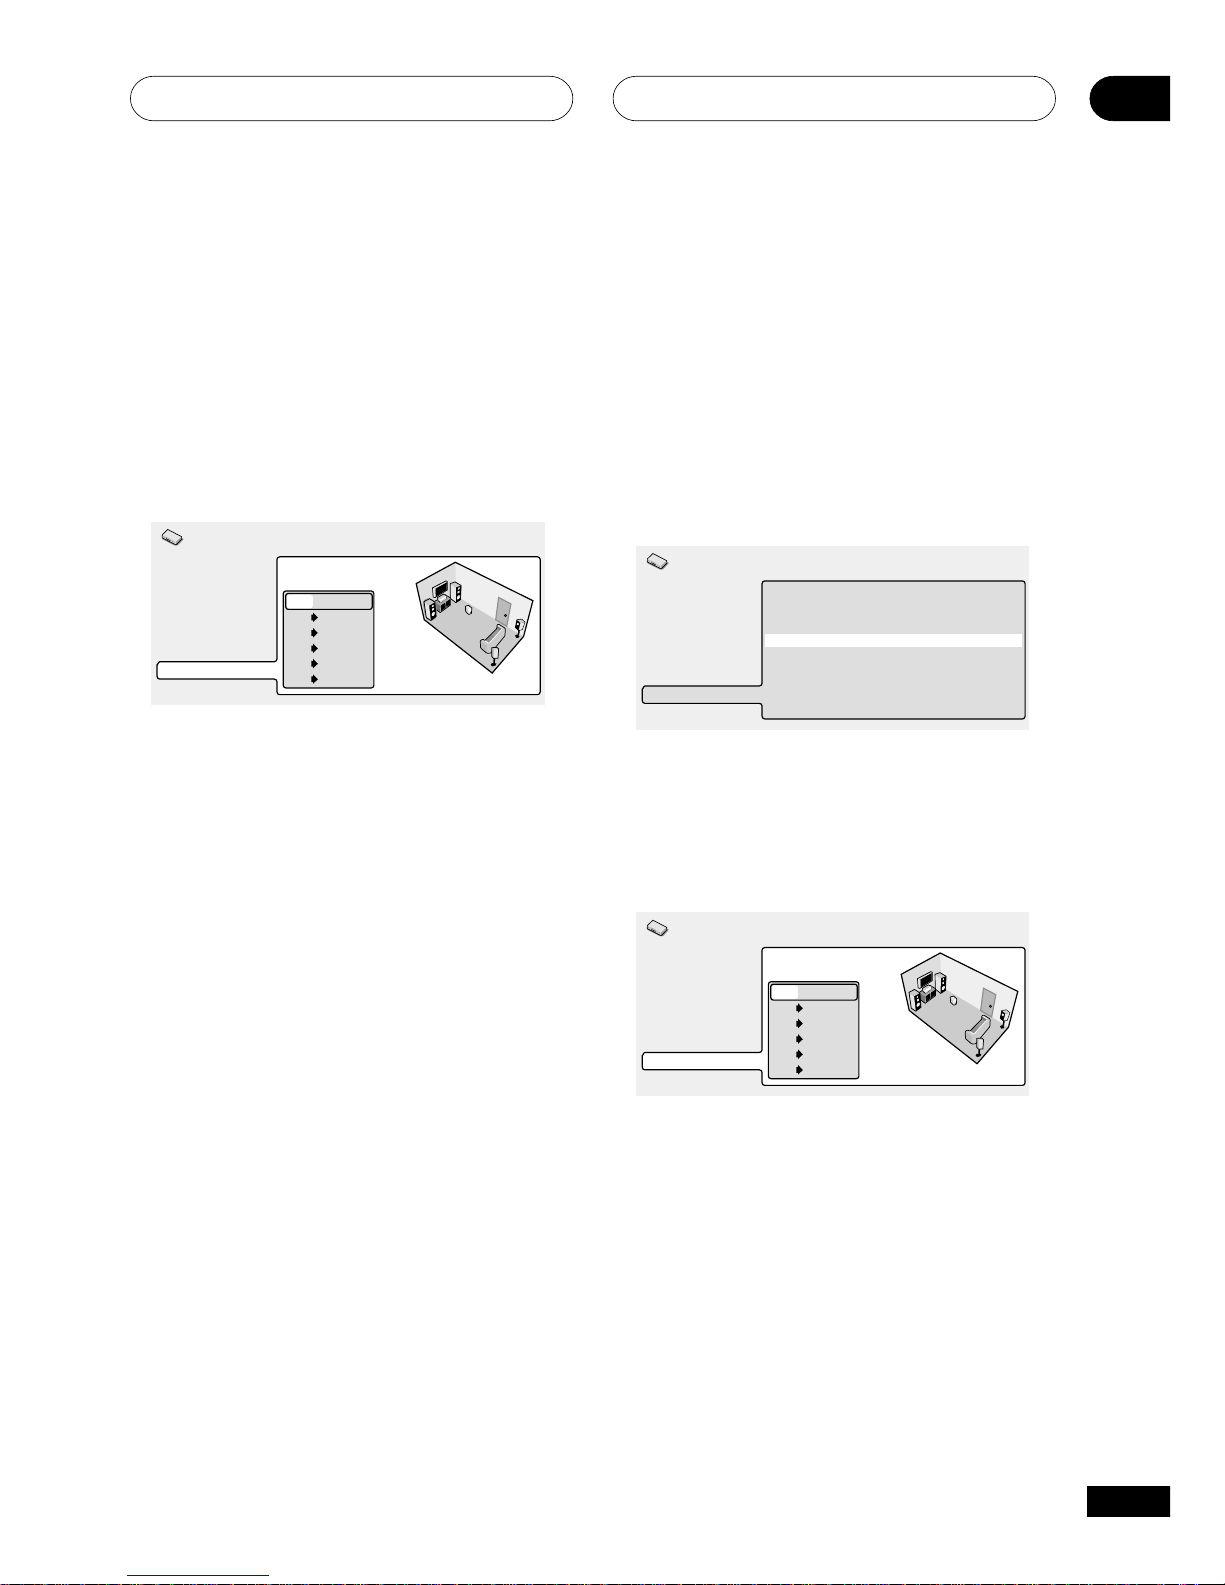
The Initial Settings Menu
08
65
En
Use the Speaker Installation screen to tell
the player what kinds of speakers you have
connected.
1 Use the joystick to move the cursor
up/down to select a speaker.
• The L and R, and RS and LS speakers
are paired; you can’t set them differently.
Digital Audio Out
Video Output
Language
Display
Options
Speakers
L
C
R
RS
LS
SW
Large
Large
Large
Large
Large
On
Initial Settings
2 Move the cursor right to modify the
selected speaker.
3 Use the joystick (up/down) to change
the current setting.
• You can see the effect of your changes
in the room graphic on the right of the
screen.
• Except for the subwoofer, you can set
speaker size to Large or Small. If the
main speaker cone in the speaker is
12cm or more, set to Large, otherwise
set to Small (or Off if you don’t have
that speaker).
• If you set the front L and R speakers to
Small, the center and surround speak-
ers are automatically set to Small and
the subwoofer to On.
• The subwoofer can only be set to On or
Off.
4 Move the joystick left to go back to
the speaker list if you want to modify
another speaker, or press ENTER to exit
the Speaker Installation screen.
Speaker Distance
• Default setting: all speakers 10 ft.
You only need to make this setting if you
connected this player to your amplifier using
the 5.1 channel analog outputs.
To get the best surround sound from your
system, you should set up the speaker
distances from your listening position.
‰ 2 Channel
Digital Audio Out
Video Output
Language
Display
Options
Speakers
Audio Output Mode
Speaker Installation
Speaker Distance
Initial Settings
1 Use the joystick to move the cursor
up/down to select a speaker.
• The L and R speakers are paired; you
can’t set them differently.
Digital Audio Out
Video Output
Language
Display
Options
Speakers
L
C
R
RS
LS
SW
10.0 ft.
10.0 ft.
10.0 ft.
10.0 ft.
10.0 ft.
10.0 ft.
Initial Settings
2 Move the cursor right to change the
speaker distance for the highlighted
speaker.
Page 55
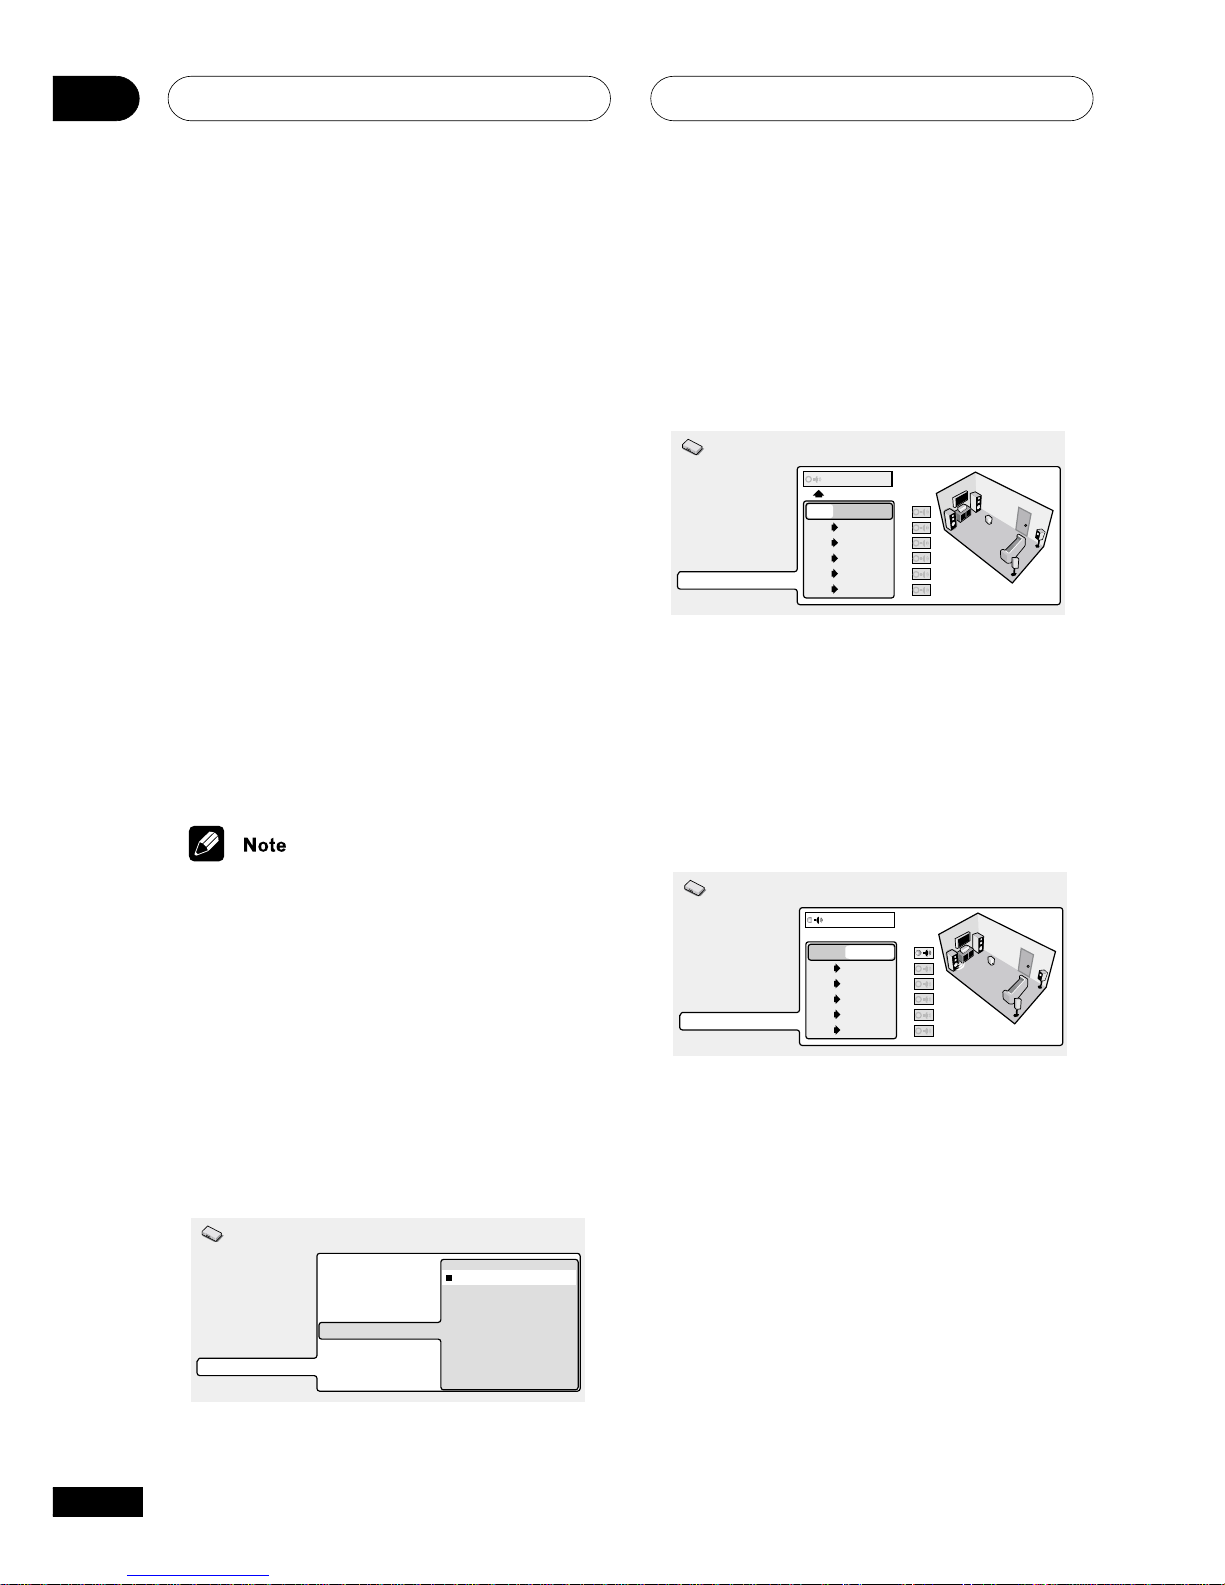
The Initial Settings Menu08
66
En
3 Use the joystick (up/down) to change
the distance.
• When you change the distance settings
of the front left (L) or front right (R)
speakers, all the other speaker distances change relative to it.
• Front left/right (L/R) speakers can be set
from 1 ft. to 30 ft. in 0.5 ft. increments.
• Center speaker (C) and subwoofer (SW)
can be set from – 6.5 ft. to +6.5 ft.
relative to the front left/right speakers
• Surround left/right (LS/RS) speakers can
be set from –20 ft. to +6.5 ft. relative to
the front left/right speakers.
4 Move the cursor left to go back to the
speaker list if you want to modify
another speaker, or press ENTER to exit
the Speaker Distance screen.
• Speaker Distance settings do not affect
SACD playback.
Channel Level
• Default setting: Fix
You only need to make this setting if you
onnected this player to your amplifier using
the 5.1 channel analog outputs.
This setting does not affect digital audio
output.
Digital Audio Out
Video Output
Language
Display
Options
Speakers
Audio Output Mode
Speaker Installation
Speaker Distance
Channel Level
Fix
Variable
Initial Settings
When set to Fix, the level of each of the 5.1
channel analog outputs is fixed. Choose
Variable if you want to adjust the relative
levels to balance the surround sound better
for your listening room.
Digital Audio Out
Video Output
Language
Display
Options
Speakers
L
C
R
RS
LS
SW
Auto
0.0dB
0.0dB
0.0dB
0.0dB
0.0dB
0.0dB
Initial Settings
You can set the individual channel levels
between –6dB and +6dB using the test tone
output as a guide to set the correct levels.
Adjust the levels until the output level from
all channels sounds the same from your
usual listening position.
Automatic: Select Auto to start the test tone
output.
Digital Audio Out
Video Output
Language
Display
Options
Speakers
L
C
R
RS
LS
SW
Auto
0.0dB
0.0dB
0.0dB
0.0dB
0.0dB
0.0dB
Initial Settings
As the test tone plays through each speaker
in turn, it is highlighted on-screen. Use the
joystick (up/down) to adjust the channel
output level of the current speaker. Note that
the test tone is not output from the
subwoofer. Move the joystick left to exit the
test tone sequence, or ENTER to save the
settings and exit the channel level setting
screen.
Page 56
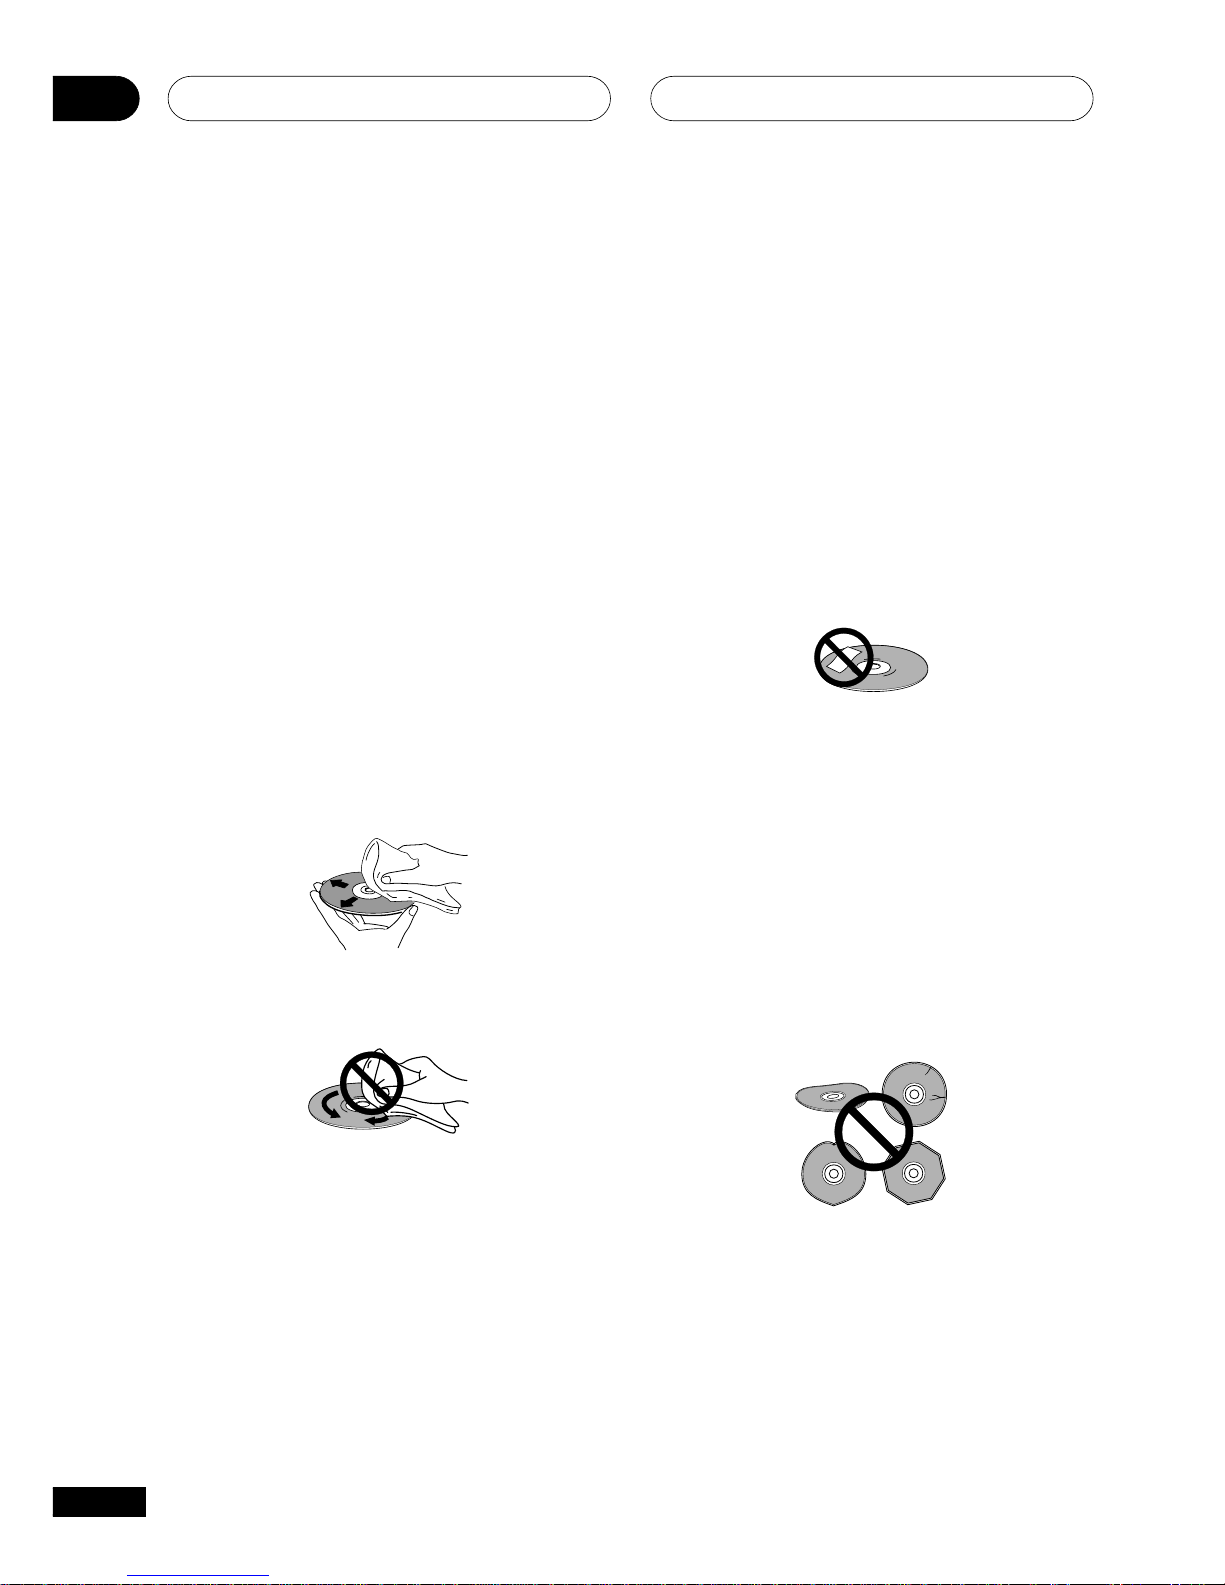
Additional Information09
68
En
Storing discs
Although CDs and DVD discs are more
durable than vinyl records, you should still
take care to handle and store discs correctly.
When you're not using a disc, return it to its
case and store upright. Avoid leaving discs
in excessively cold, humid, or hot environments (including under direct sunlight).
Don't glue paper or put stickers onto the
disc, or use a pencil, ball-point pen or other
sharp-tipped writing instrument. These could
all damage the disc.
For more detailed care information see the
instructions that come with discs.
Do not load more than one disc into the
player at a time.
Discs to avoid
Discs spin at high speed inside the player. If
you can see that a disc is cracked, chipped,
warped, or otherwise damaged, don't risk
using it in your player—you could end up
damaging the unit.
This unit is designed for use with conventional, fully circular discs only. Use of shaped
discs is not recommended for this product.
Bel Canto disclaims all liability arising in
connection with the use of shaped discs.
Taking care of your player
and discs
Handling discs
When holding discs of any type, take care
not to leave fingerprints, dirt or scratches on
the disc surface. Hold the disc by its edge or
by the center hole and edge.
Damaged or dirty discs can affect playback
performance. Take care also not to scratch
the label side of the disc. Although not as
fragile as the recorded side, scratches can
still result in a disc becoming unusable.
Should a disc become marked with fingerprints, dust, etc., clean using a soft, dry
cloth, wiping the disc lightly from the center
to the outside edge as shown in the diagram
below.
Wipe lightly from the center of the
disc using straight strokes.
Don’t wipe the disc surface using
circular strokes.
If necessary, use a cloth soaked in alcohol,
or a commercially available CD/DVD
cleaning kit to clean a disc more thoroughly.
Never use benzine, thinner or other cleaning
agents, including products designed for
cleaning vinyl records.
Page 57

Additional Information
09
69
En
✗ Place directly on top of an amplifier, or
other component in your stereo system
that becomes hot in use.
✗ Use near a television or monitor as you
may experience interference—especially
if the television uses an indoor antenna.
✗ Use in a kitchen or other room where
the player may be exposed to smoke or
steam.
✗ Use on a thick rug or carpet, or cover
with cloth—this may prevent proper
cooling of the unit.
✗ Place on an unstable surface, or one
that is not large enough to support all
four of the unit’s feet.
Moving the player
If you need to move the player, first press
STANDBY/ON on the front panel to turn
the player off. Wait for --OFF-- to disappear
from the display, then turn of the rear switch
or unplug the powcord. Never lift or move the
unit during playback—discs rotate at a high
speed and may be damaged.
Power cord caution
Handle the power cord by the plug part. Do
not pull out the plug by tugging the cord,
and never touch the power cord when your
hands are wet, as this could cause a short
circuit or electric shock. Do not place the
unit, a piece of furniture, or other object on
the power cord or pinch the cord in any other
way. Never make a knot in the cord or tie it
with other cords. The power cords should be
routed so that they are not likely to be
stepped on. A damaged power cord can
cause a fire or give you an electric shock.
Check the power cord once in a while. If you
find it damaged, ask your nearest Bel Canto
authorized service center or your dealer for a
replacement.
Cleaning the pickup lens
The DVD player’s lens should not become
dirty in normal use, but if for some reason it
should malfunction due to dust or dirt,
consult your nearest authorized
service center. Although lens cleaners for CD
players are commercially available, we do
not recommend using them since some may
damage the lens.
Problems with condensation
Condensation may form inside the player if it
is brought into a warm room from outside, or
if the temperature of the room rises quickly.
Although the condensation won’t damage
the player, it may temporarily impair its
performance. For this reason you should
leave it to adjust to the warmer temperature
for about an hour before switching on and
using.
Hints on installation
We want you to enjoy using this unit for
years to come, so please bear in mind the
following points when choosing a suitable
location for it:
Do...
✓ Use in a well-ventilated room.
✓ Place on a solid, flat, level surface, such
as a table, shelf or stereo rack.
Don’t...
✗ Use in a place exposed to high tempera-
tures or humidity, including near
radiators and other heat-generating
appliances.
✗ Place on a window sill or other place
where the player will be exposed to
direct sunlight.
✗ Use in an excessively dusty or damp
environment.
Page 58
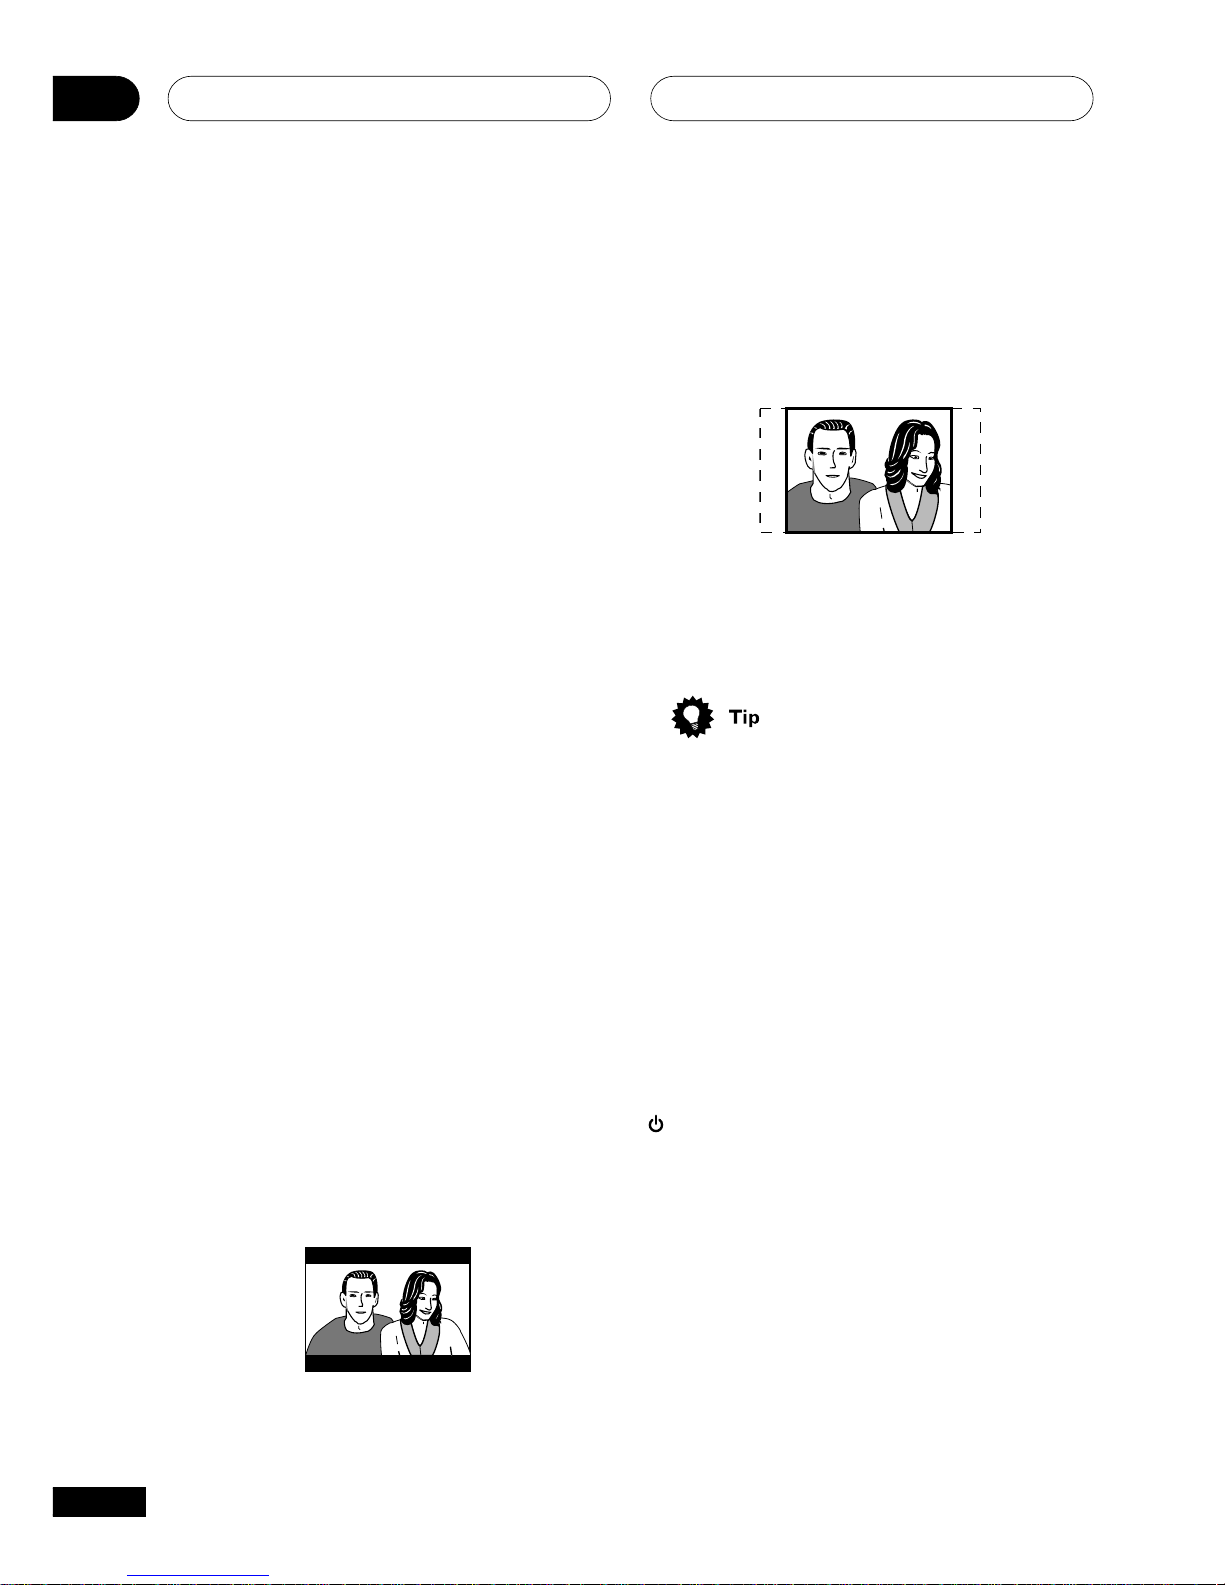
Additional Information09
70
En
Screen sizes and disc formats
DVD-Video discs come in several different
screen aspect ratios, ranging from TV
programs, which are generally 4:3, to
CinemaScope widescreen movies, with an
aspect ratio of up to about 7:3.
Televisions, too, come in different aspect
ratios; ‘standard’ 4:3 and widescreen 16:9.
Widescreen TV users
If you have a widescreen TV, the TV Screen
setting of this player should be set to
16:9(Wide).
When you watch discs recorded in 4:3
format, you can use the TV controls to select
how the picture is presented. Your TV may
offer various zoom and stretch options; see
the instructions that came with your TV for
details.
Please note that some movie aspect ratios
are wider than 16:9, so even though you have
a widescreen TV, these discs will still play in
a ‘letterbox’ style with black bars at the top
and bottom of the screen.
Standard TV users
If you have a standard TV, the TV Screen
setting of this player should be set to
4:3 (Letter Box) or 4:3 (Pan&Scan),
depending on which you prefer.
Set to 4:3 (Letter Box), widescreen discs are
shown with black bars top and bottom.
Set to 4:3(Pan&Scan), widescreen discs are
shown with the left and right sides cropped.
Although the picture looks larger, you don’t
actually see the whole picture.
Please note that many widescreen discs
override the player’s settings so that the disc
is shown in letterbox format regardless of the
setting.
• Using the 16:9 (Wide) setting with a
standard 4:3 TV, or either of the 4:3
settings with a widescreen TV, will result
in a distorted picture.
Resetting the player
Use this procedure to reset all the player’s
settings to the factory default.
1 Switch the player into standby.
2 Using the front panel buttons, hold
down the 7 (stop) button and press
STANDBY/ON to switch the player back
on.
All the player’s settings are now reset, and
you should see the ‘Let’s Get Started’ screen.
Page 59
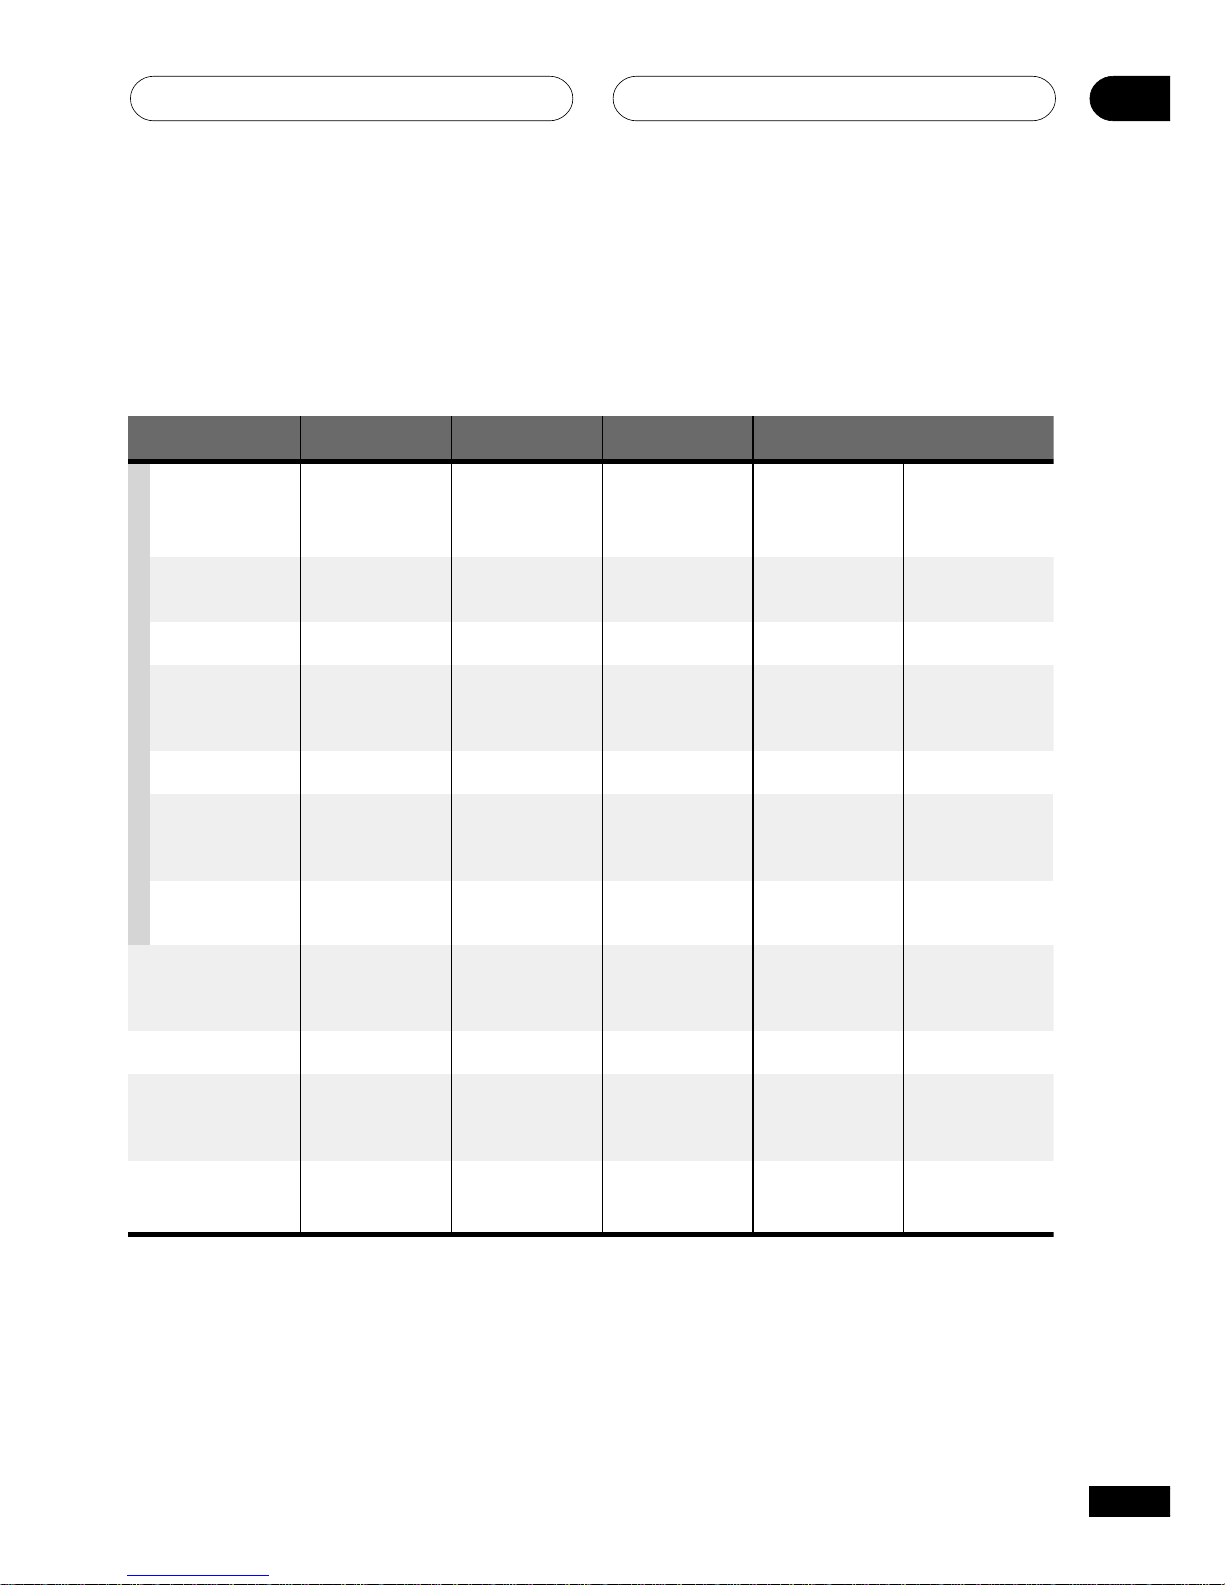
Additional Information
09
71
En
Disc audio format Player setting
2 Ch
Front L / R
–
–
–
–
––
––
–
–
–
–
–
–
Surround L/R,
Center, LFE
Surround L/R,
Center, LFE
Surround L/R,
Center, LFE
Surround L/R,
Center, LFE
Surround L/R,
Center, LFE
–
Front L / R
Front L / R
Front L / R
Left / Right Left / Right
Left / Right Left / Right
Left / Right
*6
Left / Right
Left / Right
Left / Right
Left / Right
2ch downmix
2ch downmix
*4
2ch downmix
2ch downmix
Front L / R
2ch downmix
5.1 Ch
Front L/R
analog outputs
*1
Surround L/R
Center , LFE, outputs
*1
Digital outputs
PCM convert*2Bitstream
*3
Dolby Digital
Dolby Digital
karaoke
2 Ch / 5.1 Ch
2 Ch / 5.1 Ch
2 Ch / 5.1 Ch
2 Ch / 5.1 Ch
2 Ch / 5.1 Ch
2 Ch / 5.1 Ch
Linear PCM
2 Ch
5.1 Ch
DTS
MPEG
2 Ch
5.1 Ch
DVD-Audio
2 Ch
5.1 Ch
Super Audio CD
2 Ch
5.1 Ch
DTS CD
CD
Video CD /
Super VCD
DVD-RW
DVD
2ch downmix Dolby Digital
2ch downmix
2ch downmix*52ch downmix
*5
DTS
DTSDTS
Dolby Digital
Left / Right
Left / Right
Left / Right Left / Right
Left / Right Left / Right
Dolby Digital
MPEG or PCM
MPEG
About the audio output settings
The table below shows how the audio settings you make in the Initial Settings menu affect
the output from the 5.1 channel analog outputs, and from the digital
outputs with various types of disc.
*
1
When Audio Output Mode is set to 2 Channel, the AUDIO OUT (5.1ch) FRONT L / R
jacks act as a pair of stereo audio outputs.
*2 Dolby Digital > PCM, MPEG > PCM or DTS > PCM setting.
*
3
Dolby Digital, MPEG or DTS setting.
*
4
Discs that prohibit downmixing will be output as 5.1 channel even if 2 Channel is selected
as the Audio Output Mode setting.
*
5
Discs that prohibit downmixing also mute the digital output
*
6
If the sound is mono, the Left and Right channels will be the same
Page 60

Additional Information09
72
En
Argentina, 0118, ar
Australia, 0121, au
Austria, 0120, at
Belgium, 0205, be
Brazil, 0218, br
Canada, 0301, ca
Chile, 0312, cl
China, 0314, cn
Denmark, 0411, dk
Finland, 0609, fi
France, 0618, fr
Germany, 0405, de
Japanese (ja), 1001
English (en), 0514
French (fr), 0618
German (de), 0405
Italian (it), 0920
Spanish (es), 0519
Chinese (zh), 2608
Dutch (nl), 1412
Portuguese (pt), 1620
Swedish (sv), 1922
Russian (ru), 1821
Korean (ko), 1115
Greek (el), 0512
Afar (aa), 0101
Abkhazian (ab), 0102
Afrikaans (af), 0106
Amharic (am), 0113
Arabic (ar), 0118
Assamese (as), 0119
Aymara (ay), 0125
Azerbaijani (az), 0126
Bashkir (ba), 0201
Byelorussian (be), 0205
Bulgarian (bg), 0207
Bihari (bh), 0208
Bislama (bi), 0209
Bengali (bn), 0214
Tibetan (bo), 0215
Breton (br), 0218
Catalan (ca), 0301
Corsican (co), 0315
Czech (cs), 0319
Welsh (cy), 0325
Danish (da), 0401
Language code list
Language (Language code letter), Language code
Bhutani (dz), 0426
Esperanto (eo), 0515
Estonian (et), 0520
Basque (eu), 0521
Persian (fa), 0601
Finnish (fi), 0609
Fiji (fj), 0610
Faroese (fo), 0615
Frisian (fy), 0625
Irish (ga), 0701
Scots-Gaelic (gd), 0704
Galician (gl), 0712
Guarani (gn), 0714
Gujarati (gu), 0721
Hausa (ha), 0801
Hindi (hi), 0809
Croatian (hr), 0818
Hungarian (hu), 0821
Armenian (hy), 0825
Interlingua (ia), 0901
Interlingue (ie), 0905
Inupiak (ik), 0911
Indonesian (in), 0914
Icelandic (is), 0919
Hebrew (iw), 0923
Yiddish (ji), 1009
Javanese (jw), 1023
Georgian (ka), 1101
Kazakh (kk), 1111
Greenlandic (kl), 1112
Cambodian (km), 1113
Kannada (kn), 1114
Kashmiri (ks), 1119
Kurdish (ku), 1121
Kirghiz (ky), 1125
Latin (la), 1201
Lingala (ln), 1214
Laothian (lo), 1215
Lithuanian (lt), 1220
Latvian (lv), 1222
Malagasy (mg), 1307
Maori (mi), 1309
Macedonian (mk), 1311
Malayalam (ml), 1312
Mongolian (mn), 1314
Moldavian (mo), 1315
Marathi (mr), 1318
Malay (ms), 1319
Maltese (mt), 1320
Burmese (my), 1325
Nauru (na), 1401
Nepali (ne), 1405
Norwegian (no), 1415
Occitan (oc), 1503
Oromo (om), 1513
Oriya (or), 1518
Panjabi (pa), 1601
Polish (pl), 1612
Pashto, Pushto (ps), 1619
Quechua (qu), 1721
Rhaeto-Romance (rm), 1813
Kirundi (rn), 1814
Romanian (ro), 1815
Kinyarwanda (rw), 1823
Sanskrit (sa), 1901
Sindhi (sd), 1904
Sangho (sg), 1907
Serbo-Croatian (sh), 1908
Sinhalese (si), 1909
Slovak (sk), 1911
Slovenian (sl), 1912
Samoan (sm), 1913
Shona (sn), 1914
Somali (so), 1915
Albanian (sq), 1917
Serbian (sr), 1918
Siswati (ss), 1919
Sesotho (st), 1920
Sundanese (su), 1921
Swahili (sw), 1923
Tamil (ta), 2001
Telugu (te), 2005
Tajik (tg), 2007
Thai (th), 2008
Tigrinya (ti), 2009
Turkmen (tk), 2011
Tagalog (tl), 2012
Setswana (tn), 2014
Tonga (to), 2015
Turkish (tr), 2018
Tsonga (ts), 2019
Tatar (tt), 2020
Twi (tw), 2023
Ukrainian (uk), 2111
Urdu (ur), 2118
Uzbek (uz), 2126
Vietnamese (vi), 2209
Volapük (vo), 2215
Wolof (wo), 2315
Xhosa (xh), 2408
Yoruba (yo), 2515
Zulu (zu), 2621
Hong Kong, 0811, hk
India, 0914, in
Indonesia, 0904, id
Italy, 0920, it
Japan, 1016, jp
Korea, Republic of, 1118, kr
Malaysia, 1325, my
Mexico, 1324, mx
Netherlands, 1412, nl
New Zealand, 1426, nz
Norway, 1415, no
Pakistan, 1611, pk
Philippines, 1608, ph
Portugal, 1620, pt
Russian Federation, 1821, ru
Singapore, 1907, sg
Spain, 0519, es
Sweden, 1905, se
Switzerland, 0308, ch
Taiwan, 2023, tw
Thailand, 2008, th
United Kingdom, 0702, gb
United States of America, 2119, us
Country code list
Country, Country code, Country code letter
Page 61
Additional Information
73
En
Dolby Digital 1
Using a maximum of 5.1 channels of audio,
this high quality surround system is used in
many of the finer movie theaters around the
world.
The on-screen display shows which channels
are active, for example showing 3/2.1. The 3
being the two front channels and the center
channel; the 2 being the surround channels,
and the .1 being the LFE channel.
DTS
R
DTS stands for Digital Theater System. DTS
is a surround system different from Dolby
Digital that has become a popular surround
sound format for movies.
Dynamic range
The difference between the quietest and
loudest sounds possible in an audio signal
(without distorting or getting lost in noise).
Dolby Digital and DTS soundtracks are
capable of a very wide dynamic range,
delivering dramatic cinema-like effects.
File extension
A tag added to the end of a filename to
indicate the type of file. For example, “.mp3”
indicates an MP3 file.
Interlaced video
A method of displaying a picture in which
odd-numbered lines are updated in one
pass, then even-numbered lines updated in
the next. See also Progressive scan video.
MP3
MP3 (MPEG1 audio layer 3) is a compressed
audio file format. Files are recognized by
their file extension “.mp3” or “.MP3”.
Selecting languages using
the language code list
Some of the language options (such as ‘DVD
Language’ in the Setup Navigator) allow you
to set your prefered language from any of the
136 languages listed in the language code
list on the previous page.
1 Select ‘Other Language’.
2 Use the joystick (left/right) to high-
light either the language name or code
number.
3 Use the joystick (up/down) to change
the language or code number.
• You can also use the number buttons if
you’re entering a language code.
See the language code list on the previous
page for a complete list of langauges and
codes.
Glossary
Analog audio
An electrical signal that directly represents
sound. Compare this to digital audio which
can be an electrical signal, but is an indirect
representation of sound. See also Digital
audio.
Aspect ratio
The width of a TV screen relative to its height.
Conventional TVs are 4:3 (in other words, the
screen is almost square); widescreen models
are 16:9 (the screen is almost twice as wide
as it is high).
Bonus Group (DVD-Audio only)
An ‘extra’ group on some DVD-Audio discs
that requires a key number to access. Also
see Group.
Browsable pictures (DVD-Audio only)
A feature of some DVD-Audio discs in which
the user can browse still pictures recorded
on the disc as the audio is played. See also
Slideshow.
Page 62
Additional Information09
74
En
Regions (DVD-Video only)
These associate discs and players with
particular areas of the world. This unit will
only play discs that have compatible region
codes. You can find the region code of your
unit by looking on the rear panel. Some discs
are compatible with more than one region
(or all regions).
S1 S-video output
This S-video signal format includes aspect
ratio information (4:3 or 16:9) within the
video signal. TVs which are compatible with
S1 S-video automatically switch aspect ratio
according to the signal.
S2 S-video output
S2 is an enhanced version of S-video which,
in addition to aspect ratio information,
contains letterbox / pan & scan information.
Widescreen TVs which are compatible with
S2 S-video automatically switch aspect ratio
according to the signal.
Sampling frequency
The rate at which sound is measured to be
turned into digital audio data. The higher the
rate, the better the sound quality, but the
more digital information is generated.
Standard CD audio has a sampling frequency of 44.1kHz, which means 44,100
samples (measurements) per second. See
also Digital audio.
Slidshow (DVD, Video CD/Super VCD)
A feature of some DVD discs in which still
pictures recorded on the disc cycle automatically as the audio is played. See also
Browsable Picture.
Super Audio CD (SACD)
Super Audio CD is a high quality audio disc
format that can accomodate high sampling
rate stereo and multi-channel audio, as well
as conventional CD audio all on the same
disc.
MPEG audio
An audio format used on Video CDs and
some DVD discs. This unit can convert
MPEG audio to PCM format for wider
compatibility with digital recorders and AV
amplifiers. See also PCM.
MPEG video
The video format used for Video CDs and
DVDs. Video CD uses the older MPEG-1
standard, while DVD uses the newer and
much better quality MPEG-2 standard.
Packed PCM (DVD-Audio only)
A lossless compression system that enables
more PCM audio to be stored on a DVDAudio disc than would otherwise be possible.
PCM (Pulse Code Modulation)
The most common system of encoding
digital audio, found on CDs and DAT.
Excellent quality, but requires a lot of data
compared to formats such as Dolby Digital
and MPEG audio. For compatibility with
digital audio recorders (CD, MD and DAT)
and AV amplifiers with digital inputs, this
unit can convert Dolby Digital, DTS and
MPEG audio to PCM. See also Digital audio.
PBC (PlayBack Control) (Video CD only)
A system of navigating a Video CD through
on-screen menus recorded onto the disc.
Especially good for discs that you would
normally not watch from beginning to end all
at once—karaoke discs, for example.
Progressive scan video
Also called non-interlaced video, this method
of displaying a picture updates all the lines
in one pass, resulting in a more stable,
flicker-free image than interlaced video (for a
given scanning rate). See also Interlaced
video.
Page 63
Additional Information
09
75
En
Troubleshooting
Incorrect operation is often mistaken for trouble or malfunction. If you think that there is something
wrong with this component, check the points below. Sometimes the trouble may lie in another
component. Inspect the other components and electrical appliances being used. If the trouble
cannot be rectified after checking the items below, ask your nearest Bel Canto authorized service
center or your dealer to carry out repair work.
Problem
The disc won’t play or is
automatically ejected after
loading.
DVD-Audio playback stops.
Picture playback stops and the
operation buttons cannot be
used.
New settings made in the
Setup screen menus while a
disc is playing are ineffective.
Settings are canceled.
The remote control doesn't
seem to work.
Cause / Remedy
• Make sure the disc is free from dirt and dust and is not
damaged.
• Make sure the disc is loaded with the label side face-up and
aligned properly in the disc tray guide.
• Incompatible region number: If the region number on a DVDVideo disc does not match the number on the player, the disc
cannot be used.
• Condensation inside the player: Allow time for condensation to
evaporate. Avoid using the player near an air-conditioning unit.
• Disc is loaded upside down: Reload the disc with the label side
face up.
• The disc may have been illegally copied.
• Press 7, then start playback again (3).
• Switch the power off once, unplug from the wall socket, then
plug back in and switch on again using the front panel
STANDBY/ON button.
• Some settings can be changed while a disc is playing, but are
not effective until the disc is stopped then restarted: Press 7, then
start playback again (3).
• When the power is cut due to power failure or by unplugging
the power cord, settings will be canceled: Press STANDBY/ON
on the front panel to turn the player off. Wait for -OFF- to disappear from the display, then unplug the power cord.
• The CONTROL IN jack on the rear panel is connected: Point the
remote control at the connected component to control this player.
• The remote control is too far from the player, or the angle with
the remote sensor is too wide: Use the remote within its operating
range.
• The batteries are exhausted: Put in new ones.
Page 64
Additional Information09
76
En
Problem
No picture/No color.
Screen is stretched or aspect
does not change.
Picture disturbance during
playback or the picture is dark.
No audio, or audio is distorted.
Cause / Remedy
• Check that the VIDEO OFF indicator is not lit. If it is, press the
VIDEO OFF button.
• Incorrect video connections: Check that connections are
correct and that plugs are inserted fully. Also check the video
cable for damage.
• TV/monitor or AV amplifier settings are incorrect: Check the
instruction manual of the connected equipment.
• The video ouput is progressive but your TV/monitor is not
compatible with progressive scan.
• The TV Screen setting in the Initial Settings menu is incorrect.
• If your TV/monitor is connected using an S-video cable, try
changing the S-Video Out setting.
• This player is compatible with Macro-Vision System copy guard.
Some discs include a copy prevention signal, and when this type
of disc is played back, stripes etc., may appear on some sections
of the picture depending on the TV. This is not a malfunction.
• Due to the player’s copy protection circuits, connection of this
device through a VCR or an AV selector may prevent recording or
cause picture problems. This is not a malfunction.
• No audio is output during slow motion playback or when
scanning discs other than audio CDs
• Some DVD discs do not output digital audio: Switch your
amplifier to the player's analog outputs.
• Check that the disc is free from dust and dirt, and that it is not
damaged.
• Check that all interconnects are firmly inserted.
• Check that the plugs and terminals are free of dirt, oxide, etc.
and clean if necessary. Also check the cable for damage.
• Make sure the player's output is not connected to the amplifier's phono (turntable) inputs.
• Check your amplifier/receiver’s settings (volume, input
function, speaker settings, etc.).
Page 65
Additional Information
09
77
En
Problem
The analog audio is OK, but
there appears to be no digital
audio signal.
Noticeable difference in DVD
and CD volume.
Cannot play multi-channel
audio.
Cannot listen to high-sampling
rate audio through the digital
output.
Cannot output 192kHz or
176.4kHz digital audio.
Cannot output 96kHz or
88.2kHz digital audio.
No DTS audio output.
Cause / Remedy
• Make sure that the Digital Out setting is set to On.
• Check that the Dolby Digital, DTS and MPEG out settings
are suitable for your amplifier/receiver—check the instruction
manual that came with your amplifier/receiver.
• SACDs and some DVD-Audio discs do not output digital audio.
Listen through the player’s analog audio outputs.
• This is due to differences in the audio format and is not a
malfunction.
•Make sure that Audio Output Mode is set to 5.1 Channel.
•Check that the Dolby Digital, DTS and MPEG Out settings
are suitable for your amplifier/receiver—check the instruction
manual that came with your amplifier/receiver.
• DVD-Audio and SACDs do not output multichannel digital
audio. Listen through the player’s analog outputs.
• Check that the settings in the Speaker Installation screen are
correct.
• Check the audio options available from the disc menu.
• Make sure that Linear PCM Out is set to Down Sample Off.
• As a copy-protection measure, some DVDs do not output 96kHz
audio. In this case, even if set to Down Sample Off, the player
automatically outputs the audio at 48 kHz. This is not a malfunction.
• The player does not output digital audio at these sampling
rates. The digital output is automatically downsampled.
• Check that Linear PCM Out is set to Down Sample Off.
• Some discs are digital copy protected and do not output high
sampling rate digital audio. In this case the output is automatically downsampled.
• If this unit is connected to a non-DTS compatible amplifier or
decoder using a digital audio cable, set DTS Out to DTS 3 PCM.
If you do not do this, noise will be output when you play a DTS
disc.
• If this unit is connected to a DTS-compatible amplifier or
decoder using a digital audio cable, check the amplifier settings,
and that the cable is properly connected.
Page 66
Additional Information09
78
En
Problem
Audio mix does not sound
right or sounds incomplete
(for example, inaudible ).
Disc containing the MP3 tracks
won’t play.
Can’t hear effect of
TruSurround.
Cause / Remedy
• Make sure that Audio Output Mode is set to 2 Channel if
you've connected to the stereo inputs on your amplifier or TV.
• This player is compatible with multi-session discs, but only
plays sessions that are closed.
• If the message UNPLAYABLE MP3 FORMAT is displayed when
you try to play a disc/track, check the audio file formats. For more
information.
• TruSurround does not work with CD, MP3, DVD-Audio, SACD or
96kHz linear PCM DVD.
• The TruSurround effect is only output through the AUDIO OUT
(LF/RF) analog audio outputs.
• Make sure that Audio Output Mode is set to 2 Channel.
• The effectiveness of TruSurround varies with the disc.
• Static electricity or other external
influences may cause malfunctioning of
this unit. In this case, unplug the power
cord and then plug back in. This will
usually reset the unit for proper
operation. If this does not correct the
problem, please consult your dealer.
Page 67
Additional Information
09
General
System .............................................. DVD Player
Power requirements ....... AC 80-260V, 50/60 Hz
Power consumption .................................... 43 W
Power consumption (standby)
......................... 10 W
Weight ....................................................... (23 lb )
Dimensions ..... 17 1/2(W) x 5 1/4 (H) x 15 (D) in
Operating temperature.............. +5°C to +35°C
(+36°F to +96°F)
Operating humidity ............................ 5% to 85%
(no condensation)
Component Video output (Y, PB, PR)
Output level ............................. Y: 1.0 Vp-p (75 Ω)
PB, PR: 0.7 Vp-p (75 Ω)
Jacks ................................................... RCA jacks
S-Video output
Y (luminance) - Output level..........1 Vp-p (75 Ω)
C (color) - Output level........... 286 mVp-p (75 Ω)
Jack .................................................. S-Video jack
Video output
Output level .................................... 1 Vp-p (75 Ω)
Jack ....................................................... RCA jack
Audio output (1 stereo pair)
Output level ....................... During audio output
200 mVrms (1 kHz, –20 dB)
Number of channels ..........................................2
Jacks ..................................................... RCA jack
Audio output (multi-channel / L, R, C,
SW, LS, RS)
Output level ....................... During audio output
200 mVrms (1 kHz, –20 dB)
Number of channels .......................................... 6
Jacks ..................................................... RCA jack
Digital audio characteristics
Frequency response
...........................4 Hz to 44 kHz(DVD fs: 96 kHz)
.............4 Hz to 88 kHz (DVD-Audio fs: 192 kHz)
S/N ratio .................................................... 118 dB
Dynamic range ......................................... 108 dB
Total harmonic distortion .......................0.001 %
Wow and flutter.............. Limit of measurement
(0.001% W. PEAK) or lower
Digital output
Optical digital output ........... Optical digital jack
Coaxial digital output ..................BNC, RCA jack
Accessories
Power cord ......................................................... 1
Remote control ................................................... 1
Operating Instructions........................................1
Warranty card ....................................................1
AA dry cell batteries .......................................... 2
• The specifications and design of this
product are subject to change without
notice, due to improvement.
Specifications
Page 68
bel canto –
PLayer-1(A)
RS-232 Protocol and Control Details - Rev. 2
Configuration - The following settings should be used for RS-232 transmission:
Baud Rate – RS-232 baud rate is configured using jumpers on the internal RS-232
interface located on the upper 480p board or on the separate RS232 board.
Available settings are 2400, 4800, 9600 and *19200. *Factory default is 19200.
Baud Rate Jumper 1 Jumper 2
2400 Jumped Jumped
4800 Open Jumped
9600 Jumped Open
19200 Open Open
Data Bits – Eight (8) data bits.
Stop Bits – One (1) stop bit.
Parity – No parity checking.
Flow Control – None.
RS-232 Interface –
Commands are to be sent to the unit via RS-232 using the following format:
Arguments 1 through 3 are in decimal format.
<Command> = <Header><Command ID><Argument 1><Argument 2><Argument 3>
<Header> = <CAh><FEh> = HEX or <202><254> = DECIMAL
<Command ID> = <Byte>
<Argument 1> = <Byte>
<Argument 2> = <Byte>
<Argument 3> = <Byte>
<Byte> = 0 – 255
EXAMPLE OF DECIMAL COMMAND:
To send the command “
Note: Command 1 and 2 are for IR Equivalents only. Direct Commands are # 3 and higher.
Any invalid command received via RS232 is ignored and will not affect normal operation.
Status Byte –
Upon receiving the command “Poll Status” command [CAh FEh 09h 00h 00h 00h], a
single status byte will be transmitted. The format for the status byte is:
<Status Byte> = <R><R><R><R><Device><Power Status>
<R> = 0b : Reserved
<Device> = 000b : Reserved
= 001b : Reserved
= 010b : Reserved
= 011b : Reserved
= 100-111 : Reserved
<Power Status> = 0b : Unit is in standby.
= 1b : Unit is not in standby.
Play
”, send
<202><254><3><1><0><0>
Page 69

Command Details and Explanation –
This section will outline basic functionality and usage of each command set within
the RS232 interface protocol.
Note: Command IDs one(1) and two(2) are implemented to provide provision for
future expandability. Command IDs three (3) through nine(9) offer more flexible
control solutions and should be used for most applications.
Command ID #1: Send Single-Byte IR Code Equivalent
Command Format:
<CAh><FEh><1><Data Byte><00h><00h>
Functional Description:
This command will write the given data (<Data Byte>) to the unit’s IR data bus.
Usage:
This command can be used to effectively implement any other command, which
has a one-byte equivalent IR code. Equivalent IR codes for commands can
be found on RS-232 command listing. Note that not all commands have equivalent
IR codes.
Example:
To send the
single byte
command “
<202><254><1><121><0><0> DECIMAL Equiv.
Play
”, send
<CAh><FEh><1><79h><00h><00h>
Command ID #2: Send Three-Byte IR Code Equivalent
Command Format:
<CAh><FEh><2><Data Byte 1><Data Byte 2><Data Byte 3>
Functional Description:
This command will write the given data (<Data Byte 1><Data Byte 2><Data Byte 3>) to
the unit’s IR data bus.
Usage:
This command can be used to effectively implement any other command, which
has a three-byte equivalent IR code. Equivalent IR codes for commands can be
found on RS-232 command listing. Note that not all commands have equivalent IR codes.
Example:
To send the
three byte
command “
Repeat
”, send
<CAh><FEh><2><99h><F5h><27h>
<202><254><2><153><245><39> DECIMAL Equiv.
Command ID #3: Direct Disk Commands
Function:
These commands have a function when the unit is loaded with any Theta CD, CDV
or DVD. However, the effect of a given command may vary depending on currently
loaded media and state of unit.
Command ID #4: CDV/DVD Commands
Function:
These commands have a function when the unit is loaded with video media. However,
the effect of a given command may vary depending on currently loaded media and
state of unit.
Command ID #5: DVD Commands
Function:
These commands have an effect only when the unit is loaded with a DVD.
Their function may vary depending on the current state of the unit.
Command ID #6: LD Commands
Not Used
Function:
These commands have an effect only when the unit is loaded with a LD.
Their function may vary depending of the current state of the unit.
Page 70

Command ID #7: Miscellaneous Commands
Function:
These commands have the same function regardless of media type.
However, their effect is dependent on current state of the unit.
Command ID #8: Menu Navigation Commands
Usage:
These commands can be used to navigate the unit’s menus. Note that available
menus are highly dependent on media type and state of the unit.
Command ID #9: Poll Status Command
Function:
This command will request the return of the status byte from the unit. See RS-232
specifications for format and meaning of the status byte.
Usage:
This command can be used to retrieve basic information about the current status
of the unit.
RS232-Interface Usage Details –
The RS-232 interface has a first-in-first-out (FIFO) buffer which will allow 15 full-length
commands to be received in direct succession. Commands are executed in the order
in which they are received with approximately a
½ second delay
between each command.
After a command is executed, it is removed from the buffer, making room to receive another command.
If the buffer is full, any command received is ignored.
For consistent results, no more than 15 commands should be sent in direct succession.
If a longer string of commands is necessary,
a minimum of ½ second delay
should be
added before sending additional commands.
Example for sending a long string of commands:
[Command 1]
[Command 2]
[Command 3]
.
.
[Command 15 ]
[Delay ½ sec]
[Command 16 ]
[Delay ½ sec]
[Command 17 ]
[Delay ½ sec]
At most, it will take approximately 10 seconds for the RS-232 interface to
execute all of the commands stored in a full command buffer. Overloaded buffers can
cause the unit to freeze with respect to RS-232 commands. If this occurs the unit must
be rebooted.
Data errors can occur in asynchronous data transmission. Parity checking is not
supported in the interface and unexpected operation can occur due to data errors.
However, invalid commands are ignored. For this reason, using the IR equivalent
command should be avoided if possible because the RS-232 interface will perform
no error checking on the data to be sent via the IR data bus.
Page 71
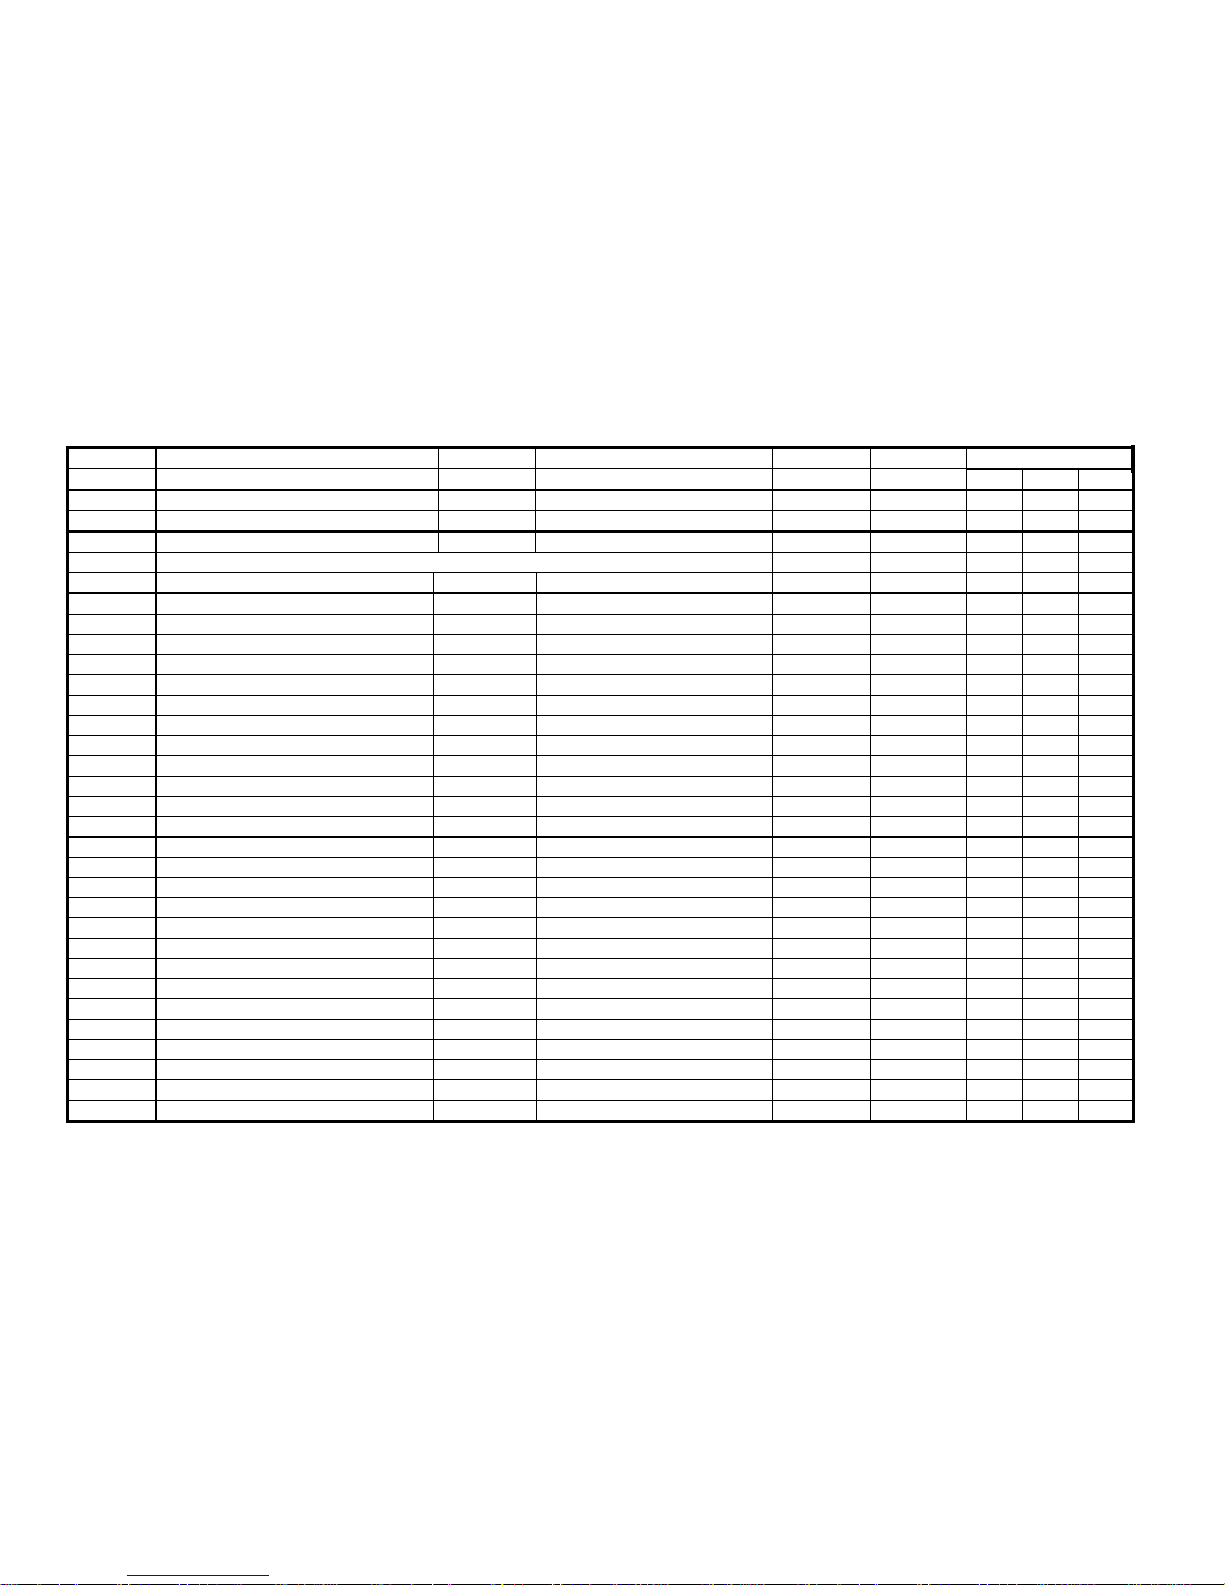
Command Command Description Argument 1 Argument 1 Description Argument 2 Argument 3 IR Code equivalent
COMMAND AND ALL ARGUMENTS (ie.1, 2 AND 3 ARE TO BE INPUT AS DECIMAL NUMBERS Byte 1 Byte 2 Byte 3
1
Send single byte IR code equivalent.
0 - 255 First Byte to be sent (1) 0 0 -- -- --
Ex: Play
<CAh><FEh><1><79h><00h><00h>
2
**Send three byte IR code equivalent.
0 - 255 First byte to be sent (2) 0 - 255 0 - 255 -- -- --
**Note: Arguments 2 and 3 are IR Code equivalents Byte 2 and Byte 3 to be sent.
Ex: Repeat
<CAh><FEh><2><99h><F5h><27h>
3
Direct disk commands
1 Play 0 0 79h -- --
Ex: Play
<202><254><3><1><0><0> (Decimal
)
2 Previous 0 0 B9h -- - 3 Pause 0 0 F9h -- - 4 Stop 0 0 19h -- - 5 Next 0 0 39h -- - 6 Step forward 0 0 99h F5h EDh
7 Step reverse 0 0 99h F5h 1Dh
9 Numeric keypad 0 0 0 99h F5h 05h
10 Numeric keypad 1 0 0 99h F5h 85h
11 Numeric keypad 2 0 0 99h F5h 45h
12 Numeric keypad 3 0 0 99h F5h C5h
13 Numeric keypad 4 0 0 99h F5h 25h
14 Numeric keypad 5 0 0 99h F5h A5h
15 Numeric keypad 6 0 0 99h F5h 65h
16 Numeric keypad 7 0 0 99h F5h E5h
17 Numeric keypad 8 0 0 99h F5h 15h
18 Numeric keypad 9 0 0 99h F5h 95h
19 Program 0 0 99h F5h 37h
21 Repeat 0 0 99h F5h 27h
22 Repeat A-B 0 0 99h F5h 17h
23 Random 0 0 99h F5h 7Fh
24 Clear 0 0 99h F5h A7h
25 Display 0 0 99h F5h C7h
26 Reverse 0 0 99h F5h 57h
27 Forward 0 0 99h F5h 97h
Page 72
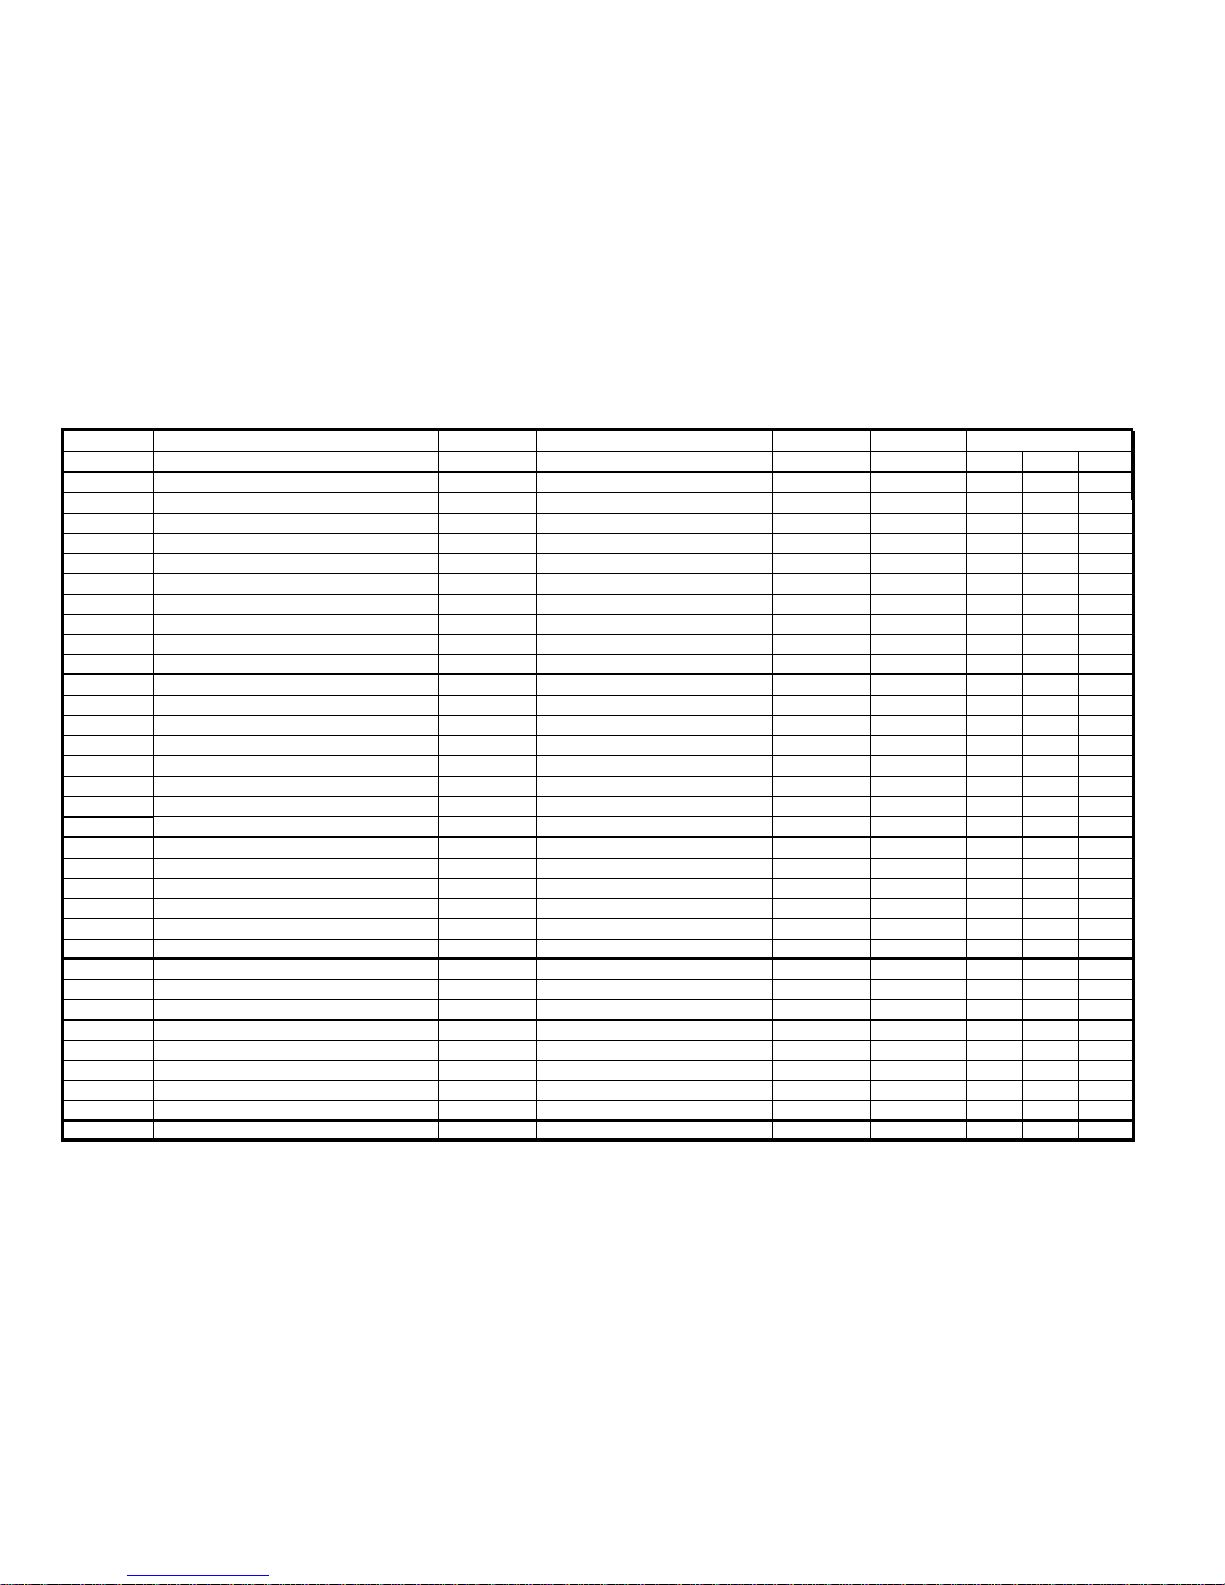
Command Command Description Argument 1 Argument 1 Description Argument 2 Argument 3 IR Code equivalent
COMMAND AND ALL ARGUMENTS (ie.1, 2 AND 3) ARE TO BE INPUT AS DECIMAL NUMBERS Byte 1 Byte 2 Byte 3
4 Commands pertaining to CDV/DVD only 0 Jog reverse 0 0 99h F5h 24h
From remote control only
1 Jog reverse medium (IR ONLY) 0 0 99h F5h A4h
From remote control o
nly
2 Jog reverse fast (IR ONLY) 0 0 99h F5h 64h
3 Jog forward 0 0 99h F5h 04h
From remote control only
4 Jog forward medium (IR ONLY) 0 0 99h F5h 84h
From remote control onl
y
5 Jog forward fast (IR ONLY) 0 0 99h F5h 44h
6 Shuttle reverse 0 0 99h F5h 3Eh
7 Shuttle forward 0 0 99h F5h 5Eh
8 Play Mode 0 0 99h F5h FEh
5 Commands pertaining to DVD only 1 Audio 0 0 99h F5h 7Dh
2 Subtitle 0 0 99h F5h 6Ch
3 Angle 0 0 99h F5h ADh
4 Top menu (title) 0 0 99h F5h 2Dh
5 Video adjust 0 0 99h F5h 0Ch
6 Surround 0 0 99h F5h 86h
7 DVD menu 0 0 99h F5h 62h
7 Miscellaneous commands 0 Dimmer 0 0 99h F5h 9Fh
1 Open/Close 0 0 99h F5h 6Dh
2 Toggle standby 0 0 99h F5h 3Dh
3 Put unit in standby 0 0 -- -- - 4 Take unit out of standby 0 0 -- -- --
8 Menu navigation commands 0 Up 0 0 99h 99h 4Fh
1 Down 0 0 99h F5h CFh
2 Right 0 0 99h F5h 26h
3 Left 0 0 99h F5h C6h
4 Return 0 0 99h F5h 2Fh
5 Enter 0 0 99h F5h F7h
6 Setup menu 0 0 99h F5h 0Dh
9 Poll status 0 Return status byte 0 0 -- -- --
Page 73
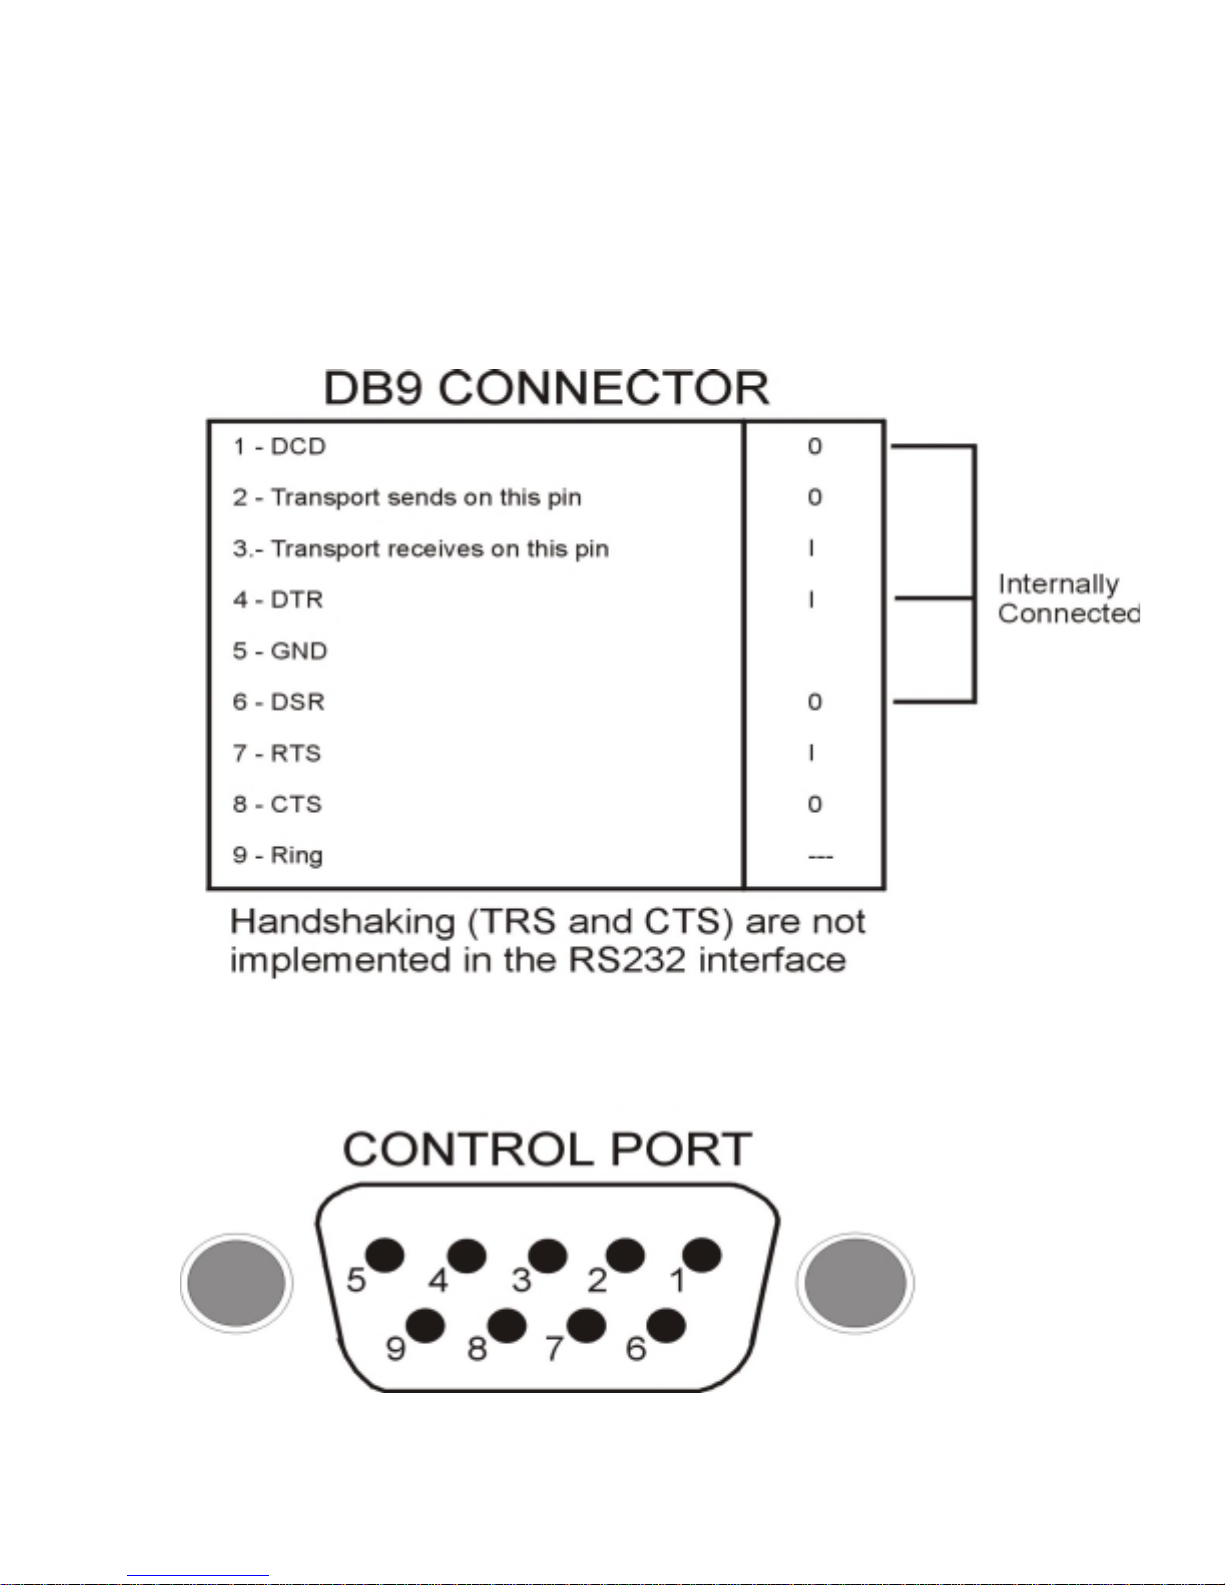
RS232 Hardware Connections
 Loading...