

Page 1
I N S T R U C T I O N S
V A R I PE T
Repetitive Positive D i s p l a c e m e n t Dispenser
Catalog Numbers
®
F37895-0010 Teflon
F37895-0040 Teflon
F37895-0100 Teflon
F37895-0300 Teflon
F37895-1010 Metal Luer-Lok
F37895-1040 Metal Luer-Lok
F37895-1100 Metal Luer-Lok
Tip 1ml
®
Tip 4ml
®
Tip 10ml
®
Tip 30ml
™
Tip 1ml
™
Tip 4ml
™
Tip 10ml
®
www.GlobalTestSupply.com
Page 2

CO N TE N TS
IMP ORTAN T NOTE . . . . . . . . . . . . . . . . . . . . . . . . . . . . . . . . . .2
PRI NCIPL E OF O PERAT ION . . . . . . . . . . . . . . . . . . . . . . . . . . . .2
SPE CIFIC AT ION S . . . . . . . . . . . . . . . . . . . . . . . . . . . . . . . . . . .2
OPE RAT ION . . . . . . . . . . . . . . . . . . . . . . . . . . . . . . . . . . . . . . .3
SET V OLU ME . . . . . . . . . . . . . . . . . . . . . . . . . . . . . . . . . . . . . .3
FIL L . . . . . . . . . . . . . . . . . . . . . . . . . . . . . . . . . . . . . . . . . . . . .3
ELI MINATE A IR . . . . . . . . . . . . . . . . . . . . . . . . . . . . . . . . . . . . .3
DIS PENSE . . . . . . . . . . . . . . . . . . . . . . . . . . . . . . . . . . . . . . . .3
CLE ANING . . . . . . . . . . . . . . . . . . . . . . . . . . . . . . . . . . . . . . . .3
AUT OCLAVIN G . . . . . . . . . . . . . . . . . . . . . . . . . . . . . . . . . . . . .3
ASS EMBLY AN D DI SA SSE MBLY . . . . . . . . . . . . . . . . . . . . . . . .4
VA RIPE T
VA RIPE T
VA RIPE T
CHE MICA L COMPATIB ILIT Y CH ART . . . . . . . . . . . . . . . . . . . . . 7, 8
Consult Chemical Resistance Chart before using your Varipet®to determine that it is compatable with the chemical to be dispensed.
All parts of the Teflon
®
Teflon
are chrome plated brass and stainless steel.
Each Varipet
of accuracy and reliability. There may be a small amount of ordinary tap water remaining in
the barrel as a result of the testing process.
®
TRO UBLES HOOT ING . . . . . . . . . . . . . . . . . . . . . . . . .4
®
1 TO 10m l DIAG RAM . . . . . . . . . . . . . . . . . . . . . . . . .5
®
30m l DIA GRAM . . . . . . . . . . . . . . . . . . . . . . . . . . . . .6
I M P OR TA N T NO T E
®
Tip Varipet® that come in contact with liquid are made of glass or
, and are suitable for use with most acids and solvents. Metal Luer-Lok™and cannula
®
is tested before it is shipped to assure that it performs to the highest standards
PRINCIPLE OF OPERATI ON
Varipet®is a variable volume pipettor for repetitive dispensing of preset amounts of liquid. Set
the desired volume, then depress the plunger for dispensing and release it for filling.
SPECIFI CATIONS
(Size)
Maximum Volume: 1ml 4ml 10ml 30ml
Graduation: 0.01ml 0.05ml 0.2ml 1ml
Repetitive accuracy ±%
at full scale: 0.75 0.5 0.5 1.0
at half scale: 1.0 0.75 0.75 1.5
at quarter scale: 1.5 1.0 1.0 1.0
Statistical accuracy within two standard deviations (97% of all readings fall within these limits).
2
www.GlobalTestSupply.com
Page 3

OPERATION
TO SET VOLUME
1. Rotate knob clockwise to decrease volume; counter-clockwise to increase volume.
2. Line up bottom edge of piston with the appropriate graduation on the glass barrel.
3. Dispense set volume in graduated beaker or cylinder. Check and readjust if necessary.
TO FILL
1. Depress plunger fully.
2. Insert tip of Varipet
3. Release plunger.
The Varipet
®
is now full and ready for dispensing.
®
in the liquid.
TO ELIMINATE AIR
Should air bubbles appear around piston, the following corrective action should be taken:
1. Depress plunger quickly and forcefully several times using short strokes
while tip is in liquid.
2. Turn pipette tip end up and tap glass barrel until air bubbles rise to the top.
Then slowly depress plunger until air is expelled.
3. Make sure glass barrel and plunger are clean.
TO DISPENSE
Depress plunger fully. Insert tip of Varipet®into the liquid to be transferred before releasing
plunger. This method should prevent air from entering the system.
CLEA NING
1. Empty Varipet®by removing tip from the liquid and pressing knob a few times.
2. Insert tip in cleaning solution. Depress plunger several times to fill and then empty unit.
3. Use only chemicals for this purpose that are compatible with the specific model.
For general cleaning, use detergent (such as Bel-Art’s Aquet
F17094-0030) or chromic-sulphuric acid solution (made with Bel-Art’s
Chromerge
4. Harsh corrosive chemicals should not be left in pipette for extended periods of time.
®
, Cat. No. F17089-0000) for more stubborn deposits.
Clean and rinse it immediately after each use.
®
, Cat. No.
AUTO CLAVI NG
All parts of Varipet®are completely autoclavable. However: it is necessary to sepa-
rate plunger assembly from glass barrel for autoclaving. Follow standard autoclaving practices.
www.GlobalTestSupply.com
3
Page 4

ASSE MBLY AND DISA SSEMBLY
TO DISASSEMBLE (1, 4, 10ml MODELS)
Hold plastic syringe adapter (93790-1109 1ml) (93790-0106, 4ml) or glass barrel (10ml) in one
hand and plastic body in the other hand. Twist a quarter turn in either direction, then pull the
upper piston assembly out of glass barrel.
TO REASSEMBLE (1, 4, 10ml MODELS)
Insert piston into glass barrel tilted at an angle so as not to damage piston edges. Once piston is inside barrel it can be pushed straight in to complete assembly. While rotating plastic
adapter (93790-1109, 1ml) (93790-0106, 4ml) or glass barrel (10ml) push both parts together
until the adapter or barrel flange disappears into the plastic body; then rotate a quarter turn
in either
direction to lock. A rotating motion of the glass barrel in the locked position will not affect the
operation of the Varipet
®
.
TO DISASSEMBLE 30ml MODEL
Remove flange screws holding plunger assembly and glass barrel together. Separate plunger
assembly from glass barrel by pulling them apart.
TO REASSEMBLE 30ml MODEL
Insert piston into glass barrel tilted at an angle so as not to damage piston edges. Once piston is inside barrel, it can be pushed straight in to complete assembly. Line up screw holes in
flange and reinsert screws. Tighten until snug. Do not overtighten.
®
VARIPET
TROU BLE SHOOTING
KNOB DIFFICULT TO TURN WHEN SETTING VOLUME
No lubrication on adjustment nut (Cat. No. 93790-1103 or 93790-0139).
Remove upper piston assembly from glass barrel. Turn knob clockwise until nut appears.
Lubricate nut with petroleum jelly and reassemble.
TO CORRECT PISTON LEAKS
When liquid passes behind the Teflon®piston it is because the Teflon®plunger and the glass
barrel are no longer forming a proper seal.
FOR 1ml MODELS, F37895-0010 & F37895-1010
1. Disassemble the unit by removing the plunger assembly from the glass barrel.
2. Insert a blunt object like a ballpoint pen in the front face groove of the plunger.
3. Gently force the thin Teflon
circumference. If the Teflon®edge is intact and has no nicks, this simple operation will
restore the sealing ability of the plunger. If not, replace the piston and pin (#93790-
1120).
®
edge outward by circling the pen around the entire
FOR ALL OTHER MODELS
1. Disassemble the unit by removing the plunger assembly from the glass barrel.
2. Closely inspect the plunger; if there is a nick in the plunger, the piston and rod should
be replaced. See diagrams for replacement #.
4
www.GlobalTestSupply.com
Page 5
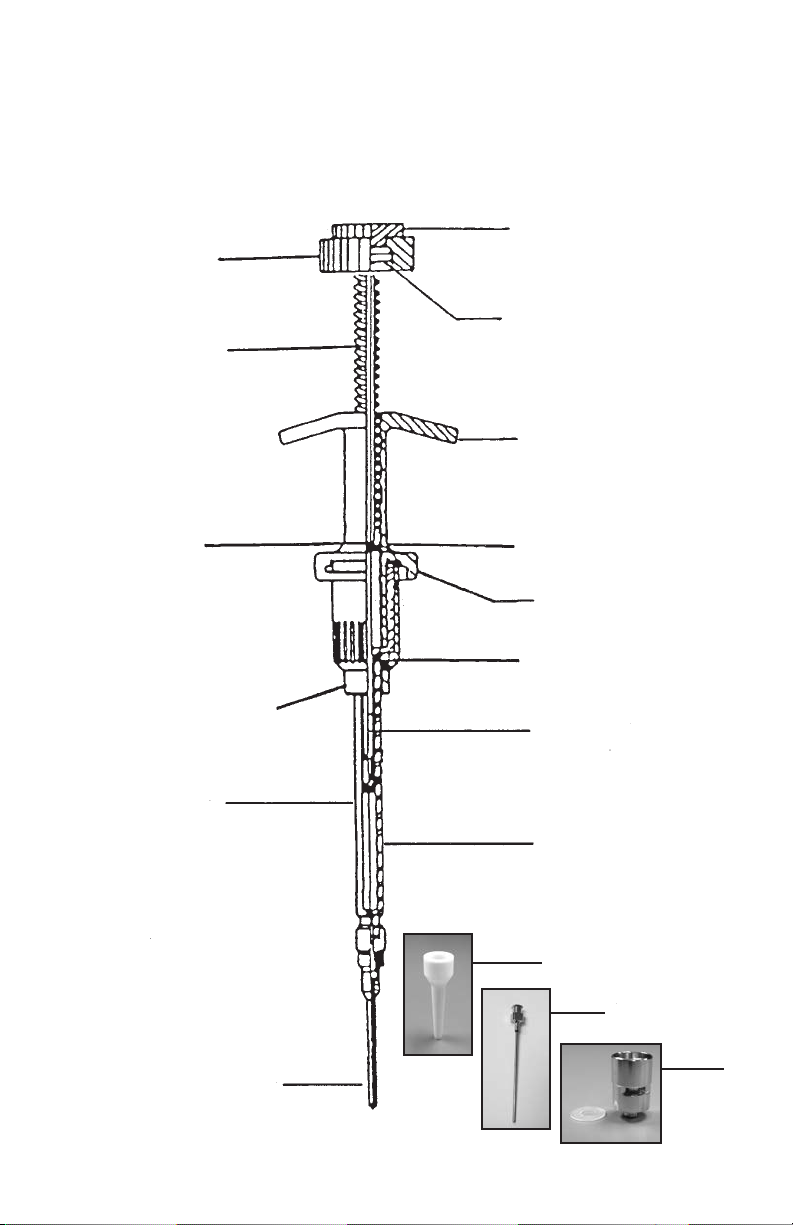
VA RI PE T®D I A G R AM
1 m l, 4 m l, 1 0 ml Si z es
Knob
93790-1131
Main Spring
93790-1128
Adjustment
Nut
93790-1103
1ml Syringe
Adapter
93790-1109 or
4ml Syringe
Adapter
93790-0106
Syringe Barrel
or Teflon
1ml w/Luer-lok™93790-1102
or
1ml w/Teflon®Tip 93789-5001
4ml w/Luer-lok™93790-0104
or
4ml w/Teflon
10ml w/Luer-lok™93790-0110
or
10ml w/Teflon®Tip 93789-5100
®
Tip
®
Tip 93795-0040
Thumb Knob
93790-1130
Bushings
93790-1132
Upper Body
93790-1137
Friction O Ring
93790-1105
E-Ring pk/2
93790-1126
Syringe Barrel O
Ring
93790-1104
Piston & Rod
1ml 93790-1121
4ml 93790-0117
10ml 93790-0120
Piston & Pin
1ml 93790-1120
4ml 93790-0116
10ml 93790-0119
Tef l o n®Tip
Cannula
Cannula or Teflon
Teflon®Tip 93789-5003
16 Ga Cannula 1ml & 4ml 937901116
13 Ga Cannula 10ml 93790-0111
®
Tip
www.GlobalTestSupply.com
Luer-Lok
™
5
Page 6
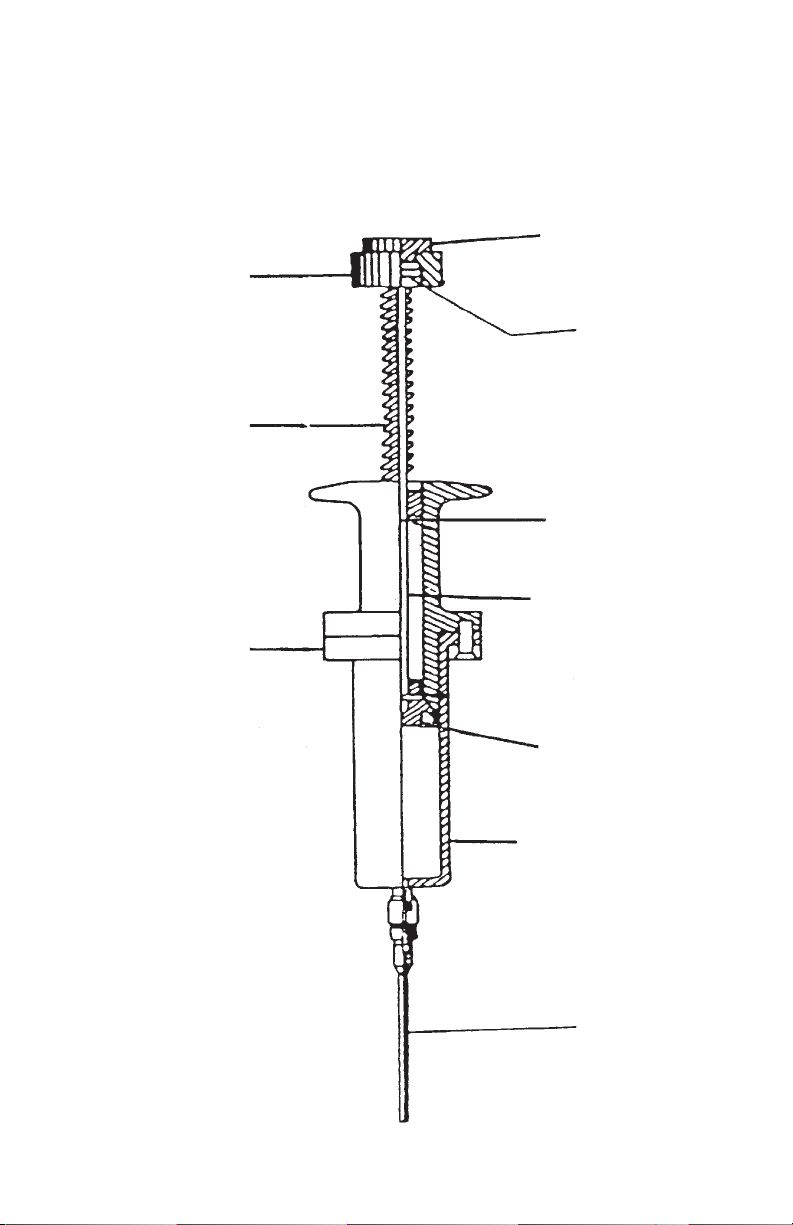
VA RI PE T®D I A G R AM
Knob
93790-1131
Main Spring
93790-0145
Clamp Flange
93790-0136
3 0 ml Si z e
Thumb Knob
93790-1130
Bushing
93790-0140
Adjustment
Nut
93790-0139
Piston & Rod
Assembly
93790-0131
Piston & Pin
93790-0144
Syringe Barrel
30ml Syringe
Only
93790-0143
w/ Teflon
93789-5030
6
®
Tip
®
Teflon
93789-5032
Tip
www.GlobalTestSupply.com
Page 7
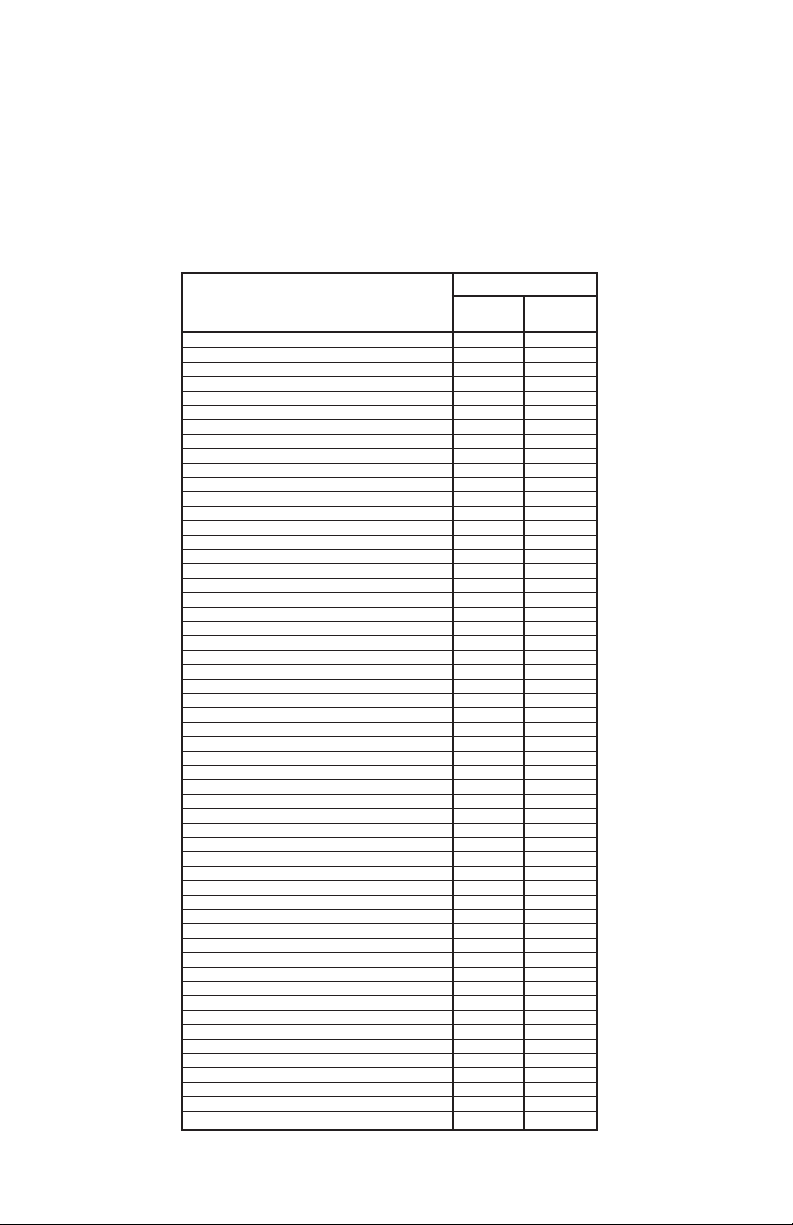
CHEMICAL COMPATIBILITY CHART
CONSULT THIS CHART TO DETERMINE THE VARIPET
®
SUITED TO YOUR REQUIREMENTS
This chart contains information gained from laboratory tests and should be used as
a guide only. For applications not shown, consult our Engineering Department.
Harsh corrosive chemicals should not be left in Varipet
®
for extended periods of time.
Clean Varipet®immediately after each use
Chemical
ACETIC ACID (5%) YES
ACETIC ACID (60%) YES
ACETIC ACID (Glacier) YES
ACETIC ANHYDRIDE YES YES
ACETONE YES
ALCOHOLS in general YES YES
ALUMINUM CHLORIDE SOLUTIONS YES YES
ALUMINUM SULFATE SOLUTIONS YES YES
AMMONIA YES YES
AMMONIUM CHLORIDE SOLUTIONS YES YES
AMMONIUM HYDROXIDE (58%) YES YES
AMMONIUM PERSULFATE (Set'd) YES
AMMONIUM PHOSPHATE YES
AMMONIUM SULFIDE YES
ANIUNE YES
BARIUM HYDROXIDE SOLUTIONS YES YES
BENZENE YES
BORIC ACID YES YES
BUTANOL YES YES
BUTYL ACETATE YES
CADMIUM CHLORIDE YES
CALCIUM CHLORIDE YES YES
CALCIUM HYPOCHLORITE YES
CARBON TETRACHLORIDE YES
CHLOROFORM YES
CHLOROACETIC ACID YES
CHROMIC ACID (10%) YES
CHROMIC ACID (50%) YES
CITRIC ACID (10%) YES YES
COPPER CHLORIDE SOLUTIONS YES
COPPER SULFATE SOLUTIONS YES YES
CELLOSOLVE YES YES
CRESOL YES
CYCLOHEXANONE YES
DIACETONE ALCOHOL YES
DIBUTYL PHTHALATE YES
DIBENZYL SEBACATE YES
DIISOBUTYL KETONE YES
ESTERS in general YES
ETHERS in general YES
ETHYL ACETATE YES
ETHYL BENZENE YES
ETHYLENE GLYCOL YES
ETHYL ETHER YES
FATTY ACIDS YES
FERRIC CHLORIDE SOLUTIONS YES
FERRIC NITRATE SOLUTIONS YES
FERRIC SULFATE YES
FORMALDEHYDE (40%) YES YES
FORMIC ACID (100%) YES YES
FUEL OIL YES YES
GASOLINE YES
GLUCOSE YES YES
GLYCERINE YES YES
HEPTANE YES
Compatability
Luer-Lok
Varipet
™
Teflon®Tip
®
Varipet
®
Chart continued on next page
7
www.GlobalTestSupply.com
Page 8
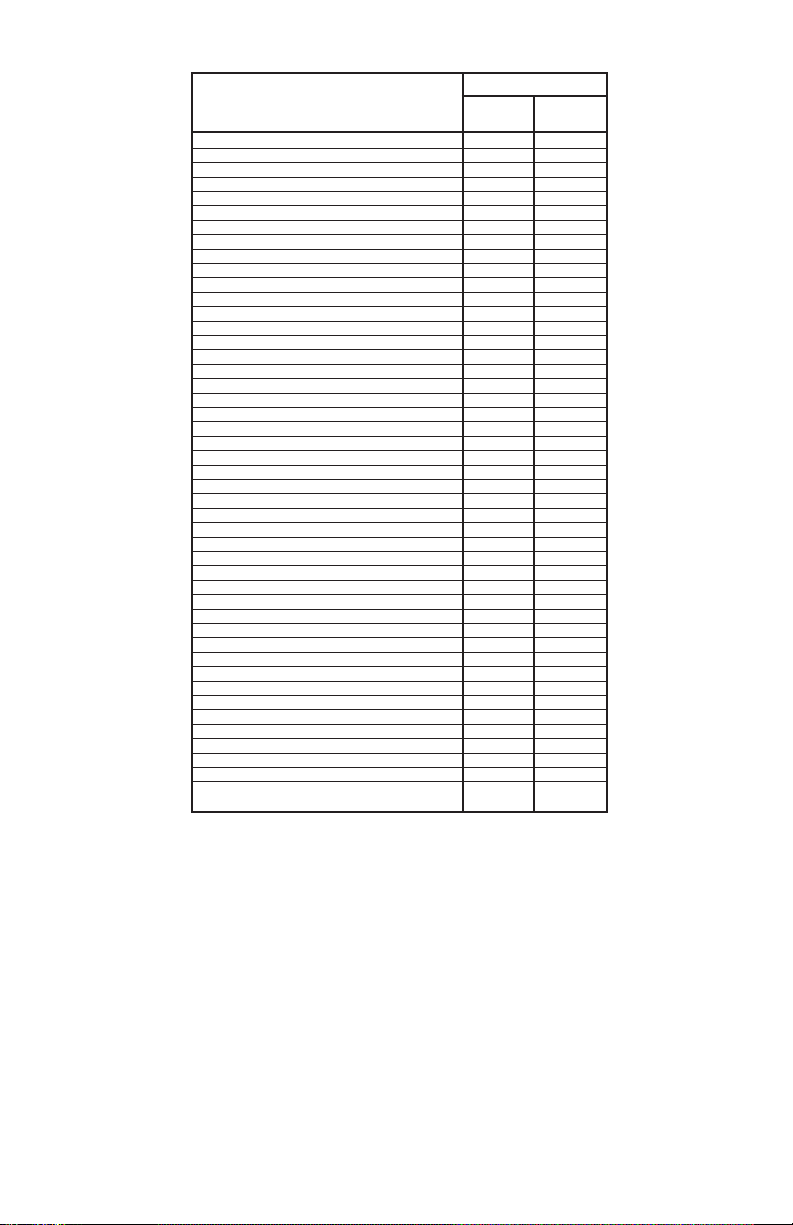
Chemical
N-HEXANE YES
HYRAULIC OIL YES YES
HYDROCHLORIC ACID (10%) YES
HYDROCHLORIC ACID (37.5%) YES
HYDROGEN PEROXIDE YES
ISOOCTANE YES YES
ISOPENTYL ACETATE YES
KEROSENE YES YES
KETONES in general YES
LACTIC ACID (85%) YES YES
MAGNESIUM CHLORIDE YES YES
METHYL ALCOHOL YES YES
METHYL BENZOATE YES
METHYL ETHYL KETONE YES
METHYL ISOBUTYL KETONE YES
NITRIC ACID (10%) YES
NITRIC ACID (50%) YES
OLEIC ACID YES
OXALIC ACID YES
PALMITIC ACID YES YES
PERCHLORIC ACID (68%) YES
PHOSPHORIC ACID (75%) YES YES
PHOTOGRAPHIC DEVELOPERS YES
PHOTOGRAPHIC FIXING SOLUTIONS YES
POTASSIUM CHLORATE YES YES
POTASSIUM HYDROXIDE (9%) YES YES
POTASSIUM HYDROXIDE (conc.) YES YES
POTASSIUM PERMANGANATE YES YES
SAE 20 OIL YES YES
SODIUM HYDROXIDE (conc.) YES
SODIUM HYPOCHLORITE YES
STANNOUS CHLORIDE YES YES
STEARIC ACID YES YES
SULFURIC ACID (10%) YES
SULFURIC ACID (50%) YES
SULFURIC ACID (75%) YES
TANNIC ACID YES YES
TARTARIC ACID YES YES
TOLUENE YES
TRICHLOROACETIC ACID YES
TRICHLOROETHYLENE YES
TRICRESYL PHOSPHATE YES YES
TRIETHANOLAMINE YES YES
TURPENTINE YES YES
XYLOL (Xylene) YES
ZINC CHLORIDE YES YES
Luer-Lok
Varipet
™
Teflon®Tip
®
Varipet
Compatability
®
CHEMICAL COMPATIBILITY CHART
CONSULT THIS CHART TO DETERMINE THE VARIPET
SUITED TO YOUR REQUIREMENTS
This chart con tai ns information gained from laboratory t est s and sh oul d be used as
a guide only. For applicat ion s not sh own , consult our Engineering Department.
Harsh corrosive c hem ica ls should not be left in Varipet®for extended p eri ods of t ime.
Clean Varipet
937895009 07/08
Scienceware
registered TM of BD • Bel-Art Products assumes no obligation or liability for any advice furnished by it, or for results obtained with respect
to these products.
All such advice is given and accepted at the buyer’s risk.
©2008 Bel-Art Products. All Rights Reserved.
®
, Varipet®are registered TMs of Bel-Art Products • Teflon®is a registered TM of E.I. duPont de Nemours & Co. • Luer-Lok™is a
®
immediately after ea ch use.
8
www.GlobalTestSupply.com
®
 Loading...