

Page 1
Dryer
User Manual
Suszarka
Instrukcja obsługi
MDS 8412RX
DS 8412GX
EN PL
2960311863_EN/170818.1153
Page 2
Please read this user manual first!
Dear Customer,
Thank you for prefering a Beko product.
We hope that your product which has been
manufactured with high quality and technology
will give you the best results. We advise you
to read through this manual and the other
accompanying documentation carefully
before using your product and keep it for
future reference. If you transfer the product
to someone else, give its manual as well. Pay
attention to all details and warnings specified
in the user manual and follow the instructions
given therein.
Use this user manual for the model indicated
on the cover page.
• Read the instructions.
Explanation of symbols
Throughout this user manual the following
symbols are used:
WARNING!
• Warning against scalding hazard.
NOTE
C
• Important information or useful hints about
usage.
Packaging materials of the product
are manufactured from recyclable
materials in accordance with our
National Environment Regulations.
Do not dispose of the packaging wastes with
the domestic waste or other wastes, discard
them to the dedicated collection points
designated by the local authorities.
B
DANGER!
• Warning against electric shock.
DANGER!
• Warning against fire hazard.
WARNING!
A
• Warning for hazardous situations with regard
to life and property.
WARNING!
• Warning against hot surfaces.
This product was manufactured using the latest technology in environmentally friendly conditions.
Page 3
1 Important instructions for safety and environment
NOTE
C
• This section contains safety
instructions that will help protect
from risk of personal injury or
property damage. Failure to follow
these instructions shall void any
warranty.
1.1 General safety
WARNING!
A
The dryer can be used by children
at and above 8 years old and by
persons whose physical, sensory
or mental capabilities were not fully
developed or who lack experience
and knowledge provided that they
are supervised or trained on the
safe usage of the product and the
risks it brings out. Children should
not play with the product. Cleaning
and maintenance works should not
be performed by children unless
they are supervised by someone.
Children of less than 3 years should
be kept away unless continously
supervised.
• Adjustable feet should not be
removed. The gap between the
dryer and the floor should not be
reduced with materials such as
carpet, wood and tape. This will
cause problems with the dryer.
A
WARNING!
Always have the installation and
repairing procedures carried
out by the Authorized Service.
Manufacturer shall not be held
liable for damages that may arise
from procedures carried out by
unauthorized persons.
• Never wash the dryer by spraying
or pouring water onto it! There is
the risk of electric shock!
For the products with a steam
function:
WARNING!
A
• Use only distilled water or water
condensed in the water tank of the
machine in steam programs. Do
not use mains water or additives.
When using condensed water in the
water tank, it should be filtered and
cleared of fibres.
• Do not open the door when steam
programs are running. Hot water
may be expelled.
• Before putting laundry in a steam
program, stains on it should be
removed.
• You may only put laundry that is not
dirty or stained but permeated with
unpleasant odour in steam (odour
removal) program.
• Do not use any dry cleaning sets
or additional materials in a steam
program or in any program.
Dryer / User Manual
3
Page 4
1.1.1 Electrical safety
DANGER!
B
• Electrical safety instructions
should be followed while electrical
connection is made during the
installation.
• The appliance must not be
supplied through an external
switching device, such as a timer,or
connected to a circuit that is
regularly switched on and off by
utility.
• Connect the dryer to a grounded
outlet protected by a fuse at the
value specified on the type label.
Have the grounding installation
performed by a qualified electrician.
Our company shall not be liable for
any damages that will arise when
the dryer is used without grounding
in accordance with the local
regulations.
• The voltage and allowed fuse
protection is stated on the type label
plate.
• The voltage specified on the type
label must be equal to your mains
voltage.
• Unplug the dryer when it is not in
use.
• Unplug the dryer from the mains
during installation, maintenance,
cleaning and repair works.
• Do not touch the plug with wet
hands! Never unplug by pulling
on the cable, always pull out by
grabbing the plug.
B
DANGER!
• Do not use extension cords, multiplugs or adaptors to connect the
dryer to power supply in order to
decrease the risk of fire and electric
shock.
• Power cable plug must be easily
accessible after installation.
• Damaged mains cable should be
changed notifying the Authorized
Service.
• If the dryer is faulty, it must not be
operated unless it is repaired by an
authorized service agent! There is
the risk of electric shock!
1.1.2 Product safety
DANGER!
• Superheating of the clothes inside
of the dryer can occur if you cancel
the programme or in the event of
a power failure whilst the dryer is
running, this concentration of heat
can cause self-combustion and fire
so always activate the ventilation
programme to cool down or quickly
remove all laundry from the dryer in
order to hang them up and dissipate
the heat.
4
Dryer / User Manual
Page 5
DANGER!
DANGER!
Points to be taken into
consideration for fire hazard:
Below specified laundry or items
must not be dried in the dryer
considering fire hazard.
• Unwashed laundry items
• Items soiled with oil, acetone,
alcohol, fuel oil, kerosene, stain
removers, turpentine, paraffin or
paraffin removers must be washed
in hot water with plenty of detergent
before being dried in the dryer.
For this reason especially the items
containing the above specified
stains must be washed very well,
to do this use adequate detergent
and choose a high washing
temperature.
Below specified laundry or
items must not be dried in the
dryer due to the fire hazard:
• Garments or pillows bolstered with
rubber foam (latex foam), shower
bonnets, water resistant textiles,
materials with rubber reinforcement
and rubber foam pads.
Clothing cleaned with industrial
chemicals.
Items such as lighter, match,
coins, metal parts, needle etc. may
damage the drum set or may lead
to functional problems. Therefore
check all the laundry that you will
load into your dryer.
Never stop your dryer before the
programme completes. If you must
do this, remove all laundry quickly
and lay them out to dissipate the
heat.
• Clothes that are washed
inadequately may ignite on their
own and even may ignite after
drying ends.
• You must provide enough ventilation
in order to prevent gases exiting
from devices operating with other
types of fuels including the naked
flame from accumulating in the
room due to the back fire effect.
WARNING!
A
• Underwear that contains metal
reinforcements should not be dried
in the dryer. Dryer may be damaged
if metal reinforcements come loose
and break off during drying.
NOTE
C
• Use softeners and similar products
in accordance with the instructions
of their manufacturers.
Always clean the lint filter before or
after each loading. Never operate
the dryer without the lint filter
installed.
Dryer / User Manual
5
Page 6
A
WARNING!
• Never attempt to repair the dryer
by yourself. Do not perform any
repair or replacement procedures
on the product even if you know
or have the ability to perform the
required procedure unless it is
clearly suggested in the operating
instructions or the published service
manual. Otherwise, you will be
putting your life and others’ lives in
danger.
• There must not be a lockable, sliding
or hinged door that may block the
opening of the loading door in the
place where your dryer is to be
installed.
• Install your dryer at places suitable
for home use. (Bathroom, closed
balcony, garage etc.)
• Make sure that pets do not enter the
dryer. Check the inside of the dryer
before operating it.
• Do not lean on the loading door of
your dryer when it is open, otherwise
it may fall over.
• The lint must not be allowed to
accumulate around the tumble dryer
• The tumble dryer is not to be used if
industrial chemicals have been used
for cleaning.
• Fabric softeners, or similar products.
should be used as specified by the
fabric softener instructions.
• Exhaust air must not be discharged
into a flue which is used for
exhausting fumes from appliances
burning gas or other fuels.
1.2 Mounting over a washing machine
• A fixing device should be used between
the two machines when installing the
dryer above a washing machine. The
fitting device must be installed by the
authorized service agent.
• Total weight of the washing machine
and the dryer -with full load- when
they are placed on top of each other
reaches to approx. 180 kilograms. Place
the products on a solid floor that has
sufficient load carrying capacity!
WARNING!
A
• Washing machine cannot be placed on
the dryer. Pay attention to the above
warnings during the installation on your
washing machine.
Installation Table for Washing Machine and Dryer
Washing Machine Depth
Dryer
Depth
62 cm
60 cm
54 cm
50 cm
54 cm Can be installed
60 cm Can be installed
Installation Table for Washing Machine and Dryer
Washing Machine Depth
Dryer
Depth
45 cm
54 cm Can be installed
60 cm Can be installed
1.3 Intended use
• Dryer has been designed for domestic
use. It is not suitable for commercial
use and it must not be used out of its
intended use.
• Use the dryer only for drying laundry that
are marked accordingly.
• The manufacturer waives any
responsibility arisen from incorrect usage
or transportation.
• The service life of the dryer that you
purchased is 10 years. During this period,
original spare parts will be available to
operate the dryer properly.
49 cm
40 cm
Cannot be
installed
6
Dryer / User Manual
Page 7
1.4 Child safety
• Packaging materials are dangerous for
the children. Keep packaging materials
away from children.
• Electrical products are dangerous for the
children. Keep children away from the
product when it is operating. Do not let
them tamper with the dryer. Use the childproof lock in order to prevent the children
to tamper with the dryer.
NOTE
C
Child-proof lock is on the control panel.
(See Child lock)
• Keep loading door closed even when the
dryer is not in use.
1.5 Compliance with the WEEE
regulation and disposing of the waste
product
This product complies with EU
WEEE Directive (2012/19/EU). This
product bears a classification
symbol for waste electrical and
electronic equipment (WEEE).
This product has been
manufactured with high quality
parts and materials which can be reused and
are suitable for recycling. Do not dispose of
the waste product with normal domestic and
other wastes at the end of its service life. Take
it to the collection center for the recycling of
electrical and electronic equipment. Please
consult your local authorities to learn about
these collection centers.
1.6 Compliance with RoHS Directive:
The product you have purchased complies
with EU RoHS Directive (2011/65/EU). It does
not contain harmful and prohibited materials
specified in the Directive.
1.7 Package information
Packaging materials of the product are
manufactured from recyclable materials in
accordance with our National Environment
Regulations. Do not dispose of the packaging
materials together with the domestic or other
wastes. Take them to the packaging material
collection points designated by the local
authorities.
1.8 Technical Specifications
EN
Height (Min. / Max.) 84,6 cm / 86,6 cm*
Width 59,7 cm
Depth 56,8 cm
Capacity (max.) 8 kg**
Net weight (± 4 kg) 44 kg
Width
See type label***Voltage
Rated power input
* Min. height: Height with adjustable feet are
closed.
Max. height: Height with adjustable feet are
opened maximum.
** Dry laundry weight before washing.
*** Type label is located behind the loading
door.
NOTE
C
• Technical specifications of the dryer are
subject to specification without notice to
improve the quality of the product.
• Figures in this manual are schematic and
may not match the product exactly.
• Values stated on markers on the dryer
or in the other published documentation
accompanying with the dryer are
obtained in laboratory in accordance with
the relevant standards. Depending on
operational and environmental conditions
of the dryer, these values may vary.
Dryer / User Manual
7
Page 8
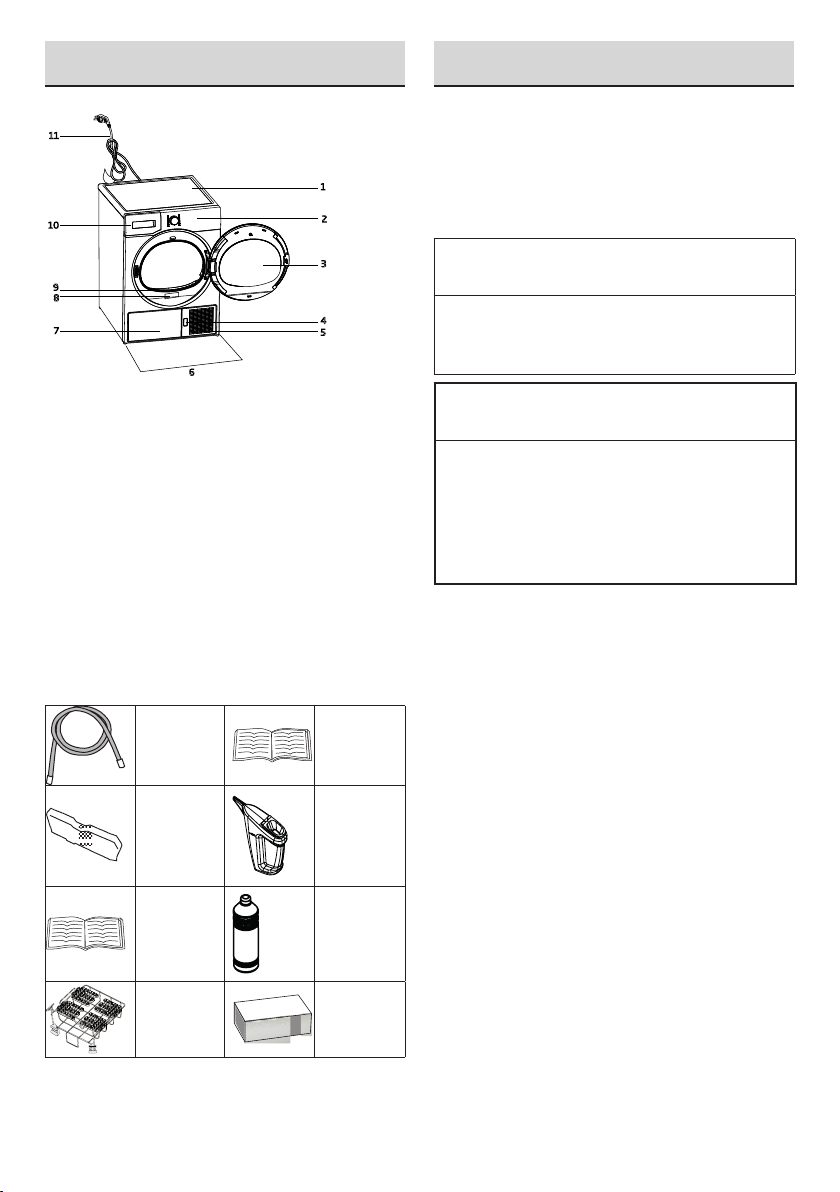
2 Your Dryer
11
10
1
2
3
4
5
6
7
8
9
3 Installation
2.1 Overview
1. Top panel
2. Control panel
3. Loading door
4. Kick plate opening button
5. Ventilation grids
6. Adjustable legs
7. In models where the tank is placed below,
the water tank is inside the toe board
8. Type label
9. Lint filter
10. Water tank drawer (in models where the tank
is placed above)
11. Power cord
2.2 Package Contents
1. Water
drain
hose *
2. Filter
drawer
spare
sponge*
3. User
*It can be supplied with your machine depending
on its model.
8
Manual
4. Drying
basket*
5. Drying
basket
user
manual*
6. Water
Filling
Container*
7. Pure
Water*
8.
Fragrance
Capsules
Group*
Before the calling the nearest Authorized
Service for the installation of the dryer, ensure
that electrical installation and water drain is
appropriate referring to the user’s manual.
If they are not suitable, contact a qualified
electrician and technician to make necessary
arrangements.
NOTE
C
• Preparation of the dryer’s location
as well as the electrical and waste
water installations is under customer’s
responsibility.
WARNING!
A
• Prior to installation, visually check if the
dryer has any defects on it. If the drier
is damaged, do not have it installed.
Damaged products cause risks for your
safety.
• Let your dryer wait for 12 hours before
starting to use it.
3.1 Appropriate installation location
Install the dryer on a stable and level surface.
Dryer is heavy. Do not move it by yourself.
• Operate your dryer in a well ventilated,
dust-free environment.
• The gap between the dryer and the
surface should not be reduced by the
materials such as carpet, wood and tape.
• Do not cover the ventilation grills of the
dryer.
• There must not be a lockable, sliding or
hinged door that may block the opening
of the loading door in the place where
your dryer is to be installed.
• Once the dryer is installed, it should stay
at the same place where its connections
have been made. When installing the
dryer, make sure that its rear wall does
not touch anywhere (tap, socket, etc.).
• Place the dryer at least 1 cm away from
the edges of other furniture.
• Your dryer can be operated at
temperatures between +5°C and +35°C.
If the operating conditions fall outside
of this range, operation of the dryer will
Dryer / User Manual
Page 9
be adversely affected and it can get
damaged.
• The rear surface of the tumble dryer shall
be placed against a wall.
DANGER!
B
Do not place the dryer on the power cable.
3.2 Removing the transportation
safety assembly
NOTE
C
• Water drain hose should be attached to a
height of maximum 80 cm.
• Make sure that the water drain hose is not
stepped on and it is not folded between
the drain and the machine.
• If there is an accessories pack supplied
with your product, please see the detailed
description.
3.4 Adjusting the feet
A
WARNING!
• Remove the
transportation
safety assembly
before using the
dryer for the first
time.
• If the door swing
side of your
appliance can
be modified, see
the reversible
door mounting
instructions.
3.3 Connecting to the drain
You can directly drain accumulated water
through the water drain hose supplied with
the product instead of periodically draining the
water collected in the water tank.
Connecting the water drain hose
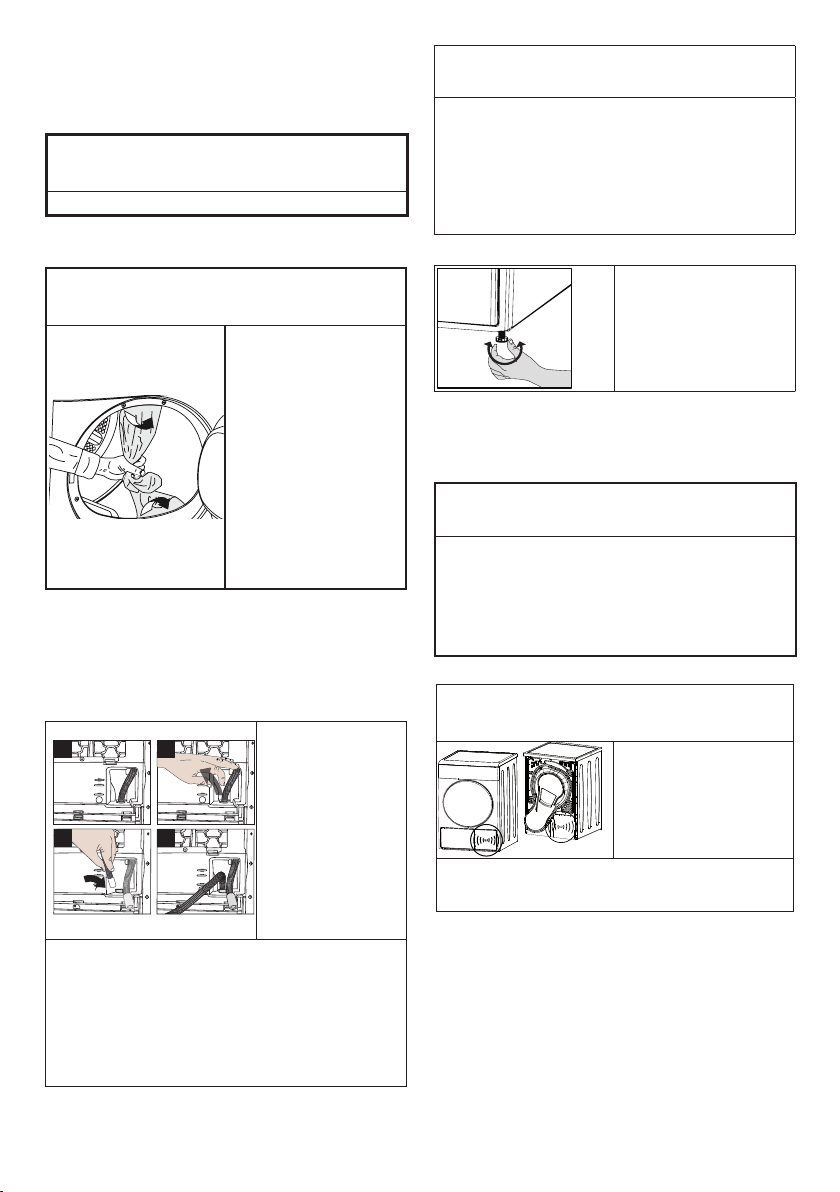
1
3 4
2
3 Connect one end of the drain hose
supplied with the dryer to the connection
point from where you removed the hose of
the product in previous step.
4 Connect the other end of the drain hose
directly to the wastewater drain or to the
washbasin.
1-2 Pull hose at
the behind of
the dryer by
hand in order
to disconnect
it from where it
is connected.
Do not use
any tools to
remove the
hose.
• Turn the feet to
left or right until
the dryer stands
level and firmly.
3.5 Transportation of the dryer
Drain all water that has remained in the dryer.
If direct water drain connection is made, then
remove the hose connections.
WARNING!
A
• We recommend carrying the dryer in
upright position. If it is not possible to
carry the machine in the upright position,
we recommend carrying it by tilting
towards the right side when looked from
the front.
3.6 Warnings about sounds
NOTE
C
• Water collected during operation is
pumped to water tank. It is normal to
hear pumping noise during this process.
3.7 Changing the illumination lamp
In case an illumination lamp is used in your
laundry dryer.To change the Bulb/LED used
for illumination of your tumble dryer, call your
Authorized Service.The lamp(s) used in this
appliance is not suitable for household room
illumination. The intended purpose of this
lamp is to assist the user to place laundry in
the tumble dryer in a comfortable way. The
lamps used in this appliance have to withstand
extreme physical conditions such as vibrations
and temperatures above 50 °C
• It is normal to
hear a metallic
noise from the
compressor
sometimes during
operation.
Dryer / User Manual
9
Page 10
4 Preparation
4.1 Laundry suitable for drying in the
dryer
Always obey the instructions given on the
garment tags. Dry only the laundry having a
label stating that they are suitable for drying
in a dryer and make sure that you select the
appropriate programme.
Do not dry with
dryer
4.2 Laundry not suitable for drying in
the dryer
C
• Delicate embroidered fabrics, woollen,
silk garments, delicate and valuable
fabrics, airtight items and tulle curtains
are not suitable for machine drying.
4.3 Preparing laundry for drying
• Laundry may be tangled with each other
after washing. Separate the laundry items
before placing them into the dryer.
• Dry garments having metal accessories
such as zippers, inside out.
• Fasten the zippers, hooks and buckles
and button sheets.
4.4 Things to be done for energy
saving
• Spin your laundry at the highest speed
possible when washing them. Thus,
the drying time is shortened and energy
consumption is reduced.
• Sort out the laundry depending on their
type and thickness. Dry the same type of
laundry together. For example thin kitchen
towels and tableclothes dries earlier than
thick bathroom towels.
• Follow the instructions in the user manual
for programme selection.
• Do not open the loading door of the
machine during drying unless necessary.
If you must open the loading door, do not
keep it open for a long time.
temperature
NOTE
At high
At medium
temperature
At low
temperature
• Do not add wet laundry while the dryer is
in operation
• For models with a condenser unit: clean
the condenser once in a month or after
every 30 operations regularly. .
• Clean the filter periodically when there
is visible air collection on it or when the
symbol lights up, if there is a filter drawer
cleaning warning symbol available.
• For models with flue unit: comply with the
flue connection instructions and clean the
flue.
• During the drying process, air the room
well where your tumble dryer is operating.
4.5 Correct load capacity
Follow the instructions
in the “Programme
selection and
consumption table”.
Do not load more than
the capacity values
stated in the table.
Following weights are given as examples.
Laundry
Cotton
quilt covers
(double)
Cotton quilt
covers (single)
Bed sheets
(double)
Bed sheets
(single)
Large
tablecloths
Small
tablecloths
Tea napkins 100
Bath towels 700 T-Shirts 125
Hand towels 350
Approximate
weights (g)*
1500 Blouses 150
1000 Cotton shirts 300
500 Shirts 250
350
700 Dresses 350
250 Jeans 700
Laundry
Cotton
dresses
Handkerchiefs
(10 pieces)
*Dry laundry weight before washing.
Approximate
weights (g)*
500
100
10
Dryer / User Manual
Page 11
5 Operating the product
1
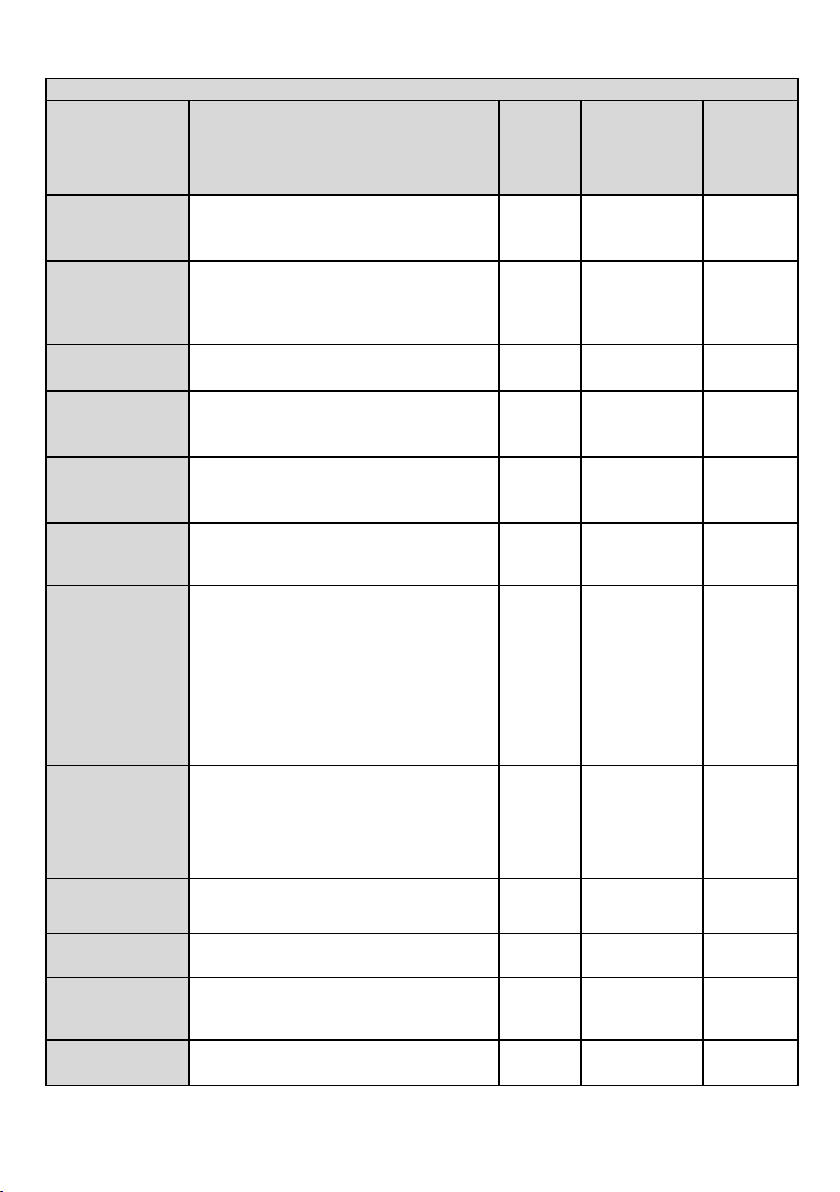
5.1 Control Panel
1. On/Off/Program selection button
2. Start/Stand-by button
3. End Time button
5.2 Symbols
Filter drawer /
Tank
full
End/anti-
creasing
Filter
cleaning
On/O
Heat exchanger
cleaning
Timer
Delay
Child-proof
lock
Drying
Mute
Cupboard
Dry
Volume up
Iron Dry
Express
14’
Jeans
BabyProtect
5.3. Preparation of drying machine
• Plug the drying machine.
• Open the loading door.
• Place the laundry to the drying machine
without jamming them.
• Push and close the loading door.
WARNING!
A
• Ensure that no
laundry is jammed
to the loading
door.
Delicates
3
4
5
2
4. Drying Level Button
5. Buzzer volume/Time programs selection
button
Shirts
Extra dry
Sport
Cupboard
dry plus
Freshen Up
Start
pause
cancel
Cottons
Synthetics
Mix
Drying Rack/
TimeDry
Daily
Express
30’
Exspress
Wool Refresh
Shirts 30
Select the desired program using the On/Off/
Program selection knob, the machine will turn
on.
NOTE
C
• Selecting a program using the On/Off/
Program selection button does not mean
that the program started. Press the Start
/ Stand-by button to start the program.
Dryer / User Manual
11
Page 12
5.4 Program selection and consumption chart
EN
Programmes Programme Description
Cottons Iron Dry
Cottons Eco
Cottons Cupboard Dry
Cottons Extra Dry
Synthetics Iron Dry
Synthetics Cupboard
Dry
TimeDry
Refresh (Wool
Refresh)
Gentle Care / Shirts
Jeans
Outdoor/Sports
(Goretex)
Mix(Daily)
You may dry your cotton laundry to be ironed in
this program to have them slightly damp for ease
of ironing. (Shirt, T-shirt, tablecloth, etc.)
You may dry all your cotton laundry in this
program. (T-shirt, pants, pyjamas, baby clothes,
underwear, linen, etc.) You can put your laundry in
the wardrobe without ironing.
You may use this program for extra dryness in
thick laundry such as pants, tracksuit. You can put
your laundry in the wardrobe without ironing.
You may dry your thick cotton laundry in this
program such as towels, bathrobe, etc. You can
put your laundry in the wardrobe without ironing.
You may dry your synthetic laundry to be ironed in
this program to have them slightly damp for ease
of ironing. (Shirt, T-shirt, tablecloth, etc.)
You may dry all your synthetic laundry in this
program. (Shirt, T-shirt, underwear, tablecloth,
etc.) You can put your laundry in the wardrobe
without ironing.
You may select from time programmes between
10 and 160 minutes to achieve the desired drying
level at low temperature. In this programme,
tumble drier’s operation lasts for the set time
independently from the dryness of laundry. This
product is available to be used with a drying
basket as option. For products that are sold
without a basket, you can obtain a basket from an
authorized service and use the drying programs
specified above. For details of use, see the drying
basket user guide.
Ventilates for 10 minutes without blowing hot air.
You can ventilate the cotton and linen clothes
that have been enclosed for a long time with this
program to remove their odour. You can use this
program to ventilate and soften wool laundry that
can be washed in a washing machine. Do not use
for full drying.
It dries the shirts in a more sensitive manner, and
causes less creasing and easier ironing.
You may dry denim pants, skirts, shirts or jackets
in this program.
Use it to dry your clothes made of synthetics,
cotton or mixed fabrics or waterproof products
such as functional jacket, raincoat etc. Turn them
inside out prior to drying.
You can dry both cotton and synthetic laundry with
this programme.Sports and fitness clothes may be
dried with this program.
in washing
Capacity (kg)
8 1000 145
8 1000 197
8 1000 205
8 1000 210
4 800 60
4 800 70
- - -
- - 10
1,5 1200 70
4 1200 150
2 1000 135
4 1000 125
Spin speed
machine (rpm)
(minutes)
Drying Time
12
Dryer / User Manual
Page 13
This is a long period program that can be used
for laundry for people with allergies or required
Hygiene
(BabyProtect+)
Bedding/Feather
Express Super Short Use this program to have 2 shirts ready for ironing. 0,5 1200 30
Energy consumption values
hygiene (infant clothes, towels, undergarments
etc. cotton textiles). High level of hygiene is made
available with high temperature.
((This program is identified and approved by
England’s “The British Foundation” (Allergy UK).))
You can dry your feather or fibre filled textile that
bears can be dried in drier label as a single piece
of laundry. You can dry king size quilt, pillow or
coats as single piece of laundry. Dry your cloths
such as coats and jackets turned inside out.
5 800 185
- 800 165
Programmes Capacity (kg)
humidity
remaining
in washing
Spin speed
machine (rpm)
Cottons Eco * 8 1000 60% 1,95
Cottons Iron dry 8 1000 60% 1,5
Synthetics cupboard
dry
Contains fluorinated greenhouse gases. Hermetically sealed R450a / 0,22 kg - GWP:1430 - 0,133 tCO2e
“Cottons Eco programme” used at full and partial load is the standard drying programme to which
the information in the label and the fiche relates, that this programme is suitable for drying normal
wet Cottons laundry and that it is the most efficient programme in terms of energy consumption for
Cottons.
4 800 40% 0,75
amount of
Approximate
Energy
value kWh
consumption
* : Energy Label standard program (EN 61121:2012) All values in the table are determined
according to EN 61121:2012 standard. Consumption values may vary from the values in the chart
depending on laundry type, wringing speed, ambient conditions and voltage levels.
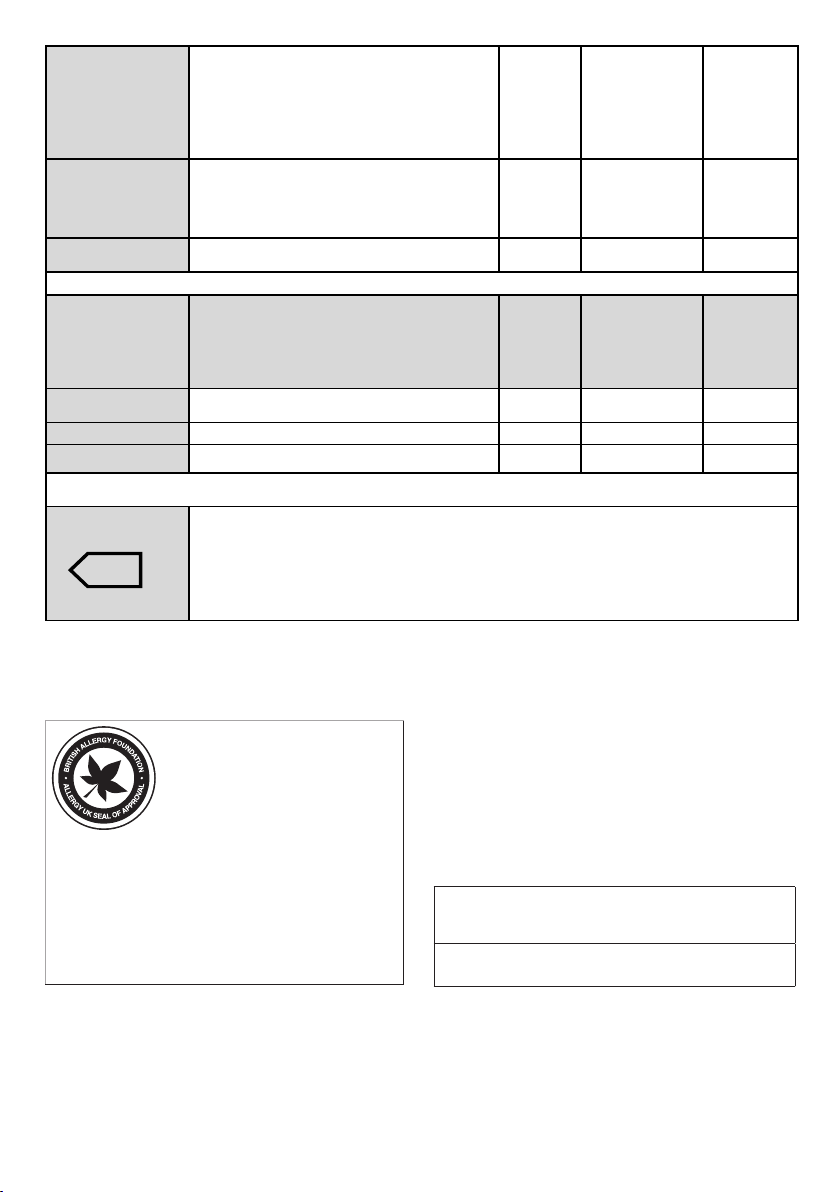
Allergy UK is the brand of the
British Allergy Association. Seal
of Approval is created to guide
people that require
recommendation about a
product that the related
product restricts / reduces / eliminates the
allergens or reduces the allergen content
5.5 Auxiliary functions
Buzzer / time
Drying machine makes an audible warning
when the program is completed. If you don’t
want the machine to make an audible warning,
press the “Buzzer / Time” button. When you
press the Buzzer/Time button, a light will
illuminate and no audible warning will be made
when the program ends.
significantly in the ambient where allergy
patients exist. It aims to provide assurance
that the products are tested scientifically or
examined in a way to provide measurable
results.
C
• You can select this function before or
NOTE
after the program starts.
Buzzer/Time button is used to adjust program
duration while the Rack/Time programs are
selected.
Drying Level
Drying Level button is used for adjusting to
desired dryness level. Program duration may
change depending on the selection.
Dryer / User Manual
13
Page 14

NOTE
C
• You can activate this function only prior
to start of program.
End time
You can delay the end time of the program up
to 24 hours with End time function.
1. Open the loading door and place the
laundry.
2. Select the drying program.
3. Press the End Time selection button and
set the delay time you wish. End Time
LED will illuminate. (When pressed and
hold the button, End Time proceeds nonstop).
4. Press the Start / Stand-by button. End
Time countdown starts. “:” Separator in
the middle of displayed delay time flashes.
NOTE
C
• You can add or remove laundry within
end time. Displayed time is the sum of
normal drying time and end time. End
Time LED will turn off at the end of
countdown, drying starts and drying LED
will illuminate.
Changing the end time
If you want to change the duration during the
countdown:
Cancel the program by turning the On/Off/
Program selection knob. Select the program
you want and repeat the End Time selection
process.
Cancelling the end time function
If you want to cancel the end time countdown
and start the program immediately:
Cancel the program by turning the On/Off/
Program selection knob. Select the program
you want and press the Start/Stand-by button.
5.6 Warning indicators
NOTE
C
• Warning indicators may vary depending
on the model of your dryer.
Filter cleaning
When the program is completed, the warning
indicator for filter cleaning turns on.
Water tank
If the water tank fills up while the program
continues, the warning indicator starts flashing
and the machine goes into stand-by. In this
case, empty the water tank and start the
program by pressing the Start / Stand-by
button. Warning indicator turns off and program
resumes.
Filter drawer /Heat exchanger cleaning
When the programme is finished, the cleaning
symbol of the heat exchanger or filter drawer
may light up.
5.7 Starting the program
Press the Start/Stand-by button to start the
program.
Start/Stand-by and Drying indicators will
illuminate to indicate that program started.
5.8 Child Lock
The drying machine has a child lock which
prevents the program flow from being
interrupted when the buttons are pressed
during a program. When the child lock is
activated, all buttons on the panel except
the On/Off/Program selection knob are
deactivated.
Press the Drying Level and Buzzer buttons
simultaneously for 3 buttons to activate the
child lock.
The child lock has to be deactivated to be
able to start a new program after the current
program is finished or to be able to interfere
with the program. To deactivate the child lock,
keep the same buttons pressed for 3 seconds.
NOTE
C
• When the child lock is activated, the child
lock warning indicator on the screen
turns on.
• Child lock deactivates when the drying
machine is turned off and on by the On/
Off/Cancel knob.
14
Dryer / User Manual
Page 15

NOTE
C
• When the drying machine runs and
the child lock is active, it beeps twice
when the program selection knob is
turned. If the child lock is deactivated
without returning the program selection
knob to its previous position, program
will terminate due to the change in the
program selection knob position.
5.9 Changing the program after it is
started
You can change the program you selected to
dry your laundry with a different program after
the drying machine starts running
• For instance, select Extra Dry program
by turning the On/Off/Program selection
knob to select Extra Dry instead of Iron
Dry.
• Press the Start/Stand-by button to start
the program.
Adding and removing clothes during
stand-by
If you want to add or remove clothes to/from
the drying machine after the drying program
starts:
• Press the Start/Stand-by button to put
the drying machine in Stand-by state. The
drying operation stops.
• Open the loading door while in Standby state, and close the door after you
remove or add laundry.
• Press the Start/Stand-by button to start
the program.
NOTE
C
• Adding laundry after the drying operation
starts may cause the dried laundry inside
the machine to mix with wet laundry and
leave the laundry damp at the end of
operation.
NOTE
C
• Adding or removing laundry during drying
may be repeated as many times as you
wish. But this operation continuously
interrupts the drying operation, and thus
increases program duration and energy
consumption. So, it is recommended to
add laundry before the program starts.
• If a new program is selected by turning
the program selection knob while the
drying machine is in stand-by, the
running program terminates.
WARNING!
• Do not touch the inner surface of the
drum while adding or removing clothes
during a continuing program. The drum
surface is hot.
5.10 Cancelling the program
If you want to cancel the program and
terminate the drying operation for any reason
after the drying machine starts running, turn
the On/Off/Cancel knob, the program will be
cancelled.
WARNING!
A
• The inside of the drying machine shall
be extremely hot when you cancel the
program during machine operation, so
run the refresh program to allow it to cool
down.
5.11 End of program
When the program ends, the Last/Anti-Wrinkle
and Fibre Filter Cleaning Warning LEDs on
the program follow up indicator will illuminate.
Loading door may be opened and the dryer
machine becomes ready for another run.
Bring the On/Off/Program selection knob to
On/Off position to turn the drying machine off.
NOTE
C
Dryer / User Manual
• If the laundry is not removed after the
program is completed, the wrinkle
prevention function activates for 2 hours
to prevent the laundry inside the machine
to get wrinkled. The program tumbles
the laundry with 10-minute intervals to
prevent them from wrinkling.
15
Page 16

6 Maintenance and cleaning
6.1 Loading Door Inner Surface
The hair and fibres that are separated from the
laundry during drying process is collected by
the Fibre Filter.
NOTE
C
• Fibres are formed during wearing and
washing clothes.
• You can clean the filter slot with a
vacuum cleaner.
WARNING!
A
• After each drying cycle, clean the fibre
filter and the inner surface of the loading
door.
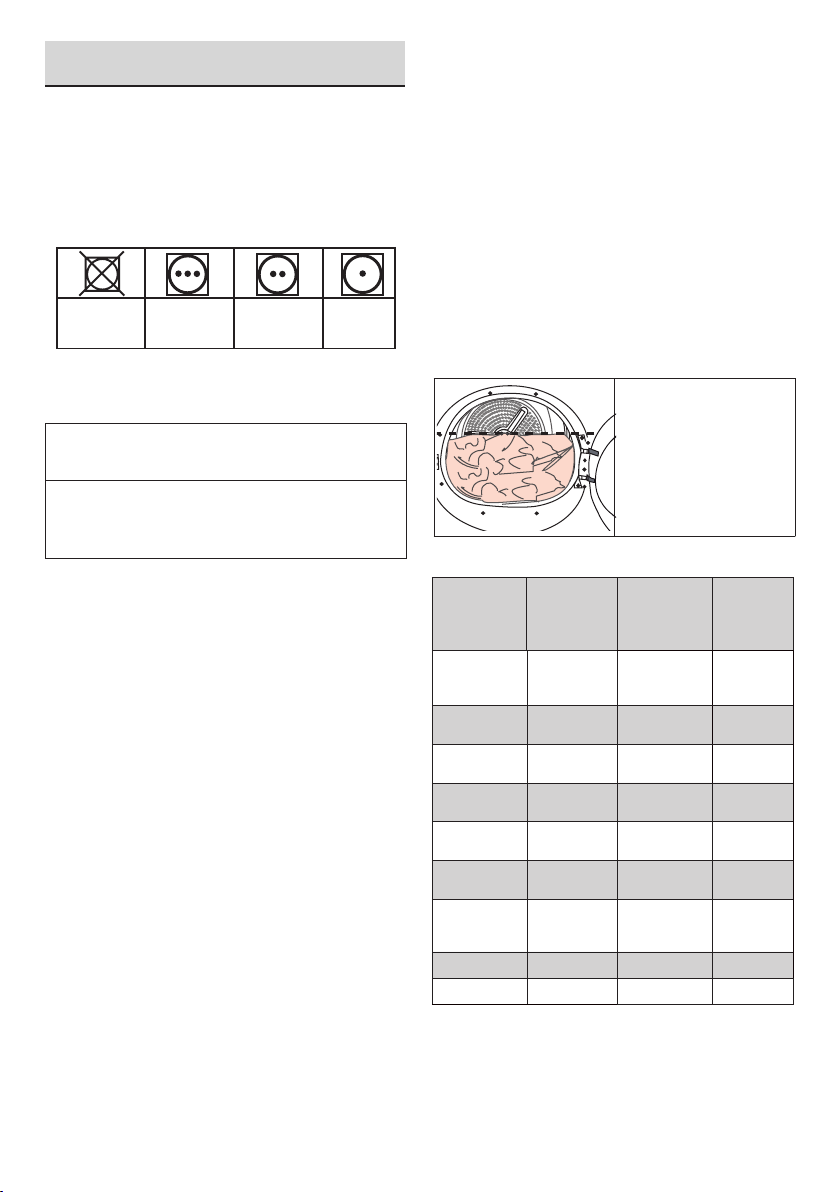
To clean the fibre filter:
• Open the loading door.
• Hold the first part (inner filter) of the two
part fibre filter and remove it by pulling it
upwards.
• Collect the hair, fibres and cotton balls with
hand or with a soft cloth.
• Remove the second part (outer filter) by
pulling it upwards.
• Clean both filters under water running in
reverse direction of fibre accumulation
or with a soft brush. Dry the filter before
placing it back.
• Insert the fibre filters
on one another and
place it back in its
place.
• Clean the loading door interior and its
washer with a soft damp cloth.
NOTE
C
• Ensure that hair, fibre and cotton balls do
not fall into the slot where the filters are
installed.
• Open both fibre filters (inner and outer
filters) remove the hair, fibre, cotton balls
with your damp hand or a vacuum cleaner
or a cloth.
16
6.2 Cleaning the sensor
There are
dampness sensors
in the dryer that
detect whether
the laundry is dry
or not.
To clean the
sensors:
Dryer / User Manual
Page 17

• Open the loading door of the dryer.
• Allow the machine to cool down if it is still
hot due to the drying process.
• Wipe the metal surfaces of the sensor
with a soft cloth, dampened with vinegar
and dry them.
2. Drain the water in the tank.
NOTE
C
• Clean metal surfaces of the sensors 4
times a year.
• Do not use metal tools when cleaning
metal surfaces of the sensors.
WARNING!
A
• Never use solvents, cleaning agents or
similar substances for cleaning due to the
risk of fire and explosion!
6.3 Draining the water tank
Dampness of the laundry is removed and
condensed during drying process and the
water that arise accumulates in the water tank.
Drain the water tank after each drying cycle.
WARNING!
A
• Condensed water is not drinkable!
• Never remove the water tank when the
program is running!
If you forget to drain the water tank, the
machine will stop during the subsequent drying
cycles when the water tank is full and the Water
Tank warning symbol will flash. If this is the
case, drain the water tank and press Start /
Pause button to resume the drying cycle.
To drain the water tank:
1. Remove the water tank in the drawer
or container carefully.
• If there is lint accumulation in the funnel
of the water tank, clean it under running
water.
• Place the water tank into its seat.
NOTE
C
• If the direct water draining is used as an
option, there is no need to empty the
water tank.
6.4 Cleaning the evaporator
The hair and fibres that are not caught by the
fibre filter goes to the fins of the evaporator
behind the toe board and accumulates here.
If the evaporator” ” icon is flashing or in 6
month periods, clean the evaporator.
• Open the toe
board by pressing
on it.
• To open the air
routing door, move
the release latch.
• Clean the fibres
on the evaporator
with a damp cloth
/ vacuum cleaner
with a brush by
moving upwards
and downwards.
Dryer / User Manual
17
Page 18

• After the cleaning
process is
completed, place
the air router door
to its place, move
the latches to close
it and close the toe
board.
A
WARNING!
• You can clean by hand, provided you wear
protective gloves. Do not try to clean with
bare hands. Evaporator fins may damage
your hands.
• Cleaning by left to right movements may
damage the evaporator fins. This may lead
to drying issues.
18
Dryer / User Manual
Page 19

7 Troubleshooting
Drying operation takes too long.
Fibre filter (interior and exterior filter) pores may be clogged.
>>> Wash the fibre filters with warm water and dry.
Evaporator front side may be clogged. >>> Clean the front
side of the evaporator.
The ventilation grills in front of the machine may be closed.
>>> Remove any object in front of the ventilation grills that
blocks air.
Ventilation may be inadequate because the are the
machine is installed in is too small. >>> Open the door
or windows to prevent the room temperature from rising
very high.
A lime layer may have accumulated on the humidity
sensor. >>> Clean the humidity sensor.
Excessive amount of laundry might be loaded. >>> Do not
load the drying machine excessively.
Laundry might not have been wrung adequately. >>>
Perform a higher speed wringing on the washing machine.
Clothes come out damp after drying.
A program not suitable for the laundry type may have been
used.>>> Check the maintenance labels on the clothes
and select a program suitable for the clothes’ type or use
time programs as extra.
Fibre filter (interior and exterior filter) pores may be clogged.
>>> Wash the filters with warm water and dry.
Evaporator front side may be clogged. >>> Clean the front
side of the evaporator.
Excessive amount of laundry might be loaded. >>> Do not
load the drying machine excessively.
Laundry might not have been wrung adequately. >>>
Perform a higher speed wringing on the washing machine.
Drying machine does not turn on or program cannot be
started. Drying machine does not run after it is configured.
Power plug might be unplugged. >>> Make sure the
power cord is plugged in.
Loading door might be open. >>> Ensure that the loading
door is properly closed.
A program might not be set or Start / Pause /Cancel
button might not be pressed. >>> Check that the program
is set and it is not in Pause position..
Child lock may be activated. >>> Turn off the child lock.
Program terminated prematurely for no reason.
Loading door might be closed completely. >>> Ensure
that the loading door is properly closed.
There might be a power outage. >>> Press the Start /
Pause / Cancel button to start the program.
Water tank may be full. >>> Empty the water tank.
Clothes have shrunk, hardened or spoiled.
A program not suitable with the laundry type might have
been used. >>> Check the maintenance labels on the
clothes and select a program suitable for the clothes.
Water drips from the loading door.
Fibres might have gathered on the inner sides of the
loading door and the loading door gasket. >>> Clean the
inner surfaces of the loading door and the loading door
gasket surfaces.
Loading door opens by itself.
Loading door might be closed completely. >>> Push the
loading door until the closing sound is heard.
Water tank warning symbol is on/flashing.
Water tank may be full. >>> Empty the water tank.
Water discharge hose might have collapsed. >>> If the
product is connected directly to the water drain check the
water discharge hose.
The lighting inside the drying machine does not turn on. (In
models with lamp)
The drying machine might not have been turned on using
On/Off button. >>> Check that the drying machine is
turned on.
Lamp might be malfunctioning. >>> Contact Authorized
Service to replace the lamp.
Anti-crease icon is lit.
Anti-Crease mode that prevents the laundry in the drier
to crease may be activated. >>> Turn the drier off and
remove the laundry.
Fibre filter cleaning icon is lit.
Fibre filter (interior and exterior filter) may be unclean. >>>
Wash the filters with warm water and dry..
A layer may be formed on the fibre filter pores that leads to
clogging. >>> Wash the filters with warm water and dry.
Fibre filters may not be inserted. >>> Insert the interior and
exterior filters to their places.
An audible warning is heard from the machine
Fibre filters may not be inserted. >>> Insert the interior and
exterior filters to their places.
Evaporator warning icon is flashing.
Evaporator front side may be clogged with fibres. >>>
Clean the front side of the evaporator.
Fibre filters may not be inserted. >>> Insert the interior and
exterior filters to their places.
The lighting inside the drying machine turns on. (In models
with lamp)
If the drying machine is plugged to the power outlet, the
On/Off button is pressed and the door is open; the light
turns on. >>> Unplug the drying machine or bring the On/
Off button to Off position.
WARNING!
A
• If the problem persists after following the
instructions in this section, contact your vendor
or an Authorized Service. Never try to repair your
product yourself.
NOTE
C
• In an event that you encounter an issue on any part
on your appliance, you can ask for a replacement
by contacting the authorized service with the
appliance model number.
• Operating the appliance with non-authentic parts
may lead the appliance to malfunction.
• Manufacturer and distributor are not liable for
malfunctions resulting from using non-authentic
parts.
Dryer / User Manual
19
Page 20

PRODUCT FICHE
Complying Commission Delegated Regulation (EU) No 392/2012
Supplier name or trademark
Model name
Rated capacity (kg)
Type of Tumble Dryer
Energy efficiency class
Annual Energy Consumption (kWh)
(1)
(2)
Type of Control
Energy consumption of the standard cotton programme at full load (kWh)
Energy consumption of the standard cotton programme at partial load (kWh)
Power consumption of the off-mode for the standart cotton programme at full load, P
Power consumption of the left-on mode for the standart cotton programme at full load, P
The duration of the left on mode (min)
Standard cotton programme
Programme time of the standard cotton programme at full load, T
Programme time of the standard
Weighted programme time of the standard cotton programme at full and partial load (T
Condensation efficiency class
Average condensation efficiency of the standard cotton programme at full load, C
Average condensation efficiency of the standard cotton programme at partial load, C
Weighted condensation efficiency of the standard cotton programme at full load and partial load, C
Sound power level for the standard cotton programme at full load
Built-in
(3)
cotton programme at partial load, T
(4)
(min)
dry
(min)
dry1/2
(5)
(W)
O
(W)
L
)
t
dry
dry1/2
t
Air Vented
Condenser
Automatic
Non-automatic
BEKO
MDS8412RX / DS8412GX
8
-
A++
235
-
1,95
1,06
0,5
1,0
30
197
115
150
B
86%
86%
86%
65
-
: Yes - : No
(1) Scale from A+++ (most efficient) to D (least efficient)
(2) Energy consumption based on 160 drying cycles of the standard cotton programme at full and partial load, and the consumption of
the low-power modes. Actual energy consumption per cycle will depend on how the appliance is used.
(3) "Cotton cupboard dry programme" used at full and partial load is the standard drying programme to which the information in the
label and the fiche relates, that this programme is suitable for drying normal wet cotton laundry and that it is the most efficient
programme in terms of energy consumption for cotton
(4) Scale from G (lest efficient) to A (most efficient)
(5) Weighted average value — L
expressed in dB(A) re 1 pW
WA
20
Dryer / User Manual
Page 21

Page 22

Prosimy najpierw zapoznać się z
niniejszą instrukcją!
Drodzy Klienci,
Dziękujemy za wybranie produktu firmy Beko.
Mamy nadzieję, że będą Państwo zadowoleni
z produktu,który został wyprodukowany z
najwyższą starannością i dzięki najnowszej
technologii. Zalecamy uważne zapoznanie się z
niniejszą instrukcją i pozostałymi dokumentami,
zanim zaczną Państwo go używać.
Zalecamy także zachowanie ich do
wykorzystania w przyszłości. Jeżeli przekażą
Państwo ten produkt komuś innemu, prosimy
dołączyć również niniejszą instrukcję. Prosimy
zwracać uwagę na wszystkie szczegółowe
informacje i ostrzeżenia wyszczególnione w
instrukcji obsługi i postępować zgodnie z nimi.
Należy wykorzystać niniejszą instrukcję
do obsługi modelu wyszczególnionego na
okładce.
• Przeczytaj instrukcję.
Wyjaśnienie użytych symboli
W niniejszej instrukcji wykorzystano
następujące symbole:
ZAGROŻENIE!
B
• Ostrzeżenia przed porażeniem prądem
elektrycznym.
OSTRZEŻENIE!
• Ostrzeżenia przed gorącymi powierzchniami.
OSTRZEŻENIE!
• Ostrzeżenie przed ryzykiem oparzenia
UWAGA !
C
• Ważne informacje lub użyteczne porady
dotyczące użytkowania.
Materiały użyte do opakowania
produktu są produkowane z
materiałów, które można poddać
recyklingowi zgodnie z naszymi
krajowymi przepisami dot.
środowiska naturalnego.
Nie należy wyrzucać materiałów
wykorzystanych do opakowania z odpadami
domowymi lub innymi odpadami. Należy je
dostarczyć do punktów odbioru materiałów
opakowaniowych wyznaczonych przez władze
lokalne.
ZAGROŻENIE!
• Ostrzeżenia przed zagrożeniem pożarem.
OSTRZEŻENIE!
A
• Ostrzeżenia dotyczące niebezpiecznych
sytuacji zarażających życiu lub majątkowi.
Produkt ten został wykonany z wykorzystaniem najnowocześniejszych technologii i w warunkach przyjaznych dla środowiska.
22
Suszarka / Instrukcja obsługi
Page 23

1Ważne instrukcje dotyczące bezpieczeństwa i środowiska
UWAGA !
C
• Niniejsza sekcja zawiera informacje
dotyczące bezpieczeństwa, które
pozwalają chronić użytkownika
przed uszkodzeniami ciała
i szkodami materialnymi.
Niezastosowanie się do tych
instrukcji może spowodować
unieważnienie gwarancji.
1.1 Bezpieczeństwo ogólne
OSTRZEŻENIE!
A
• Suszarka może być używana przez
dzieci od 8 roku życia oraz przez
osoby, których zdolności fizyczne,
czuciowe i umysłowe nie są w pełni
rozwinięte, a także przez osoby,
które nie mają doświadczenia i
odpowiedniej wiedzy, o ile osoby
te znajdują się pod nadzorem lub
zostały przeszkolone w kwestii
bezpiecznego używania urządzenia
oraz powiązanego z nim ryzyka.
Dzieci nie powinny manipulować
przy urządzeniu. Czyszczenie i
prace konserwacyjne nie mogą być
prowadzone przez dzieci, jeśli nie są
nadzorowane przez osobę dorosłą.
• Dzieci poniżej 3 roku życia
powinny być trzymane z dala od
urządzenia, chyba że są nieustannie
nadzorowane.
• Nie należy usuwać regulowanych
nóżek. Nie należy ograniczać
przestrzeni pomiędzy suszarką
a podłogą materiałami takimi jak
dywany, drewno czy taśma. Może
to powodować problemy z pracą
urządzenia.
Suszarka / Instrukcja obsługi
A
OSTRZEŻENIE!
• Instalacja urządzenia oraz wszelkie
naprawy muszą być wykonywane
przez autoryzowany serwis.
Producent urządzenia nie ponosi
odpowiedzialności za wszelkie
uszkodzenia wynikające z obsługi
prowadzonej przez nieautoryzowane
osoby.
• Nie wolno myć suszarki, spryskując
ją lub polewając wodą! Istnieje
ryzyko porażenia prądem!
Dla produktów z funkcją pary:
OSTRZEŻENIE!
A
• Używaj tylko wody destylowanej lub
wody skondensowanej w zbiorniku
na wodę urządzenia w programach
parowych. Nie używaj wody z
kranu lub dodatków. W przypadku
wody skondensowanej w zbiorniku
na wodę należy ją odfiltrować i
oczyścić z włókien.
• Nie otwieraj drzwiczek, gdy
uruchomione są programy parowe.
Może wydostać się gorąca woda.
• Przed włożeniem prania do
programu pary należy usunąć
plamy.
• W programie pary (usuwanie
zapachów) do urządzenia można
wkładać jedynie pranie, która
jest przesiąknięte nieprzyjemnym
zapachem, ale nie jest brudne lub
poplamione.
• Nie używaj żadnych zestawów
do czyszczenia na sucho ani
dodatkowych materiałów w
programie parowym ani w żadnym
innym programie.
•
23
Page 24

1.1.1 Bezpieczeństwo
elektryczne
ZAGROŻENIE!
B
• Podczas instalacji i podłączania
do prądu należy przestrzegać
instrukcji bezpieczeństwa.
• Urządzenie nie może być
zasilane za pośrednictwem
zewnętrznego urządzenia
przełączającego, takiego jak
wyłącznik czasowy i nie może
być podłączone do obwodu,
zasilanie którego jest regularnie
włączane i wyłączane.
• Podłącz suszarkę do uziemionego
gniazdka chronionego
bezpiecznikami o wartościach
podanych na tabliczce
znamionowej. Instalacja uziemiająca
powinna być wykonana przez
wykwalifikowanego elektryka. Nasza
firma nie ponosi odpowiedzialności
za wszelkie uszkodzenia wynikające
z użytkowania urządzenia bez
uziemienia zgodnego z lokalnymi
przepisami.
• Napięcie i dopuszczone
bezpieczniki określone są na
tabliczce znamionowej.
• Napięcie określone na tabliczce
znamionowej musi być równe
napięciu sieci zasilającej. )
• Odłącz suszarkę, jeśli jej nie
używasz.
• Odłącz suszarkę od sieci zasilającej
podczas instalacji, konserwacji,
czyszczenia i prac naprawczych.
• Nie dotykaj wtyczki mokrymi dłońmi.
Odłączając urządzenie nigdy nie
ciągnij za kabel zasilający, zawsze
chwyć wtyczkę i wyciągnij ją.
B
ZAGROŻENIE!
• Aby ograniczyć ryzyko pożaru
i porażenia prądem podczas
podłączania urządzenia do źródła
energii elektrycznej nie używaj
przedłużaczy, rozgałęźników
elektrycznych (złodziejek) lub
przejściówek.
• Wtyczka kabla zasilającego musi
znajdować się w łatwo dostępnym
miejscu.
• Uszkodzony kabel główny
należy wymienić uprzedzając o
tym
• Jeśli suszarka jest uszkodzona
nie należy jej używać do
momentu naprawy przez
pracownika autoryzowanego
serwisu! Istnieje ryzyko
porażenia prądem!
1.1.2 Bezpieczeństwo produktu
ZAGROŻENIE!
• Należy uwzględnić
następujące punkty w kwestii
bezpieczeństwa pożarowego:
• Nie należy suszyć następujących
rodzajów prania lub przedmiotów
w suszarce, ponieważ stwarza to
zagrożenie pożarowe.
• Rzeczy, które nie zostały wyprane
• Rzeczy poplamione olejem,
acetonem, alkoholem, olejem
napędowym, naftą, odplamiaczami,
terpentyną, parafiną lub środkami
do usuwania parafiny. Zanim będzie
można je wysuszyć, rzeczy te
muszą zostać wyprane w gorącej
wodzie z dużą ilością środka
piorącego.
24
Suszarka / Instrukcja obsługi
Page 25

ZAGROŻENIE!
• Dlatego też rzeczy poplamione
środkami wymienionymi powyżej.
• Nie należy suszyć następujących
rodzajów prania lub
przedmiotów w suszarce,
• ponieważ stwarza to zagrożenie
pożarowe:
• Części garderoby lub podgłówków
wzmocnionych pianką
gumową(pianką lateksową),
czepków do kąpieli, odpornych
na wodę tekstyliów,materiałów
z gumowymi wzmocnieniami i
wkładkami z pianki gumowej.
• Ubrań czyszczonych za pomocą
przemysłowych środków
chemicznych.
• Przedmioty takie jak zapalniczki,
zapałki, monety, metalowe elementy,
igły itp. mogą uszkodzić bęben
lub spowodować problemy w
funkcjonowaniu urządzenia. Dlatego
też należy sprawdzić pranie, które
wkładasz do suszarki.
• Nigdy nie wyłączaj suszarki przed
zakończeniem programu. Jeśli
musisz to zrobić, wyjmij szybko
pranie i rozłóż je, aby rozproszyć
ciepło.
• Nieprawidłowo wyprane
ubrania mogą doprowadzić do
samozapłonu lub nawet zapalić się
po ukończeniu suszenia.
• Należy zapewnić odpowiednią
wentylację, aby zapobiec zbieraniu
się w tym samym pomieszczeniu
gazów pochodzących z innych
urządzeń działających na innych
paliwach w tym otwartym
płomieniem.
Suszarka / Instrukcja obsługi
A
OSTRZEŻENIE!
• Nie należy suszyć elementów
bielizny, które zawierają metalowe
fiszbiny. Suszarka może zostać
uszkodzona jeżeli fiszbiny wysuną
się lub zostaną połamane.
UWAGA !
C
• Można używać środków
zmiękczających lub podobnych,
zgodnie z zaleceniami producentów.
• Należy wyczyścić filtr przed lub
po załadowaniu suszarki. Jeśli filtr
nie jest zainstalowany, nie należy
używać suszarki .
OSTRZEŻENIE!
A
• Nie należy samodzielnie naprawiać
suszarki. Nie należy przeprowadzać
żadnych prac naprawczych lub
wymian podzespołów produktu
nawet jeśli posiadasz stosowną
wiedzę i umiejętności do wykonania
tych czynności, jeśli nie określono
inaczej w instrukcji użytkowania
lub instrukcji serwisowej. W
przeciwnym wypadku wystawiasz
swoje życie i życia innych ludzi na
niebezpieczeństwo.
• Nie należy instalować urządzenia
za drzwiami z zamkiem, drzwiami
przesuwnymi, ani drzwiami na
zawiasach, które mogą blokować
otwarcie drzwiczek suszarki.
• Umieść suszarkę w miejscu
dogodnym do użytku domowego.
(łazienka, zamknięty balkon, garaż
itp.)
25
Page 26

A
OSTRZEŻENIE!
• Upewnij się, że zwierzęta domowe
nie będą miały dostępu do suszarki.
Zanim uruchomisz suszarkę
sprawdź wnętrze bębna.
• Nie wolno opierać się o otwarte
drzwiczki suszarki, ponieważ
suszarka może się przewrócić.
• Należy regularnie usuwać
zabrudzenia gromadzące się wokół
suszarki
1.2 Mocowanie urządzenia nad
pralką
• Należy użyć odpowiedniego elementu
mocującego podczas instalacji suszarki
nad pralką. Element mocujący musi
zostać zamontowany przez pracownika
autoryzowanego serwisu.
• Całkowita waga pralki i suszarki - z
pełnym ładunkiem - w momencie, kiedy
ustawione są jedna nad druga wynosi
około 180 kilogramów. Urządzenia te
należy umieścić na trwałym podłożu,
które wytrzyma takie obciążenie.
OSTRZEŻENIE!
A
• Nie można zamontować pralki nad
suszarką. Zwróć uwagę na powyższe
zapisy podczas instalacji twojej pralki.
Stolik instalacyjny dla pralki i suszarki
Głębokość pralki
Głębokość
suszarki
62 cm
60 cm
54 cm
54 cm
60 cm
Głębokość
suszarki
54 cm
60 cm
50 cm
Można zainstalować
Można zainstalować
Stolik instalacyjny dla pralki i suszarki
Głębokość pralki
45 cm
Można zainstalować
Można zainstalować
49 cm
40 cm
Nie można
zainstalować
1.3 Przeznaczenie
• Suszarka przeznaczona jest do użytku
domowego. Urządzenie to nie nadaje
się do użytku komercyjnego i nie może
być użytkowane niezgodnie ze swoim
przeznaczeniem.
• Urządzenie należy stosować tylko
do suszenia tkanin z odpowiednim
oznakowaniem.
• Producent nie ponosi odpowiedzialności
z tytułu niewłaściwego użytkowania lub
transportu produktu.
• Szacowany okres użytkowania
niniejszego produktu wynosi 10 lat. W tym
czasie dostępne będą oryginalne części
zamienne do tego produktu.
26
1.4 Bezpieczeństwo dzieci
• Materiały wykorzystane do opakowania
produktu są niebezpieczne dla dzieci.
Materiały te należy przechowywać poza
zasięgiem dzieci.
• Urządzenia elektryczne są niebezpieczne
dla dzieci. Podczas użytkowania
produktu należy trzymać dzieci z dala od
uruchomionego urządzenia. Nie należy
pozwalać dzieciom na manipulowanie
przy urządzeniu. Należy użyć blokady
zabezpieczającej przed dziećmi, aby nie
mogły manipulować przy urządzeniu.
Suszarka / Instrukcja obsługi
Page 27

UWAGA !
C
• Blokada dostępu dzieci znajduje się
na panelu kontrolnym. (Patrz Blokada
dostępu dzieci)
• Należy zamykać drzwiczki nawet jeśli
suszarka nie jest uruchomiona.
1.5 Zgodność z dyrektywą WEEE i
usuwanie odpadów:
Niniejszy wyrób jest zgodny z
dyrektywą Parlamentu
Europejskiego i Rady (2012/19/
WE). Wyrób ten oznaczony jest
symbolem klasyfikacji zużytych
urządzeń elektrycznych i
elektronicznych (WEEE).
Wyrób ten wykonano z części i materiałów
wysokiej jakości, które mogą być odzyskane
i użyte jako surowce wtórne. Po zakończeniu
użytkowania nie należy pozbywać się go
razem z innymi odpadkami domowymi. Należy
przekazać go do punktu zbiórki urządzeń
elektrycznych i elektronicznych na surowce
wtórne. Aby dowiedzieć się, gdzie jest
najbliższy taki punkt, prosimy skonsultować się
z władzami lokalnymi.
1.6 Zgodność z dyrektywą RoHS:
Niniejszy wyrób jest zgodny z dyrektywą
Parlamentu Europejskiego i Rady
RoHS (Ograniczenie użycia substancji
niebezpiecznych) (2011/65/WE). Nie zawiera
szkodliwych i zakazanych materiałów,
podanych w tej dyrektywie.
1.7 Informacje o opakowaniu
Materiały wykorzystane do produkcji
opakowania zostały wytworzone z materiałów,
które można poddać recyklingowi zgodnie
z przepisami krajowymi przepisami dot.
środowiska. Materiałów opakowaniowych nie
należy wyrzucać wraz z normalnymi odpadami
domowymi itp. Należy je dostarczyć do
punktów odbioru materiałów opakowaniowych
wyznaczonych przez władze lokalne.
1.8 Specyfikacja techniczna
PL
Wysokość
(regulowana)
Szerokość 59,7 cm
Głębokość 56,8 cm
Pojemność (maks.) 8 kg**
Ciężar netto (± 4
kg)
Napięcie
Znamionowy pobór
mocy
Kod modelu
* Minimalna wysokość: Wysokość z
regulowanymi nóżkami nierozłożonymi.
Maksymalna wysokość: Wysokość
z regulowanymi nóżkami maksymalnie
rozsuniętymi.
** Waga suchego prania przed praniem.
*** Aby uzyskać informacje o położeniu tabliczki
znamionowej patrz
84,6 cm / 86,6 cm*
44 kg
Patrz: tabliczka
znamionowa***
UWAGA !
C
• Szczegóły techniczne suszarki podlegają
specyfikacji bez uprzedniej informacji, w
celu poprawienia jakości produktu.
• Dane liczbowe znajdujące się w niniejszej
instrukcji są jedynie schematyczne i
mogą odbiegać od danych właściwego
produktu.
• Wartości podane na znakach suszarki
lub w innych rodzajach dokumentacji
dostarczonej z suszarką zostały uzyskane
w laboratorium zgodnie z odpowiednimi
standardami. W zależności od warunków
środowiskowych i operacyjnych suszarki
te wartości mogą się różnić.
Suszarka / Instrukcja obsługi
27
Page 28

2 Twoja suszarka
3 Instalacja
2.1 Widok ogólny
11
1
10
9
8
7
6
2
3
4
5
1. Panel główny
2. Panel sterowania
3. Drzwiczki do ładowania
4. Przycisk otwierający blachę zabezpieczającą
5. Kratki wentylacyjne
6. Regulowane nóżki
7. Blacha zabezpieczająca
8. Tabliczka znamionowa
9. Filtr kłaczków
10. Szuflada zbiornika na wodę
11. Przewód zasilający
2.2 Zawartość opakowania
1. Wąż
do spustu
wody *
2.
Zapasowa
gąbka do
szuflady
filtra*
3. Instrukcja
obsługi
4. Kosz do
suszenia*
* Przedmiot może być dostarczony z
urządzenie w zależności od jego modelu.
5. Instrukcja
obsługi
kosza do
suszenia*
6. Pojemnik
do
napełniania
wodą*
7. Czysta
woda*
8. Grupa
kapsułek
zapachowych*
Zanim zadzwonisz do najbliższego
autoryzowanego serwisu w celu instalacji
suszarki, upewnij się, że posiadasz
odpowiednią instalację elektryczną i spust
wody. Dane na ten temat znajdują się w
instrukcji obsługi. Jeżeli te instalacje nie są
zgodne, skontaktuj się z wykwalifikowanym
elektrykiem lub hydraulika, w celu dokonania
niezbędnych zmian.
UWAGA !
C
• Przygotowanie miejsca pod suszarkę, a
także instalacji elektrycznych i wodnych
należy do obowiązkówklienta.
OSTRZEŻENIE!
A
• Przed instalacją urządzenia, należy
wzrokowo sprawdzićczy suszarka
ma jakiekolwiek widoczne wady. Jeśli
suszarka jest uszkodzona nie należy
jej instalować. Uszkodzone produkty
stwarzają zagrożenie dla twojego
bezpieczeństwa.
• Zanim zaczniesz używać suszarki
odczekaj 12 godzin.
3.1 Właściwe miejsce instalacji
Suszarkę należy instalować na stabilnym i
równym podłożu. Suszarka jest ciężka.
Nie należy przesuwać jej samemu.
• Suszarka powinna działać w dobrze
wentylowanym, wolnym od pyłu miejscu.
• Przestrzeń pomiędzy suszarką a
podłożem nie powinna być blokowa przez
takie materiały jak wykładziny dywanowe,
listwy drewniane, czy taśmy.
• Nie należy przykrywać kratki wentylacyjnej
suszarki.
• Nie należy instalować urządzenia
za drzwiami z zamkiem, drzwiami
przesuwnymi, ani drzwiami na zawiasach,
które mogą blokować otwarcie drzwiczek
suszarki.
• Kiedy suszarka jest już zainstalowana,
powinna stać w miejscu, gdzie zostały
wykonane odpowiednie przyłącza.
Podczas instalacji suszarki należy
28
Suszarka / Instrukcja obsługi
Page 29

upewnić się, że tylna ściana nie dotyka
żadnych innych elementów (kranu,
gniazdka itp.).
• Suszarkę należy umieścić w odległości
przynajmniej 1 cm od innych mebli.
• Suszarka może być eksploatowana
w temperaturach od +5°C do +35°C.
Warunki eksploatacji wykraczające poza
podany przedział wpływają niekorzystnie
na urządzenie, które może ulec
uszkodzeniu.
• Tylna powierzchnia suszarki powinna
opierać się o ścianę.
ZAGROŻENIE!
B
• Nie należy umieszczać suszarki na kablu
zasilającym.
3.2 Usuwanie zabezpieczeń
stosowanych podczas transportu
OSTRZEŻENIE!
A
3.3 Podłączanie do spustu
Można bezpośrednio spuścić zebraną wodę
ze zbiornika przez wąż do odprowadzania
wody dostarczony wraz z produktem zamiast
okresowego odprowadzania wody zebranej w
zbiorniku.
Podłączanie węża do odprowadzania
wody
1
3 4
3 Podłącz jedną końcówkę węża do
odprowadzania wody dostarczonego z
suszarką do miejsca, z którego usunięto
wąż w poprzednim kroku.
4 Podłącz drugi koniec węża do
odprowadzania wody bezpośrednio do
odpływu ścieków lub do umywalki.
2
1-2Należy ręką
wycągnąć
wąż z mejsca
gdze został on
podłączony.
Ne należy
używać
żadnych
narzędz do
odłączena
węża.
• Należy usunąć
• Jeśli możliwa jest
Suszarka / Instrukcja obsługi
zabezpieczenia
stosowane
podczas
transportu zanim
suszarka zostanie
użyta po raz
pierwszy.
zamiana strony
otwierania drzwi
urządzenia,
patrz: instrukcje
dotyczące
montażu
odwracalnych
drzwi
UWAGA !
C
• Wąż do odprowadzania wody
powinienbyć podłączony na wysokości
maksimum.
• Upewnij się, że wąż spustu wody
nie został przygnieciony lub zagięty
pomiędzy odpływema urządzeniem.
• Jeśli do Twojego urządzenia dołączony
jest zestaw akcesoriów, przeczytaj
szczegółowy opis.
3.4 Dostosowanie regulowanych
nóżek
• Obróć nóżki w
prawo lub w lewo
do momentu aż
urządzenia będzie
stało w poziomie.
29
Page 30

3.5 Transport suszarki
Spuść całą wodę, jaka pozostała w suszarce.
Jeżeli wykonano bezpośrednie połączenie
odprowadzania wody, usuń podłączenia węża.
A
OSTRZEŻENIE!
• Zalecamy przewożeniesuszarkiw pozycji
pionowej. Jeżeli przewożenie urządzenia
w pozycji pionowej nie jest możliwe,
zalecamy transport suszarki poprzez
przechylenie jej na prawą stronę, patrząc
od przodu.
3.6 Ostrzeżenia dotyczące dźwięków
UWAGA !
C
• Woda zebrana podczas pracy urządzenia
jest pompowana do zbiornika wodnego.
Podczas tego procesu dźwięk
wydobywający się podczas pompowania
jest normalnym zjawiskiem.
3.7 Wymiana żarówki
Jeœli lampka podœwietlaj¹ca jest
wykorzystywana w Twojej suszarce bêbnowej
Aby wymienić żarówkę/diodę podświetlającą
suszarkę bębnową skontaktuj się z
autoryzowanym serwisem.
Lampa (lampy) wykorzystywane w tym
urządzeniu nie są przeznaczone do
oświetlania pomieszczeń. Lampa ta ma
pomagać użytkownikowi wygodnie i
bezpiecznie umieszczać pranie w suszarce
bębnowej. Lampy zamontowane w tym
urządzeniu muszą być odpowiednie do pracy
w skrajnych warunkach fizycznych, takich jak
wibracje i temperatury przekraczające 50°C.
• To normalne
zjawisko,
że suszarka
czasem wydaje
metaliczny dźwięk
ze skraplacza,
podczas działania.
30
Suszarka / Instrukcja obsługi
Page 31

4 Przygotowanie
4.1 Rzeczy nadające się do suszenia
w suszarce
Należy zawsze przestrzegać instrukcji
zamieszczonych na metkach garderoby.
Należy suszyć tylko rzeczy oznaczone
metkami określającymi zdatność części
garderoby do suszenia w suszarce. Należy
upewnić się, że wybrano odpowiedni
program.
Nie susz w
suszarce
4.2 Rzeczy nienadające się do
suszenia w tej suszarce
C
• Delikatne haftowane materiały,
• odzież wełniana, jedwabne części
garderoby oraz odzież wykonana z
cennych materiałów, rzeczy wykonane
z włókien hermetycznych oraz tiulowe
firanki nie są odpowiednie do suszenia
maszynowego.
W wysokiej
temperaturze
UWAGA !
W średniej
temperaturze
Przy niskiej
temperaturze
• Postępuj zgodnie z poleceniami w
instrukcji obsługi dotyczącymi wyboru
programu.
• Jeśli nie ma takiej potrzeby nie otwieraj
drzwiczek do ładowania podczas
suszenia. Jeżeli musisz otworzyć
drzwiczki, nie powinny pozostawać
otwarte przez zbyt długi czas.
• W przypadku modeli ze skraplaczem:
regularnie czyść kondensator raz na
miesiąc lub po 30 operacjach.
• W modelach z zespołem pompy ciepła:
regularnie czyść szufladę filtra, gdy
widoczne jest nagromadzenie meszku lub
gdy zaświeci się wskaźnik czyszczenia
szuflady filtra .
• W przypadku modeli z zespołem
ewakuacyjnym: postępować zgodnie ze
wskazówkami dotyczącymi podłączenia
do przewodu wentylacyjnego i jego
czyszczenia.
• Podczas procesu suszenia, należy dobrze
wietrzyć pomieszczenie, w którym pracuje
suszarka bębnowa.
4.5 Właściwy wsad
Postępuj zgodnie z
poleceniami w „Tabeli
wyboru programu i
zużycia”. Nie należy
ładować więcej niż
podano w tabeli.
4.3 Przygotowanie prania do suszenia
• Części garderoby mogą zaplątać się
podczas prania. Zanim włożysz te rzeczy
do suszarki rozplącz je.
• Części garderoby, które posiadają
metalowe akcesoria np. suwaki, należy
przewlec na lewą stronę.
• Zasuń suwaki, zapnij haczyki i klamerki
oraz guziki.
4.4 Oszczędzanie energii
• Należy odwirować pranie na najwyższej
prędkości. W ten sposób, czas suszenia
zostanie znacząco skrócony, a zużycie
energii będzie mniejsze.
• Posortuj części garderoby w zależności
od ich rodzaju i grubości. Susz jeden
rodzaj ubrań.
• Na przykład cienkie ręczniki kuchenne i
obrusy, czy serwetki suszą się szybciej niż
grube ręczniki łazienkowe.
Suszarka / Instrukcja obsługi
Poniższe przykłady dotyczą wagi
poszczególnych rzeczy.
Odzież i przedmioty
użytku domowego
Bawełniane powłoki
na kołdry
Bawełniane powłoki
na kołdry
Prześcieradła
(podwójne)
Prześcieradła
(pojedyncze)
Duże obrusy 700 Suknie 350
Małeobrusy 250 Dżinsy 700
Serwetkistołowe 100
Ręcznik kąpielowy 700
Ręcznik do rąk 350
* Waga suchego prania przed praniem.
Przybliżona
waga (g)*
1500 Bluzki 150
1000
500 Koszule 250
350
Odzież i
przedmioty
użytku
domowego
Bawełniane
koszule
Bawełniane
sukienki
Chusteczki
do nosa (10
sztuk)
Podkoszulki
(T-Shirt)
Przybliżona
waga (g)*
300
500
100
125
31
Page 32

5 Obsługa urządzenia
1
5.1 Panel kontrolny
1. Przycisk Wł./Wył./Wybór programu
2. Przycisk Start/Tryb gotowości
3. Przycisk czasu zakończenia
5.2 Symbole
3
4
5
2
4. Przycisk poziomu suszenia
5. Głośność brzęczyka/przycisk wyboru
programów czasowych
Zbiornik
wody
Koniec /
Wygładzanie
Czyszczenie
ltru
Zał./Wył
Filterlade /
warmtewisselaar
czasowa
reiniging
Zwłoka
Blokada
przed dostępem
dzieci
Suszenie
Wycisz
Suszenie do
przechowania
w szae
Zwiększ
głośność
Suszenie do
prasowania
Xpress 14
5,3. Przygotowanie suszarki
• Podłącz suszarkę.
• Otwórz drzwiczki.
• Umieścić pranie w suszarce bez wpychania
na siłę.
• Popchnij drzwiczki i zamknij je.
OSTRZEŻENIE!
A
Upewnij się, że pranie
nie jest przytrzaśnięte
drzwiczkami.
32
Dżinsy
Tkaniny
delikatne
Niemowlęce
Koszule
Bardzo
wysuszone
Odzież
sportowata
Suszenie do
przechowania
w szae plus
Wietrzenie
Start/Pauza
Bawełna
Syntetyczne
Wybierz żądany program za pomocą przycisku
Wł./Wył./Wybór programu; urządzenie włączy
się.
UWAGA !
C
• Wybranie programu za pomocą przycisku
Wł./Wył./Wybór programu nie oznacza
rozpoczęcia pracy. Aby uruchomić program
wciśnij przycisk Start/Tryb gotowości.
Suszarka / Instrukcja obsługi
Mieszane
Koszyk z
wełną /
Programy ze
ster owaniem
czasowym
Codziennie
Xpress 30
Page 33

5.4 Wybór programu oraz tabela zużycia energii
PL
Programy Opis programu
W tym programie można suszyć bawełniane
Bawełna, prasowania
Bawełna Eco
Bawełna, do szafy
Bawełna, ekstra suche
Syntetyki do
prasowania
Syntetyki do szafy
Programy czasowe
Odświeżanie
Delikatne/Koszule
pranie do prasowania (koszule, T-shirty, obrusy
itp.) – będzie ono lekko wilgotne, aby ułatwić
prasowanie.
W tym programie można suszyć całe pranie
bawełniane (T-shirty, spodnie, pidżamy, ubranka
dziecięce, bieliznę, pościel itp.). Można włożyć
pranie do szafy bez prasowania.
Można użyć tego programu do ekstra suszenia
grubego prania, np.: spodni lub dresu. Można
włożyć pranie do szafy bez prasowania.
W tym programie można suszyć grube
bawełniane pranie, takie jak: ręczniki czy
szlafroki. Można włożyć pranie do szafy bez
prasowania.
W tym programie można suszyć syntetyczne
pranie do prasowania (koszule, T-shirty, obrusy
itp.) – będzie ono lekko wilgotne, aby ułatwić
prasowanie.
W tym programie można suszyć całe pranie
syntetyczne (koszule, T-shirty, bieliznę, obrusy
itp.). Można włożyć pranie do szafy bez
prasowania.
Można wybrać program czasowy od 10 do 160
minut, aby osiągnąć żądany poziom wysuszenia
w niskiej temperaturze. W tym programie czas
działania suszarki wynosi tyle, co ustawiony
czas, niezależnie od poziomu wilgotności prania.
Ten produkt można stosować opcjonalnie z
koszem do suszarki. W przypadku produktów
sprzedawanych bez kosza do suszarki można go
dokupić w autoryzowanym serwisie i korzystać
z opisanych powyżej programów suszących.
Aby uzyskać szczegółowe instrukcje, należy się
odnieść do instrukcji obsługi kosza do suszarki.
Wietrzy przez 10 minut bez wdmuchiwania
gorącego powietrza. Z tym programem możesz
przewietrzyć bawełniane i lniane ubrania, które
były schowane w szafie przez dłuższy czas, aby
usunąć zapach stęchlizny. Możesz użyć tego
programu do wietrzenia i zmiękczania wełnianych
ubrań, nadających się do prania w pralce. Nie
używaj do zupełnego suszenia.
Suszy koszule w delikatniejszy sposób,
powodując mniej zagnieceń i ułatwiając
prasowanie.
Prędkość
Pojemność (kg)
8 1000 145
8 / 4 1000 197
8 1000 205
8 1000 210
4 800 60
4 800 70
- - -
- - 10
1,5 1200 70
wirowania w
pralce (obr./min.)
Czas suszenia
(min)
Suszarka / Instrukcja obsługi
33
Page 34

Jeans
Outdoor/Sport
Mix/Codzienny
BabyProtect+
Kołdra / Puchowe
Codzienne Szybkie
Zużycie energii
W tym programie można suszyć dżinsowe
spodnie, spódnice, koszule lub kurtki.
Używaj go do suszenia ubrań wykonanych
z tkanin syntetycznych, bawełnianych
lub mieszanych albo wodoodpornych,
takich jak kurtka wielofunkcyjna, płaszcz
przeciwdeszczowy, itp. Odwróć je na lewą stronę
przed suszeniem.
Za pomocą tego programu można suszyć
zarówno pranie z bawełny, jak i z włókien
syntetycznych.Z tym programem można suszyć
odzież sportową i fitness.
Jest to długi program przydatny do prania dla
osób cierpiących na alergie lub ze specyficznymi
wymaganiami higienicznymi (bawełniane ubrania
dla niemowląt, ręczniki, bielizna, itp.). Wysoki
poziom higieny osiągany jest dzięki wysokiej
temperaturze. ((Program ten został uznany
i zatwierdzony przez brytyjską „The British
Foundation” (Allergy UK).))
Możesz suszyć odzież wypełnioną puchem lub
włóknami, nadającą się do suszenia w suszarce
jako jedną sztukę prania. Możesz suszyć kołdrę
o rozmiarze king size, poduszkę lub płaszcze
jako jedną sztukę prania. Susz ubrania, takie jak
płaszcze i kurtki, obrócone na lewą stronę.
Użyj tego programu, aby przygotować 2 koszule
do prasowania.
4 1200 150
2 1000 135
4 1000 125
5 800 185
- 800 165
0,5 1200 30
Programy Pojemność (kg)
w pralce
Prędkość
wirowania
(obr./min.)
Bawełna Eko* 8 / 4 1000 60% 1,95
Bawełna, prasowanie 8 1000 60% 1,5
Włókna syntetyczne,
bez prasowania
Zawiera fluorowane gazy cieplarniane. Zamknięte hermetycznie. R450a / 0,22 kg - GWP:1430 - 0,133 tCO2e
„Tryb Bawełna Eco“ używany przy pełnym lub częściowym ładunku jest standardowym
programem suszenia, do którego odnoszą się informacje umieszczonej na etykiecie i karcie;
program ten jest odpowiedni do suszenia normalnie mokrego prania składającego się z ubrań
bawełnianych; jest to najefektywniejszy program jeśli chodzi o chodzi o zużycie energii dla
suszenia bawełny.
4 800 40% 0,75
ilość
wilgoci
pozostałej
Przybliżona
energii
Zużycie
* : Etykieta efektywności energetycznej programu standardowego (EN 61121:2012) Wszystkie
wartości w tabeli są określone zgodnie ze standardem EN 61121:2012. Wartości zużycia mogą
różnić się od wartości podanych w tabeli, w zależności od rodzaju prania, prędkości wirowania,
warunków zewnętrznych oraz wartości napięcia prądu.
34
Suszarka / Instrukcja obsługi
(kWh)
Page 35

Allergy UK to marka
Brytyjskiego Stowarzyszenia
Alergików. Pieczęć jakości
została stworzona po to, aby
doradzać ludziom
wymagającym rekomendacji
dotyczących produktów ograniczających/
obniżających/eliminujących alergeny lub
znacząco redukujących zawartość
alergenów w otoczeniu osób cierpiących na
alergie. Ma ona na celu zapewnienie
testowania produktów w sposób naukowy
lub badania je w sposób zapewniający
wymierne wyniki.
5.5 Funkcje dodatkowe
Brzęczyk/czas
Suszarka wyda sygnał dźwiękowy po
zakończeniu programu. Jeśli nie chcesz, aby
urządzenie wydawało słyszalne ostrzeżenie,
naciśnij przycisk „Brzęczyka/Czasu”. Po
naciśnięciu przycisku Brzęczyka/Czasu światło
zaświeci się, ale słyszalne ostrzeżenie po
zakończeniu programu nie rozlegnie się.
UWAGA !
C
• Możesz wybrać tą funkcję przed lub po
rozpoczęciu pracy programu.
Przyciski Brzęczyka/czasu służą do regulacji
czasu trwania programu, podczas gdy wybrane
są programy Kosz/Czas.
Poziom suszenia
Przycisk ustawień suchości służy do wyboru
stopnia wysuszenia. Czas trwania programu
może różnić się w zależności od dokonanego
wyboru.
Zaświeci się dioda czasu zakończenia.
(Gdy wciśniesz i przytrzymasz przycisk,
czas zakończenia będzie przesuwał się bez
przerwy).
4. Naciśnij przycisk Start/Tryb gotowości.
Rozpocznie się odliczanie czasu
zakończenia. „:” Zacznie migać separator „:”
na środku wyświetlanego czasu opóźnienia.
UWAGA !
C
• Możesz wkładać i wyjmować pranie przez
czasem zakończenia. Wyświetlany czas
stanowi sumę standardowego czasu
suszenia oraz czasu zakończenia. Dioda
zakończenia wyłączy się po zakończeniu
odliczania, rozpocznie się suszenie oraz
zaświeci się dioda suszenia.
Zmiana czasu zakończenia
Jeśli chcesz zmienić czas opóźnienia podczas
odliczania:
Anuluj program przekręcając pokrętło
wyboru Wł./Wył./Program. Wybierz żądany
program i powtórz czynnośąć wyboru czasu
zakończenia.
Anulowanie funkcji czasu zakończenia
Jeśli chcesz anulować odliczanie czasu
zakończenia i rozpocząć program od razu:
Anuluj program przekręcając pokrętło wyboru
Wł./Wył./Program. Wybierz żądany program i
naciśnij przycisk Startu/Trybu gotowości.
5.6 Wskaźniki ostrzeżenia
UWAGA !
C
• Wskaźniki ostrzeżenia mogą się różnić w
zależności od modelu suszarki.
UWAGA !
C
• Aktywacji tej funkcji można dokonać jedynie
przed uruchomieniem programu.
Czas zakończenia
Funkcja czasu zakończenia umożliwia
opóźnienie czasu zakończenia pracy programu
do 24 godzin.
1. Otwórz drzwiczki bębna i włóż pranie.
2. Wybierz program suszenia.
3. Naciśnij przycisk wyboru czasu zakończenia
i ustaw czas opóźnienia wedle życzenia.
Suszarka / Instrukcja obsługi
Czyszczenie filtra
Po zakończeniu programu uruchamia się
symbol ostrzegawczy czyszczenia filtra.
Zbiornik wody
Jeśli zbiornik na wodę zapełni się podczas
pracy programu, lampka ostrzegawcza
zacznie migać, a urządzenie przejdzie w tryb
gotowości. W takim wypadku należy wylać
wodę ze zbiornika i ponownie uruchomić
program, naciskając przycisk Start/Tryb
gotowości. Wskaźnik ostrzeżenia wyłączy się, a
program zostanie wznowiony.
35
Page 36

Filterlade / warmtewisselaar reiniging
Po zakończeniu programu może się zapalić
symbol czyszczenia wymiennika ciepła lub
szuflady filtra.
5.7 Włączenie programu
Aby uruchomić program wciśnij przycisk
Startu/Trybu gotowości.
Wskaźniki Startu/Trybu gotowości i Suszenia
zaświecą się, wskazując rozpoczęcie
programu.
5.8 Blokada klawiszy
Urządzenie posiada blokadę klawiszy,
która chroni przed zakłócaniem przebiegu
programu suszenia, do którego mogłoby
dojść przez wciskanie przycisków w trakcie
pracy. Po dokonaniu aktywacji blokady
klawiszy wszystkie przyciski na panelu zostaną
dezaktywowane (z wyjątkiem przycisków Wł./
Wył./Anuluj oraz Blokada klawiszy).
Naciśnij jednocześnie przycisk Poziomu
suszenia i Brzęczyka na 3 sekundy, aby
włączyć blokadę klawiszy.
Blokada klawiszy musi być wyłączona, aby
móc rozpocząć nowy program po zakończeniu
bieżącego programu lub w przypadku
konieczności wstrzymania bieżącego
programu. Aby wyłączyć blokadę klawiszy,
przytrzymaj te same przyciski na 3 sekundy.
UWAGA !
C
• Po włączeniu blokady klawiszy na ekranie
wyświetlony zostanie symbol blokady.
• Blokada klawiszy wyłącza się po
wyłączeniu i włączeniu suszarki pokrętłem
Wł./Wył./Anuluj.
Kiedy blokada klawiszy jest aktywna:
Gdy suszarka pracuje lub znajduje się w stanie
gotowości, symbole wskaźników nie zmienią
się po zmianie położenia pokrętła wyboru
programu.
UWAGA !
C
• Gdy suszarka pracuje, a blokada klawiszy
jest aktywna, rozlegnie się dwukrotny
sygnał dźwiękowy, gdy pokrętło wyboru
programów zostanie przekręcone. Jeśli
blokada klawiszy zostanie wyłączona bez
ustawienia pokrętła wyboru programu w
poprzedniej pozycji, program zostanie
przerwany z powodu zmiany pozycji
pokrętła wyboru programu.
5.9 Zmiana programu po jego
uruchomieniu
Możesz zmienić wybrany wcześniej program
suszenia prania na inny po rozpoczęciu pracy
urządzenia.
• Na przykład, wybierz program Super
suszenia, obracając pokrętło wyboru funkcji
Wł./Wył./Program, aby wybrać Super
suszenie zamiast Do prasowania.
• Aby uruchomić program wciśnij przycisk
Startu/Trybu gotowości.
Wkładanie i wyjmowanie ubrań w trybie
gotowości
Jeśli chcesz włożyć do suszarki lub wyjąć z niej
ubrania po rozpoczęciu programu suszenia:
• Naciśnij przycisk Start/Tryb gotowości, aby
wprowadzić suszarkę w tryb gotowości.
Proces suszenia zostanie zatrzymany.
• Otwórz drzwiczki bębna w Trybie gotowości
i zamknij je po włożeniu lub wyjęciu prania.
• Aby uruchomić program wciśnij przycisk
Startu/Trybu gotowości.
UWAGA !
C
• Wkładanie prania po rozpoczęciu
czynności suszenia może doprowadzić do
wymieszania się suchego prania wewnątrz
urządzenia z mokrym praniem, czego
skutkiem może być jego wilgotność po
zakończeniu programu.
• Wkładanie lub wyjmowanie prania w trakcie
suszenia może być dokonywane dowolną
ilość razy. Jednakże operacja ta nieustannie
zakłóca proces suszenia, doprowadzający
tym samym do wydłużenia trwania
programu oraz wzrostu zużycia energii. W
związku z tym zaleca się wkładać pranie
przed rozpoczęciem programu.
• Jeśli wybór nowego programu dokonany
zostanie za pomocą pokrętła gdy
urządzenie znajduje się w trybie gotowości,
aktualny program pracy zostanie
zakończony.
OSTRZEŻENIE!
• Nie dotykaj wewnętrznej powierzchni
bębna suszarki podczas wkładania lub
wyjmowania prania po rozpoczęciu pracy
suszarki. Powierzchnia bębna jest gorąca.
36
Suszarka / Instrukcja obsługi
Page 37

5.10 Anulowanie programu
Jeśli chcesz anulować program i zakończyć
suszenie z jakiegokolwiek powodu po
rozpoczęciu pracy suszarki, przekręć pokrętło
Wł./Wył./Anuluj, a program zostanie anulowany.
A
OSTRZEŻENIE!
• Wnętrze suszarki będzie skrajnie gorące po
anulowaniu programu w trakcie działania
urządzenia, dlatego należy uruchomić
program odświeżania, aby pozwolić
urządzeniu ostygnąć.
5.11 Zakończenie programu
Po zakończeniu programu zaświecą się
kontrolki Ostatnie/Zapobieganie zagniataniu
i Czyszczenia filtra włókien.Można otworzyć
drzwiczki urządzenia, a suszarka będzie
gotowa do ponownego uruchomienia.
W celu wyłączenia suszarki, przekręć pokrętło
Wł./Wył./Program do pozycji Wł./Wył., aby
wyłączyć urządzenie.
UWAGA !
C
• Jeśli pranie nie zostanie wyjęte po
zakończeniu programu, funkcja
zapobiegania zagniataniu zostanie
włączona na 2 godziny, aby zapobiec
zagniataniu prania wewnątrz urządzenia.
Program porusza praniem w odstępach
10-minutowych, aby zapobiec jego
zagniataniu.
Suszarka / Instrukcja obsługi
37
Page 38

6 Konserwacja i czyszczenie
6.1 Powierzchnia wewnętrzna drzwi
bębna
Włosy i włókna, które zostały oddzielone z
prania w trakcie procesu suszenia zbierane są
w filtrze włókien.
UWAGA
C
• Włókna powstają podczas noszenia i
prania ubrań.
• Gniazdo filtra można oczyścić
odkurzaczem.
• Oba filtry należy oczyścić z
nagromadzonych włókien pod bieżącą
wodą lub miękką szczotką. Osusz filtr
przed ponownym umieszczeniem.
A
OSTRZEŻENIE!
• Po każdym cyklu suszenia należy
oczyścić filtr włókien oraz wewnętrzną
powierzchnię drzwi bębna.
Aby oczyścić filtr włókninowy:
• Otwórz drzwiczki.
• Przytrzymaj pierwszą część (filtr
wewnętrzny) dwuczęściowego filtra i wyjmij
ją, pociągając do góry.
• Zbierz włosy, włókna i kulki bawełny ręką
lub miękką szmatką.
• Zdejmij drugą część (filtr zewnętrzny),
pociągając ją do góry.
UWAGA
C
• Upewnij się, że włosy, włókno i bawełna
nie wpadają do gniazda, w którym
zamontowane są filtry.
• Otwórz oba filtry (wewnętrzny i zewnętrzny),
usuwając włosy, włókna, kuleczki
bawełniane wilgotną ręką, odkurzaczem lub
ściereczką.
• Włóż filtry i
umieść je z
powrotem na
swoim miejscu.
• Wyczyścić wnętrze drzwi bębna i ich pralki
miękką, wilgotną szmatką.
6.2 Czyszczenie czujnika
W suszarce
znajdują
się czujniki
wilgotności, które
wykrywają, czy
pranie jest suche,
czy nie.
Aby oczyścić
czujniki:
• Otwórz drzwiczki bębna suszarki.
• Pozostawić maszynę do ostygnięcia, jeśli
jest jeszcze gorąca z powodu procesu
suszenia.
• Wytrzeć powierzchnie metalowe czujnika
miękką ściereczką, zwilżyć octem i
wysuszyć.
38
Suszarka / Instrukcja obsługi
Page 39

UWAGA
C
• Metalowe powierzchnie czujników należy
czyścić 4 razy w roku.
• Do czyszczenia metalowych powierzchni
czujników nie należy stosować
metalowych narzędzi.
OSTRZEŻENIE!
A
• Nigdy nie używać do czyszczenia
rozpuszczalników, środków
czyszczących lub podobnych substancji
z uwagi na ryzyko pożaru lub wybuchu!
6.3 Suszenie zbiornika na wodę
Podczas procesu suszenia wilgoć z prania
jest usuwana i kondensowana, a powstała w
ten sposób woda gromadzona w zbiorniku
na wodę. Opróżnij zbiornik wody po każdym
suszeniu.
OSTRZEŻENIE!
A
• Skondensowana woda nie nadaje się do
picia!
• Nigdy nie wyjmuj zbiornika na wodę w
trakcie uruchomionego programu!
Jeśli zapomnisz opróżnić zbiornik na wodę,
urządzenie zatrzyma się podczas kolejnych
cykli suszenia, gdy zbiornik na wodę będzie
pełny i zacznie migać symbol ostrzegawczy
zbiornika na wodę. W takim wypadku opróżnij
zbiornik na wodę i naciśnij przycisk Start /
Pauza aby wznowić program suszenia.
Aby opróżnić zbiornik na wodę:
1. Ostrożnie wyjmij zbiornik wody w szufladzie
lub pojemniku.
2. Opróżnij wodę ze zbiornika.
• Jeśli w lejku zbiornika na wodę
nagromadzą się włókna, należy oczyścić
go pod bieżącą wodą.
• Umieść zbiornik na wodę na swoim
miejscu.
UWAGA
C
• Jeśli ewentualnie stosowany jest
bezpośredni spust wody, nie ma
potrzeby opróżniania zbiornika na wodę.
6.4 Czyszczenie parownika
Włosy i włókna, które nie są wychwytywane
przez filtr włókninowy, trafiają do żeber wyparki
za deską szczytową i gromadzą się w tym
miejscu. Wyparkę należy oczyścić, gdy ikona
zacznie migać, bądź co 6 miesięcy.
• Otwórz deskę
szczytową,
naciskając ją.
• Aby otworzyć
drzwi kanału
powietrza,
przesuń zatrzask
zwalniający.
• Oczyść włókna
przy wyparce
wilgotną
ściereczką /
odkurzaczem
ze szczotką,
przesuwając je w
górę i w dół.
Suszarka / Instrukcja obsługi
39
Page 40

• Po zakończeniu
procesu
czyszczenia
umieść drzwi
kanału powietrza
na swoim
miejscu, przesuń
zatrzaski, aby
je zamknąć i
zamknij płytę
przypodłogową.
A
OSTRZEŻENIE!
• Dopuszczalne jest czyszczenie ręczne pod
warunkiem założenia rękawic ochronnych.
Nie czyścić gołymi rękoma. Żebra wyparki
mogą uszkodzić dłonie.
• Czyszczenie ruchem w prawo lub lewo
może uszkodzić żebra wyparki. Może to
doprowadzić do problemów z suszeniem.
40
Suszarka / Instrukcja obsługi
Page 41

7 Rozwiązywanie problemów
Suszenie trwa za długo.
Pory filtrów włókninowych (filtrów wewnętrznych i
zewnętrznych) mogą się zatykać. >>> Wypłucz filtry
włókninowe ciepłą wodą i osusz.
Przednia strona wyparki może być zatkana. >>>
Wyczyścić przednią stronę wyparki.
Kratka wentylacyjna z przodu urządzenia może być
zamknięta. >>> Usuń wszelkie rzeczy znajdujące się przed
kratką wentylacyjną z przodu, które blokują wentylację.
Wentylacja może być niewystarczająca, ponieważ
pomieszczenie, w którym zainstalowane jest urządzenie
jest zbyt małe. >>> Otwórz drzwi lub okna aby
temperatura w pomieszczeniu nie wzrosła za bardzo.
Na czujniku wilgotności mogła nagromadzić się warstewka
kamienia wapiennego. >>> Wyczyść czujnik wilgotności.
Mogła zostać załadowana nadmierna ilość prania. >>> Nie
przeładowuj suszarki.
Pranie mogło zostać niewystarczająco odwirowane. >>>
Odwiruj pranie w pralce z wyższą prędkością.
Ubrania są wilgotne po suszeniu.
Mógł zostać użyty program niewłaściwy dla tego rodzaju
prania.>>> Sprawdź metki na ubraniach i wybierz program
odpowiedni dla ich typu lub wydłuż czas suszenia.
Pory filtrów włókien (filtrów wewnętrznych i zewnętrznych)
mogą się zatykać. >>> Wypłucz filtry ciepłą wodą i osusz.
Przednia strona wyparki może być zatkana. >>>
Wyczyścić przednią stronę wyparki.
Mogła zostać załadowana nadmierna ilość prania. >>> Nie
przeładowuj suszarki.
Pranie mogło zostać niewystarczająco odwirowane. >>>
Odwiruj pranie w pralce z wyższą prędkością.
Nie można włączyć suszarki lub nie można rozpocząć
programu. Suszarka nie działa po jej skonfigurowaniu.
Wtyczka kabla zasilającego może być wyjęta z gniazdka.
>>> Upewnij się, że kabel zasilania jest podłączony.
Drzwiczki suszarki mogą być otwarte. >>> Upewnij się, że
drzwiczki suszarki są dokładnie zamknięte.
Może program nie został ustawiony lub nie został wciśnięty
przycisk Start / Pauza / Anuluj. >>> Sprawdź, czy program
został ustawiony i nie znajduje się w położeniu Pauza.
Mogła zostać włączona blokada klawiszy. >>> Wyłącz
blokadę klawiszy.
Program został przerwany bez powodu.
Być może drzwiczki nie są dokładnie zamknięte. >>>
Upewnij się, że drzwiczki suszarki są dokładnie zamknięte.
Może wystąpiła awaria zasilania. >>> Naciśnij przycisk
Start / Pauza / Anuluj, aby uruchomić program.
Zbiornik na wodę może być pełny. >>> Opróżnij zbiornik
wody.
Odzież uległa skurczeniu, stwardniała lub została
uszkodzona.
Mógł zostać użyty program niewłaściwy dla tego rodzaju
prania. >>> Sprawdź metki na ubraniach i wybierz
program odpowiedni dla tego typu ubrań.
Woda cieknie z drzwiczek suszarki.
Na wewnętrznych powierzchniach drzwiczek suszarki i
uszczelki mogły zgromadzić się włókna. >>> Wyczyść
wewnętrzne powierzchnie drzwiczek i uszczelki.
Drzwiczki same się otwierają.
Być może drzwiczki nie są dokładnie zamknięte. >>>
Dociśnij drzwiczki, aż usłyszysz dźwięk zamknięcia.
Świeci się/miga symbol zbiornika wody.
Zbiornik na wodę może być pełny. >>> Opróżnij zbiornik
wody.
Wąż wylotowy wody mógł się zawinąć. >>> Jeśli
urządzenie jest podłączone bezpośrednio do odpływu,
sprawdź wąż odprowadzający.
Oświetlenie wnętrza suszarki nie włącza się. (W modelach
z lampką)
Suszarka mogła nie być włączona za pomocą przycisku
WŁ/WYŁ. >>> Sprawdź, czy suszarka jest włączona.
Żarówka może być spalona. >>> Skontaktuj się z
autoryzowanym serwisem w celu wymiany lampy.
Świeci się ikona antyzmarszczkowa.
Może zostać włączony tryb antyzmarszczkowy, który
zapobiega zagniataniu się prania w suszarce. Wyłącz
suszarkę i wyjmij pranie.
Świeci się ikona czyszczenia filtra włókninowego.
Filtr włókninowy (wewnętrzny i zewnętrzny) może być
brudny. >>> Wypłucz filtry ciepłą wodą i osusz.
Na porach filtra może powstawać warstwa, która prowadzi
do zatykania się filtra. >>> Wypłucz filtry ciepłą wodą i
osusz.
Filtry włókninowe mogą być niewyczyszczone. >>> Włóż
filtry wewnętrzne i zewnętrzne na swoje miejsce.
Z maszyny wydobywa się dźwiękowy sygnał ostrzegawczy
Filtry włókninowe mogą być niewyczyszczone. >>> Włóż
filtry wewnętrzne i zewnętrzne na swoje miejsce.
Miga ikona ostrzegawcza wyparki.
Przednia strona wyparki może być zatkana włóknami. >>>
Wyczyścić przednią stronę wyparki.
Filtry włókninowe mogą być niewyczyszczone. >>> Włóż
filtry wewnętrzne i zewnętrzne na swoje miejsce.
Oświetlenie wnętrza suszarki włącza się. (W modelach z
lampką)
Jeśli suszarka jest podłączona do gniazdka, naciśnięty
zostaje przycisk WŁ/WYŁ i otwarte zostają drzwi; włącza
się światło. >>> Odłącz suszarkę lub ustaw przycisk WŁ/
WYŁ w pozycji WYŁ.
OSTRZEŻENIE!
A
• Jeśli problem nie zniknie po wykonaniu instrukcji
podanych w tym rozdziale, skontaktuj się ze
sprzedawcą lub autoryzowanym serwisem. Nigdy
nie próbuj samodzielnie naprawić urządzenia.
UWAGA
C
• W przypadku pojawienia się problemu z jakąkolwiek
częścią urządzenia można poprosić o jej wymianę,
kontaktując się z autoryzowanym serwisem wraz z
podaniem numeru modelu urządzenia.
• Eksploatacja urządzenia z nieoryginalnymi częściami
może prowadzić do jego nieprawidłowego działania.
• Producent i dystrybutor nie ponoszą
odpowiedzialności za wadliwe działanie wynikające
z użycia nieoryginalnych części.
Suszarka / Instrukcja obsługi
41
Page 42

KARTA PRODUKTU
Zgodna z Rozporządzeniem Delegowanym Komisji (UE) nr 392/2012
Nazwa dostawcy lub znak firmowy
Nazwa modelu
Pojemność znamionowa (kg)
Ewakuacyjna
Typ suszarki bębnowej
Klasa efektywności energetycznej
Roczne zużycie energii (kWh)
(1)
(2)
Typ obsługi
Zużycie energii przy pełnym ładunku w standardowym programie dla bawełny (kWh)
Zużycie energii przy częściowym ładunku w standardowym programie dla bawełny (kWh)
Zużycie energii w trybie wyłączenia przy pełnym ładunku w standardowym programie dla bawełny, P (W)
Zużycie energii w trybie czuwania przy pełnym ładunku w standardowym programie dla bawełny, P (W)
Czas trwania trybu czuwania (min.)
Standardowy program dla bawełny
Czas trwania programu przy pełnym ładunku w standardowym programie dla bawełny, T (min.)
Czas trwania programu przy częściowym ładunku w standardowym programie dla bawełny, T (min.)
Ważony czas trwania programu przy pełnym lub częściowym ładunku w standardowym programie dla bawełny (T )
Klasa efektywności kondensacyjnej
Średnia efektywność kondensacyjna przy częściowym ładunku w standardowym programie dla bawełny, C
Średnia efektywność kondensacyjna przy częściowym ładunku w standardowym programie dla bawełny, C
Ważona efektywność kondensacyjna przy pełnym lub częściowym ładunku w standardowym programie dla bawełny, C
Poziom mocy dźwięku przy pełnym ładunku w standardowym programie dla bawełny
Do zabudowy
(3)
dry
(4)
(5)
Kondensator
Automatyczny
Nieautomatyczny
O
L
dry1/2
t
dry
dry1/2
BEKO
MDS8412RX / DS8412GX
8
-
A++
235
-
1,95
1,06
0,5
1,0
30
197
115
150
B
86%
86%
t
86%
65
-
: Tak - : Nie
(1) Skala od A+++ (najbardziej efektywna) do D (najmniej efektywna)
(2) Zużycie energii w oparciu o 160 cykli suszenia przy pełnym lub częściowym ładunku w standardowym programie dla bawełny oraz zużyciu w trybach niskonapięciowych.
Rzeczywiste zużycie energii na cykl będzie zależeć od sposobu użytkowania urządzenia.
(3) „Tryb suszenia do szafy“ używany przy pełnym lub częściowym ładunku jest standardowym programem suszenia, do którego odnoszą się informacje umieszczonej na tej
karcie; program ten jest odpowiedni do suszenia normalnie mokrego prania składającego się z ubrań bawełnianych; jest to najefektywniejszy program jeśli chodzi o chodzi o
zużycie energii dla suszenia bawełny.
(4) Skala od G (najmniej efektywna) do A (najbardziej efektywna)
(5) Ważona średnia wartość —L wyrażona w dB(A) na 1 pW
42
WA
Suszarka / Instrukcja obsługi
Page 43

Page 44

 Loading...