How it Works
Log In / Sign Up
Buy Points
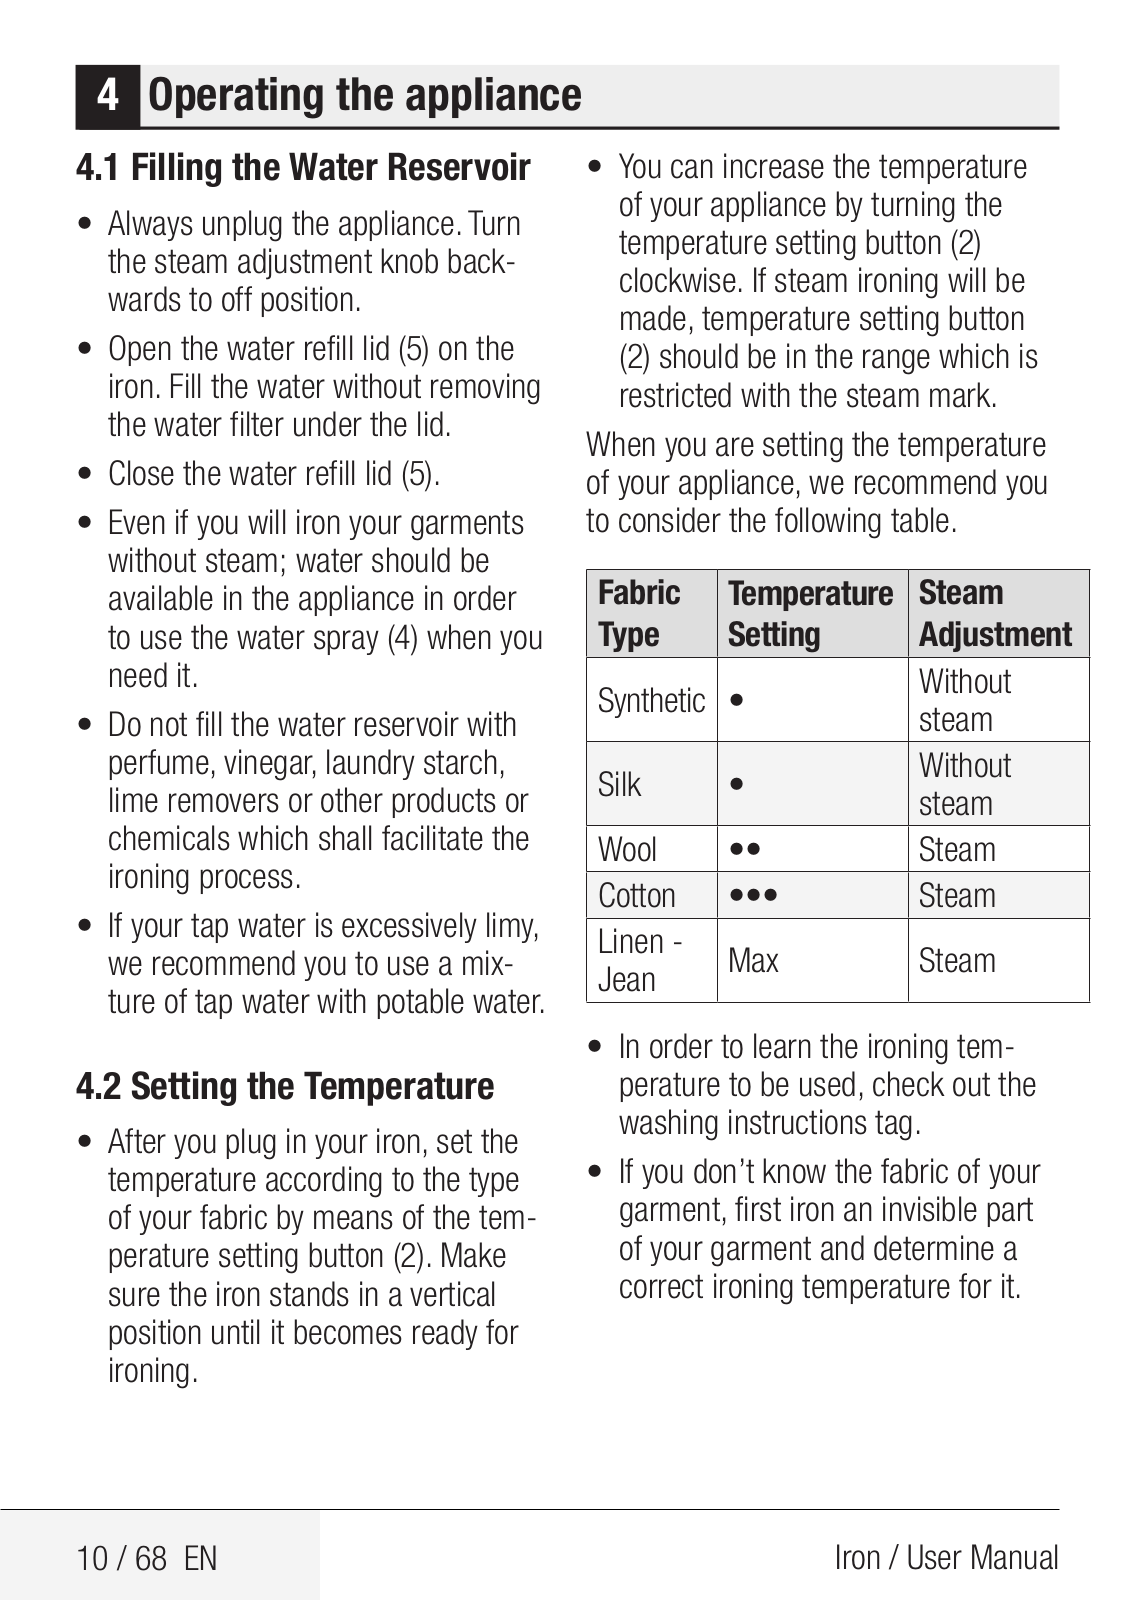
How it Works
FAQ
Contact Us
Questions and Suggestions
Users
Beko
Loading...
B
BKK 2111 P
14
BKK 2112
BKK 2113
13
BKK 2113M
9
BKK 2113 P
4
BKK 2114
BKK 2114 Y
3
BKK 2115
4
BKK 2115 BLS
2
BKK 2115 E
2
BKK 2115 EY
BKK 2116
3
BKK 2117
BKK 2118
4
BKK 2118 B
2
BKK 2119 Y
BKK 2120
BKK 2123 A
BKK 2125
BKK 2126 P
BKK 2127 P
2
BKK 2131
6
BKK 2132
2
BKK 2132 K
2
BKK 2133
4
BKK 2135
BKK 2136
BKK 2137
2
BKK 2137 T
BKK 2139
2
BKK 2140
2
BKK 2141
2
BKK 2143
BKK 2144
4
BKK 2144 Y
3
BKK 2145
BKK 2146
BKK 2147
2
BKK 2152 NS
BKK 2153
BKK 2154
4
BKK 2155
5
BKK 2155 HBS
BKK 2156
3
BKK 2156 HB
BKK 2156 HBS
BKK 2158
3
BKK 2159
BKK 2160
BKK 2161
2
BKK 2162
BKK 2164 P
3
BKK 2165
BKK 2166
3
BKK 2167 RHB
BKK 2168
3
BKK 2169
2
BKK 2170
BKK 2171
BKK 2176
BKK 2178
BKK 2179
BKK 2181
2
BKK 2182 TG
2
BKK 2183 TG
2
BKK 2185
BKK 2185 TG
BKK 2187
2
BKK 2188
BKK 2189
BKK 2190
BKK 2191
BKK 2192 EK
BKK 2194
BKK 2195
BKK 2196
BKK 2197 TG
BKK 2198
BKK 2199
BKK 2201
BKK 2203
BKK 2204 SD
BKK 2205
2
BKK 2206 SD
BKK 2207
BKK 2207 SK
BKK 2210 C
2
BKK 2210 C BLS
BKK 2211
2
BKK 2212
BKK 2213
3
BKK 2214 IN
2
BKK 2215 IN
BKK 2216
BKK 2219 IN
BKK 2220 IC
BKK 2220 IN
BKK 2221 C
BKK 2232
2
BKK 2233
Loading...
Loading...
Nothing found
BKK 2162
User manual [EN,TR,FR,RU]
84 pgs
962.42 Kb
0
Table of contents
Loading...
Beko BKK 2162 User manual [EN,TR,FR,RU]
...
Beko User manual [EN,TR,FR,RU]
Download
Specifications and Main Features
Frequently Asked Questions
User Manual
Download
Loading...
+
58
hidden pages
Unhide
You need points to download manuals.
1 point = 1 manual.
You can buy points or you can get point for every manual you upload.
Buy points
Upload your manuals