

Page 1
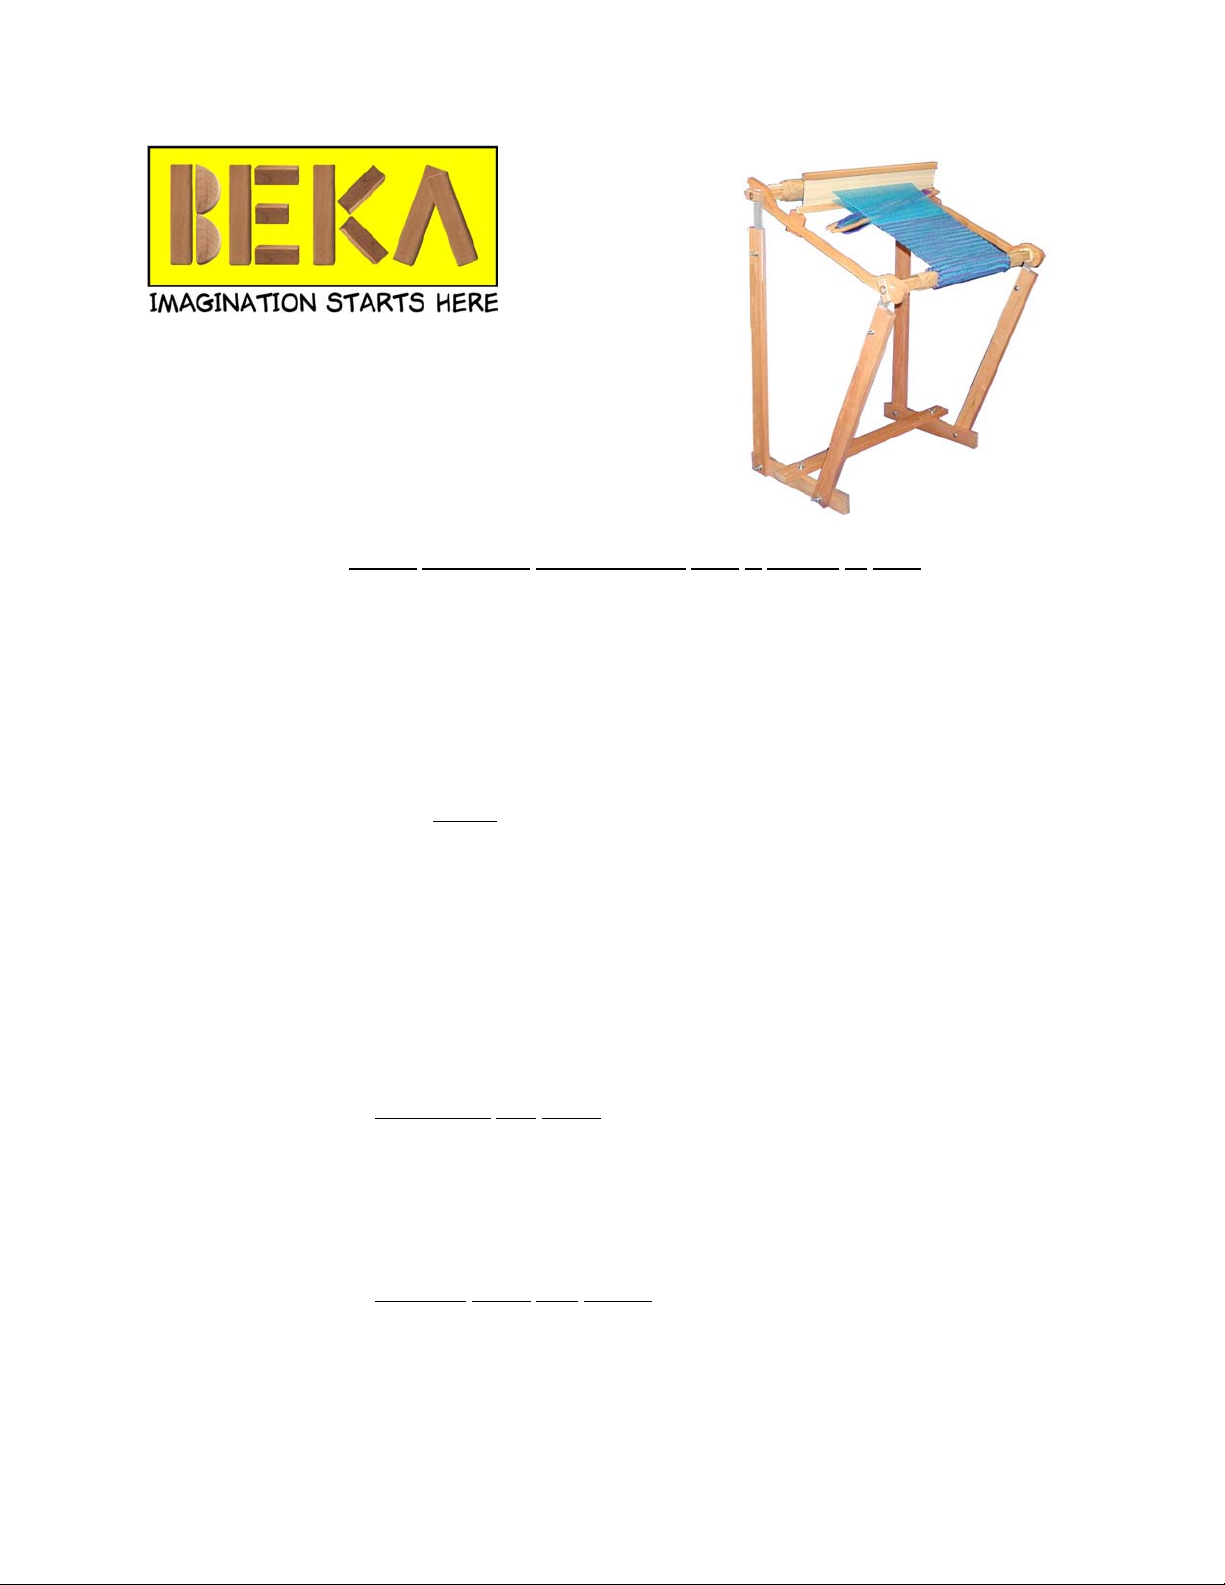
SG FLOOR STAND
Model SG-FS
Fits Model SG-20 and SG-24 Beka looms
STAND ASSEMBLY INSTRUCTIONS (refer to diagram on back)
1) Position base pieces with notches out as shown. Insert #3 bolts through base pieces from bottom.
Align cross bar holes so the bolts can pass through the proper pair of holes for the loom to be
mounted (use the holes closer to the center for the SG-20 loom , or nearest the end for the SG-24
loom). Secure each bolt with a flat washer, a lock washer and then a wing nut above the cross bar.
2) Position the 2 long uprights in the base notches so the sloted ends are up and facing forward as
shown. Pass a #2 bolt through each base piece and then each long upright, securing it with a flat
washer, lock washer and wing nut.
3)Position the short uprights outside
ward the long uprights as shown. Pass a #2 bolt from the inside through the front hole in each base
piece and then through the hole in the short upright. Secure each bolt with a flat washer, lock
washer and wing nut.
4) Position each of the 4 aluminum brackets in the slots provided at the top of the uprights, with the
notched bracket ends up. Attach the brackets with #2 bolts going from the inside of the stand to the
outside to reduce chances of snagging clothing on the wing nuts. the brackets in the long uprights
must be attached with the same choice of the 3 optional holes in the aluminum, so the back of the
loom will be level. The same is true of the front brackets in the short uprights. Experiment with the
various hole settings to find the loom position that works best for you. Secure with flat washers, lock
washers and wing nuts.
ATTACHING
Loosen the 4 knobs on your loom. Slip the loom’s threaded beam rods into the notches in each aluminum bracket, being sure to position the bracket between the washers and the knobs. Aluminum
can discolor the sides of your loom, so it is important that the washers be between the wood and the
brackets. Retighten knobs. Check that the height is comfortable and raise or lower the aluminum
brackets as necessary. Begin weaving.
STORING
To temporarily store your loom and stand, remove loom from the long upright brackets, leaving it
attached to the short upright brackets. Fold the loom down, and lean the short uprights backward
until the loom hangs upside down and rests against the long uprights.
the base pieces, with the slotted ends up and facing back to-
THE LOOM
LOOM AND STAND
Beka Inc, 542 Selby Ave., St. Paul, MN 55102 (1-888-999-2352)
Page 2
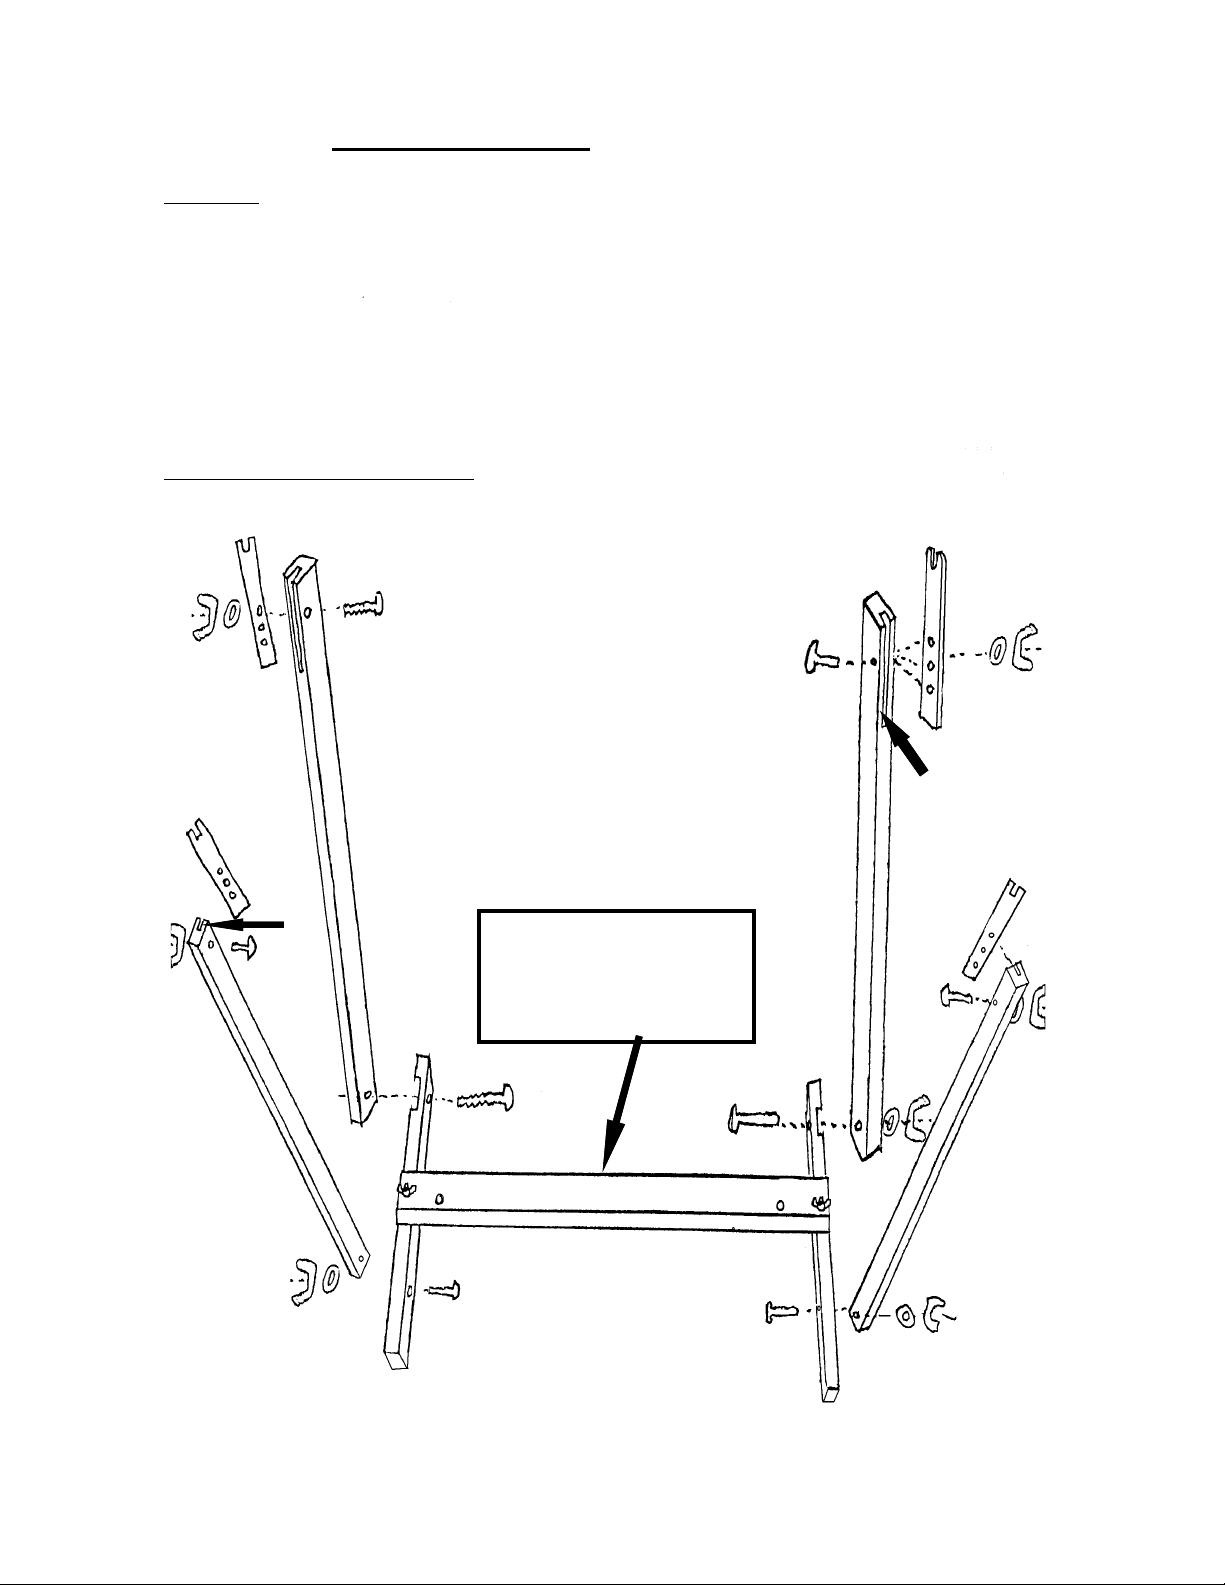
ASSEMBLY DIAGRAM
Hardware: All bolts should go through from the inside to provide smooth inside surfaces, to
avoid snagging yarn and clothing during use.
#1: 11/2” bolts, smooth tops (4)
#2: 2” bolts, smooth tops (4)
#3: 3” bolts, slotted tops (2)
All bolts are secured with a flat washer (10), a lock washer (10) and then a wing nut (10).
Note: the lock washers always go between the flat washers and the wing nuts.
Aluminum Support Brackets (4): These are positioned in the slots provided in the 4 uprights,
and secured with a bolt (#1) in the proper hole to give a comfortable weaving height.
___________________________________________________________
#1
#1
#1
short upright
slot
long upright
#3
NOTE: for an SG-20 loom, use
the inner 2 holes in the cross
bar. Use the 2 end holes for an
SG-24 loom (sketch shows SG24 setup).
#2
#2
cross bar
#2
long upright
#2
slot
#1
#3
short upright
base piece
base piece
file:SG floor st and instructions 02/17/00
 Loading...