

Page 1
ART TABLE INSTRUCTIONS
MODEL # 08402
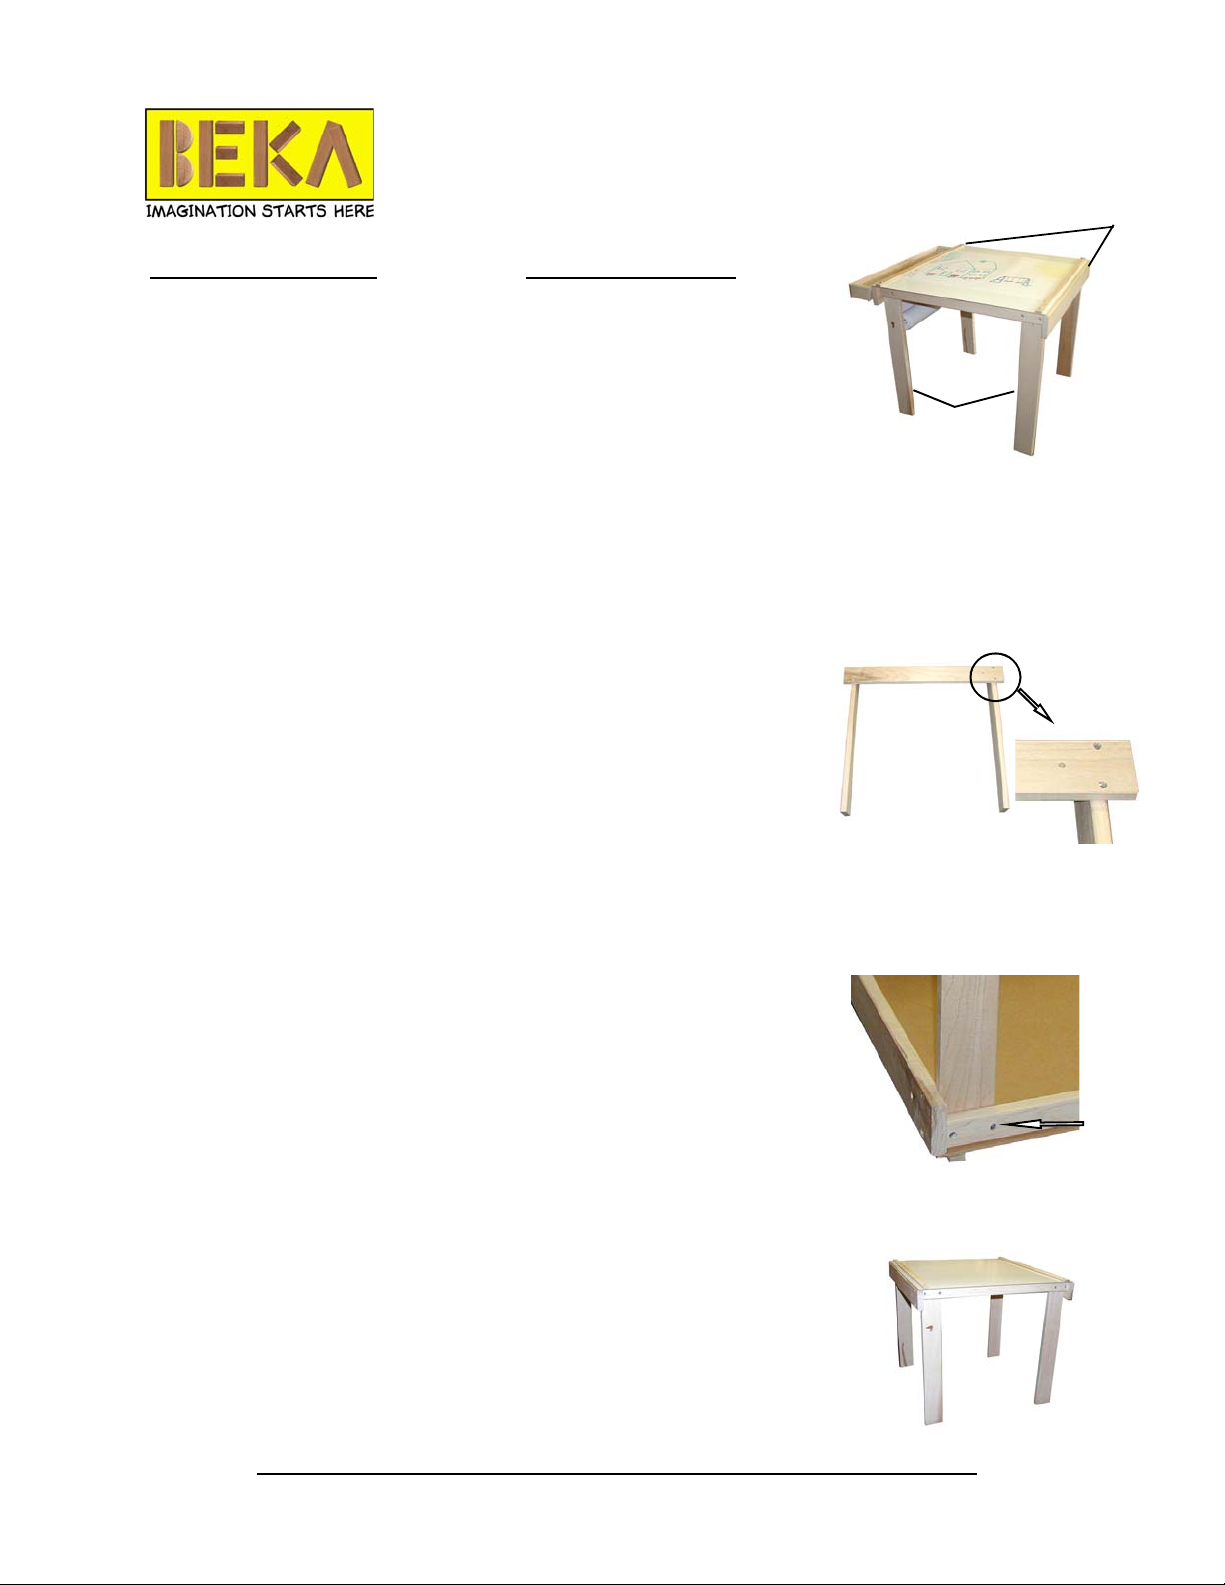
Tray mounting bars
Wood Parts Included:
1– Paper roll dowel
2– Tray mounting bars
1– Paint tray
1– Pre-assembled art surface
4– Table legs (2 drilled to hold paper roll)
Hardware Included:
2– 2” Carriage bolts
4– Washers
2– Wing nuts
2– Brass screws
2– Retainer buttons
16– # 10 X 1 1/4” wood screws
Table legs
Your table is shipped with the art surface and paper guides/cutters attached to
the two table top support bars. The remaining assembly steps are described
here. This should take only a few minutes, and requires a phillips screwdriver.
Fig. 1
Step 1) Attach the two legs drilled to hold the paper roll
dowel, to a tray mounting bar using 4 -1 1/4” screws. Be
sure the countersunk holes on the mounting bar are on
top, as shown (figure 1). Do not fully tighten the screws.
Step 2) Repeat with the second pair of legs (not drilled
for the paper roll dowel) and the other mounting bar.
Step 3) Place the table top upside down on a cloth (to
protect the top of the art surface and your floor from
scratches).
Step 4) Position and attach assembled leg sets to the table
top support bars using the 8 remaining screws (figure 2).
Again, do not fully tighten the screws.
Step 5) Carefully turn the table right side up (figure 3),
place it on a level surface, then tighten all 16 screws. Do
not over-tighten, as this may strip out the threads in the
legs or crack the wood.
Beka Inc., 542 Selby Ave., St. Paul MN 55102 Phone 1-888-999-2352
Fig. 2
Fig. 3
Page 2
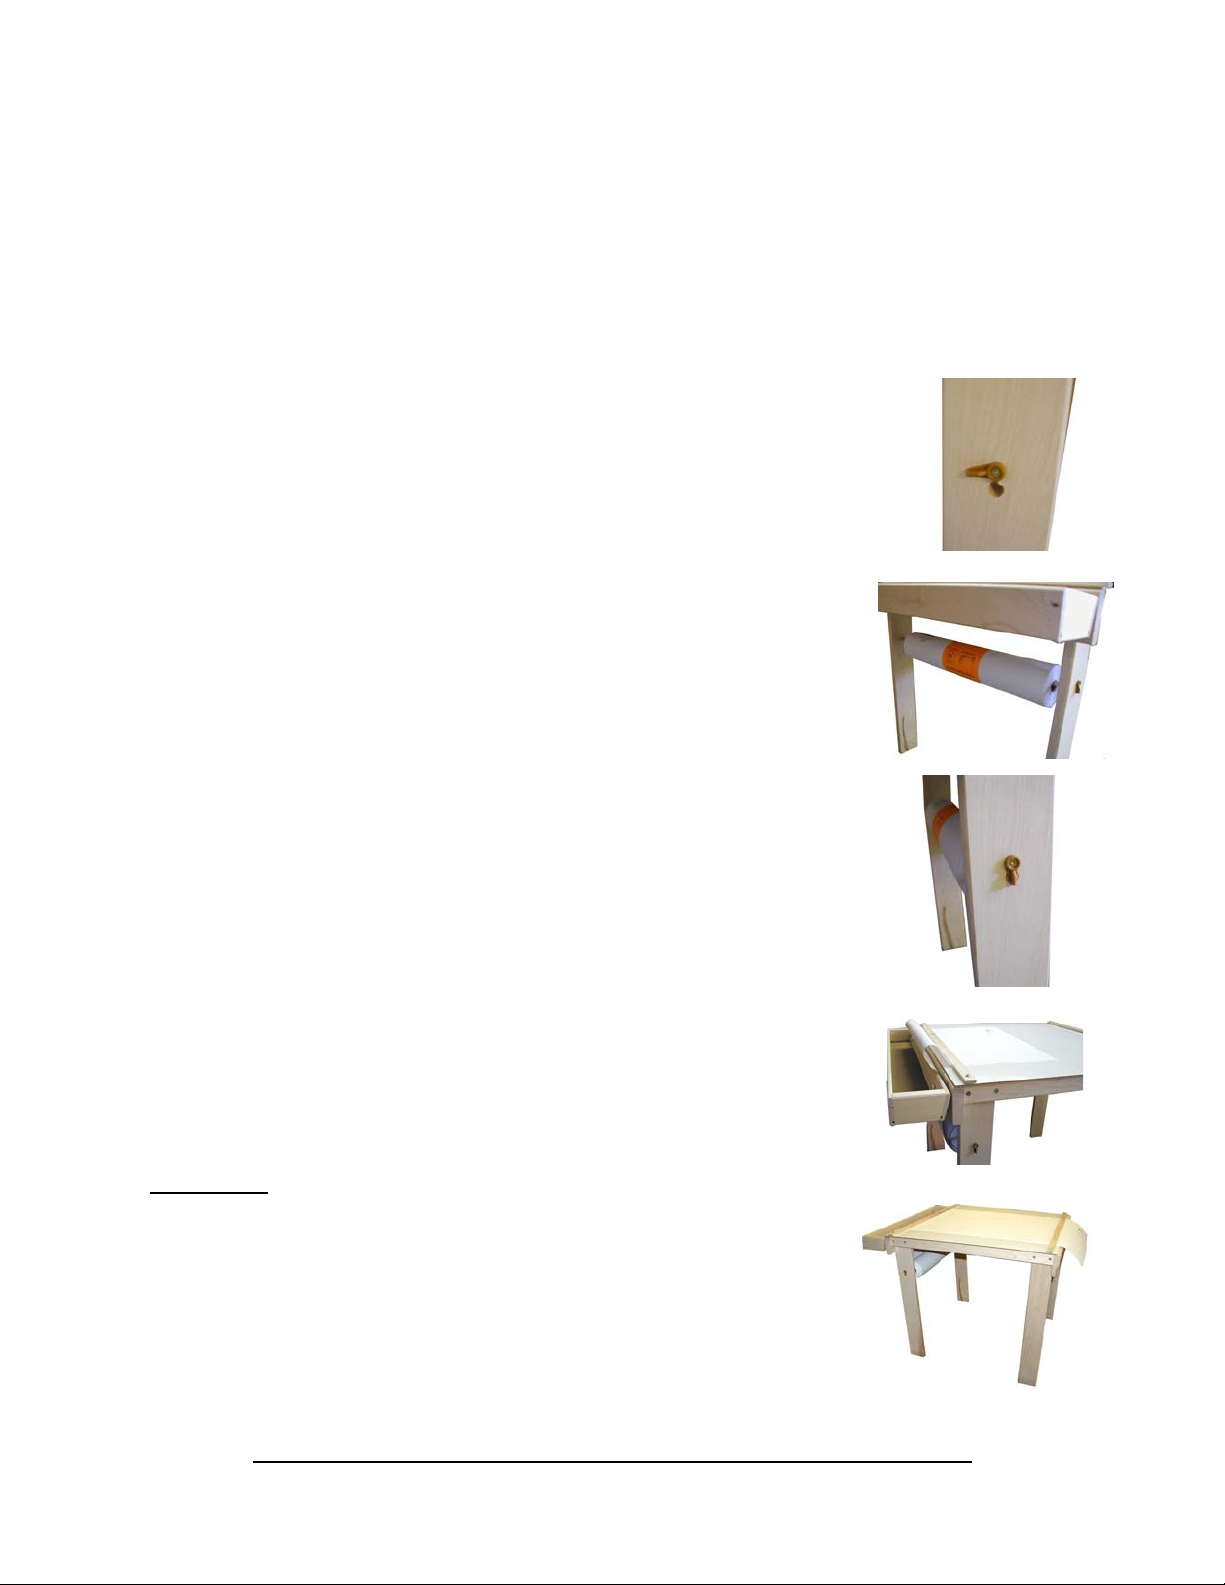
Step 6) Attach the paint tray to one of the tray mounting bars, using the 2”
carriage bolts. Place washers between the tray and tray support bar on each
bolt to act as a spacer between the tray and the tray support bar (paper will go
through the space provided). Secure each bolt with a washer and wing nut on
the inside of the mounting bar.
Step 7) Attach the two dowel retainer buttons on the
outside of the legs by passing a brass screw through
each retainer button and into the predrilled screw holes.
The screw head should fit flush into the recessed portion of the retainer button (figure 4).
Step 8) Slide the paper roll support dowel through the
predrilled dowel hole of one leg, then through the optional paper roll, and finally into the predrilled hole of
the opposite leg (figure 5). To lock paper roll dowel in
place simply turn retainer buttons so they cover the
dowel holes (figure 6).
Fig. 4
Fig. 5
Fig. 6
Step 9) Pull the paper up between the paint tray and
the paint tray support bar and slide the paper under the
paper guides/cutters (figures 7 & 8).
Please Note:
The art table is made of high-quality natural hard maple. The
table’s top is a white wipe-off marker surface. Be sure to test
markers on a corner to ensure easy erasure before allowing
general use (markers are not all created equal!). Clean the entire surface regularly. Marker stains may be removed with
special white board cleaners. Never use abrasive household
cleaners, which may damage the surface.
Beka Inc., 542 Selby Ave., St. Paul MN 55102 Phone 1-888-999-2352
Fig. 7
Fig. 8
 Loading...