

Page 1
WWW.BEGLEC.COM
Operation Manual
Mode d'emploi
Gebruiksaanwijzing
Bedienungsanleitung
Manual de instrucciones
Manual do utilizador
EN
FR
NL
DU
ES
PT
Reproduction or publication of the content in any manner, without express permission of the publisher, is prohibited.
Copyright © 2007 by BEGLEC cva.
Version: 1.0
Page 2
EN - DISPOSAL OF THE DEVICE
Dispose of the unit and used batteries in an environment friendly manner
according to your country regulations.
FR - DÉCLASSER L’APPAREIL
Débarrassez-vous de l’appareil et des piles usagées de manière écologique
Conformément aux dispositions légales de votre pays.
NL - VERWIJDEREN VAN HET APPARAAT
Verwijder het toestel en de gebruikte batterijen op een milieuvriendelijke
manier conform de in uw land geldende voorschriften.
DU - ENTSORGUNG DES GERÄTS
Entsorgen Sie das Gerät und die Batterien auf umweltfreundliche Art und
Weise gemäß den Vorschriften Ihres Landes.
ES - DESHACERSE DEL APARATO
Reciclar el aparato y pilas usadas de forma ecologica conforme a las
disposiciones legales de su pais.
PT - COMO DESFAZER-SE DA UNIDADE
Tente reciclar a unidade e as pilhas usadas respeitando o ambiente e em
conformidade com as normas vigentes no seu país.
Page 3
ENGLISH OPERATION MANUAL
Thank you for buying this Briteq®product. To take full advantage of all possibilities and for yourown safety, please read
these operatinginstructionsverycarefully before you startusing this unit.
FEATURES
This product meets the requirements of the current European and national guidelines. Conformity has been established
and the relevant statementsanddocumentshavebeen deposited by themanufacturer.
Thisdevice has been designed to producedecorative effectlighting and is used in light show systems.
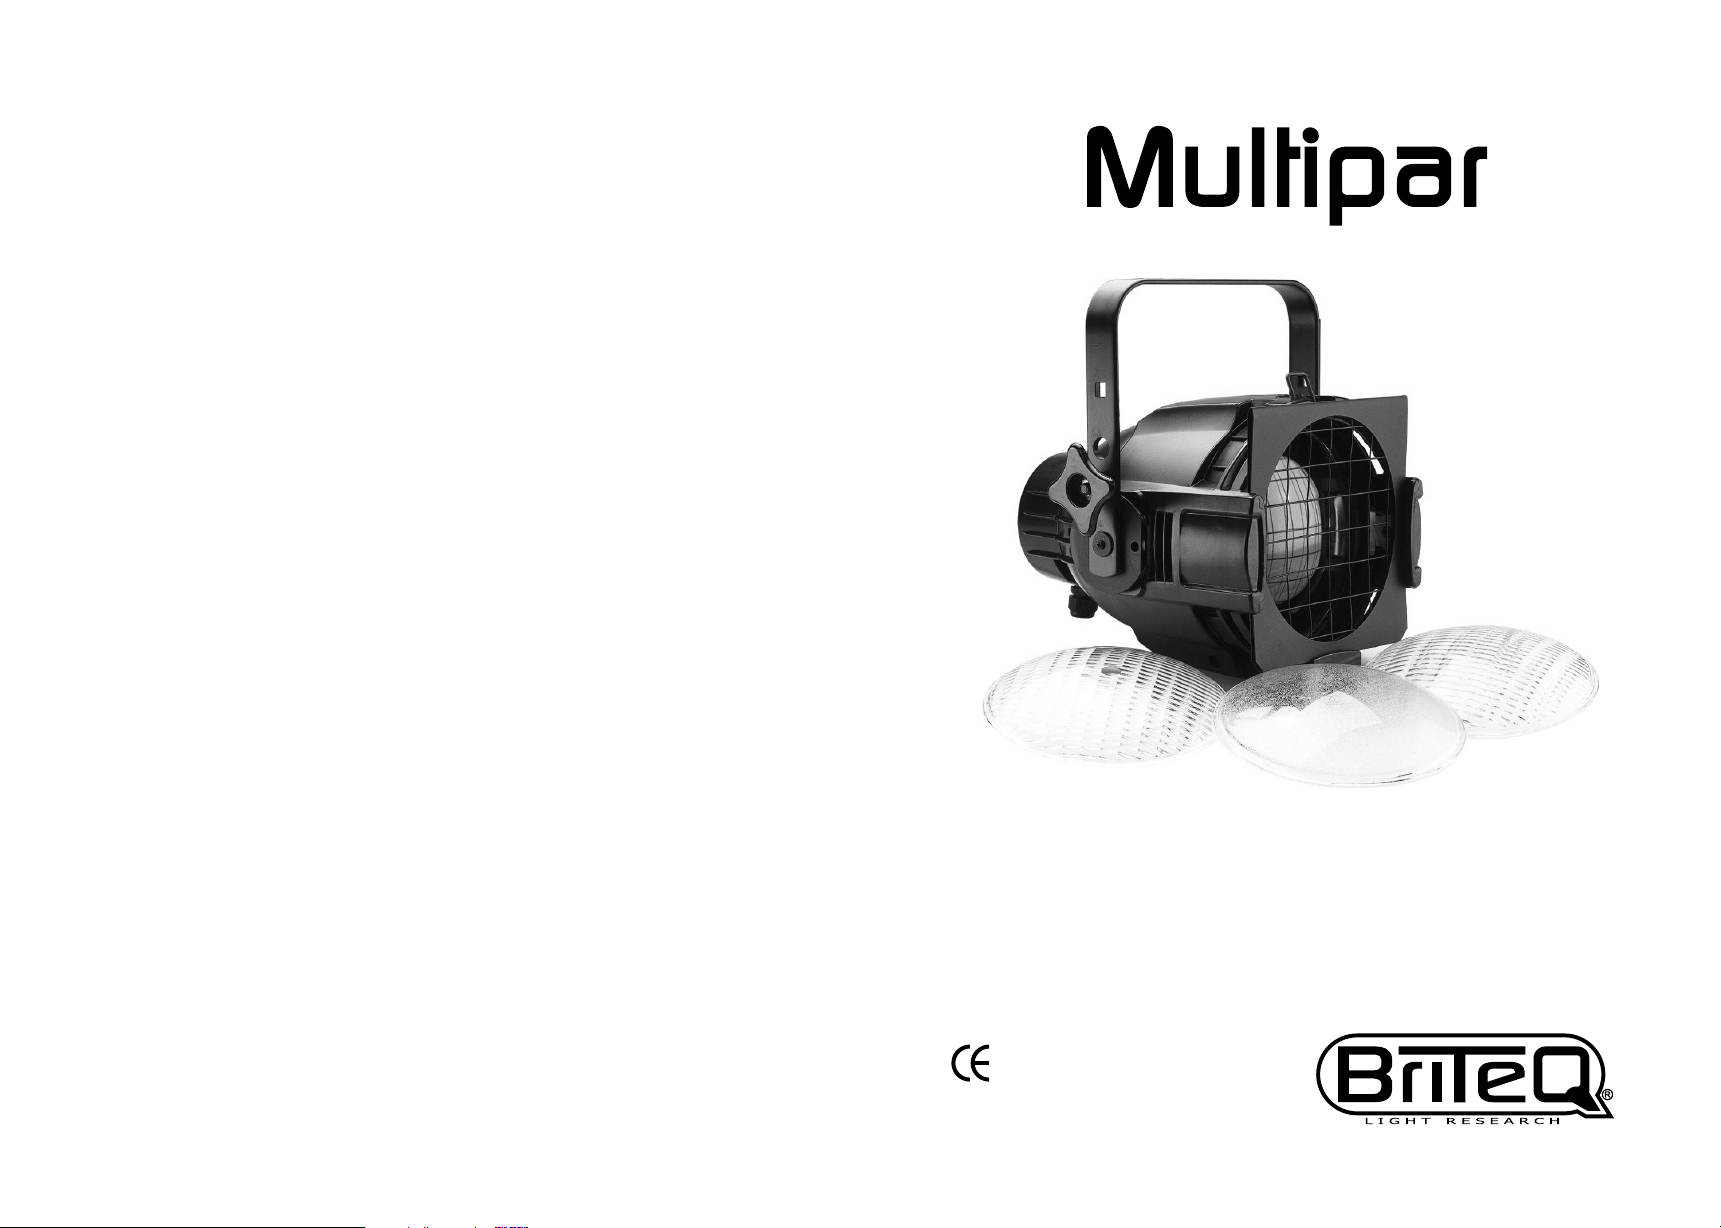
Multifunctionallight projector
Produces the same light output as a 1000 W PARprojector. Thanks to thespecial HPL575-X lamp, this projector only
consumes575 Watt
4 lenses (very narrow,narrow,mediumflood, wide flood) are included
Available in black or silver
Optional: barndoors
BEFORE USE
Beforeyou start using this unit, please check if there’s no transportation damage. Should therebe any, do not use the
device and consult your dealer first.
Important: This device left ourfactory in perfect conditionand well packaged. Itis absolutely necessary for the user to
strictly follow the safety instructions and warnings in this user manual. Any damage caused by mishandling is not
subject to warranty. The dealer will not accept responsibility for any resulting defects or problems caused by
disregardingthisuser manual.
Keep this booklet in a safeplace forfutureconsultation.If you sellthe fixture,be sure to add thisuser manual.
Check the contents:
Check thatthe cartoncontainsthe following items:
Operating instructions
Multipar (Silver/Black)
Colour frame
4 lenses (very narrow,narrow,medium flood, wide flood) are included
SAFETY INSTRUCTIONS:
CAUT ION
The lightning flash with arrowhead symbol within the equilateral triangle is intended to alert the use or the
presence of un-insulated “dangerous voltage” within the product’s enclosure that may be of sufficient magnitude
to constitutearisk ofelectric shock.
The exclamation point within the equilateral triangle is intended to alert the user to the presence of important
operation and maintenance (servicing) instructions inthe literature accompanyingthis appliance.
This symbol means: indoor use only.
This symbol means: Read instructions.
This symbol determines: the minimum distance from lighted objects. The minimum distance between lightoutput and the illuminated surfacemust bemore than 2 meters.
To protect the environment,please tryto recyclethe packing materialas much as possible.
A new light effect sometimes causes some unwanted smoke and/or smell. This is normal and disappears after some
minutes.
To prevent fire or shock hazard, do notexpose this appliance to rain ormoisture.
To avoid condensation to be formed inside, allow the unit to adapt to the surrounding temperatures when bringing it
into a warmroom after transport. Condense sometimes prevents the unit from workingat full performance or may even
causedamages.
This unit is for indoor use only.
Don’t place metal objects or spill liquid inside the unit. Electric shock or malfunction may result. If a foreign object
enters theunit, immediately disconnect themainspower.
CAUTION: To reduce the risk of electric shock, do not remove the top cover. No userserviceable partsinside. Refer servicing toqualified service personnel only.
ENGLISH OPERATION MANUAL
Locatethe fixture in a well ventilatedspot, away from any flammable materials and/orliquids. The fixture must be fixed
at least 50cm from surroundingwalls.
Don’t cover any ventilation openingsasthis mayresult in overheating.
Prevent use industy environments and clean the unit regularly.
Keep the unit away fromchildren.
Inexperienced persons should not operatethisdevice.
Maximum save ambient temperature is 40°C. Don’t use this unit at higherambient temperatures.
The units’ surfacetemperaturemay reach up to 85°C. Don’t touch the housingwith bare hands duringits operation.
Makesure the area below the installation place is free from unwanted persons duringrigging,de-rigging and servicing.
Allow thedevice about 10 minutes tocool down before replacing the bulbor start servicing.
Always unplugthe unit when it is not used for alonger time or before replacing the bulb or start servicing.
The electrical installation should be carried out by qualified personal only, according to the regulations for electrical
and mechanical safety in yourcountry.
Check that the available voltage is not higherthan the one stated on the rear panel of the unit.
The power cord should always be in perfect condition. Switch the unit immediately off when the power cord is
squashed or damaged.It must be replacedby themanufacturer, itsservice agent or similarly qualified personsin order
to avoida hazard.
Never letthe power-cord come into contact with other cables!
This fixture must be earthed to in order comply with safetyregulations.
Always use an appropriate and certified safety cable when installing the unit.
In order to prevent electric shock, do not open the cover. Apart from the lamp there are no user serviceable parts
inside.
Never repair a fuse or bypass the fuse holder. Always replace a damaged fuse with a fuse of the same type and
electricalspecifications!
In the event of serious operatingproblems, stop usingthe fixture and contactyour dealer immediately.
The housing and the lenses must be replaced ifthey are visibly damaged.
Please use the original packing whenthe device is to be transported.
Due to safety reasonsit is prohibited to make unauthorized modifications to the unit.
Important: Never look directly into the light source! Don’t use the effect in the presence of persons suffering from
epilepsy.
INSTALLING THE POWER PLUG
When you instal the power plug (at least 2.5A type), you have to connect the wires according to the following color
codes:
Important remark: this projectormust be earthed
Green and yellow = Earthconnection
Blue = Neutral
Brown = Live
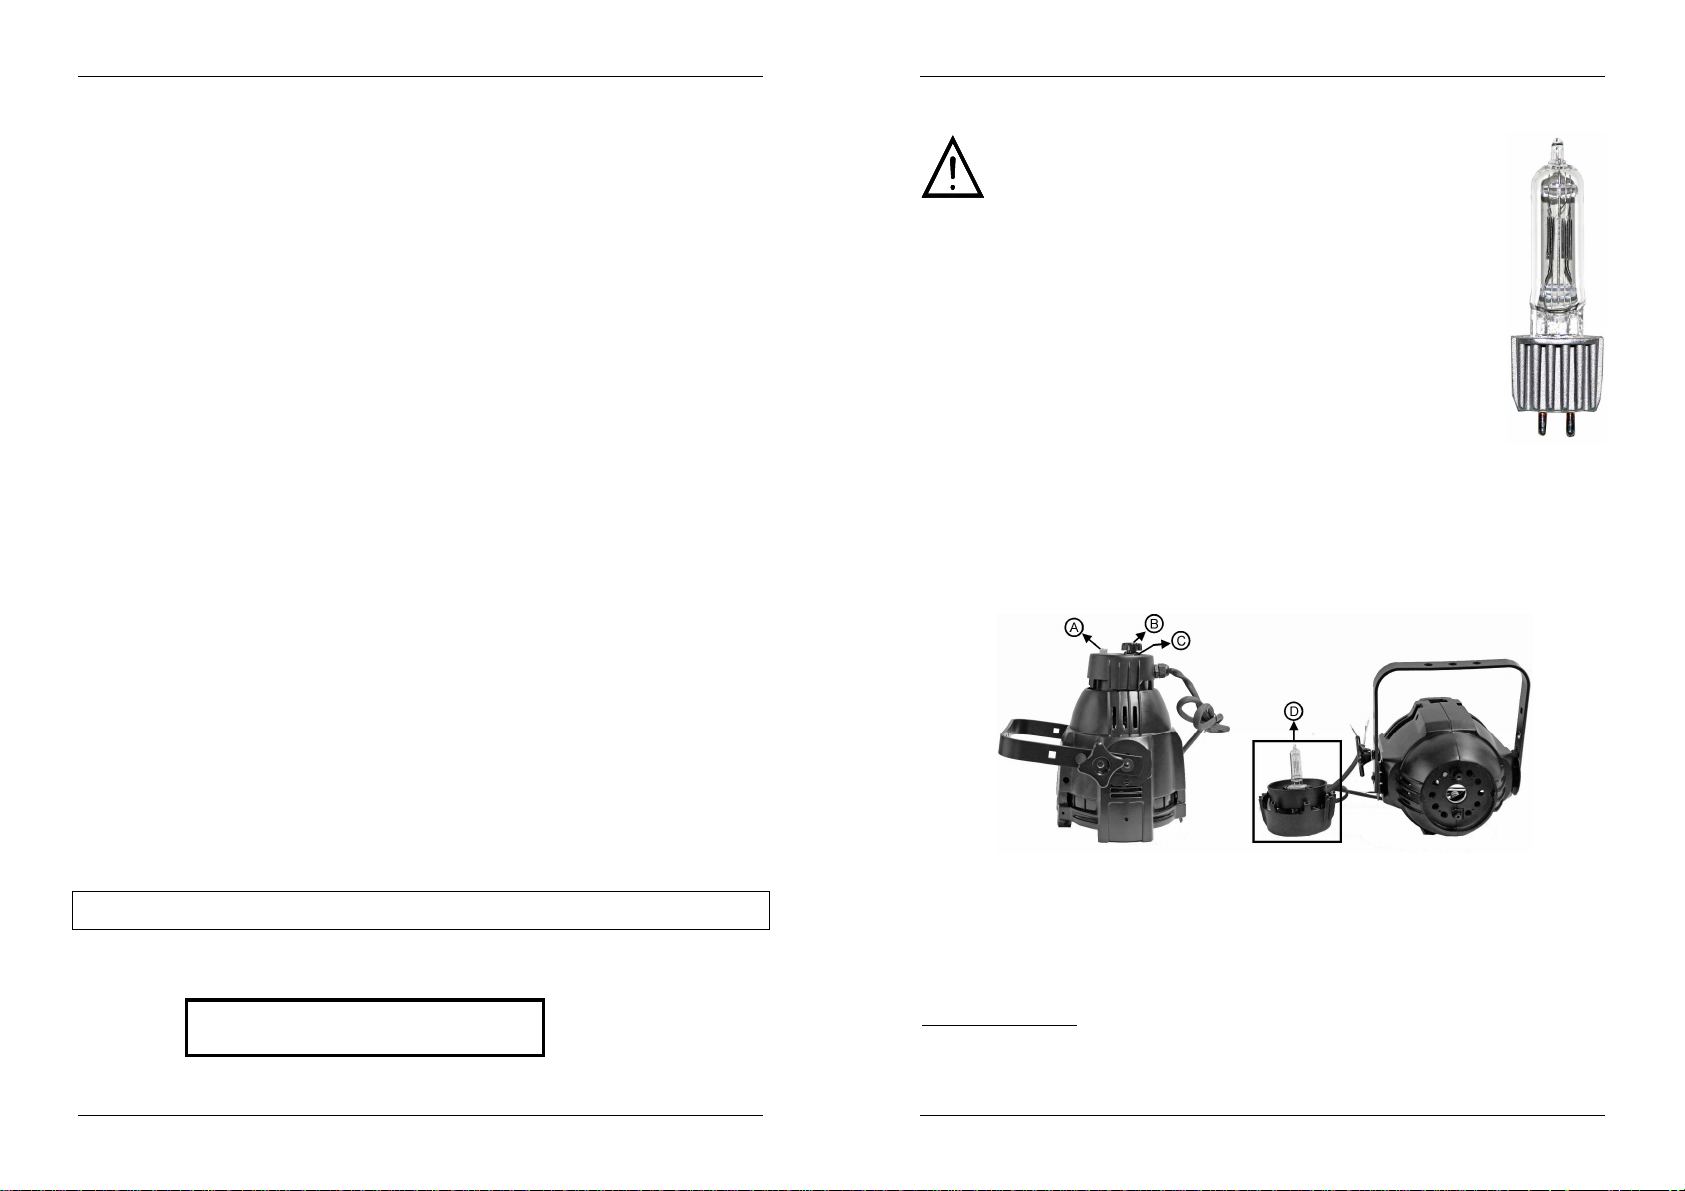
LAMP (RE)PLACEMENT
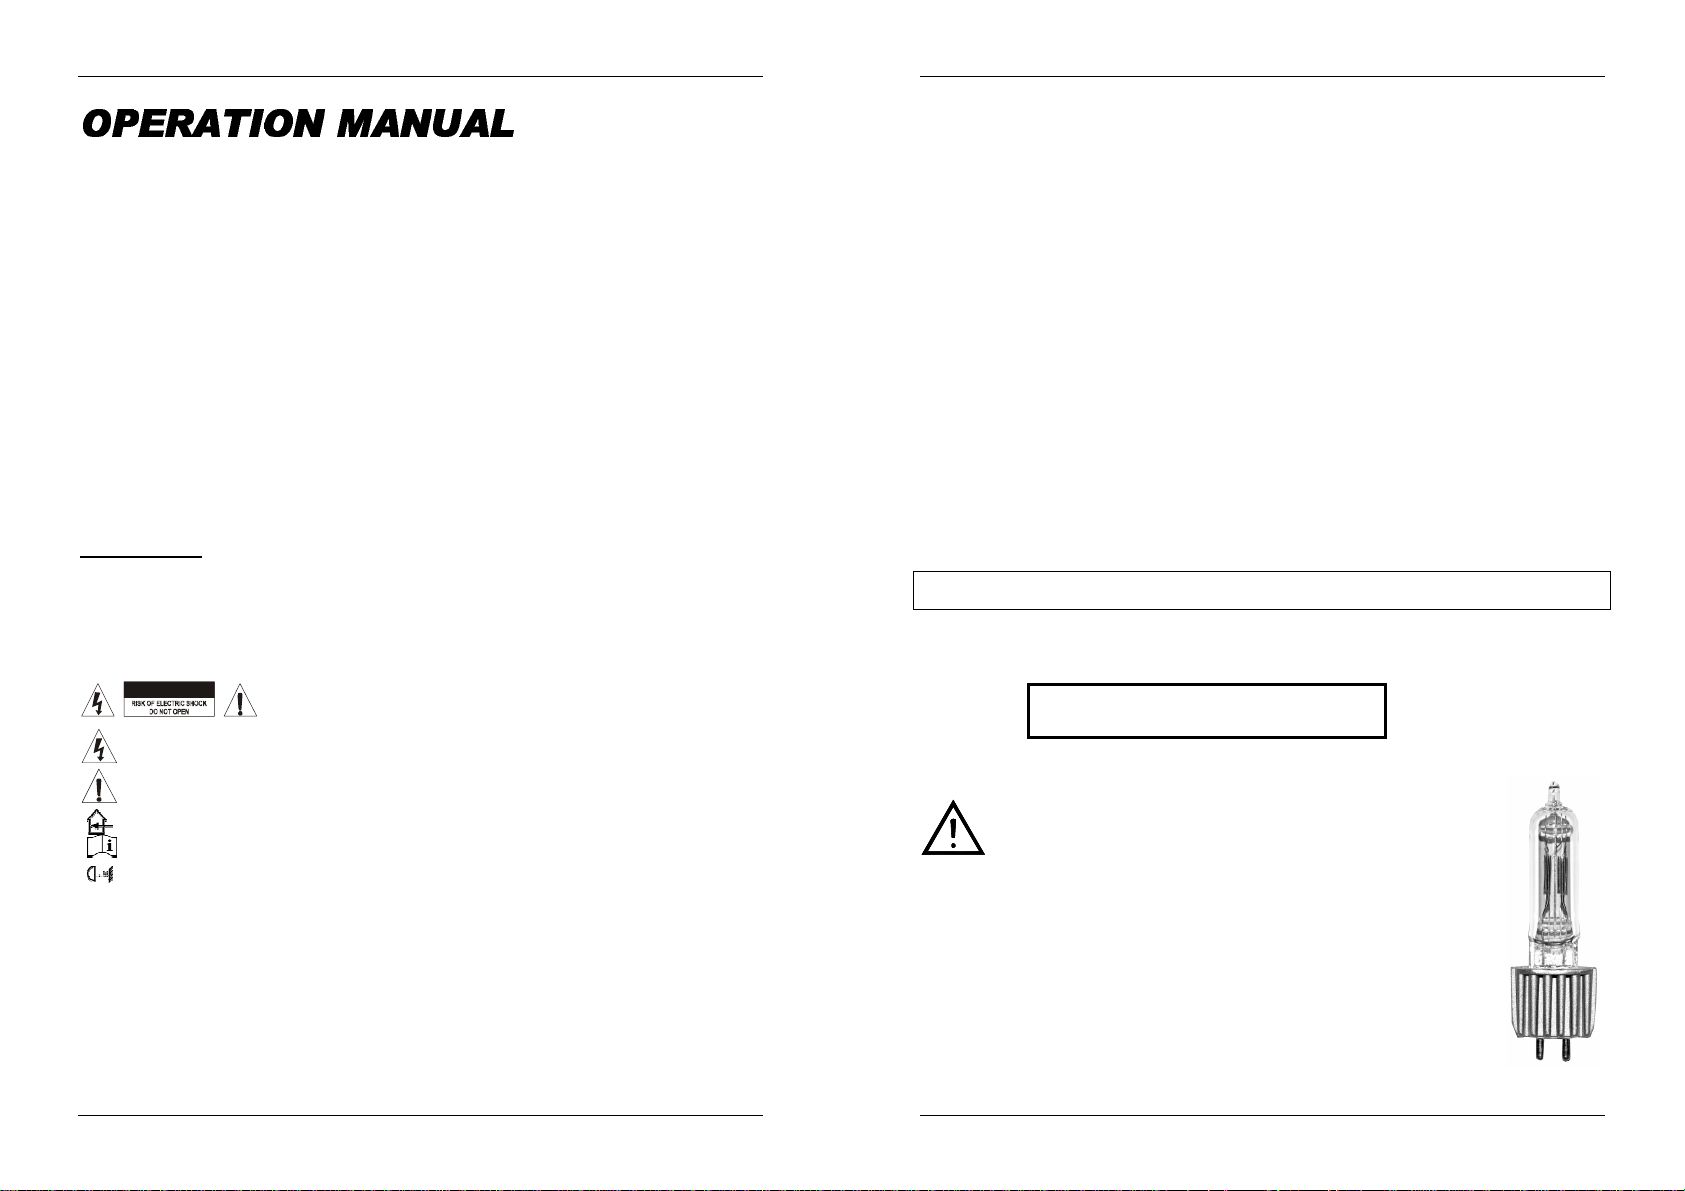
This projector can only beused with a special HPL 575-X lamp. In case of
replacement ofthelamp ormaintenance, do not open the fixturewithin 10
minutes until theunit coolsdown after switching off. Alwaysunplug the unit
beforeservicing! Always use the same type of spareparts(bulbs, etc.)When
Switch offthe unit and unplugthe mains cable.
Wait forabout 10minutes until the unit has been cooled down.
Use a screwdriver to unscrew the screw that closes the lamp compartment on the back of the
projector (A on the picture below).
Tear the lamp socket gently out of the lamp compartment. (See D on the picture below)
Unplug the old lamp. Holdthe lamp socket while unpluggingthe lamp
Hold the lamp socket while pressingthe new lampgently in thesocket.
Attention! Check the label on the backsideof the device or see the technical specifications in this
manualto know which lamp should be used. Neverinstall lamps with a higher wattage!Lamps with
higher wattagegenerate temperatures the device was not designed for. If the device uses a lamp
transformer, it will burn due to current overload.
Don’t touch the bulb with bare hands! This drastically shortens the lifespan of the lamp. If you
touched the lamp, clean it with a cloth and a little denatured alcohol. Wipe the lamp off before
installing.
replacing parts, please only genuinespareparts.
BRITEQ
®
1/35 MULTIPAR
BRITEQ
®
2/35 MULTIPAR
Page 4
ENGLISH OPERATION MANUAL
Put the new lamp back inside the unit. Be sure that the wires don’t touch thelamp.
Close thelamp compartment withthe screw.
Loosen both the focus (B on thepicture below) andthe locking knob (C on the picture below)
Switch the projector on andturn the focus knob(B) until you get themaximumlight output.
Turn the lockingknob (C) counterclockwise until the focus knob is locked.
Done!
ENGLISH OPERATION MANUAL
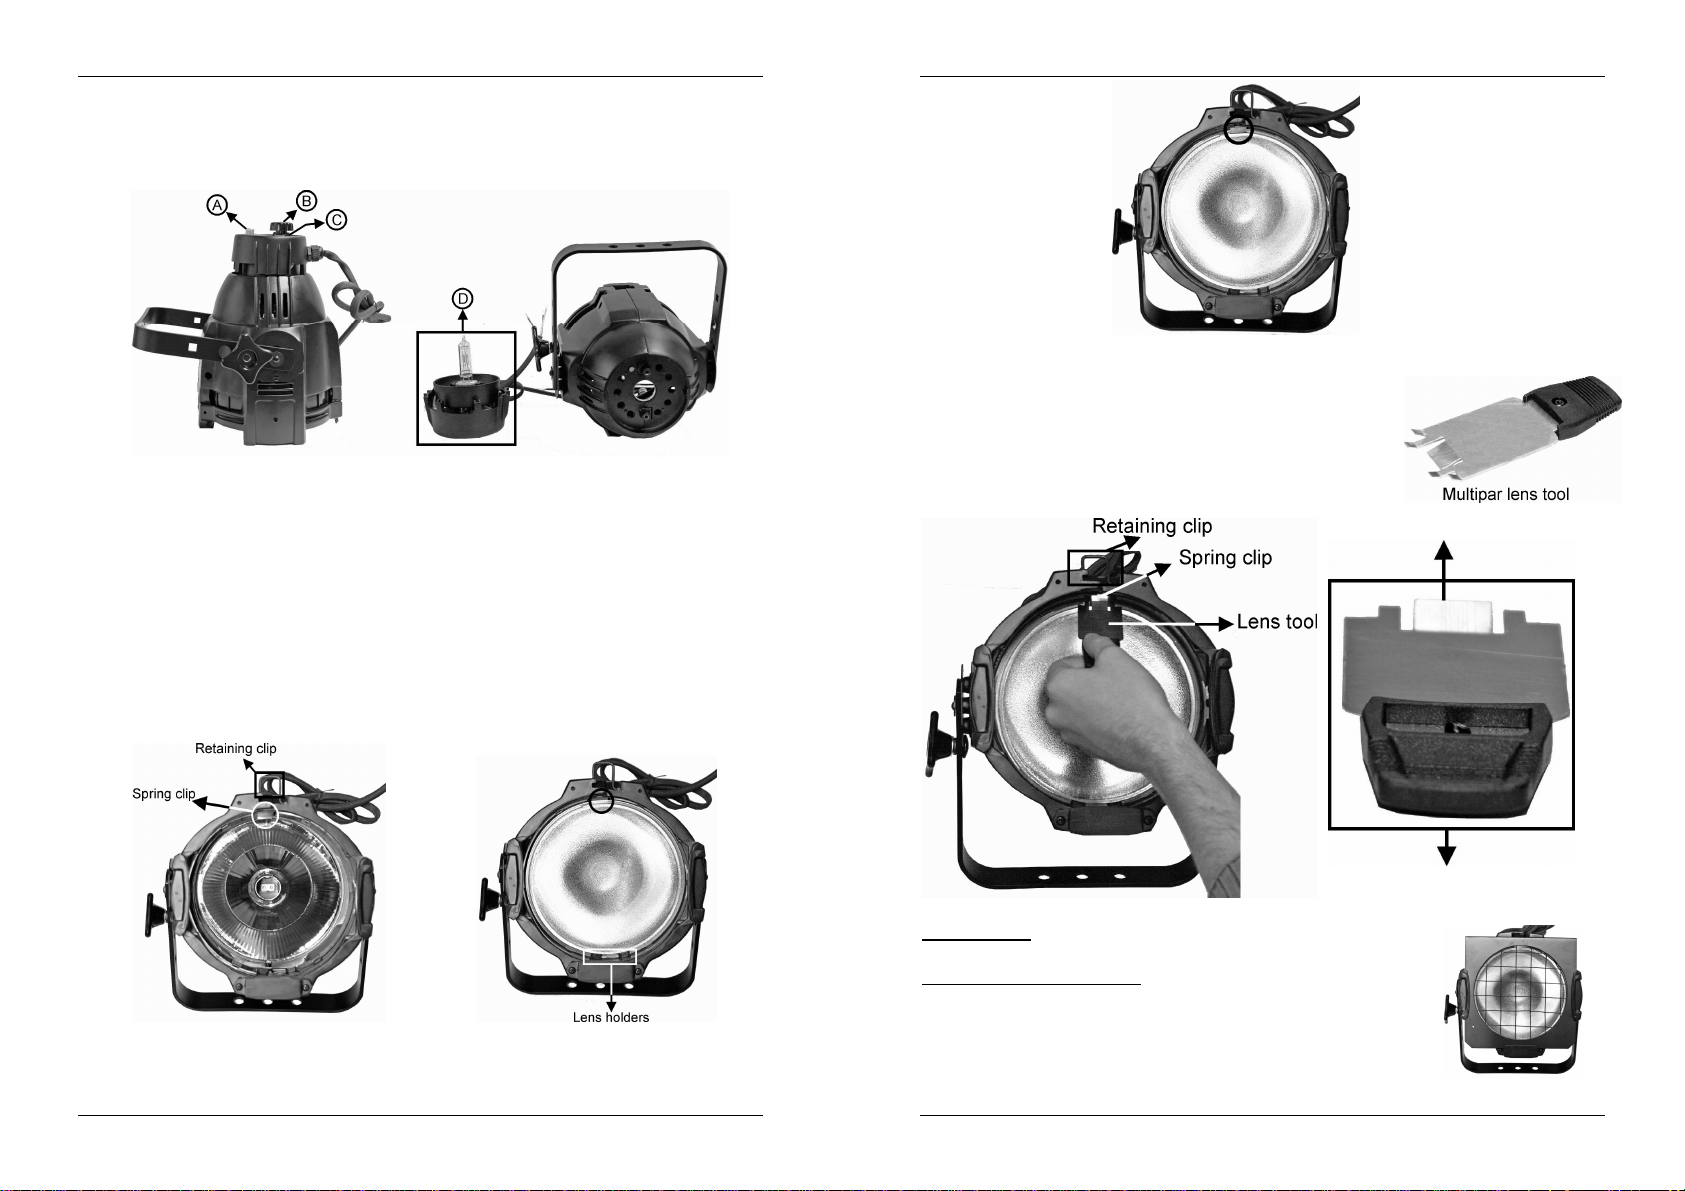
LENS (RE)PLACEMENT
The Multipar comes with 4lenses, each with different beam angle. To keep the maximum light output, changethe lens if
it becomes scratched orcracked.The nameofeach lens is printed onthe border of the lens:
Installinga lens:
Keep your Multipar horizontally and turn the plastic rotationring until the spring clip points to the top of the Multipar,
Putthe lens behind the lens holders (the convex side must be on the insideof the Multipar !!!) and gently push the
The lens is fixed behind the springclip.(see picture 3)
Done!
Verynarrow spot: clear glass,15° roundbeam
Narrow spot: Stipple glass, 19° round beam
Medium flood: facets (6 x 22mm), 21° x 34° beam
Wide flood:facets (6 x 12mm),30° x 51° beam
below the retaining clip. (see picture 1)
lens inwards against the springclip untilit clicks. (see picture2)
Picture 1 Picture 2
Removinga lens:
Make surethe projectorhas cooled down before removing thelens.
Keepyour Multipar horizontally and turn the plastic rotation ring until the spring
clip pointsto the topof the Multipar, below the retaining clip.(same waylike
installing the lens)
Put the lens tool (see pictures below) in the holes besides the spring clip and
push the spring clipupwards
Balance the front of the Multipar a little down and keep your hand under the
projector so the lens willnot fall on the floor(but nicely in youhand! )
Done !
Importantremark:
When you install the colorframe, don’t forget to lock it with theretaining clip. This prevents
color frames and accessoriesfrom falling out.
How toinstall the color frame correctly:
Release the retaining clip by pushingit sideways andthen up
Install the colorframe
Press theretaining clip down and sideways to lockit
Picture3
The lipmust pointupwards
This is the way to putthe lens tool in the
Multipar to removethe lens
BRITEQ
®
3/35 MULTIPAR
BRITEQ
®
4/35 MULTIPAR
Page 5
ENGLISH OPERATION MANUAL
OVERHEAD RIGGING
Important: The installation must be carried out by qualified service personal only. Improper installation can
result in serious injuries and/or damage to property. Overhead rigging requires extensive experience!
Working load limits should be respected, certifiedinstallation materials should be used, the installed device
should beinspected regularly for safety.
Make sure the area below theinstallationplaceis free from unwanted persons duringrigging,de-rigging and servicing.
Locate the fixture in a wellventilated spot, far away from any flammable materials and/or liquids. The fixture must be
fixed at least 50cm from surroundingwalls.
The device should be installed outof reach of people and outsideareas where persons may walkby or be seated.
Before riggingmake sure that the installationarea can holda minimum point load of 10times thedevice’s weight.
Always use a certified safety cable that can hold 12times the weight of the device when installing the unit. This
secondary safety attachment should be installed in a way that no part of the installation can drop more than 20cm if
the mainattachment fails.
The deviceshould be well fixed; a free-swingingmountingis dangerous and maynot be considered!
Don’t cover any ventilationopenings asthis may result in overheating.
The operator has to make sure that the safety-relating and machine-technical installations are approved by an expert
before using themforthe first time. The installations should beinspected every year by a skilledperson to be sure that
safety is still optimal.
OPERATING INSTRUCTIONS
Do not switch the unit on and offin short timeintervals as this reduces the lamp life.
The units’ surfacetemperaturemay reach up to 85°C. Don’t touch the housing withbare-hands during its operation.
Always unplugthe unit whenit is not used for a longertime orbefore replacingthe bulb or start servicing.
In the event of serious operating problems,stop using the fixture and contact yourdealer immediately.
Important: Never look directly into the light source! Don’t use the effect in the presence of persons suffering from
epilepsy.
MAINTENANCE
Make sure the areabelow the installationplaceis free from unwanted persons duringservicing.
Switch offthe unit, unplug themains cable and wait until the unit has been cooled down.
During inspectionthefollowingpointsshould bechecked:
All screws usedforinstalling the device and any of its parts should be tightly fastened and may not be corroded.
Housings, fixationsandinstallations spots (ceiling,truss,suspensions) should be totallyfree from any deformation.
When anoptical lens is visibly damaged due to cracks or deep scratches, it must be replaced.
The mainscables must be in impeccablecondition and shouldbe replaced immediately when even a small problemis
detected.
In order to protect the device from overheat the cooling fans (if any) and ventilation openings should be cleaned
monthly.
The interior of the device should be cleaned annually using a vacuumcleaner or air-jet.
The cleaning of internal and external optical lenses and/or mirrors must be carried out periodically to optimize light
output. Cleaning frequency depends on the environment in which the fixture operates: damp, smoky or particularly
dirty surroundings can cause greater accumulation of dirt on the unit’s optics.
Clean with a soft cloth usingnormal glass cleaning products.
Always dry the parts carefully.
Clean the externaloptics at leastonce every 30 days.
Clean the internalopticsatleast every 90 days.
When youclean the reflector, certainly don’t useany chemical cleaner. This may harm the reflective coating of
the reflector.
Attention: We strongly recommend internal cleaningto be carried outby qualifiedpersonnel!
SPECIFICATIONS
MainsInput: AC 230V, 50Hz
Lamp: HPL 575-X
Size: 273 x215 x 279 mm
Weight: 3.4 kg
You can download the latest version of this user manualon our website: www.briteq-lighting.com
Every information issubject to changewithout prior notice
FRANÇAIS MODE D’EMPLOI
Merci d’avoir choisi ce produit Briteq®. Pour votre sécurité et pour une utilisationoptimale de toutes les possibilités de
l’appareil,lisez attentivement cette notice avantutilisation.
EN VOUS INSCRIVANT POUR LA LETTRE D’INFORMATION VOUS SEREZ TOUJOURS TENU AU
COURANT DES DERNIERES NOUVELLES CONCERNANT NOS PRODUITS: NOUVEAUTES,
ACTIONS SPECIALES, JOURNEES PORTES OUVERTES,ETC.
SURFEZ SUR: WWW.BEGLEC.COM
CARACTERISTIQUES
Il répond aux exigences nationales et européennes. La conformité a été établie et les déclarations et documents
correspondants ont été déposés parle fabricant.
Cet appareil a été conçu pour la productionde jeux de lumières décoratifset est utilisé dans des spectacles lumineux.
Projecteur de lumière multifonctionnel.
Produit la même puissance lumineuse qu'un projecteur de type PAR de 1000 watts.Grâce à sa lampe spéciale HPL
575-X,ce projecteur ne consommeque 575 watts.
4 lentilles sont incluses (very narrow, narrow, medium flood, wide flood).
Disponible en noir ou en gris argenté.
En option: volets coupe-flux.
AVANT UTILISATION
Avant d’utiliser cet appareil, assurez-vous de l’absence de dommages liés au transport. En cas de dommages,
n’utilisez pas l’appareilet contactez levendeur.
Important: Cet appareil a quitté notre usine en parfaite condition et bien emballé. Il est primordial que l’utilisateur
suive les instructions de sécurité et avertissements inclus dans ce manuel. La garantie ne s’applique pas en cas de
dommage lié à une utilisationincorrecte. Le vendeur ne prend pas la responsabilité des défauts ou de tout problème
résultantdu fait de n’avoirpas tenu compte des mises en gardede ce manuel.
Conservezce manuel dans un endroit sûr pour toute consultation future. Si vous vendez l’appareil, assurez-vous d’y
joindre cemanuelégalement.
Afin de protégerl’environnement, merci de recycler les emballages autant que possible.
Vérifiezlecontenu:
Vérifiezsi l’emballage contient bien les articles suivants:
Appareil
Mode d'emploi
Support pourfiltre de couleur.
4 lentilles sont incluses (very narrow, narrow,mediumflood, wide flood).
INSTRUCTIONS DE SECURITE:
CAUTION
qualifiés.
La flèche dans un triangle met l'utilisateur en garde contre la présence de haute tension sans isolation dans
l'appareil,ce qui peut causer un risque d'électrocution.
Un point d'exclamation dans un triangle prévient de la présence d'instructions relatives au fonctionnement et à
la maintenance se trouvantdans le manuel fourniavecl'appareil.
Ce symbolesignifie: uniquementpour usage à l'intérieur.
Ce symbolesignifie : Lire lemode d’emploi.
Ce symbole représente la distance de recul minimum à respecter, c'est-à-dire, la distance minimum entre le
projecteur et la surface à éclairer.Cette distance doit être de plusde 2mètres.
Afin deprotéger l’environnement, merci de recycler les emballages autant que possible.
ATTENTION: afin de réduire le risque d’électrocution, n’enlevez jamais le
couvercle de l’appareil. Il n’y a aucune pièce à l’intérieur de l’appareil que vous
puissiezremplacer vous-même. Confiezl’entretien uniquement àdes techniciens
BRITEQ
®
5/35 MULTIPAR
BRITEQ
®
6/35 MULTIPAR
Page 6
FRANÇAIS MODE D’EMPLOI
FRANÇAIS MODE D’EMPLOI
Un effet lumière neuf peut provoquer de la fumée et/ou une odeur non souhaitée, qui devrait disparaître après
quelquesminutes.
Afin d’évitertout risque d’incendie ou de décharge électrique,ne pas exposer cet appareil à la pluie ou à l’humidité.
Pour éviter la formation de condensation à l’intérieur de l’appareil, patientez quelques minutes pourlaisser l’appareil
s’adapter à la température ambiante lorsqu’il arrive dans une pièce chauffée après le transport. La condensation
empêche l'appareil de fonctionnermanière optimale,et elle peut mêmecauser des dommages.
Cet appareil est destinéàune utilisationà l’intérieur uniquement.
Ne pas insérer d’objet métallique ou renverser de liquide dans l’appareil. Aucun objet contenant un liquide, tels que
des vases, ne peut être placé sur cet appareil. Cela risquerait de provoquer une décharge électrique ou un
dysfonctionnement. Si un corps étranger est introduit dans l’appareil, déconnectez immédiatement de la source
d’alimentation.
Aucune source de flammenue, telle que des bougies allumées, ne peut être placée surl'appareil.
Placez l’appareil dans un endroit bien ventilé, éloigné de toutmatériauou liquide inflammable. L’appareil doit être fixé
à 50cm minimum des murs.
Ne pas couvrirles orifices de ventilation,un risque de surchauffe en résulterait.
Ne pas utiliser l'appareil dans un environnementpoussiéreuxet le nettoyer régulièrement.
Ne pas laisserl'appareilà portée des enfants.
Les personnes non expérimentéesne doiventpasutiliser cetappareil.
La température ambiante maximale d’utilisation de l’appareil est de 45°C. Ne pas l’utiliser au-delà de cette
température.
La température des parois de l'appareil peut atteindre 85°C. Ne pas toucher ces parois à mains nues en cours de
fonctionnement.
Assurez-vous que la zone au-dessousdulieu d’installationnecomporte pas de personnes non concernées pendant le
montage,le démontageet les opérationsdemaintenance.
Laissezl’appareilrefroidirenviron 10 minutes avant de remplacer l’ampoule oud’effectuer des réparations.
Débranchez toujours l’appareil si vous ne l’utilisez pas de manière prolongée avant de changer une ampoule ou
d’entreprendredesréparations.
Les installations électriques ne peuvent être faites que par du personnel qualifiéet conformément aux règlements de
sécurité électriqueetmécanique en vigueur dans votre pays.
Assurez-vous que la tensiond’alimentationde la source d’alimentationde la zone dans laquelle vous vous trouvez ne
dépasse pascelle indiquéeà l’arrière de l’appareil.
Le cordon d’alimentation doit toujours être en parfait état. Mettez immédiatement l’unité hors tension si le cordon
devait être écrasé ou endommagé. Pour éviter tout risque de choc électrique, le cordon doit être remplacé par le
constructeur, sonagentou un technicien qualifié.
Ne laissez jamaisle cordond’alimentation entrer en contactavec d’autres câbles!
L’appareil doit être à la masse selon les règlesde sécurité.
Utilisez toujoursdes câbles appropriéset certifiés lorsque vousinstallez l'appareil.
Pour éviter toutedécharge électrique,ne pas ouvrir l’appareil. En dehors des ampoules,il n’y a pas de pièces pouvant
être changées par l’utilisateur à l’intérieur.
Ne jamais réparer ou court-circuiter un fusible. Remplacez systématiquement un fusible endommagé par un fusible
de mêmetype et ayantles mêmes spécifications électriques !
En cas de problèmes de fonctionnement sérieux, arrêtez toute utilisation de l’appareil et contactez votre revendeur
immédiatement.
La carrosserie et les lentilles doivent êtreremplacéessi ellessont visiblementendommagées.
Utilisez l’emballaged’origine si l’appareil doit être transporté.
Pour des raisons de sécurité, il est interdit d’apporter une quelconque modification à l’unité non spécifiquement
autoriséepar les partiesresponsables.
Important: Ne jamais fixer directement la source de lumière ! Ne pas utiliser d’effets en présence de personnes
souffrantd’épilepsie.
INSTALLATION DE LA PRISE SECTEUR
Lors du montagede la prise secteur (de type 2.5Aau minimum), il y a lieu de connecter les fils en respectant les codes
"couleur" suivants:
Remarque importante : ce projecteurdoit êtreraccordé à une prisede terre.
Vert et jaune = connexionà la terre
Bleu = neutre
Brun = phase
MISE EN PLACE / REMPLACEMENT DES AMPOULES
Ce projecteur ne peut être utilisé qu'exclusivement avec une lampe spéciale, la
HPL 575-X.
ampoules, ne pas ouvrir l’installation dans les 10 minutes suivant la fin de
l’utilisation, jusqu’à ce que l’appareil ait refroidi. Débranchez
toujours le même type de pièces (ampoules, etc.) Lors du remplacement, n’utilisez que
des piècesd'origine.
Mettez l’unité hors tensionet débranchezle câbled’alimentation.
Attendez environ 10 minutes,jusqu’àce que l’unité ait refroidi.
Utilisez un tournevis pour enlever les vis qui ferment le logement de la lampe, à l'arrière du
projecteur (se reporter à la figureci-dessous, lettre A).
Sortez la douille délicatement du compartiment à ampoules. (se reporter à la figure ci-dessous,
lettre D).
Sortez l’ampoule usagée. Maintenez la douillependant l’opération.
Maintenez égalementla douille lorsquevous mettezla nouvelleampouleen place.
Attention! Reportez-vous à l’étiquette à l’arrière de l’appareil ou aux spécifications techniques de
ce manuel pour savoir quelle ampoule utiliser. Ne jamais installer d’ampoules à puissance plus
élevée! De telles ampoules produisent des températures supérieures à celles pour lesquelles
l’appareil a été conçu. Si l’appareil utilise un transformateur, il brûlera en raison de la surcharge
induite.
Ne pas toucher l’ampoule à mains nues! Cela réduirait énormément le cycle de vie de la lampe. Si
vous l’avez touchée, nettoyez-la avec un linge et un peu d’alcool dénaturé. Essuyez l’ampoule
avant de l’installer.
Insérez la nouvelle ampouleà l’intérieur de l'appareil. Assurez-vousque les fils ne touchent pasl’ampoule.
Refermez le compartiment à ampoules àl’aide de la vis.
Dévissez ET le bouton du 'focus' (se reporter à la figure ci-dessous, lettre B) ET le bouton deverrouillage (se reporter
à la figure ci-dessous,lettre C)
Mettez le projecteur sous tension et faites tourner le bouton du 'focus' (se reporter à la figure ci-dessous, lettre B)
jusqu'à ce que vousobteniez le maximum de puissance lumineuse.
Faites tourner le bouton de verrouillage dans le sens inversedes aiguilles d'une montre jusqu'à ce que le bouton du
'focus' soitverrouillé.
Et voilà!
systématiquement l'appareil avant toute opération de maintenance. Utilisez
En cas d’opération de maintenance ou de remplacement des
(REM-) PLACEMENT DE LA LENTILLE
Le Multipar est livré avec 4 lentilles, chacune possédant un angle de dispersion différent. Afin d'être en mesure de
projeter unmaximumde lumière, remplacez(la ou) les lentilles si elles deviennent griffées ou fêlées. Le nomde chaque
lentille est imprimé surle bordde la lentille :
Installation d'une lentille :
Maintenez le Multipar horizontalement et faites tournerl'anneau en plastique jusqu'àce que l'étrier du ressortsoit au
sommetdu Multipar(juste en dessous de l'étrierde maintien). (se reporter à la figure 1)
Very narrow spot : verre clair, rayon cylindrique de 15°.
Narrow spot : verre pointillé, rayon cylindriquede 19°.
Mediumflood : lentille à facettes (6 x 22mm),rayon de 21° x34°.
Wide flood : lentille à facettes (6 x12mm),rayon de 30° x 51°.
BRITEQ
®
7/35 MULTIPAR
BRITEQ
®
8/35 MULTIPAR
Page 7

FRANÇAIS MODE D’EMPLOI
Mettez la lentille derrièreles supportsde lentille (la face convexe doit se trouver vers l'intérieurdu Multipar !!!), puis
poussez lalentille sansforcer vers l'intérieur,contre l'étrier à ressort jusqu'àce quele clic se produise. (se reporter à
la figure 2)
A ce moment,la lentille est bloquée derrièrel'étrier à ressort. (se reporter à la figure 3)
C'est terminé !
Figure 1 Figure 2
FRANÇAIS MODE D’EMPLOI
Les encoches doivent se trouververs le
haut.
Voicila manière d'introduire dansle
Multiparl'outil destiné à retirerlalentille.
Remarque importante:
Lorsque l'on installe le supportpour filtrede couleur, il ne faut pas oublier de le fixer au moyen
de l'étrierde maintien. De cette manière, on évite que les supports pour filtre de couleur et les
accessoires ne sortent de leur logement.
Commentinstallercorrectementle support pourfiltre de couleur :
Relâchez l'étrier de maintienen le poussant de côtépuisvers le haut.
Placez le support pour filtre de couleur.
Appuyez surl'étrierde maintienvers le bas puisde côté pour le remettre en place.
Figure 3
Enlèvement d'une lentille:
Assurez-vous que le projecteur a eu le temps de refroidir avant d'enlever une
lentille.
Maintenez le Multipar horizontalement et faites tourner l'anneau en plastique
jusqu'à ce que l'étrier du ressort soit au sommet du Multipar (juste en dessous
de l'étrier de maintien). (Même procédure que pourinstaller une lentille)
Placez l'outil destiné à retirer la lentille(voir la figure ci-contre) dansles trous à
côté de l'étrier à ressort et poussezl'étrierà ressortversle haut.
Remuez l'avant du Multipar et inclinez-le quelque peu vers le bas tout en
gardant une main sous le projecteur de sorte que la lentille ne tombe pas par
terre maisdélicatement dans votre main !
C'est terminé!
BRITEQ
®
9/35 MULTIPAR
INSTALLATION EN HAUTEUR
Important: L’installation doit être faite par du personnel qualifié uniquement. Uneinstallation incorrecte peut
causer des blessures sévères et/ou endommager l’appareil. L’installation en hauteur exige de l’expérience !
Les limites de charge doivent être scrupuleusement respectées, du matériel d’installation certifié doit être
utilisé, et l’appareilinstallédoit subir desinspectionsde sécuritérégulièrement.
Assurez-vous que la zone au-dessous du lieu d’installation ne comporte pas de personnes non concernées lors de
l’installation,ladésinstallation ou lamaintenance.
Placez l’appareil dans un endroit bien ventilé, éloigné de tout matériauou liquide inflammable. L’appareil doit être fixé
à 50cmminimum des murs situés à proximité.
L’appareil doit être hors de portée du public et en dehors des zones de passage de personnes ou des zones où le
public est installé.
Avant l’installation, assurez-vous que la zone d’installation pourra supporter, en son point de fixation, un minimum de
10 fois le poids de l’appareil.
Utilisez systématiquementun câble de sécurité qui peut supporter 12 foisle poids de l’appareillors de l’installation. Ce
câble de sécurité secondaire doit être installé de manière à ce qu’aucune partie de l’appareilne puisse descendre de
plus de 20 cm si le supportprincipaltombe.
L’appareil doit être bien fixé, unmontage à balancementest dangereux et ne devrait pas êtrepris en considération !
Ne pas couvrirles orifices de ventilation pouréviter tout risque de surchauffe.
L’utilisateur doit s’assurer que les installations techniques et de sécurité sont bien approuvées par un expert avant la
première utilisation. Les installationsdoivent être inspectées chaque année pardu personnelqualifié pour assurer une
sécuritéoptimale.
BRITEQ
®
10/35 MULTIPAR
Page 8

FRANÇAIS MODE D’EMPLOI
INSTRUCTIONS D’UTILISATION
Ne pas mettre l’unitésous tension et horstension à defaibles intervalles, cela réduit la durée de vie des ampoules.
La surface de l’unité peut atteindre une température de 85°C. Ne pas toucher les parois à mains nues en cours de
fonctionnement del’appareil.
Débranchez systématiquement l’appareil s’il n’est pas utilisé pour une période prolongée ou avant de changer une
ampouleoud’effectuer des opérationsde maintenance.
En cas de problèmes de fonctionnement sérieux, arrêtez toute utilisation de l’appareil et contactez votre revendeur
immédiatement.
Important: Ne jamais fixer directement la source de lumière ! Ne pas utiliser d’effets en présence de personnes
souffrantd’épilepsie.
NEDERLANDS HANDLEIDING
Hartelijk dank voor de aankoop van dit Briteq®product.Om ten volle te kunnenprofiteren van allemogelijkheden en voor
uw eigen veiligheid, gelieve de aanwijzingen zeer zorgvuldigte lezen voor U begint het apparaattegebruiken.
DOOR U OP ONZE MAILINGLIJST IN TE SCHRIJVEN ONTVANGT U STEEDS DE LAATSTE
INFORMATIE OVER ONZE PRODUCTEN: NIEUWIGHEDEN, SPECIALE ACTIES,
OPENDEURDAGEN, ENZ.
SURF NAAR: WWW.BEGLEC.COM
MAINTENANCE
Assurez-vous que lazone au-dessous du lieu d’installation ne comportepas de personnes non concernées lors de la
maintenance
Mettez l'appareilhors tension,débranchezle cordond’alimentationet attendez que l’appareilait refroidi.
Pendant l’inspection, lespoints suivants doiventêtrevérifiés :
Toutes les vis utilisées pour l’installation de l’appareil ou de chacune de ses pièces doivent être bien fixées et non
corrodées.
Les niches, fixations et structures de support (plafond, poutres, suspensions) doivent être totalement intactes, sans
aucunedéformation.
Lorsqu’une lentille optique est visiblementendommagée (fissureou éraflures profondes), elledoit êtreremplacée.
Les câbles doivent être en parfait état et doivent être remplacés immédiatement en cas de détection d’un problème,
même bénin.
Pour protéger l’appareil de toute surchauffe, les ventilateurs (le cas échéant) et les orifices de ventilation doivent être
nettoyés tous les mois.
L’intérieur de l’appareil doit être nettoyé chaque année à l’aided’un aspirateurou d'un pistolet à air.
Le nettoyage des lentilles optiques internes et externes et/ou des miroirs doit être effectué périodiquement pour
optimiser la production de lumière. La fréquence de nettoyage dépend de l’environnement dans lequel l’appareil
fonctionne: des environnements humides, enfumés ou particulièrement sales peuvent entraîner une accumulation de
saletés plusimportante sur les parties optiques del’appareil.
Nettoyezà l’aided’un chiffondouxavec des produits de nettoyage pourverres normaux.
Séchez toujoursles partiessoigneusement.
Nettoyezles optiques externes ou moins une fois tousles 30 jours.
Nettoyezles optiquesinternes oumoins une foistous les 90 jours.
Lorsque vous nettoyez le réflecteur, assurez-vous de n'utiliser aucun nettoyant chimique. Cela pourrait
endommager le revêtementde réflexion du réflecteur.
Attention: Nous vous recommandons fortement defaireexécuter le nettoyageinternepar du personnel qualifié !
SPECIFICATIONS
Alimentation: CA 230V,50Hz
Ampoules: HPL 575-X
Dimensions: 273 x 215 x 279mm
Poids: 3.4kg
Chacune de ces informations peutêtremodifiée sans avertissement préalable. Vous pouvez téléchargerla
dernière version de ce mode d’emploi denotre site Web: www.briteq-lighting.com
KARAKTERISTIEKEN
Dit product voldoet aan de gangbare Europese en nationale voorschriften. Het is vastgesteld dat het apparaat er zich
aan houdt en de desbetreffende verklaringenen documenten zijn doorde fabrikant afgegeven.
Het toestel isontworpenom decoratieve lichteffectente produceren en kan eventueel wordengebruikt in lichtshows.
Multifunctionele licht projector.
Produceert dezelfde lichtuitstoot als een 1000W PAR-projector. Dankzij de speciale HPL 575-X lamp verbruikt deze
projector slechts 575watt.
4 lenzen (very narrow,narrow, medium flood, wide flood) zijn inbegrepen
Verkrijgbaar in zwart of zilver
Optioneel: barndoors
VOOR DE IN GEBRUIKNAME
Controleer voor het eerste gebruik van het apparaat of het tijdens het transport beschadigd werd. Mocht er schade zijn,
gebruik het dan niet,maar raadpleeg eerstuw dealer.
Belangrijk: Dit apparaat verliet de fabriekin uitstekende staat en goed verpakt. Het is erg belangrijk dat de gebruiker de
veiligheidsaanwijzingen en raadgevingen in deze gebruiksaanwijzinguiterst nauwkeurig volgt. Elke schade veroorzaakt
door verkeerd gebruik van het apparaat valt niet onder de garantie. De dealer aanvaardt geen verantwoordelijkheidvoor
mankementen en problemen diekomen door het veronachtzamen van dezegebruiksaanwijzing.
Bewaar deze brochure op een veilige plaats om hem in de toekomst nogmaals te kunnen raadplegen. Indien U het
apparaatverkoopt, denktU er wel aanomde gebruiksaanwijzingbij te voegen.
Controleer deinhoud:
Controleer of de doos volgende onderdelen bevat:
Handleiding
Multipar (Zilver/Zwart)
Kleurenframe
4 lenzen (very narrow,narrow, medium flood, wide flood)
VEILIGHEIDSVOORSCHRIFTEN:
CAUTION
De bliksempijl die zich in een gelijkbenige driehoek bevindt is bedoeld om u te wijzen op het gebruik of de
aanwezigheid van niet-geïsoleerde onderdelen met een “gevaarlijke spanning” in het toestel die voldoende
kracht heeft om een risico vanelektrocutie in tehouden.
Het uitroepteken binnen de gelijkbenige driehoek is bedoeld om de gebruiker erop te wijzen dat er in de
meegeleverdeliteratuurbelangrijkegebruik en onderhoudsinstructiesvermeldstaanbetreffende dit onderdeel.
WAARSCHUWING: Om het risico op elektrocutie zoveel mogelijk te vermijden
mag u nooit de behuizing verwijderen. Er bevinden zich geen onderdelen in het
toestel die u zelf kan herstellen. Laat de herstellingen enkel uitvoeren door een
bevoegdetechnicus.
BRITEQ
Dit symbool betekent: het apparaatmagenkel binnenhuis wordengebruikt.
Dit symbool betekent:Lees de handleiding!
Dit symbool bepaalt: de minimumafstandvan te belichten voorwerpen. De minimumafstandtussen projector en
het verlichte voorwerp moet meer dan 2 meter zijn.
Om hetmilieu te beschermen, probeer zoveelmogelijk het verpakkingsmateriaal terecycleren.
Een nieuw lichteffect kan soms ongewenste rook en/of reukveroorzaken. Dit is normaal en verdwijnt na een paar
minuten.
®
11/35 MULTIPAR
BRITEQ
®
12/35 MULTIPAR
Page 9

NEDERLANDS HANDLEIDING
NEDERLANDS HANDLEIDING
Stel dit apparaat niet bloot aanregen of vocht, dit om het risicoop brand en elektrische schokken te voorkomen.
Om de vorming van condensatie binnenin te voorkomen, laat het apparaat aan de omgevingstemperatuur wennen
wanneer het, na het transport, naar een warm vertrek is overgebracht. Condensatie kan het toestel soms verhinderen
perfectte functioneren.Het kansoms zelfs schadeaanhet apparaattoebrengen.
Gebruik dit apparaat uitsluitendbinnenshuis.
Plaats geen stukkenmetaal en mors geen vocht binnenin het toestelom elektrische schokken of storingte vermijden.
Indien een vreemd voorwerpin het apparaat geraakt, moet Uhet directvan het lichtnet afkoppelen.
Plaats de installatie op een plaats met goede ventilatie, ver van brandbare materialenen/of vloeistoffen. De installatie
moet opminstens 50cm van de murenrondom geplaatst worden.
Bedekgeen enkele ventilatieopeningom oververhittingte vermijden.
Zorg dat het toestel niet in een stoffige omgevingwordtgebruikt en maak het regelmatig schoon.
Houd het apparaat uit debuurt van kinderen.
Dit apparaatmag niet dooronervaren personen bediend worden.
De maximumveilige omgevingstemperatuuris 40°C.Gebruikhet apparaat dus niet bij hogere temperaturen.
De temperatuur van het oppervlak van het apparaatkan 85°C bereiken. Raak de metalen ombouw tijdens het gebruik
niet met blotehanden aan.
Verzeker er U van dat er zich onder de plaats waar het toestel wordt geïnstalleerd geen ongewenstepersonen
bevindentijdens het bevestigen enlosmaken alsookbij het onderhoud.
Laat het toestel ongeveer 10 minuten afkoelen alvorens de lamp te vervangen of alvorens te starten met de
onderhoudsbeurt.
Trek altijd de stekker uit wanneer het apparaat gedurende langere tijd niet wordt gebruikt of alvorens de lamp te
vervangen of alvorens te beginnen metde onderhoudsbeurt.
De elektrische installatie behoort uitsluitend uitgevoerd te worden door bevoegd personeel, volgens de in uw land
geldenderegels betreffende elektrischeenmechanischeveiligheid.
Controleerdatde beschikbare spanning niethoger is dan dieaangegeven op de achterzijde van het toestel.
De elektrische kabel behoort altijdin uitstekende staatte zijn. Zet het apparaatonmiddellijk afals de elektrische kabel
gekneusd of beschadigdis. De kabel moet vervangen worden door de fabrikantzelf,zijn dealer of vergelijkbare
bekwame personen om een brandte voorkomen.
Laat de elektrische draadnooit in contact komenmet andere draden.
Volgens deveiligheidsvoorschriftenmoet deze installatiegeaard worden.
Sluit het apparaatnietaan op een elektronischedimmer.
Gebruik altijdeen geschikteen gekeurdeveiligheidskabel bijhet installerenvanhet toestel.
Om elektrischeschokkentevoorkomen,moet Ude behuizing niet openen. Afgezienvan de lamp en de zekering zitten
er geen onderdelen in die door de gebruikermoeten wordenonderhouden.
Repareer nooit een zekering en overbrug de zekeringhouder nooit. Vervang een beschadigde zekering steeds door
een zekering vanhetzelfde type enmet dezelfde elektrischekenmerken.
Ingeval van ernstige problemenmet het bedienen van het toestel, stopt U onmiddellijk het gebruik ervan. Contacteer
uwdealer vooreen eventuele reparatie.
De behuizingen de lenzenmoeten vervangenwordenalsze zichtbaarbeschadigd zijn.
Gebruik best de originele verpakking als het toestel vervoerdmoet worden.
Om veiligheidsredenen is het verboden omongeautoriseerdemodificaties aanhet toestelaan tebrengen.
Belangrijk: Kijk nooit rechtstreeks in de lichtbron. Gebruik het lichteffect niet in de tegenwoordigheid van personen die
lijden aanepilepsie.
DE CONTACTSTOP INSTALLEREN
Wanneer u de contactstop installeert (tenminste een 2.5A type), dient u de draden te verbinden volgens de volgende
kleurencode
Belangrijkeopmerking: deze projectordient geaard te worden.
Groen en geel = Aarding
Blauw = Neutral
Bruin = Live
PLAATSEN OF VERVANGEN VAN DE LAMP
Deze projector kan enkel gebruikt worden in combinatie met een specialeHPL
575-X lamp. Wacht, in het geval van het vervangen van een lamp of van het
geven van een onderhoudsbeurt, 10 minuten na het uitzetten van de installatie
met het openen ervan totdat het apparaatis afgekoeld. Trek altijdde stekkeruit
het stopcontact voor U begint aan het onderhoud. Gebruik altijd hetzelfdetype
reserveonderdelen (lampen, e.d.) Gebruik bij het vervangen van onderdelen
Zet het toestel af en trek denetstekker uit het stopcontact.
Wacht 10 minutentot hetapparaatis afgekoeld.
Gebruik een schroevendraaier omde schroef los te schroeven die het lampcompartiment sluitaan
de achterzijdevan de projector (zie A opde fotohieronder).
Trek de lampenhoudervoorzichtiguit het lampcompartiment. (Zie D op de foto hieronder)
Verwijder de oude lamp. Bij het verwijderen vande oude lamp houdt Ude lampenhouder vast.
Houd de lampenhouder vast terwijl U de nieuwe lamp rustig in de lampenhouder drukt.
Opgepast! Controleer het etiketachter ophet toestel of kijk naar de technische karakteristieken in
deze gebruikswijzing om te weten welke lamp U moet gebruiken. Gebruik nooit een lamp met een
hogere wattage.Lampenmet eenhogere wattageproduceren temperaturen waarvoorhet apparaat
niet ontworpenwas. Alshet apparaateen lampentransformator gebruikt, zalhij verbranden wegens
de te grote belasting.
Raak de lamp nietmet blote handen aan; dit zal de levensduur van de lamp drastisch verkorten. Indien U de lamp
aanraakte, maak hem dan schoon met een lapje en een beetje schoonmaakalcohol. Veeg de lamp droog alvorens
hem te installeren.
Plaats de nieuwe lampterug inhet apparaat.Vergewis U ervan dat geen draden de lamp raken.
Sluit het lampcompartiment met de schroef.
Maak de focus knop(zie B op de fotohieronder) en de vergrendelknop (zie C op de foto hieronder) los.
Schakelde projectoraan en draai aande focus knob (B)totdat ude maximale lichtuitstootverkrijgt.
Draai de vergrendelknop (C)tegen de wijzers van de klok in totdat de focus knopvergrendeldis.
Klaar.
uitsluitendauthentiekereserveonderdelen.
LENS (HER)PLAATSEN
Bij de Multipar krijgtu 4 lenzen, elk meteen andereopeningshoek. Om de maximalelichtuitstoot te behouden dient u de
lens te vervangen wanneer deze krassenof barsten vertoond. De naamvan elke lens staatopde rand vande lens
geprint:
Very narrowspot: klaar glas, ronde bundelvan 15°
Narrowspot: Gestippeldglas, ronde bundel van 19°
Mediumflood: facetten van 6x22mm, ronde bundel van21° x34°
Wideflood: facetten van 6x12mm,ronde bundel van 30° x 51°
Een lens installeren:
Hou uw Multipar horizontaal en draai de plasticring totde springclip naar de top van de Multipar wijst, onder de
retaining clip (see foto 1)
Plaatsde lens achter de lens holders (de convexe zijde (bolle zijde)dient aan de binnenzijdevande Multipar
geplaatst te worden !!!) en duw de lens zachtjes naarbinnen totdat de springclip klikt (zie foto 2)
De lens zit vast achter de spring clip (zie foto 3)
Klaar!
BRITEQ
®
13/35 MULTIPAR
BRITEQ
®
14/35 MULTIPAR
Page 10

NEDERLANDS HANDLEIDING
Foto 1 Foto 2
Een lensverwijderen:
Wees er zeker van dat de projector afgekoeld is alvorens de lens te verwijderen
Hou uw Multipar horizontaal en draai de plasticring totdatde spring clipnaar de
top van de Multiparwijst, onder de retaining clip (zelfde manier als om de lens te
installeren)
Plaatsde lens tool(zie foto’s hieronder)in de gaten naast despring clip en duw
de springclip naar boven.
Balanceer devoorzijde van de Multipareen beetje naar beneden en hou uw
hand onder de projectorzodat de lens niet op de grond valt (maar mooi in uw
hand )
Klaar!
Foto 3
NEDERLANDS HANDLEIDING
Deze lip moet naarboven wijzen.
Dit is de manier omde lens toolin de
Multiparte plaatsenom een lens te
verijderen
Belangrijkeopmerking:
Wanneer u de kleuren frame wil installeren, vergeet dan niet op deze te vergrendelen met
de retainingclip. Dit voorkomt dat de kleurenframeen accessoires kunnen vallen.
Hoe dekleuren frame correct installeren:
Ontgrendel de retaining clip doorhet zijwaartsen dan naar boven te duwen.
Plaats de kleuren frame.
Vergrendel de retaining clip door deze naar beneden en dan zijwaarts te duwen.
OPHANGEN VAN HET APPARAAT
Belangrijk: De installatie van het toestel mag uitsluitend door bekwaam onderhoudspersoneeluitgevoerd
worden. Onjuiste plaatsing kan ernstige letsels en/of schade aan eigendommen tot gevolg hebben. Het
ophangen vergt veel ervaring. U behoort de grenzen te respecteren aan de werklast; erkende
installeringmaterialen moetenworden gebruikt; de veiligheid van het geïnstalleerde toestel moet regelmatig
wordengecontroleerd.
Overtuig U ervan dat het gebied onder installatieplaats vrij is van ongewenste personen tijdens het plaatsen, het
weghalenen het onderhoud.
Installeer het toestel op een goed geventileerde plaats, ver van brandbare stoffen en/of vloeistoffen. Het toestelmoet
wordenbevestigd op minstens 50 cm van de omringende muren.
Het toestel moet worden geïnstalleerd buiten het bereik van iedereen en weg van plaatsen waar men mag lopen en
zitten.
Alvorens tot plaatsen over te gaan, moet men controleren dat de minimum puntbelasting van de installatieplaats 10
keer het gewicht van hettoestel bedraagt.
Gebruik bij het installeren van het toestel altijd een gewaarmerkte veiligheidskabel die 12 keer het gewicht van het
toestel kan dragen. Deze bijkomende veiligheidsbevestiging moet zo worden aangebracht dat geen deel van het
toestel meer dan 20 cm vallenkan als de hoofdbeveiliging faalt.
Het apparaatmoet goedworden vastgezet; aan een vrij zwaaiendemontagemag zelfs niet gedacht worden.
Bedekgeen ventilatieopeningen, anders zou dit oververhitting tot gevolgkunnen hebben.
De gebruiker moet er zich van verzekeren dat de installaties met betrekking tot de veiligheid en de technische
mechaniek door een expert zijn goedgekeurd alvorens ze voor de eerste keer te gebruiken. Elk jaar moeten de
installaties worden gekeurd door een vakman om tecontrolerenof de veiligheid nogsteeds perfect is.
BRITEQ
®
15/35 MULTIPAR
BRITEQ
®
16/35 MULTIPAR
Page 11

NEDERLANDS HANDLEIDING
BEDIENINGSVOORSCHRIFTEN
Zet het toestel niet aan en uitmetkorte tussenpozen omdat de lamp het anders eerder begeeft.
De oppervlaktetemperatuur van het apparaat kan 85º bereiken. Raak gedurende het bedienen van het apparaat de
behuizing niet met blote handen aan.
Trekt U altijd de stekker uit het stopcontact als het apparaat langere tijd geen dienst doet of alvorens een lamp te
vervangenof alvorens een onderhoudsbeurtte beginnen.
Stop, in geval van serieuze bedieningsproblemen, met het gebruiken van het apparaat en stel U onmiddellijk in
verbindingmet uw dealer.
Belangrijk: Kijk nooit rechtstreeks in de lichtbron. Gebruik het effect nooit in de aanwezigheid van mensen die aan
epilepsielijden.
ONDERHOUD
Overtuig U ervandat het gebied onder de installatieplaatsvrij is van ongewenste personen tijdens het onderhoud.
Zet het toestel uit, trekde netstekker uithet stopcontact en wacht tothet toestelisafgekoeld.
Bij inspectiemoeten de volgendepuntenworden gecontroleerd.
Alle schroeven gebruikt om het tetoestel te installeren en al zijn onderdelen moeten goed vastgedraaidzijn en mogen
niet verroest zijn.
Behuizingen, vastzetstukken, installeringplaatsen (plafond, spanten, schokbrekers) mogen absoluut niet verwrongen
zijn.
Wanneer een optische lens klaarblijkelijk beschadigd is door barsten of diepe krassen, dan moet deze vervangen
worden.
De stroomkabels moeten in perfecte staat zijn en behoren vervangen te worden, wanneer er zelfs maar een klein
probleemontdekt werd.
Om het toestel tegen oververhitting te beschermen, behorende ventilatoren (als die er zijn) en de ventilatieopeningen
elke maand gereinigdte worden.
De binnenkant vanhet toestelbehoort elkjaar gereinigd te worden met een stofzuigerofeen luchtspuit.
Het schoonmaken van inwendige en uitwendige optischelenzen en/of spiegels moet regelmatig worden uitgevoerd om
een zo goed mogelijke lichtuitstraling te verkrijgen. Hoe vaak ze schoon moeten worden gemaakt hangt af van de
omgeving waar het toestel wordt gebruikt: een klamme, rokerige of bijzonder vuile omgeving kan een grotere
opeenhoping van vuilveroorzakenop de optische uitrusting.
Reinigmeteen zachte doek en gebruik normaleglasreinigendeproducten.
Droog de onderdelen altijdzorgvuldigaf,
Reinig deuitwendige optische uitrustingminstens één keer per maand.
Reinig deinwendigeoptische uitrustingminstens om de 3 maanden.
Wanneer u de reflector reinigt, gebruik dan zeker geen chemische reiniger. Deze kan de weerspiegelende
bekleding vandereflector aantasten
Let op: We bevelen sterk aan dat het schoonmaken van de binnenkant wordt uitgevoerd door vakbekwaam
personeel!!
TECHNISCHE KENMERKEN
Netvoeding: wisselstroom 230 V, 50 Hz
Lamp: HPL 575-X
Afmetingen: 273 x 215 x 279 mm
Gewicht: 3.4 kg
U kan de laatsteversievandeze handleidingdownloaden viaOnze website: www.briteq-lighting.com
Elkeinlichtingkanveranderenzonder waarschuwingvooraf
DEUTSCH BEDIENUNGSANLEITUNG
Vielen Dank, dass Sie sich für den Erwerb dieses Briteq®-Produkts entschieden haben. Bitte lesen sie diese
Bedienungsanleitung sorgfältig vor der Inbetriebnahme durch, zur vollen Ausschöpfung der Möglichkeiten, die dieses
Gerätbietet sowie, zuIhrer eigenen Sicherheit.
EIGENSCHAFTEN
Das Gerät istfunkentstörtund erfüllt dieAnforderungen der europäischen undnationalenBestimmungen. Entsprechende
Dokumentationliegt beim Hersteller vor.
Das Gerät istzur Erzeugungvon dekorativem Lichtsowie zurBenutzungin Lightshowsbestimmt.
Multifunktionsscheinwerfer.
Erzeugt die gleiche Lichtausbeute wie ein 1000 W PAR-Scheinwerfer. Dank der speziellen HPL 575-X Lampe
verbrauchtder Scheinwerfernur 575Watt.
inklusive 4 Linsen (very narrow,narrow, mediumflood, wide flood)
Verfügbar in schwarz und silbern
Wahlweise: Torflügel
VOR DER ERSTBENUTZUNG
Vor der Erstbenutzung bitte das Gerät zuerst auf Transportschäden überprüfen. Sollte das Gerät einen Schaden
aufweisen, Gerät bitte nicht benutzen, sondern unverzüglichmit ihrem Händlerin Verbindungsetzen.
Wichtiger Hinweis: Das Gerät hat das Werk unbeschädigt und gut verpackt verlassen. Es ist wichtig, dass der
Benutzer sich streng an die Sicherheitshinweise und Warnungen in der Bedienungsanleitung hält. Schäden durch
unsachgemäße Handhabung sind von der Garantie ausgeschlossen. Der Händlerübernimmt keine Verantwortungfür
Schäden, die durch Nichtbeachtung der Bedienungsanleitunghervorgerufenwurden.
Die Bedienungsanleitung, für zukünftiges Nachschlagen, bitte aufbewahren. Bei Verkauf oder sonstiger Weitergabe
desGerätes, bitteBedienungsanleitungbeifügen.
Packungsinhaltprüfen:
Bitte überprüfen Sie,dass die PackungfolgendeEinzelteile enthält:
Bedienungsanleitung
Multipar (Silber/Schwarz)
Filterrahmen
inklusive 4 Linsen (very narrow,narrow, mediumflood, wide flood)
SICHERHEITSHINWEISE
CAUTION
qualifiziertenKundendienst.
Das Blitzsymbol im Dreieck weist den Benutzer darauf hin, das eine Berührungsgefahr mit nicht isolierten
Teilen im Geräteinneren, welche eine gefährliche Spannung führen, besteht. Die Spannung ist so hoch, das
hier die Gefahreines elektrischen Schlages besteht.
Das Ausrufezeichen im Dreieck weist den Benutzer auf wichtige Bedienungs- und Wartungshinweise in den
Dokumenten hin, die demGerät beiliegen.
Dieses Symbolbedeutet: NurinnerhalbvonRäumenverwenden.
Dieses Symbol bedeutet: Achtung!
Bedienungsanleitunglesen!
Dieses Symbol stellt fest: der minimale Abstand von beleuchteten Gegenständen. Der minimale Abstand
Aus Umweltschutzgründen,Verpackungbitte wiederverwenden, oderrichtigtrennen.
Ein neues Gerät kann Geruch oder Rauch entwickeln. Dasist völlig normal und legt sich nach einigen Minuten.
Zur Vermeidung vonStromschlag oder Feuer, Gerätbitte nicht Regen oder Feuchtigkeitaussetzen.
Zur Vermeidung von Kondensation im Inneren des Geräts, bitte nach Transport in eine warme Umgebung einige Zeit
Gerät nichtim Freien und infeuchten Räumenund Umgebungenverwenden.
zwischen Projektor und dembelichteten Gegenstandmussmehr als 2 Meters sein.
zum Temperaturausgleich bringen. Kondensation kann zu Leistungsverlust des Gerätes oder gar Beschädigung
führen.
ACHTUNG: Um sich nicht der Gefahr eines elektrischen Schlags auszusetzen,
entfernen Sie keines der Gehäuseteile. Im Geräte-innerenbefinden sich keine
vom Benutzer reparierbaren Teile. Überlassen Sie Reparaturen dem
BRITEQ
®
17/35 MULTIPAR
BRITEQ
®
18/35 MULTIPAR
Page 12

DEUTSCH BEDIENUNGSANLEITUNG
DEUTSCH BEDIENUNGSANLEITUNG
Keine Metallgegenstände oder Flüssigkeiten ins Innere des Geräts gelangen lassen, Kurzschluss oder Fehlfunktion
können die Folge sein. Falls es doch einmal vorkommen sollte, bitte sofort Netzstecker ziehen und vom Stromkreis
trennen.
Gerät nur in gut belüfteter Position und nicht in der Nähe von entflammbarenMaterialien oder Flüssigkeitenbetreiben.
Mindestabstand an allen Seiten sollmindestens 50 cm sein.
Ventilationsöffnungennichtabdecken, da Überhitzungsgefahr!
Nicht instaubiger Umgebung verwendenund regelmäßig reinigen.
Für Kinderunerreichbar aufbewahren.
Unerfahrene Personen sollen dasGerätnichtbedienen.
Umgebungstemperatur darf40ºC nicht überschreiten.
Die Oberflächentemperatur kann bis zu 85ºC erreichen, Gerät während des Betriebs nicht mit bloßen Händen
anfassen.
Sicherstellen, dasssichwährend des Auf- undAbbaus keine unbefugten Personen unterhalbdes Geräts befinden.
Vor dem Auswechseln des Leuchtmittels oder sonstigen Eingriffen,10Minuten Abkühlzeiteinhalten.
StetsNetzstecker ziehen, wenn Gerätfürlängeren Zeitraum nicht genutzt,oder es gewartet wird.
ElektrischeAnschlüssenurdurchqualifiziertes Fachpersonalüberprüfen lassen.
Sicherstellen, dassNetzspannungmit Geräteaufkleber übereinstimmt.
Gerät nicht mit beschädigtem Netzkabel betreiben. Ist die Zugangsleitung beschädigt, muss diese durch den
Hersteller, seinen Vertrieboder durch eine QualifiziertePersonersetzt werden.
Netzkabel nicht mit anderen Kabeln in Berührungkommenlassen!
Zur EinhaltungderSicherheitsbestimmungenmuss dasGerätgeerdet sein.
Ausschließlich vorschriftsmäßige Kabel zurInstallationverwenden.
Gerät nichtöffnen.Abgesehen vomAustausch des Leuchtmittels sind keine zu wartenden Bauteile im Gerät enthalten.
Sicherung niemalsreparierenoder überbrücken, sondern immer mit gleichartiger Sicherung ersetzen!
Bei Fehlfunktion,Gerät nicht benutzenund mit Händler in Verbindungsetzen.
Bei sichtbaren Beschädigungenmüssen Gehäuse und Optikersetzt werden.
Bei Transport bitte Originalverpackung verwenden, um Schäden am Gerät zu vermeiden.
Aus Sicherheitsgründen dürfenandemGerät keine unbefugtenVeränderungen vorgenommen werden.
Wichtiger Hinweis: Nicht direkt in die Lichtquelle blicken! Gerät nicht verwenden, wenn sich Personen im Raum
befinden, die unterEpilepsieleiden.
NETZSTECKER MONTIEREN
Wenn Sie den Netzstecker (Mindestbelastbarkeit 2.5A) montieren, müssen Sie dieAdern entsprechend der folgenden
Farbenzuordnungverbinden:
WichtigerHinweis:dieser Scheinwerfermussgeerdet sein
Grün und gelb = Erdung
Blau = Neutral
Braun = Stromführend
erheblich. Fallses docheinmal vorkommensollte, mit etwas Alkohol reinigen und vordemEinsetzen gut abreiben.
Neues Leuchtmittel einsetzen und sicherstellen,dass es nichtvonKabeln berührt wird.
Fach wiederzuschrauben. (mitdem Schraubendreher und mit der Hand)
Schalten Sie den Scheinwerfer an und drehen Sie den großen Fokusknopf auf der Rückseite des Scheinwerfers
(sieheB auf nachfolgender Abbildung) bis Sie einemaximaleLichtausbeute erhalten.
Fertig!
LINSE EINBAUEN/AUSTAUSCHEN
Der Multipar hat 4 Linsen mit jeweils unterschiedlichen Abstrahlungswinkeln. Um eine maximale Lichtausbeute zu
behalten, sollten Sie die Linse austauschen, sobald sie Kratzer oder Risse aufweist.Die Bezeichnung jeder Linse ist am
Rand der Linseaufgedruckt:
EinsetzeneinerLinse:
Halten Sie Ihren Multiparwaagerecht und drehen Sie den Kunststoffring bis sich die Federklammer[springclip]
Setzen Sie die Linse hinter die Linsenhalter [lens holders](die gewölbte Seite mussnach Innenin den Multipar
Die Linse ist hinter der Federklammer befestigt. (Siehe Abbildung 3)
Fertig!
Very narrow spot: Klarglas, 15° runde Strahlform
Narrow spot: Kornraster,19° runde Strahlform
Medium flood: Facetten (6 x 22mm),21° x 34° Strahl
Wide flood: Facetten (6 x12mm), 30° x 51° Strahl
oben am Multipar (unter der Halteklammer [retainingclip]) befindet. (Siehe Abbildung 1)
gedreht sein!!!)und drücken Sie die Linse sanft nach Innengegen die Federklammer bissie einrastet.(Siehe
Abbildung 2)
EINSETZEN/AUSTAUSCHEN DER LICHTQUELLE
Der vorliegende Scheinwerfer kann nur mit einer speziellen HPL 575-X Lampe
betrieben werden. Bei Austausch oder Ersatz der LichtquelleGerät fürmindestens
10Minuten abkühlen lassen. StetsNetzstecker ziehenund vom Stromkreistrennen!
Stets gleichartige Ersatzteile (Lichtquelle, etc) verwenden. Original-Ersatzteile
Gerätabschalten und Netzsteckerziehen.
Etwa 10 Minuten abwarten, bis das Gerät abgekühlt ist.
Verwenden Sie einen Schraubendreher, um die Schraube am Lampenfach an der Rückseite des
Scheinwerfers zu lösen (siehe A auf nachfolgender Abbildung). Den Fokusknopf ebenfalls mit der
Hand durch drehen lösen (SieheB auf nachfolgender Abbildung)
Vorsichtigaus dem Fachherausziehen. (Siehe C auf nachfolgenderAbbildung)
Gebrauchtes Leuchtmittelherausziehen. Hierbei an der Fassung festhalten.
An der Fassung festhalten, wenn ein neues Leuchtmittel eingesetzt wird.
Achtung! Geräteaufkleber auf der Rückseite des Geräts oder technische Einzelheiten in dieser
Bedienungsanleitung beachten, damit stets das richtige Leuchtmittel eingesetzt wird. Keine
Leuchtmittel mit höherer Wattanzahl einsetzen! Diese Leuchtmittel erzeugen höhere Temperaturen,
für die dieses Gerät nicht ausgelegt ist. Hat das Gerät einen Transformator, kann dieser wegen
Überlastungdurchbrennen.
Leuchtmittel nicht mit bloßen Händen berühren! Das verkürzt die Lebensdauer der Lichtquelle
BRITEQ
verwenden.
®
19/35 MULTIPAR
BRITEQ
Abbildung 1 Abbildung 2
®
20/35 MULTIPAR
Page 13

DEUTSCH BEDIENUNGSANLEITUNG
Ausbauen einer Linse:
Achten Sie darauf, dass der Scheinwerfer abgekühlt ist, bevor Sie die Linse
herausnehmen.
Halten Sie den Multipar waagerecht und drehen Sie den Kunststoffring, bis
sich die Federklammer oben am Multipar unter der Halteklammer befindet.
(Gleiche Vorgehensweise wie beim Einbau derLinse)
Stecken Sie das Linsen-Entfernwerkzeug [lens tool] (siehe nachfolgende
Abbildungen) in die Löcher neben der Federklammer und drücken Sie die
Federklammer nach unten.
Kippen Sie die Vorderseite des Multipars leicht nach vorne und halten Sie
Ihre Handunter den Scheinwerfer, so dass die Linse nicht auf den Boden fallen kann (aber schöninIhre Hand! )
Fertig!
Abbildung 3
DEUTSCH BEDIENUNGSANLEITUNG
Wichtiger Hinweis: Wenn Sie den Filterrahmen montieren, vergessen Sie nicht, ihn mit
der Halteklammer zu befestigen. Auf diese Weise wird verhindert, dass Filterrahmen und
Zubehörherausfallen.
Wie wird der Filterrahmenkorrekt montiert:
Lösen Siedie Halteklammer, indem Sie sie zur Seiteund dann nach oben drücken
Bringen Sie den Filterrahmen an
Drücken Siedie Halteklammer nach unten und zur Seiteum sie wieder festzusetzen
ÜBERKOPF-MONTAGE
Wichtig: Montageausschließlichdurch qualifiziertesFachpersonal durchführenlassen.Unvorschriftsmäßiger
Einbau kann erhebliche Verletzungen und/oder Schäden verursachen. Überkopf-Montage verlangt
entsprechende Erfahrung! Belastungsgrenzen müssen beachtet werden, geeignetes Installationsmaterial
muss verwendet werdenunddasinstallierteGerätmuss in regelmäßigen Abständen überprüftwerden.
Sicherstellen, dass sich keine unbefugten Personen unterhalb des Geräts befinden, während es installiert oder
gewartet wird.
Gerät in gut belüfteter Positioninstallieren, weit entfernt von entflammbarenMaterialienund/oder Flüssigkeiten. Einen
Seitenabstandvon mindestens50cm einhalten.
Gerät außerhalb der Reichweite von Personen, und nicht in niedrigen Durchgängen oder in der Nähe von
Sitzgelegenheiteninstallieren.
Vor Montage sicherstellen,dass diegewählte Position wenigstens das 10-facheGerätegewichtaufnehmenkann.
Zur Aufhängung stets geeignetes Befestigungsmaterial verwenden, das das 12-fache Gerätegewicht aushalten kann.
Eine zweite Sicherungsaufhängung muss angebracht werden, die ein Absacken des Geräts von mehr als 20 cm
verhindert,sollte dieBefestigung brechen.
Gerät gut befestigen. Eine freischwingende Aufhängung ist gefährlich und sollte auf gar keinen Fall in Betracht
gezogenwerden!
Ventilationsöffnungennichtabdecken, da Überhitzungsgefahr!
Betreiber muss sicherstellen, dass die sicherheitsrelevanten und technischen Installationen vor Erstbetrieb
fachmännischvorgenommenwordensind.
Installationen sollten jährlich durch qualifiziertes Fachpersonal inspiziert werden, um jederzeit einen sicheren Betrieb
zugewährleisten.
BRITEQ
Die Laschemussnach oben zeigen
BEDIENUNGSANLEITUNG
Gerät nichtinkurzen Abständenein- undausschalten, da es die Lebensdauer desLeuchtmittels verkürzt.
Die Oberflächentemperatur kann bis zu 85ºC erreichen, Gerät während des Betriebes nicht mit bloßen Händen
anfassen.
Stets Netzstecker ziehen, wenn Gerätfürlängeren Zeitraum nicht genutzt, oder es gewartet wird.
Bei FehlfunktionGerätnicht benutzenund umgehend mit ihrem Händler in Verbindung setzen.
Wichtiger Hinweis: Nicht direkt in die Lichtquelle blicken! Gerät nicht verwenden, wenn sich Personen im Raum
befinden, die unterEpilepsieleiden.
WARTUNG UND INSTANDHALTUNG
Sicherstellen, dasssichkeine unbefugtenPersonenunterhalb des Gerätsbefinden, währendes gewartet wird.
Gerät ausschalten, Netzstecker ziehenund warten,bises sichabgekühlt hat.
Während der Wartung sindfolgende Punkteganz besonders zu beachten:
Sämtliche Schrauben zurInstallationund Befestigung jeglicher Teile müssenfest angezogen und rostfrei sein.
Gehäuse, Befestigungsmaterialienund Aufhängungen(Decke, Balken, abgehängte Decken) dürfen keine Anzeichen
von Verformungzeigen.
So muss das LinsenEntfernwerkzeuginden Multipar
eingeführtwerden
®
21/35 MULTIPAR
Ist die Optiksichtbar beschädigt(Sprüngeoder tiefe Kratzer),dann müssen die entsprechenden Teile ausgewechselt
werden.
Netzkabel muss stets in einwandfreiem Zustandsein und selbst bei kleinsten Beschädigungen erneuert werden.
Zur Vermeidung von Überhitzung müssen die Ventilatoren (sofern vorhanden) und Lüftungsschlitze monatlich
gereinigtwerden.
Gerät innen mindestenseinmalpro Jahrmit Staubsauger oder Airjetreinigen.
Reinigung der inneren und äußeren optischen Linsen und/oder Spiegel müssen in regelmäßigen Abständen zur
Beibehaltung einer optimalen Lichtausbeute vorgenommen werden. Reinigungsintervalle hängen stark von der
Umgebung ab: feuchte, verrauchte und besonders verschmutzte Umgebungführen zu größerer Verschmutzung auf
denLinsen.
Mit weichemTuch und gewöhnlichemGlasreinigersäubern.
Alle Teilestets gutabtrocknen.
Äußere Optikmindestens alle 30 Tage säubern.
Innere Optikmindestens alle90 Tage säubern.
Verwenden Sie für die Reinigung des Scheinwerfers auf keinen Fall chemische Reinigungsmittel. Sie könnten
denreflektierendenBelagdes Scheinwerfersbeschädigen.
BRITEQ
®
22/35 MULTIPAR
Page 14

DEUTSCH BEDIENUNGSANLEITUNG
Achtung:Wirempfehlendringend, Reinigung im Innerndes Geräts nur von qualifiziertemPersonaldurchführen
zulassen!
ESPAÑOL MANUAL DE FUNCIONAMIENTO
TECHNISCHE EINZELHEITEN
Netzspannung: ≈ 230V,50Hz
Lichtquelle: HPL 575-X
Abmessungen: 273 x 215 x 279 mm
Gewicht: 3.4 kg
Technische Änderungen können auchohneVorankündigungvorgenommenwerden!
Sie können sich dieneueste Version dieses Benutzerhandbuches von unsererWebsiteherunterladen:
www.briteq-lighting.com
Gracias por comprar este producto Briteq®. Para sacar el máximo rendimiento a sus posibilidades y por su propia
seguridad,lea estasinstrucciones de funcionamiento detenidamente antes de comenzar autilizar esta unidad.
CARACTERÍSTICAS
Este producto cumplelos requisitos de las directrices nacionales y europeas actuales. Se ha establecido la conformidad
y las instruccionesy documentoscorrespondienteshan sidodepositadospor el fabricante.
Este dispositivo ha sido diseñado para producir efectos luminosos decorativos y se utiliza en sistemas de
espectáculosdeluces.
Proyecto de luzmultifuncional.
Genera la misma emisiónluminosa que un proyector PAR de 1000 W.Gracias a la lámpara especial HPL 575-X, este
proyector sólo consume 575 vatios.
Se incluyen 4 lentes (hazmuy estrecho, estrecho,iluminaciónmediay ancha).
Disponible en negro o plata
Opcional: pantallasopacas
ANTES DE UTILIZAR EL APARATO
Antes de comenzar a utilizar esta unidad, compruebe que no haya habido daños durante el transporte. Si observa
algún daño, no utilice el dispositivo y consulte primero a su distribuidor.
Importante: Este dispositivo ha salido de nuestras instalaciones en perfecto estado y bien embalado. Es
absolutamente necesario que el usuario siga estrictamente estas instrucciones y advertencias de seguridad que
aparecen en este manual de usuario. Cualquier daño producido por un manejo innecesario queda excluido de la
garantía. El distribuidor no asumirá ninguna responsabilidad por cualquier defecto o problema que surja por no haber
seguido elmanual de usuario.
Guarde este folleto en un lugar seguro para consultarlo en el futuro. Si vende este aparatomás adelante, asegúrese
de incluir este manual de usuario.
Compruebeelcontenido:
Compruebeque la caja contiene lossiguientes elementos:
Instrucciones defuncionamiento
Multipar (Plata/Negro)
Cuadro de color
Se incluyen 4 lentes (hazmuy estrecho, estrecho,iluminaciónmediay ancha).
INSTRUCCIONES DE SEGURIDAD:
CAUT ION
El símbolo en forma de rayo con cabeza de flecha dentro de un triángulo equilátero se emplea para alertar
sobre el uso o presencia de "voltaje peligroso" no aislado dentro de la carcasa del producto con la magnitud
suficiente para constituirun riesgo de descarga eléctrica.
El signo de exclamación dentro del triángulo equilátero se emplea para alertar al usuario de la presencia de
instrucciones de funcionamiento y mantenimientoimportantes en el texto que acompaña aeste aparato.
Este símboloindica: Usar sólo en el interior.
Este símboloindica:Leer las instrucciones.
Este símboloindica: La distanciamínima de objetos iluminados. La distancia mínimaentre la emisión luminosa
y la superficie iluminadatiene que ser más de 2 metros. (Comprobar)
Para proteger el medio ambiente, recicle elmaterialde embalaje en la medida de lo posible.
Un nuevo efecto luminoso provoca a veces humo y/u olor no deseados. Esto es normal y desaparece después de
algunosminutos.
Para evitar incendios o riesgos de descarga,no exponga la unidad a la lluviao a la humedad.
Para evitar que se formecondensación en el interior, deje que la unidad se adapte a la temperaturaexterior cuando la
lleve a una habitación cálida después del transporte. A veces la condensación impide que la unidad funcione a pleno
rendimiento y puede incluso provocardaños.
PRECAUCIÓN: Para reducir el riesgo de descarga eléctrica, no quite la cubierta
superior. No existen piezas en el interior que pueda mantener o reparar el usuario.
Asigne el mantenimiento y las reparacionesa personal cualificado.
BRITEQ
®
23/35 MULTIPAR
BRITEQ
®
24/35 MULTIPAR
Page 15

ESPAÑOL MANUAL DE INSTRUCCIONES
ESPAÑOL MANUAL DE INSTRUCCIONES
Estaunidadsólo se puede usar en el interior.
No coloque objetos metálicos ni derramelíquidosdentro del reproductor de la unidad. Se pueden producir descargas
eléctricas o fallos de funcionamiento. Si algún objeto extraño entra en la unidad, desconecte inmediatamente el
suministroeléctrico.
Coloque el aparato en un lugar bien ventilado, lejos de materiales y/o líquidos inflamables. El aparato debe colocarse
a al menos 50 cm de las paredes.
No cubra ninguna abertura de ventilación puestoque podríaproducirse un sobrecalentamientode la unidad.
Evite el uso en ambientes conpolvo y limpie la unidad regularmente.
Mantengala unidadlejos de los niños.
Las personas sin experiencia no deben utilizar este aparato.
La máxima temperatura ambiente para un funcionamiento seguro es de 40°C. No utilice la unidad a temperaturas
ambientesuperiores.
La temperatura de la superficie de la unidad puede alcanzar hasta 85°C. (Comprobar) No toque la carcasa sin
protección durante el funcionamiento.
Asegúrese de que debajo del área del lugar de instalación no hay personas durante el montaje, desmontaje o
mantenimiento.
Deje que el aparato se enfríe durante al menos 10 minutos antes de reemplazar la bombilla o comenzar el
mantenimiento.
Desenchufe siempre la unidad cuando no vaya a ser utilizada durante un largo periodo de tiempo o antes de
reemplazarla bombilla o comenzar el mantenimiento.
La instalación eléctrica sólo debe ser llevada a cabo por personal cualificado, de acuerdo con la regulaciones sobre
seguridad eléctrica y mecánica de supaís.
Compruebe que el voltajedisponible no supera el que se indica en el panel trasero dela unidad.
El cable de alimentación siempre debe estar en perfecto estado. Apague la unidad inmediatamente cuando observe
daños o desperfectos en el cable de alimentación. Debe ser reemplazado por el fabricante, su agente de servicio o
personas cualificadas paraevitarcualquierpeligro.
¡Nunca deje que el cablede alimentaciónentre en contacto con otroscables!
Esteaparatodebe conectarse atierra para cumplircon las regulaciones sobre seguridad.
Utilice siempreun cablede seguridad apropiadoy homologadocuando instale la unidad.
Para evitar descargas eléctricas, no abra la cubierta. Aparte de la lámparano hay piezas en el interior de este aparato
que pueda mantenerel usuario.
Nunca repare un fusible ni derive el soporte del fusible. ¡Reemplace siempre el fusible dañado por un fusible del
mismotipo y especificación eléctrica!
En caso de que ocurranproblemas de funcionamiento serios, dejede utilizar el aparato y póngase en contacto con su
distribuidor inmediatamente.
La carcasa ylalente debenreemplazarse si presentan dañosvisibles.
Utilice el embalaje original cuando tenga que transportarel dispositivo.
Por razones de seguridad se prohíbe realizar modificacionesno autorizadasen la unidad.
Importante: ¡Nuncamire directamentea la fuente de luz! No utilice el efecto en presencia de personas epilépticas.
REEMPLAZO Y COLOCACIÓN DE LA LÁMPARA
Este proyector sólo puede utilizarse con una lámpara especial HPL 575-X. Cuando tenga que
reemplazar la lámpara o realizar el mantenimiento de ésta, no abra el aparato
hasta 10 minutos después de haberla apagado para que se enfríe. ¡Desconecte
siempre la unidad antes de realizar el mantenimiento! Utilice siempre el mismo
tipo de piezas de repuesto (bombillas, etc.) Cuando reemplace piezas, utilice
Apague launidady desenchufe el cable de red.
Espere unos 10minutos hasta que la unidad se haya enfriado.
Utilice un destornillador para desenroscar el tornillo que cierra el compartimento de la lámpara
en la parte traseradel proyector(consulte A en la imagen de abajo).
Desprenda suavemente el casquillo de la lámpara del compartimento de la lámpara. (Consulte
D en la imagende abajo)
Desconecte la lámparavieja. Sujete el casquillo de la lámpara mientras desconecta la lámpara,
sujete el casquillode lalámpara mientras empuja suavemente la lámpara nueva en el casquillo.
¡Atención! Compruebe la etiqueta en el lado posterior del dispositivo o lea las especificaciones
técnicas en estemanual para saber qué lámpara utilizar.¡Nunca instale lámparas conun vatiaje
superior! Las lámparas con un vatiaje superior generan temperaturas para las que el dispositivo
no ha sido diseñado. Si utiliza un transformadorde lámpara,se quemará debido a la sobrecarga
decorriente.
¡No toque la bombilla sin protegerse las manos! Esto reduce drásticamente la vida útil de la
lámpara. Si ha tocado la lámpara, límpiela con un paño y alcohol de quemar. Limpie la lámpara
antes de instalarla.
Vuelva a colocar la nueva lámpara dentro de la unidad. Asegúrese de que los cables no toquen
la lámpara.
Cierre el compartimentode la lámpara con el tornillo.
Afloje los del focus (B en la imagen inferior) y aprete el botón (C en la imageninferior)
Encienda el proyector y gire el botóndel focus(B) hasta que ustedconsiga la luz máxima.
Gire el botón(C) que se cierra en sentido contrarioa las agujas del reloj hastaque esté blocado.
¡Ya está!
sólo piezas derepuestooriginales.
INSTALACIÓN DEL ENCHUFE DE ALIMENTACIÓN:
Cuando instale el enchufe de alimentación (al menos del tipo 2,5 A), debe conectar los cables de acuerdo con los
siguientescódigos de colores:
Verde y amarillo = Conexión a tierra
Azul = Neutral
Marrón = Concorriente
Observaciónimportante:este proyectordebeconectarse atierra
BRITEQ
®
25/35 MULTIPAR
SUSTITUCIÓN Y COLOCACIÓN DE LA LENTE
El Multipar incluye 4 lentes, cada una de ellas con un ángulo de haz diferente. Para mantener la máxima emisión
luminosa,cambielalente si se rayao cuartea. El nombre de cada lente viene impreso en el borde de lalente:
Instalación de lalente:
Mantenga el Multipar horizontalmente y gire el aro de plástico hasta que el clip de resorte esté orientado hacia la
Coloque la lente debajo de los soportes de lente (el lado convexo debe estar en el interior del Multipar) y empuje
La lente queda fijada detrás del clipde resorte. (Consulte la imagen 3)
¡Yaestá!
BRITEQ
Hazmuyestrecho: vidrio claro, hazredondo de 15°
Hazestrecho: vidriopunteado, haz redondo de 19°
Iluminaciónmedia: facetas (6 x 22 mm),haz 21° x 34°
Iluminaciónancha: facetas (6 x 12 mm),haz 30° x 51°
parte superiordel Multipar, pordebajo del clip deretención. (Consulte la imagen 1)
suavementela lente hacia dentrocontrael clip de resorte hasta quehaga clic.(Consulte laimagen 2)
®
26/35 MULTIPAR
Page 16

ESPAÑOL MANUAL DE INSTRUCCIONES
Imagen 1 Imagen 2
ESPAÑOL MANUAL DE INSTRUCCIONES
Observaciónimportante:
Cuando instaleel cuadrode color, no olvidebloquearlo conel clipde retención. esto evita
que los cuadros de color y los accesorios se caigan.
Cómoinstalarcorrectamente el cuadro de color:
Suelte el clip de retención empujándolo hacialos lados y luego hacia arriba
Instale elcuadro de color
Empujeel clip de retención hacia abajo y hacialos lados para bloquearlo
Extracción de lalente:
Asegúrese de que el proyector se ha enfriado antes de quitarlalente.
Mantenga el Multipar horizontalmente y gire el aro de plástico hasta que el clip
de resorte esté orientado hacia la parte superior del Multipar, por debajo del
clip de retención.(De lamisma formaque para instalarla lente)
Coloque la herramienta de la lente (consulte las imágenes de abajo) en los
agujeros al lado del clip de resorte y empujeel clip de resorte haciaarriba.
Equilibre la parte delantera del Multipar un poco hacia abajo y mantenga su
mano debajo del proyector para que la lente no se caiga al suelo (sino en su
mano suavemente)
¡Yaestá!
BRITEQ
®
Imagen 3
27/35 MULTIPAR
MONTAJE SUPERIOR
Importante: La instalación sólo debe llevarse a cabo por personal técnico
cualificado. Una instalación incorrecta puede provocar lesiones graves y/o daños en la propiedad. ¡El
montaje superior requiere mucha experiencia! Deben respetarse los límites de carga de funcionamiento,
deben utilizarse materiales de instalación homologados, el dispositivo instalado debe inspeccionarse
regularmentepor su seguridad.
Asegúrese de que debajo del área del lugar de instalación no hay personas durante el montaje, desmontaje o
mantenimiento.
Coloque el aparato en un lugar bien ventilado, lejos de materiales y/olíquidosinflamables. El aparato debe colocarse
a al menos 50 cm de las paredes.
El dispositivo debe instalarse lejos del alcance de las personas y de las áreas exteriores donde éstas puedanandar o
sentarse.
Antes del montaje asegúrese de que el área de la instalación puede soportar una carga mínima de 10 veces el peso
de la unidad.
Utilice siempre un cable de seguridad homologado que pueda soportar 12 veces el peso del dispositivo cuando
instale la unidad. Este accesorio de seguridad secundario debe instalarse de forma que ninguna pieza de la
instalaciónpueda caerse más20 cm si falla el accesorioprincipal.
El dispositivo debe fijarse correctamente; ¡unmontajecon girolibre es peligroso y no debe considerarse!
No cubraningunaaberturade ventilaciónpuesto que podríaproducirse un sobrecalentamiento de la unidad.
El operario debe asegurarse de que las instalaciones relacionadas con la seguridad son aprobadas por un experto
antes de utilizarlas por primera vez. Las instalaciones deberán inspeccionarse anualmente por una persona
cualificadapara asegurarquela seguridades óptima.
BRITEQ
®
28/35 MULTIPAR
Page 17

ESPAÑOL MANUAL DE INSTRUCCIONES
INSTRUCCIONES DE FUNCIONAMIENTO
No encienda niapague la unidad en intervaloscortos de tiempo puesto que esto reduce la vida útil de la lámpara.
La temperatura de la superficie de la unidad puede alcanzar hasta 85°C. No toque la carcasa sin protección durante
el funcionamiento. (Comprobar)
Desenchufe siempre la unidad cuando no vaya a ser utilizada durante un largo periodo de tiempo o antes de
reemplazarla bombillao comenzarel mantenimiento.
En caso de que ocurran problemasde funcionamiento serios,deje de utilizar el aparatoy póngase en contacto con su
distribuidor inmediatamente.
Importante: ¡Nunca miredirectamentea la fuente deluz! No utilice el efecto en presencia de personasepilépticas.
MANTENIMIENTO
Asegúrese de que debajo de lazona del lugarde instalaciónno haya personasdurante el mantenimiento.
Apague la unidad, desenchufe el cablede red y espere hastaque la unidad sehaya enfriado.
Durantela inspeccióndeberácomprobarlossiguientes puntos:
Todos los tornillos utilizados para instalar el dispositivoy cualquiera de sus piezas deberán apretarse firmemente y no
corroerse.
Las carcasas, las fijaciones y los puntos de instalación (techo, suspensiones) no deberán presentar ninguna
deformidad.
Cuando unalente óptica estévisiblemente dañadapor grietas o rasguños profundos, deberá ser reemplazada.
Los cables de red deberán estar en perfecto estado y deberán reemplazarse inmediatamente incluso si el problema
detectadoespequeño.
Para proteger al aparato del sobrecalentamiento, las aletas de refrigeración (si las hubiera) y las aberturas de
ventilacióndeberánlimpiarsemensualmente.
El interior del dispositivo deberá limpiarse anualmentemediante una aspiradorao chorro de aire.
La limpieza de las lentes internas y externas y/o espejos deberá llevarse a cabo periódicamente para optimizar la
emisión luminosa. La frecuencia de limpieza depende del entorno en el que funcione el aparato: los ambientes
húmedos, con humo o especialmente sucios pueden provocar una mayor acumulación de suciedad en los elementos
ópticos del aparato.
Limpie con un pañosuave utilizando productosde limpiezade cristalesnormales.
Seque siempre las piezas con cuidado.
Limpie los elementosópticos externos al menos una vez cada 30 días.
Limpie los elementosópticosinternos al menos una vez cada 90días.
Cuando limpie el reflector, no utilice productos químicos. Esto puede dañar el revestimiento reflectante del
reflector.
Atención: ¡Le recomendamos encarecidamente que la limpieza interna sea llevada a cabo por personal
cualificado!
ESPECIFICACIONES
Entrada de red: CA 230V, 50Hz
Lámpara: HPL 575-X
Tamaño: 273 x 215 x 279 mm
Peso: 3.4 kg
Puede descargarlaúltima versión de estemanual deusuario en nuestra página Web: www.briteq-lighting.com
Toda la información estásujeta acambios sin previo aviso
PORTUGUÊS MANUAL DO UTILIZADOR
Obrigado por ter adquirido este produto da Briteq®. De modo a tirar total proveito das possibilidades deste produto, por
favorleia estemanual com atenção.
CARACTERÍSTICAS
Este produto cumpre as exigências impostas pelas presentes directivas nacionais e europeias. A conformidade deste
produtofoicomprovadae as declarações e documentosrelevantes foram efectuados pelofabricante.
Estaunidadedestina-se a produzir efeitos luminosos decorativos e é utilizadaemsistemasdeespectáculosde luz.
Projector de luzmulti funcional
Produz a mesma intensidade de luz de um projector PAR 64 1000W. Graças a sualâmpada especial HPL 575-Xeste
projector apenas consome575Watt.
4 Lentes (muitofechado, fechado, médio, e dispersão larga)estão incluídas
Disponível em Preto eCromado
Opcional: Palas
ANTES DE UTILIZAR
Antes de utilizar esta unidade verifique se existem danos provocados durante o transporte. Caso existam danos
aparentes, não utilizea unidadee contacteo seu revendedor.
Importante: Esta unidade deixou a nossa fábrica em perfeitas condições e devidamente embalada. É imprescindível
que o utilizador siga as instruções de segurança e avisos descritos neste manual. Quaisquer danos provocados por
utilização incorrecta não serão cobertos pela garantia. O revendedor não será responsável por quaisquer danos ou
problemas causadospeloincumprimento dasinstruções deste manual.
Guarde este manual num local seguro paraconsulta futura.Caso venda esta unidade, forneça este manual.
Verifique oconteúdo:
Certifique-se que a caixa contém os seguintes artigos:
Manual do utilizador
Multipar (Cromado/Preto)
Porta filtros
4 Lentes (muitofechado, fechado, médio,e dispersão larga) estãoincluídas
INSTRUÇÕES DE SEGURANÇA:
CAUT ION
O símbolo composto por um triângulo equilátero com um relâmpago no interior alerta para a presença de
voltagemperigosa não isoladanointerior do produto que poderá constituirriscode choque eléctrico.
O símbolo composto por um triângulo equilátero com um ponto de exclamação alerta o utilizador para a
presença de instruções importantes de utilização emanutenção do produto.
Este símbolosignifica: utilização unicamente em espaçosfechados.
Este símbolosignifica:Leiainstruções.
Este símbolo determina: a distância mínima dos objectos iluminados. A distânciamínima entre o projector e o
objecto iluminado deve ser mais de 2 metros.
Proteja oambiente. Recicle o material destaembalagem.
Os efeitos luminososnovos podempor vezes produzir algum fumo e/ou cheiro desagradável. Esta situação é normal
e temporária.
De modo a evitar risco de fogo ou choqueeléctrico, não exponhaeste produtoa chuvaou humidade.
De forma a evitara formação de condensação no interior da unidade, ao transportá-lapara ambiente quente aguarde
algumtempode modo a que haja uma ambientação à temperatura. A condensação poderá afectar o desempenho da
unidade ou até danificá-la.
Estaunidadedestina-seunicamente a utilizaçãoemespaços fechados.
Não introduza objectos de metal nem verta líquidos no interior doproduto, correrá risco de choque eléctrico ou poderá
danificar o produto.Caso algum objecto estranho entre emcontacto com o interiorda unidade,desligue-a de imediato
dacorrente.
ATENÇÃO: De forma a evitar o risco de choque eléctrico, não remova peças da
unidade.Nãotente fazer reparações. Contactepessoalqualificado.
BRITEQ
®
29/35 MULTIPAR
BRITEQ
®
30/35 MULTIPAR
Page 18

PORTUGUÊS MANUAL DO UTILIZADOR
PORTUGUÊS MANUAL DO UTILIZADOR
Coloque esta unidade num local arejado, afastado de materiais inflamáveis e/ou líquidos. Esta unidade deverá ser
instalada a pelosmenos50cm de distânciade paredes circundantes.
Não cubra os orifíciosde ventilação ou a unidadepoderá sobreaquecer.
Evite locais com poeiras.Limpe a unidade regularmente.
Mantenhaesta unidade foradoalcance dascrianças.
Estaunidadedeverá ser operada unicamenteporpessoas experientes.
Temperatura ambiente de funcionamentomáximaé de 40ºC. Não utilize estaunidade a temperaturas ambientes mais
elevadas.
A temperatura da superfície da unidade pode alcançar os 85ºC. Não toque na cobertura da unidade com mãos
descobertas duranteo funcionamento.
Certifique-se de que não irão passar pessoas sob a área de instalação da unidade durante a instalação e
manutenção.
Aguarde cerca de 10 minutos para que a unidade arrefeça antes de substituir a lâmpada ou de efectuar a
manutenção.
Desliguesempre a unidade da corrente quando não a utilizar durante longos períodosde tempo, antes de substituir a
lâmpadaou de efectuarmanutenção.
A instalação eléctrica deve ser efectuada unicamente por pessoal qualificado, cumprindo os regulamentos de
segurança eminstalações eléctricas emecânicas do seu país.
Certifique-se que a voltagem a utilizar não é superiorà voltagem indicada no painel traseiro da unidade.
O cabo dealimentação deveráestar sempre em perfeitas condições. Desliguea unidade e substitua imediatamente o
cabo caso este apresente algum dano. Deverá ser substituído pelo fabricante, pelo agente autorizado ou pessoal
qualificado de modoa evitar um acidente.
Nunca permita que este cabo entreemcontacto com outros cabos!
Estaunidade deverá estar ligada à Terra deformaa respeitaras regras de segurança.
Utilize sempre umcabo de segurança aprovadoao instalar a unidade.
De forma a não correr risco de choque eléctrico não abra a cobertura da unidade. À excepção da lâmpada não
existempeças que possam ser substituídaspelo utilizador.
Nunca repare um fusível nem tente operar a unidade sem fusível. Substitua sempre um fusível danificado por outro
com as mesmas características!
Em caso de problemas sérios de funcionamento, interrompa a utilização da unidade e contacte imediatamenteo seu
revendedor.
A cobertura e as lentes deverão ser substituídas casoapresentem danos visíveis.
Casosejanecessário transportar a unidade utilize a embalagem original.
Por motivos de segurança, são proibidas quaisqueralterações nãoautorizadasà unidade.
Importante: Nunca olhe directamente para a luz!Não utilize esteefeito luminosona presença de pessoas epilépticas.
COMO INSTALAR A FICHA DE ALIMENTAÇÃO
Quando instala a ficha de alimentação (no mínimo tipo 2.5A), tem de conectar os fios de acordo com os seguintes
códigos de cores:
Verde e amarelo = Ligação Terra
Azul = Neutro
Castanho = Fase
Nota importante: Este projector tem de ser ligado á terra.
COLOCAR/SUBSTITUIR A LÂMPADA
Este projector apenas pode ser usado com uma lâmpada especial HPL 575-X. Em caso de
substituição da lâmpada ou manutenção, aguarde 10 minutos após desligar a unidade. Desligue
sempre a unidade da corrente antes de efectuar a manutenção! Utilize sempre peças suplentes
com asmesmascaracterísticas(lâmpadas, etc). Utilize unicamente peçasoriginais
Aguarde cerca de 10 minutospara que a unidade arrefeça.
Use umachave de parafusos paradesaparafusar o parafuso que fecha o compartimento da lâmpadana parte de trás
do projector (ver A na figura em baixo)
Retire cuidadosamente o conectordo compartimentoda lâmpada. (Ver D na figuraem baixo)
Ao retirara lâmpada usada,segure o conector.
Segure o conectore insira cuidadosamente a lâmpada.
Desligueo cabodealimentação.
.
Atenção! Verifique o rótulo na parte de trás da unidade ou consulte as especificações descritas
neste manual para saber que lâmpada deve utilizar. Nunca instale lâmpadas com nível de watts
superior ao indicado! Lâmpadas com nível de watts superiorgeram temperatura que a unidade não
está preparada para suportar. Caso a unidade utilize um transformador de lâmpada, este irá
danificar-se devido a sobrecarga de corrente.
Não toque no interior do reflector da lâmpada com as mãos descobertas, caso contrário irá diminuir
drasticamente a sua duração! Caso toque na lâmpada com as mãos, limpe-a utilizando um pano e
álcool antes de efectuarainstalação.
Coloque anova lâmpada no interior da unidade. Certifique-se que os fios não tocam na lâmpada.
Feche o compartimento da lâmpada.
Desaperte ambos os botões, o defocagem (B na figura em baixo) e o de travão (C na figura em
baixo).
Ligue o projector e gire o botãode focagem(B)até quetenha a máximaintensidade de luz.
Gire o botão de travão (C) no sentido contrário dos ponteiros do relógio até que o botão de focagem
estejafechado.
Operação concluída!
COLOCAR/SUBSTITUIR LENTES
O Multipar vem com 4 lentes, cada uma com um ângulo de luz diferente. Paramanter o máximo de intensidade, mude
as lentes se ficaremriscadas ou estaladas.O nomede cada lente é impressona aba da lente.
Comocolocar umalente:
Mantenha o seuMultipar horizontalmente e gire o anel de plástico até que o grampo de mola aponte para o topodo
Coloque as lentes por detrás dos suportes da lente (o lado convexo deverá ficar no interior do Multipar !!!) e
A lente é fixadapor detrás do grampo de mola.(ver figura 3)
Feito!
Verynarrowspot: vidro claro, feixe redondo com 15º
Narrowspot: vidromartelado,feixe redondo com 19º
Mediumflood: vidro facetado (6 x 22mm), feixe com angulo 21° x 34°
Wideflood: vidrofacetado (6 x 12mm), 30° x 51°
Multipar, por baixodo grampode retenção (veja afigura 1)
gentilmente empurre para dentro contra o grampo de molaaté que este faça clique (ver figura2)
BRITEQ
®
31/35 MULTIPAR
BRITEQ
®
32/35 MULTIPAR
Page 19

PORTUGUÊS MANUAL DO UTILIZADOR
PORTUGUÊS MANUAL DO UTILIZADOR
The lipmust pointupwards
Figura 1 Figura 2
Como removerumalente:
Tenha a certeza queo projector arrefeceuantes de remover as lentes.
Mantenha o seu Multipar horizontalmente e gire o anel de plástico até que o
grampo de mola aponte para o topo do Multipar, por baixo do grampo de
retenção (mesmamaneiracomo instalar uma lente).
Coloque a ferramenta das lentes (ver figuras em baixo) nos orifícios ao lado
do grampode mola e empurre ogrampo de mola para cima.
Balance a frente do Multipar um pouco para baixo e mantenha a sua mão por
baixo do projector para que a lente não caia no chão (mas gentilmente na sua
mão! )
Feito!
Figura 3
This is the way to put the lens tool in
the Multipartoremove thelens
Notaimportante:
Quando coloca o porta filtros, não se esqueça de o trancar com o grampo de
retenção, Esteevitaque oporta filtros e os acessórios de cair.
Como instalar o portafiltros correctamente:
Liberte oclipretentor pressionando-o lateralmentee depoispara cima.
Instale oporta-filtros
Pressione o grampo de retenção para baixo e lateralmente parao trancar.
INSTALAÇÃO EM SUSPENSÃO
Importante: A instalação deve ser efectuada unicamente por pessoal qualificado. Uma instalação incorrecta
pode resultar em ferimentos graves e/ou danos na sua propriedade. Para efectuar uma instalação em
suspensão é necessária muita experiência! Respeite os limites de carga, utilize materiais de instalação
aprovados einspeccione a unidadeinstalada regularmentedeformaa assegurar a segurança.
Certifique-se que sob a área de instalação da unidade nãoirão passar pessoas durantea instalaçãoemanutenção.
Coloque esta unidade num local arejado, afastada de materiais inflamáveis e/ou líquidos. Esta unidade deverá ser
instalada a pelos menos 50cm de distânciadeparedes circundantes.
A unidade deve ser instalada fora do alcance das pessoas; afastada de áreas onde as pessoas possam passar ou
sentar-se.
Antes de proceder à instalação certifique-seque a área seleccionada pode suportar umacarga mínima de 10 vezes o
peso da unidade.
Na instalação, utilize sempre um cabo de segurança aprovado com capacidade para suportar 12 vezes o peso da
unidade. Esta medida de segurança secundária deverá ser instalada de forma a que nenhuma parte da instalação
possa cairmais de 20cm caso o ponto de apoio principalceda.
A unidade deverá ser fixafirmemente. Uma instalaçãooscilante pode ser perigosae nãodeverá ser efectuada!
Não cubraos orifícios de ventilaçãoou a unidade poderá sobreaquecer.
O utilizador da unidade deverá certificar-se que a instalação é aprovada em termos de segurança e em termos
técnicos por uma pessoa qualificada antes de efectuar a primeira utilização. A instalação deverá ser inspeccionada
todos os anos por um técnico qualificado de forma a certificar-se que asegurança estáassegurada.
BRITEQ
®
33/35 MULTIPAR
BRITEQ
®
34/35 MULTIPAR
Page 20

PORTUGUÊS MANUAL DO UTILIZADOR
INSTRUÇÕES DE FUNCIONAMENTO
Não ligue e desligue a unidade emcurtos períodos detempo,irá reduzir a duração da lâmpada.
A temperatura da superfície da unidade pode alcançar os 85ºC. Não toque na cobertura da unidade com mãos
descobertas duranteo funcionamento.
Desligue sempre a unidade da corrente quando não a utilizardurante longos períodosde tempo, antes de substituira
lâmpadaou de efectuar a manutenção.
Caso a unidade apresente problemas sérios de funcionamento,interrompa a utilização da unidade e contacte o seu
revendedorimediatamente.
Importante: Nunca olhe directamente para a luz! Não utilize este efeito luminoso na presença de pessoas
epilépticas.
MANUTENÇÃO
Certifique-se que sob a área de instalação daunidade não irão passar pessoas durante a manutenção.
Desligue o cabo de alimentação dacorrente e aguardeque a unidade arrefeça.
Durante a inspecção deverá verificar os seguintespontos:
Todos os parafusos utilizados nas peças da unidade e na instalação deverão estar apertados firmemente e não
poderão estar corroídos.
A cobertura da unidade, os pontos de fixaçãoe as áreas de instalação(tecto, armação, etc.) não deverão apresentar
qualquerdeformação.
Caso uma lente apresente danos visíveis como fendasou riscos profundos, deverá ser substituídaimediatamente.
O cabo de alimentação deverá estar emperfeitas condições e deverá ser substituído assim que for detectado omais
pequenodano.
As ventoinhas de arrefecimento (caso existam) e os orifícios de ventilação deverão ser limpos todos os meses de
modo a evitarque unidade sobreaqueça.
Utilize um aspiradorou um compressor de ar paralimpar o interior da unidade umavez porano.
De formaa optimizar a projecção de luz, limpe as lentes ópticas internas e externas e/ou espelhos periodicamente. A
regularidade das limpezas depende do ambiente em que está instalada a unidade: um ambiente húmido, com fumo
ou poeirento dará origem a umamaior acumulação deimpurezas nas ópticas da unidade.
Utilize um panomacio e um limpa-vidrosnormalna limpezada unidade.
Seque sempre as peças cuidadosamente.
Limpe as ópticas externas pelo menos umavez em cada 30dias.
Limpe as ópticasinternas pelo menos umavez em cada 90 dias.
Quando limpa o reflector, certamente não use nenhum produto químico. Isto poderá danificar a camada
reflectora do reflector.
Atenção: Recomendamos vivamente que a limpeza do interior da unidade seja efectuada por pessoal
qualificado!
ESPECIFICAÇÕES
Fonte de Alimentação: AC 230V,50Hz
Lâmpada: HPL 575-X
Dimensões: 273 x 215 x 279 mm
Peso: 3.4 kg
Pode fazer downloaddaversão mais recente deste manualnonosso site: www.briteq-lighting.com
BRITEQ
®
Estas informações estãosujeitas aalterações semaviso prévio
35/35 MULTIPAR
 Loading...