

Page 1
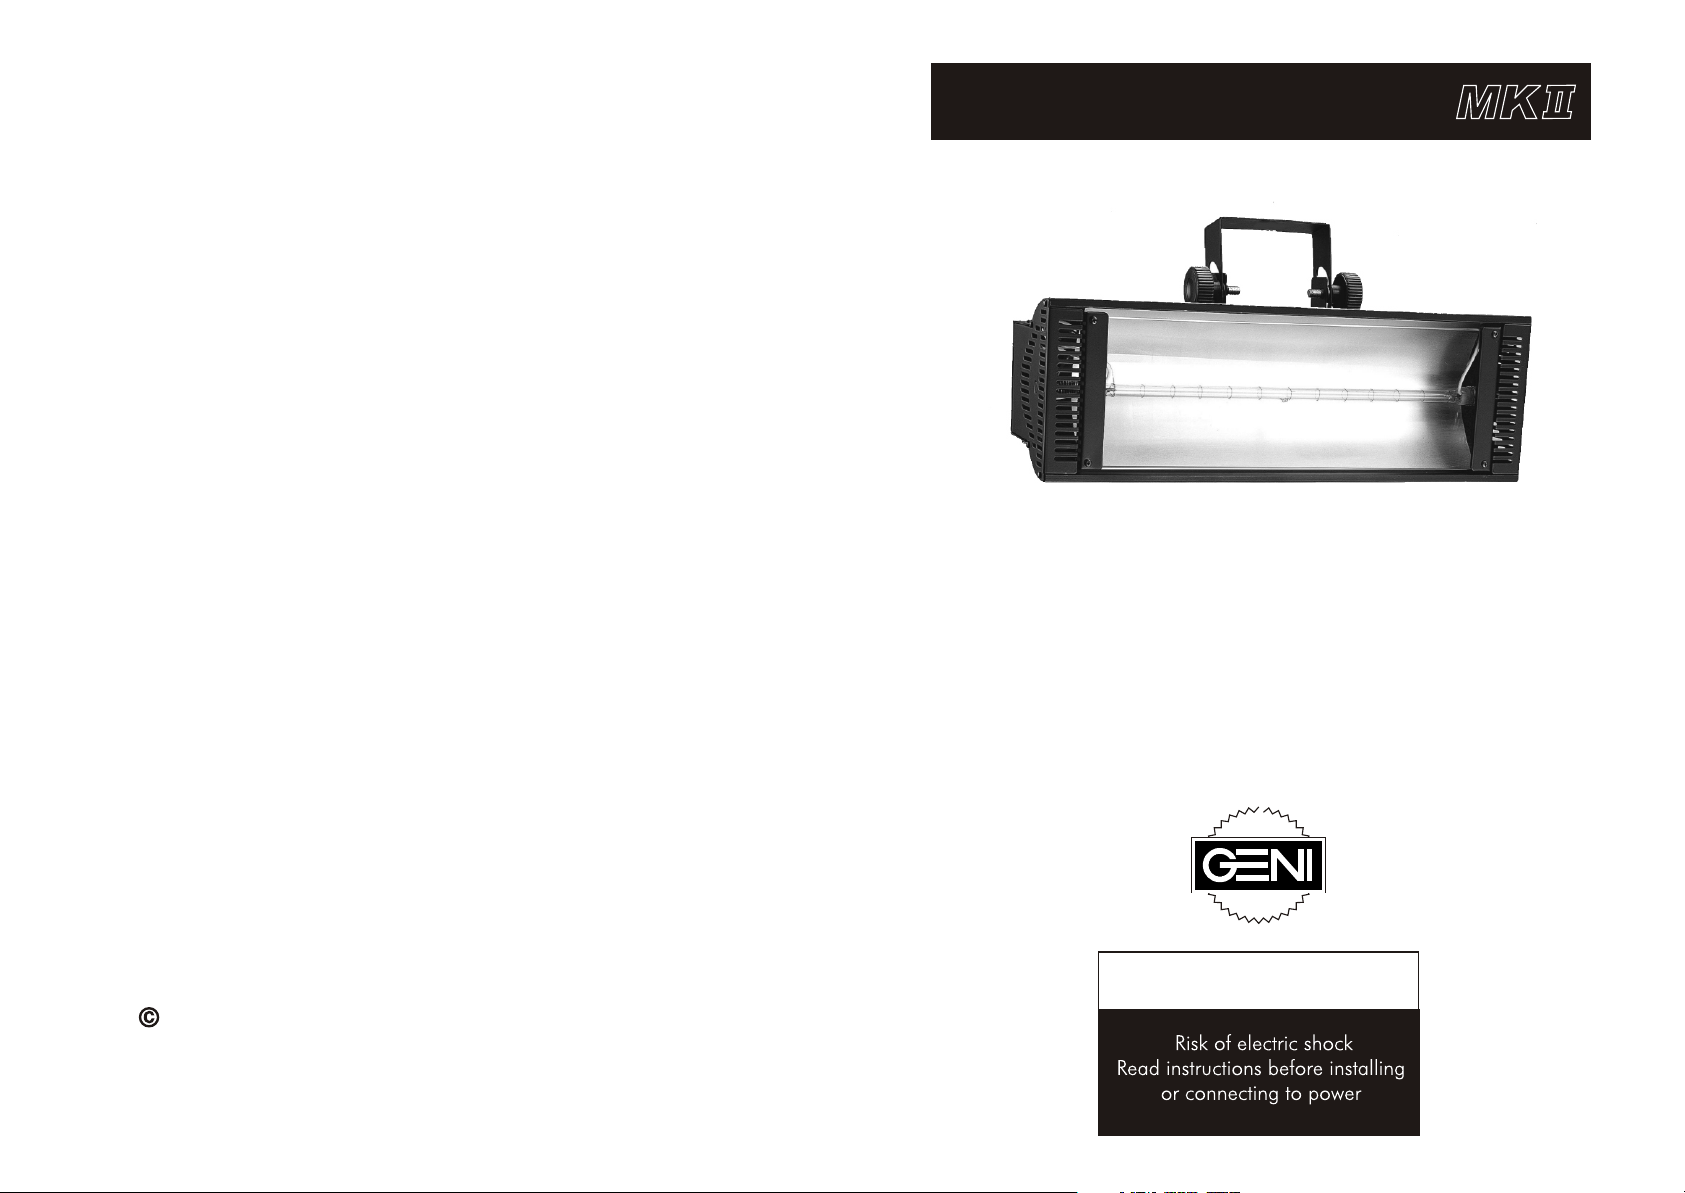
FL-1800D GOLDEN STROBE
A dimmable, DMX-controlled strobe with a 2000W flash.
Heat dissipating rounded case design.
Controllable flash speed/intensity. Fully dimmable.
Silent operation. A flash that lasts.
Copyright 2005 Geni Electronics Co.,Ltd.
Product specifications may be subject to change.
For more information, please visit our web site:
Http://www.geni.com.tw. Thank you!
CAUTION!
Page 2
Congratulations!
You have a great, innovative product from Geni Electronics Co.,
Ltd.
You can rely on Geni Electronics Co., Ltd., for more excellent
lighting products. We design and manufacture strobes, effects,
and mirrored projectors. And new products are being launched
regularly. For information, please visit our web site at
http;//www.geni.com.tw. We work hard to keep you, our
customer, satisfied.
You can get some of the best quality, best priced products on
the market from Geni. So next time, turn to Geni for more great
lighting equipment. Always get the best-with Geni.
Appendix-B
E
D
C
Main Office/Factory:
Geni Electronics Co., Ltd.
No. 23, Keji 1st Rood,709 An Nan
Chiu , Tainan City, Taiwan
Tel: 886-6-3840689
Fax: 886-6-3840686
Showroom:
Geni Electronics Co., Ltd.
Taipei World Trade Center, Room 3A-04
No. 5, Section 5, Hsin Yi Road,
Taipei, Taiwan
Tel: 886-2-2722-2910
Fax: 886-2-2722-2918
Thank you!
Get the best -- get Geni!
Geni Quality Sets the Standard
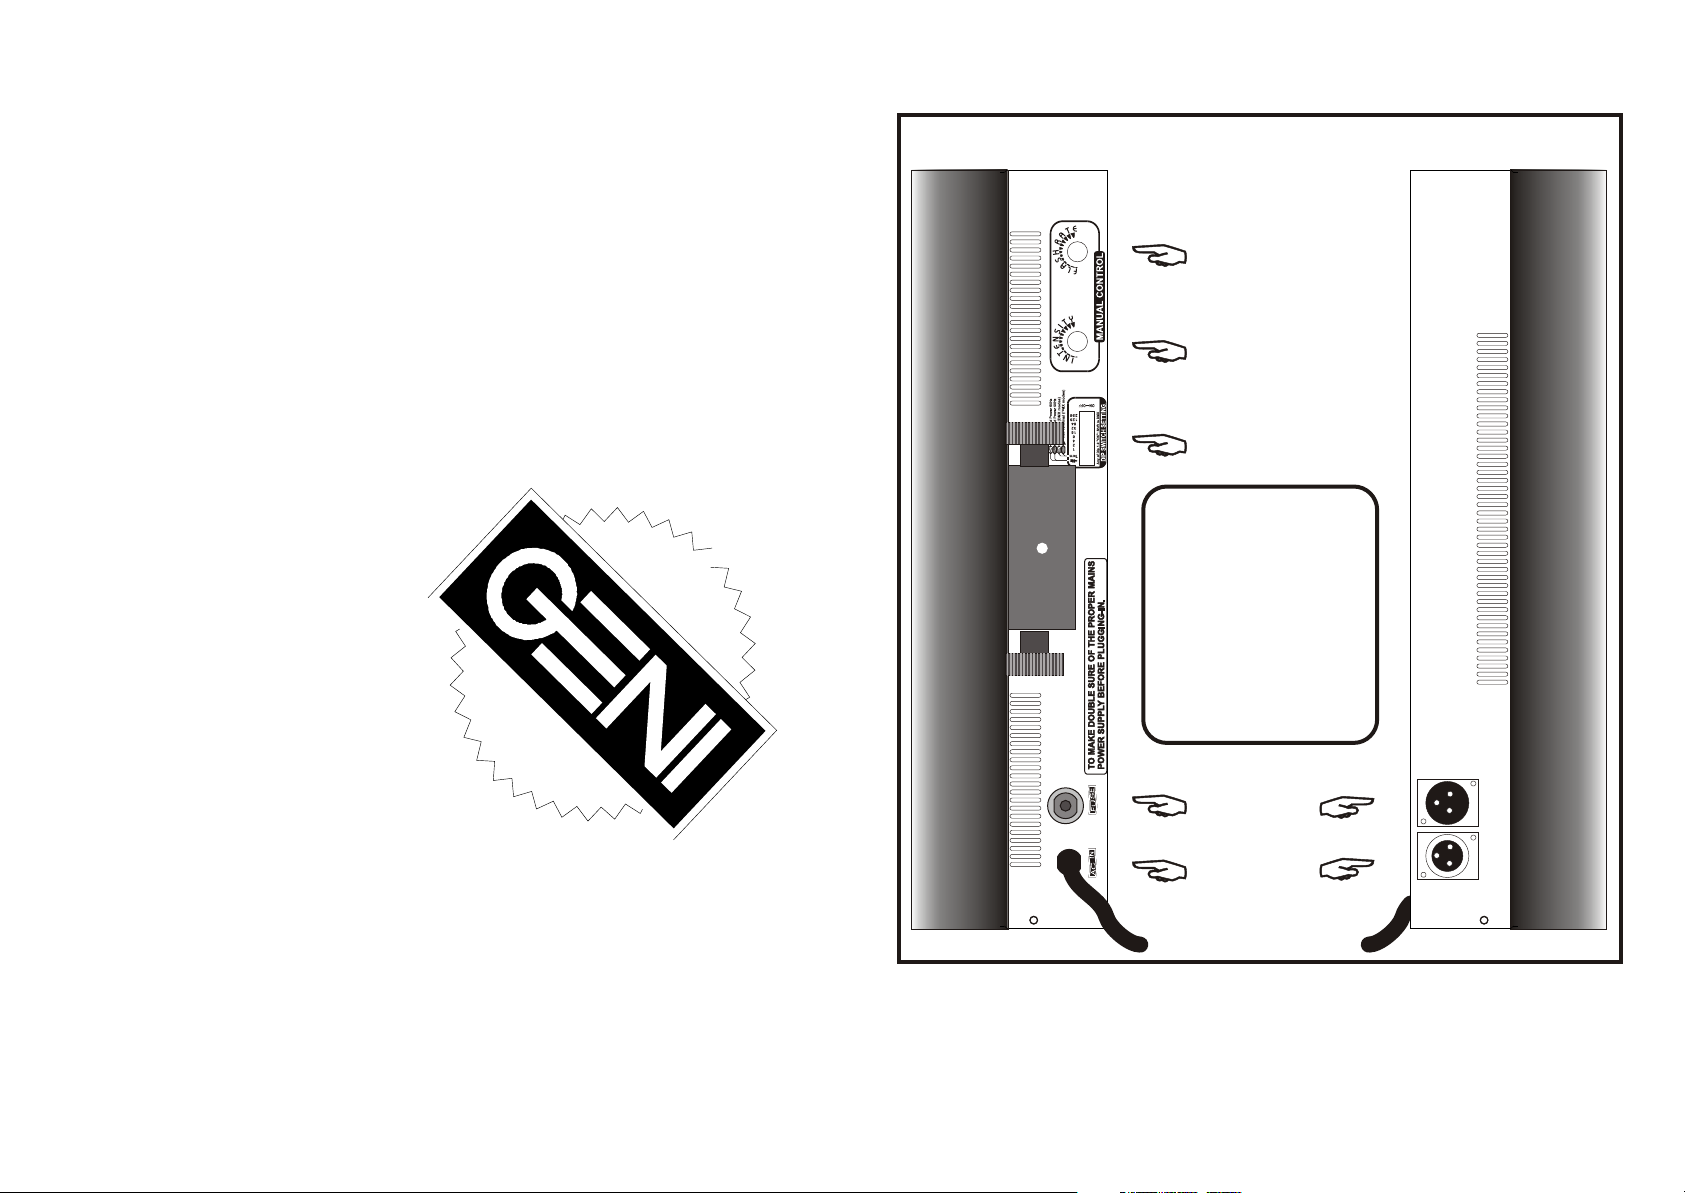
A-Power
B-Fuse
C-Dip Switch
D-Intensity
E-Flash Rate
F-DMX OUT
G-DMX-IN
B
A
G
F
4
Page 3

Description
Golden Strobe DMX is a dimmable, DMX-controlled strobe
with a 2000W flash. Its rounded case is designed to dissipate
heat emitted from the 2000W strobe tube.Flash speed/intensity
is controllable. Operation is silent. Glass is tempered for
strength.Giga Strobe DMX provides a flash that lasts.
The unit can be selected to connect to power supply at
50Hz or 60Hz.
Features
*Dimmable * Rounded case design
*DMX512 control * Filter frame
*Manual control *Silent operation
*Thermal safety switch *Controllable flash speed/intensity
Warning!
This product involves electric
!
voltage, chemicals, glass, etc.
Observe safety precautions.
! Disconnect mains power supply before removing glass
plate or servicing.
! Let unit cool before handling. Keep away from liquids
and flammables.
! Do not mount on flammable surface. Keep distance of
30 cm to illuminated surface.
! Keep distance of one meter between this product and
other electrical products.
! Do not look directly at lamp flash. Avoid direct skin
exposure.
! Strobe tubes contain poisonous chemicals. Discard
used strobe tubes appropriately. Keep out of reach of
children and animals.
! This appliance must be earthed (grounded). Secure
front glass plate before connecting to mains power
supply.
! Keep air vents clear to avoid overheating.
! Product contains no user serviceable parts. Refer
servicing to qualified technicians only.
1
Inspection
Every Golden Strobe (FL-1800D MK2) is thoroughly tested at
the factory and shipped in perfect condition. Please notify your
dealer immediately if damage occurred during shipping.
Setting up
Golden Strobe (FL-1800D MK2) is shipped complete, ready to
use. The bracket is installed before shipping. Simply use a 20
kg rated or stronger C clamp to attach the bracket to firm
trussing.
Manual Control Operation(All Dip 1-9 "OFF")
1. Plug strobe power cord into appropriate mains power supply.
2. Turn the flash speed dial ( on upside of unit
to adjust the flash speed.
(There is a small, white adjustment knob on the unit. This SVR
can be adjusted with a screwdriver. Note, however, that this
SVR is adjusted to the optimal position at the factory. Do not
adjust this SVR.)
See Appendix. B)
DMX Control Operation(Any of Dip 1-9 "ON)
Use Dip switches 1-9 to set the unit to the desired DMX 512
address. Refer to the DMX chart in (Figure .
1)
!Connect the DMX 512 controller cable to the input socket of
the strobe unit. Make sure the signal cable polarity is correct.
Connect power lines. Your FL-1800D Mk2 is now ready for
operation with your DMX controller.
CH1-FLASH RATE CH2-INTENSITY
ONE TRIGGER
12fps
FAST
7fps
SLOW
2fps
STOP
255
250
249
128
11
10
0
255
128
0
Figure 1
2
To use single trigger :
go to "stop" first ,
then to "trigger" ,
one flash results.
Do the same process
repeatedly for
repeated single flash.
Page 4

Trouble Shooting
You can expect years of trouble free operation from your
Golden Strobe DMX. However, incorrect voltage, power
surges, or other occurrences can cause equipment failure. If
such problems do occur, visit a certified technician for service.
Problem: Strobe does not flash when it should.
Solution:
!Check DMX signal. Is the DMX dip switch setting correct?
!Get a working DMX strobe and cable. Link properly to
controller. Test. If this strobe flashes properly, the first
strobe is malfunctioning.
!Check fuse.Try to re-set.
Appendix A - DMX Dip Switch Value Guide
FL-1800D MK2 Product User Guide
Description..............................................................
Features..................................................................
Warning...................................................................
Inspection...............................................................
Setting up................................................................
Manual Control Operation.........................................
DMX Control Operation.........................................
Trouble shooting.......................................................
Appendix-A.............................................................
Appendix-B.............................................................
Page 1
Page 1
Page 1
Page 2
Page 2
Page 2
Page 2
Page 3
Page 3
Page 4
This is a brief guide to DMX dip switch value settings.
DMX products must have their own "address" to receive DMX signals.
Addresses on FL-1800D MK2 are set by flipping appropriate DMX dip
switches.
To do this, you need to know that DMX dip switches have the following values:
#1=1; #2=2; #3=4; #4=8; #5=16; #6=32; #7=64; #8=128; #9=256. And you
need to know that DMX address settings are the sum of the dip switch values.
For example, standard DMX addresses for four FL-1800D MK2 , each of
which has two channels (See page 2.), follow:
Address Value DMX Dip Switches "ON"
Unit 1 1 #1
Unit 2 3 #2 & #1
Unit 3 5 #3 & #1
Unit 4 7 #3, #2, #1
Explanation: Since each unit has two channels, each address advances two
values (See Address Value above).
Once address values are figured out, add DMX dip switch values to obtain the
appropriate address (Any of Dip 1-9 "ON) for each unit. Flip appropriate DMX
dip switches on each unit.
Product Specifications
Name: Golden Strobe
Model: FL-1800D MK2
Voltage: 230V 50/60Hz
Power: 2700W
Fuse: 250V/15A
Lamp: ST2000
Dimensions: 460x125x220mm (WxDxH)
Weight: 3.7 Kg
3
 Loading...