

Page 1
ISO 9001 CERTIFIED
www.liteputer.com.tw
D
D
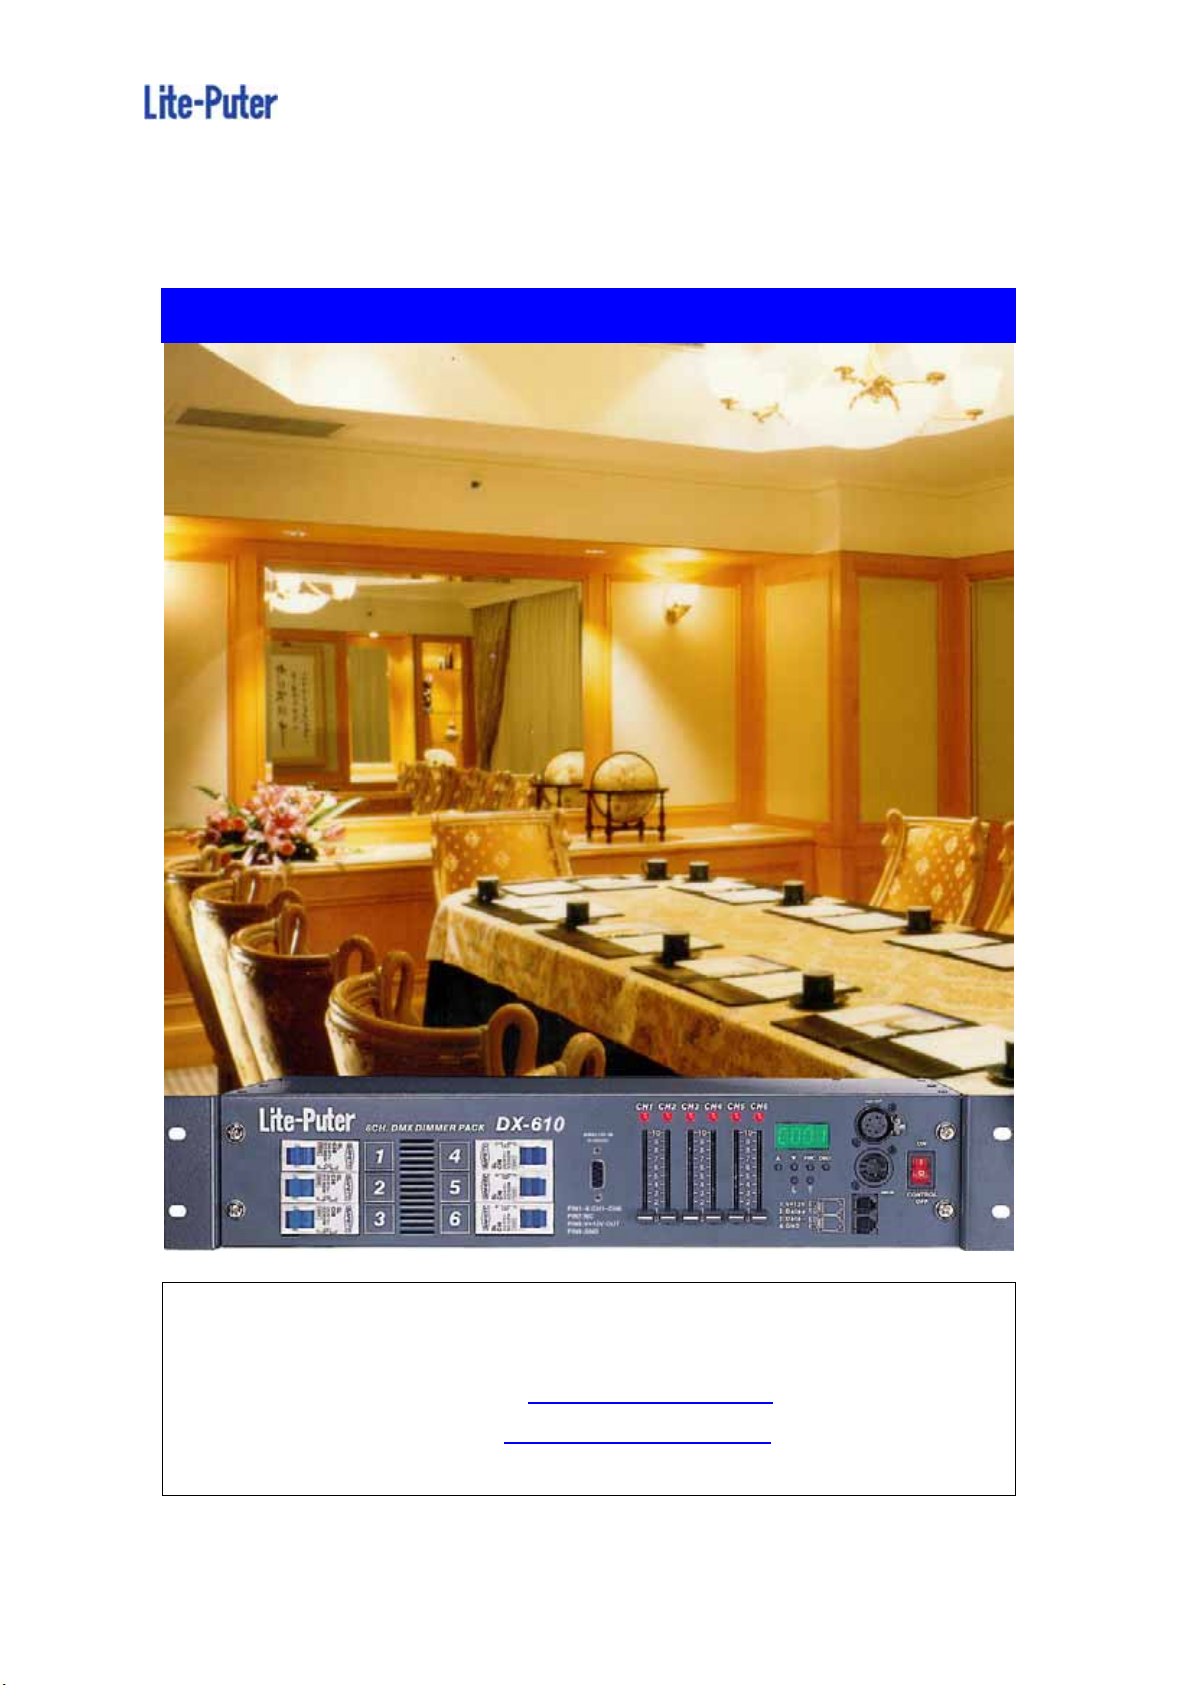
66CCHH.. DDMMXX DDIIMMMMEERR PPAACCKK
X--
X
6
6
1
1
0//
0
6
6
2
2
6
6
Lite-Puter Enterprise Co., Ltd.
WEBSITE: www.liteputer.com.tw
E-MAIL: sales@liteputer.com.tw
Lite-Puter
DX-610/626 [EUM-E]
Page 2

ISO 9001 CERTIFIED
INDEX:
www.liteputer.com.tw
Safety Introductions ................. ...........
2
Chapter 1.:Introduction of DX-610/626
1-1 Feature................................................................ 3
1-2 Brief device introduction................................... 3
1-3 Specification ...................................................... 3
1-4 Front panel......................................................... 4
1-5 Output terminal board / Sockets panel ............ 4
1-6 Wiring Diagram .................................................. 6
Chapter 2:Operation
2-1 Standard DMX512 Signal................................... 6
2-2 DMX start address setting................................. 6
2-3 Dimming/Switching setting............................... 7
2-4 Warm up setting (0…6%)................................... 7
2-5 Channel output status preview......................... 7
2-6 Manual dimming ................................................ 8
2-7 Display the dimming value of DMX channel,
internal temperature.......................................... 8
2-8 DMX status & DMX address.............................. 8
Lite-Puter 1
DX-610/626 [EUM-E]
Page 3

ISO 9001 CERTIFIED
www.liteputer.com.tw
SAFETY INTRODUCTIONS
Please note the load power:
Please refer to the data we suggest to ensure the normal total working hours of
DX-610/626
1. If DX-610/626 is installed in a rack, please make sure the rack is airy.
Otherwise the machine will become over-heat and result in the
mis-function.
2. DX-610: the max. output of each channel if 10A: For testing (DO Not over 30
minutes)
DX-626: the max. output of each channel if 20A: For testing (DO Not over 30
minutes)
3. DX-610: the output of each channel is≦8A: For several hours use (Theaters,
Stages)
DX-626: the output of each channel is≦16A: For several hours use
(Theaters, Stages)
4. DX-610: the output of each channel is ≦8A: Can work for the whole year
without switching off (Hotels, Restaurants, Buildings)
DX-626: the output of each channel is ≦12A: Can work for the whole year
without switching off (Hotels, Restaurants, Buildings)
Working Environment
1. Temperature: Under 35°C
2. If the machine is installed in a rack, then the temperature inside the rack
must be under 45°C
3. Humidity:40% --- 80%
Suggested Dimming Lights
Incandescent lamps, halogen lamps, low volt halogen lamps with ballast.
Lite-Puter 2
DX-610/626 [EUM-E]
Page 4

ISO 9001 CERTIFIED
Chapter 1. Introductions of DX-610/626
www.liteputer.com.tw
1-1 Feature
6 dimming channels.
Auto tracking of frequency and phase.
Temperature control device: When the temperature is over 35℃,the fan
will start automatically.
Auto tracking of frequency: Enables stable dimming output in different
frequencies.
Testing function: Can do test without connecting a console.
Warm-up function to protect the loads. (Warm-up setting 0---6.0%)
1-2 Brief device introductions
DX-610: 10A no fuse breaker.
DX-626: 25A no fuse breaker.
Fan for temperature controlling to sink heat
and clean the dust inside. (37CFM X 1)
The front panel can be dismantled easily for
quick repair.
1-3 Specification
Power AC100-240V, 45-63Hz, 3Ø4W, 1Ø2W
Output DX-610: Maximal output is 10A each channel
DX-626: Maximal output is 20A each channel
(Please refer to the user manual)
DMX signal output/ input DMX512/ 1990
DMX signal connector XLR 5Pin, RJ11-6p4c phone jack
Analog signal power input DC 0-10V
Analog input channel 9 channels
PIN 1~6( CH1~6, PIN 7(NC,
PIN 8(V+12V OUT,PIN 9(GND
Analog signal connector D-Type Plug 9Pin(F)
Lite-Puter 3
DX-610/626 [EUM-E]
Page 5

ISO 9001 CERTIFIED
www.liteputer.com.tw
Dimension 482(W) x 88(H) x 300(D)mm
Location 19" 2U standard rack
Weight 8Kg
1-4 Front panel
4
CH1 CH2 CH3
4
5
DX-610/626
ANALOG IN
0~10VDC
PIN1~6:CH1~CH6
PIN7:NC
PIN8:V+12V OU T
PIN9:GND
8
10
9
8
7
6
5
4
3
6CH. DMX DIMMER PACK
1
2
36
7
CH4
CH6CH5
10
10
9
9
8
8
7
7
6
6
5
5
4
4
3
3
222
6 5
1:V+12V
2:Data+
3:Data4:GND
FNC
LT
4
3
2
1
4
3
2
1
2
DMX OUT
DMX
3
(1) Power on/ off switch (5) Function Key
(2) DMX OUT/ IN (5 pin) (6) Dimming VR of Channel 1- 6
(3) DMX IN (RJ11, phone jack) (7) No fuse breaker (Channel 1-3)
(4) LED display/ function keys (8) No fuse breaker (Channel 4-6)
PUSH
ON
DMX IN
CONTROL
OFF
1
1-5 Output terminal board / Sockets panel
TERMINAL TYPE
9
10 11
(9) DMX connector
(10) DMX IN
(XLR-3 pin)
12
(RJ11, phone jack)
(12) Power input terminal board.
(DX-610: 20A Single phase;
DX-626: 40A Single phase)
(13) Output terminal board
channel, External power no fuse
13
(10A each
Lite-Puter 4
DX-610/626 [EUM-E]
Page 6

ISO 9001 CERTIFIED
www.liteputer.com.tw
(11) DMX OUT (XLR-3 pin)
breaker is necessary when
mounting.)
AMERICAN TYPE
Output sockets (DX-610: 10A each channel; DX-626: 15A each channel,External
power no fuse breaker is necessary when mounting.)
SCHUKO TYPE
Output sockets (DX-610: 10A each channel; DX-626: 16A each channel,External
power no fuse breaker is necessary when mounting.)
1-6 Wiring diagram
Lite-Puter 5
DX-610/626 [EUM-E]
Page 7

ISO 9001 CERTIFIED
www.liteputer.com.tw
3 PHASES 4 WIRES
SINGLE PHASES
2 WIRES
V
THE BEST WIRING DIAGRAM
N
R
S
T
N
V
E
N
V1
V2
V3
E
N
V1
V2
V3
PS.: There are ‘3 PHASES 3 WIRES’ and ‘SINGEL PHASE 3 WIRES’ as option.
Chapter 2. Operation
2-1 Standard DMX512 Signal
This point flashing when receiving DMX
2-2 DMX start address setting
STEP-1 holding【DMX】, press【▲】or【▼】to find the start address.
【▲】: move 1 number forward : up to Channel 512
【▼】: move 1 number backward :down to Channel 1
Lite-Puter 6
DX-610/626 [EUM-E]
Page 8

ISO 9001 CERTIFIED
www.liteputer.com.tw
DX-626 is a 6 channel dimmer pack so when setting this unit:
【1】 as C.001, the output is from Channel 1Æ Channel 6.
【2】 as C.007, the output is from Channel 7Æ Channel 12.
【3】 It is allowed for setting more than 1 piece of DX-626 at the same
start address.
2-3 Dimming/Switching setting
STEP-1 press【DMX】key into DMX status
STEP-2 press and hold the【FNC】key for 3 sec.
Default setting:all channel
are dimming mode
STEP-3 press【FNC】key to select channel
STEP-4 press【▲】or【▼】to select dimming mode or switching mode
(dimming) (Switching)
2-4 warm up setting (0…6%)
STEP-1 press【FNC】key
STEP-2 press【FNC】key to select the setting channel, EX :select channel 1
STEP-3 press【▲】,【▼】key to adjust
Channel 1 set on 6% for warm up
2-5 Channel output status preview
STEP-1 Enter to DMX status and press【DMX】key
STEP-2 press【▲】or【▼】to preview
Lite-Puter 7
DX-610/626 [EUM-E]
Page 9

ISO 9001 CERTIFIED
www.liteputer.com.tw
2-6 Manual dimming
STEP-1 Push【VR1-VR6】to do the prompt dimming output of individual channel.
When there is another signal inputting from a console, it will take the higher value as
the output.
2-7
Display the dimming value of DMX channel, internal temperature.
Press【L】to display the dimming value of DMX channel.
Press【T】to display the internal temperature.
2-8 DMX status & DMX address
a.press【DMX】to DMX status
b.10 minutes unused of unit, the DMX will activate to DMX status
Lite-Puter 8
DX-610/626 [EUM-E]
 Loading...