

6
Assembly Instructions
Beefeater Barbecues
Assembly Notes
Before any assembly or installation is attempted it is
important that you check for damage or missing parts. Your
dealer or the manufacturer must be notified of any problems
immediately before proceeding.
The main frame of the barbecue has been factory
assembled requiring only the following simple steps for
completion. Check the “Gas Type “ label attached to
barbecue and side burner to be certain this gas type is the
one required for your use eg. Propane / LPG or Natural Gas.
See Fig 5.
Trolleys, roasting hoods and side burners are optional
so read this manual in conjunction with the manual that
comes with each accessory before attaching any other
components. Attach the roasting hood last of all.
Fig 6
Assembly Procedure
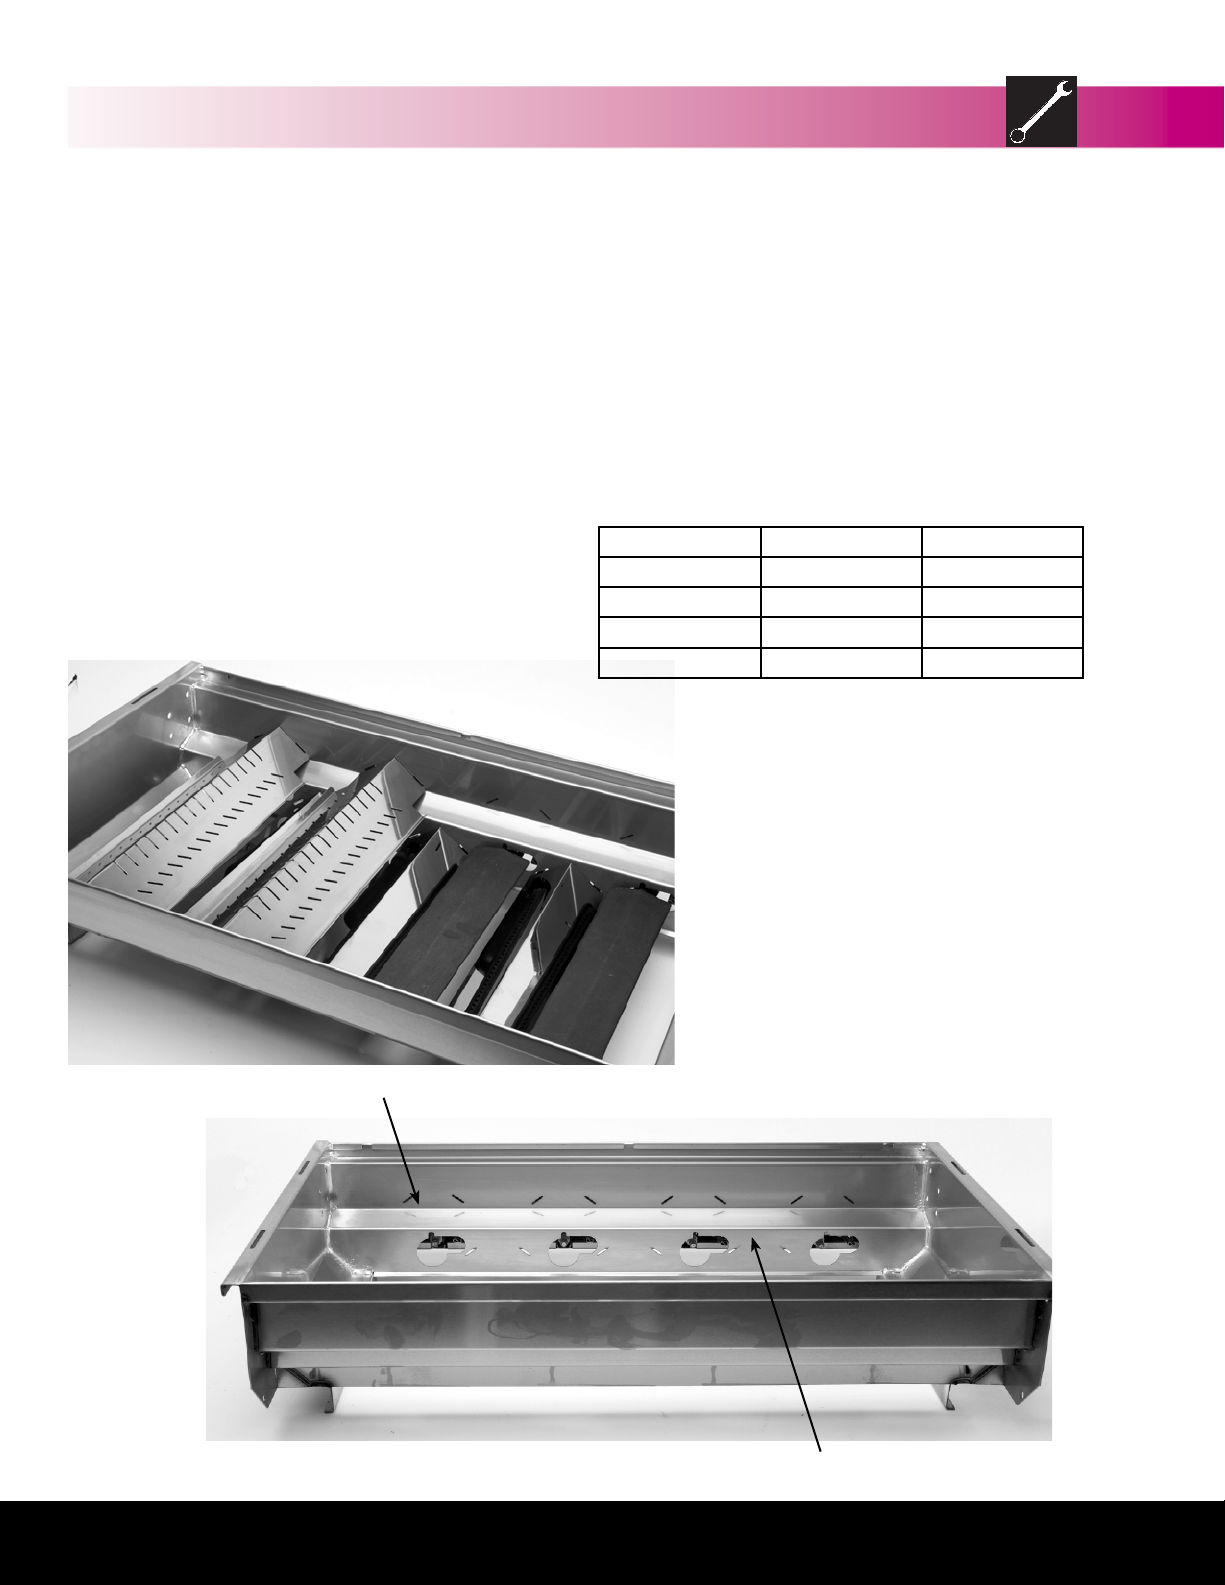
Heat Reflectors, Burners And Vaporizers
The modular Vaporizer Grid system has been designed to
maximise the performance of your BeefEater barbecue
The reflectors fit between each burner. They reflect heat
from the burners, upwards to the cooking surfaces.
The Vaporizers are designed to vaporise fats and juices
from the meat. One Vaporizer is fitted over each burner that
is located under the grill. The Vaporizers reduce flare-ups
and help to add that great barbecue flavour.
How Many Vaporizers And Reflectors Are
There?
Model Vaporizer Reflector
2 Bnr: 2 1
3 Bnr: 2 2
4 Bnr: 3 3
5 Bnr: 3 4
Fig 7
Upper slots for Vaporizers
Lower slots for heat reflectors
Australia’s Leading Barbecue
Assembly Instructions
BeefEater Barbecues
7
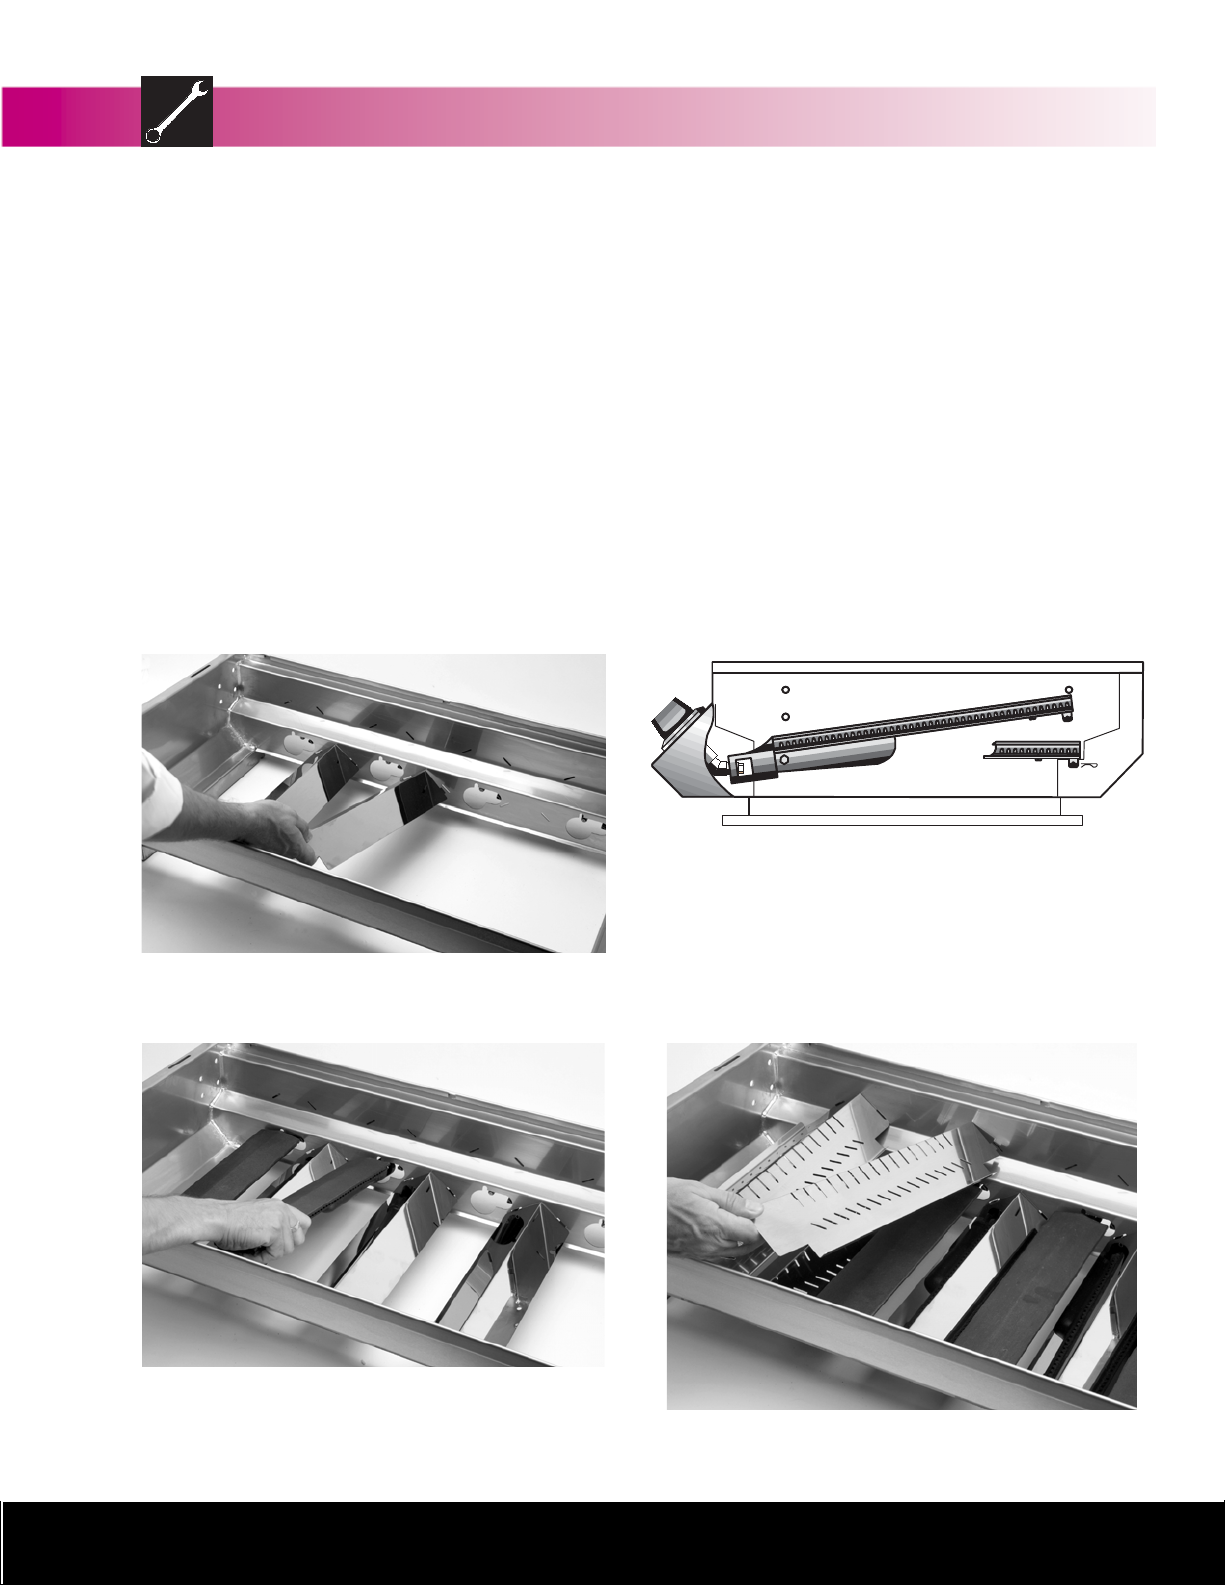
Fitting The Heat Reflectors
Completely remove all of the plastic film from the reflectors.
The tabbed ends of the heat reflectors face forward to the
front of the barbecue frame. The tabs fit into the slots in
the front end of the barbecue (behind the control fascia).
Key the tabs of the Vaporizers into the lower slots (between
the burners). Key the tabs of each reflector into the slots. If
slots are partially covered with enamel, work the tabs until
the enamel clears. See Fig 8.
Fitting The Burners
Remove the retaining clips from the burners, then fit the
burners - open end first, over the brass stem of the control
valves at the front of the barbecue, allowing the rear
burner lug to locate into the cross-lighting channel and
corresponding hole in the support panel at the rear or the
barbecue. To secure burners fit retaining clips (“R” shape)
into burner lugs. See Fig 9 & 10.
Fig 8
Fitting The Vaporizers
Remove the protective plastic film from each Vaporizer and
then fit the Vaporizers to the barbecue. The tabbed ends
of the Vaporizers face forward to the front of the barbecue
frame. The tabs fit into the slots in the front end of the
barbecue (behind the control fascia). Key the tabs of the
Vaporizers into the upper slots. The Vaporizers should be
fitted to the same side of the barbecue to which the grill is
to be placed. (They will not work if fitted under the plate). If
slots are partially covered with enamel, work the tabs until
the enamel clears. See Fig 11 & 12.
Fig 10
Fig 9
Fig 11
Australia’s Leading Barbecue

8
Assembly Instructions
Beefeater Barbecues
Assembly Procedure (Continued)
Fitting The Cooking Plates And Grills
We recommend fitting the plate to the left-hand side of the
barbecue frame (with the drain hole to the extreme left).
The grill or grills can be fitted to the right hand side of the
barbecue frame. Grills must always be positioned over the
Vaporizer grids. See Fig 13.
BeefEater 2, 3 & 4 burner barbecues come standard with
plate and
of 50% plate over the entire cooking area. Do not replace
the grill with another plate as this will cause severe heat
damage to the appliance.
BeefEater 5 burner barbecues come standard with
and
plate. Do not cover the entire surface of the barbecue frame
with plates as this will cause severe heat damage to the
appliance.
1
/2 grill and are approved for use with a maximum
2
/3 grill and are approved for use with a maximum of 2/
1
/
plate
3
1
/2
3
Fig 12 Rear of Barbecue
Fig 14 Grease drain hole
Fig 13 Rear of Barbecue
Fig 15 Fig 16
Neatly line the drip tray with
aluminium foil
Fig 17 Fig 18
Spread the absorbent material out
evenly
Add the absorbent material
Ensure that the absorbent material is not
more than 6mm deep.
Fitting The Grease Tray
Neatly line the drip tray with a couple of sheets
of aluminium foil. Cut the foil to shape and make
sure that the foil sits on the bottom of the tray or
corners of the foil so that it does not foul in the tray
sliders on the bottom of the barbecue frame. The
foil will aid in clean up & help reduce leakage.
Fill the tray with a 6mm (1/4”) layer of dry sand
or other non-combustible absorbent material to
absorb grease. Change the foil and absorbent
material regularly to reduce the likelihood of a drip
tray fire. See Fig 15-18.
Australia’s Leading Barbecue
 Loading...