

Becker TRAFFIC ASSIST Z098, CROCODILE POI, TRAFFIC ASSIST Z100 POI, TRAFFIC ASSIST Z099, TRAFFIC ASSIST Z201 POI User Manual
Page 1

Installation Manual
for the Becker Trac Assist Z099, Z098, Z100 and Z201
Page 2

Installation manual
Table of contents
Connecting to your PC . . . . . . . . . . . . . . . . . . . . . . . . . . . . . . . . . . . . . . . . . . . . . . . . . . . . . . . . . . . . . . . . . . . . . . . . . . 3
1.
Installing the synchronisation software onto your PC . . . . . . . . . . . . . . . . . . . . . . . . . . . . . . . . . . . . . . . . . . . .4
2.
Internet registration . . . . . . . . . . . . . . . . . . . . . . . . . . . . . . . . . . . . . . . . . . . . . . . . . . . . . . . . . . . . . . . . . . . . . . . . . . . . . 6
3.
Selecting, using and updating POIs . . . . . . . . . . . . . . . . . . . . . . . . . . . . . . . . . . . . . . . . . . . . . . . . . . . . . . . . . . . . . .9
4.
Synchronising POIs . . . . . . . . . . . . . . . . . . . . . . . . . . . . . . . . . . . . . . . . . . . . . . . . . . . . . . . . . . . . . . . . . . . . . . . . . . . . .10
5.
Information about us . . . . . . . . . . . . . . . . . . . . . . . . . . . . . . . . . . . . . . . . . . . . . . . . . . . . . . . . . . . . . . . . . . . . . . . . . . .14
6.
2Table of contents
Page 3

Installation manual
1. Connecting to your PC
For the rst step of the installation process, please begin by connecting your navigation
system to your PC with a USB cable. The device will be recognised as a removable storage
device.
Note: 2 removable storage devices will be shown in My Computer – the rst is the
internal memory of the navigation system and the second is the memory card which
has been inserted into the navigation system. The navigation software is located on the
internal memory of the navigation system. Depending on the number of USB devices you
currently have attached to your computer, the drive letters in the illustration below may
dier slightly.
Fig. 1: Recognition as a removable storage device
Installing the synchronisation software onto your PC (1/2)
3Connecting to your PC
Page 4

Installation manual
2. Installing the synchronisation software onto your PC
In order to install the Overlays from POI FINDER onto your Becker navigation system,
you rst need to install the synchronisation software onto your PC. Simply start the Web
Downloader on the CD/DVD and follow the installation instructions.
During the rst installation, you will be asked if you would like the positions of xed speed
cameras in Europe to be installed on your navigation system. If you would like this data to
be installed, click “YES”, if not, click “NO”. Your rst installation is completely free of charge;
only a data update would carry a cost, and this can be selected from our Premium Content
Shop.
Note: The laws pertaining to the use of speed camera data are not standardised
throughout the EU. It is up to you to check if the use of such data is legal in the country
in which you are driving. In Germany, for example, the use of such data whilst driving is
illegal.
Following a successful installation, and for following updates, you can start the
synchronisation software by clicking on “Start -> All Programs -> POI FINDER 3 5 (Becker)
-> POI FINDER 3 5 (Becker)”.
Installing the synchronisation software onto your PC (2/2)
4Installing the synchronisation software onto your PC
Page 5
Installation manual
Fig. 2: Start screen of the Sync-Tool
Internet registration (1/3)
5Installing the synchronisation software onto your PC
Page 6

Installation manual
3. Internet registration
In order to be able to synchronise the services, you must rst complete a one-o online
registration. In the sync tool, click on the “Change registration info” button, and then on
“Request”. You will then be automatically redirected to the corresponding registration
page on the internet.
Fig. 3: Request registration details
Internet registration (2/3)
6Internet registration
Page 7

Installation manual
Fig. 4: Internet Registration
For the registration, you will need the following details:
• A username of your choice without spaces or special characters (e.g. JohnSmith)
• A valid email address (name@company.com) for the delivery of your password
• Some additional details
After entering all the relevant details, click on “Activate licence”. This will open a new
browser window which will contain your username and your transaction number. The
password for your account will be sent to the email address provided in the registration
process.
Note: The transaction number is not your password. Please check your email inbox
following the registration process in order to nd your password.
Internet registration (3/3)
7Internet registration
Page 8

Installation manual
Copy your username and password from your registration email into the registrations
window of the Synchronisation Tool and click on the “OK” button.
Fig. 5: Enter your registration details
Now that you have entered your username and password into the Sync-Tool, you can
choose which POI services you would like to use.
Selecting, using and updating POIs
8Internet registration
Page 9

Installation manual
4. Selecting, using and updating POIs
Additional POI services (e.g. car parks, cash machines, pharmacies, and much more) can
be installed and updated using the POI FINDER Sync-Tool installed on your PC.
After launching the tool, a list of available Points of Interest and Insider Tips will open
automatically.
The program dierentiates between services that are cost-free and those which are
provided at a cost to the user: those which are marked with a star (*) require the user to
pay a fee; all of those without a star are free and can be used and updated immediately.
At this point, please ensure once again that your computer is connected to the internet.
If you are interested in any of our premium services, you can purchase them from our
Online Content Shop. Alternatively, you can call us on the following number: +49 (0)
1805-76 42 66 (Mon – Fri , 9am – 6pm) .
Synchronising POIs (1/4)
9Selecting, using and updating POIs
Page 10

Installation manual
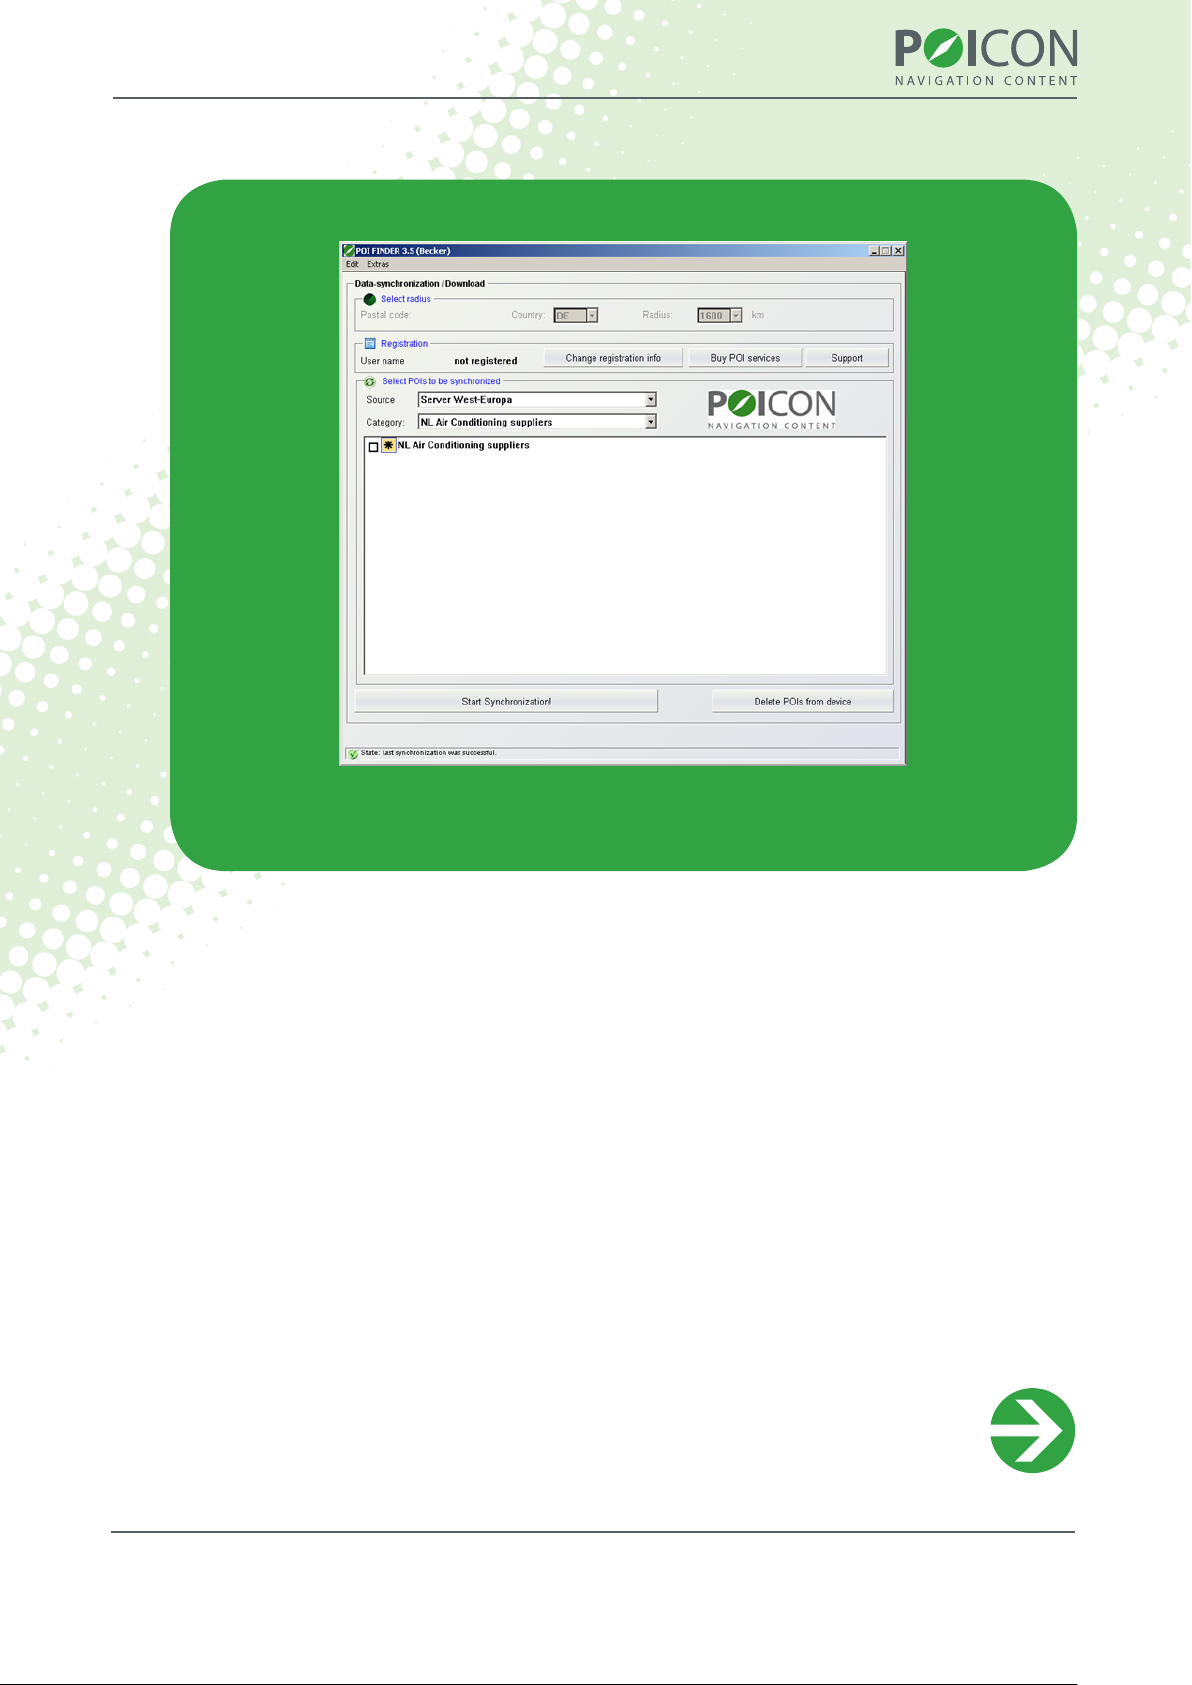
5. Synchronising POIs
If you have purchased any additional content, you can activate the services in exactly
the same way as the cost-free Points of Interest and Insider Tips. This process is described
below.
Fig. 6: Selecting POIs
Under “Category”, choose an area from which you would like to use POIs. After selecting
the desired category, a list of all available POIs will appear. Select the POIs you require by
simply placing checks in the boxes next to them.
Synchronising POIs (2/4)
10Synchronising POIs
Page 11

Installation manual
If you want to select all of the Points of Interest and Insider Tips from one category at
once, click on the Edit menu and then on Select all from category. The entire list of POIs
and Insider Tips in this category will be selected.
Fig. 7: Selecting single POIs
Synchronising POIs (3/4)
11Synchronising POIs
Page 12

Installation manual
Fig. 8: Selecting all POIs
Whilst selecting POIs, you may change between the dierent categories and select POIs
and Insider Tips from them. The POI FINDER software will remember your selections from
each of the categories for the synchronisation.
Before you can start the synchronisation, you must enter a valid postcode into the
“Postcode” eld. You must also determine the radius within which POIs should be
synchronised. (only required for POIs from the server D/A/CH).
After selecting the POIs and Insider Tips you wish to install, click on the
“Start synchronisation” button.
The POIs you have selected will then be downloaded via your internet connection and
automatically copied to the correct directories. The rst synchronisation of POIs and Insider
Tips may take a little longer than usual.
Synchronising POIs (4/4)
12Synchronising POIs
Page 13

Installation manual
Subsequent synchronisations are much quicker. Once the synchronisation process is
complete, the message “Last synchronisation successful” will be displayed in the status
line in the lower section of the navigation system’s screen. After downloading all of your
desired POIs and Insider Tips, simply close the menu. You may notice short delays when
navigating the main menu following the rst synchronisation.
Should you no longer need them, you can remove all POIs installed by the POI FINDER
Sync-Tool by pressing the “Delete POIs from device” button.
Note: The additional POIs and Insider Tips which you have installed using the Sync-Tool
can be retrieved on your Becker navigation system by clicking “Select Destination -> Enter
destination -> Select Point of Interest -> POI nearby -> POI FINDER”.
In order to be alerted by sound of possible danger spots, you must activate sound
warnings by following “Settings -> Navigation settings -> Danger spots”. However, this
can only be done with an active GPS signal.
Fig. 9: POIs shown on the map
13Synchronising POIs
Page 14

Installation manual
Information about us
If you have any questions or suggestions, contact us free
• by email: support@poicon.com,
• by fax: +49 (0) 1805-76 42 99
or personally and direct
• by telephone: +49 (0) 1805-76 42 66 (Mon - Fri , 9am – 6pm)
Further information can be found at www.poicon.com.
Yours,
POICON Team
Hamburg
14Information about us
 Loading...