

Page 1
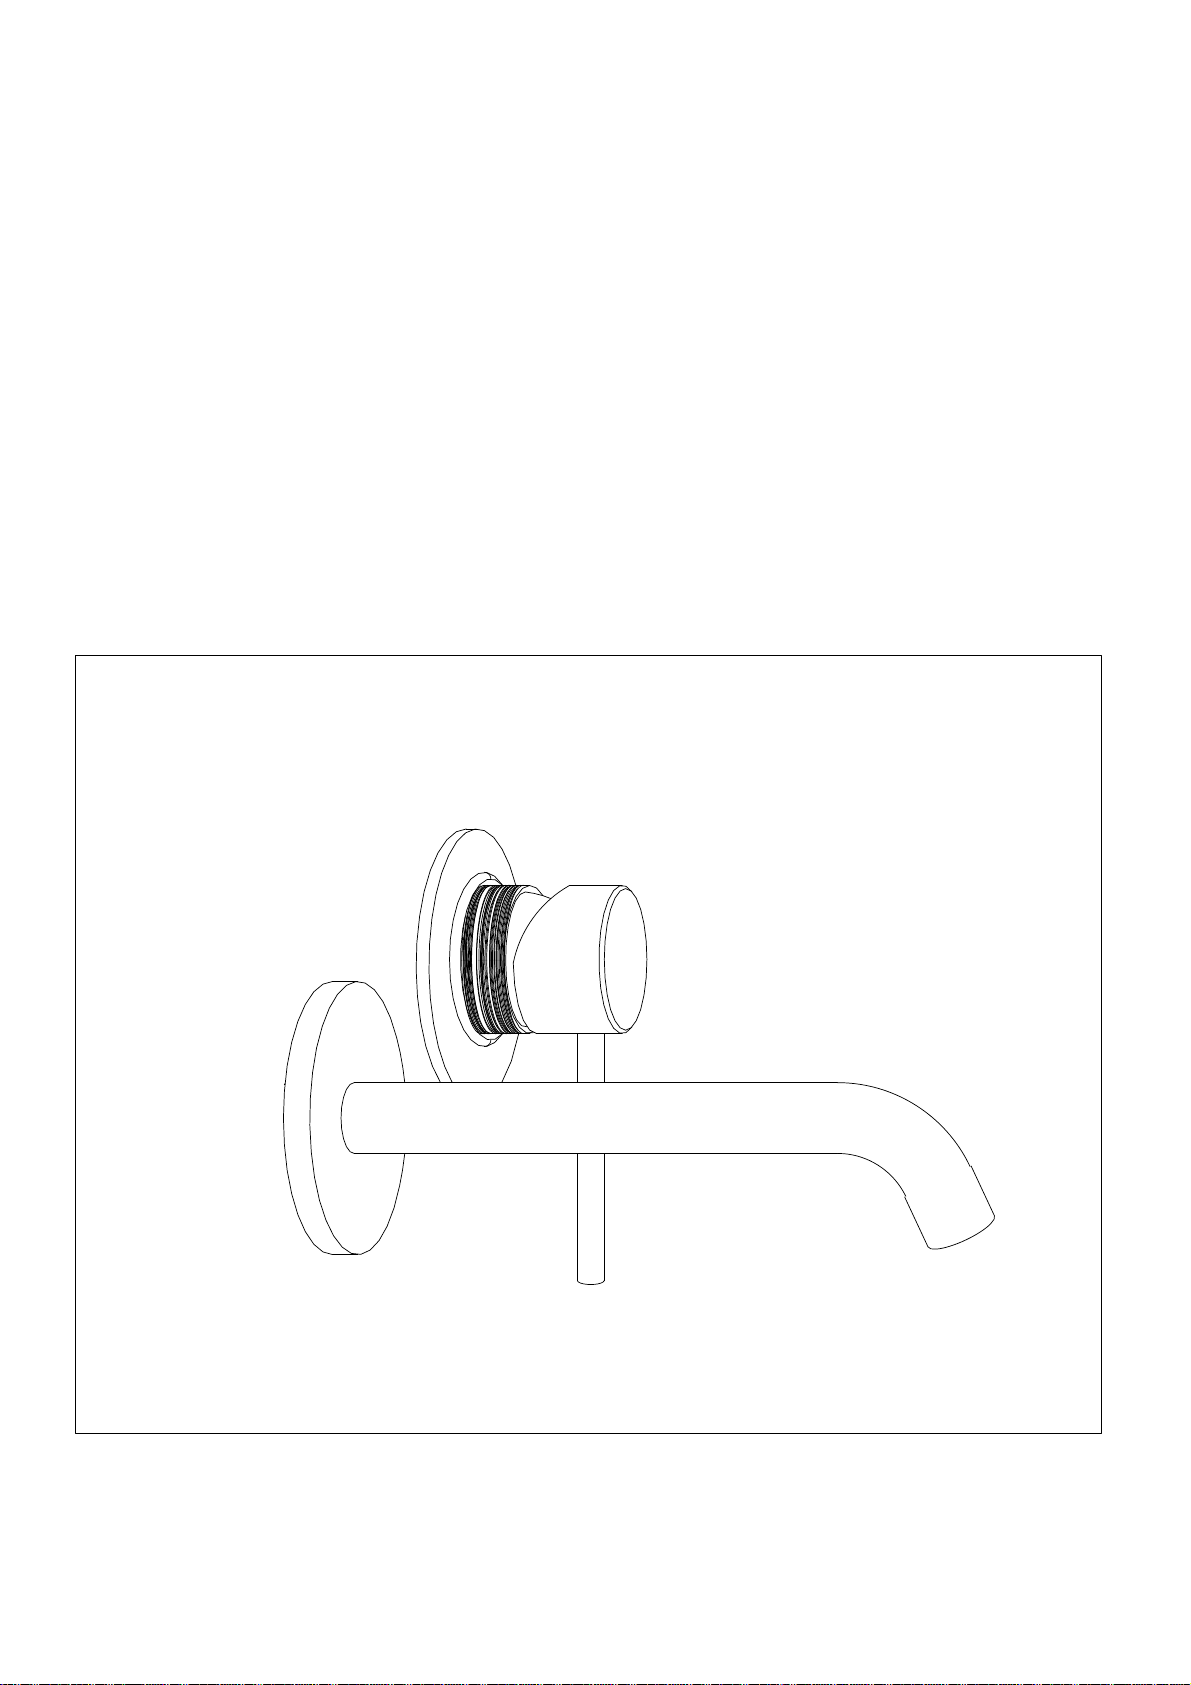
Empire Wall Mounted Bath Filler
CODE: BeBa_25978
Page 2
1 NOTES FOR INSTALLATION
1)Installation must be carried out in compliance with The Water Fittings Regulations and Scottish Water Byelaws.
Minimum and Maximum working pressure : 1 - 5 bar
2)Please do not connect hot and cold water supply lines in reverse. This could result in hot water flowing from cold
line and cause scalding.
3)The feed-water temperature of water shall not exceed 85
faucets might be shortened, or the faucet might be damaged.
4) The valve must be installed on the wall that is strong and thick enough.
5)After installation, please make sure the faucet is securely mounted.
Warning
you are uncertain about installing this product.
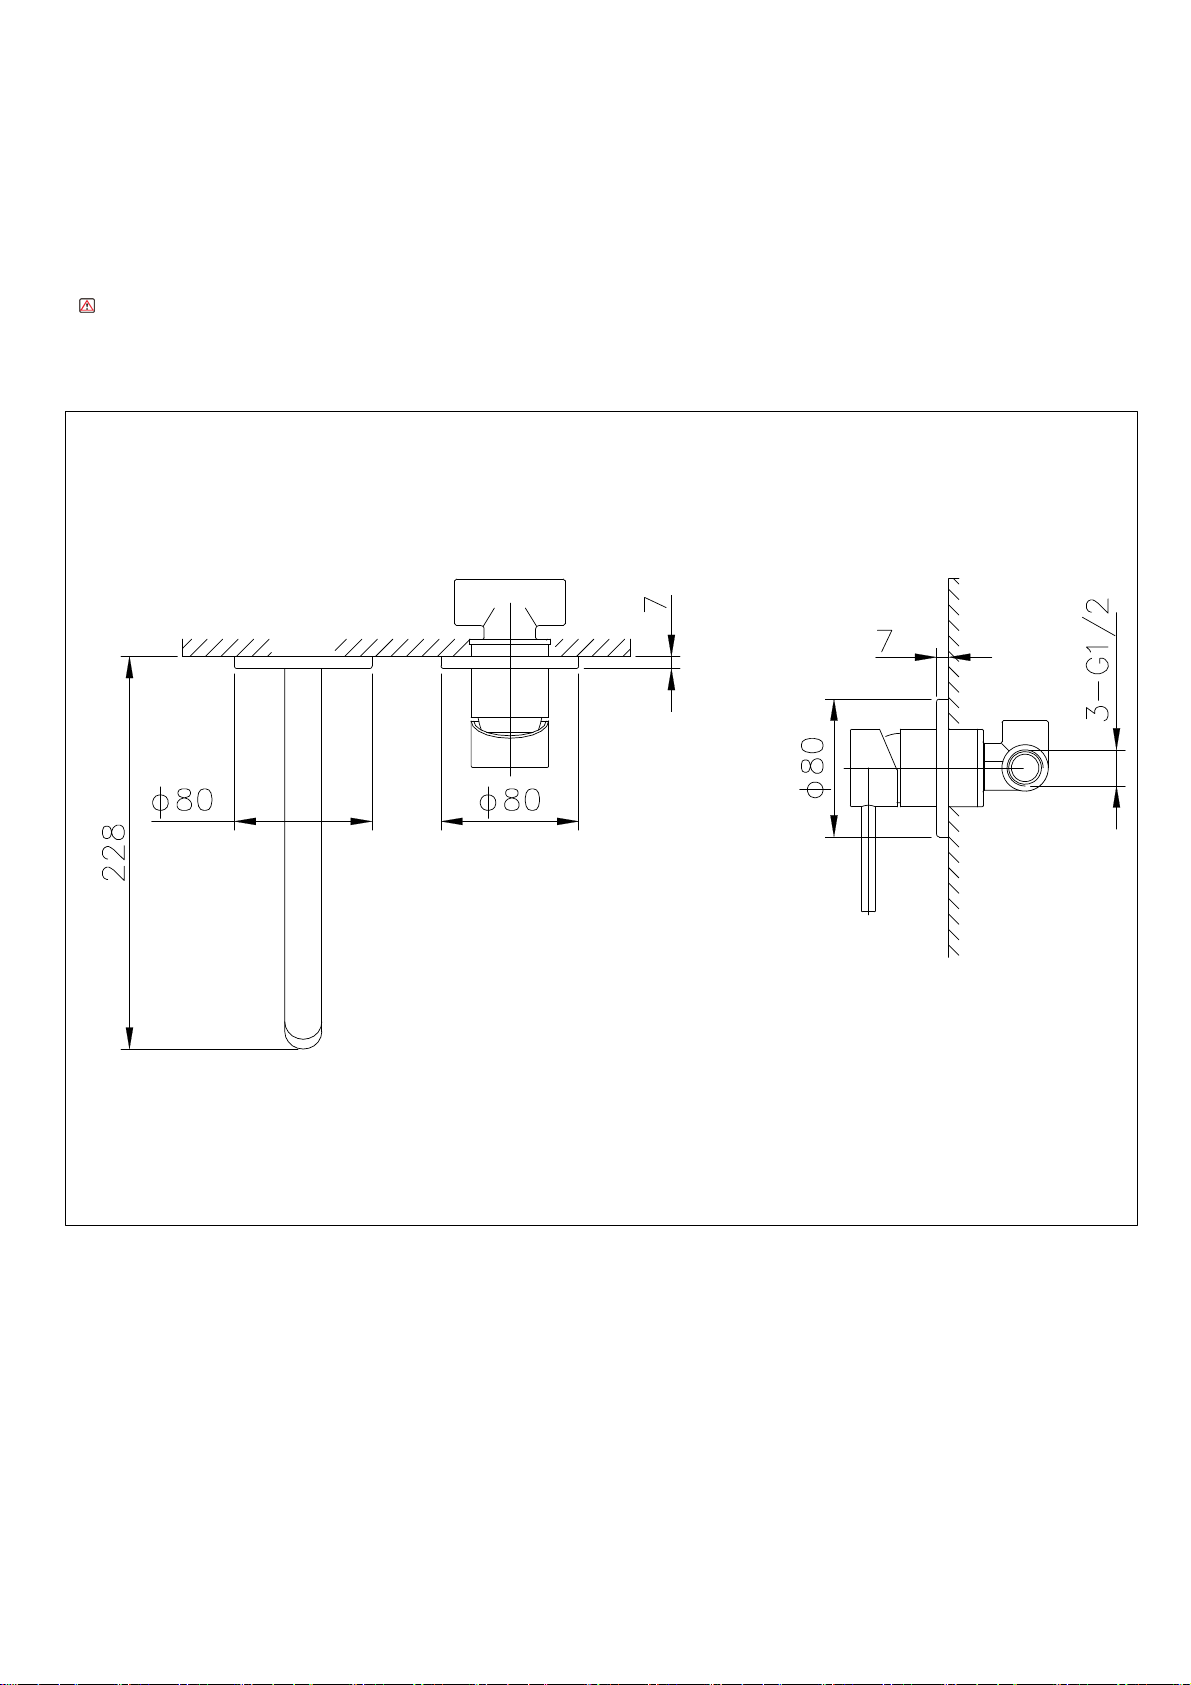
2 DIMENSIONS(mm)
:Read all the instructions completely before proceeding. We recommend calling a professional if
°C. Exceeding 85° may cause scalding, the service life of
3 SHUT OFF WATER SUPPLY
Locate water supply inlets and shut off the water supply valves. These are usually found under the sink or near the water meter.
2
Page 3
4 INSTALLATION
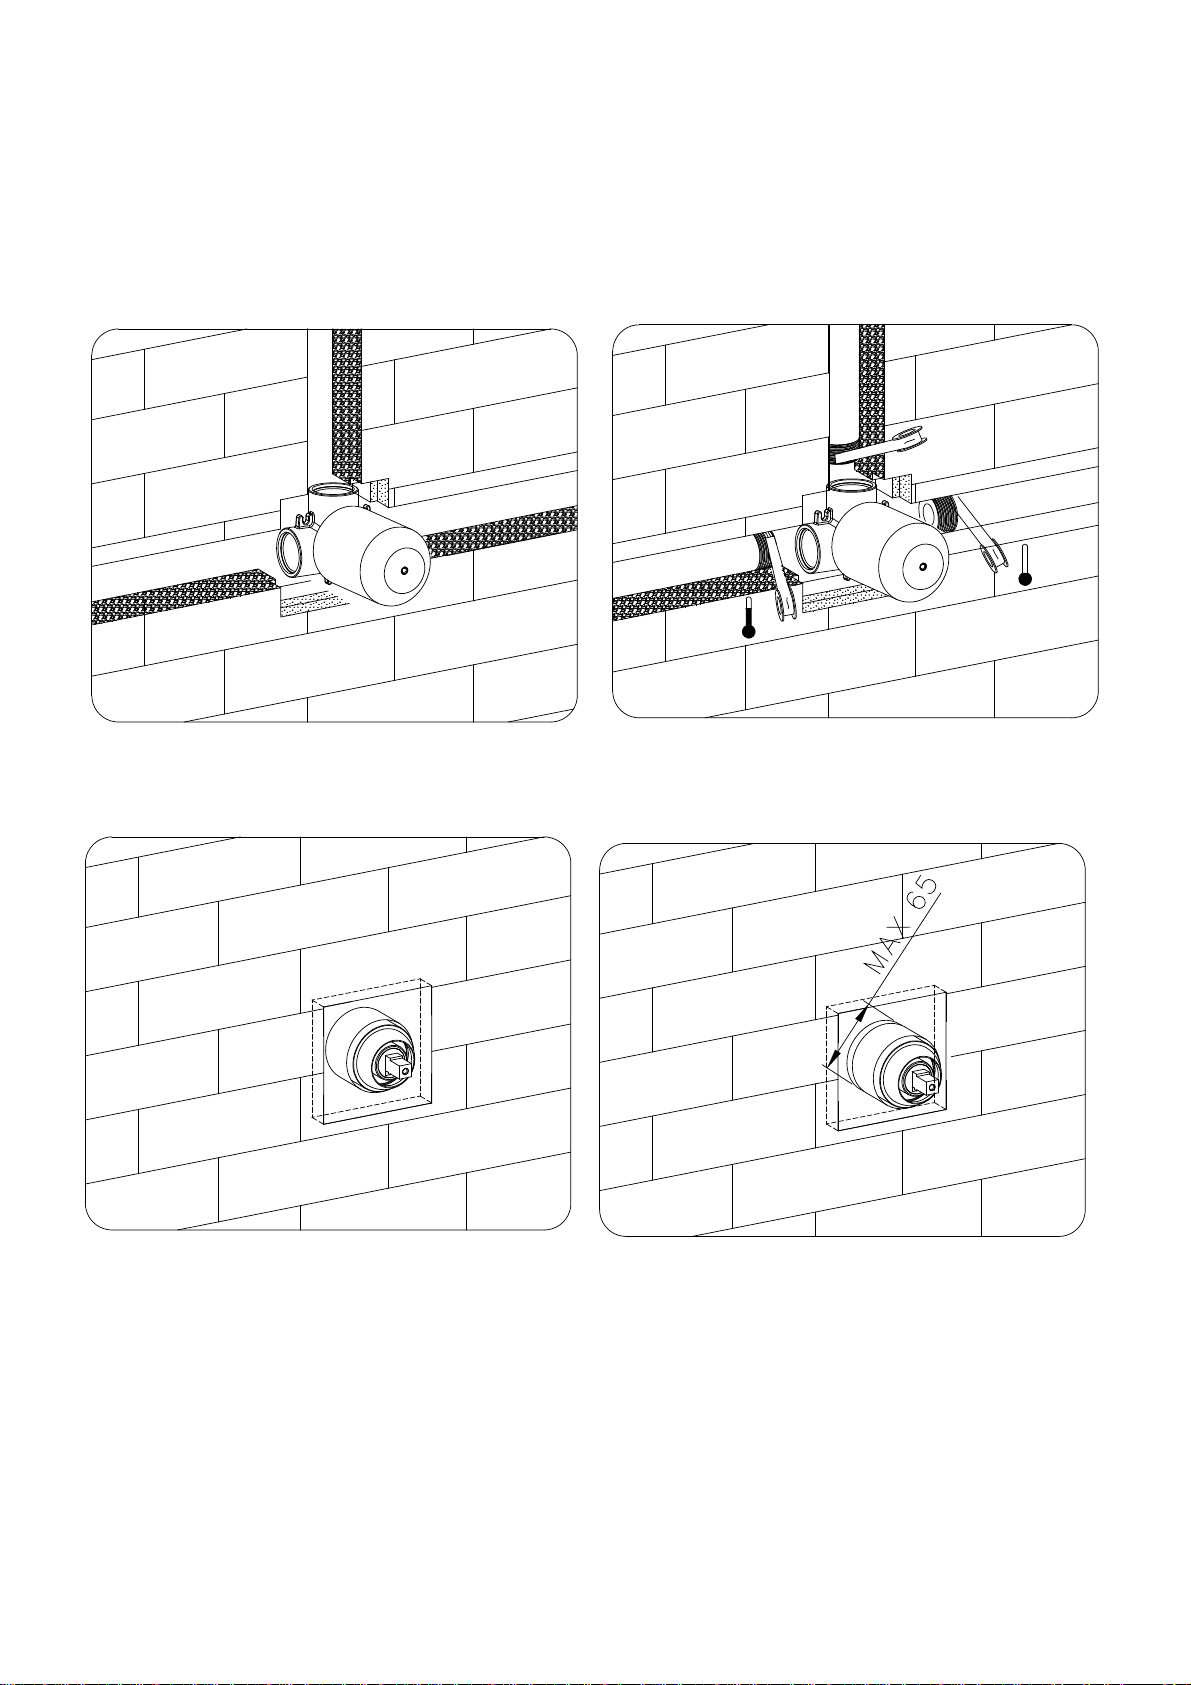
Based on the size of the body and the wall type, either
secure it to the noggins or embed it into the wall at an
approximate height. Ensure that the body is installed
level, plumb and square.
Either, sheet around the mixer body with fibre cement
sheeting or backfill the exposed channels ready for tiling.
Connect the hot(left) and cold(right)supply and the
mixed water pipes using applicable sealing practices.
Remove the plastic tiling templates and test for water
security with the mixer in both open and shut positions
and the diverter open in both positions.
Ensure tiles are cut as close to the plastic template covering
the mixer dome as possible; Remove the plastic template
after the tiling is completed.
Ø
3
Page 4
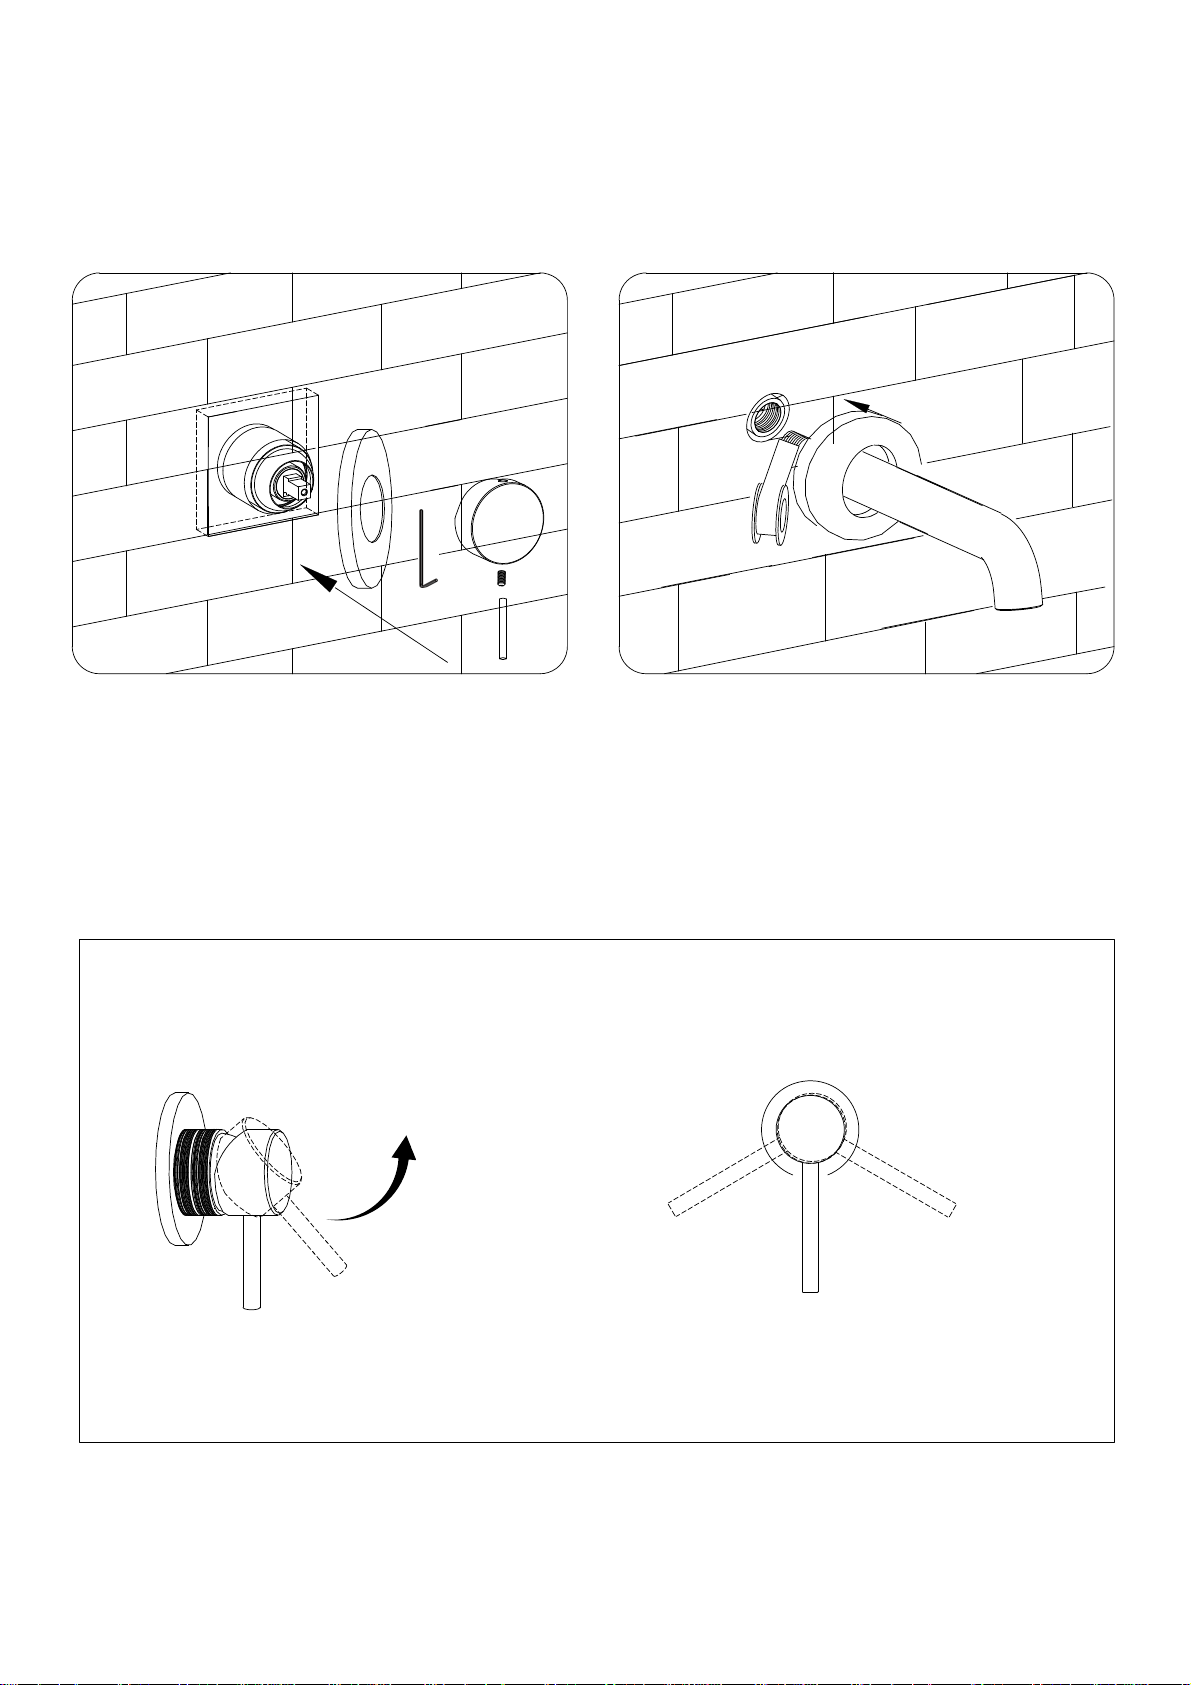
Install the trim cover plate with the valve.
Remove the lever from handle set, by rotating
counter-clockwise, and loose the grub screw
by Allen key. Install the lever handle onto the
body, and securing it with the grub screw; Fix
the lever back to the handle.
Install the trim cover plates over the dome and
spout. Fix the spout into the wall using thread
seal tape.
5 UNIT START UP
Turn on hot and cold water supplies, and check for leaks above and below the basin.
6 VALVE FUNCTIONS
By lifting the Lever Handle upwards, the valve will be activated. Water flow will increase by continuing to lift up the Lever Handle.
By rotating the Lever Handle counter-clockwise, the water temperature will decrease. By rotating the Lever Handle colockwise, the water
temperature will increase.
OPEN
HOT
COLD
4
Page 5
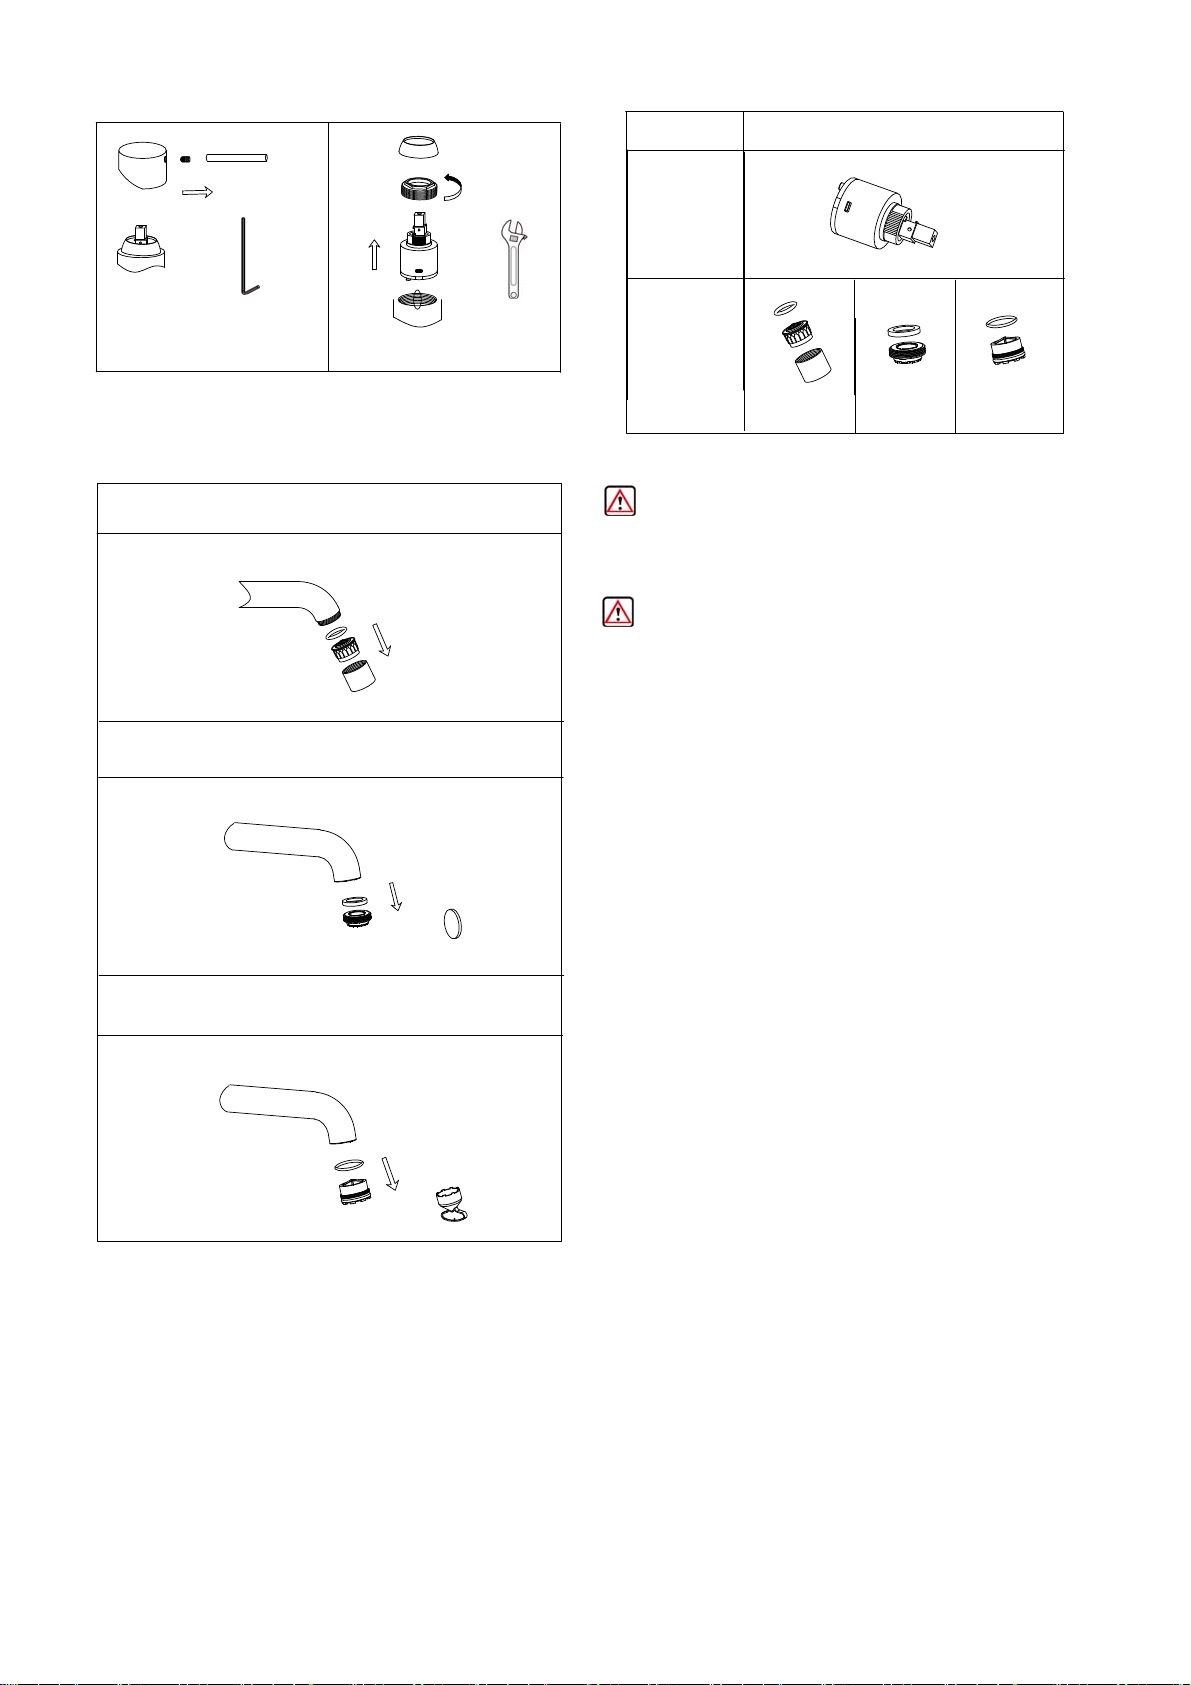
Replacement of Cartridge
Parts for Maintenance
Parts Picture for Reference
Cartridge
A
CLEANING OF AERATOR
To avoid the dust and impurities from construction that might
influence the water flow, it is suggested to clean the aerator
on a regular basis.
Type 1: Aerator with Housing
Type 2: Coin Slot Aerator
B
CAUTION:Maintenance
The valves must be turned off to release the pressure
of waterpipe during maintenace.
For all decorative finishes, use only a soft damp cloth
to clean and shine. Use of polish, detegents, abrasive
cleaners, organic solvents or acid may cause damage.
Use of other than a soft damp cloth will nullify our
warranty.
Aerator
NOTE: Cleaning Instructions:
Type 3: Hidden Aerator with Aerator Key
5
 Loading...