

Page 1

150.730_150.732 V1.1
STARCOLOR 72 & 128
Page 2
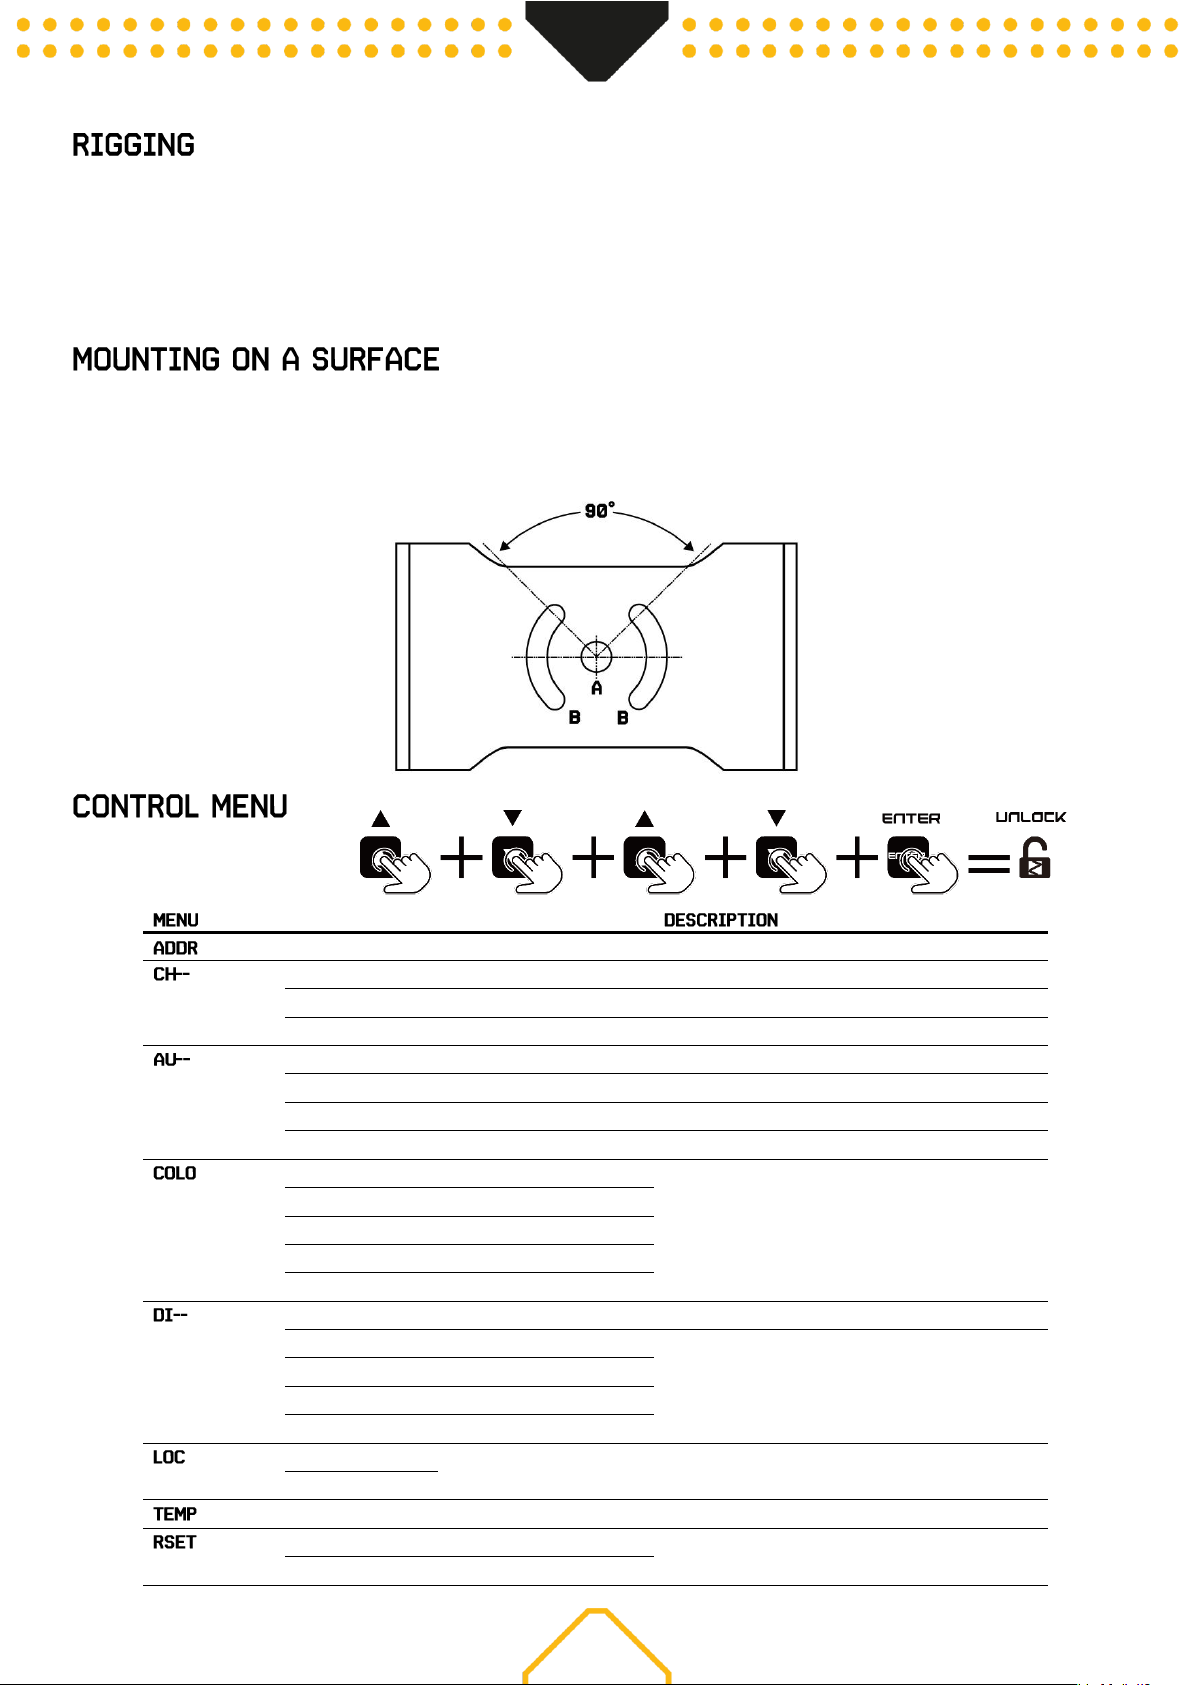
In temporary installations, you can suspend the fixture from a rigging truss by means of a rigging clamp that is approved for the weight of the fixture
securely fastened through the hole in the center of the bracket (A). The fixture must be installed hanging vertically downwards only. When using a rigging
clamp, secure the fixture with a safety cable, that is approved for the weight of the fixture so that the safety cable will hold the fixture if the rigging clamp
fails. Remove as much slack as possible from the safety cable (by looping it more than once around the truss chord, for example). Check that the truss and
all fasteners used can support 10 times the weight of all the fixtures and equipment that they will support.
When carrying out any installation, always comply European and national guidelines concerning rigging, truss and all other safety issues. Always let the
installation checked out by an authorized dealer!
To anchor the mounting bracket to a wall or other flat surface, use three high-strength corrosion-resistant fasteners that are safe for the application. Use
selflocking nuts! Install washers under all nuts and bolt heads. Make sure that there is a washer between each fastener and the bracket. Ensure that the
surface and all fasteners used can support 10 times the weight of all the fixtures and equipment that they will support.
Fasten the center of the bracket with a 10 mm (25/64inch) shaft diameter bolt in the center hole A. Then use two bolts with 8 mm (5/16 inch) shaft
diameter passing through the curved slots B to anchor the fixture. This setup will give approximately 90° of pan adjustment.
If the display is in standby, unlock it:
A001-A512
DMX address setting
8CH
Internal program 1-9
8 DMX Channel mode
4CH
4 DMX Channel mode
10CH
10 DMX Channel mode
Au.01
T.(00-99)
Macro mode 1 from slow to fast
Au.02
Macro mode 2 from slow to fast
…
…
Au.10 Macro mode 10 from slow to fast
r.(000-255)
Manual colour adjustment
g.(000-255)
b.(000-255)
u.(000-255)
S.(0-20)
nod.0
No dimmer curve
nod.1
Dimmer curve
nod.2
nod.3
nod.4
ON
Enable or disable control menu locking
OFF
Show the LED PCB temperature
No
Load factory settings
Yes
Page 3
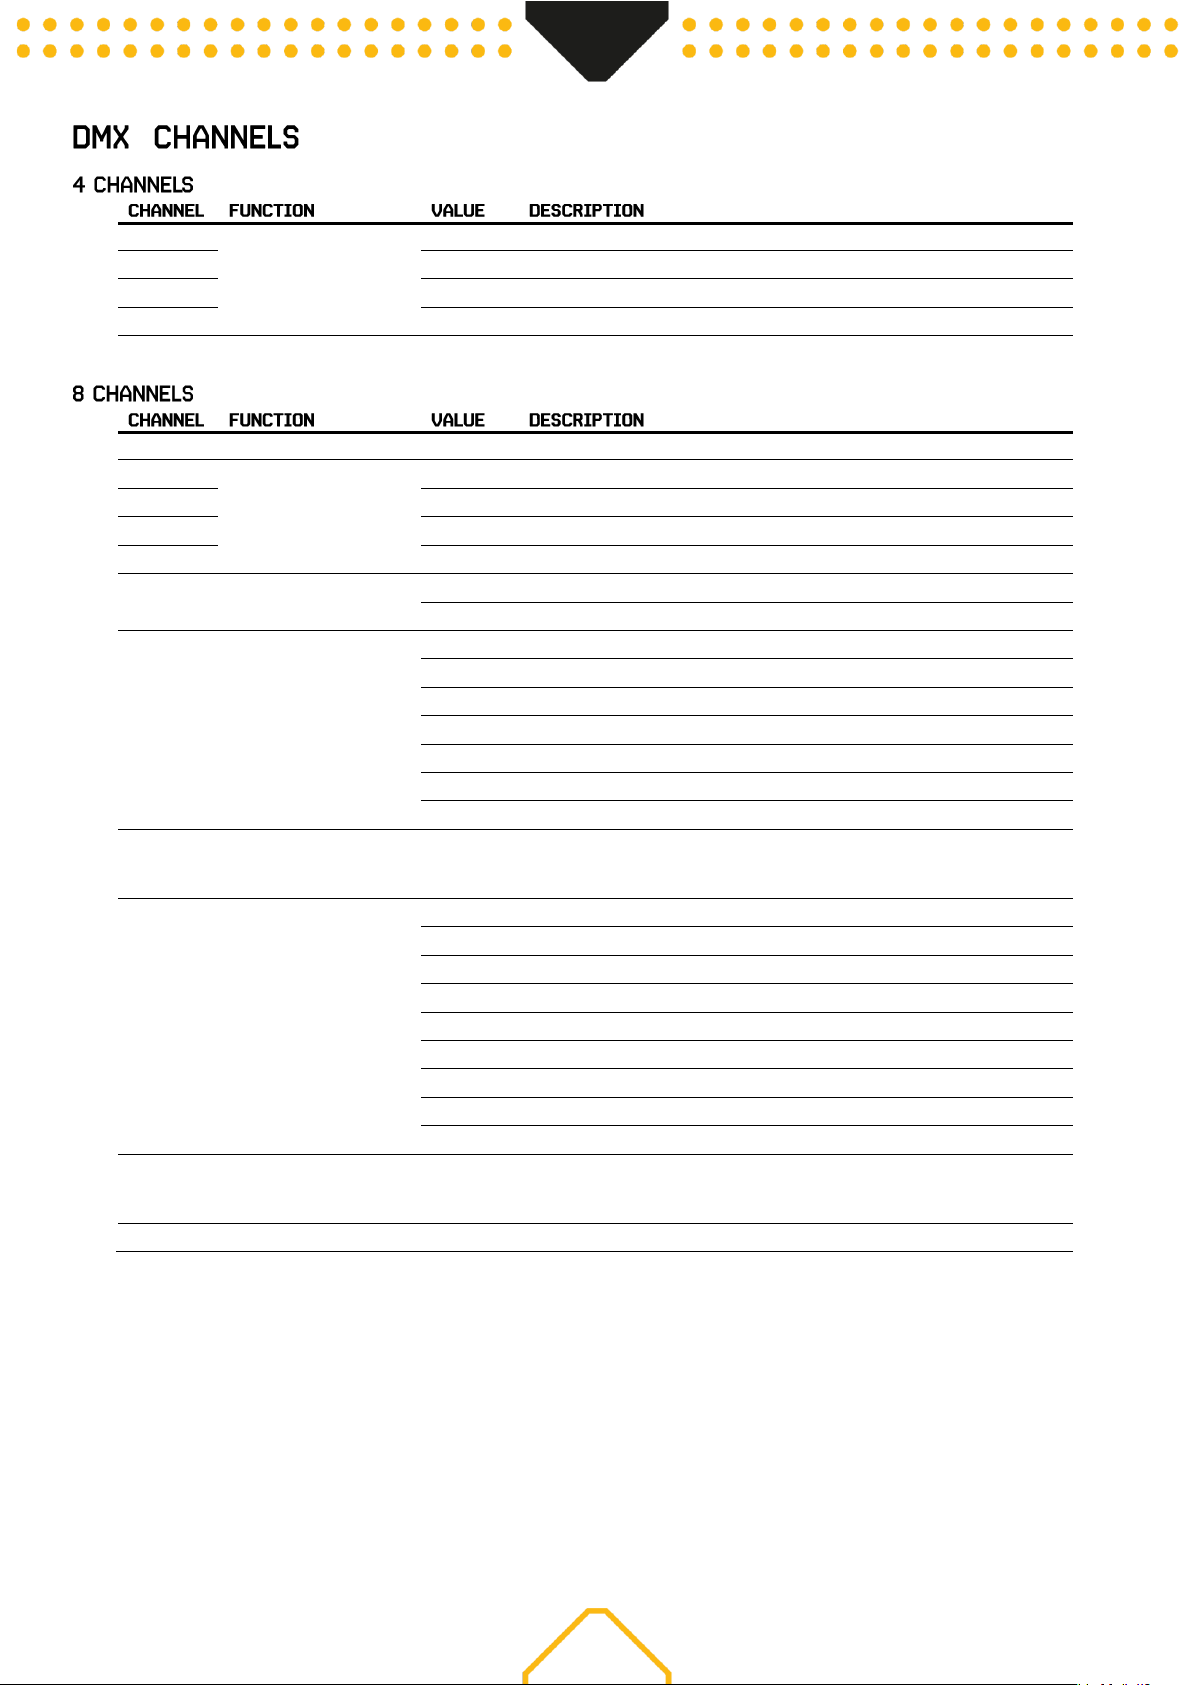
1
Colour
000-255
Red dimmer 0-100%
2
000-255
Green dimmer 0-100%
3
000-255
Blue dimmer 0-100%
4
000-255
White dimmer 0-100%
1
Dimmer
000-255
Master dimmer 0-100%
2
Colour
000-255
Red dimmer 0-100%
3
000-255
Green dimmer 0-100%
4
000-255
Blue dimmer 0-100%
5
000-255
White dimmer 0-100%
6
Strobe
000-012
No function
013-255
Strobe from slow to fast
7
Macro
000-050
No function
051-100
Static colours
101-109
Macro mode 1
110-119
Macro mode 2
…
190-199
Macro mode 10
200-255
Sound active
Channel 8 when value 51-100 (CH7)
8
Colour selection
000-255
Static colour
000-031
Red
032-063
Green
064-095
Blue
096-127
White
128-159
Red + Green
160-191
Red + Blue
192-223
Green + Blue
224-255
Full on
Channel 8 when value 101-255 (CH7)
8
Macro speed
000-255
Macro speed
Page 4

 Loading...