

Page 1

Smart Garage Door Controller
Installation Guide
Installation requires no special tools—you’ll just need a
screwdriver, stepladder and smartphone!
Model V2B
beamlabs.io
1-800-436-9186
Page 2
Thank you for purchasing the beamUP Smart
Garage Door Controller!
Please read and follow all installation instructions. Homeowners
should retain this guide for reference.
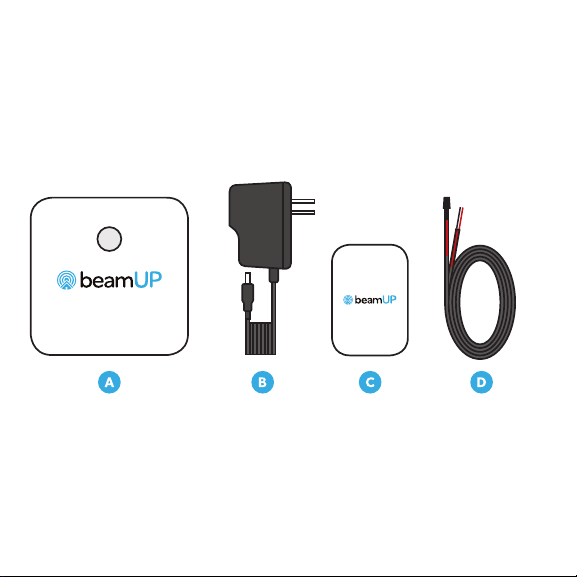
Controller Power
adapter
Wireless door
sensor
Opener
cable
Page 3
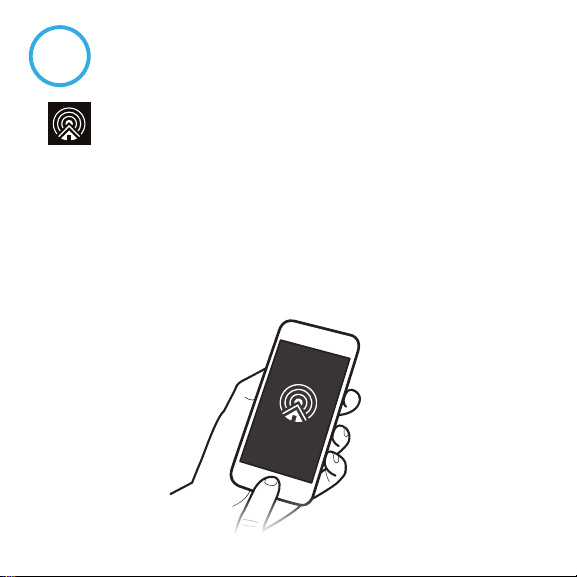
Download the app & begin setup
1
• While inside your home, download the “beam Home”
app from the App Store (iOS) or Google Play (Android).
• Open the app, and select “Setup Your beam.”
• Follow prompts within the app to verify the WiFi network you’d like
your controller to connect to, and enter your network password.
TIP: Make sure you do not select a 5G network for setup (beam
only connects to 2.4GHz networks).
Page 4
Power up the controller
2
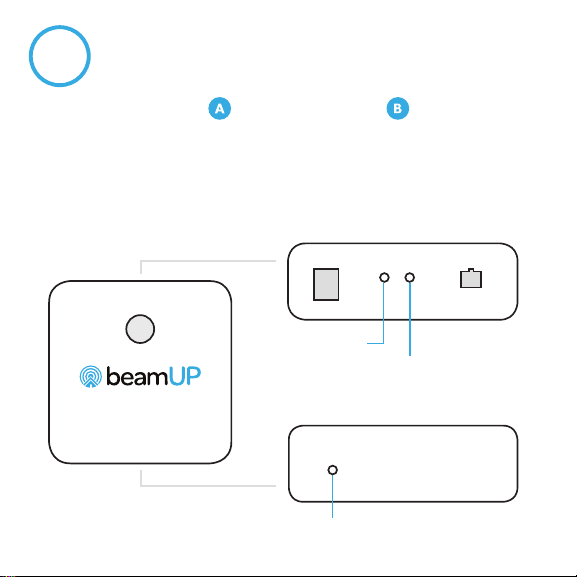
• Locate the controller and power adapter . Plug the adapter
into the DC IN port on the controller and a nearby power source.
• The controller’s WiFi status light will blink orange to indicate it’s
ready for setup.
Top Side
Power Indicator
WiFi Status
Bottom Side
Power Indicator
Setup Port
Page 5
3
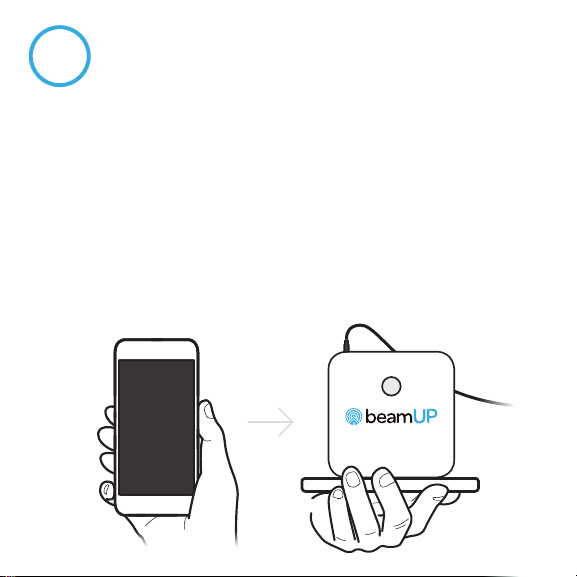
• Follow prompts within the app, and when directed, press your
phone screen tightly against the bottom setup port.
TIP: It may be helpful to dim the lights or cup your hand over your
phone during programming to minimize light interference.
• If successful, the controller will beep and the WiFi status light
will blink green. You’ll then be prompted to create an account.
(If not successful, the WiFi status light will blink red and you will be
guided through setup again.)
Program the controller
Point screen at
sensor now!
5
Page 6
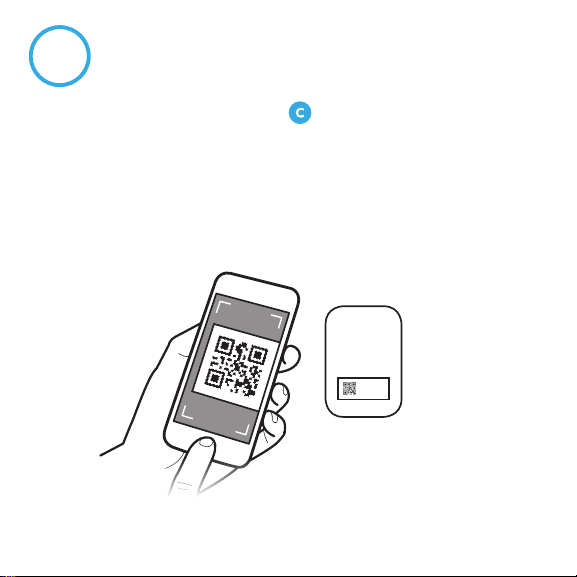
4
• Locate the wireless door sensor and follow prompts within the
app to scan the code (found on the back of the sensor).
• Enter a name to identify your door.
• Unplug the controller and head out to the garage!
Scan the wireless door sensor code
Page 7
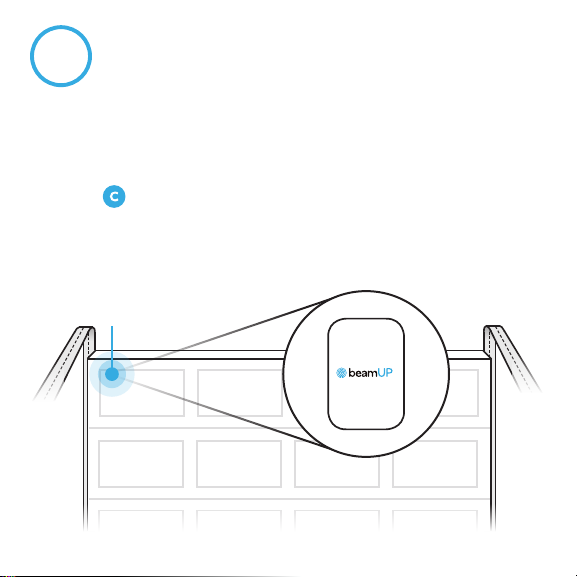
5
• Clean and wipe dry an area at the top of your garage door’s
interior panel.
• Remove the battery tab from the back of the wireless door
sensor and mount to the cleaned area of the garage door
using the adhesive Velcro strip.
Mount the wireless door sensor
Mounting location
(top of interior panel)
Page 8
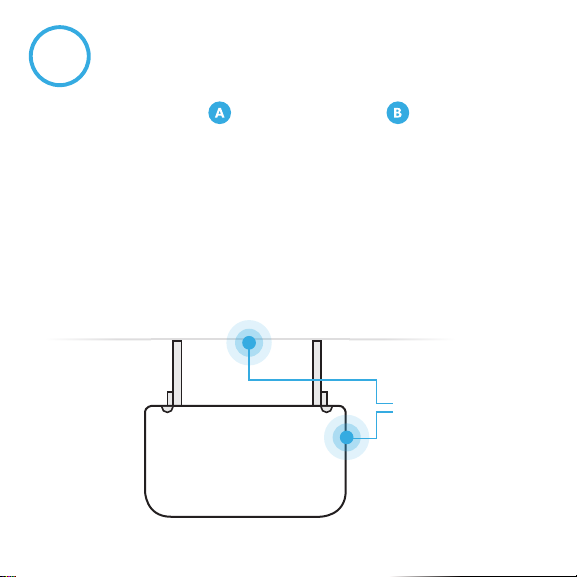
6
• Locate the controller and power adapter , and grab your
stepladder.
• Clean and wipe dry your selected mounting location, either on
the garage door opener or a nearby surface. Mount using the
adhesive strip on the back of the controller.
TIP: The controller should be mounted within 3 feet of the garage
door opener and within 6 feet of a power source.
Mount the controller
Mounting location
options
Page 9
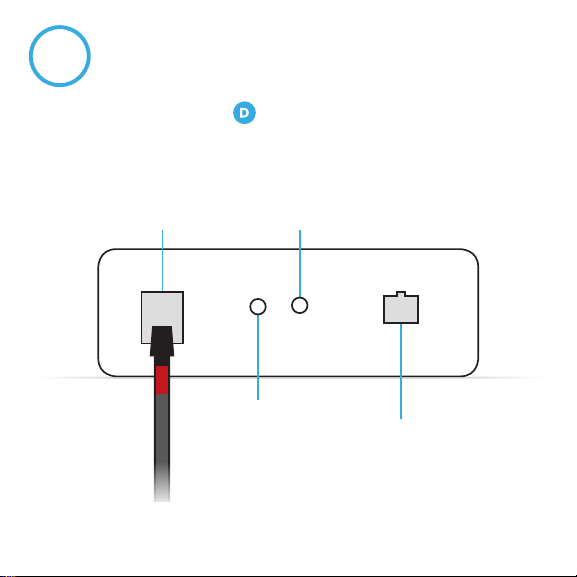
7
• Locate the opener cable .
• Plug the black connector into the opener port on the top side of
the controller.
Connect the opener cable to the controller
Opener Port
WiFi Status
Power Indicator
DC IN Port
Page 10
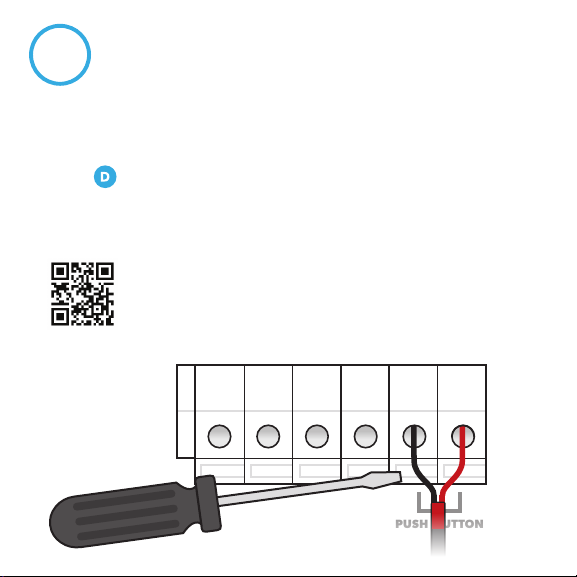
8
• Unplug your garage door opener.
• Using a small screwdriver, connect the other end of the opener
cable to your garage door opener push button terminals. If
there are already other wires present, they can be spliced together
with the opener cable to share the same terminals.
door opener
TIP: View sample connection diagrams for other
garage door opener makes and models at:
beamlabs.io/openers
PUSH BUTTON
Connect the controller to the garage
Page 11
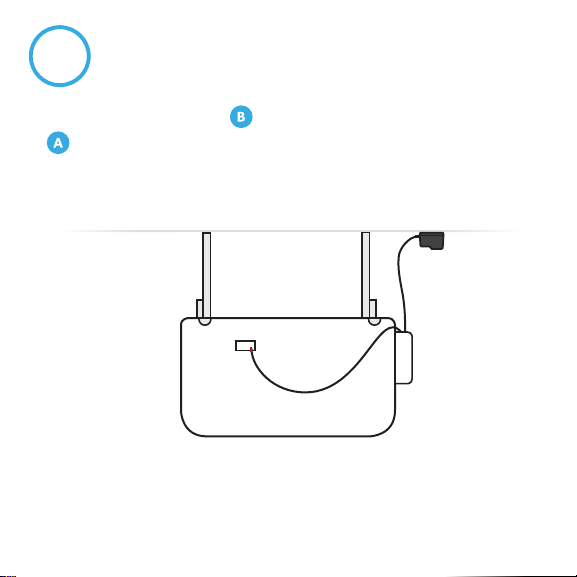
Power up the controller & opener
9
• Plug the power adapter into the DC IN port on the controller
and a nearby power source.
• Plug your garage door opener back in. All done!
Page 12
Get the most from your beamUP Smart Garage
Door Controller!
• Share access with others – Invite friends and family within the
app. No need to share your code or buy additional remotes.
• Explore integrations – beam plays well with others, from IFTTT to
Amazon Alexa.
Warning:
To reduce the risk of injury to persons:
• Use this Smart Garage Door Controller only with Residential Sectional Garage doors.
• Do not enable this device on a one-piece or swinging garage door.
• Do not use this device on garage door openers made before 1993 without
a working photo-eye safety system.
©2019, Beam Labs, LLC. Amazon, Alexa and all related logos are
trademarks of Amazon.com, Inc. or its affiliates.
Beam Labs,LLC I 122 Penn Street I El Segundo, CA 90245
 Loading...