

Page 1
HIGH PERFORMANCE
FURNITURE FOR YOUR
HOME THEATER
6/2008
Deploy® Collection
Assembly Instructions
Page 2

Deploy
™
Component List
Home Theater Furniture
™
Home Theater Furniture is engineered for easy
A - Assembled Frame x 1
B - Allen Wrench x 1
C - Back Panel x 1
D - Shelf Pin x 4
(Models 9628, 9638) x 8
Your Deploy
assembly. Carefully follow this procedure to prevent any damage.
Placement and Maintenance
Deploy™ Home Theater Furniture is designed for indoor use on level
floors. Clean glass with glass cleaner, and steel parts and wood
veneer with a moist cloth.
Step 1
Unpack and identify the parts listed above.
The assembly workspace should be a non-marring surface such as carpet.
For missing hardware pieces, please contact BDI Customer Service at:
customerservice@bdiusa.com
All other concerns please contact your local BDI Retailer.
Step 2
Unfold the metal legs on the Assembled Frame (A). Install the Shelf
Pins (D) into the desired location on the folding metal legs and the
inside area of the wood frame using the Allen Wrench (B). Install the
Rubber Bumper Inserts (E) to the assembled frame.
www.bdiusa.com
customerservice@bdiusa.com
D
E - Rubber Bumper Inserts
(Models 9624, 9629, 9634,
9644, 9639, 9649) x 15
(Model 9640, 9640-1) x 18
(Models 9628, 9638) x 24
F - Threaded Knob x 4
G - Center Shelf Support x 1
(Models 9628, 9638) x 2
H - Center Glass Shelf x 2
(Models 9628, 9638) x 3
I - Top Glass Shelf x 1
A
A
E
Step 3
Insert back panel.
Once the metal legs are opened, slide the Back Panel (C) down into the
“U” channel.
C
J - Velcro Strap/Wood
Screws
(Models 9624, 9629, 9634,
9639, 9640, 9640-1, 9644,
9649) x 9
(Models 9628, 9638) x 12
A
2
Page 3
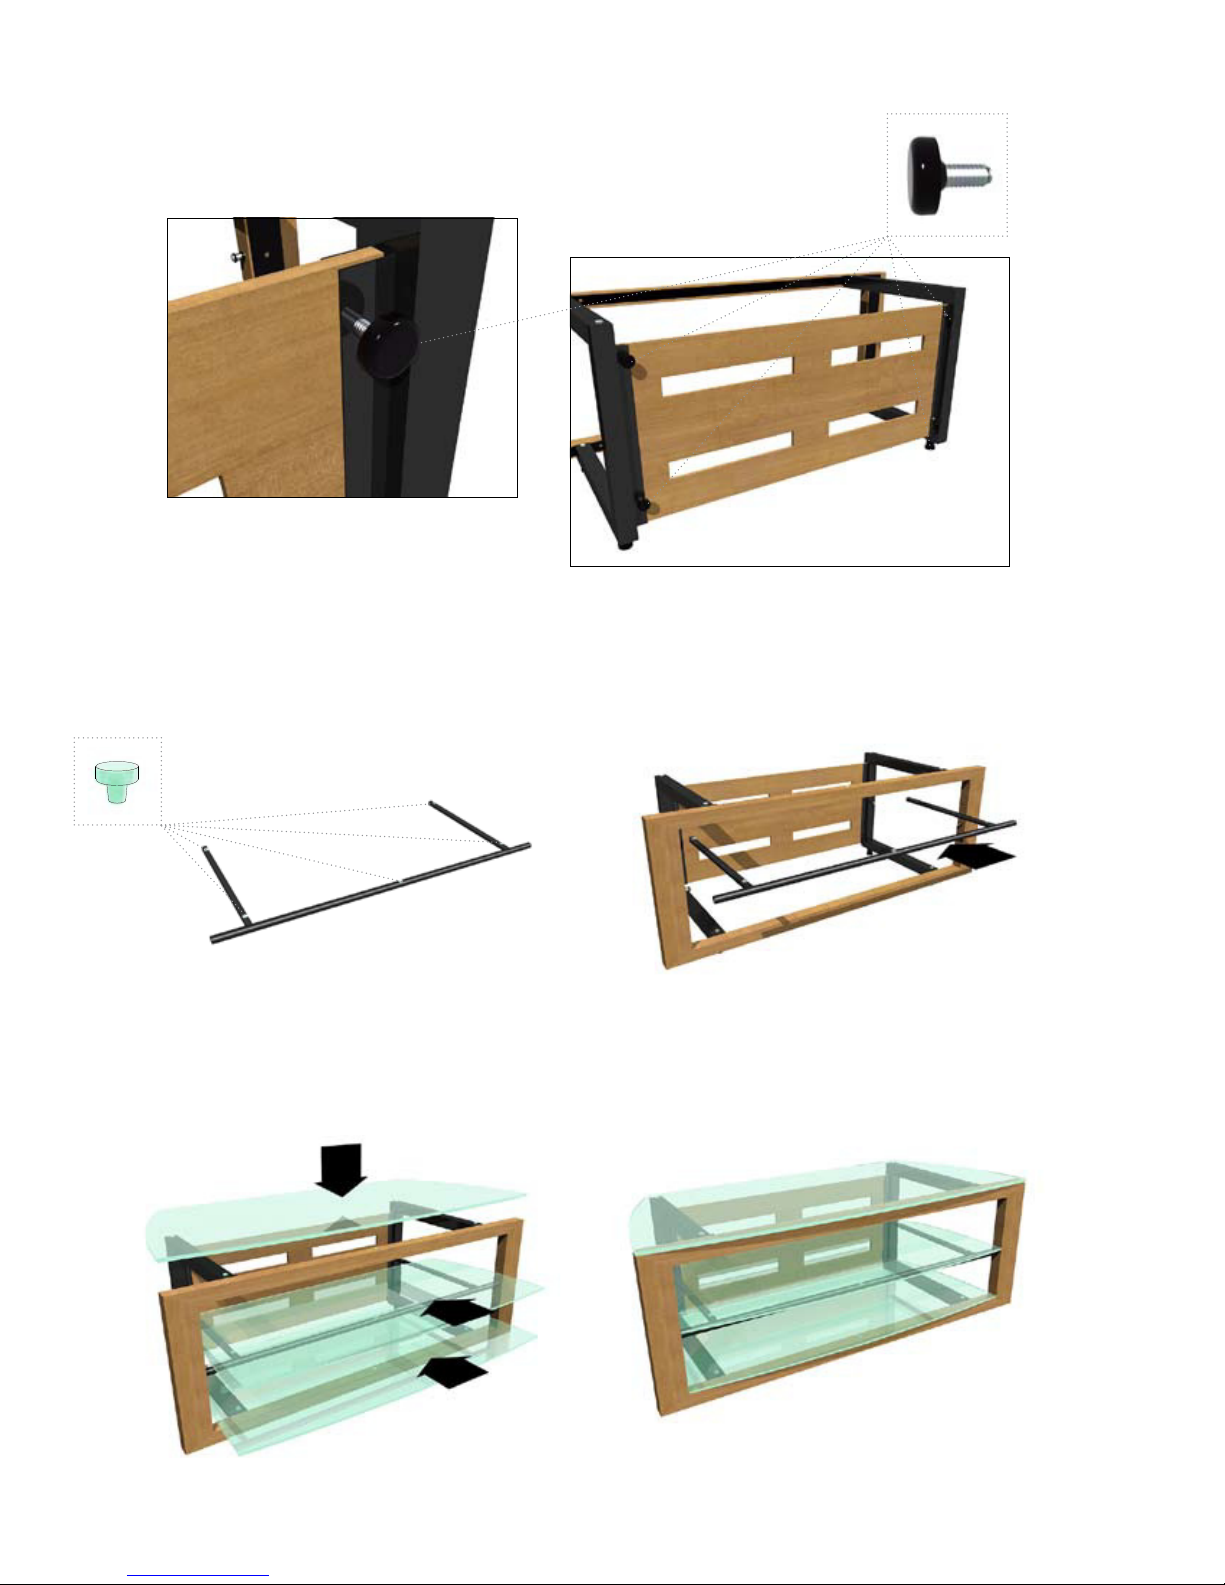
Step 4
Secure Back Panel
Then tighten the four Threaded Knobs (F) to secure back panel into position.
NOTE: Threaded knobs are included with the assembled frame.
F
C
Step 5
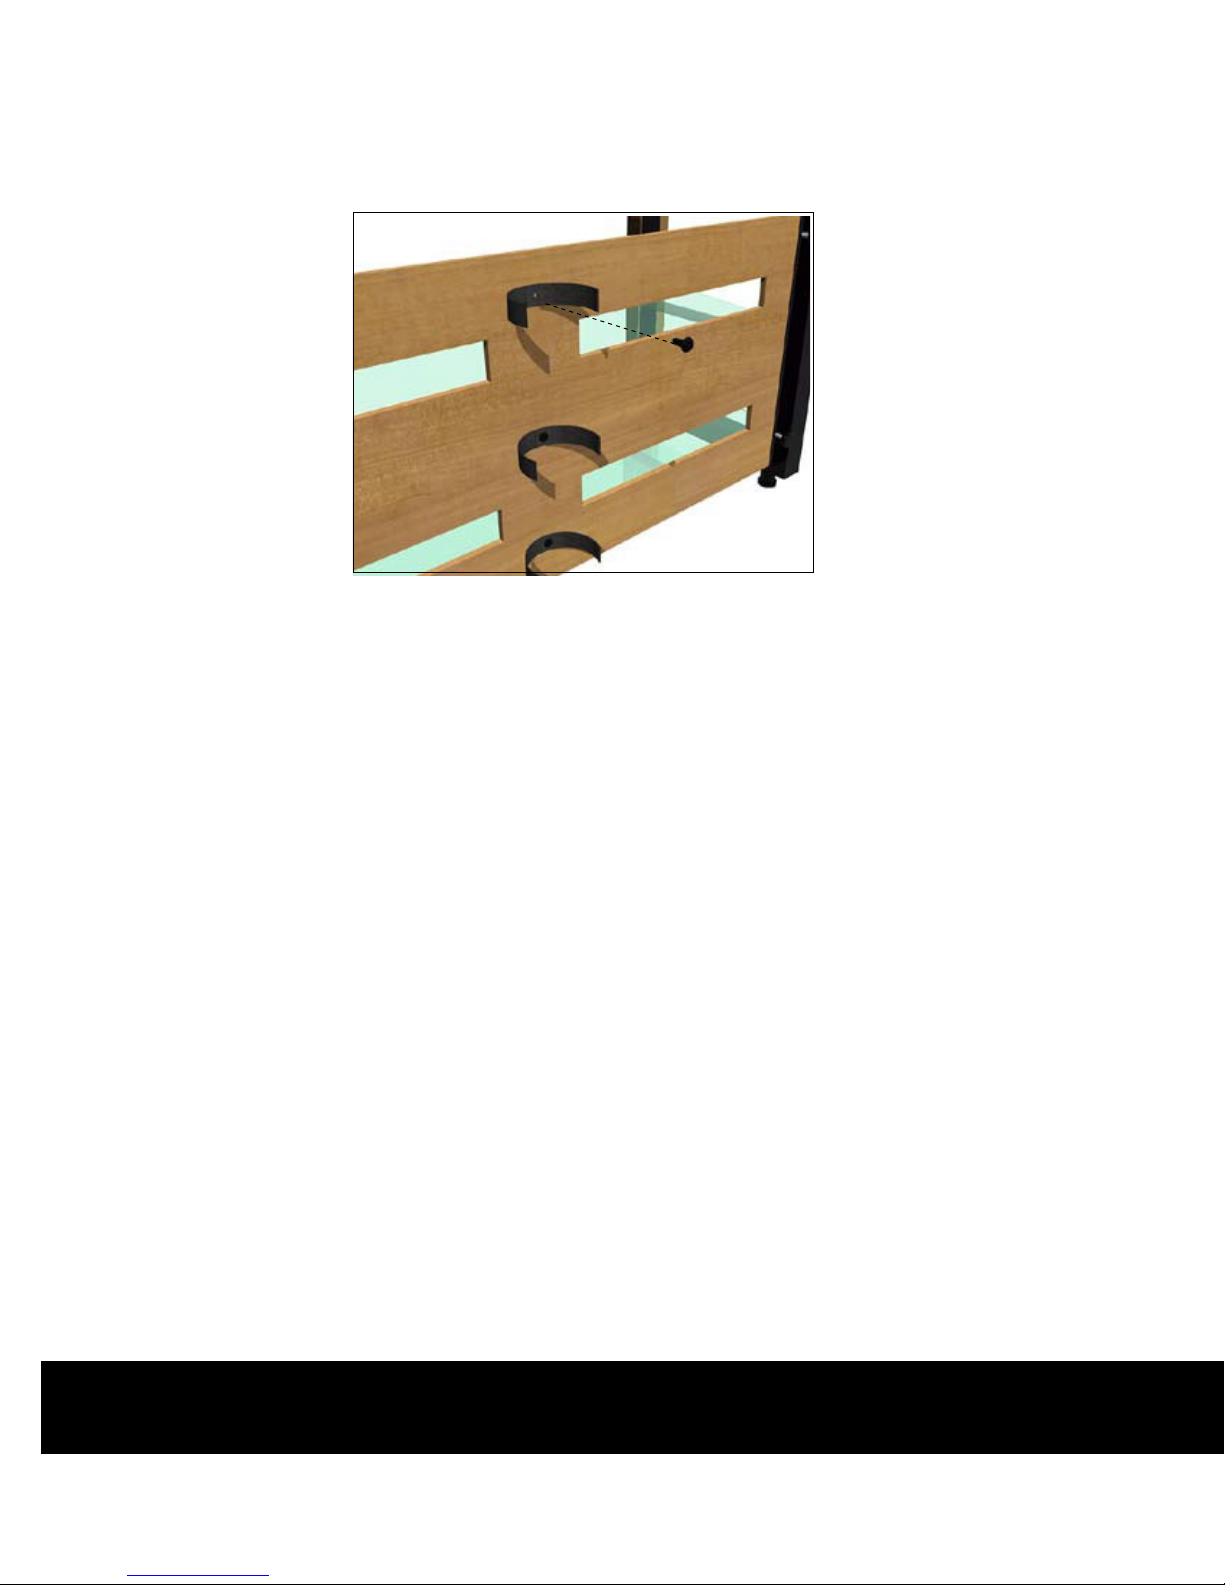
Installing the Rubber Bumper inserts and Center Shelf Support
Install the Rubber Bumper Inserts (E) to all of the hole locations on the Center Shelf Support (G). Then install the
Center Glass Shelf Support (G) by placing on the previously installed shelf pins.
E
G
Step 6
Install the glass shelves.
Install the Center Glass Shelves (H) and Top Glass Shelf (I).
I
A
H
G
A
3
Page 4
Step 7
Cable Management
Velcro straps and small wood screws (J) are supplied, and can be used for organizing cable management.
On the rear side of the back panel, are pre-drilled holes for installing the Velcro straps using a Phillips screw driver.
J
C
Deploy® Collection
Designed by BDI Design Studio.
These distinctive product configurations are protected by US
and international patents, trade dress, and/or copyright laws.
“Deploy” and BDI are trademarks of Becker Designed, Inc.
All Rights reserved. ©2008, BDI
6/2008
4
 Loading...